Do you want to make sure an email got sent successfully? Do you have a user who isn’t sure where their email was sent? Well, as an admin, you can find all of this information in the Email Logs section of the Admin Console.

Accessing Email Related Logs
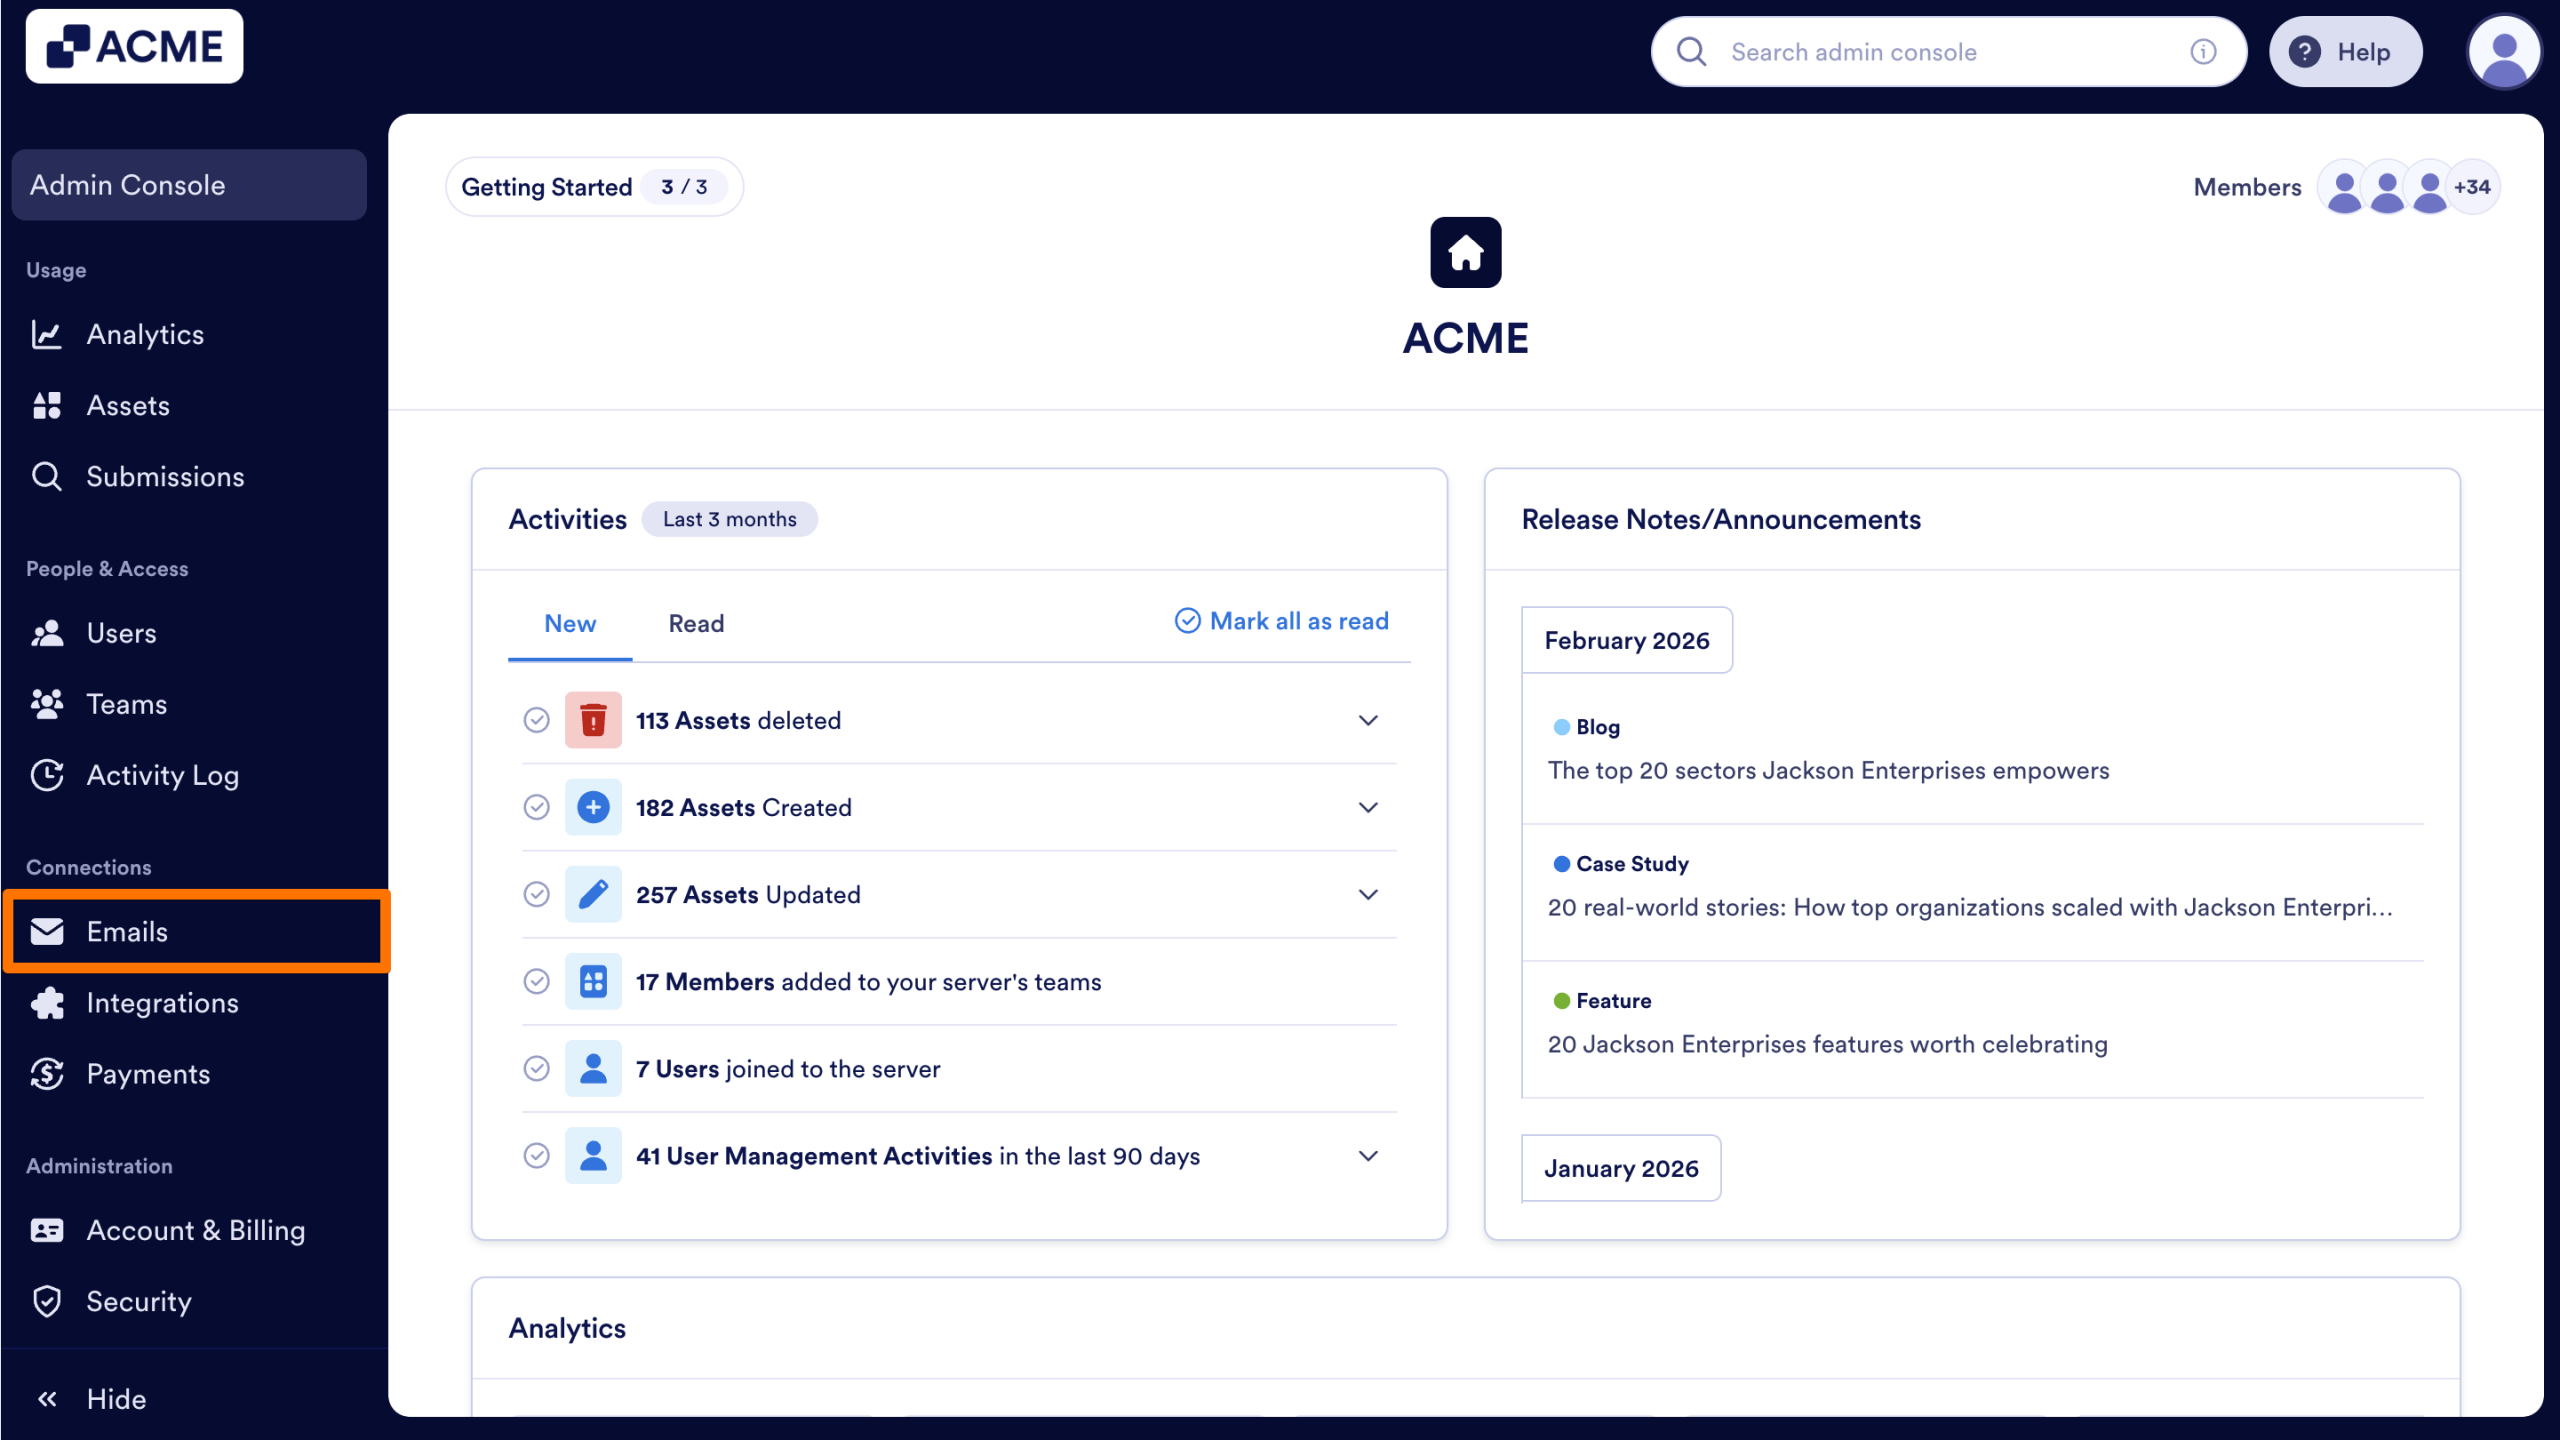
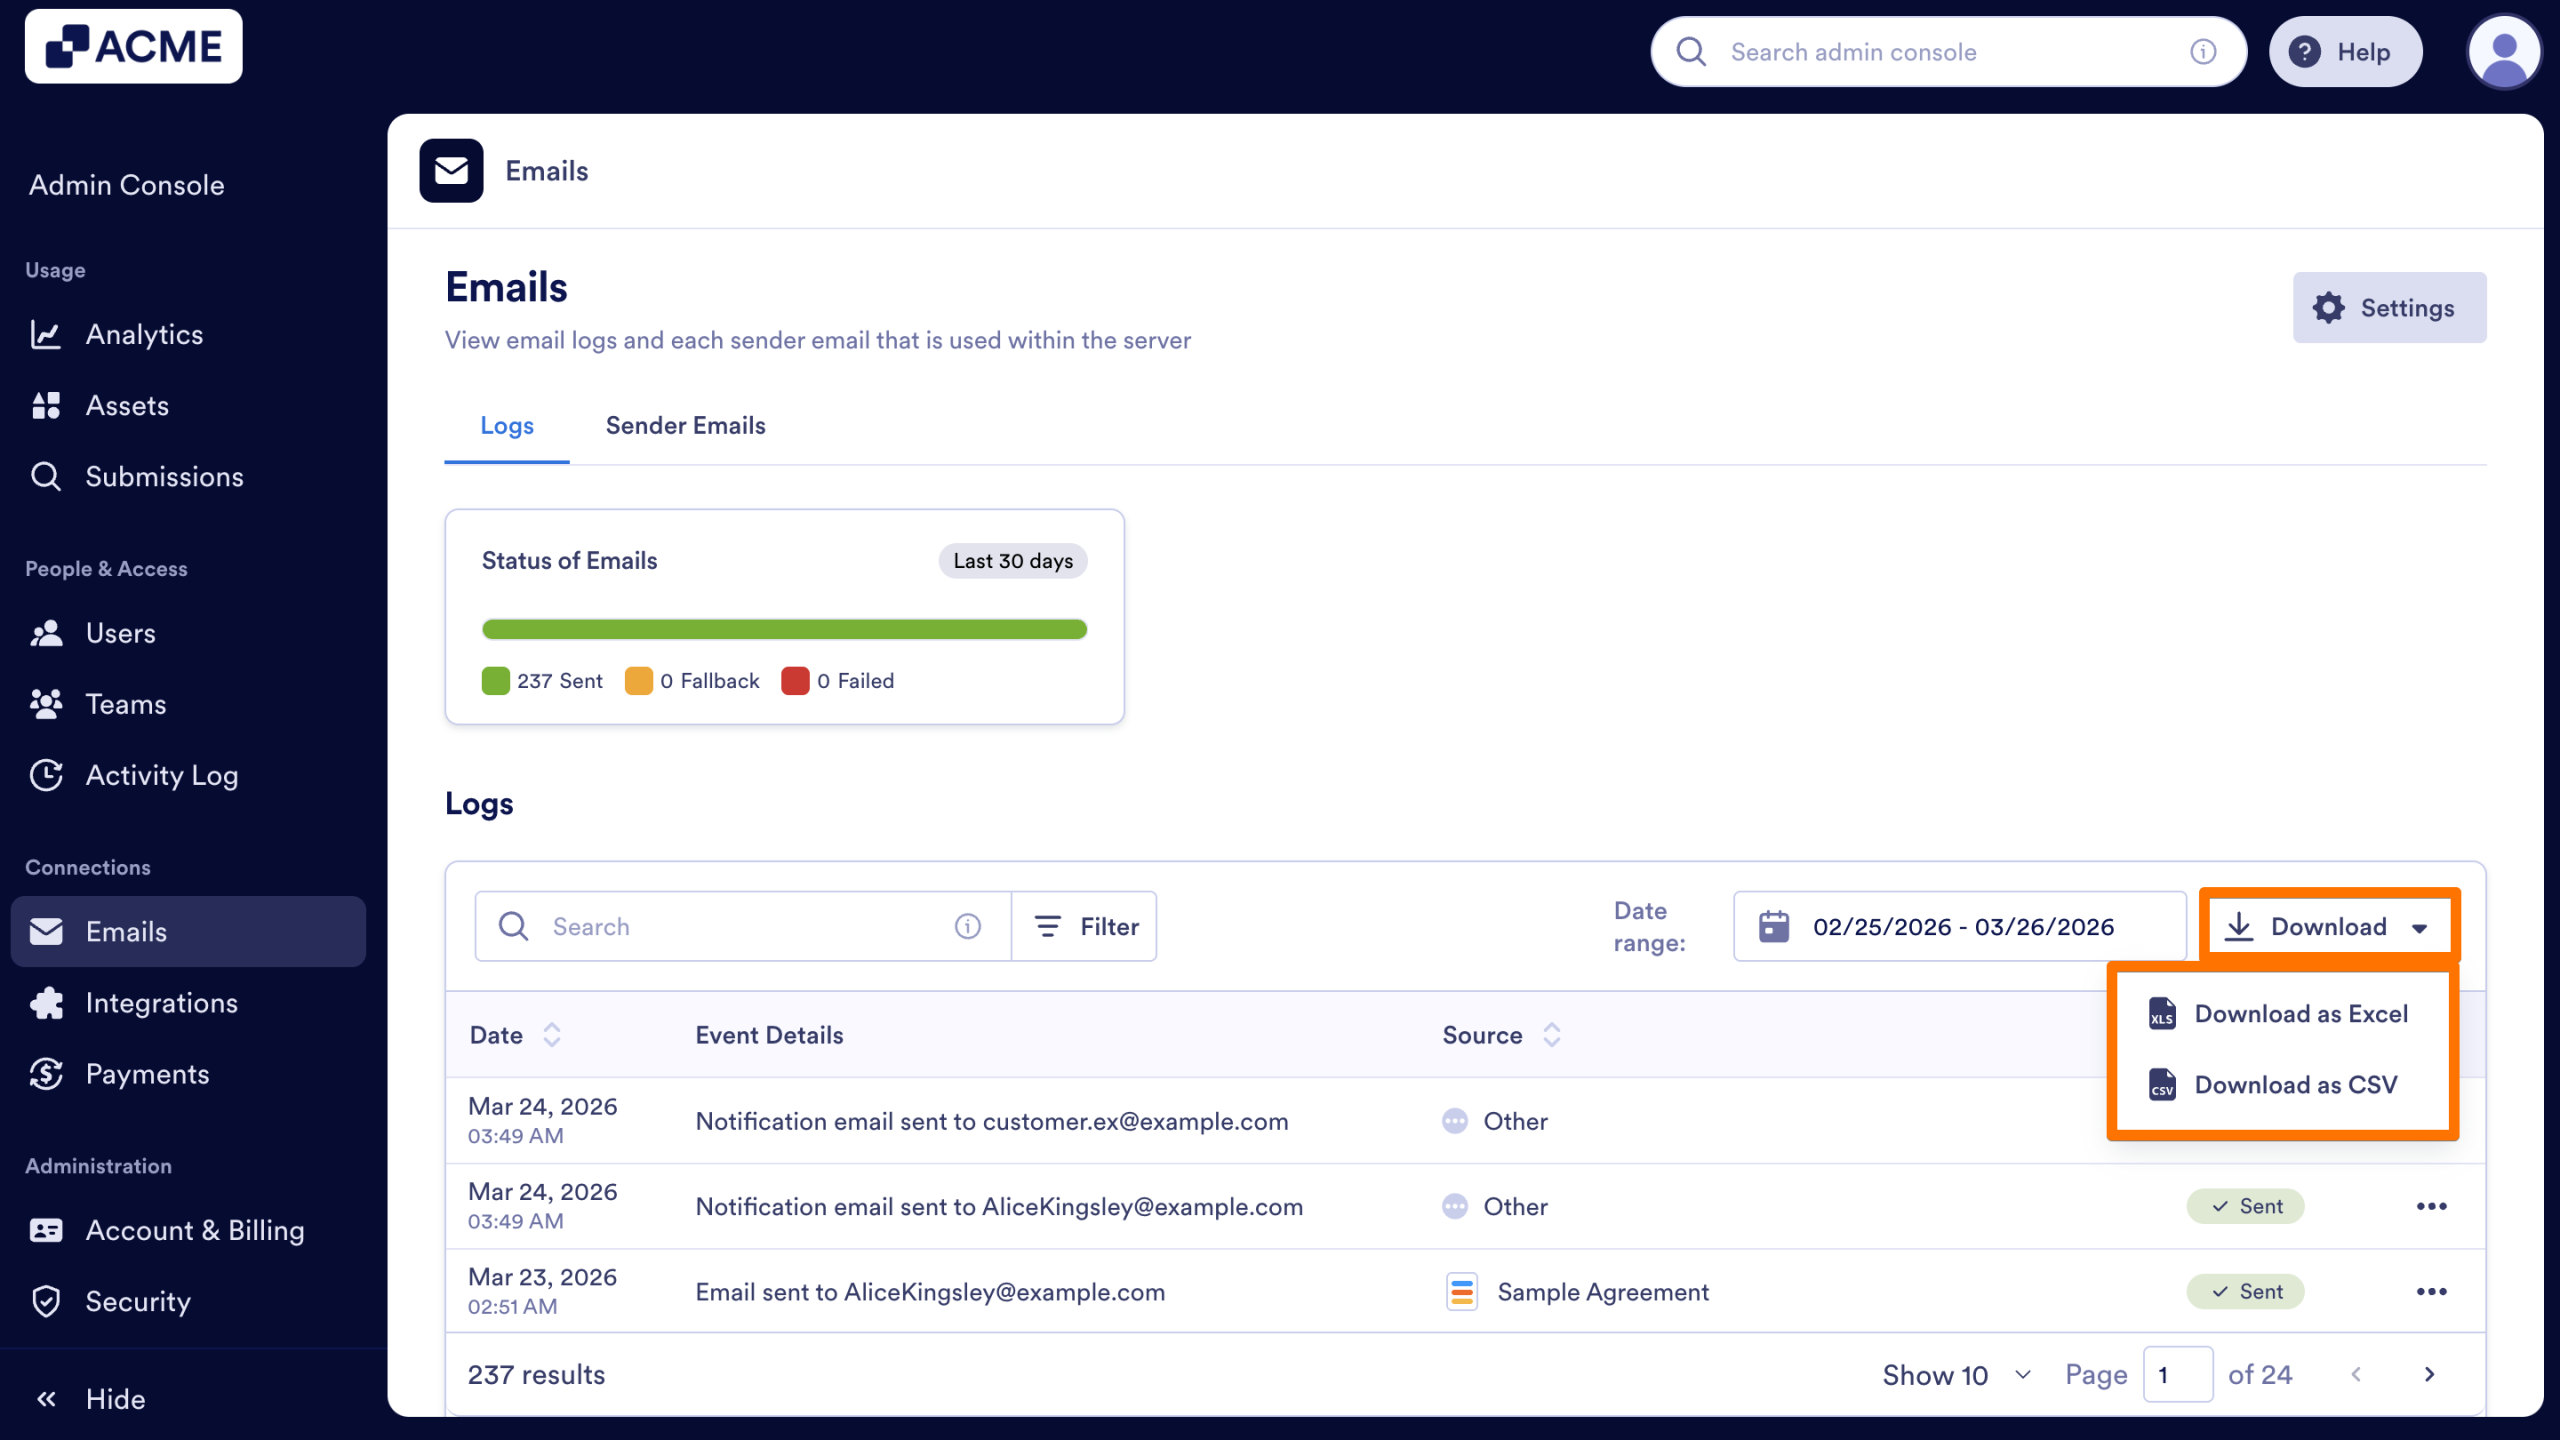
In the Admin Console, click on Emails from the left-hand menu.
On the Email Log landing page, you can find an overview of successful emails, as well as a table with all email logs. Let’s dive into each section below:
Status of Emails
This section is a brief overview of how many emails have been sent in the last three months, as well as how many were successful and how many failed.
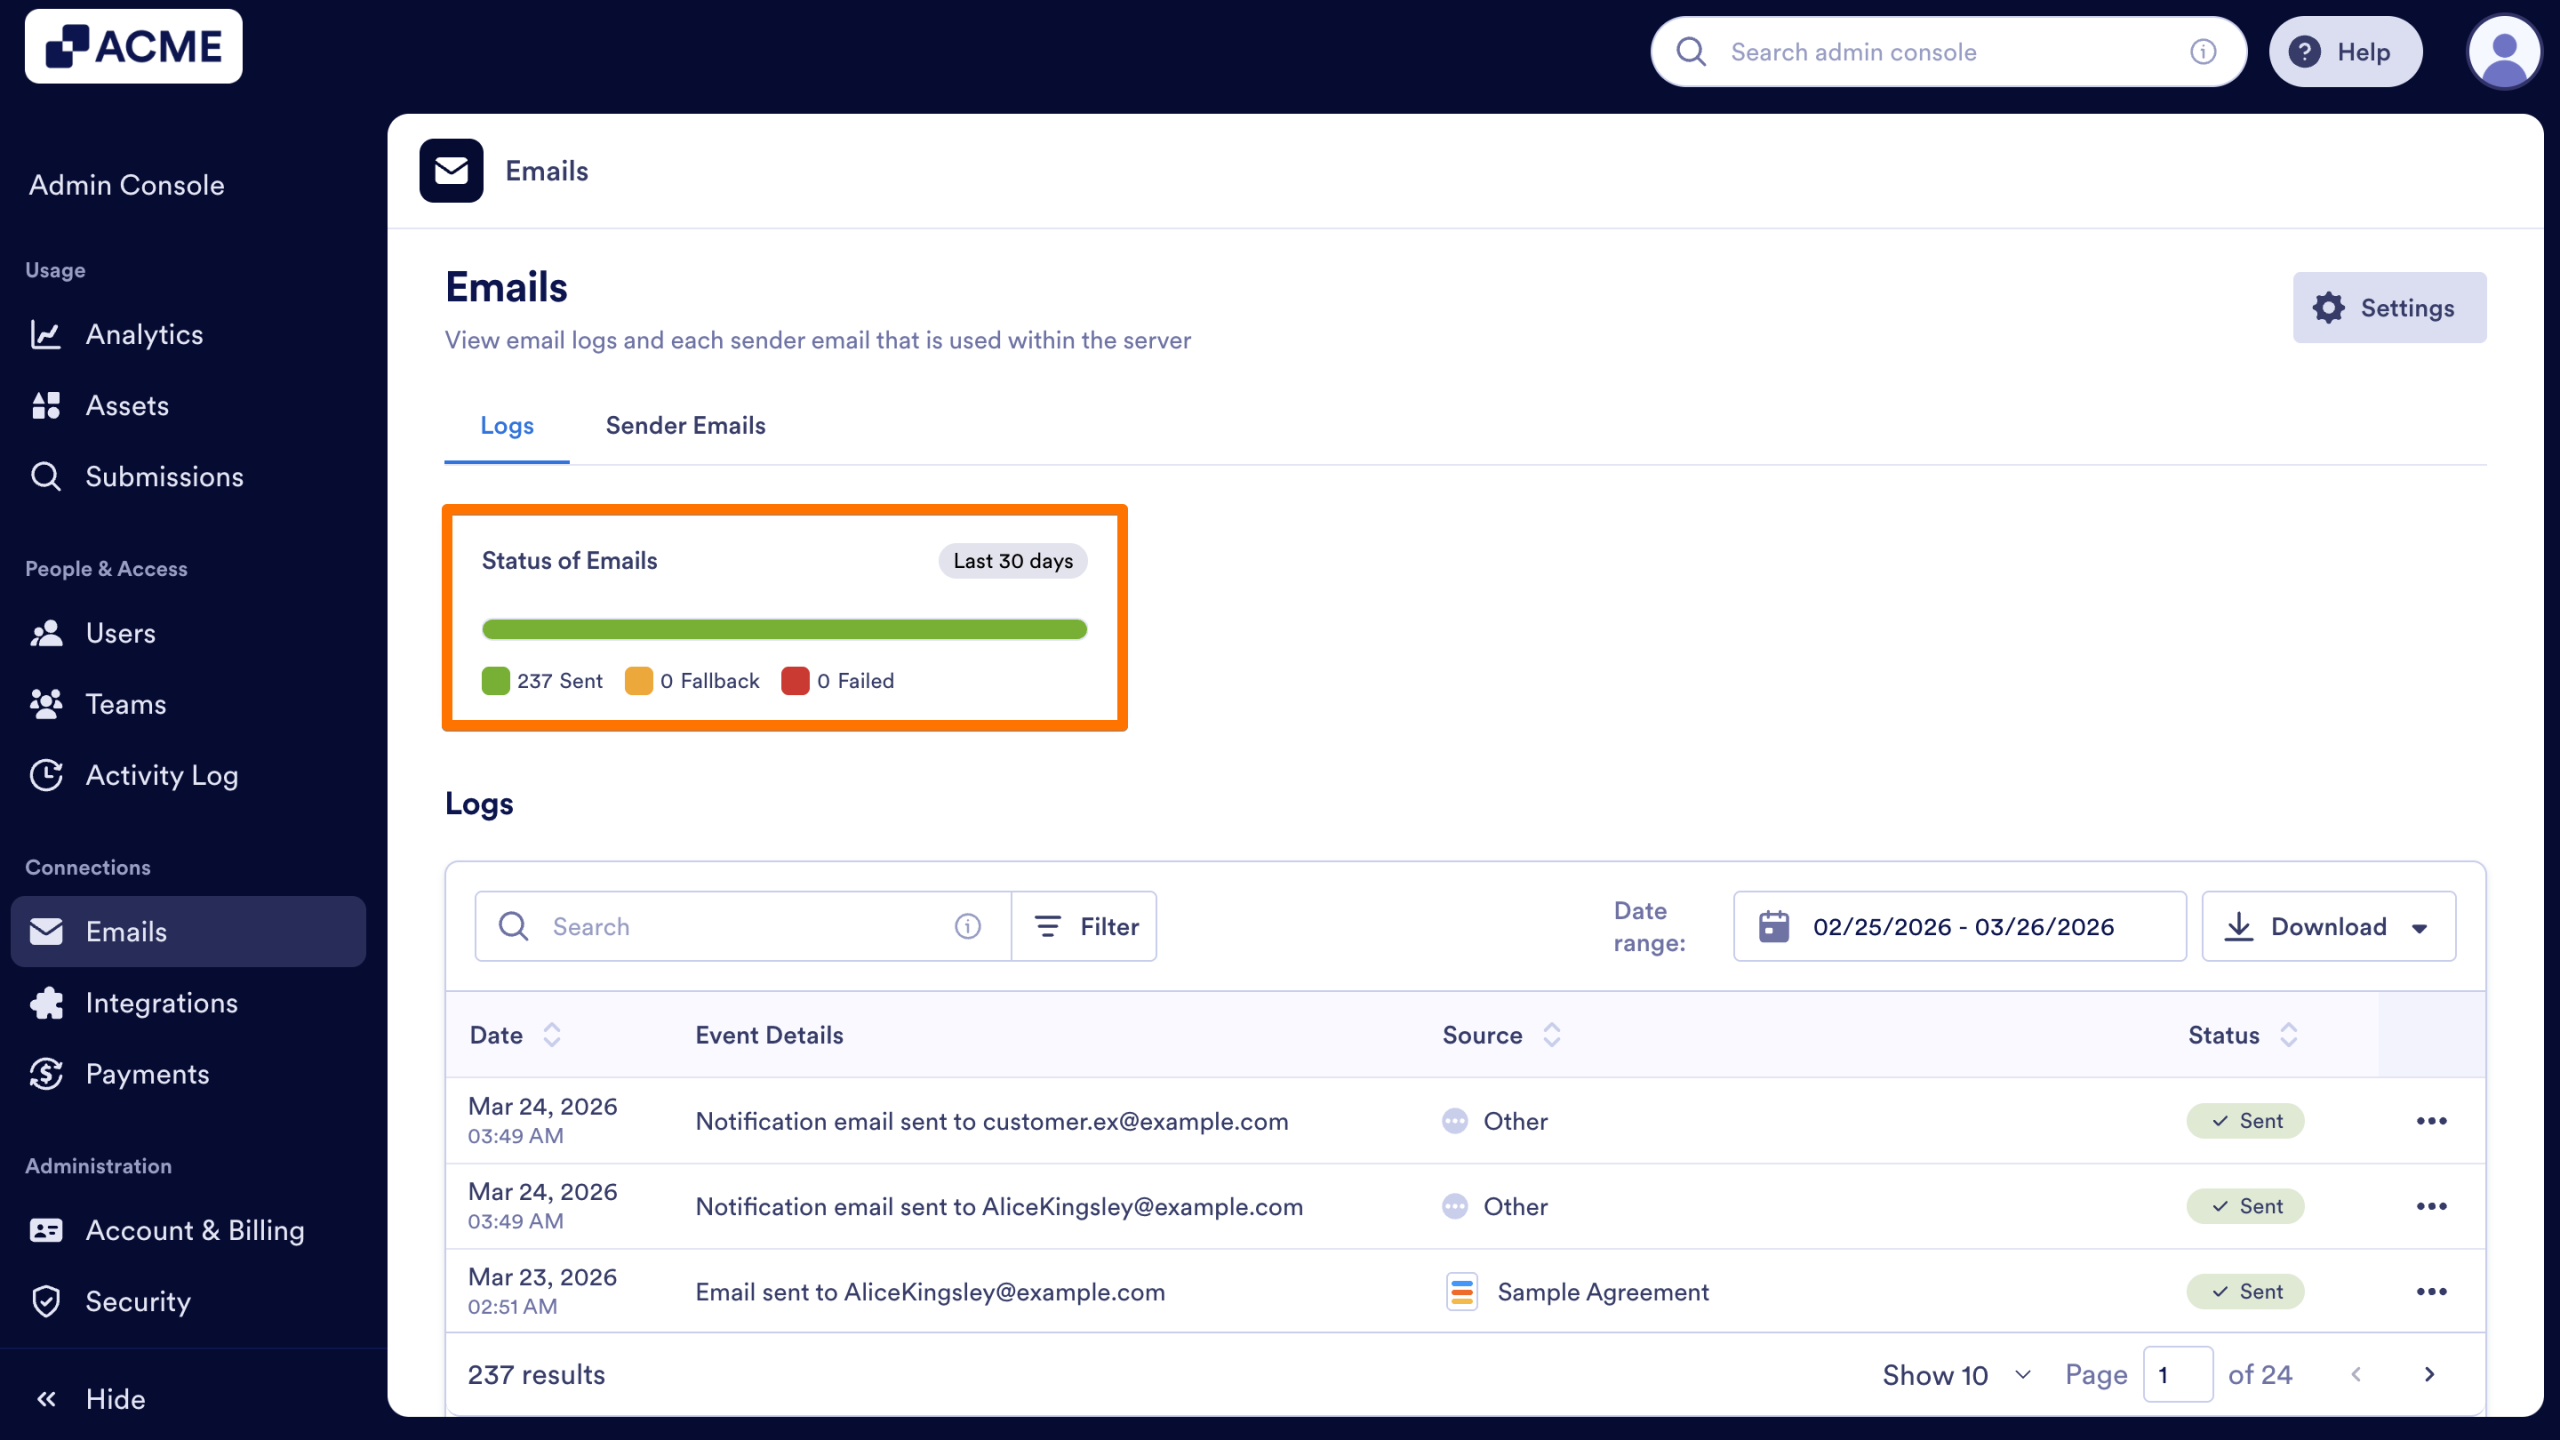
Logs Table
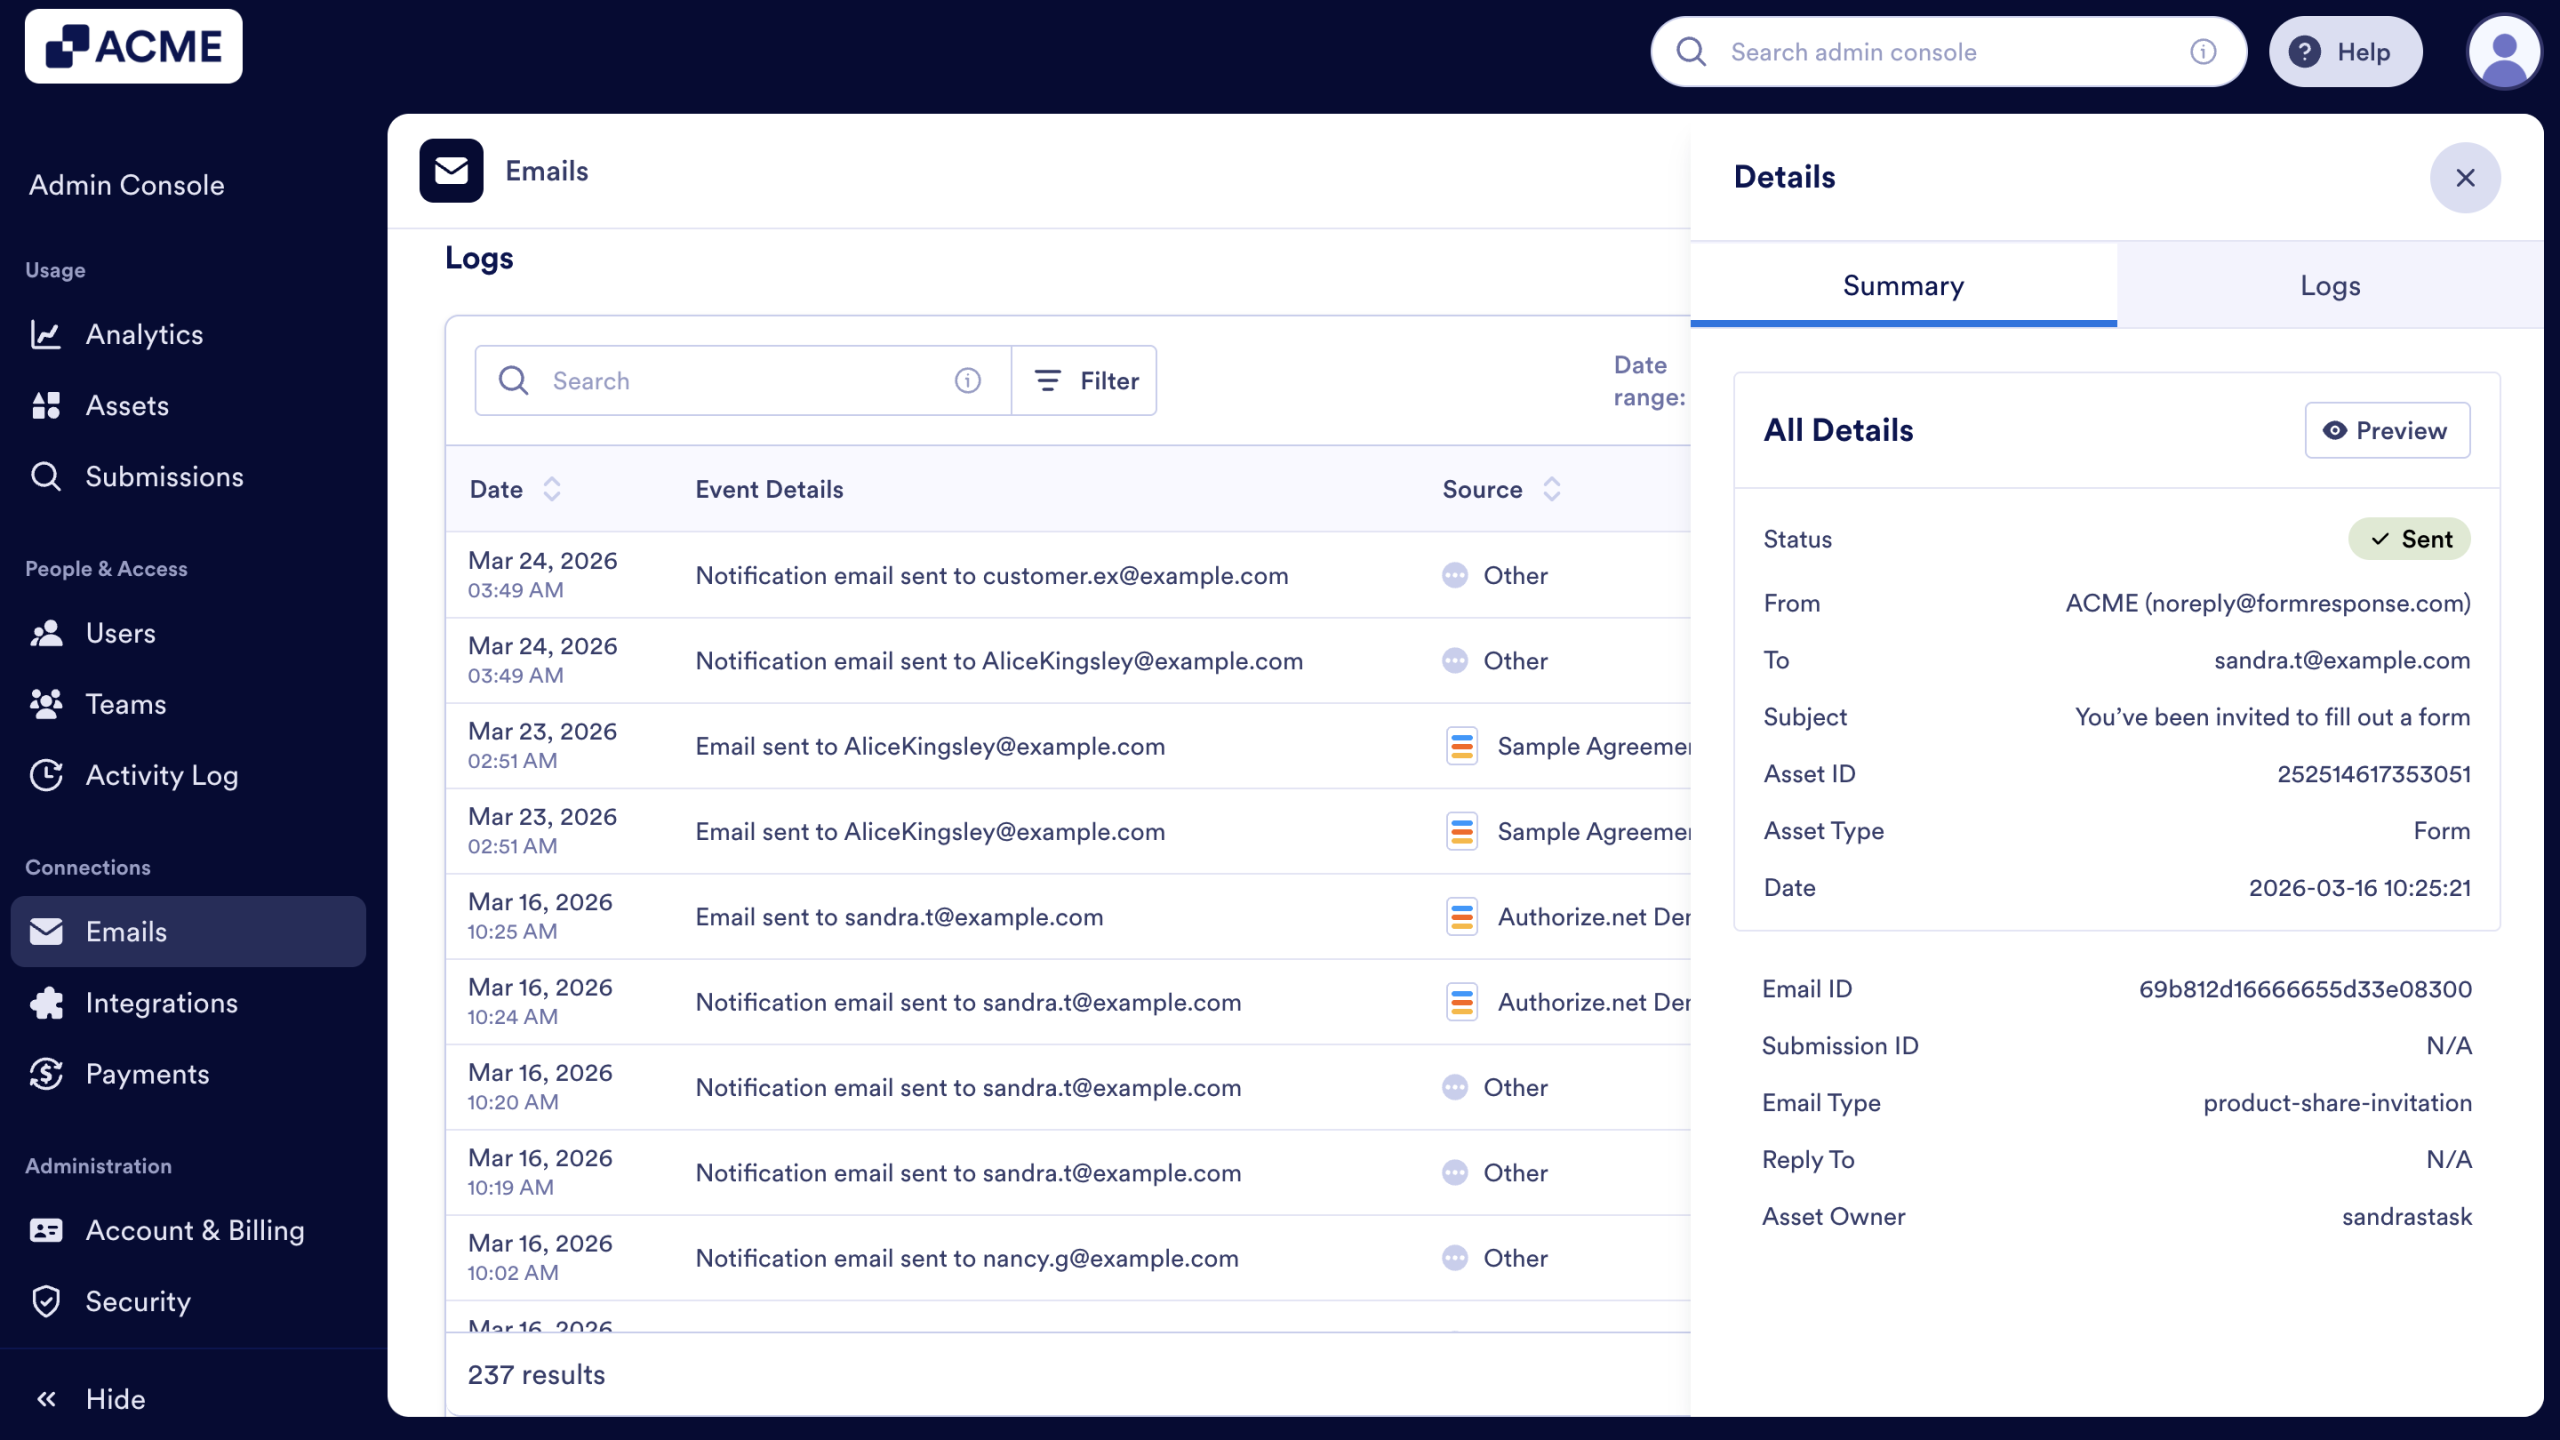
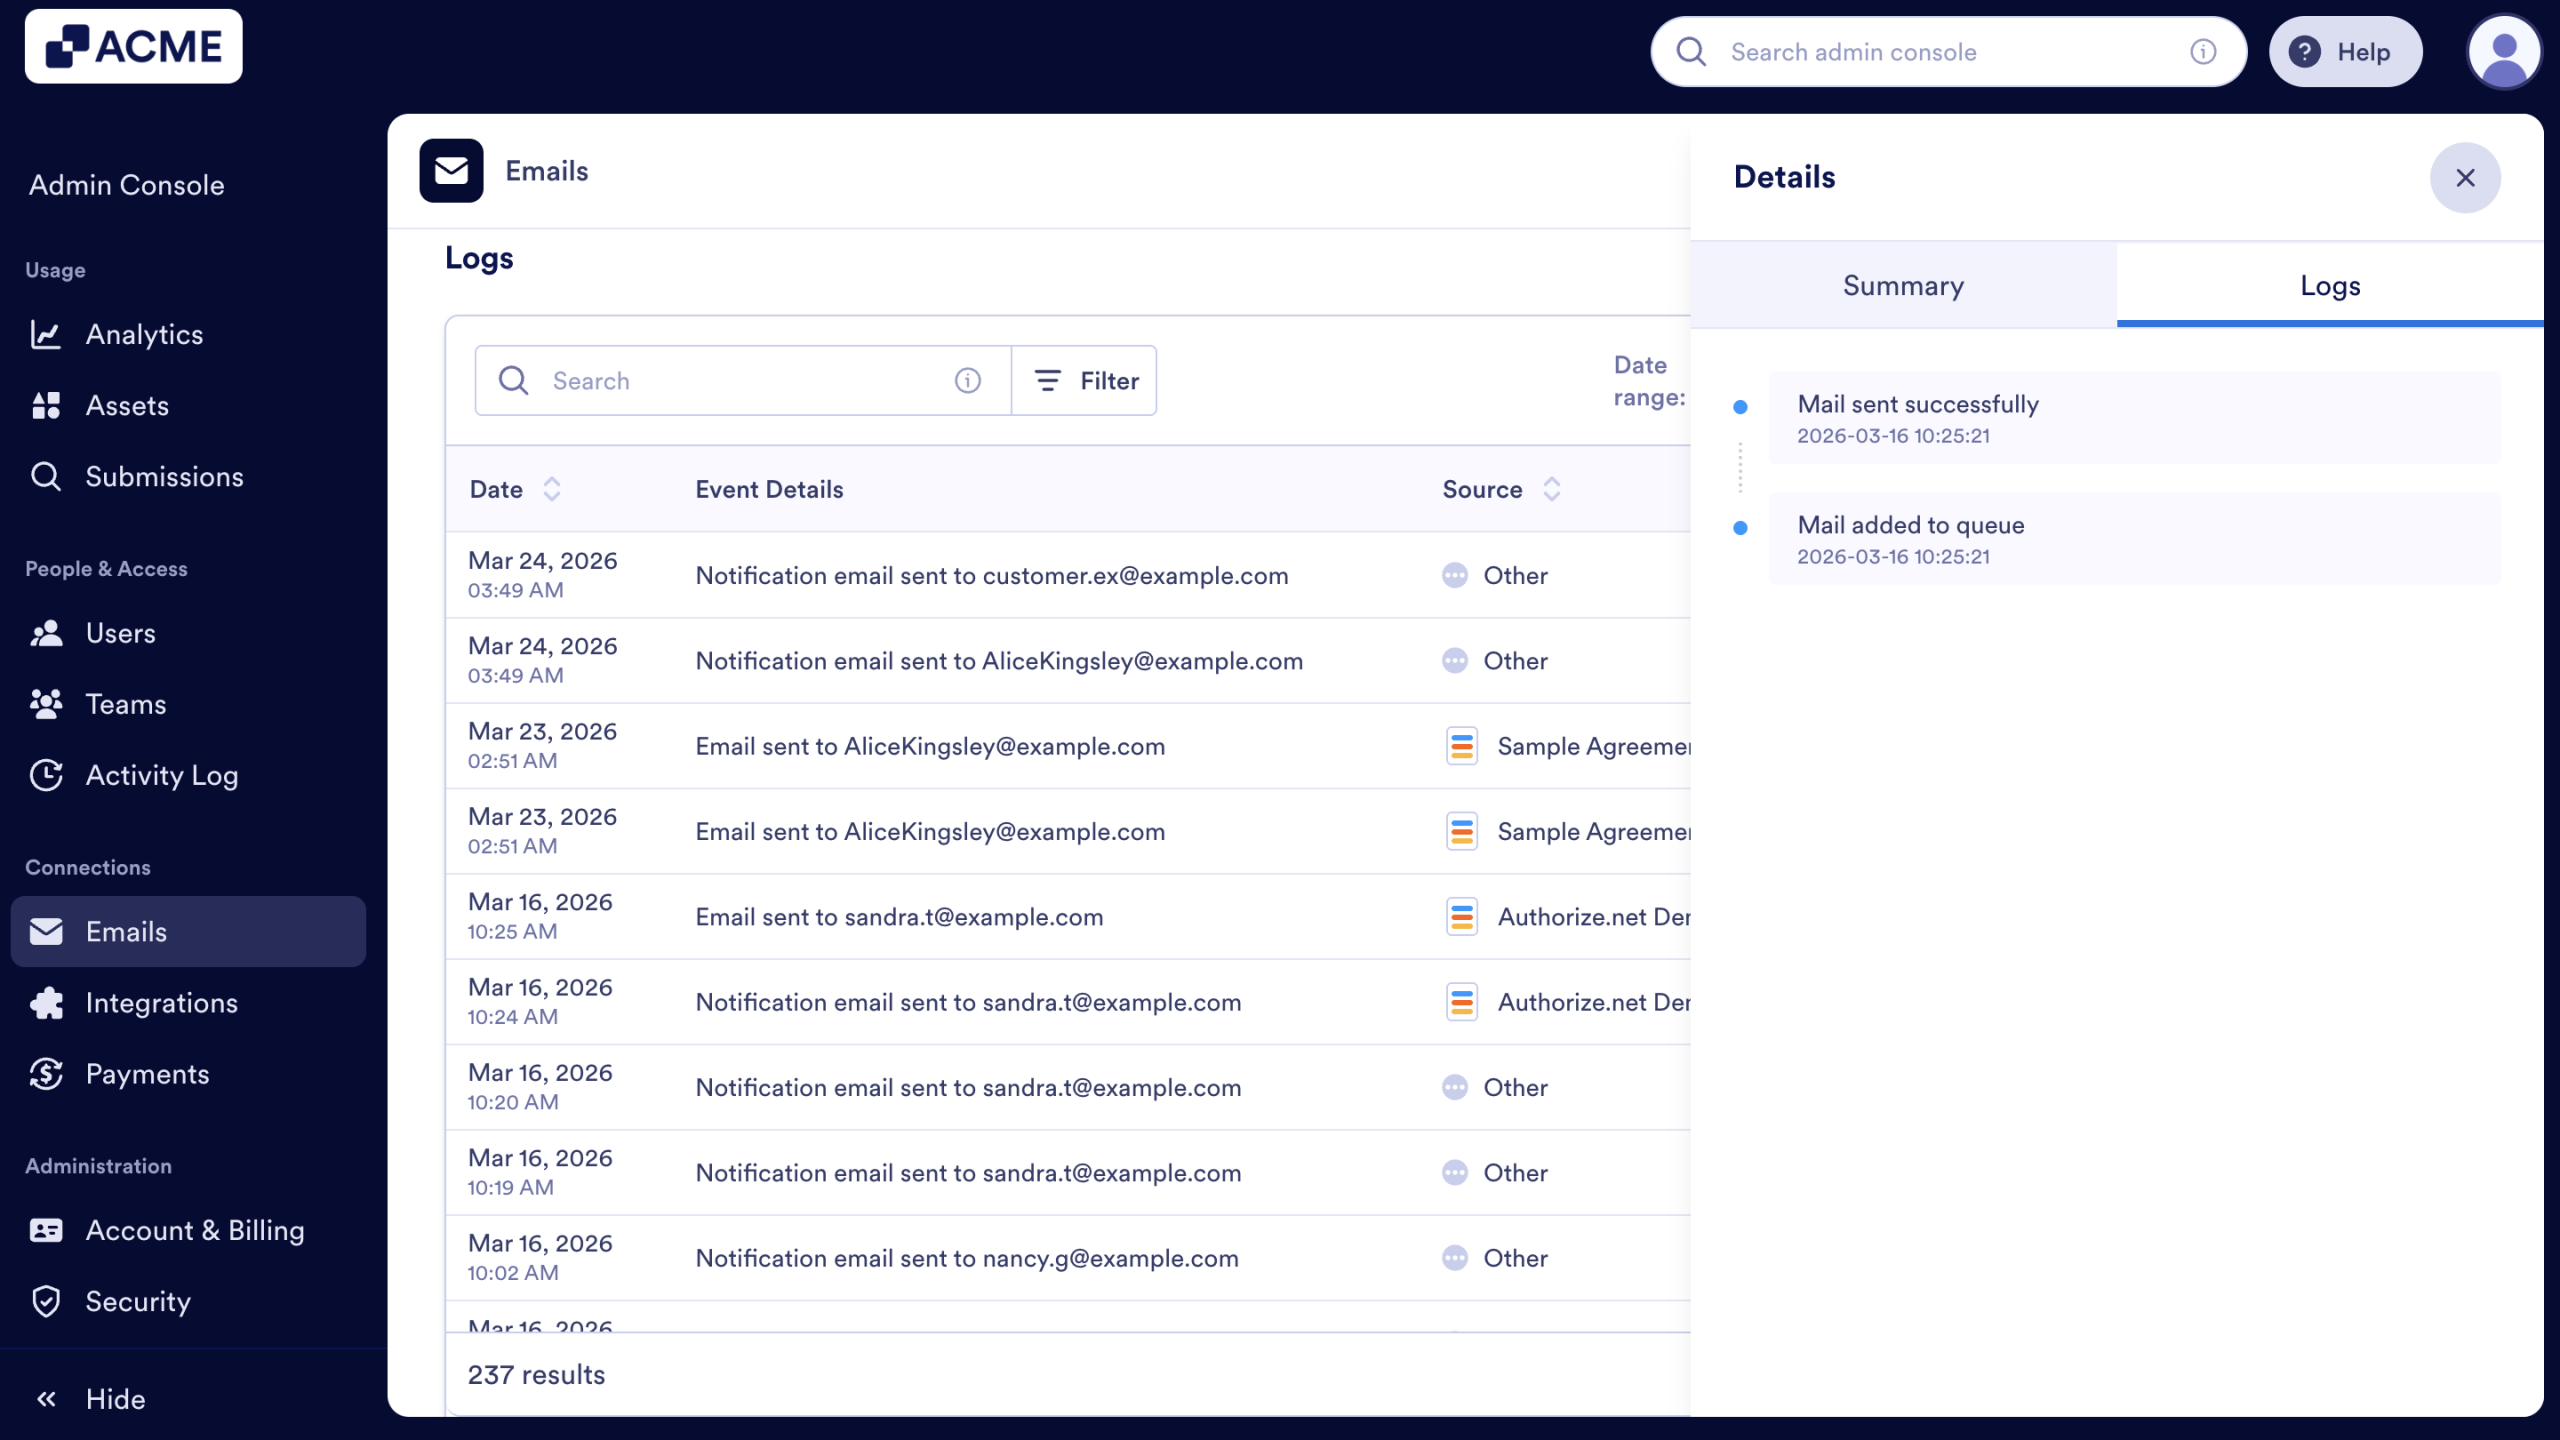
In this section, you’ll see the most recent email logs, along with the Date, Event Details, Source, and Status. You can also click on each individual entry to open the Details sidebar. This sidebar is divided into two main tabs to help you troubleshoot or verify email delivery.
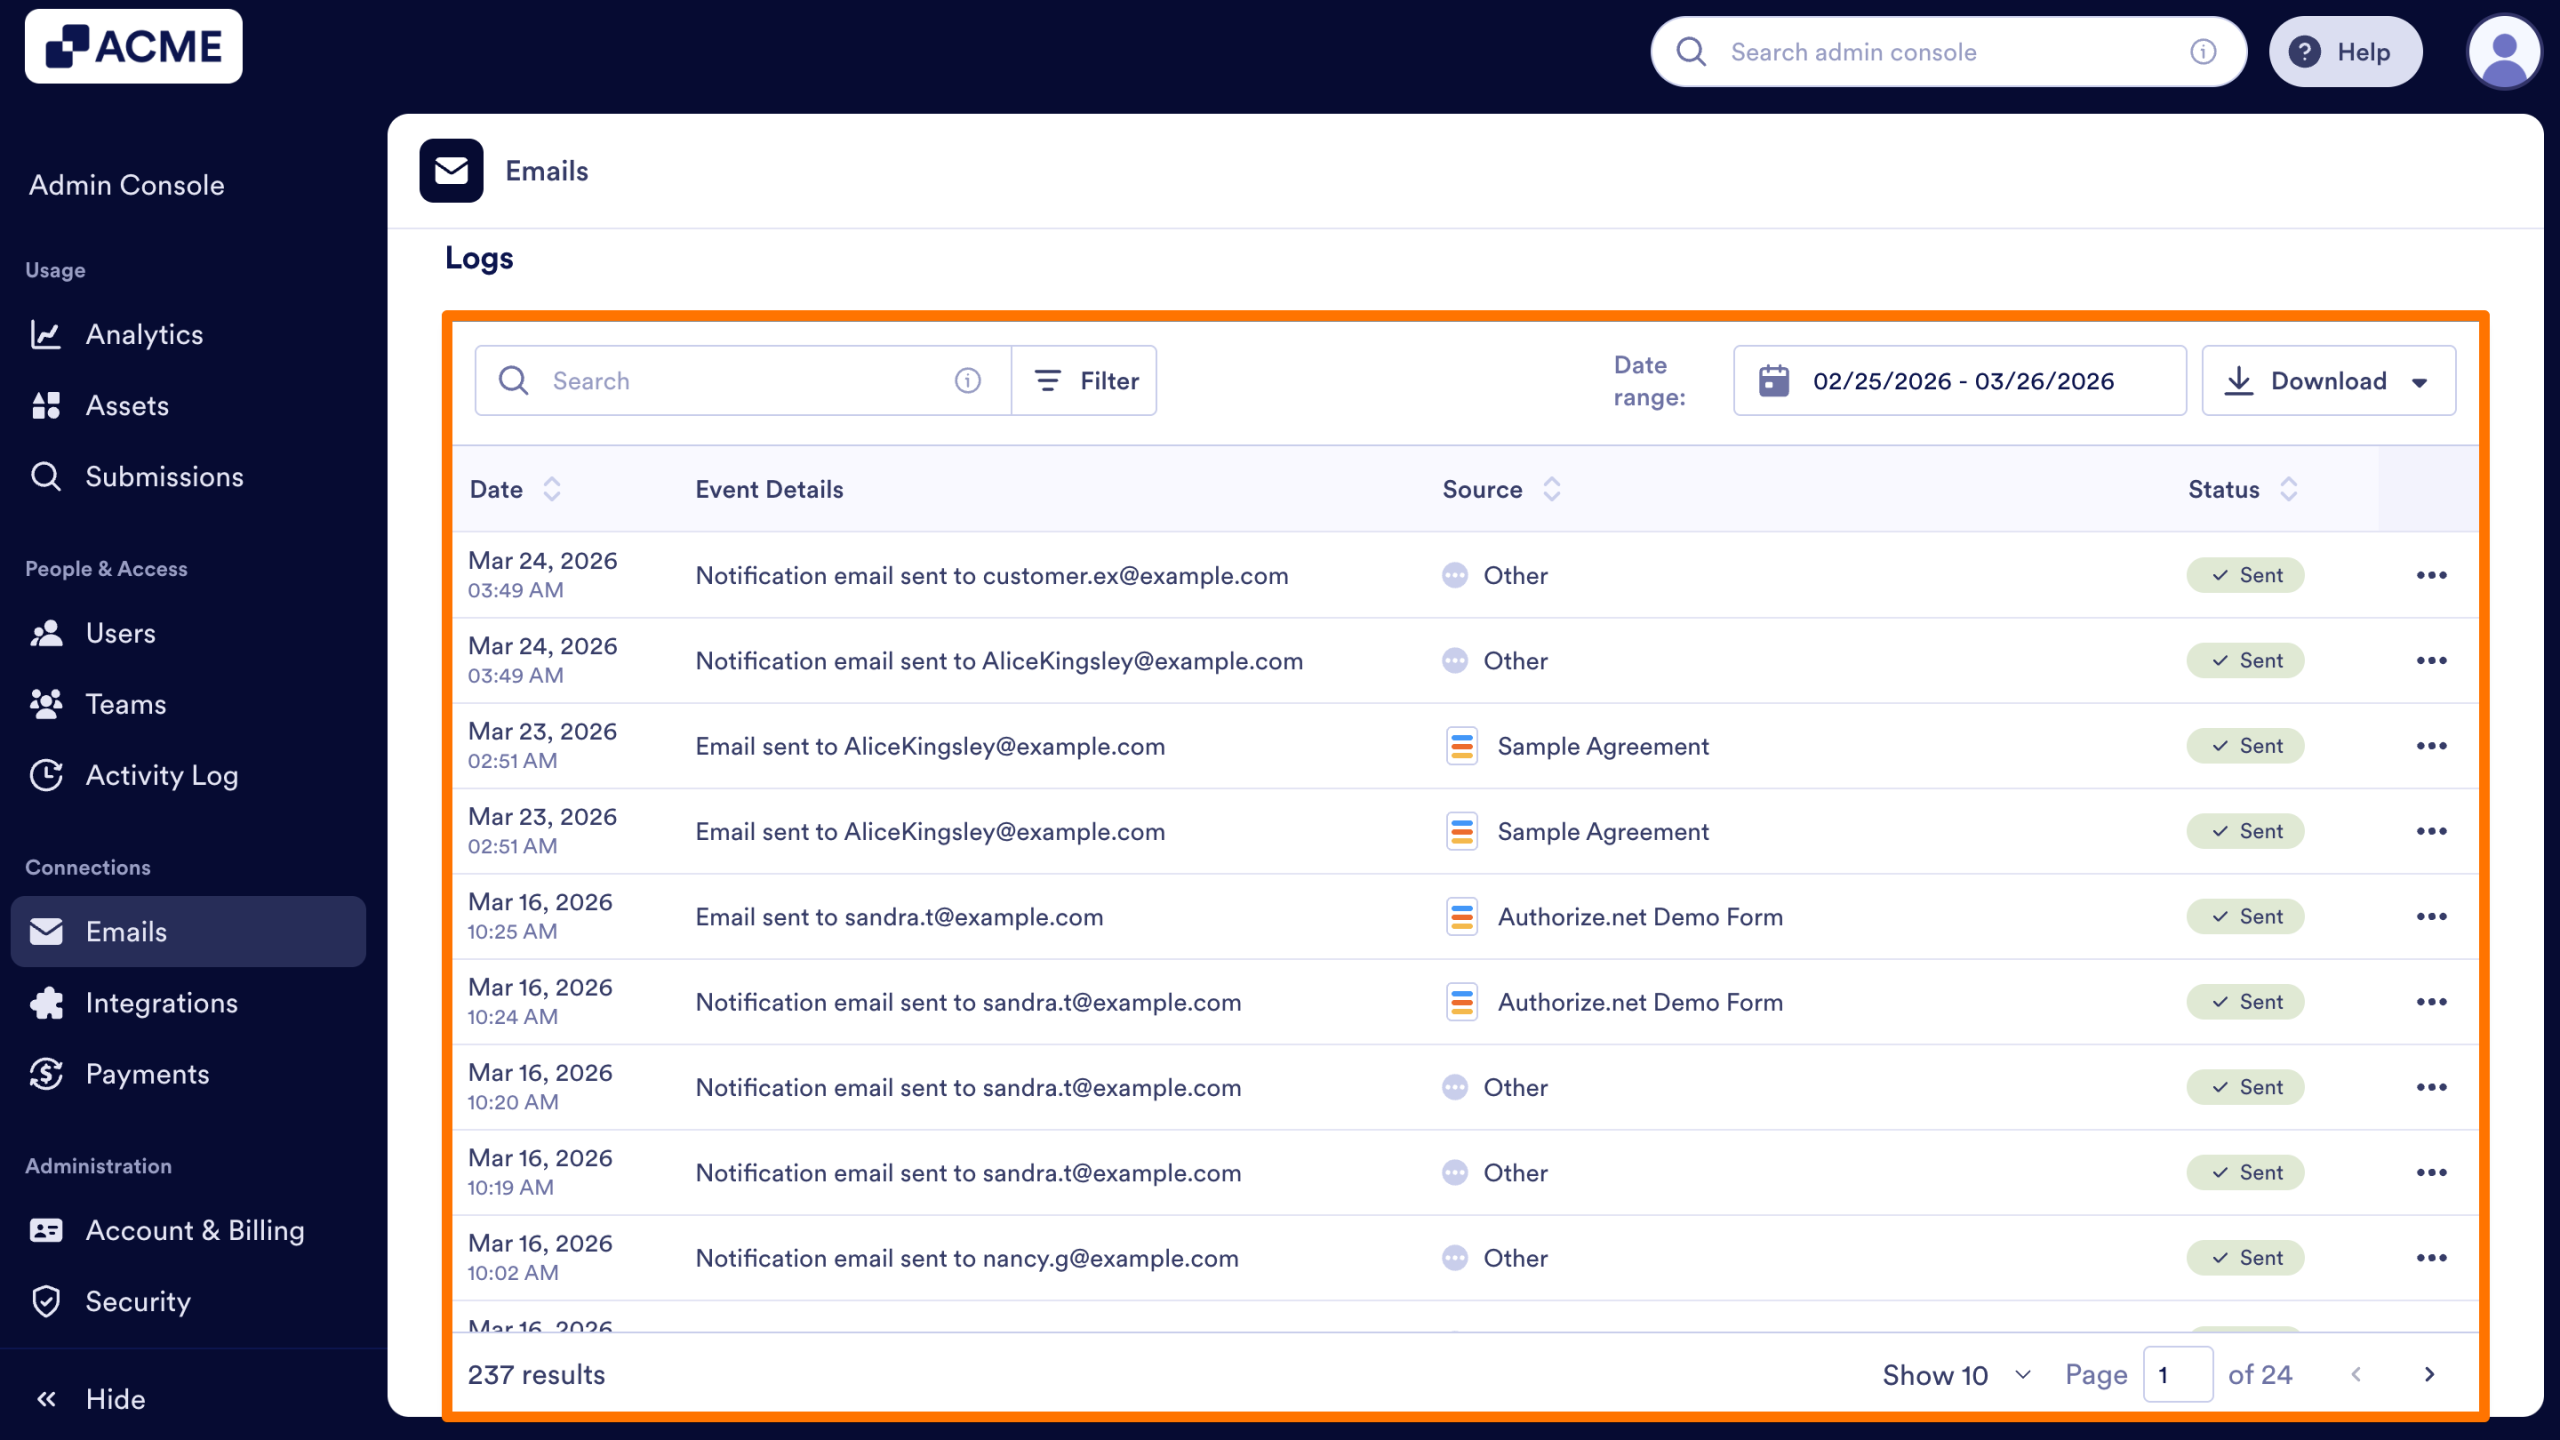
- Date: Date Email was sent
- Event Details: What type of email was sent (Notification, Autoresponder, etc.) and who it was sent to.
- Source: Where the email was sent from.
- Form: If the email was sent from a form, along with the form name.
- Other: If the email was sent from the system, such as a Lost Password email, an invitation to the server, etc.
- Status: Sent, Failed
- Date Range: Date Range for Logs
- Download: Download options for all logs in the date range and that fit the search criteria.
Details Sidebar
Summary
This tab provides a high-level overview of the email's metadata. You can verify the Status, the specific Recipient (To), the Subject line, and the Email ID. This is particularly useful for confirming exactly where a notification was routed and when it was triggered.
Logs
This tab shows the real-time lifecycle of the email. It provides a timestamped audit trail, such as when the Mail was added to queue and when the Mail was sent successfully. If an email fails, this section will often provide the specific error or reason for the delivery failure.
Downloading Email Related Logs
You can also download logs for your email logs as well, in either a .CSV or Excel format. Let’s walk through this process together:
- In the Logs Table, click on the Date Range to update the Date Range.
- After you’ve updated the date range, click on Apply.
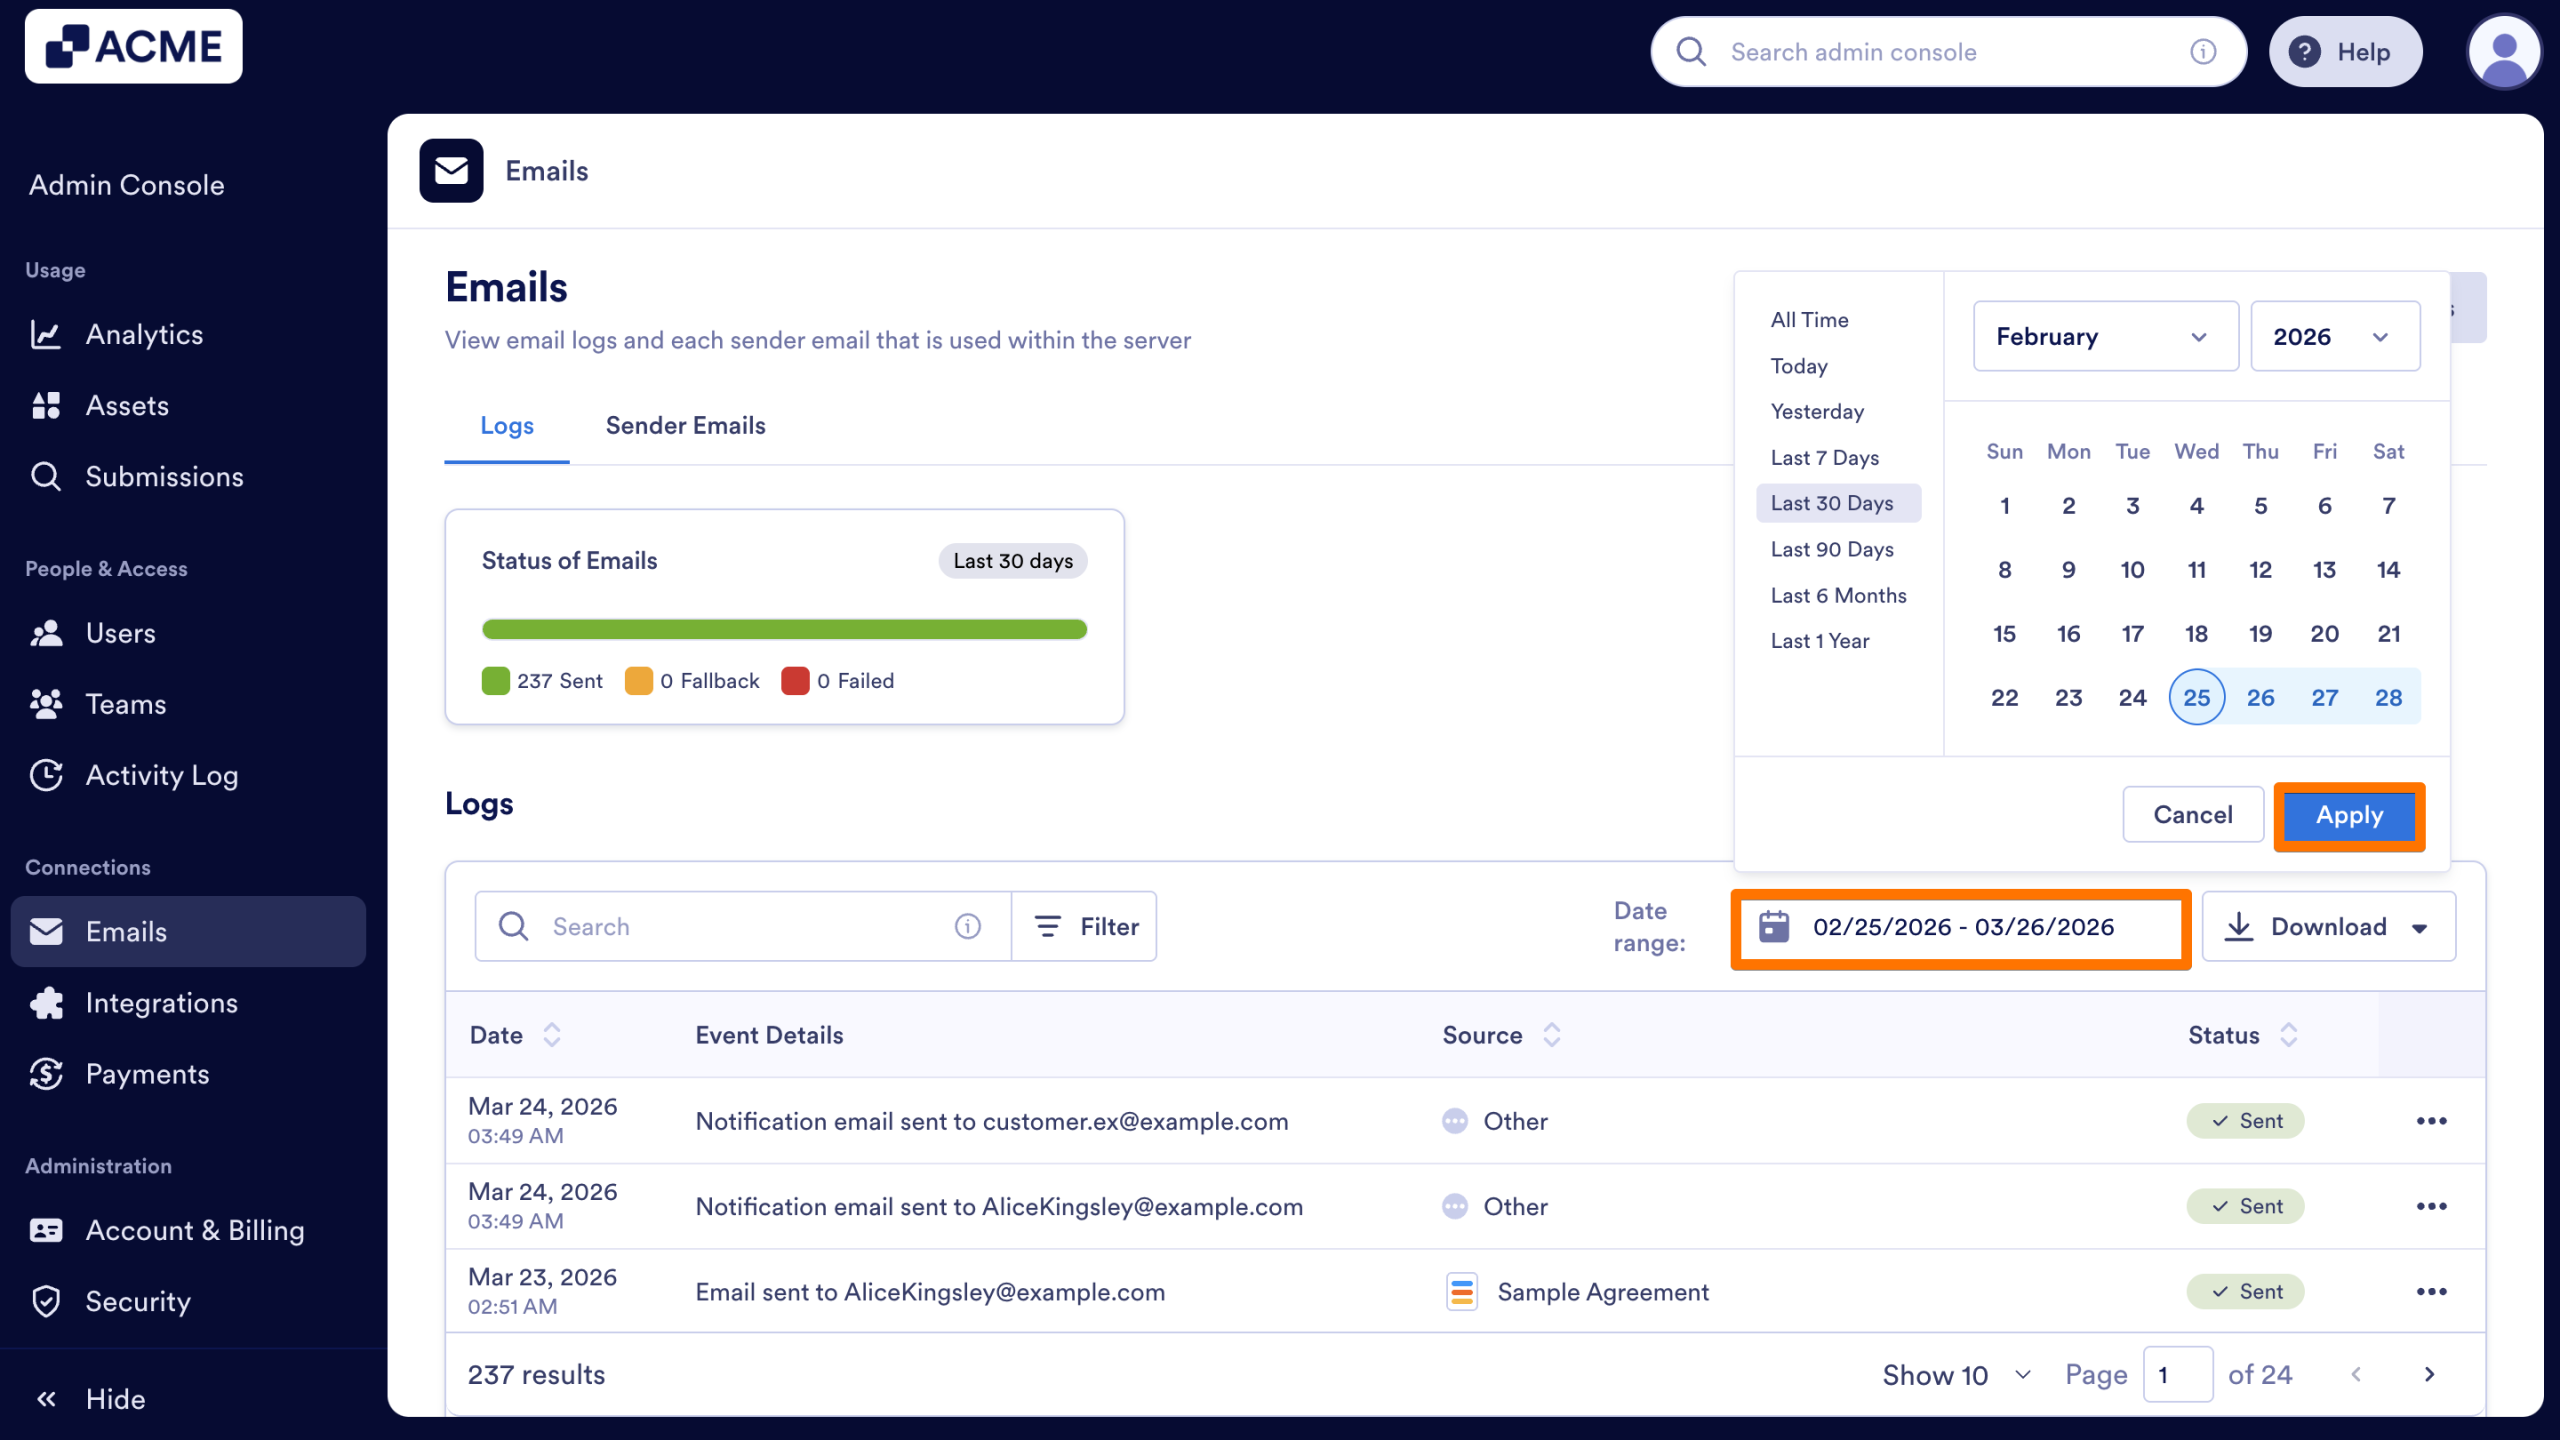
- Finally, click Download and select either CSV or Excel.

Send Comment: