The Email Element makes it easy to collect valid email addresses by automatically checking the format to help ensure accurate submissions. It’s a simple way to gather contact details for follow-ups, confirmations, or account creation.
Here are a few ways to use it:
- Collect email addresses for communication.
- Validate entries to reduce errors.
- Send confirmations or notifications.
- Build contact lists from form responses.
Whether you’re building a new form or editing an existing one, you can add and configure the Email Element in just a few steps. This is how it’s done:
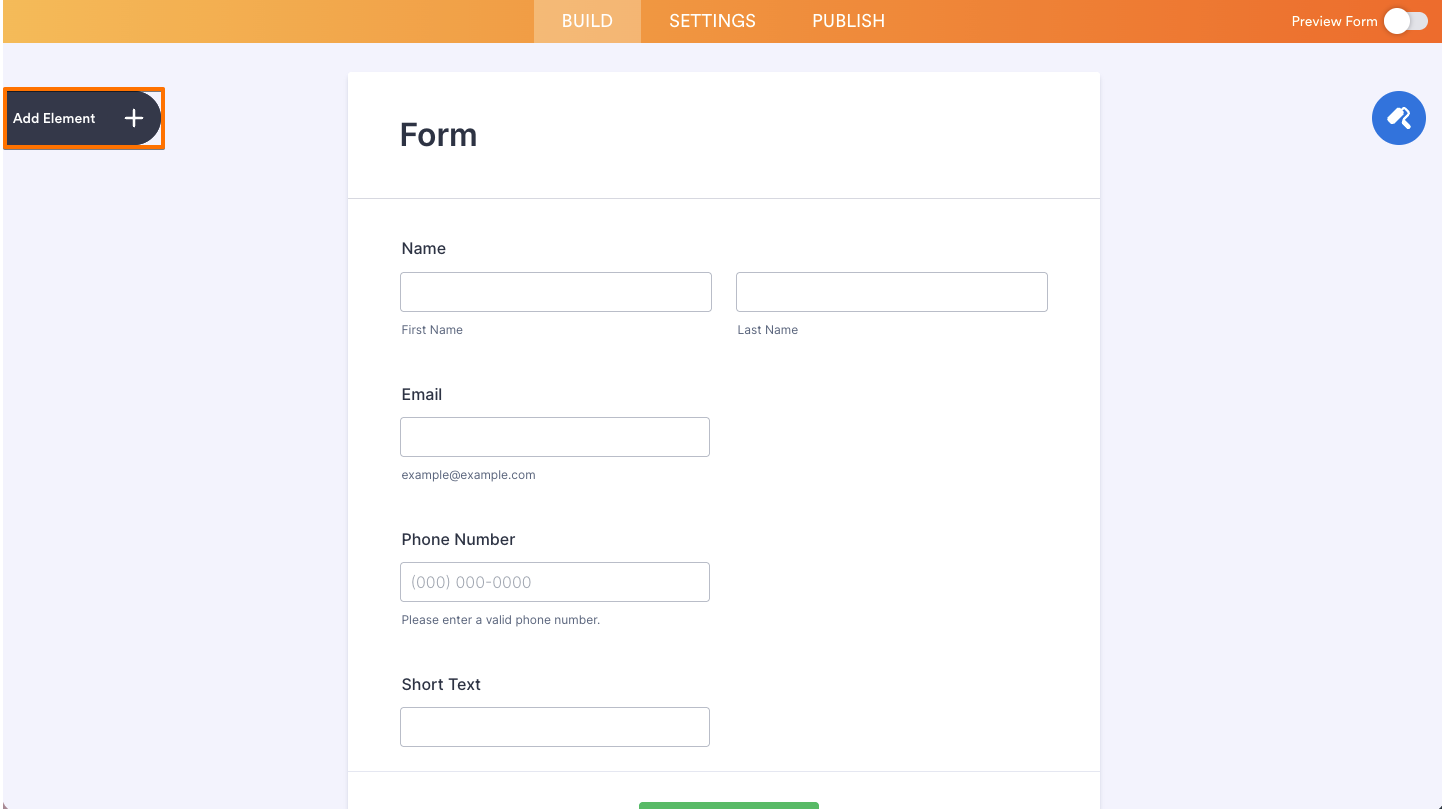
- In Form Builder, click on Add Element on the left side of the page.
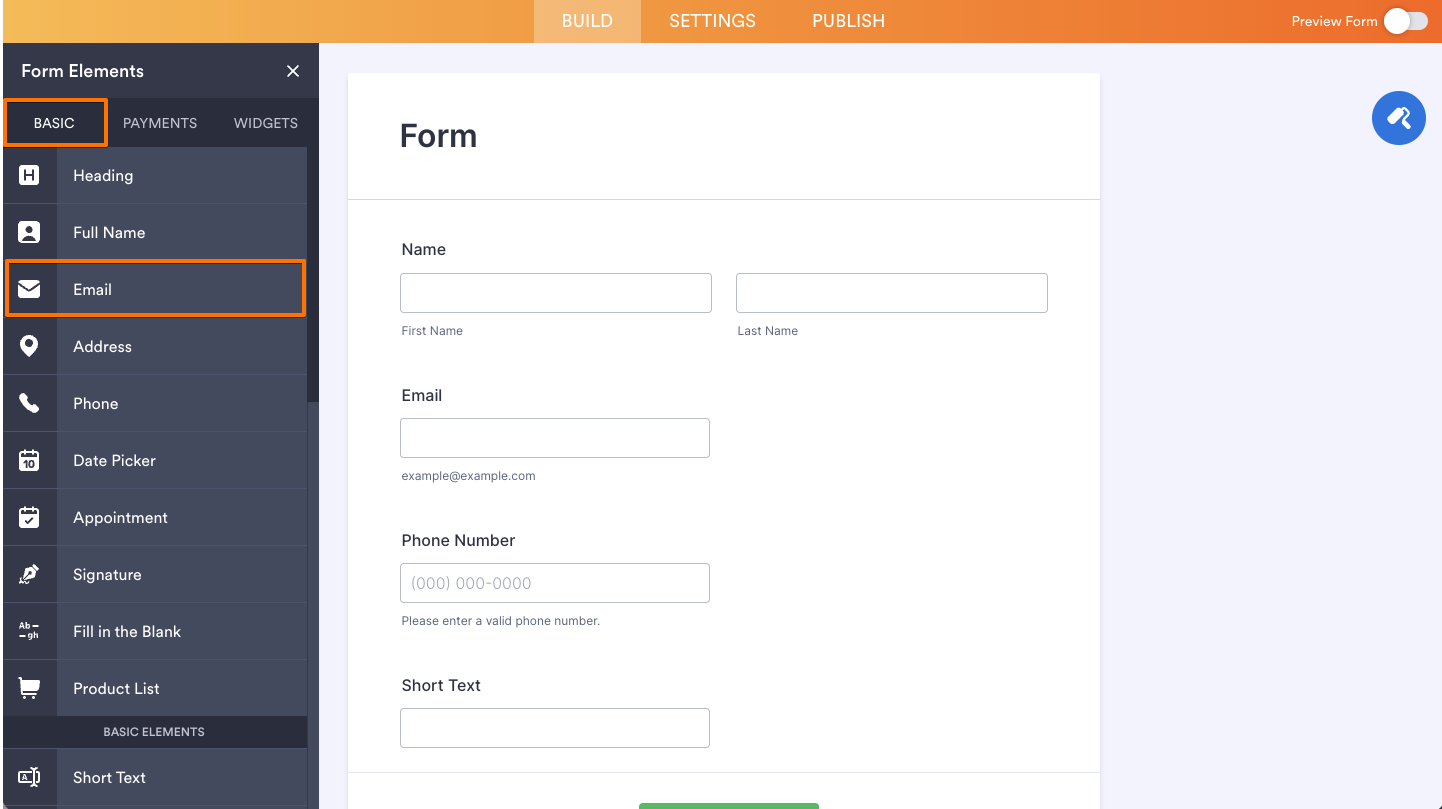
- Now, in the Form Elements menu, under the Basic tab, click on Email. Or, just drag and drop it to where you want it to be on your form.
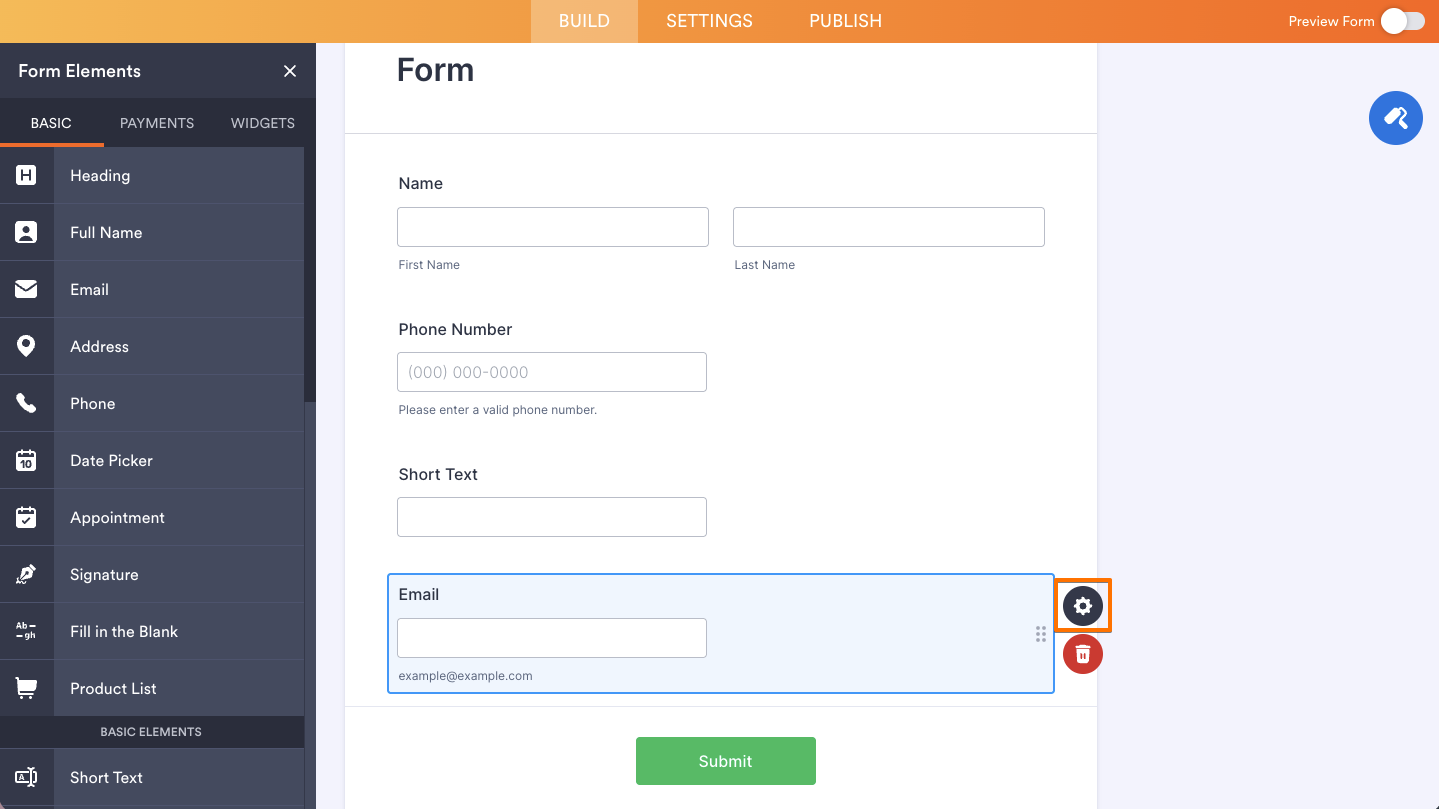
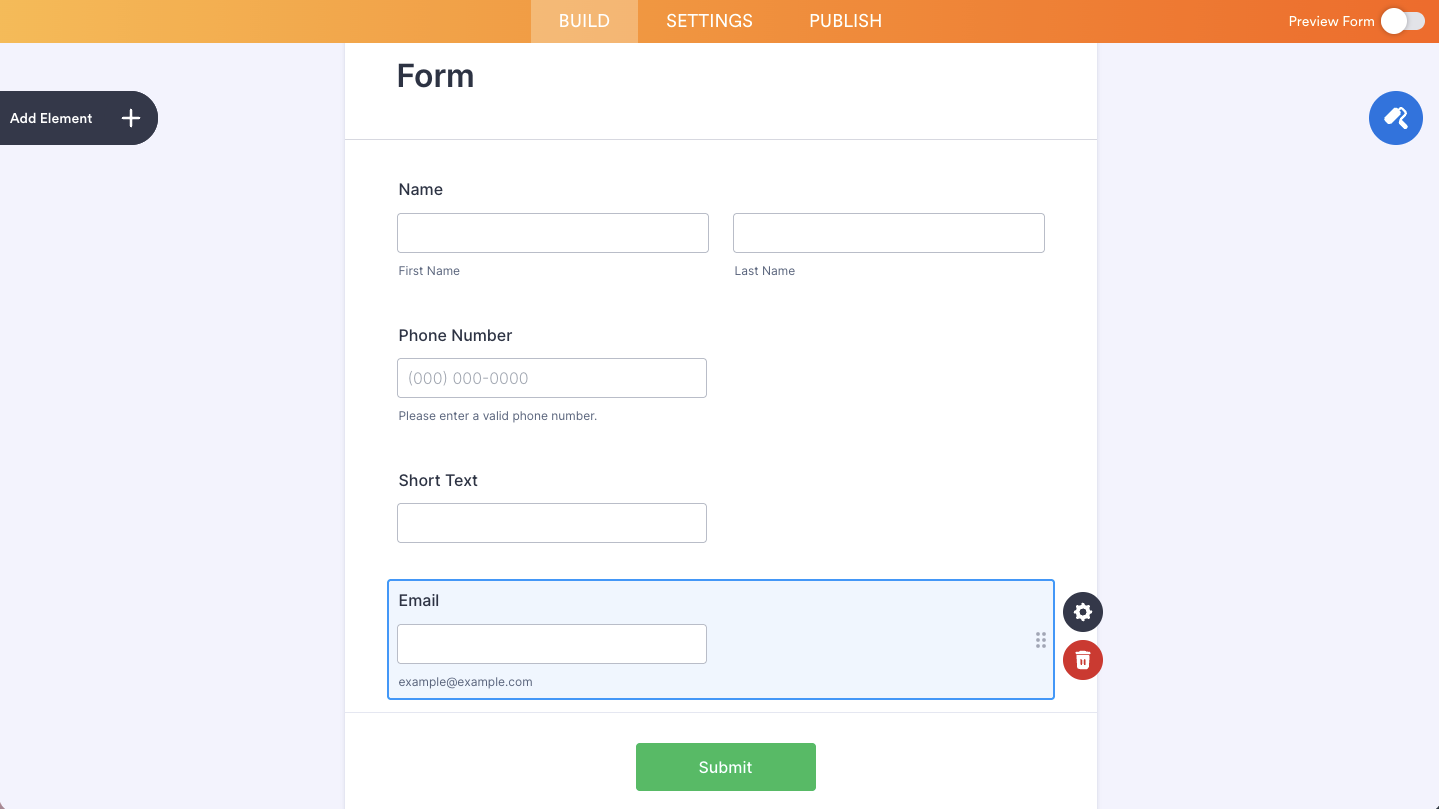
- Next, click on the Gear icon to open the Email Properties menu on the right side of the page.
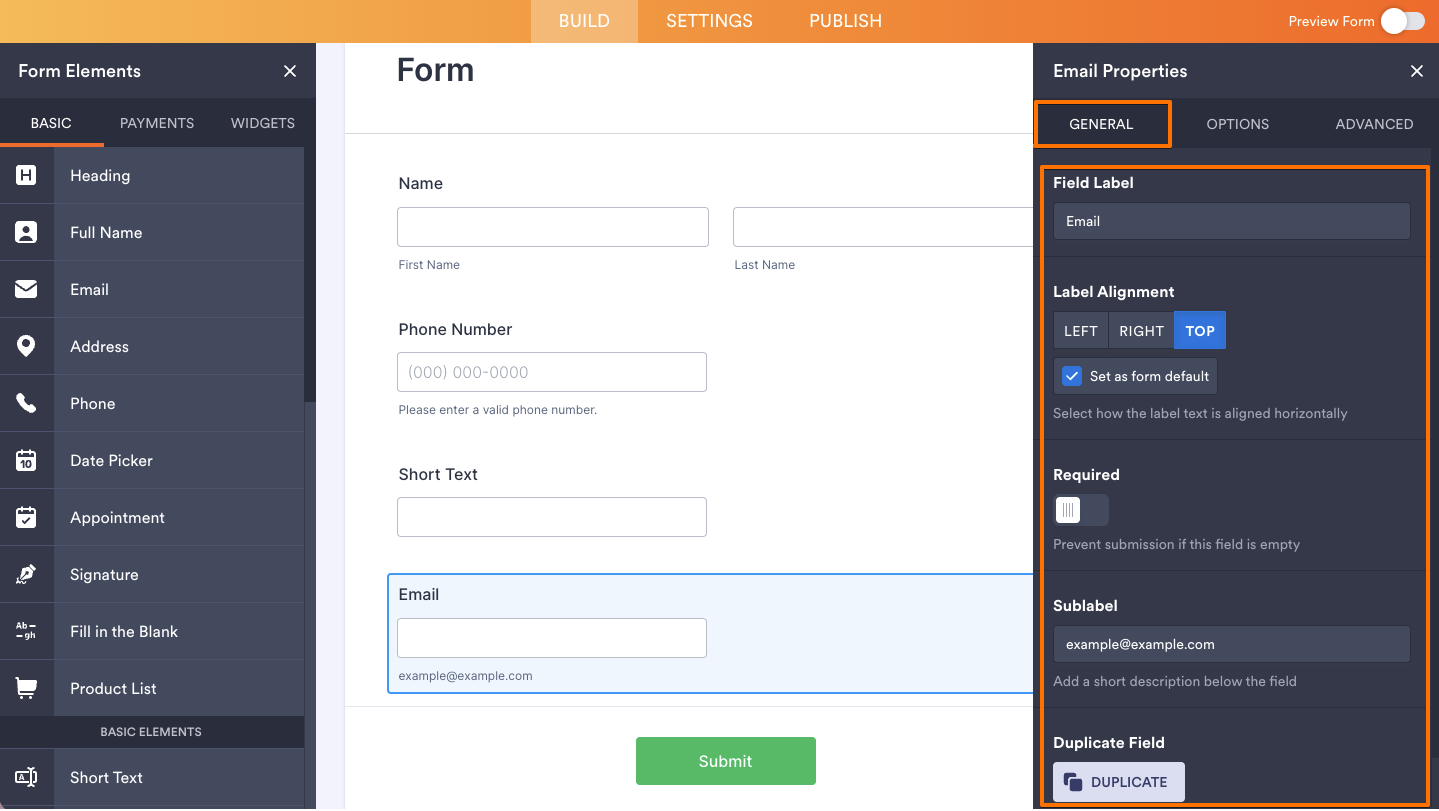
- Then, under the General tab, set up these things:
- Field Label — Enter the label that will appear above the email field on your form.
- Label Alignment — Choose how the label is aligned. Options include Left, Right, and Top. Check Set as Form Default to apply this alignment to all fields on your form.
- Required — Toggle this on to prevent form submission if this field is left empty.
- Sublabel — Add a short description below the field. By default, it shows example@example.com.
- Duplicate Field — Click on Duplicate to create a copy of this field with all its saved settings.
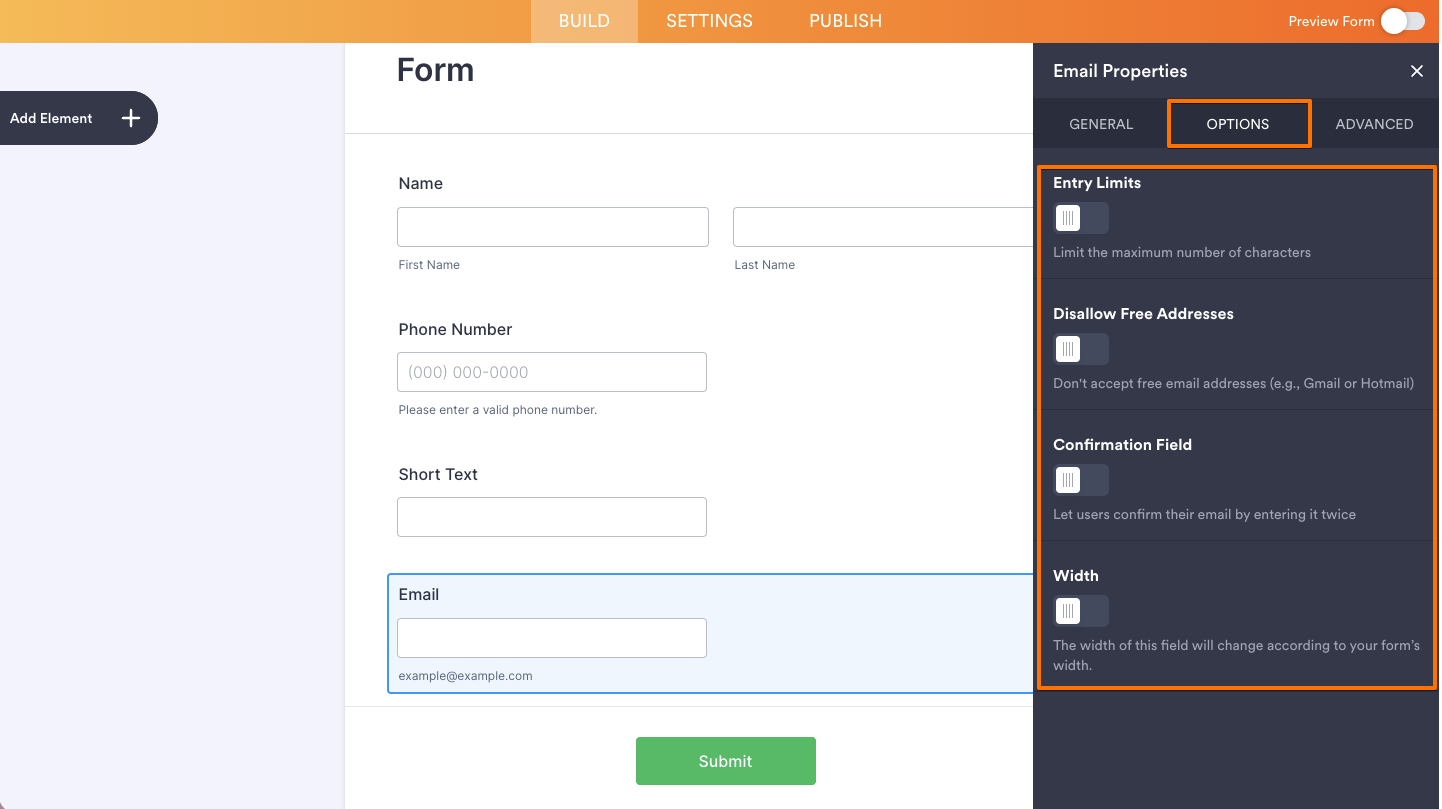
- Now, click on the Options tab and select what you want to do:
- Entry Limits — Toggle this on to limit the maximum number of characters that can be entered in the field.
- Disallow Free Addresses — Toggle this on to block free email providers such as Gmail or Hotmail, allowing only business or custom domain email addresses.
- Confirmation Field — Toggle this on to add a second email field where form fillers must re-enter their email address to confirm it.
- Width — Toggle this on to make the field width adjust automatically based on your form’s width.
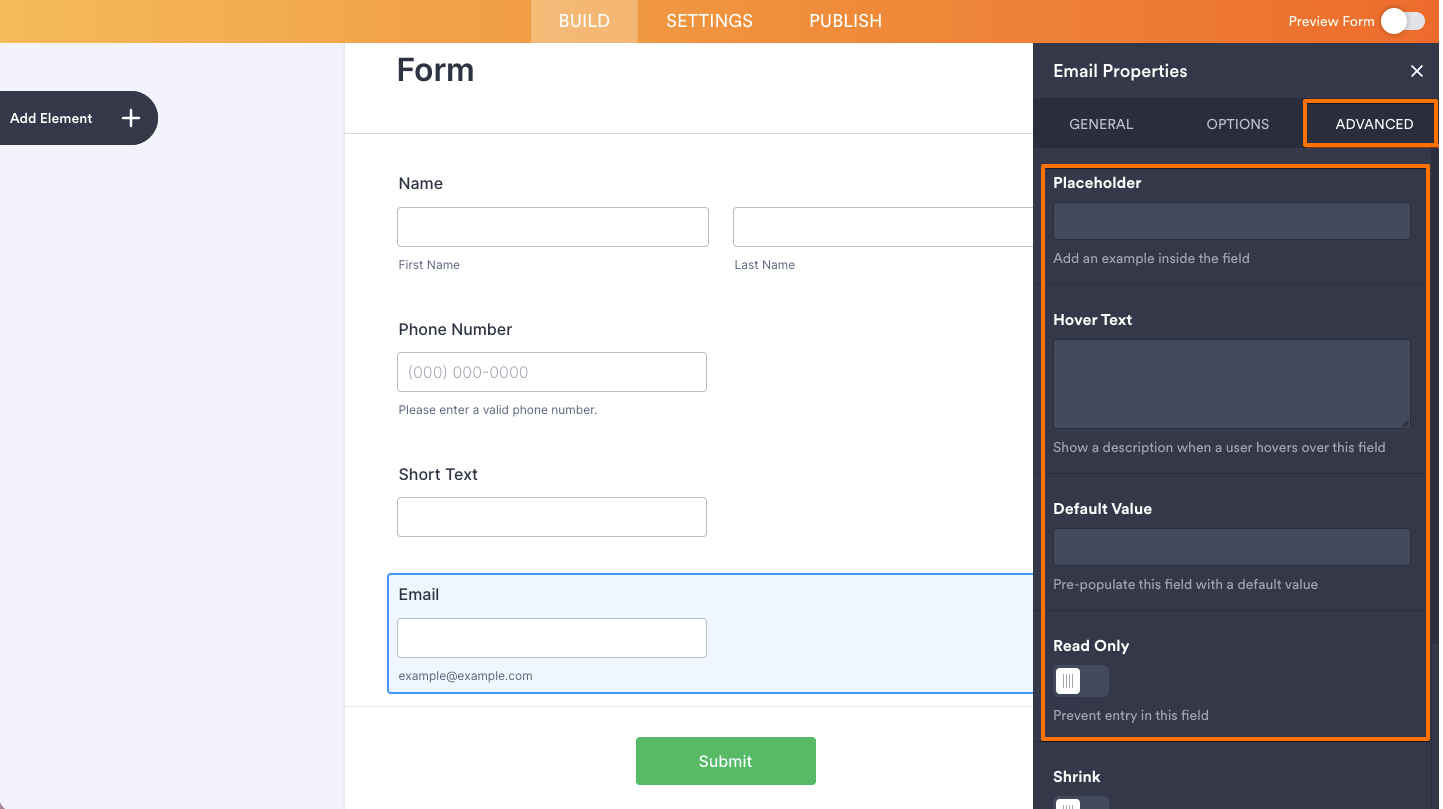
- Next, click on the Advanced tab and fill in these details:
- Placeholder — Add example text inside the field to guide form fillers on what to enter.
- Hover Text — Add a short description that appears when a user hovers over the field.
- Default Value — Enter a value to pre-populate the field with a default email address.
- Read Only — Toggle this on to prevent form fillers from entering or editing the field.
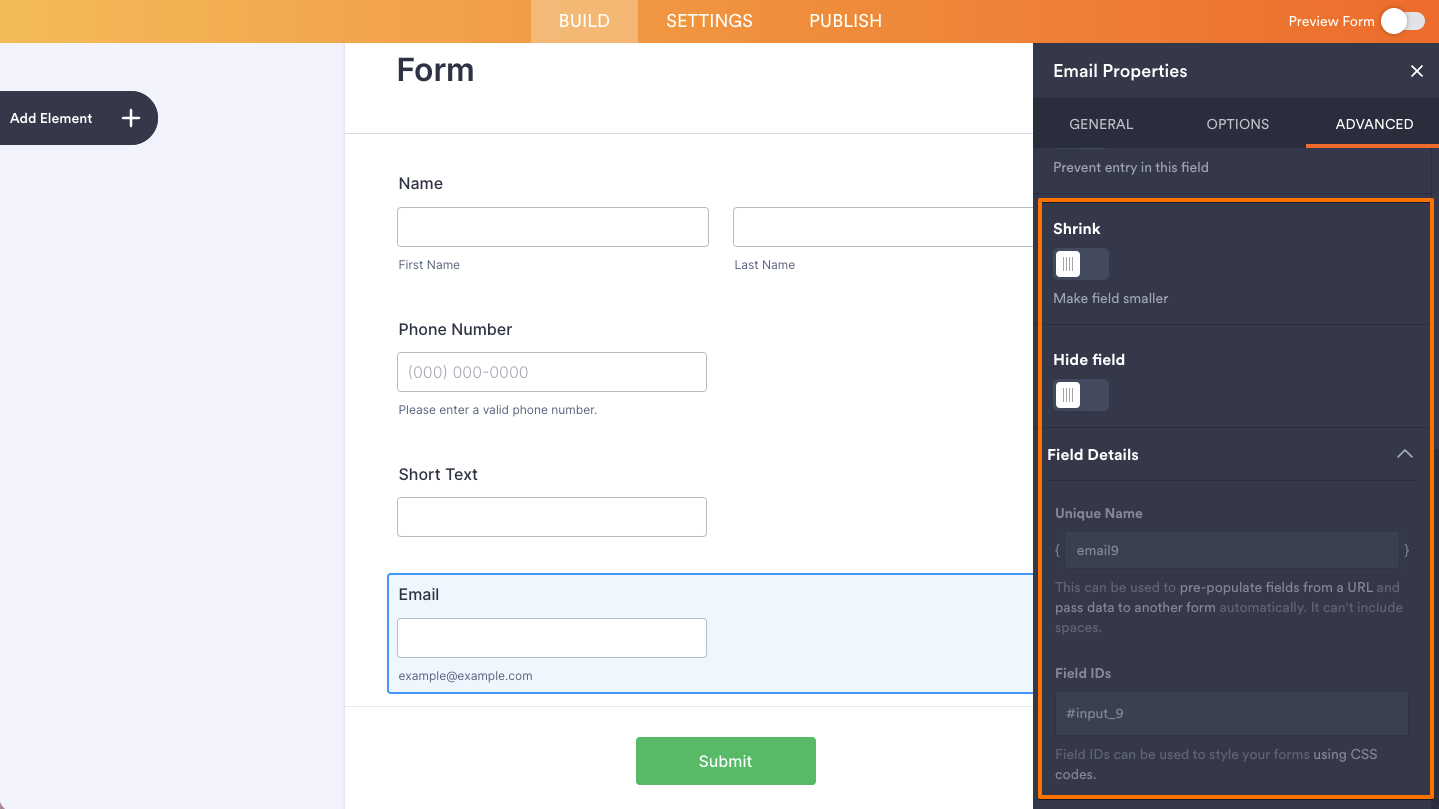
- Then, scroll down to the bottom and continue to set up these things, and you’re done.
- Shrink — Toggle this on to make the field smaller in size.
- Hide Field — Toggle this on to hide the field from form fillers.
- Field Details — View additional technical information about the field:
- Unique Name — The unique identifier for the field, which can be used to pre-populate it from a URL or pass data to another form automatically.
- Field IDs — The CSS selector for the field, which can be used to style it with custom CSS.
Note
Any changes you make to the element are automatically saved.
That’s it! You’ve successfully added and set up the Email element on your form. With the right settings in place, you can collect accurate and properly formatted email addresses, making it easier to stay connected with your form users and manage your submissions more effectively.

Send Comment: