Jotform’s Webhook element in Jotform Workflows lets you send real-time data from your forms and workflow steps directly to external applications or services. This enables seamless automation by triggering actions in other platforms based on specific workflow events — such as form submissions, approvals, or status changes. Whether you’re integrating with a custom system, notifying a CRM, or updating a third-party tool, the Webhook element helps extend the power of your workflows without manual intervention.
Whether you’re creating a new workflow or updating an existing one, adding and setting up the Webhook element only takes a second—here’s how:
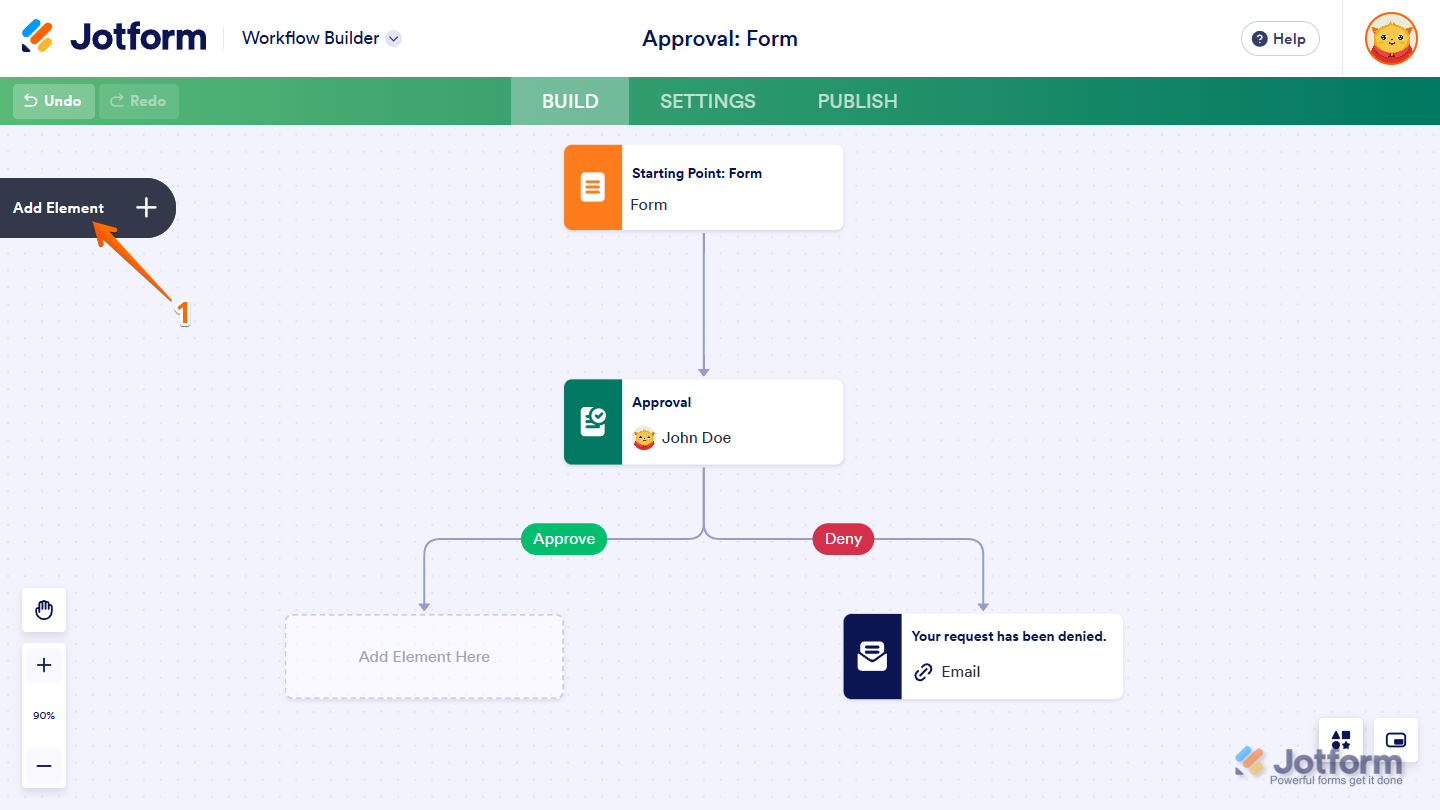
- In Workflow Builder, click on Add Element on the left side of the page.
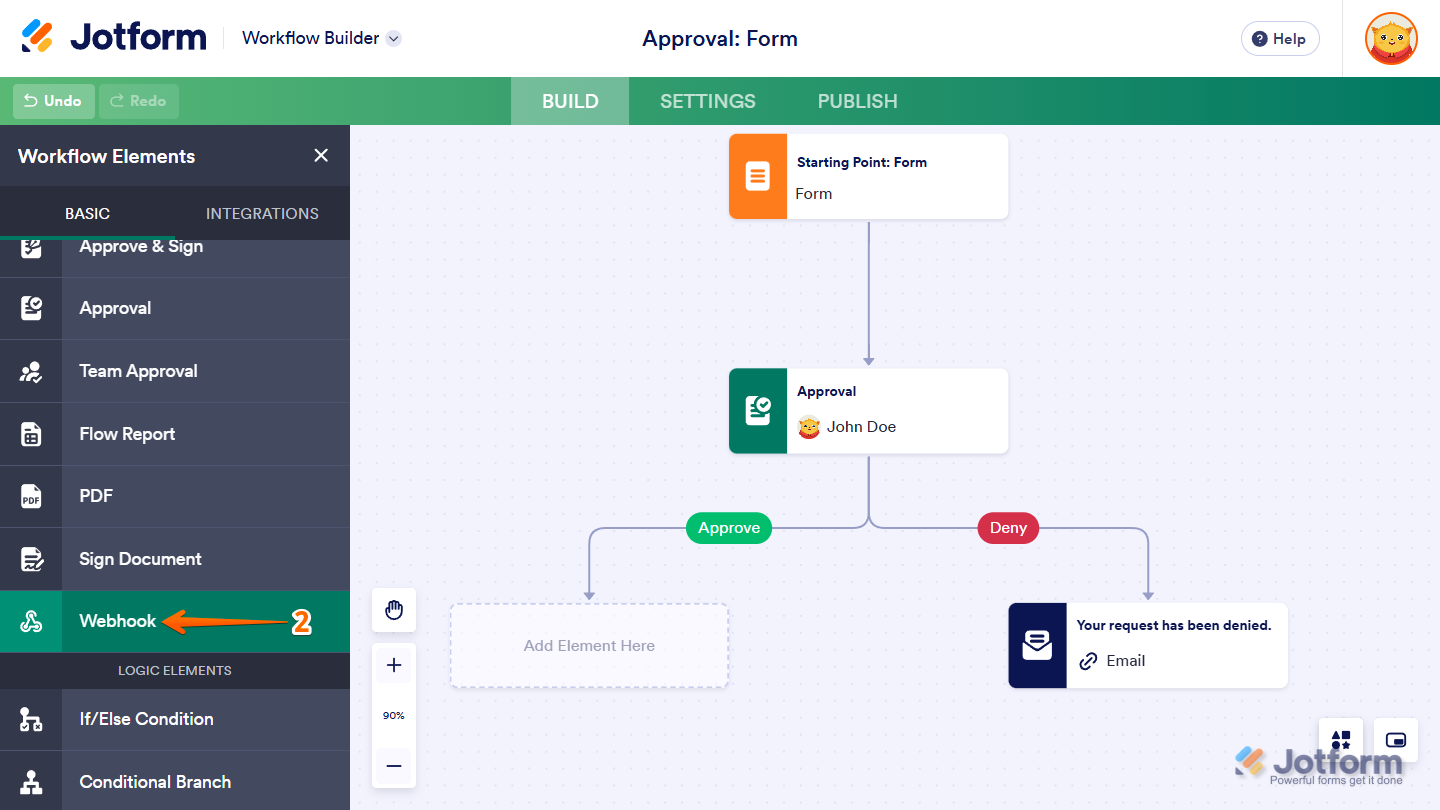
- Now, in the Workflow Elements menu, under the Basic tab, drag and drop the Webhook element to the Add Element Here placeholder on your workflow connections.
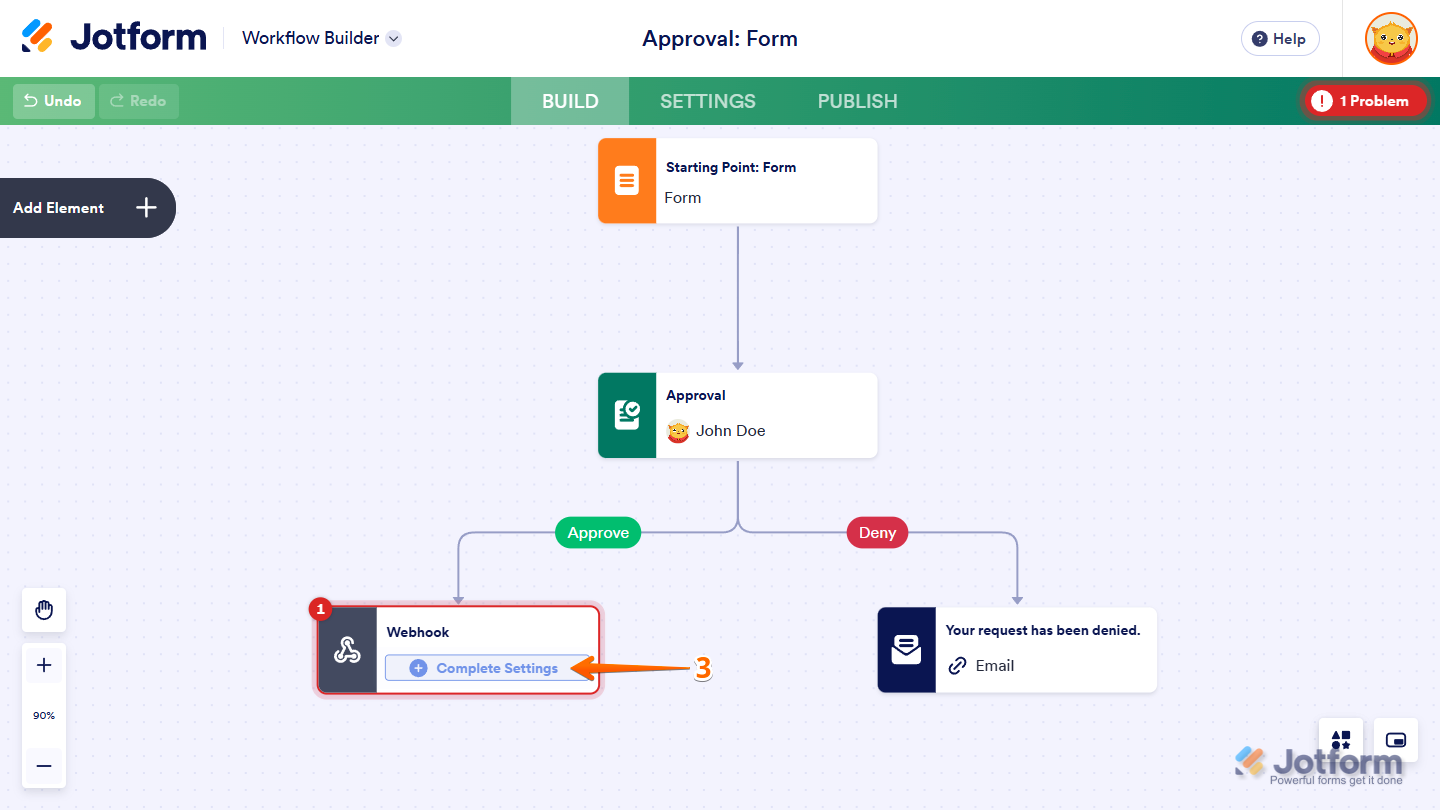
- Next, in the Webhook Element, click on the Complete Settings button.
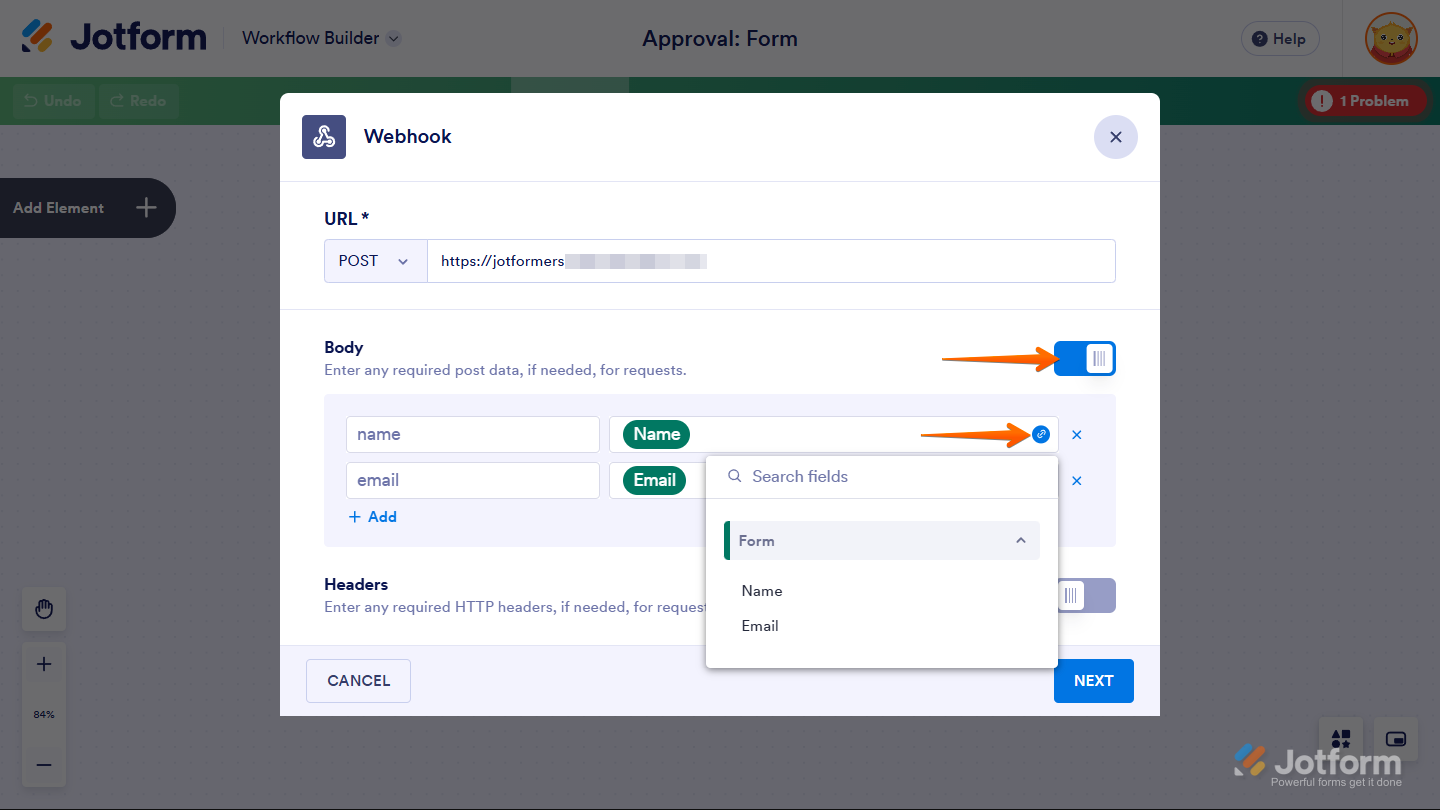
- Then, in the Webhook window that opens, under the URL section, choose an HTTP Request and enter the Webhook URL in the URL box.
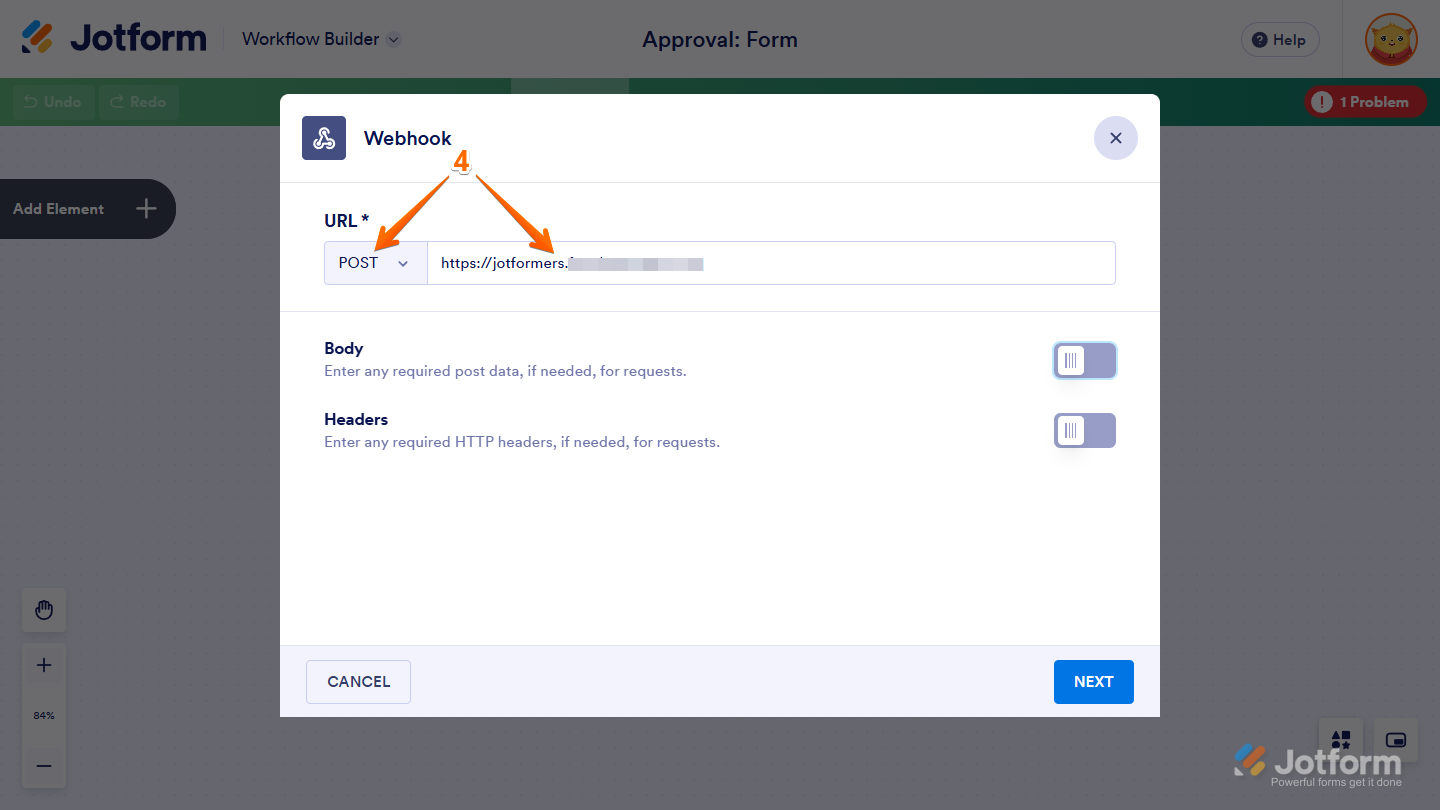
Optionally, you can toggle on the Body and enter both Keys and Value, respectively, as needed. You can personalize the value with your form fields by hovering over the right side of the box and clicking the link icon.
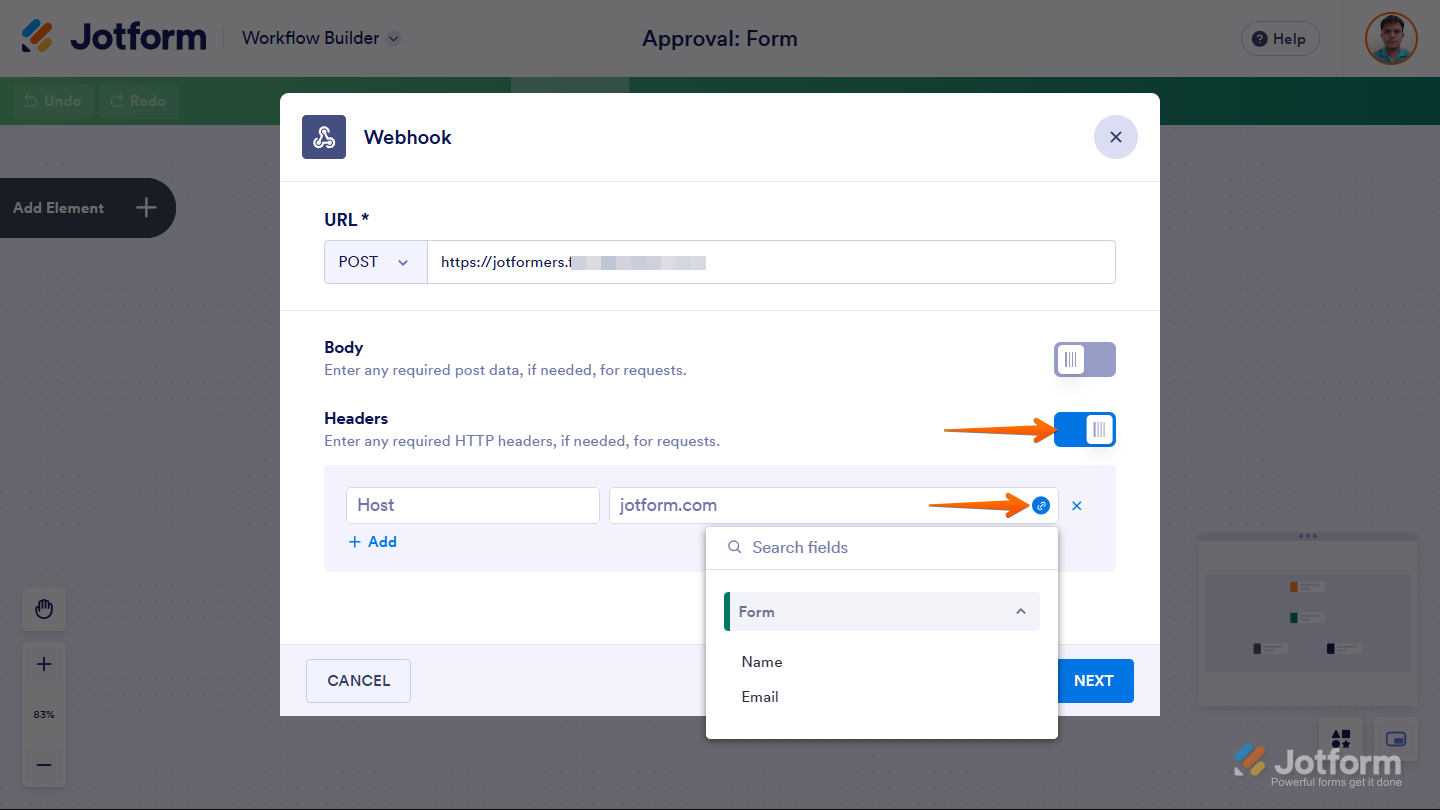
You can also customize the HTTP Headers of your requests, as needed. Toggle on the Header and enter the Keys and Value. You can also use the form fields as your value.
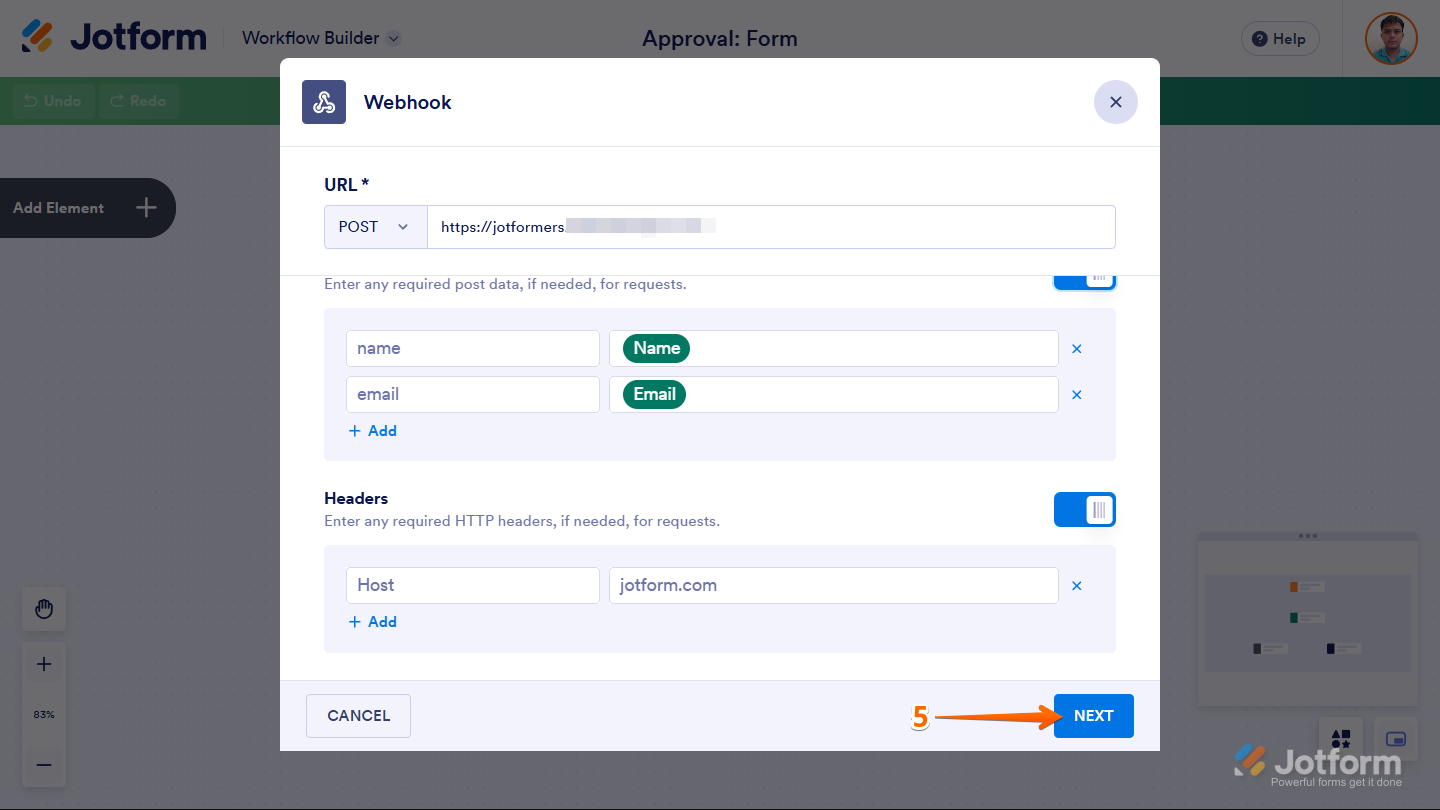
- Now, click on Next to automatically test your Webhook settings.
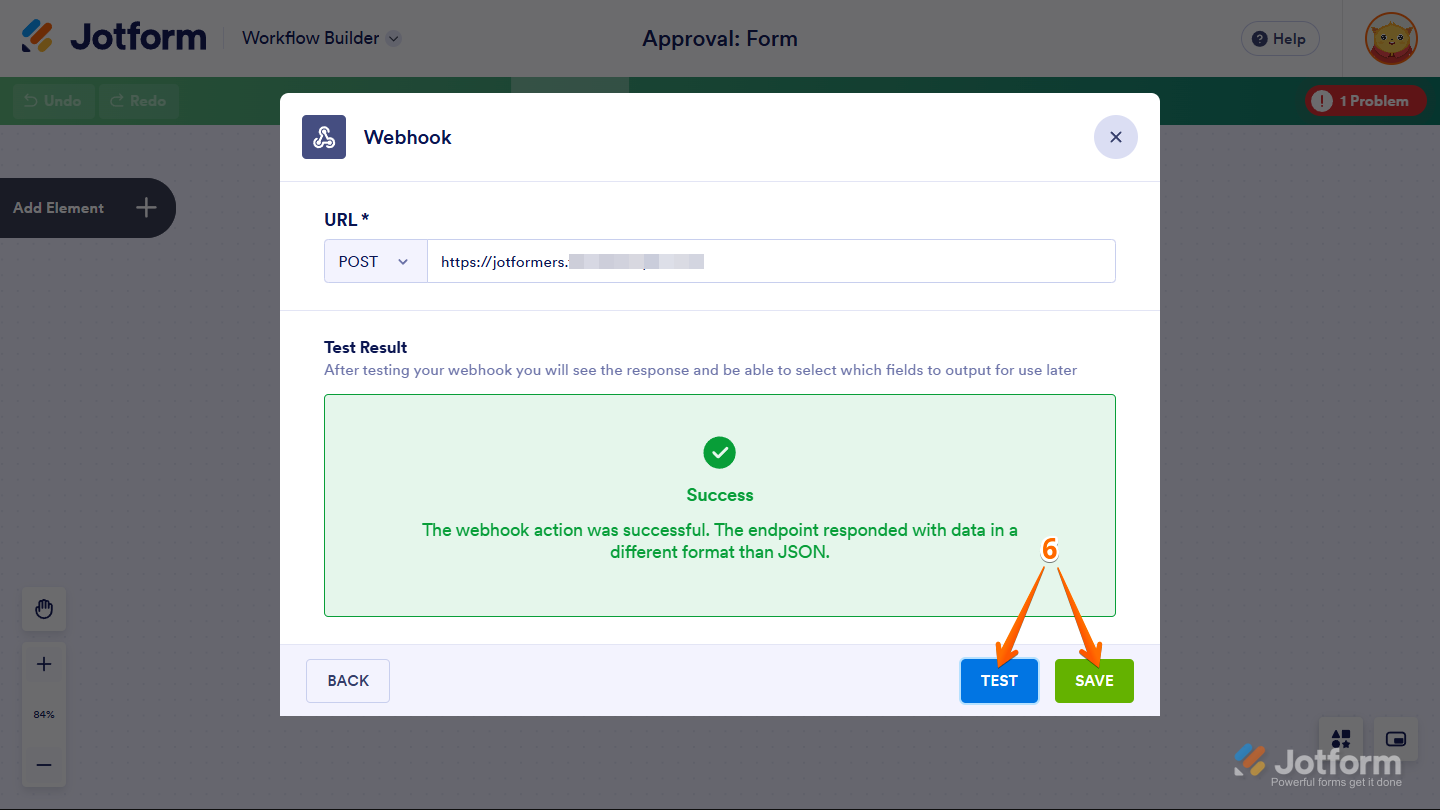
- Then, click on Test to manually check the settings, and finally click on Save at the bottom right of the window to complete the setup.
That’s it! You’ve now successfully created a webhook in your workflow. Test it out live on your form to see it in action.

Send Comment: