Jotform makes it easy to update your existing workflows so you can fine-tune steps, adjust approvals, add new elements, or reorganize your process as your needs change. Whether you’re modifying a simple workflow or a multi-step setup, you can update everything right inside the Workflow Builder.
Accessing Your Workflow
You can access your workflow in several ways, but the easiest is from your Workspace page or the Form Builder. Here’s how to access it from your Workspace page:
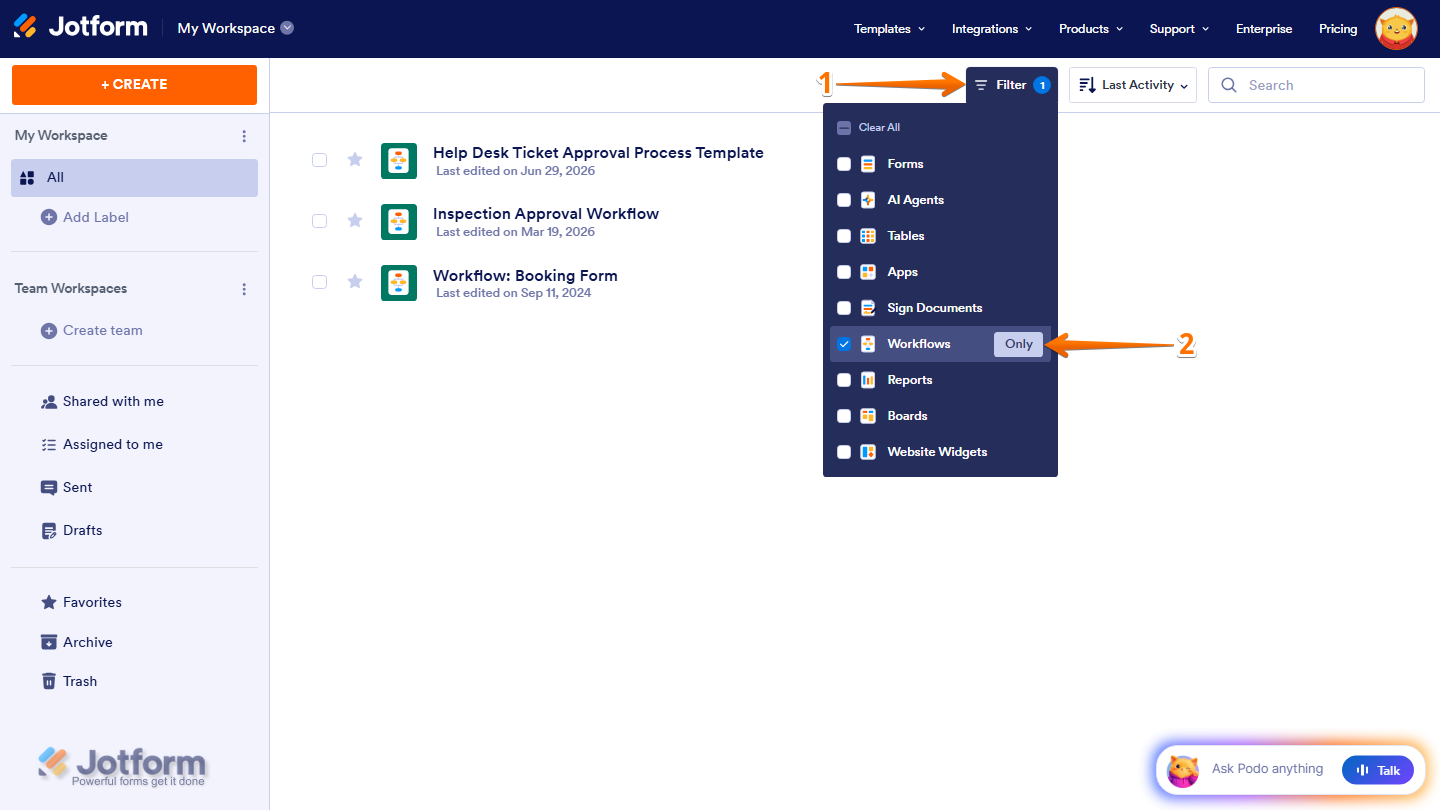
- On your Workspace page, at the top, click on Filter.
- Then, in the menu that opens, hover over Workflows and click on Only to display only workflow assets on the page.
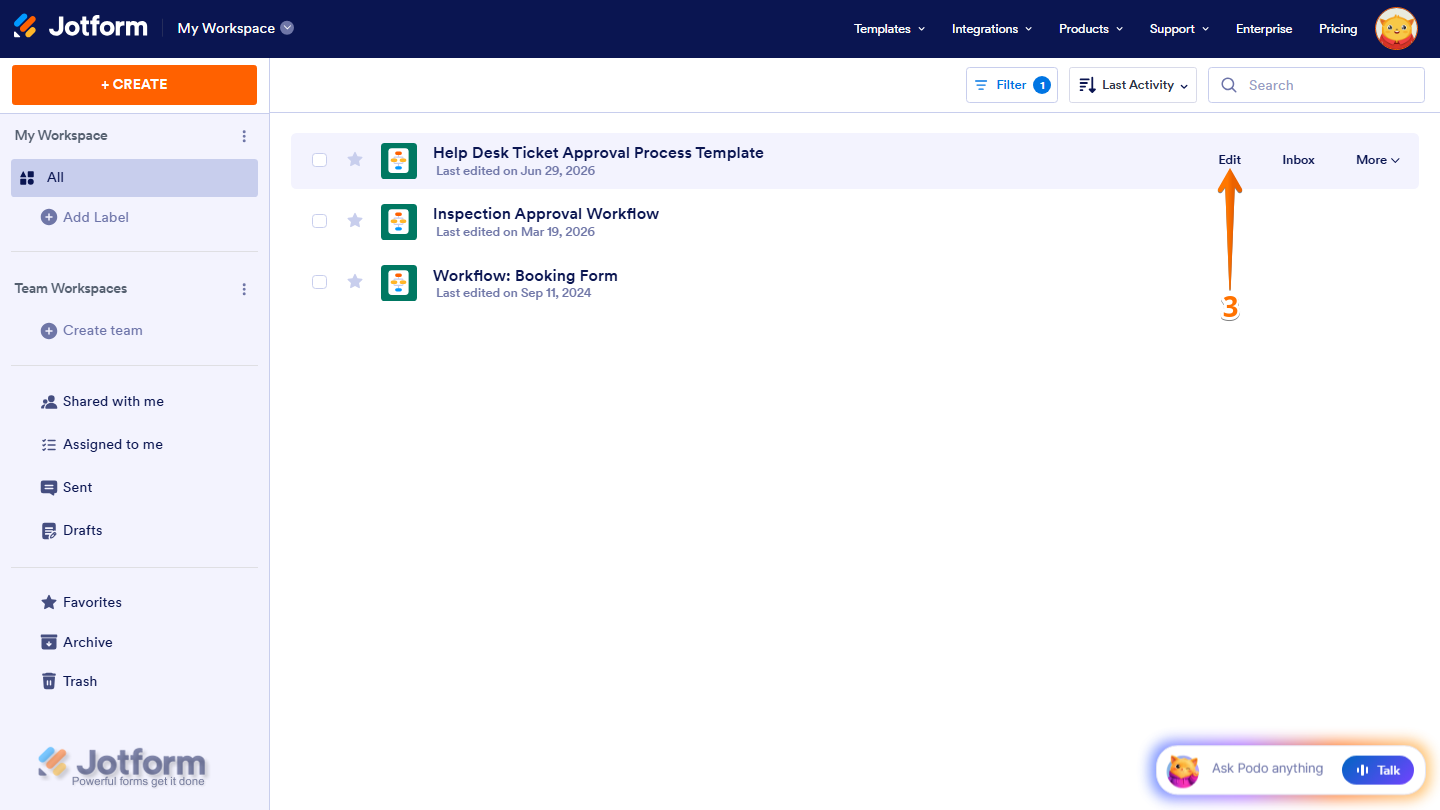
- Next, hover over the workflow you want to update, and then on the right side of the workflow, click on Edit.
And here’s how to access it from the Form Builder:
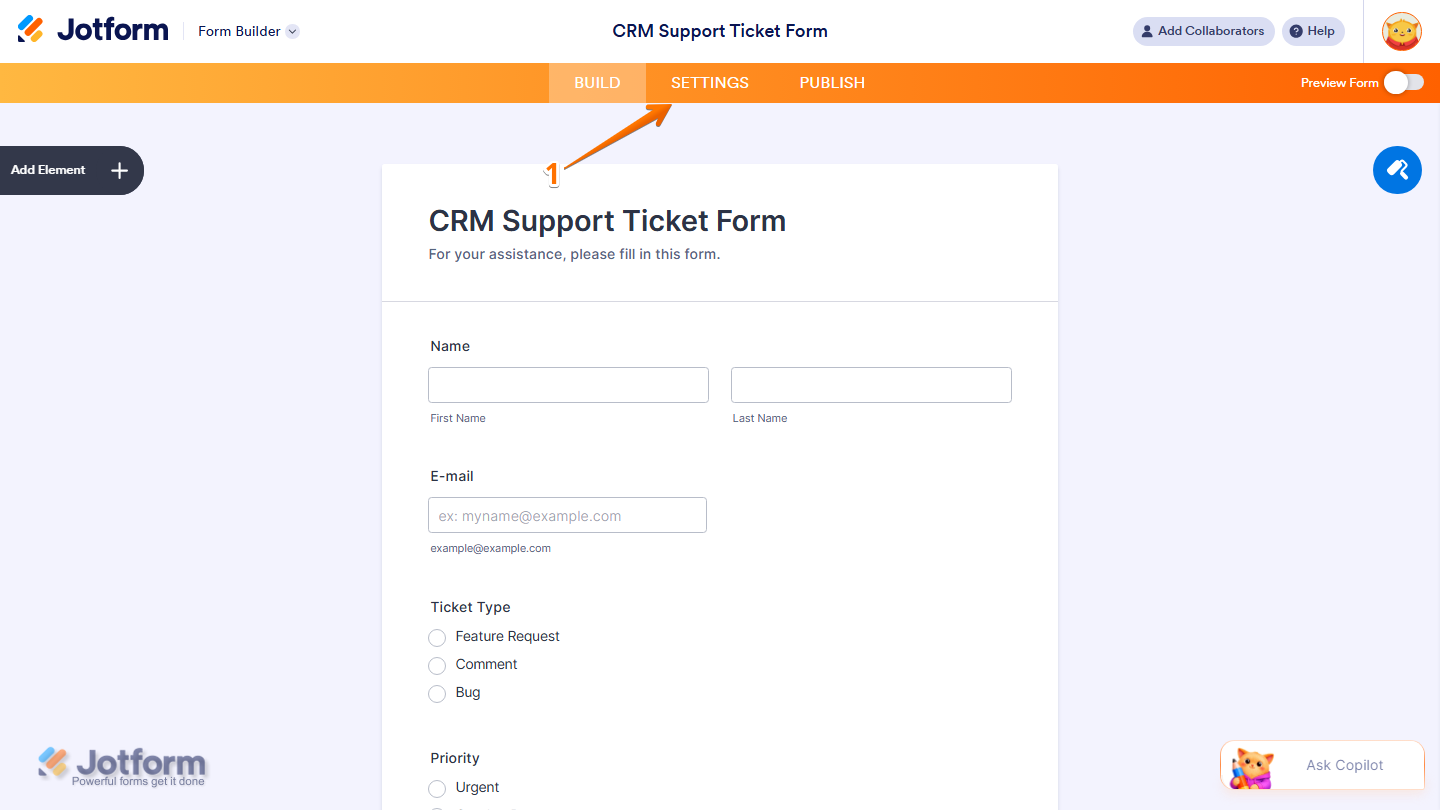
- In Form Builder, in the orange navigation bar at the top of the page, click on Settings.
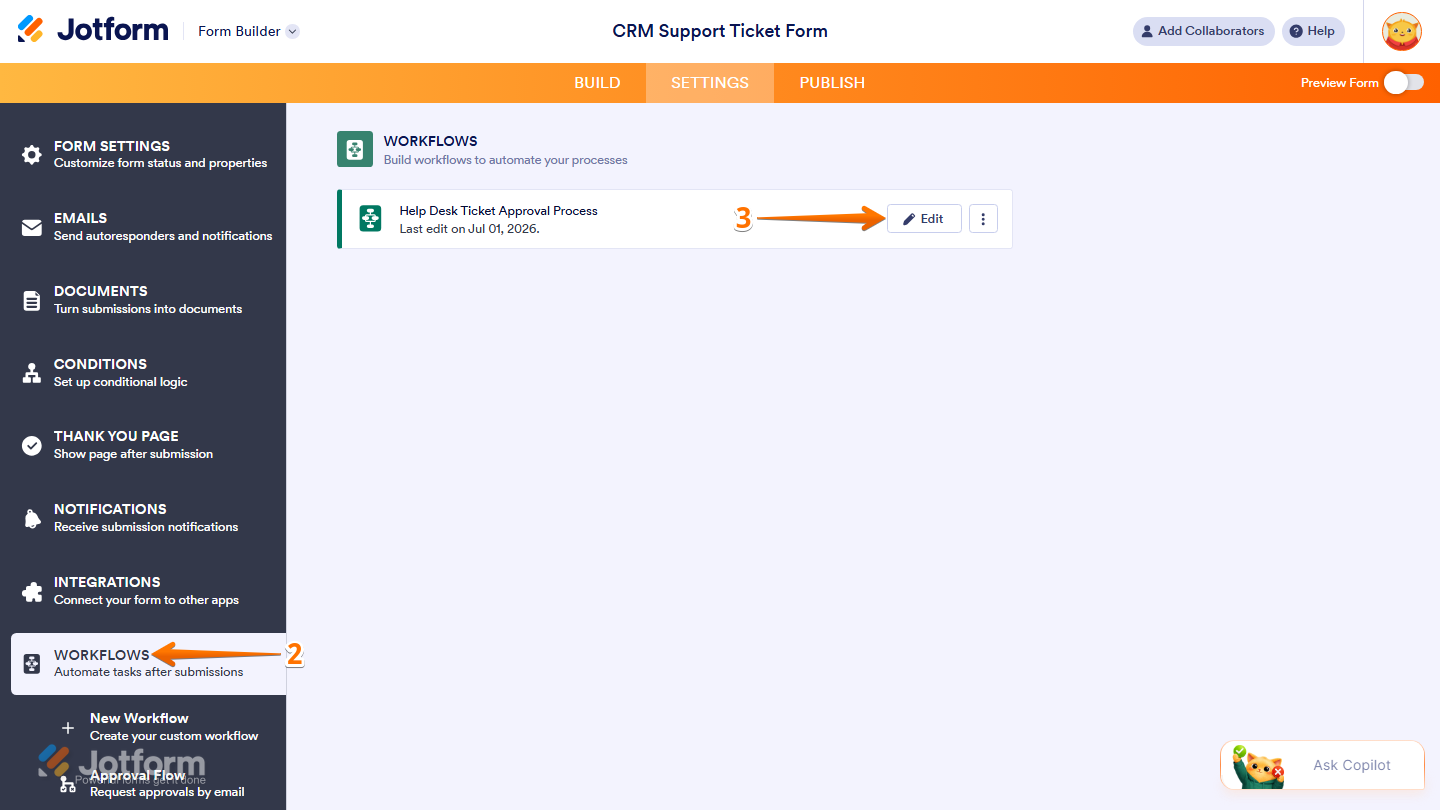
- Then, in the menu on the left, click on Workflows.
- Now, hover your mouse over the workflow you want to update, and click on Edit.
That’s it. You’ll be redirected to Workflow Builder, where you can continue working on your workflow.
Editing Existing Elements
If you want to tweak the settings of an Email, Approval, or other workflow element, here’s how to do it:
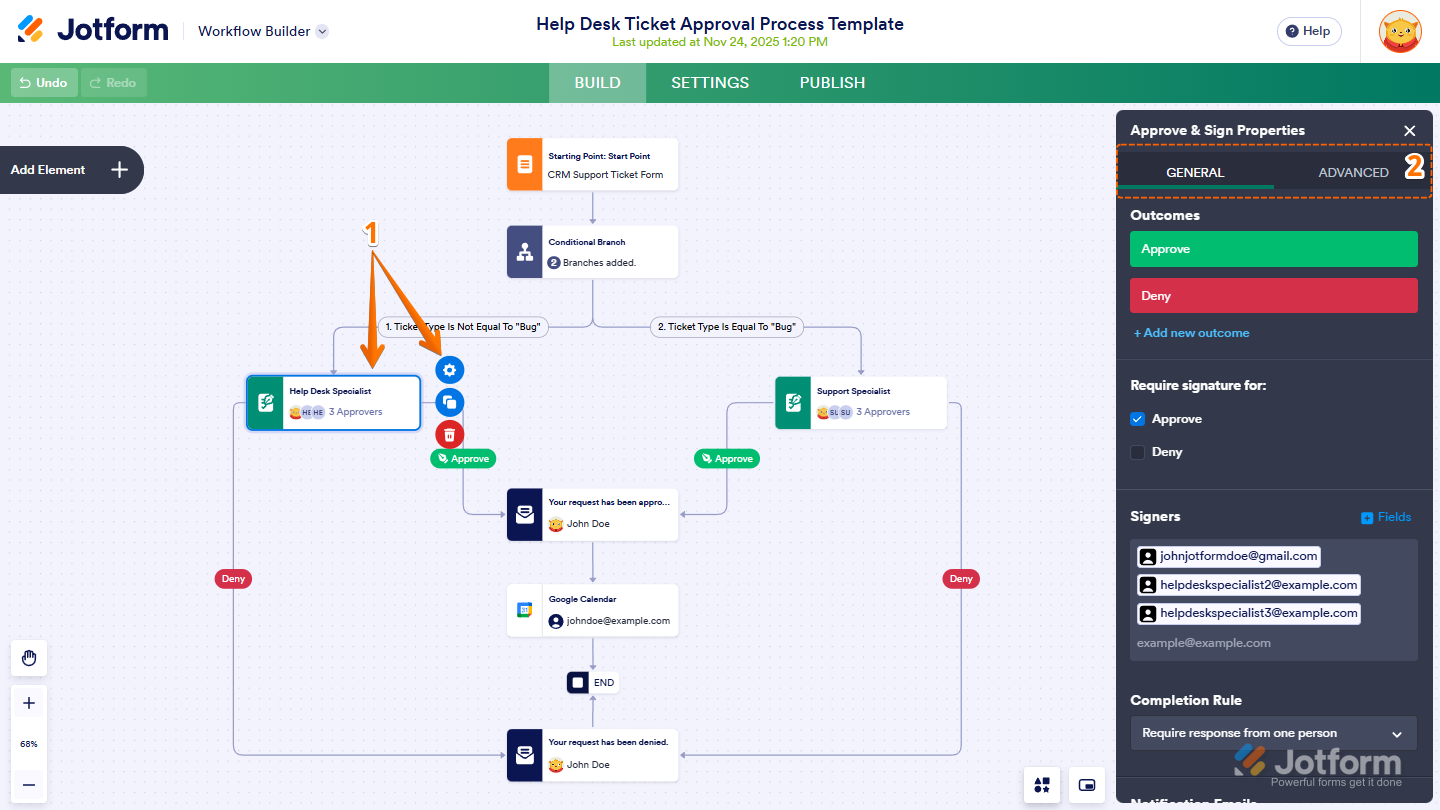
- In Workflow Builder, click on the element you want to edit and click on the Gear icon. For example, the Approve & Sign element.
- Then, in the menu that opens on the right side of the page, you can configure and update the settings under the General and Advanced tab as needed.
Editing Existing Integration
You can also edit an existing integration in your workflow to update its settings, field mappings, or connected account without adding a new one. Here’s what to do:
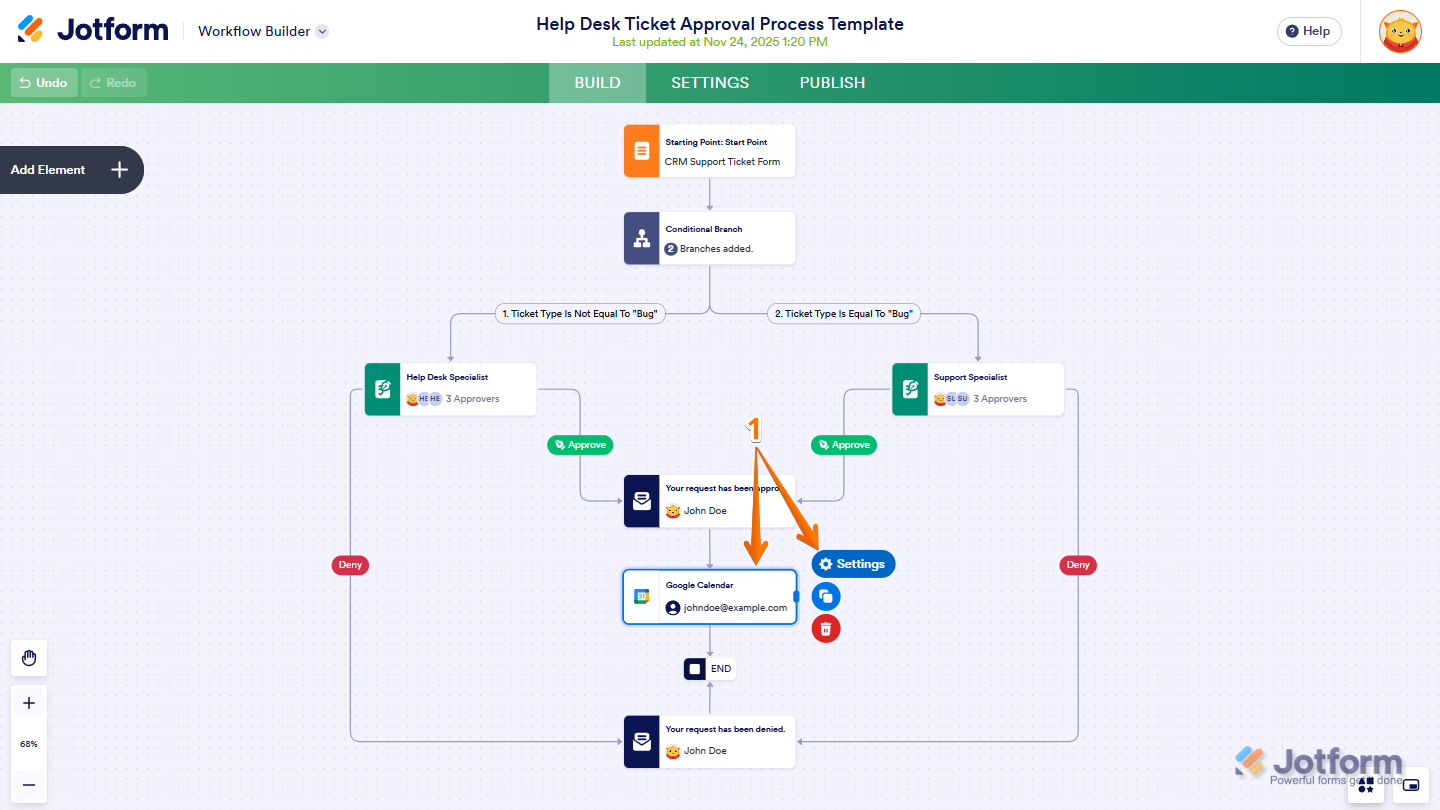
- In Workflow Builder, click on the integration you want to edit and click on the Gear icon. For example, the Google Calendar.
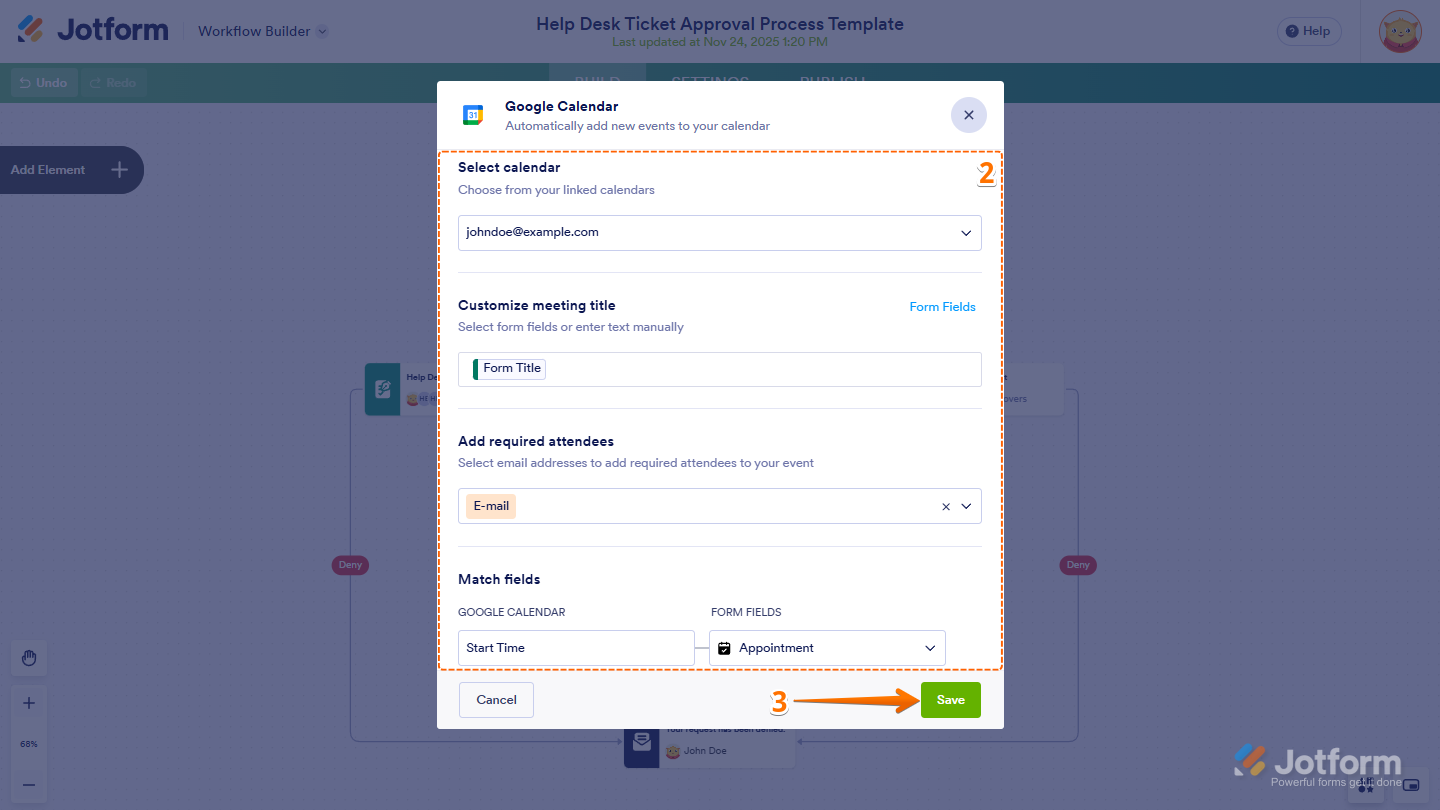
- Then, in the window that comes up, configure and update the following settings as needed.
- Once you’re done, click on Save.
Note
The settings you see may vary depending on which integration you added, as each integration has its own configuration options.
Editing Logical Elements
Adjust the workflow’s logical elements, like conditional branches, to control how submissions move through your process. Here’s the quick way to do it:
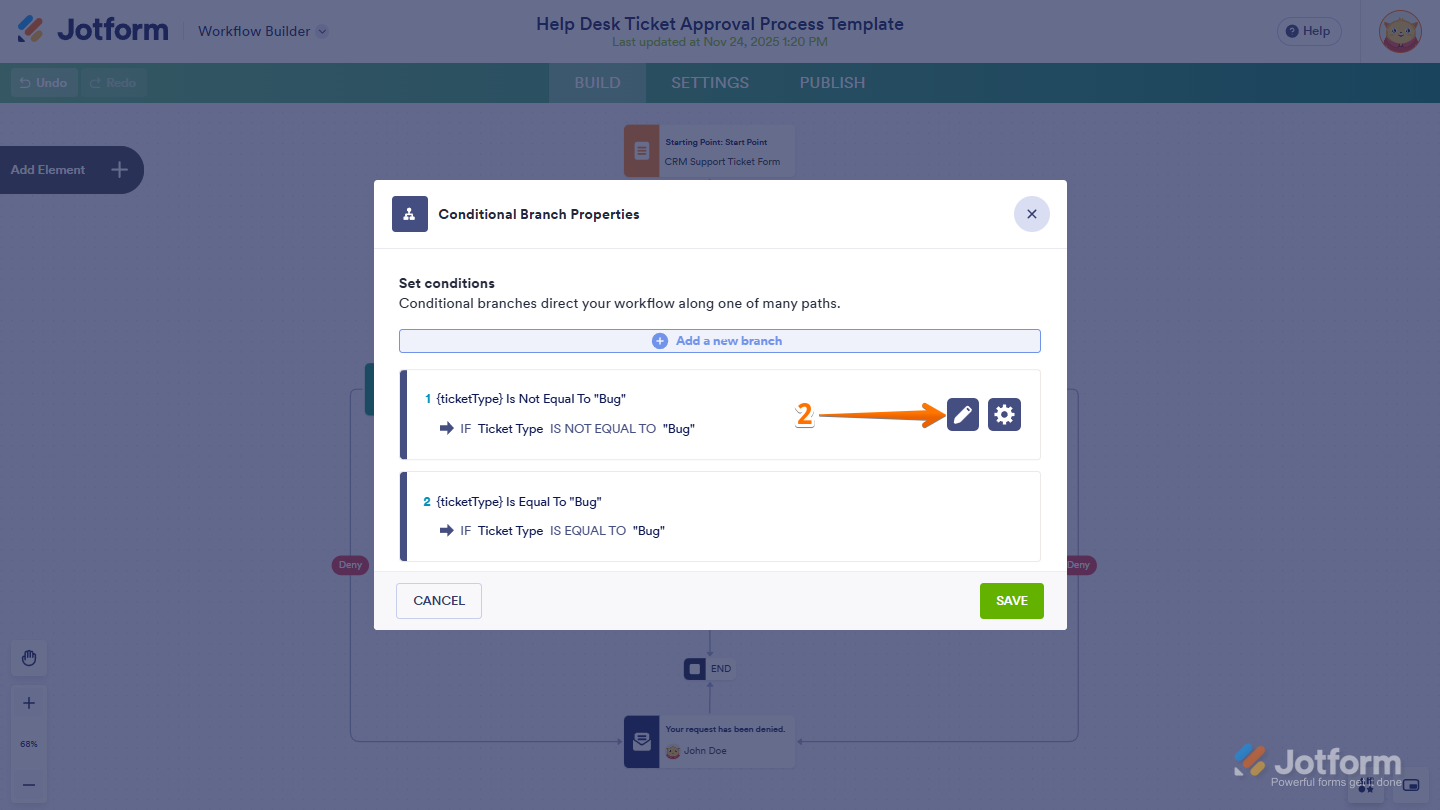
- In Workflow Builder, click on the Logical Element you want to edit and click on the Gear icon. For example, Conditional Branch.
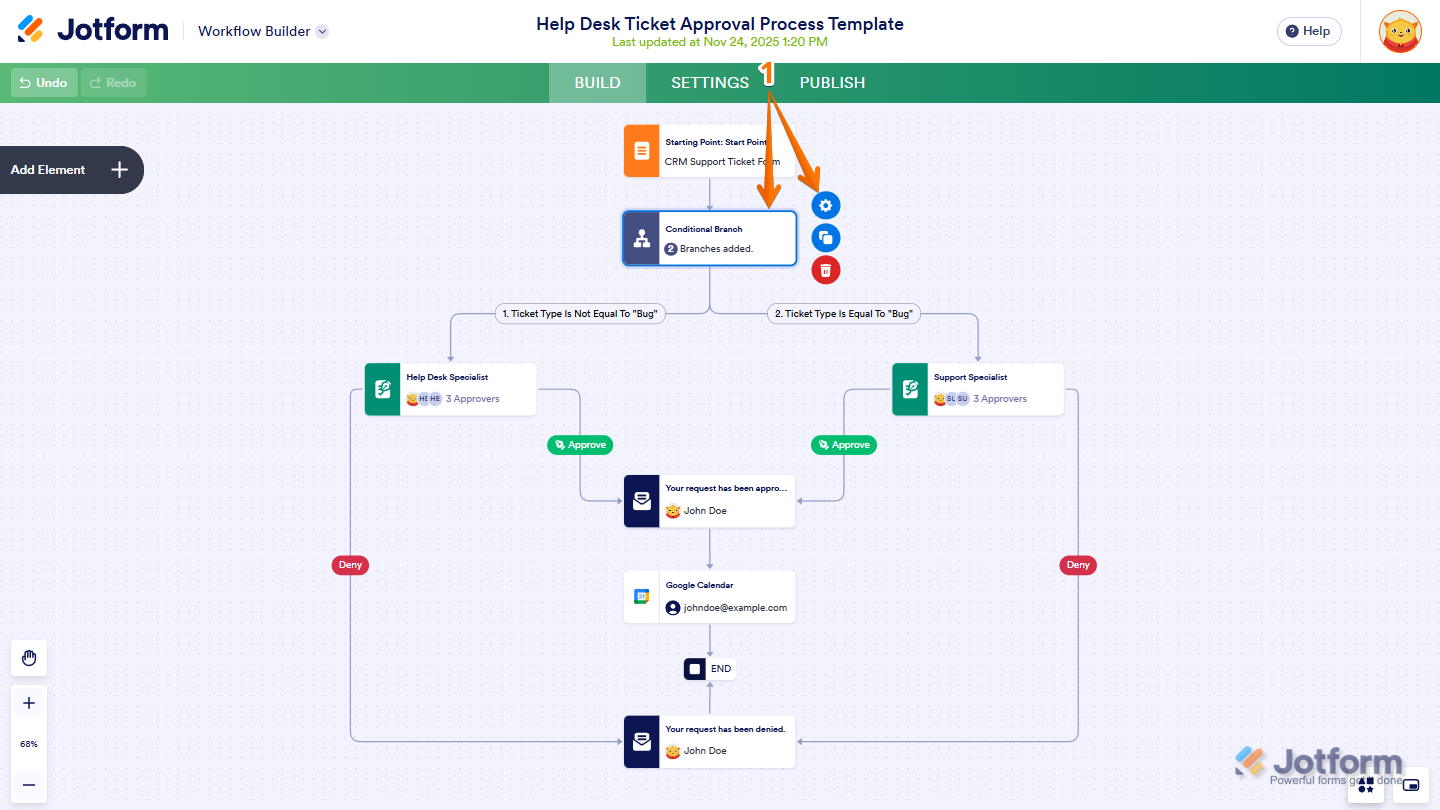
- Then, in the window that opens, hover your mouse over the condition that you want to edit and click on the Pencil icon.
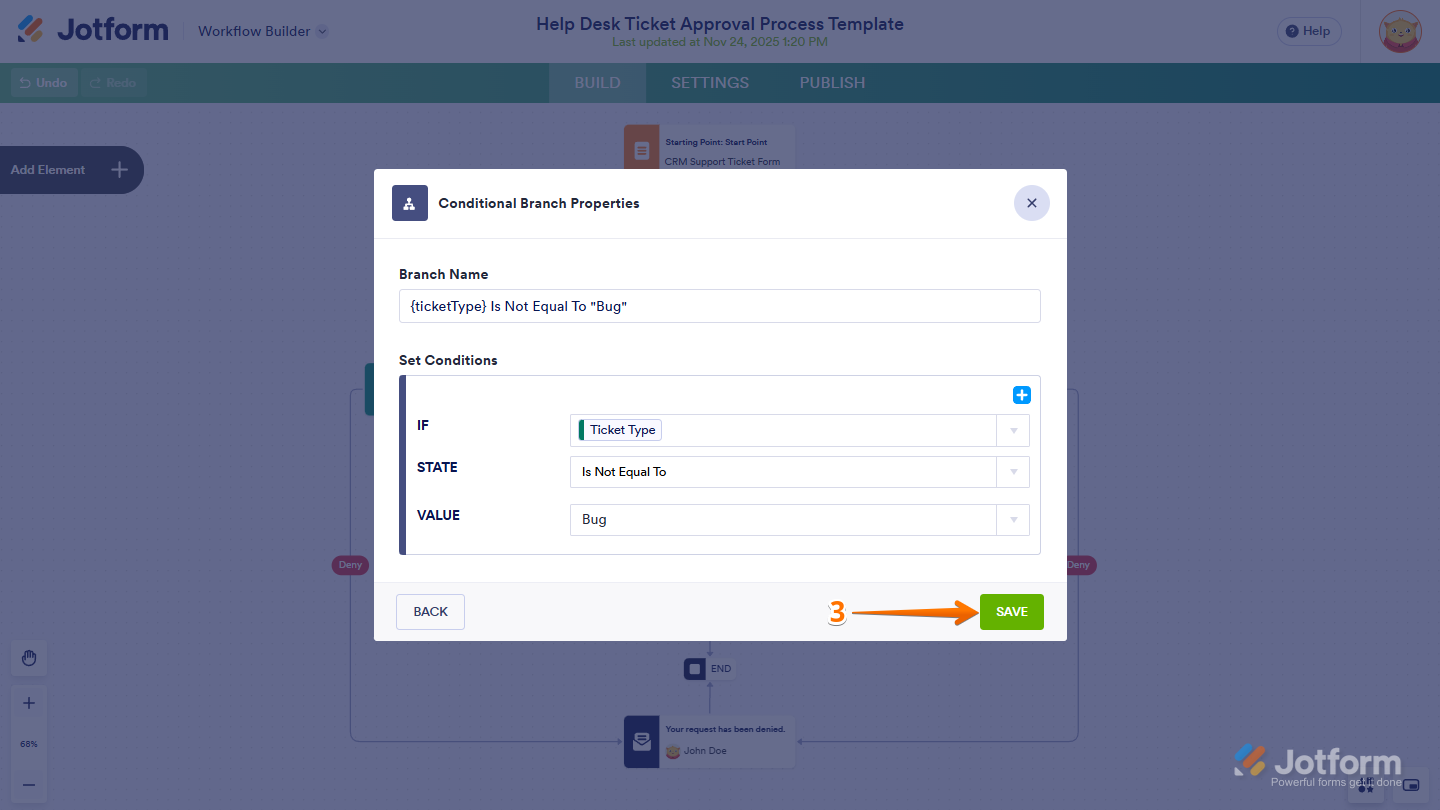
- Now, update the conditional logic as needed and click on Save.
Note
The available settings may vary depending on the type of logical element you’re editing, since each Logical element has its own options.
Adding New Elements, Logical and Integrations
If your process has changed and you need more steps, you can easily do that in your workflow. You can do it in just a few steps:
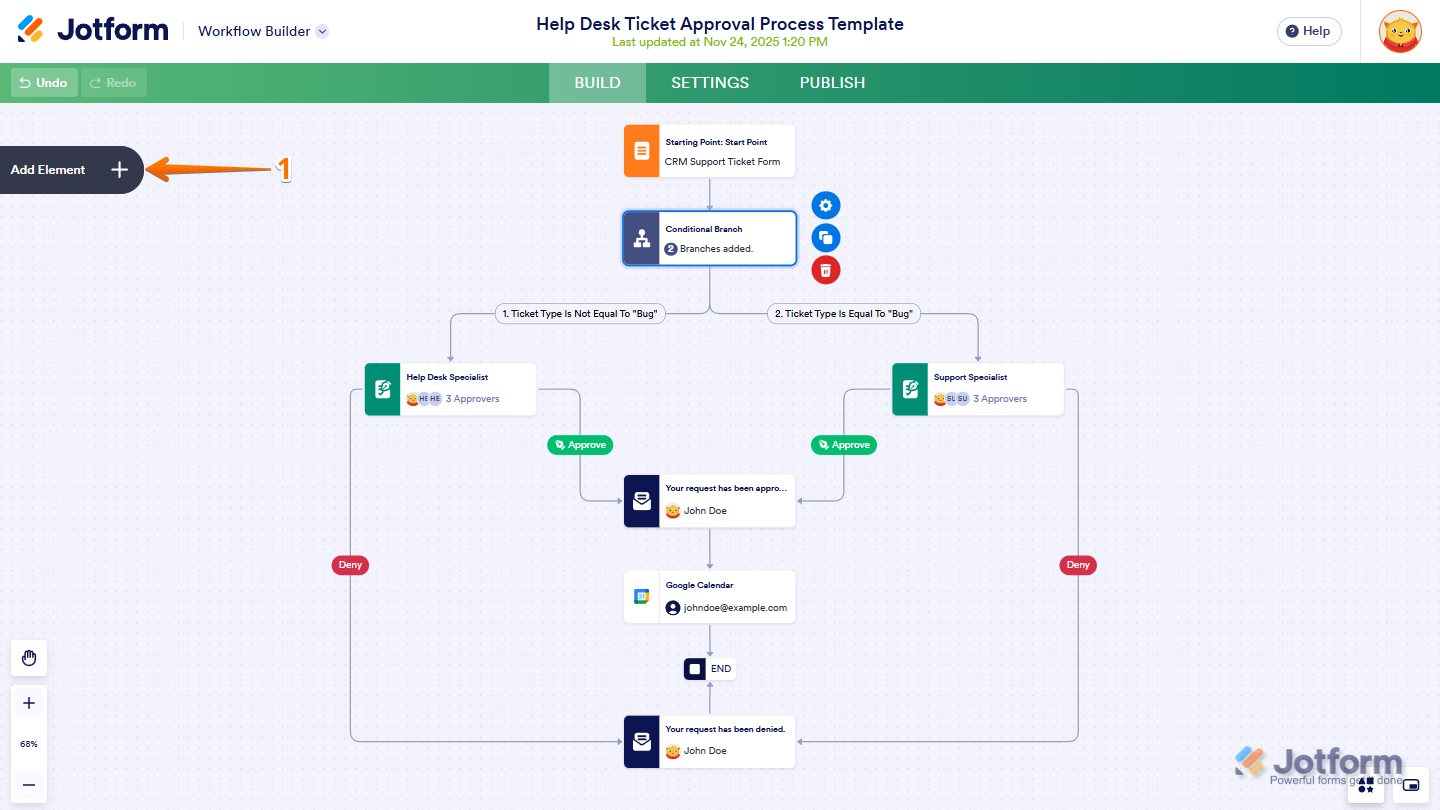
- In Workflow Builder, click on Add Element on the left side of the page.
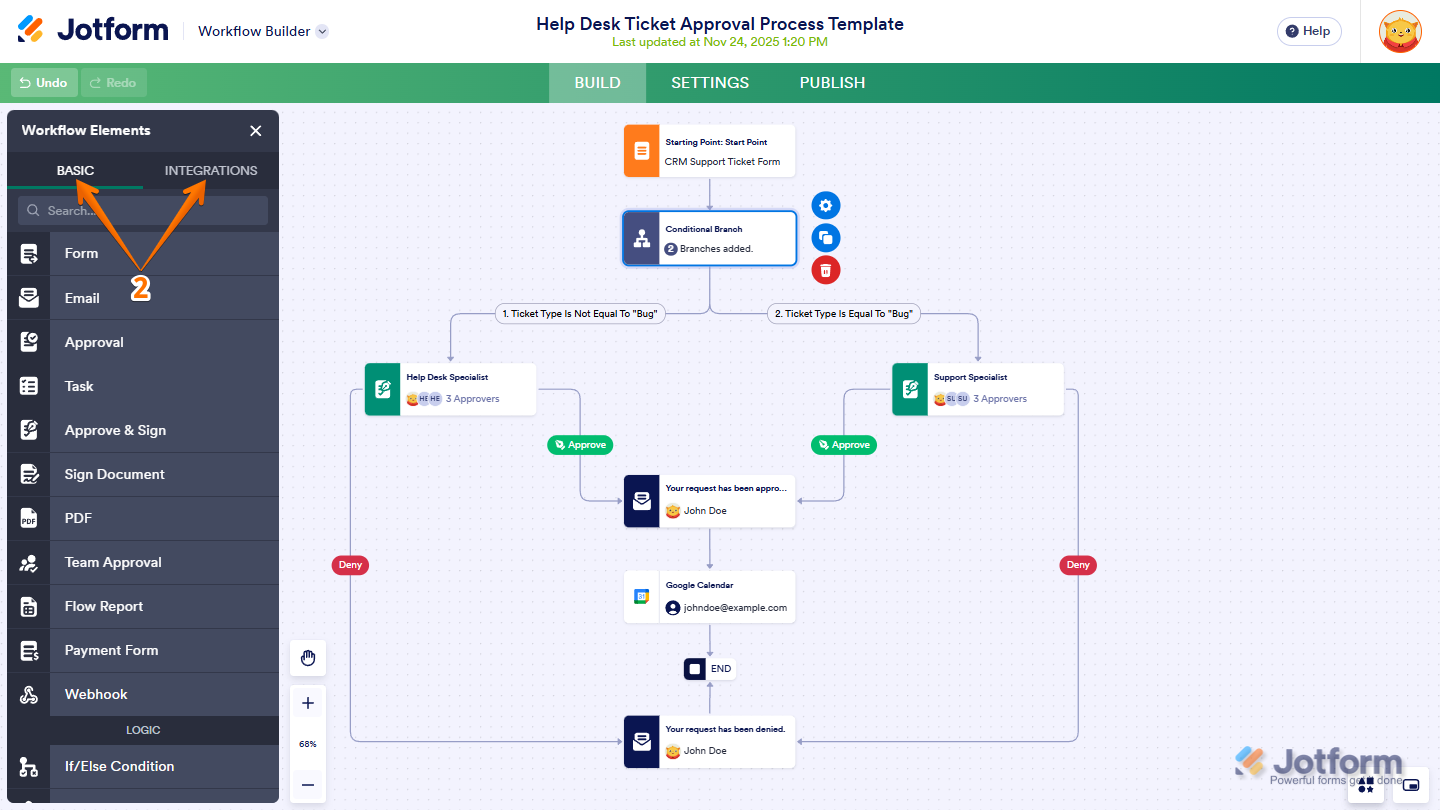
- In the Workflow Elements menu that opens, you’ll see additional basic and logical elements under the Basic tab and available integrations under the Integrations tab. Just click on it or drag and drop it to your workflow connections.
And that’s it! Now start connecting and setting up your newly added elements, logical or integrations to your workflow connections. Take a look at our guide on How to Add and Connect Elements in Jotform Workflows for more details.
Deleting Workflow Elements
You can also remove workflow elements you no longer need to keep your workflow organized and up to date. Here’s how:
- In Workflow Builder, click on the element you want to remove and click on the Trash Can icon. For example, the Email element.
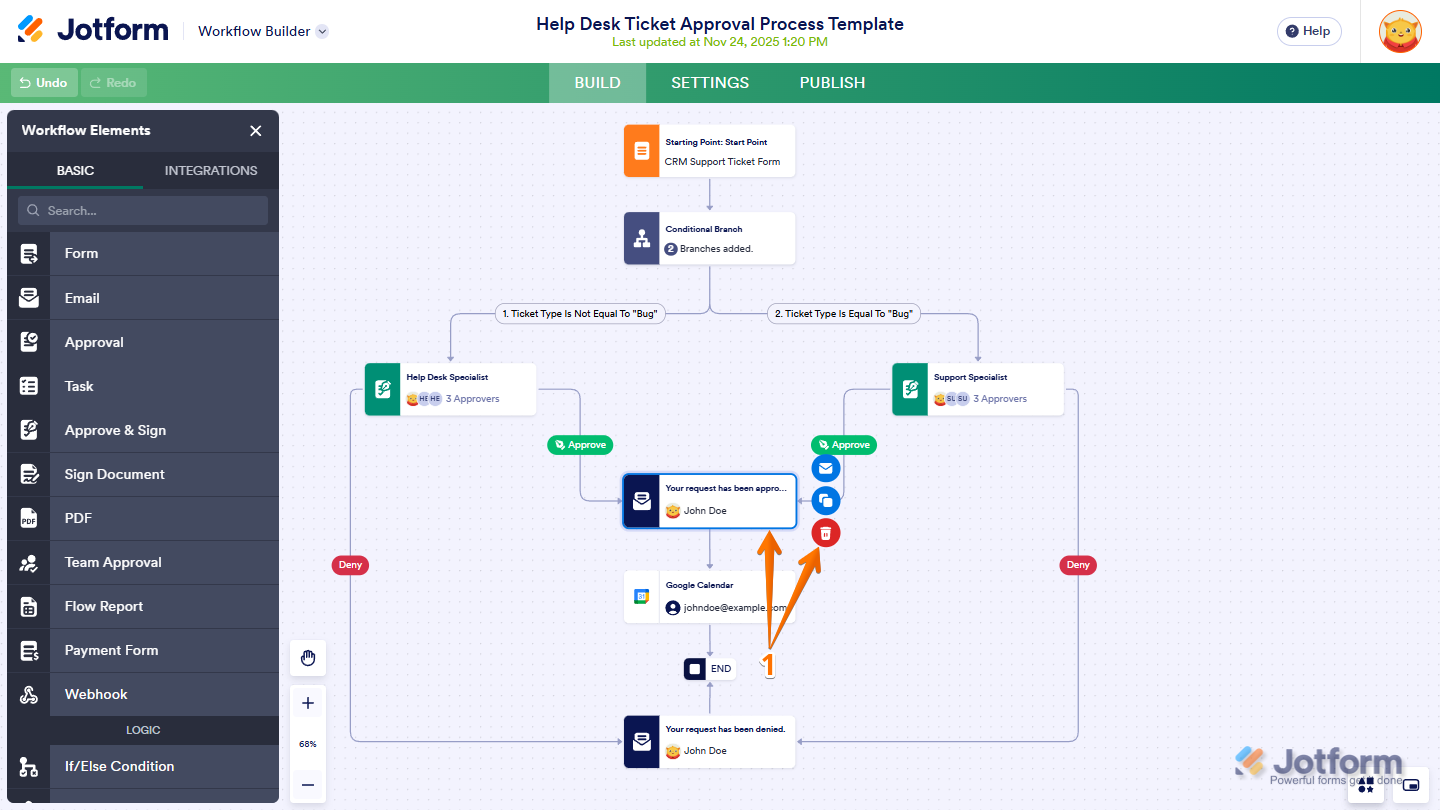
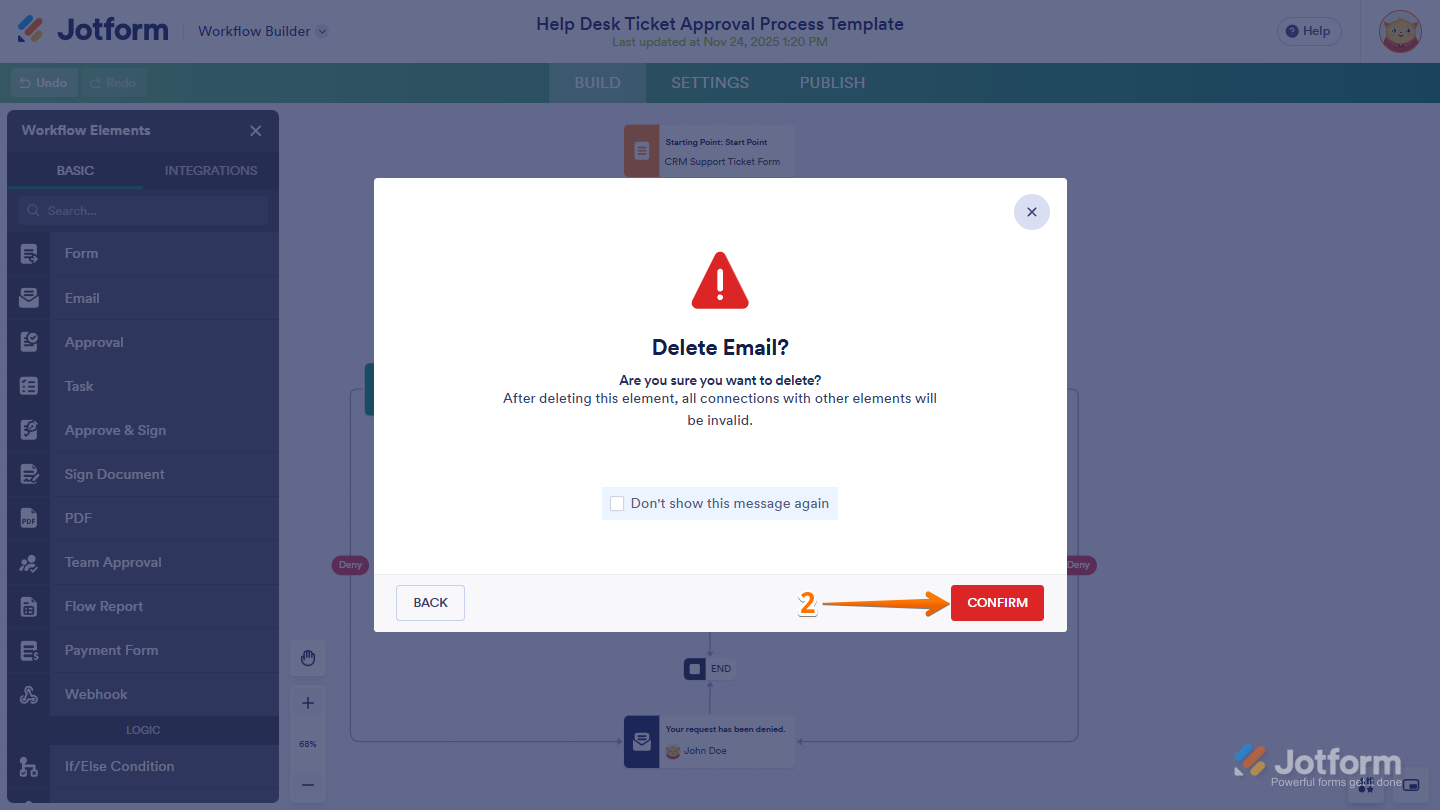
- Then, in the Confirmation window that comes up, click on Confirm and you’re done.
Note
Deleting an element may remove linked steps as well. Review your workflow after removing anything.

Send Comment: