As an Admin, you can create and manage Support tickets for your organization from within the Admin Console. You can also schedule Zoom calls with CSMs and allow users to create Support Tickets and schedule Zoom calls.
In this guide, we’ll go over creating and replying to Support Tickets, scheduling a Zoom call, and explore the Support Dashboard.
Creating a Support Ticket
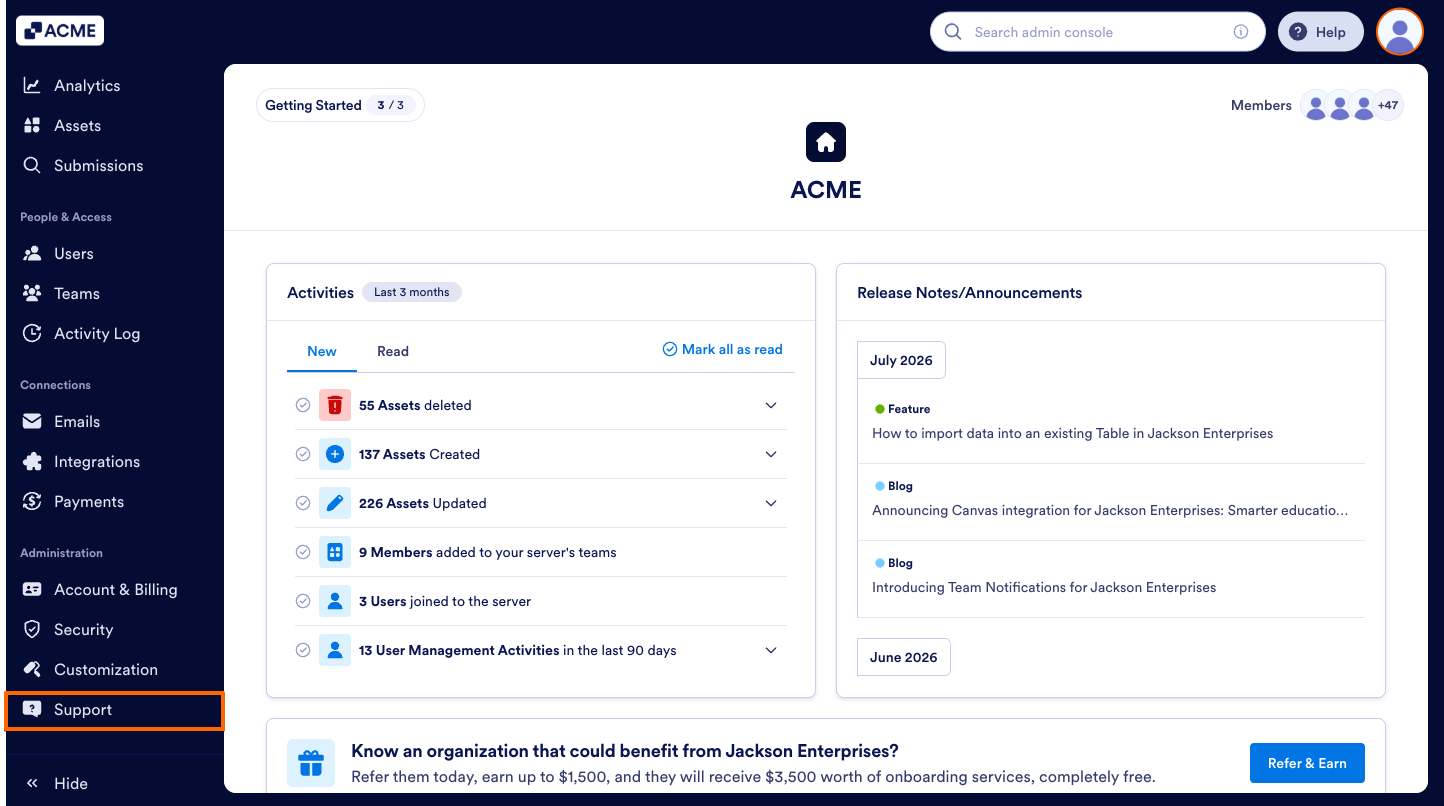
- In the Admin Console, click Support from the left-side menu.
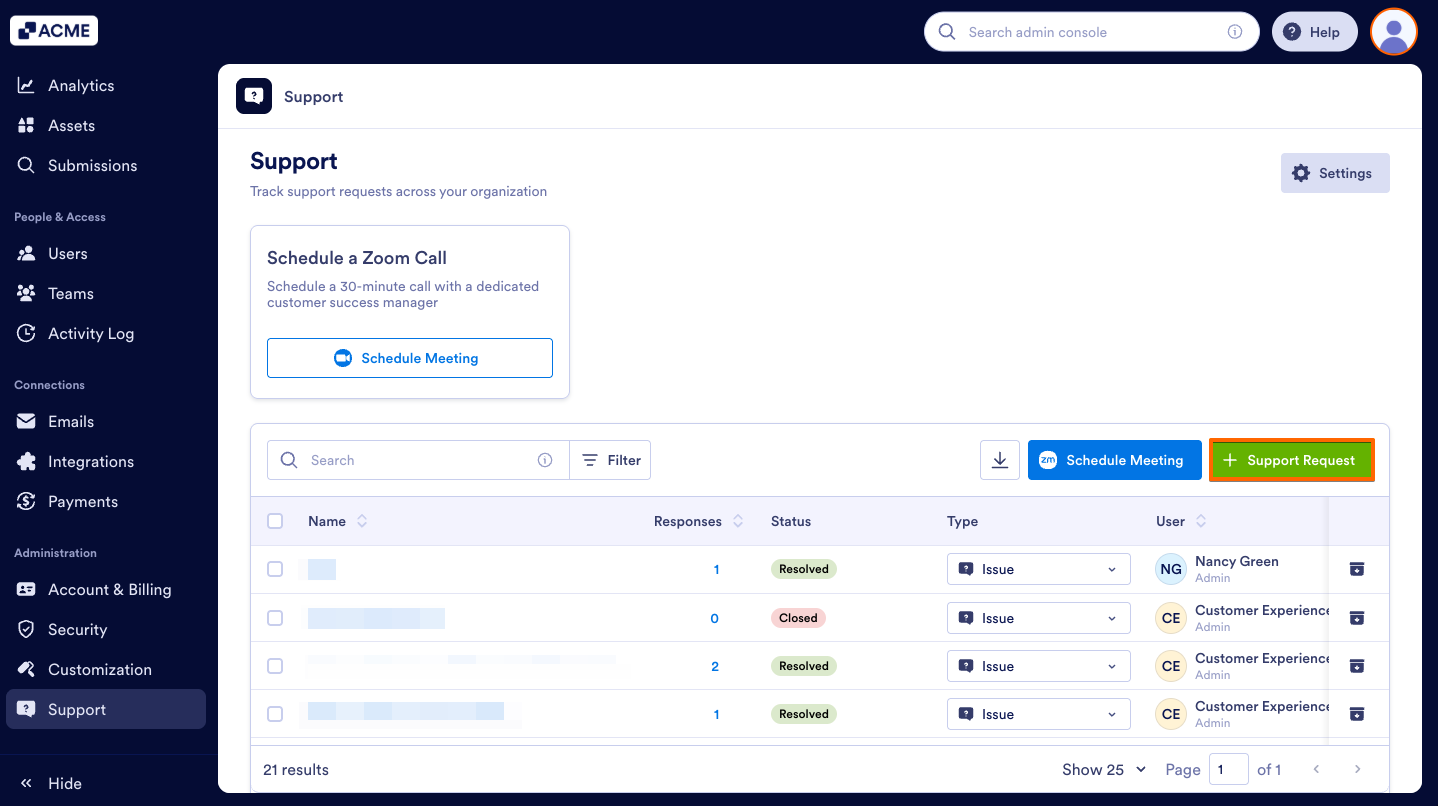
- Click the +Support Request button on the right side of the page.
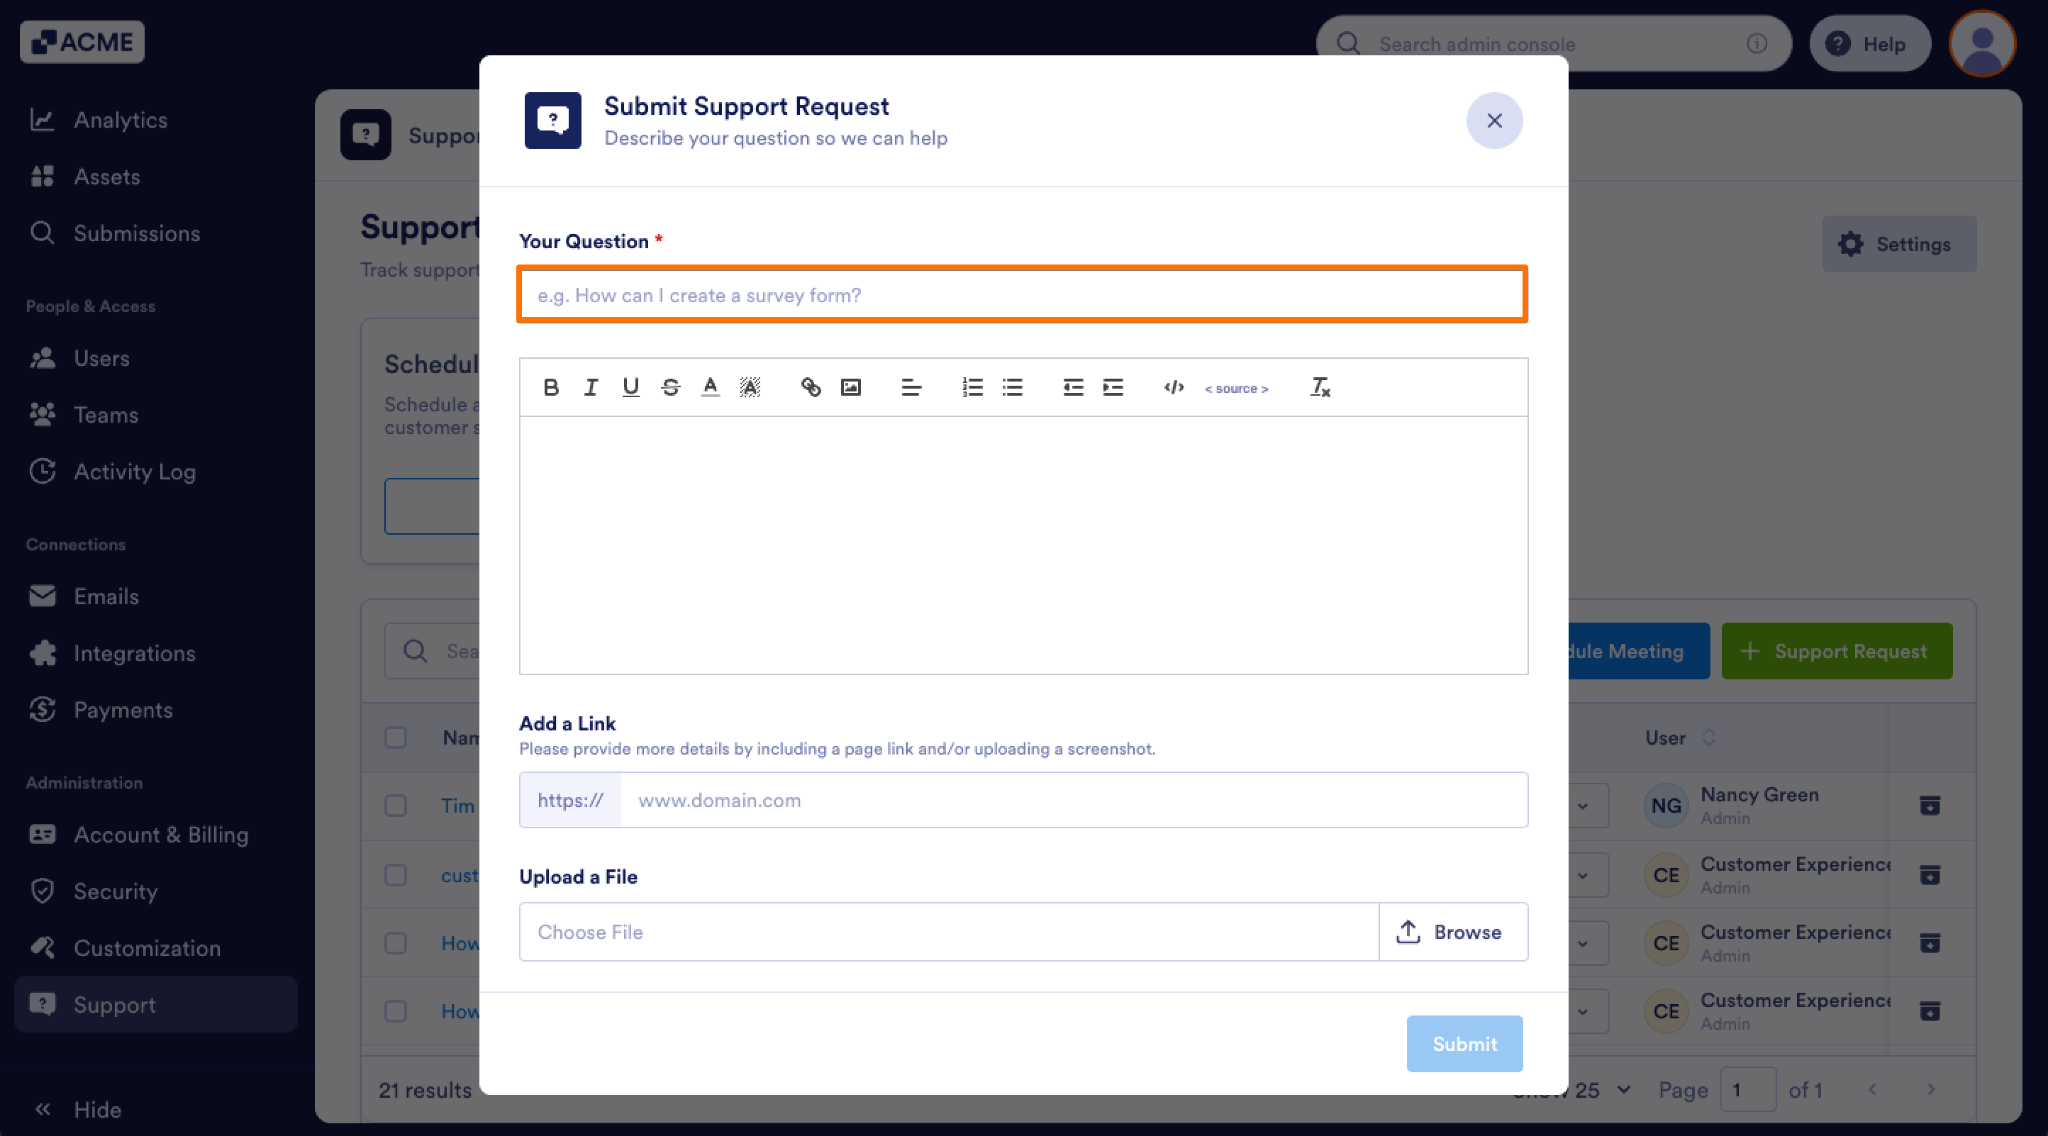
- In the popup window, fill out both Your Question textboxes, along with providing a URL in Add a Link or a screenshot or image file in Upload a File.
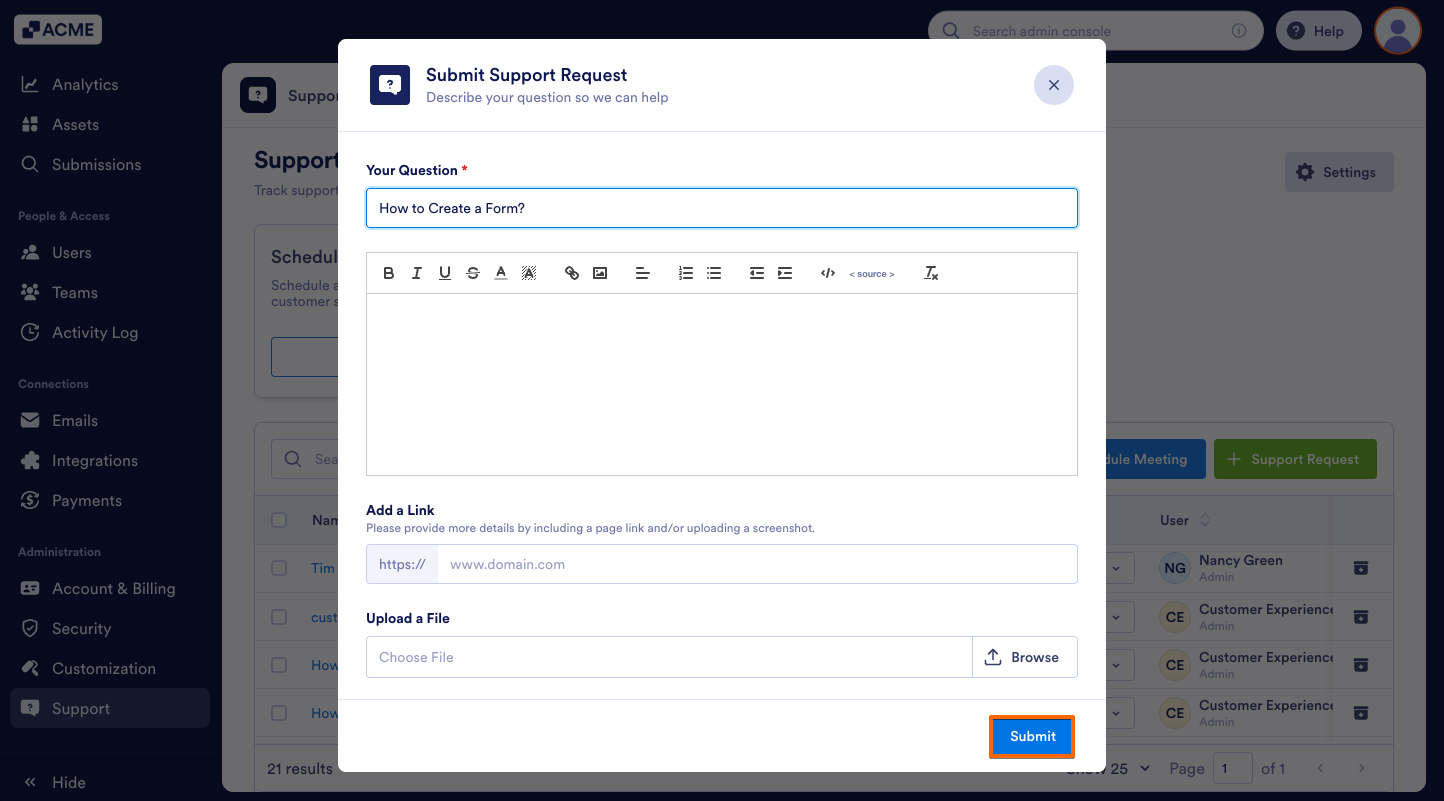
- Finally, click Submit to post the question.
Once submitted, any tickets you create will appear on your Support page.
Reviewing and Replying to Support Tickets
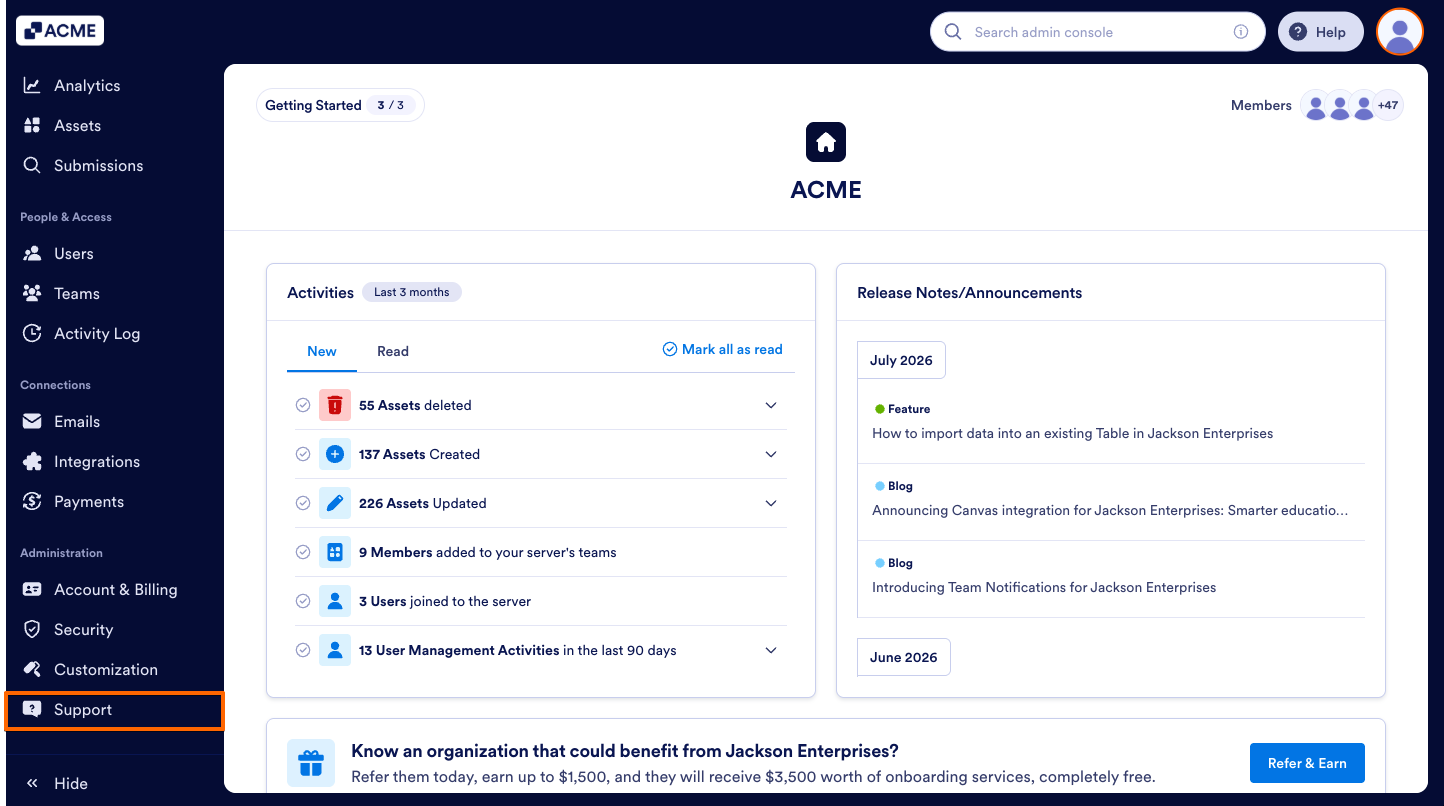
- In the Admin Console, click on Support on the left-hand side of the page.
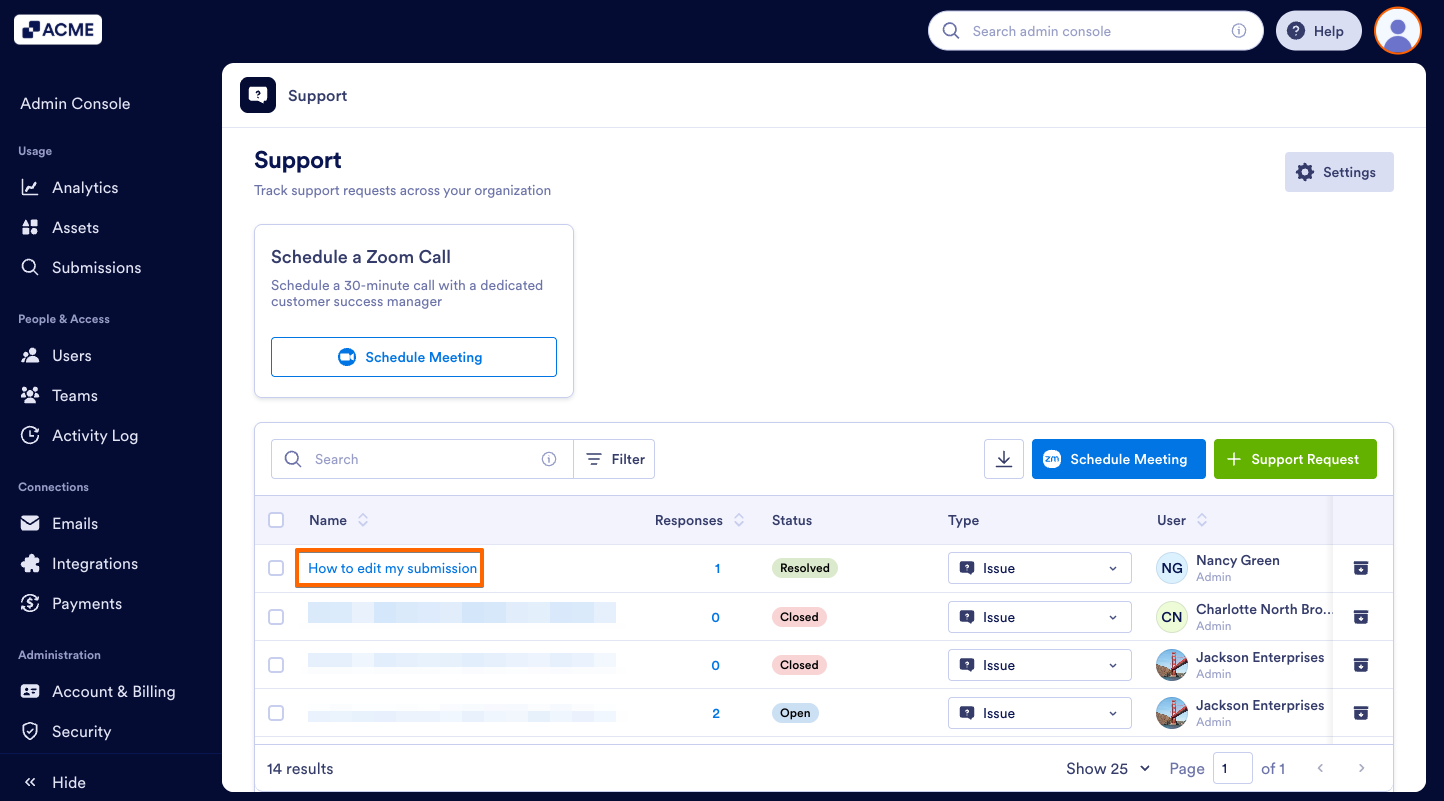
- Then, find the ticket you’d like to view and click on its Name.
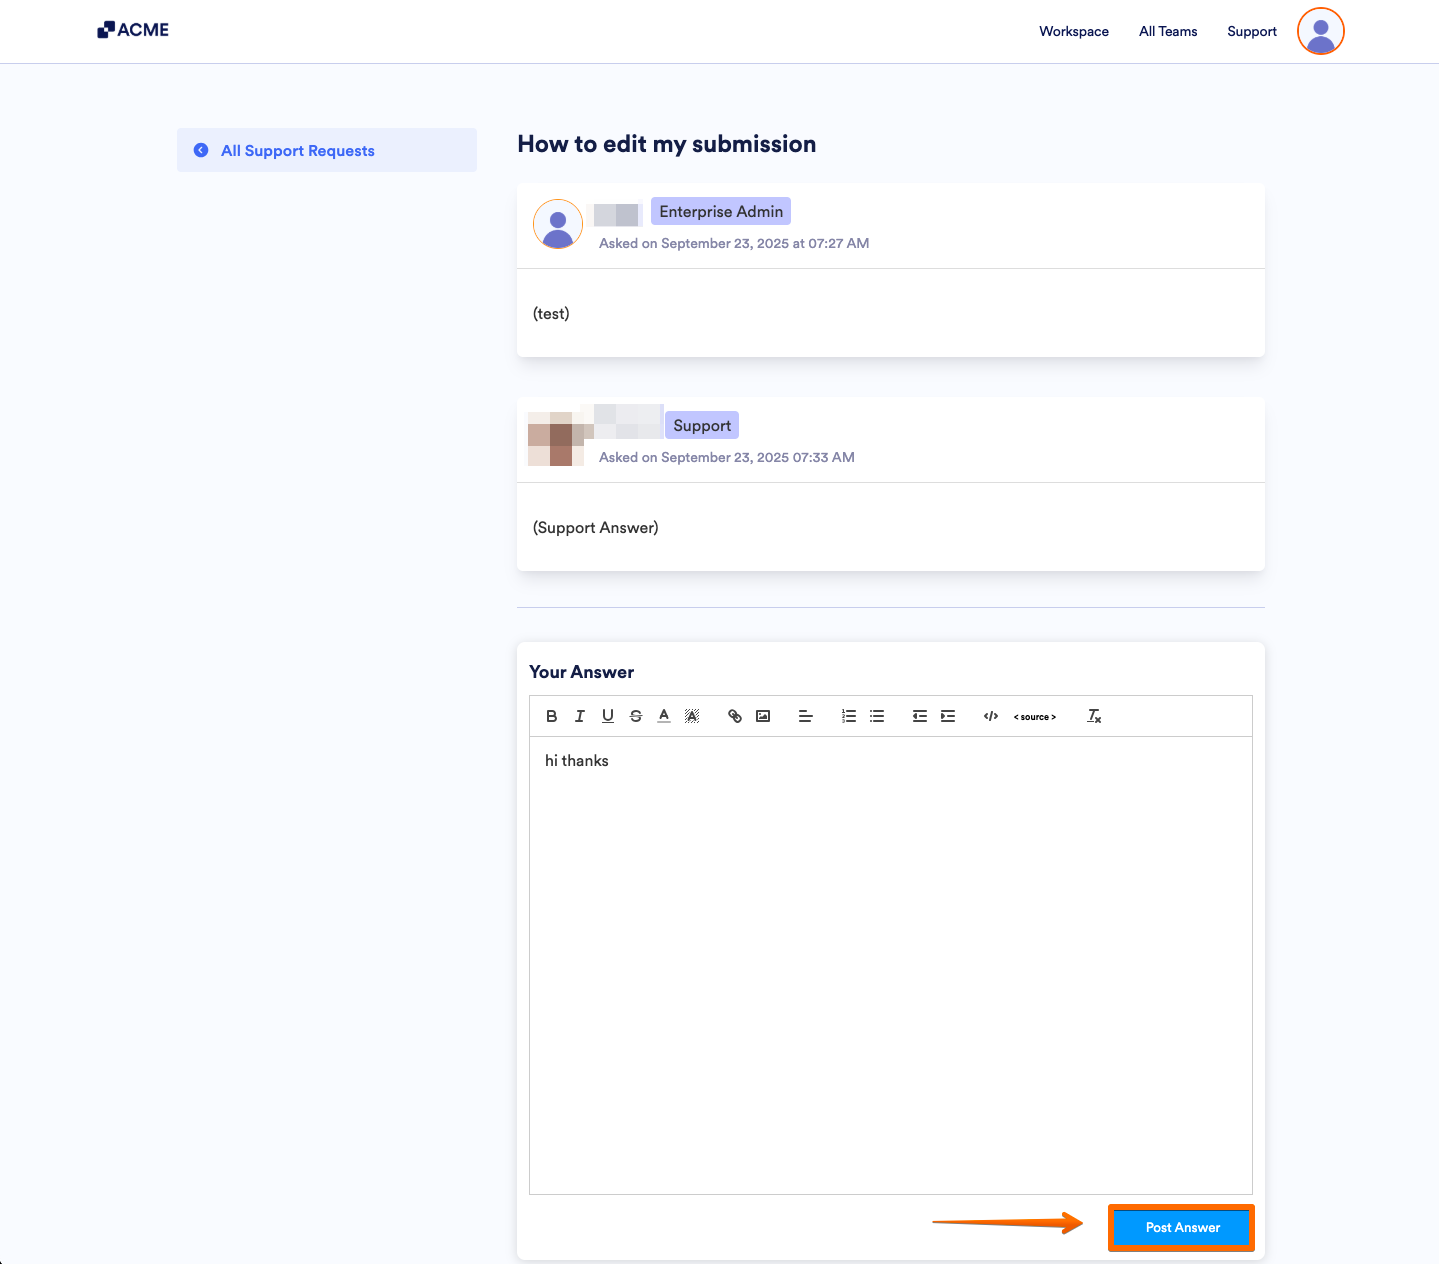
- Scroll to the bottom of the page and add comments in Your Answer.
- Finally, click Post Answer.
Scheduling Zoom Support Calls
Want to talk through a question with a Customer Success Manager? We’re here to help! Customer Success Managers are available during standard business hours based on your region—make sure to check the scheduling page for available time slots.
Customer Success Managers aren’t developers and aren’t able to troubleshoot developer-related issues on a live call, nor are they able to bring Developers onto the call.
Let’s walk through the process of scheduling a Zoom call in the Admin Console together:
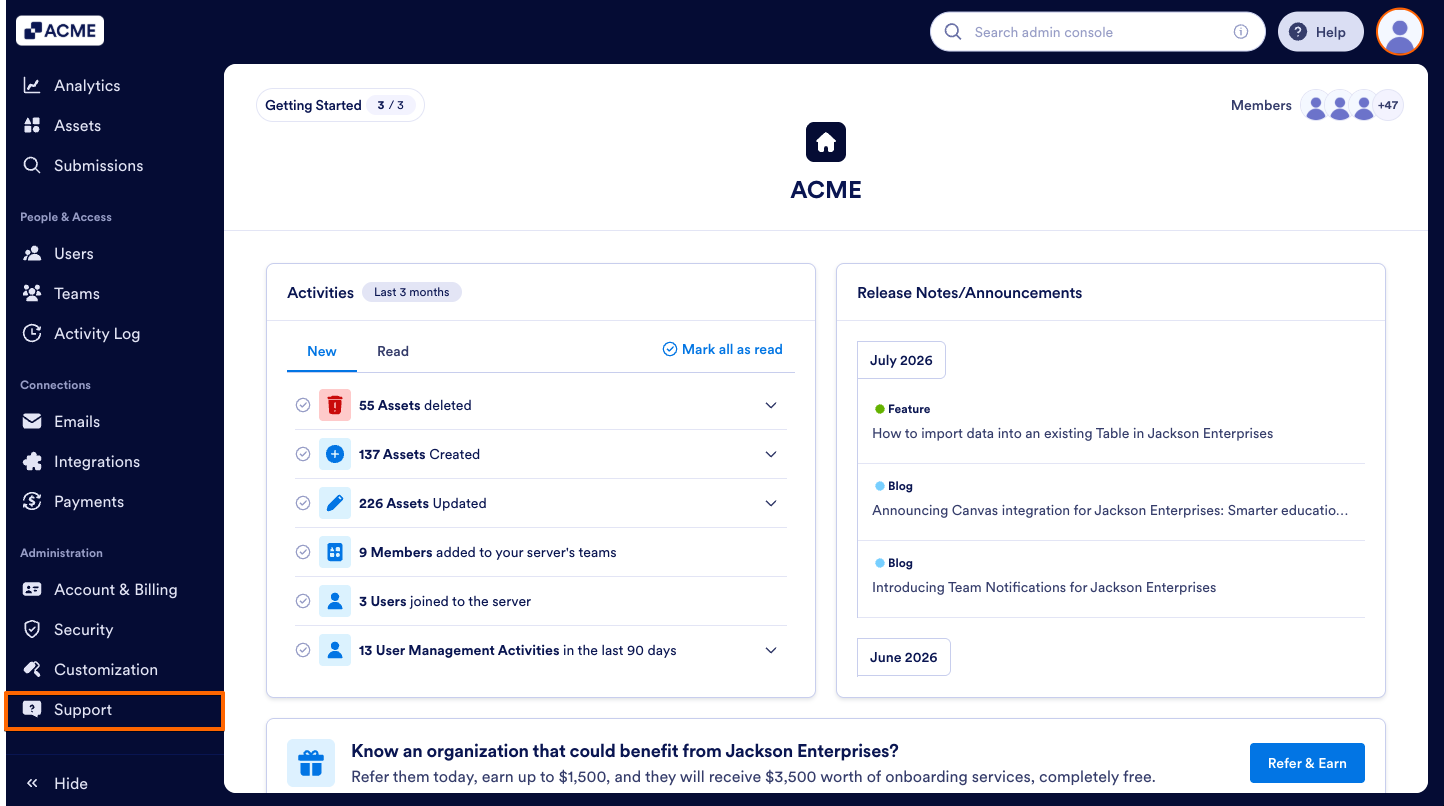
- In the Admin Console, click on Support on the left-hand side of the page.
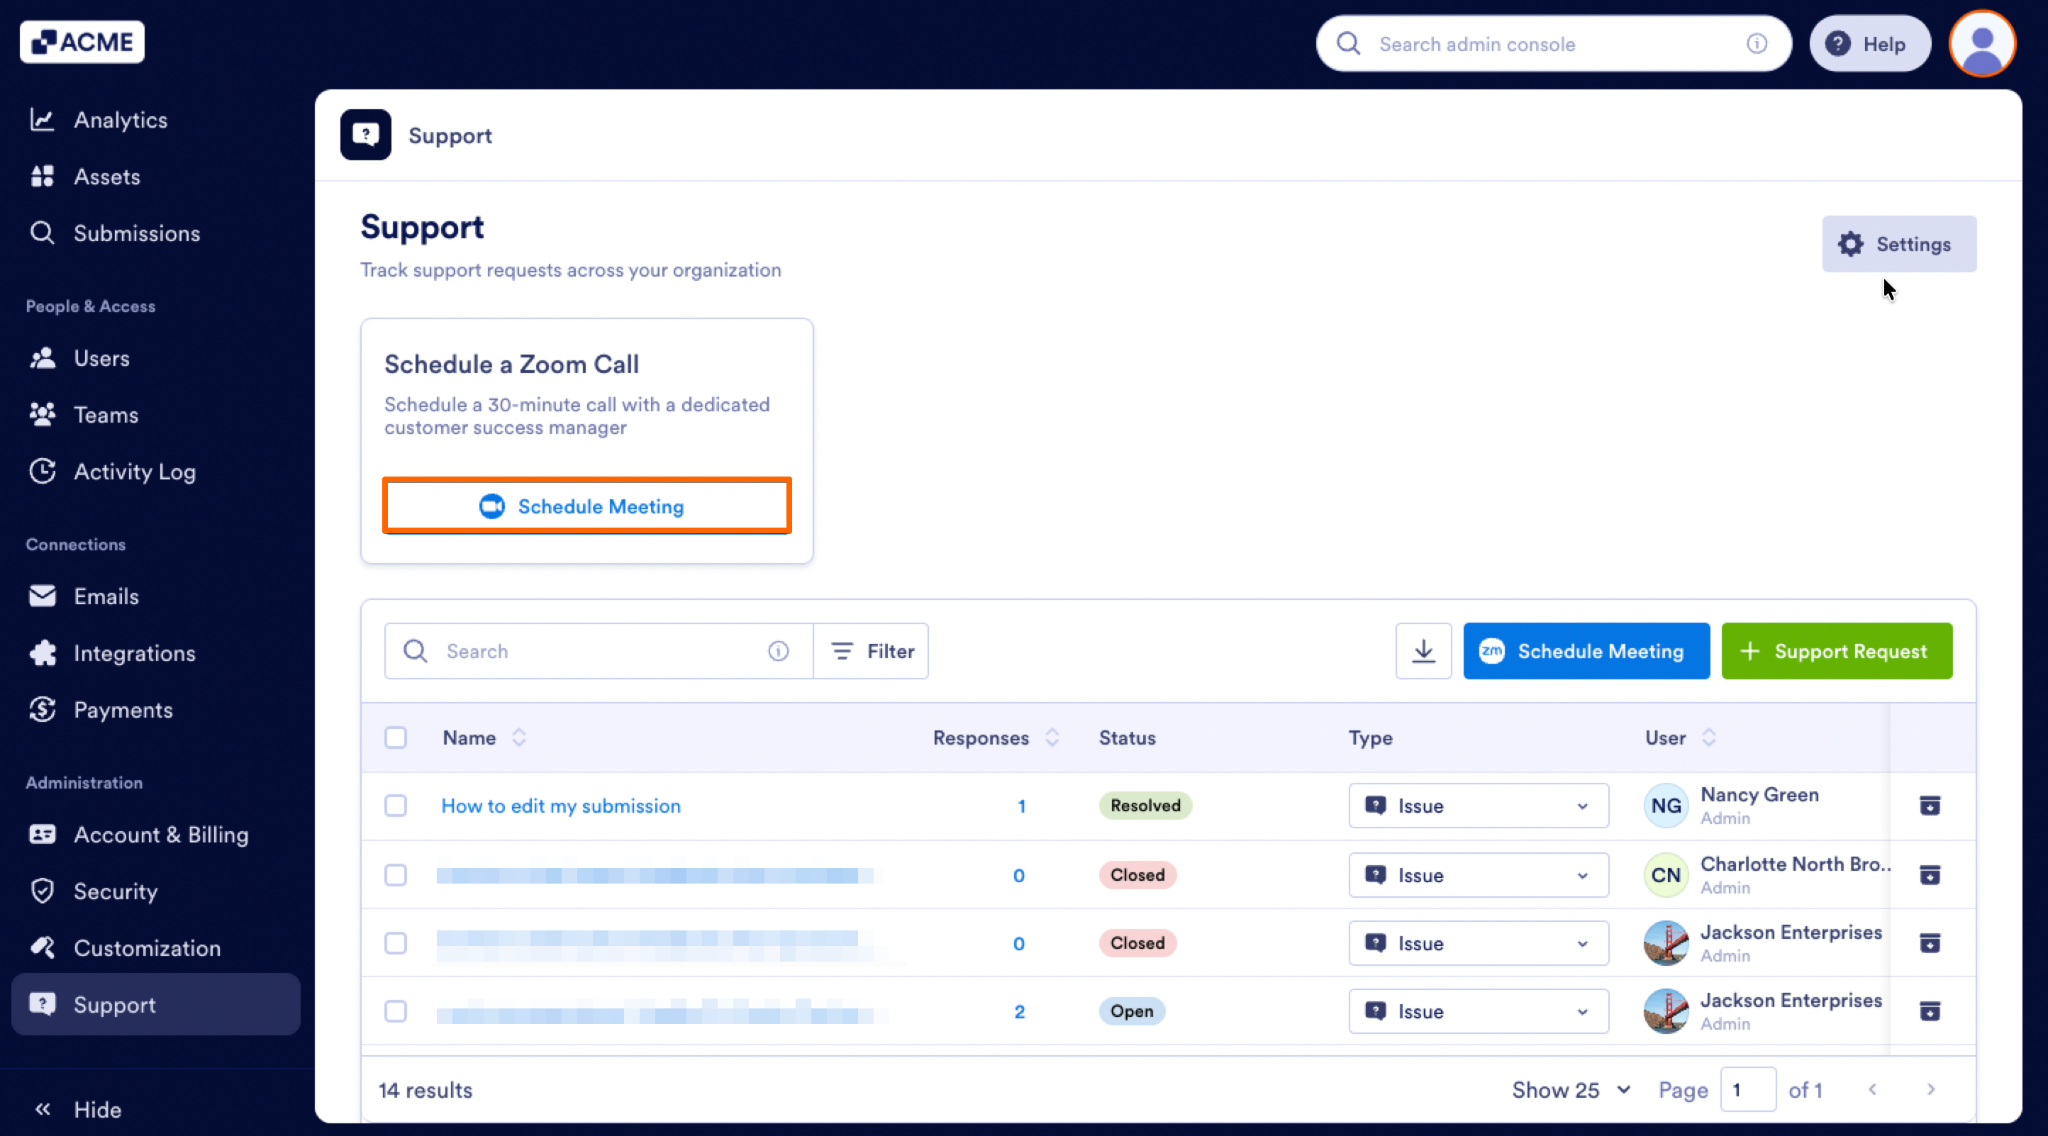
- Then, click on Schedule a Zoom Meeting in the middle of the page.
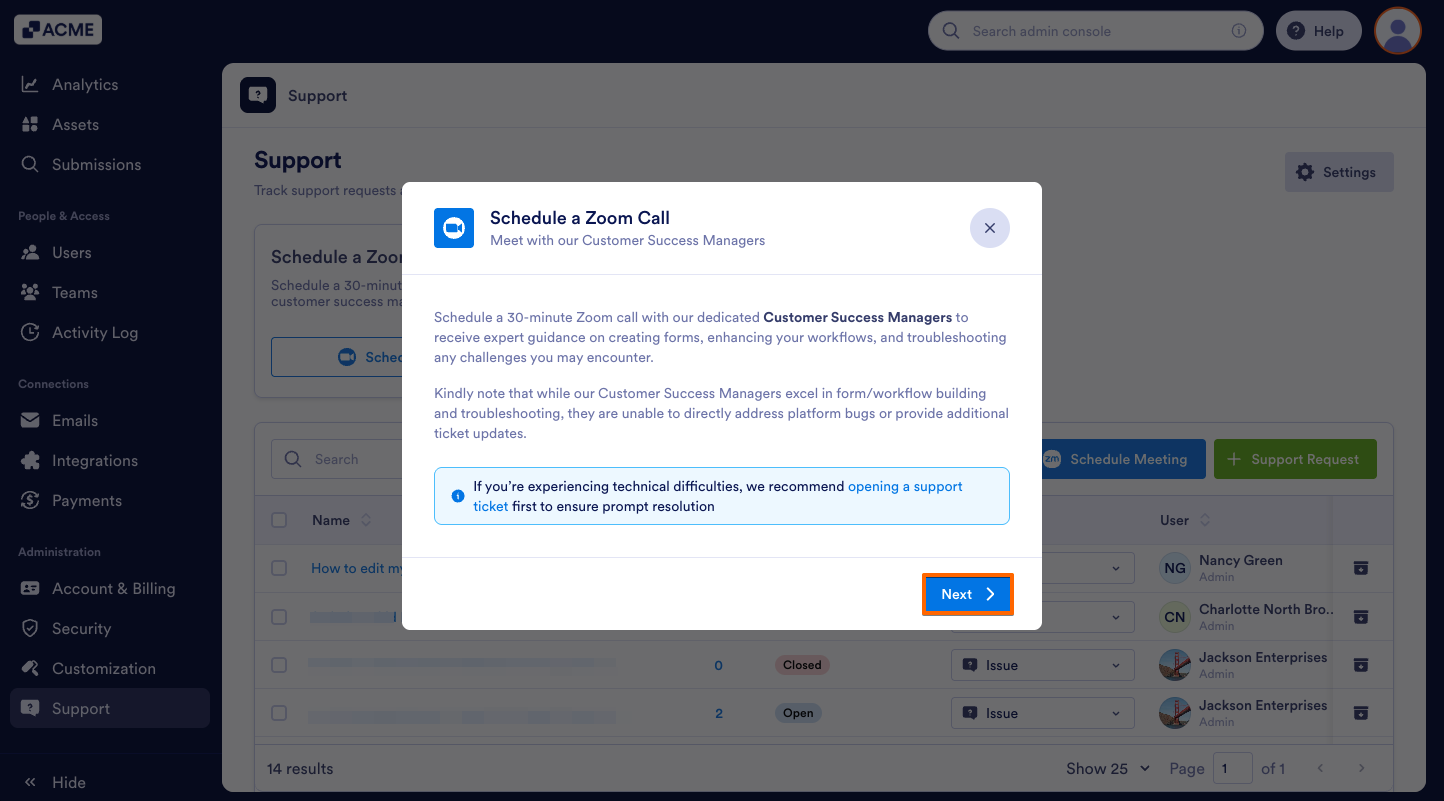
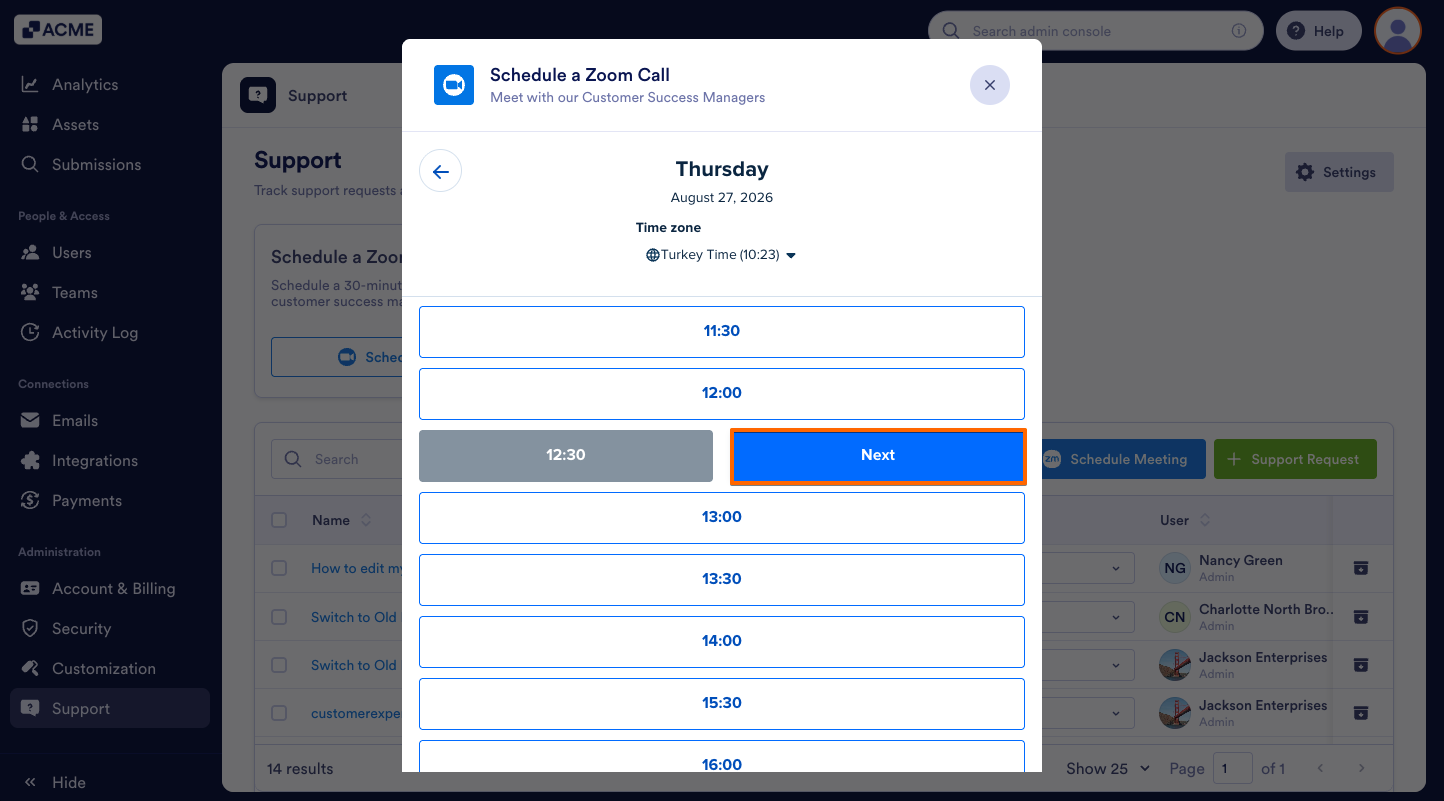
- Click Next in the pop-up window to open the Calendar.
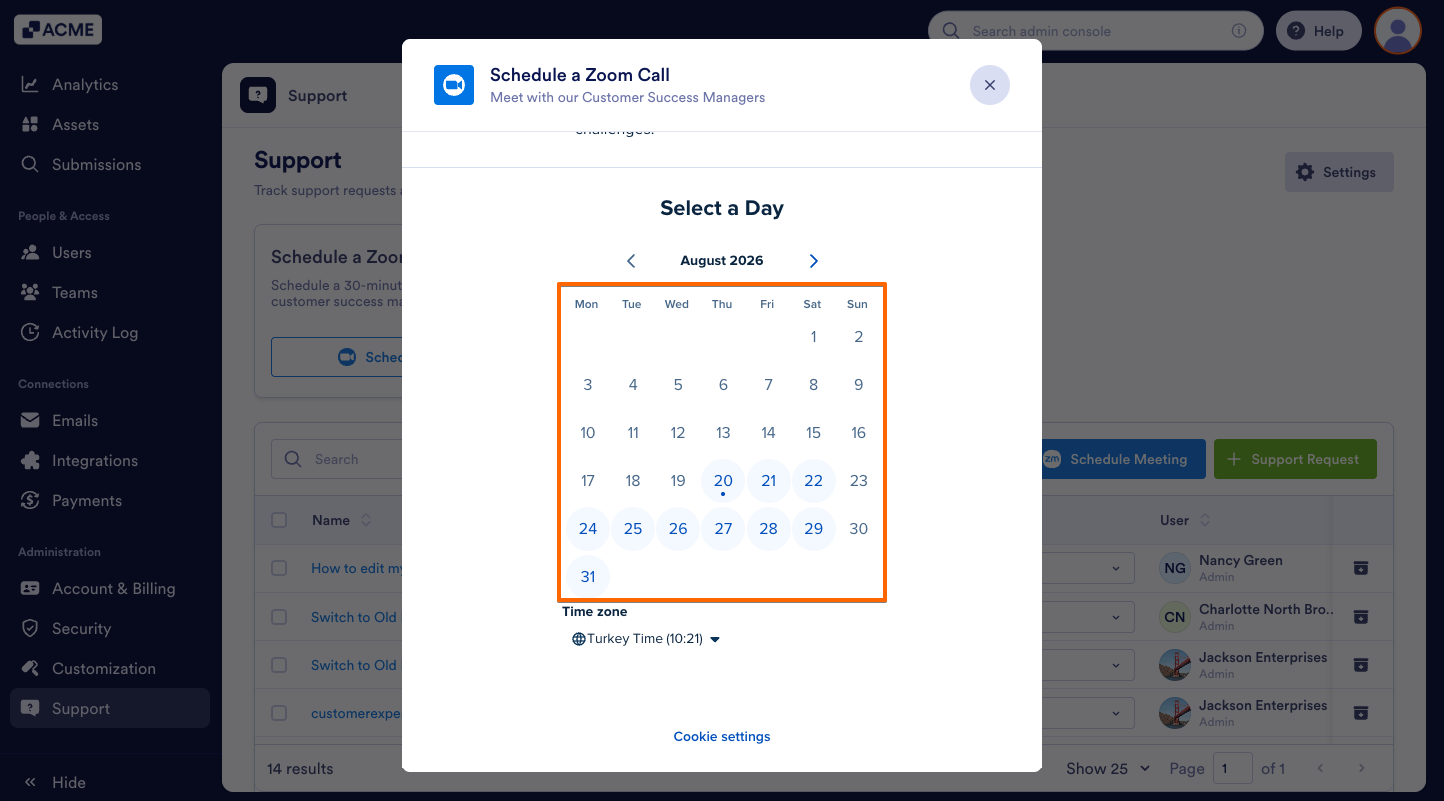
- Then, select the Date that works best for you.
- Now, select the Time that works best.
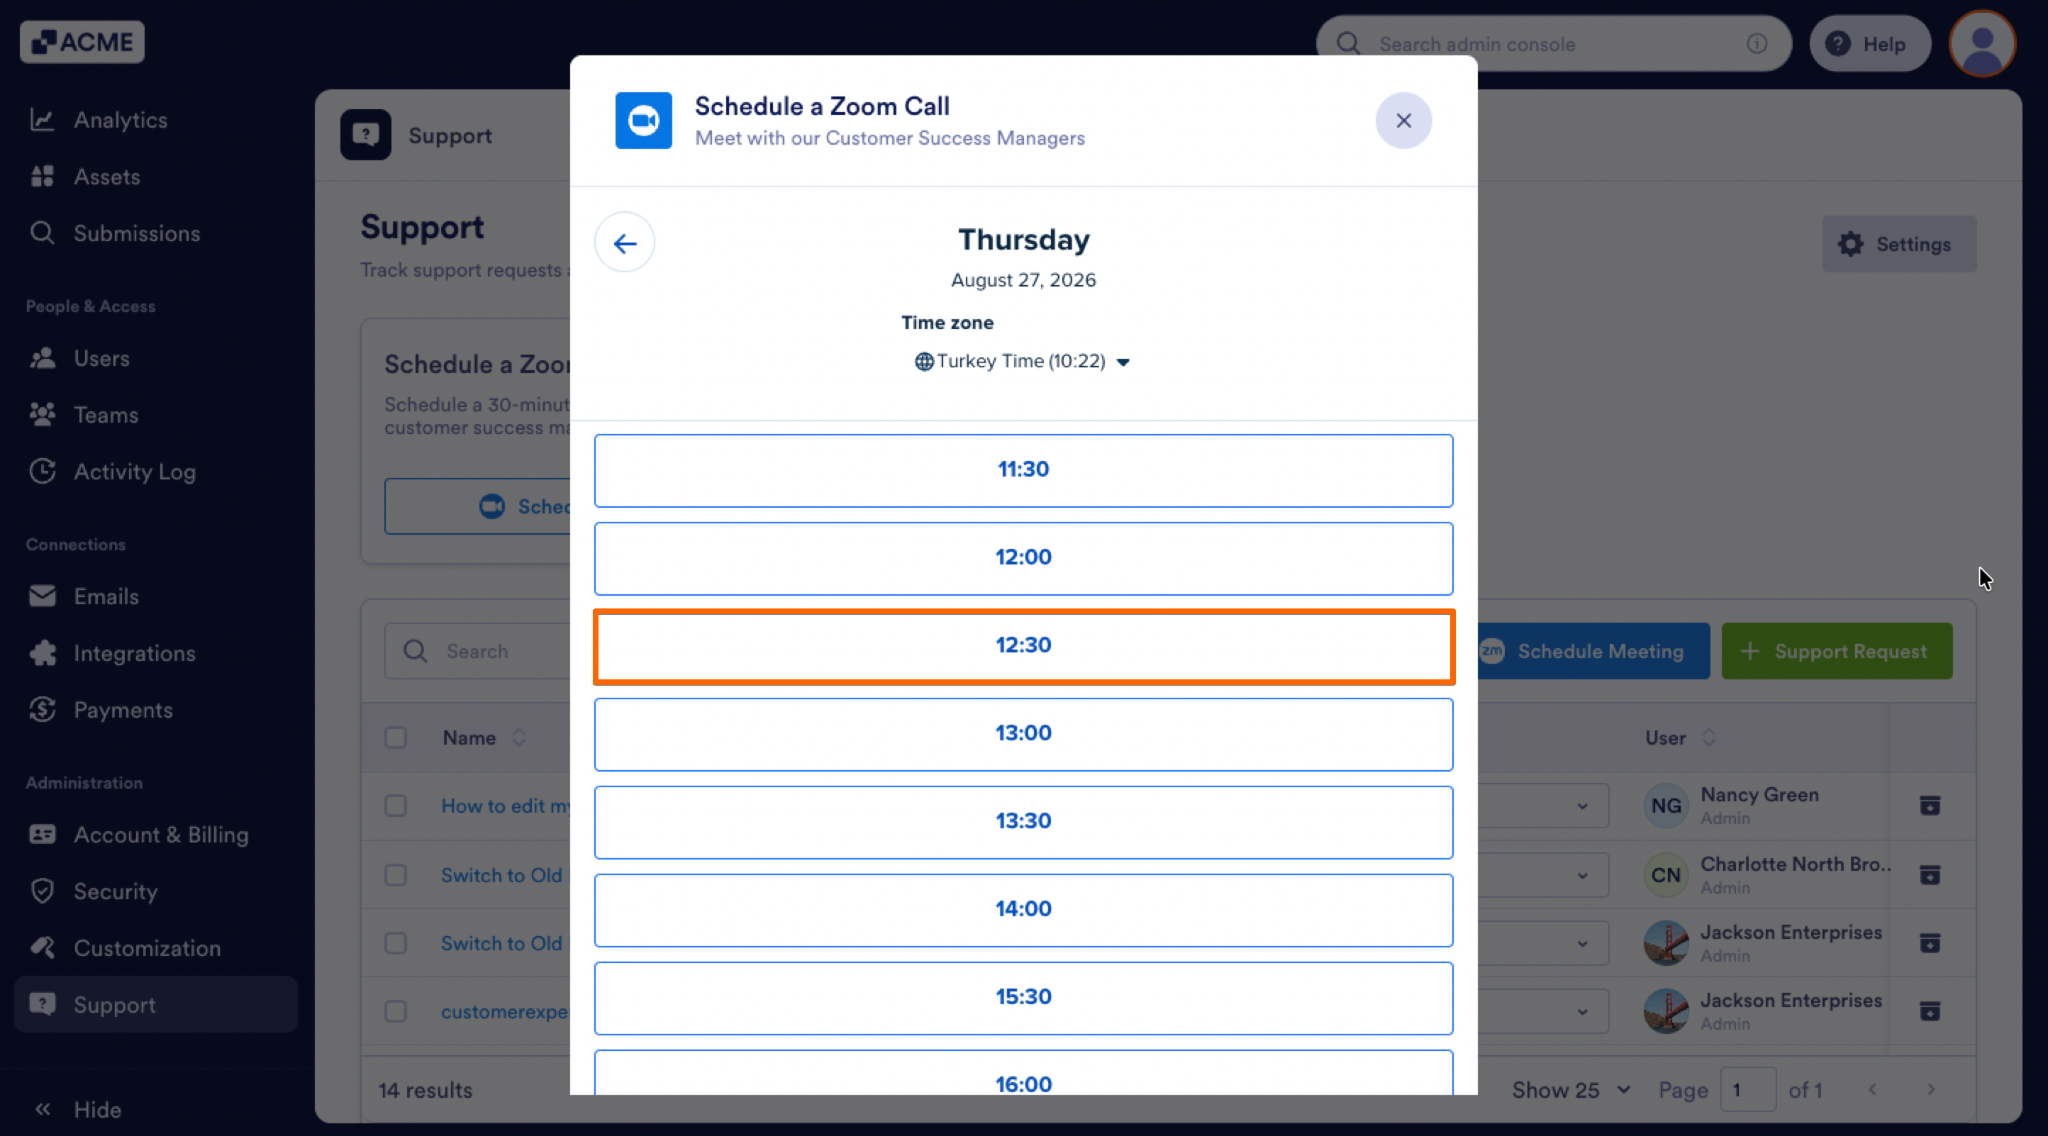
- After you’ve confirmed that the date and time work, click Next.
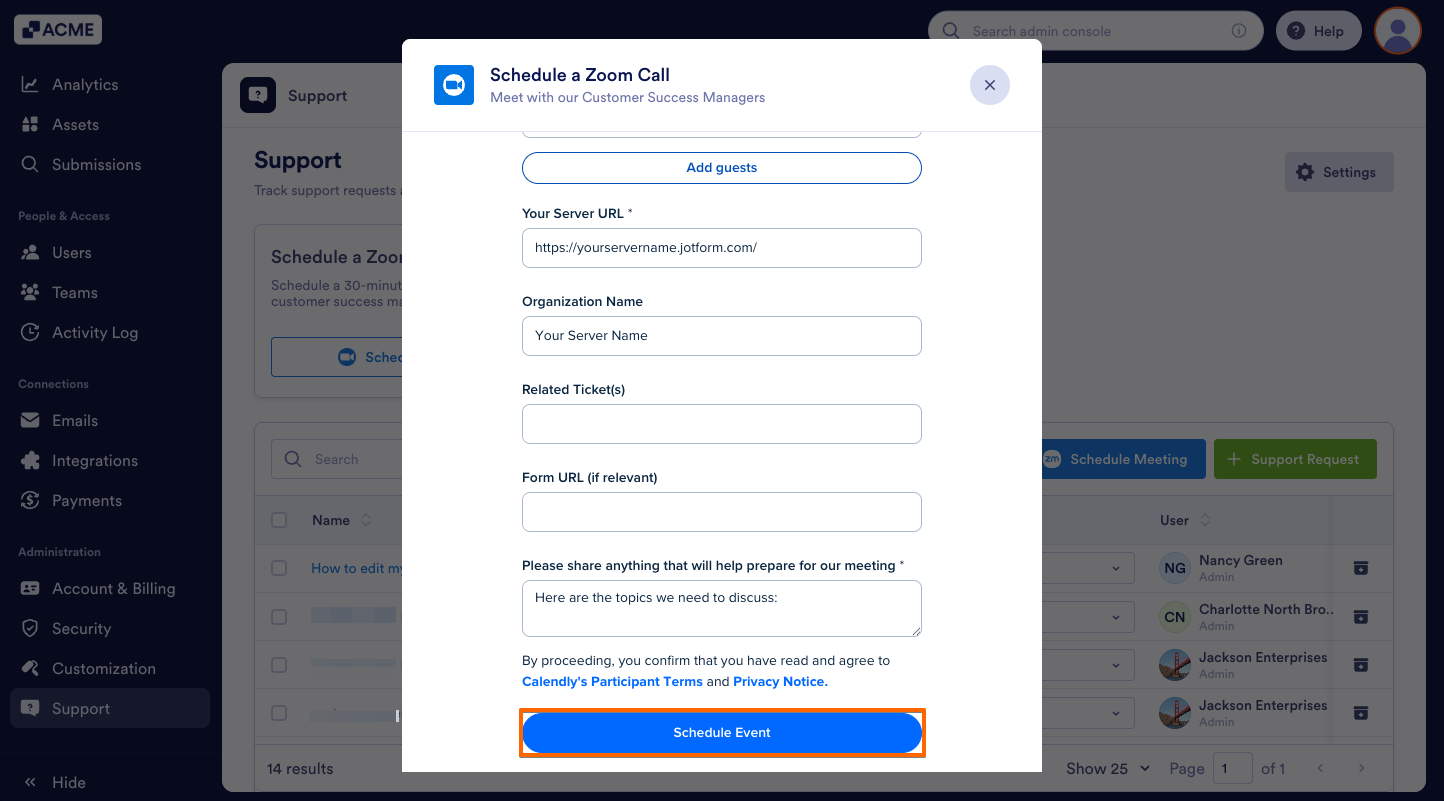
- Finally, enter your Name, email address, Server URL, and any additional details for the call and click Schedule Event.
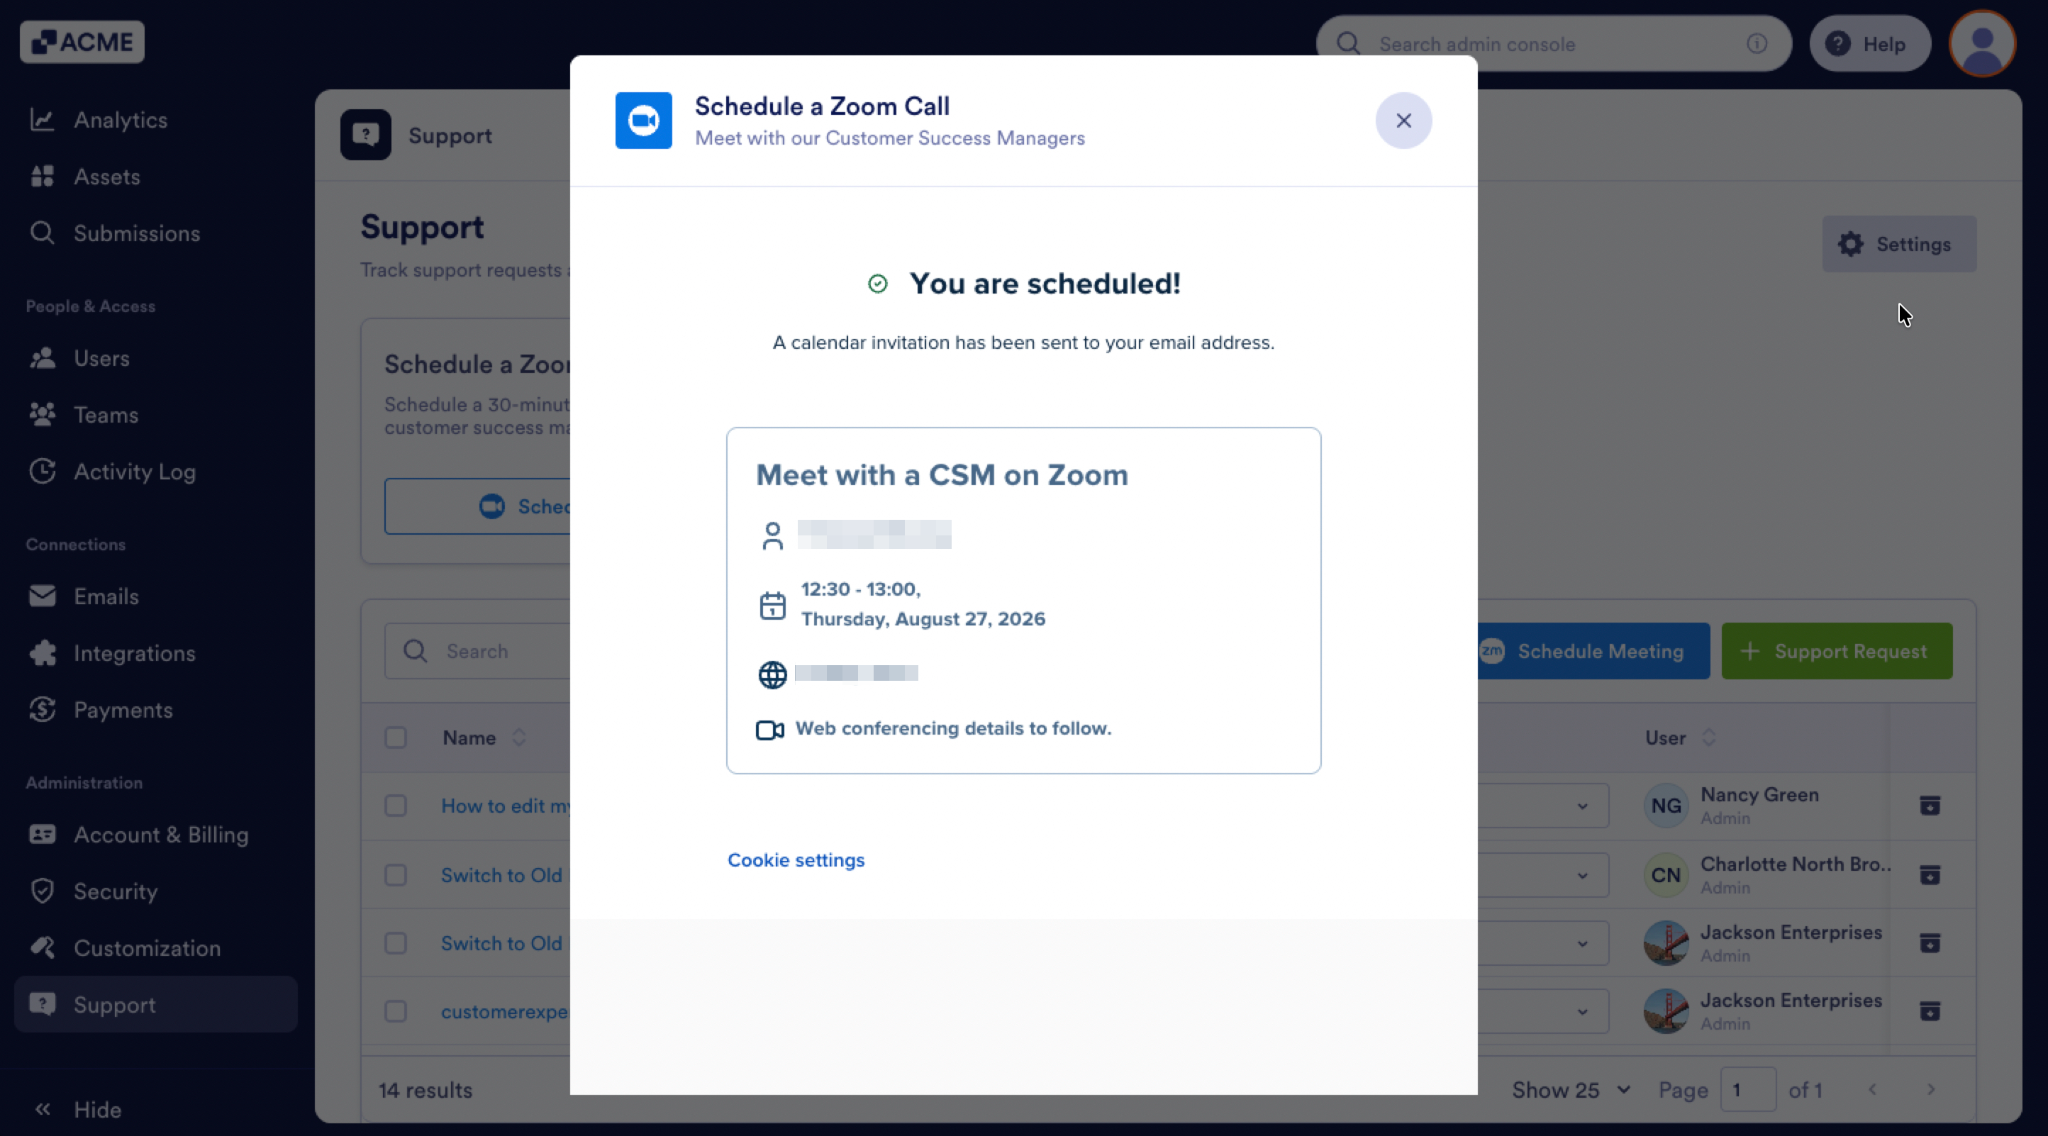
You’ll see a pop-up window confirming the date and time, along with which Customer Success Manager you’ll be meeting with.
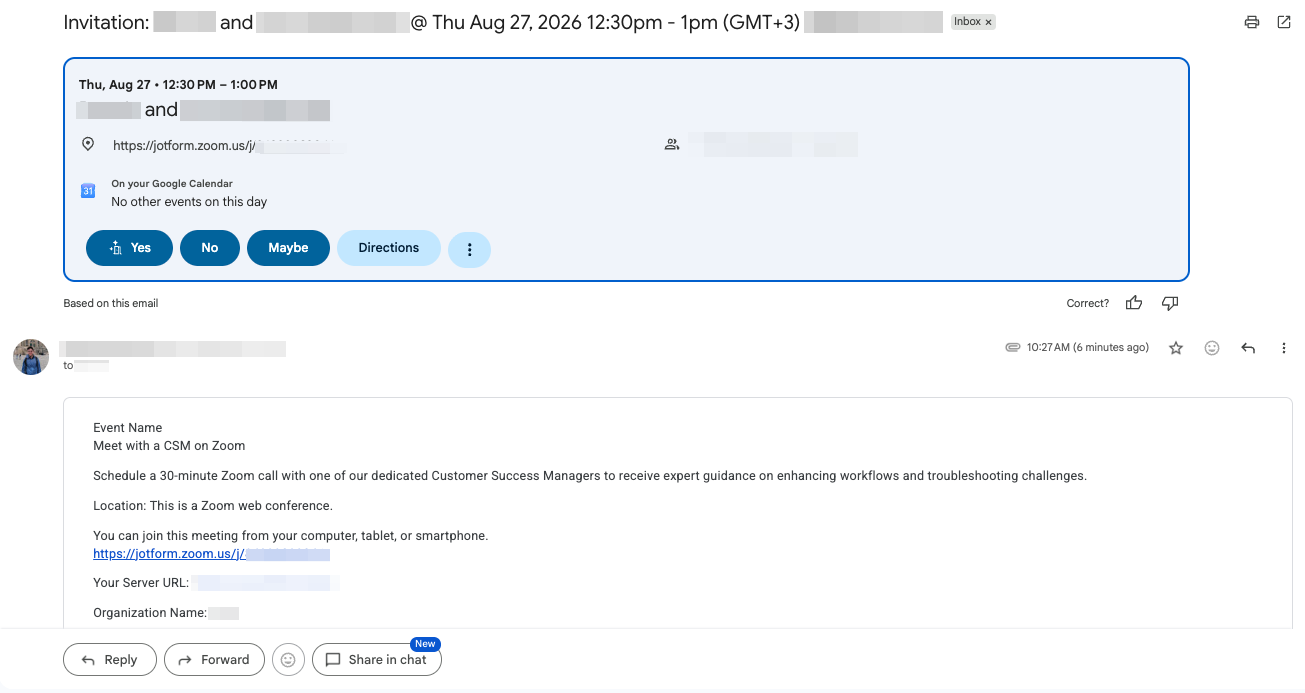
You’ll also receive an email with a Calendar invite and a Zoom link for your meeting:
Navigating the Support Dashboard
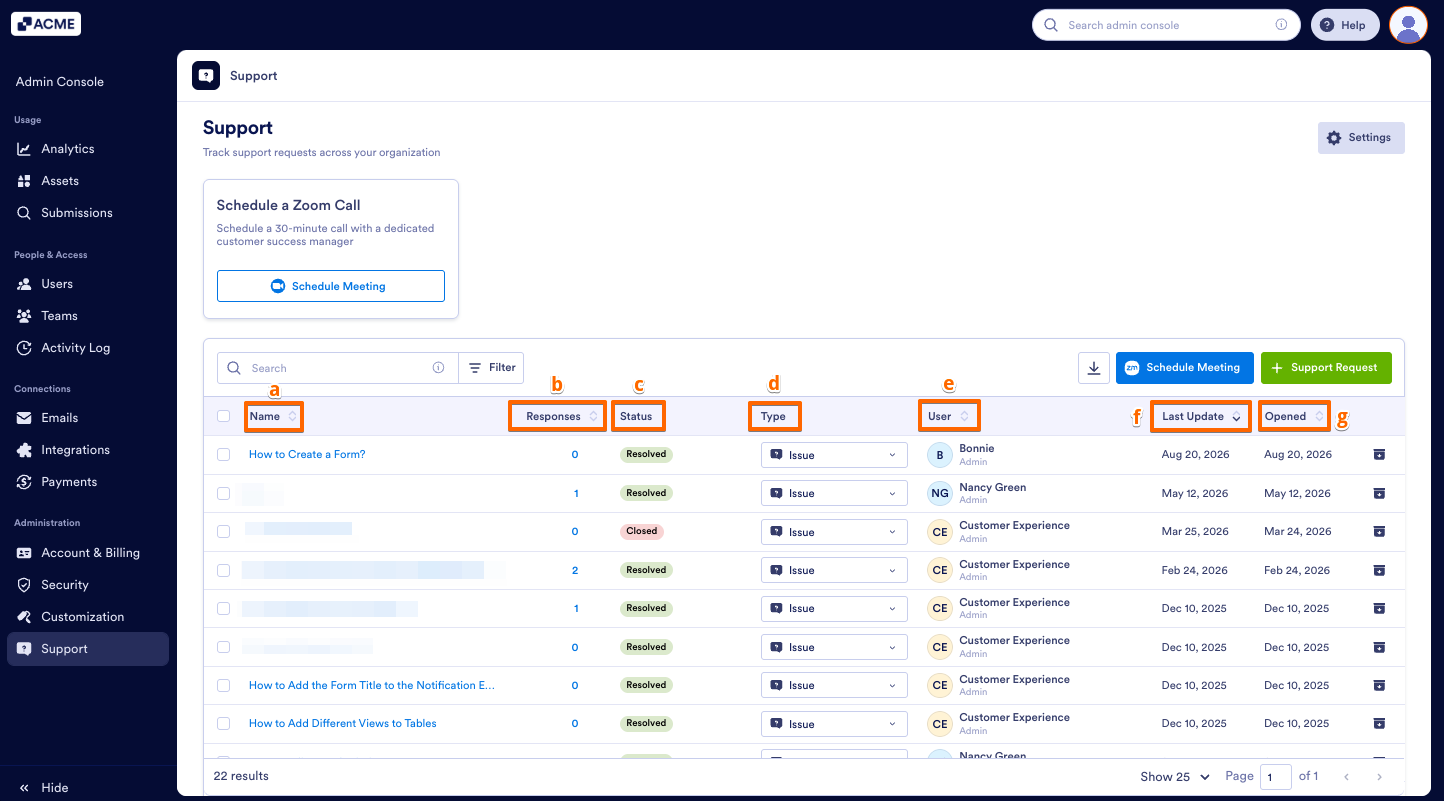
Now you know how to create Support Tickets. Let’s explore how the Support Dashboard provides an overview of all workspace interactions through a central table and detailed sidebars.
Table View Details
- Name: Displays the title or subject line of the support request.
- Responses: Indicates the total number of replies exchanged on the ticket.
- Status: Shows the current progress of the request (e.g., Open, Resolved, Closed).
- Type: Categorizes the nature of the submission directly from the dropdown menu.
- User: Displays the requester’s avatar, name, and account role (e.g., Admin, User).
- Last Update: Shows the date when the request was most recently modified or answered.
- Opened: Displays the original creation date of the request.
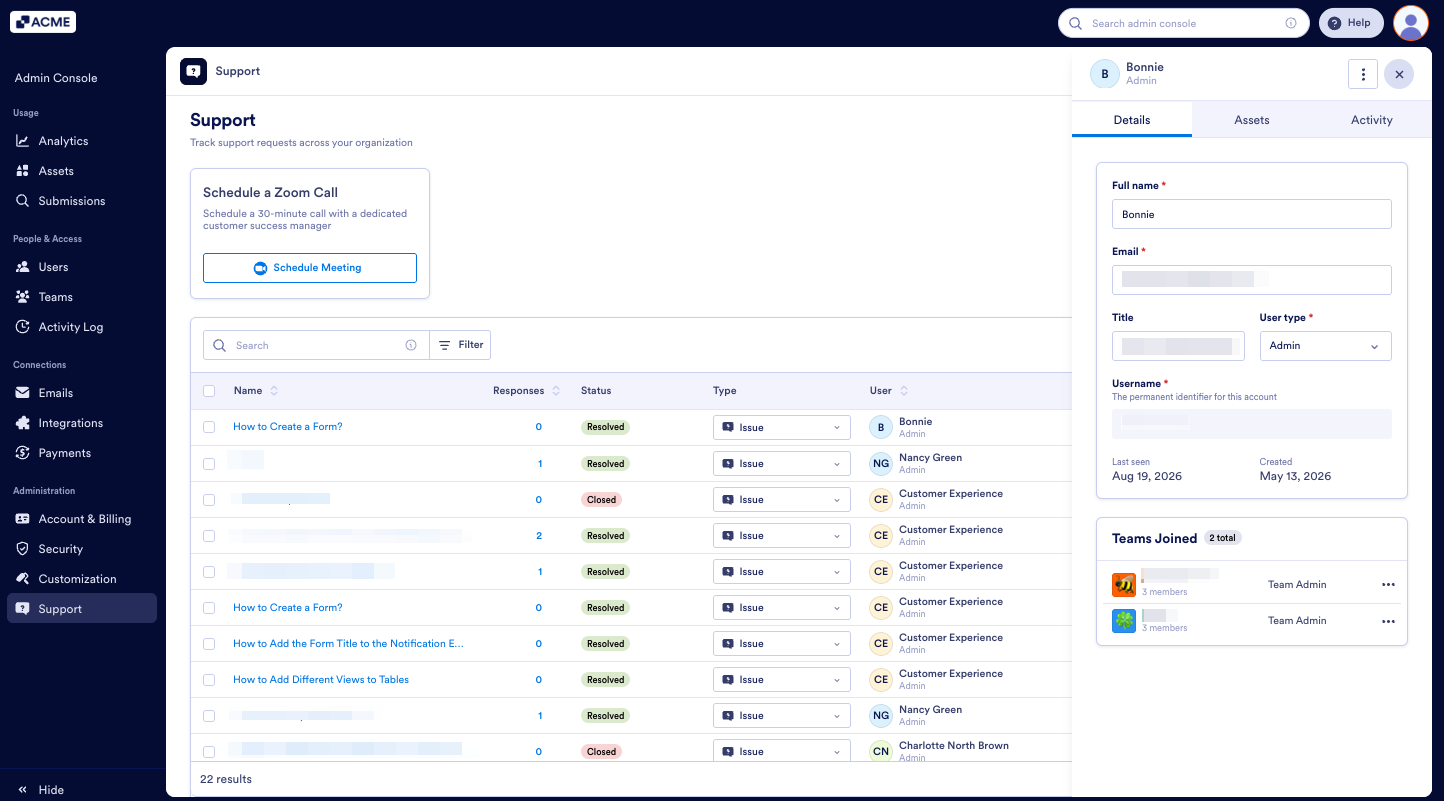
User Information Sidebar
When you select a user from the table, a user info sidebar opens to display essential contact details and account permissions for the person who submitted the request.
Organizing and Managing Requests
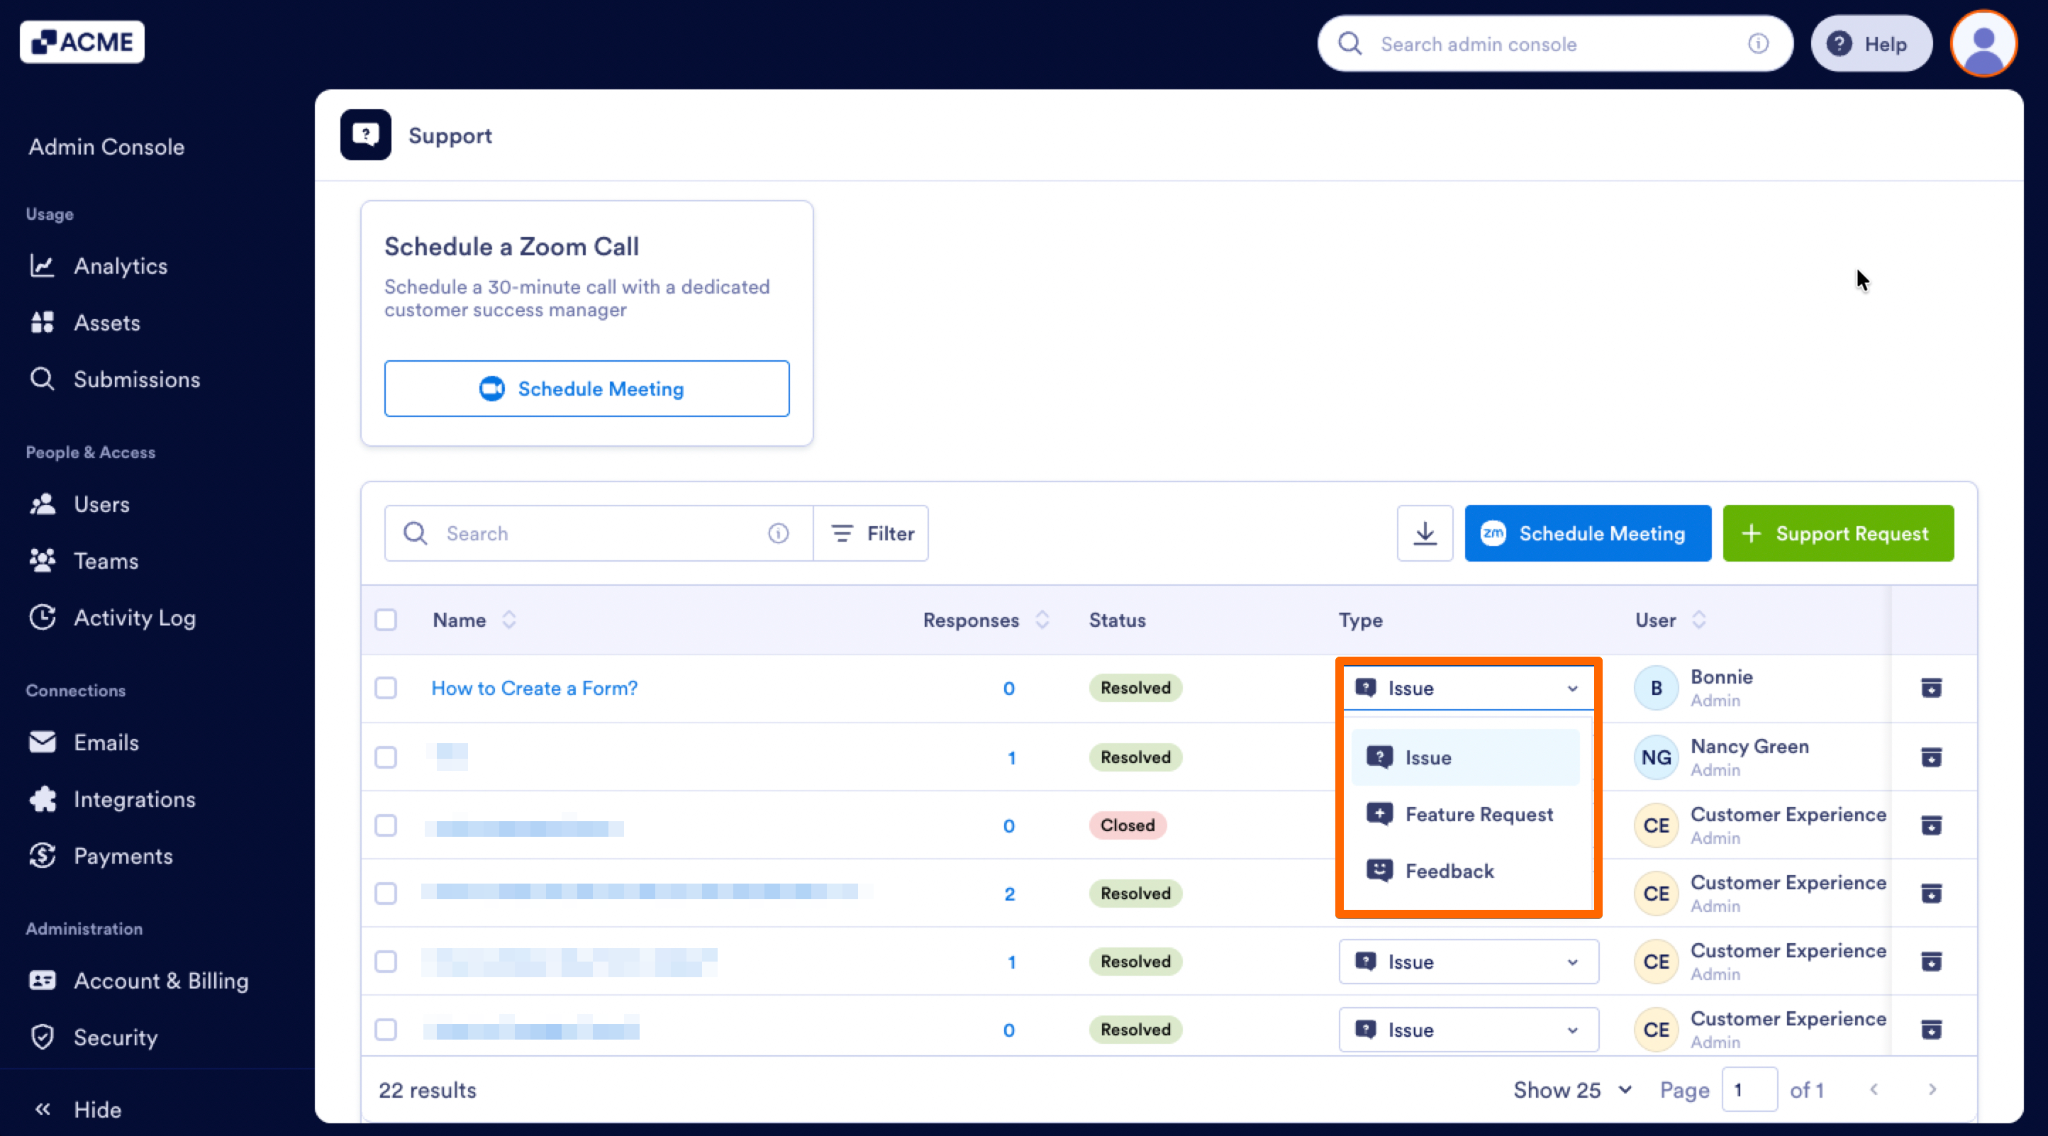
Type Management
Categorize requests directly within the table view using the Type dropdown:
Issue: Technical problems, bugs, or errors requiring troubleshooting and resolution.
Feature Request: Suggestions or ideas for new functionality and platform enhancements.
Feedback: General comments, opinions, or general user experience input.
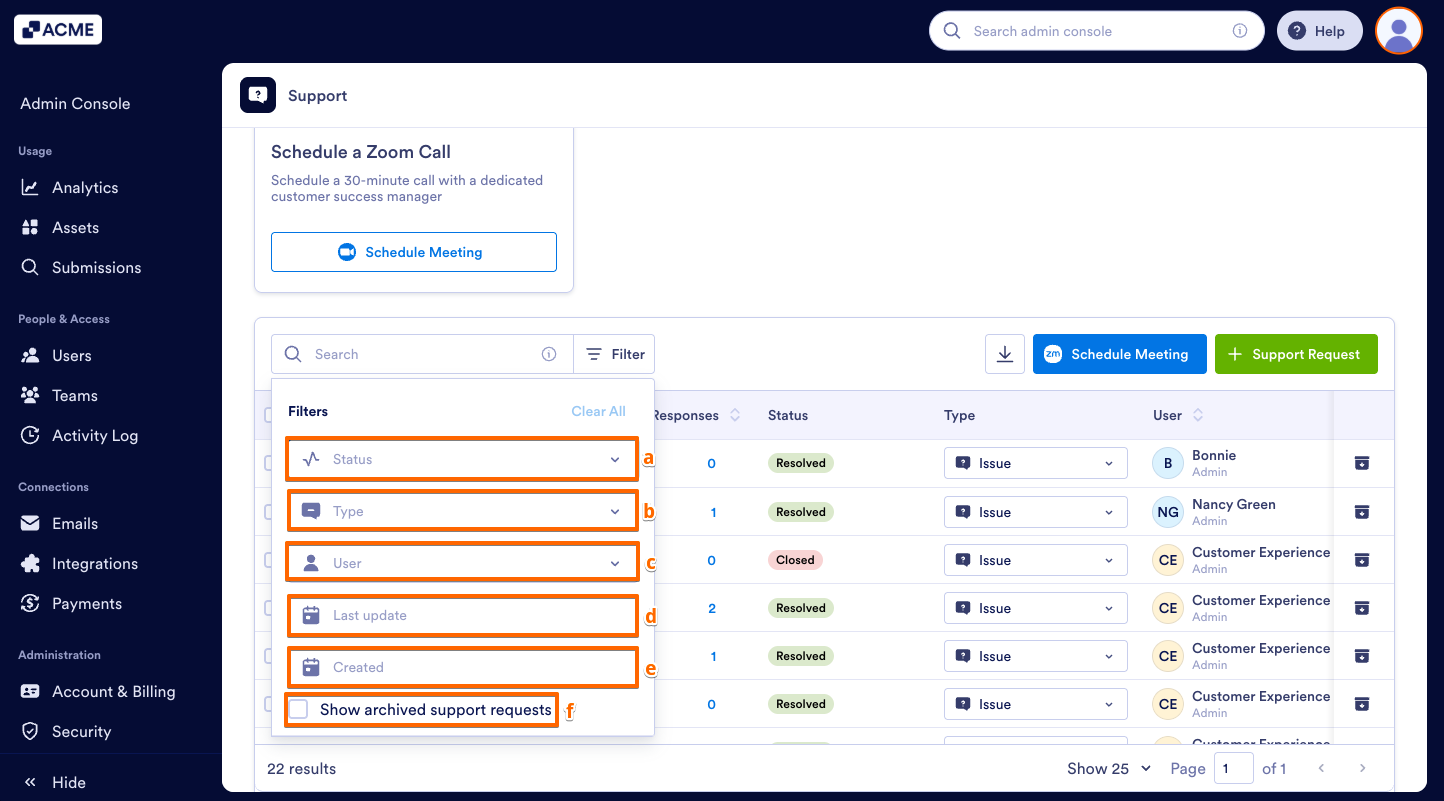
Filter Panel
Click the Filter button next to the search bar to narrow down displayed records using the following criteria:
- Status: Filter by request state, choosing from Open, Resolved, or Closed.
- Type: Isolate tickets categorized as Issue, Feature Request, or Feedback.
- User: Target requests submitted by specific members.
- Last Update: Narrow results by the timeframe.
- Created: Filter by the date or date range the ticket was originally created.
- Show Archived Support Requests: Check this box to include archived items in your search results.
Data Export
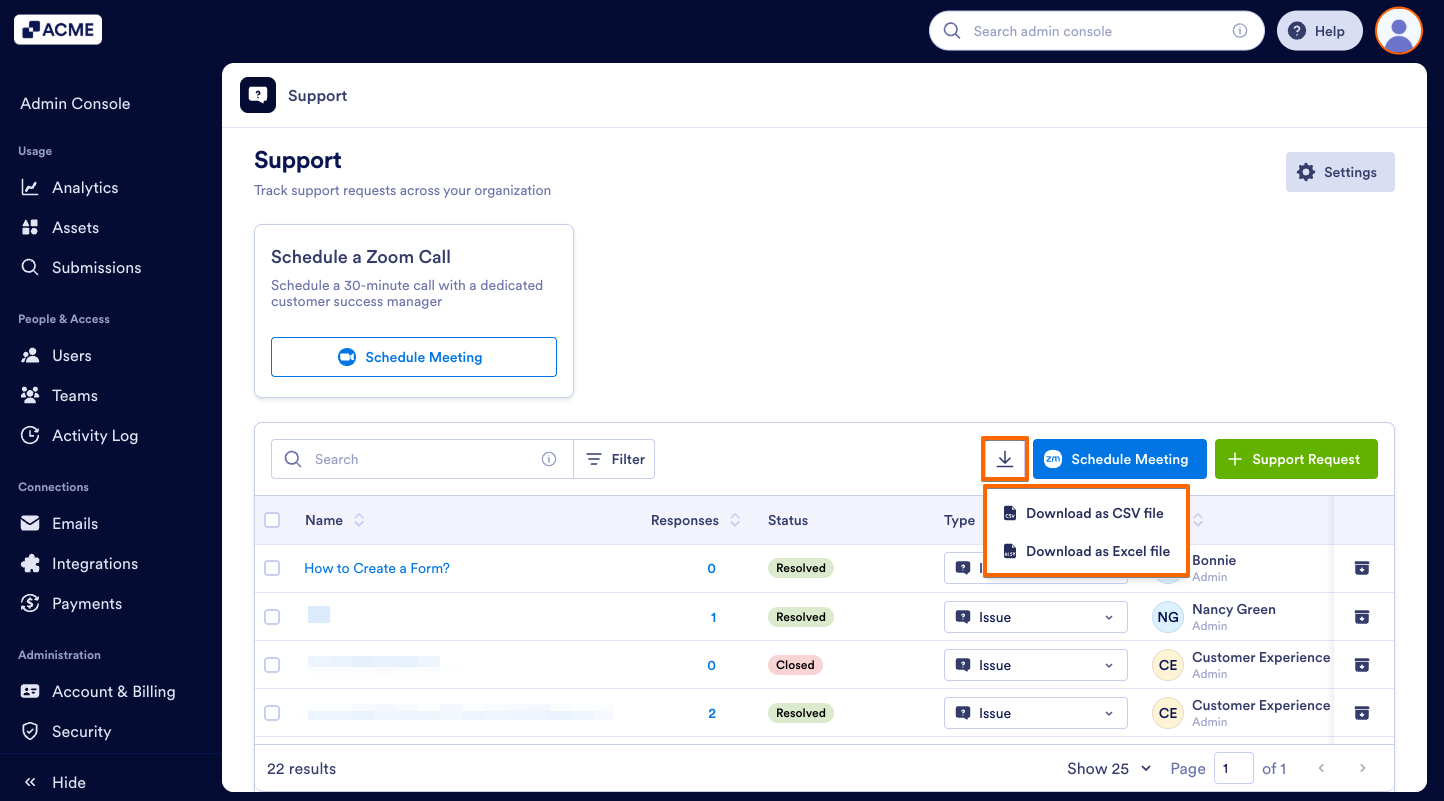
You can click on the Download icon in the table and select CSV or Excel file to download for offline reporting.
Archive & Restore
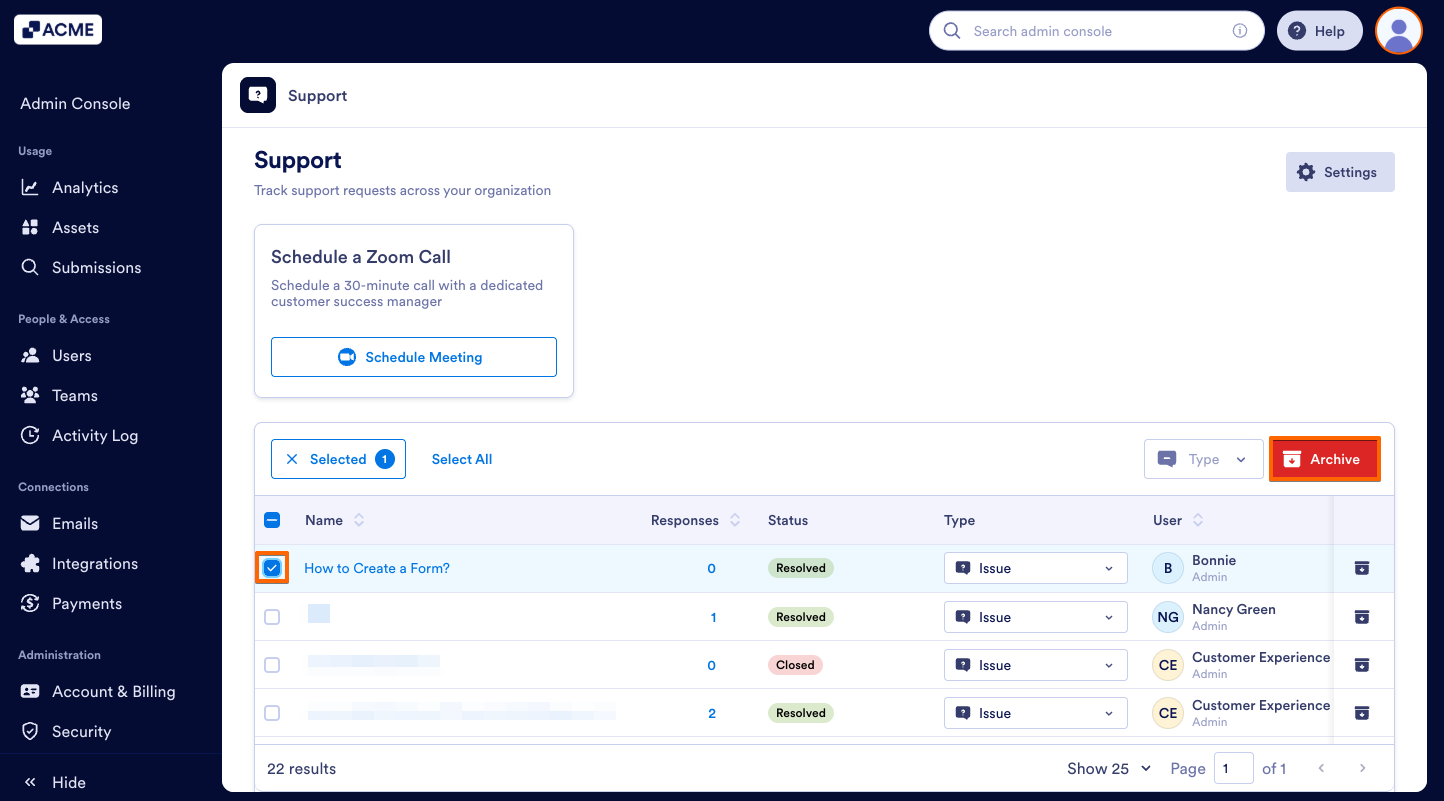
Keep your active queue clean by archiving tickets that no longer interest you.
- You can Archive tickets by clicking the checkbox next to them and clicking on Archive.
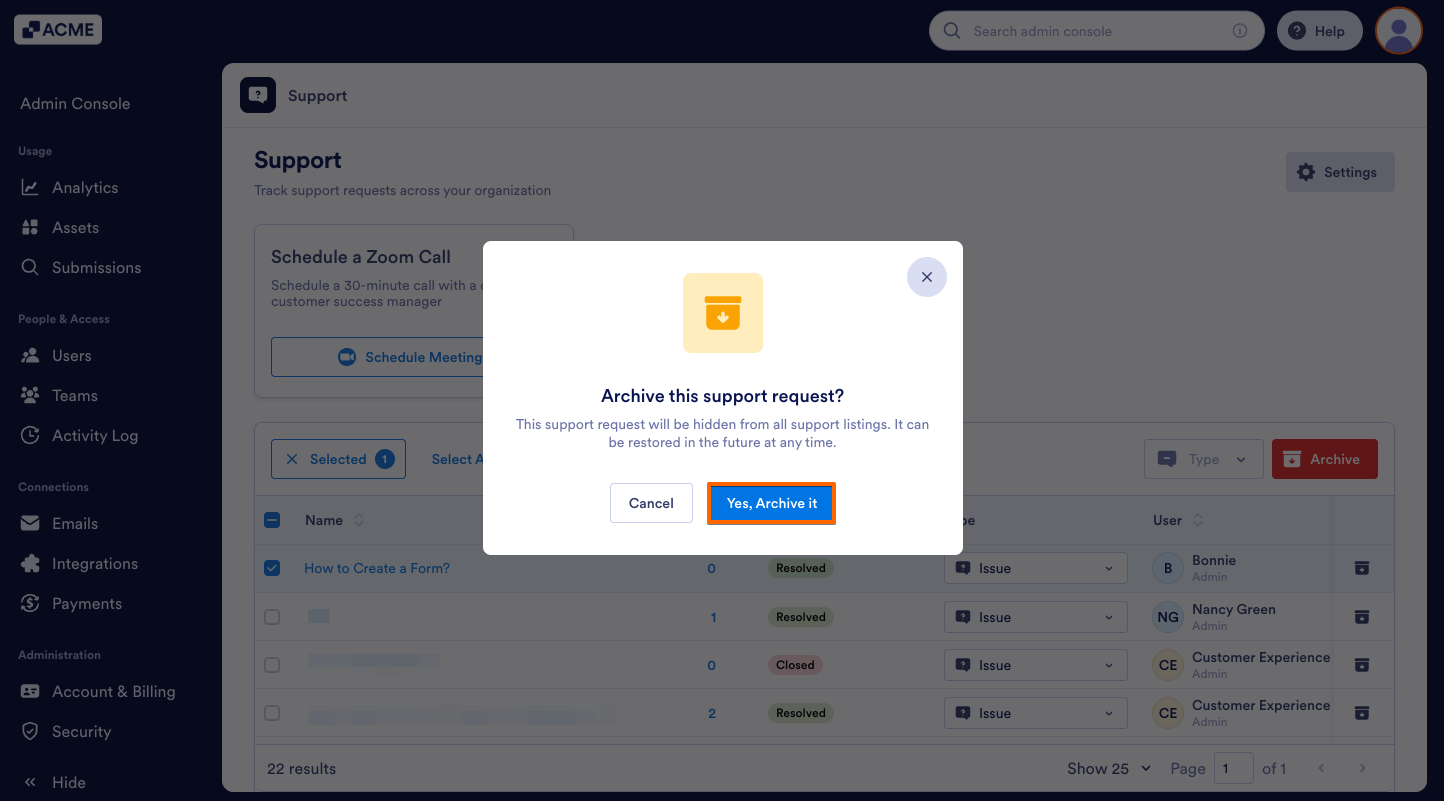
- In the pop-up window, click on Yes, Archive it.
You can easily restore your archived tickets at any time. Here’s how:
- In the Support page, select the Show archived support requests checkbox in the filter panel.
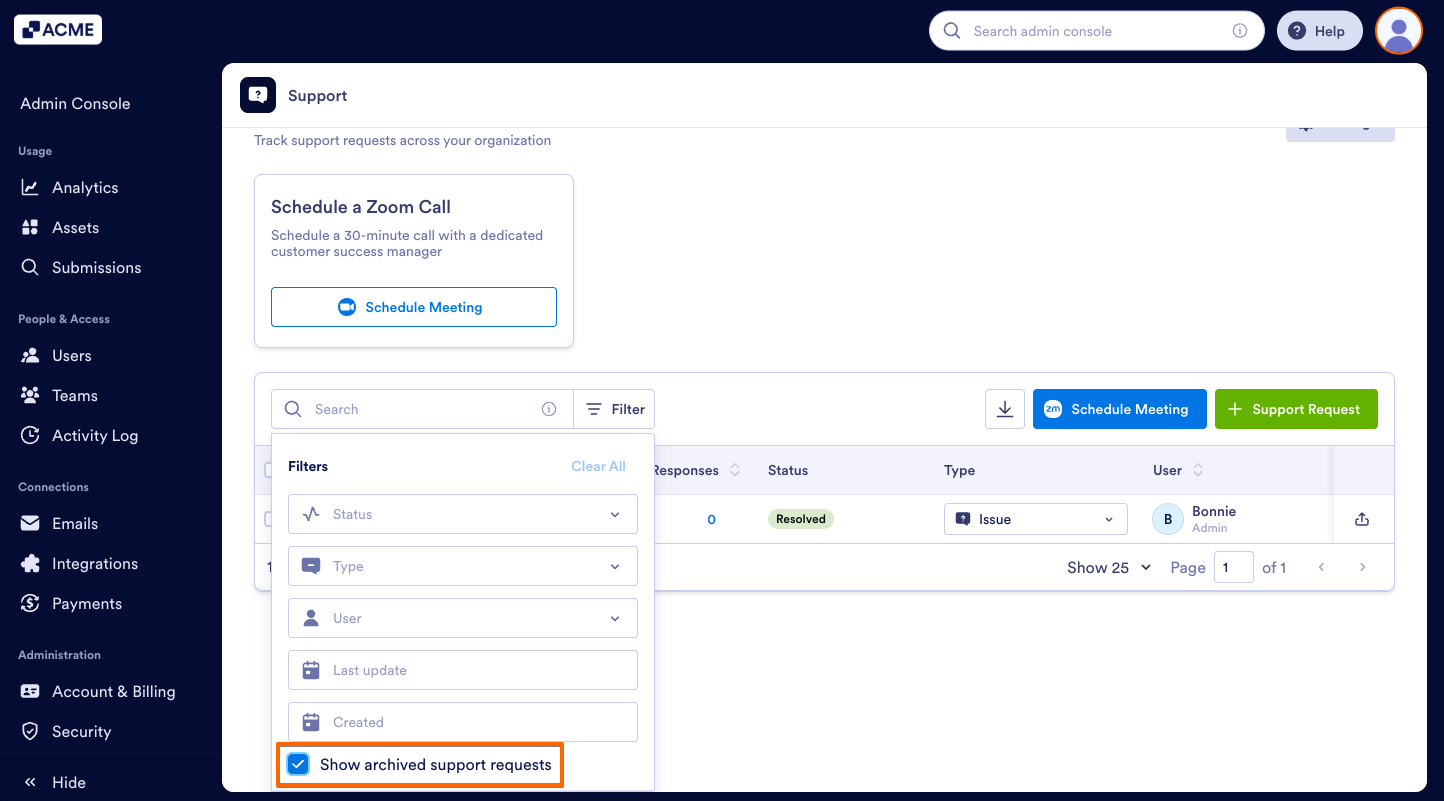
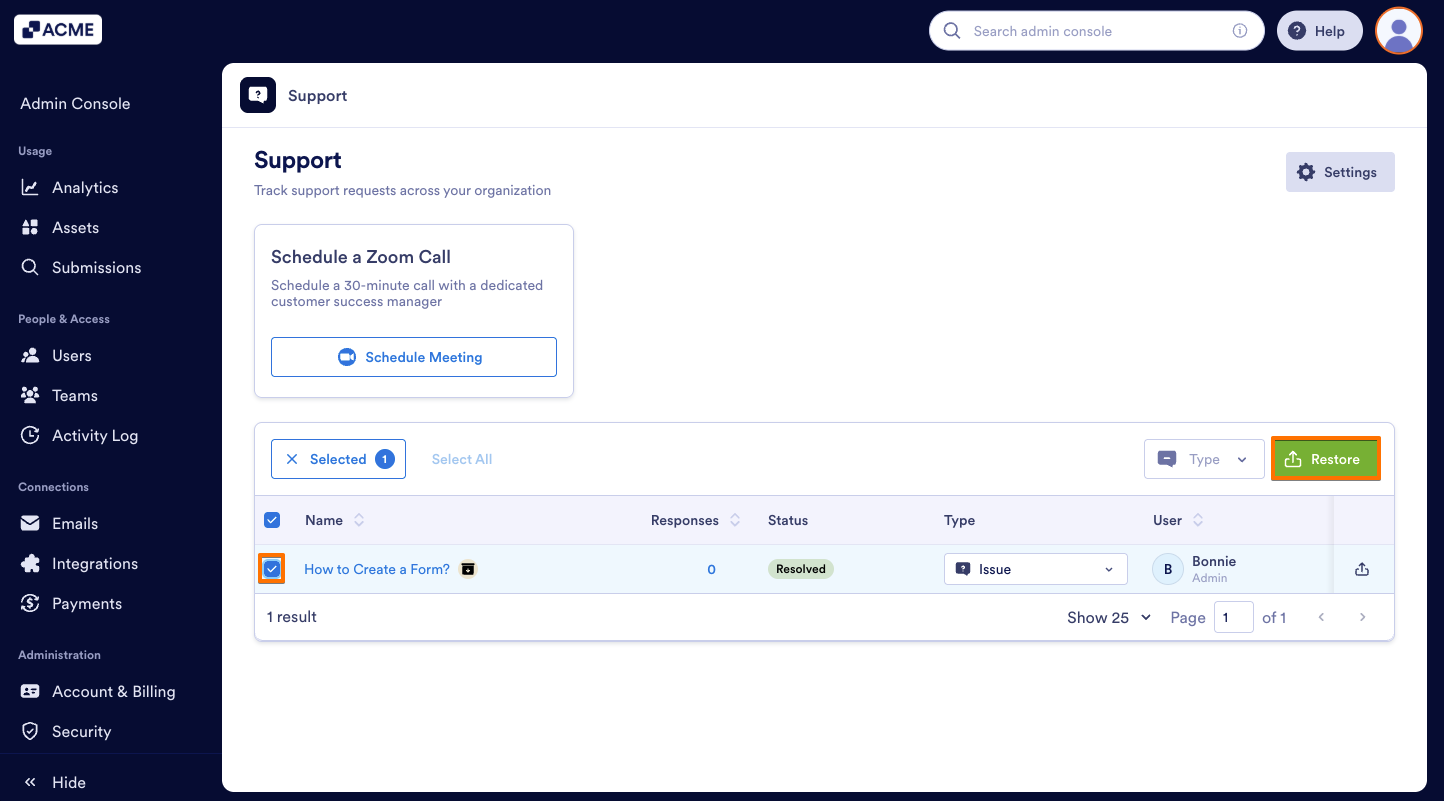
- Next, select the checkbox and click on Restore to restore the ticket.
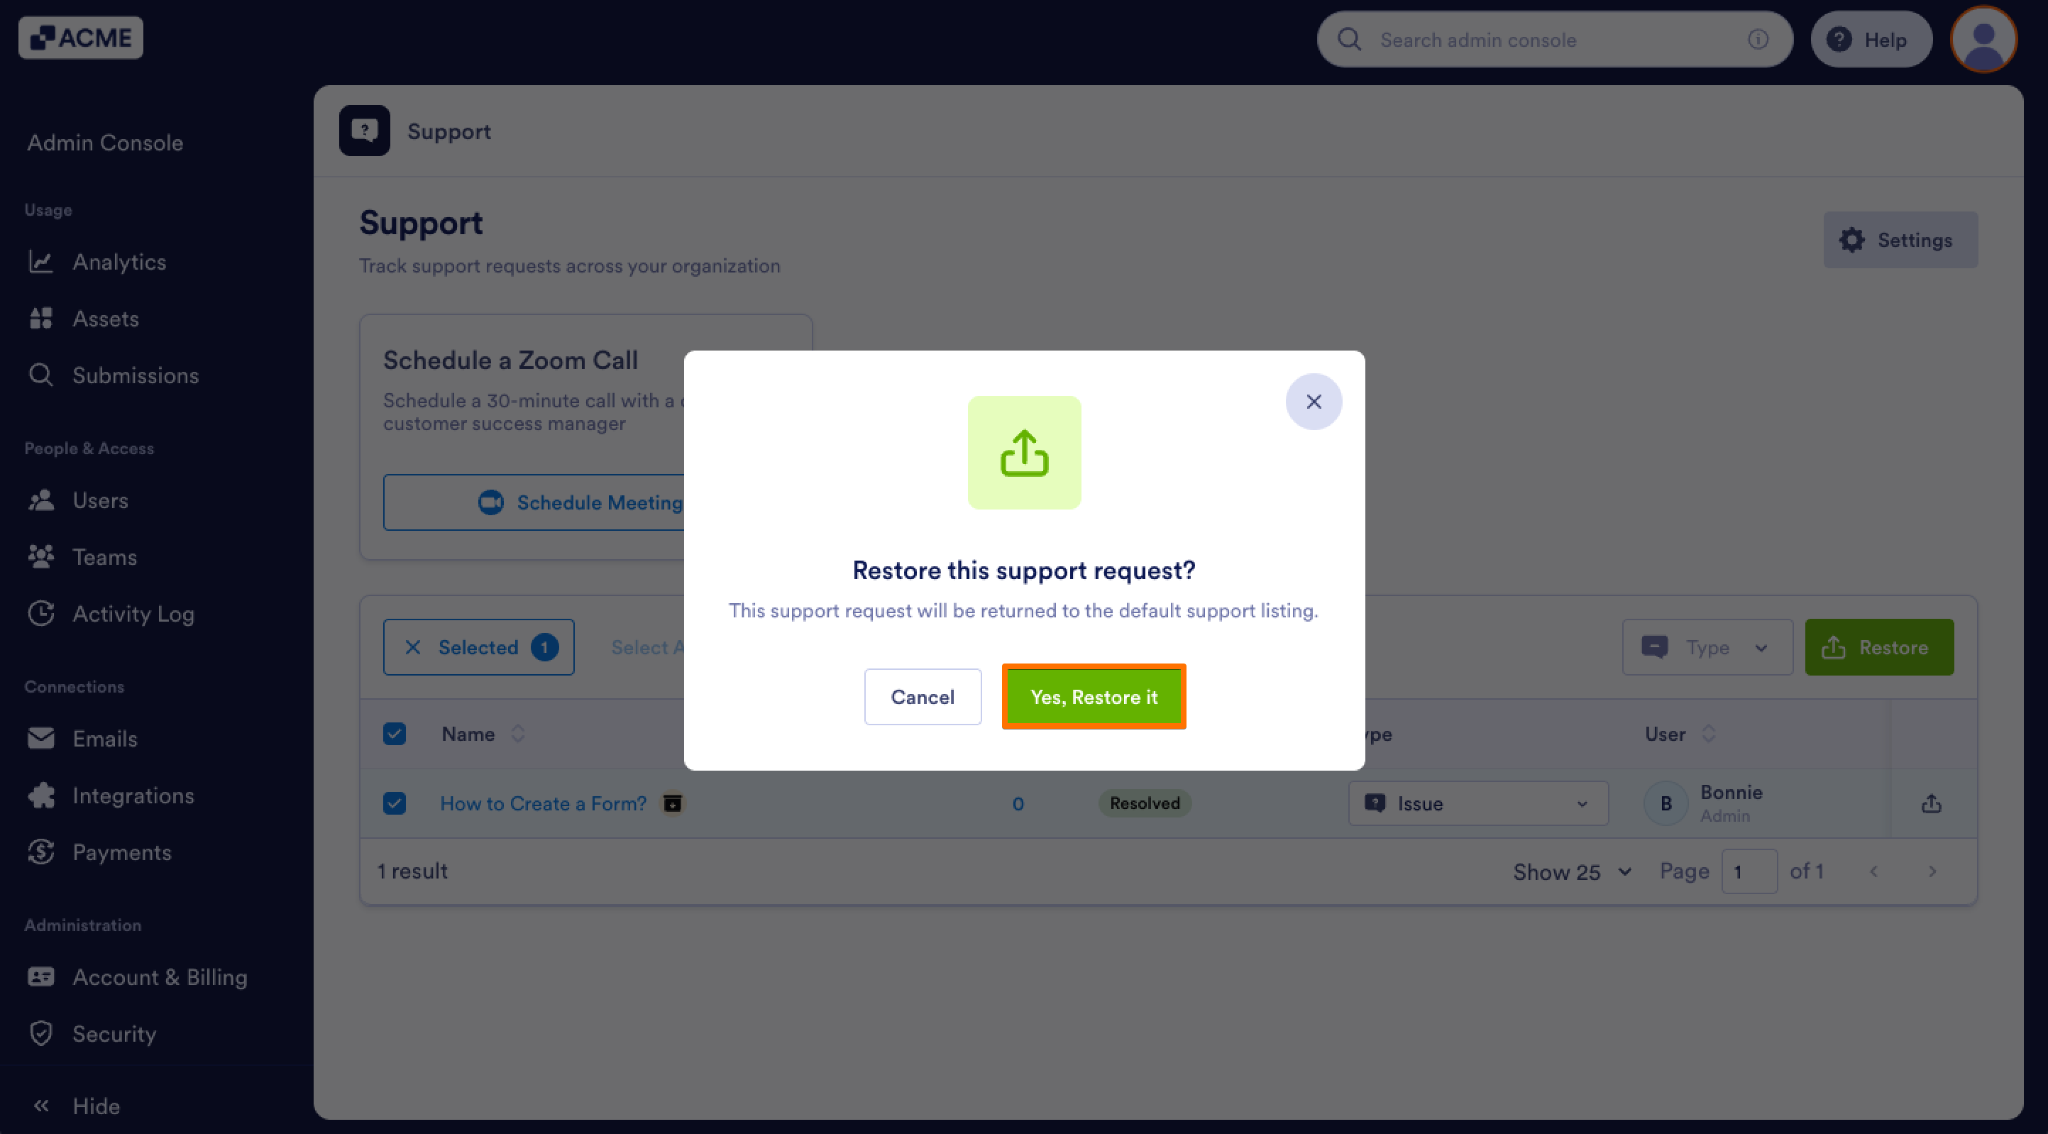
- In the pop-up window, click on Yes, Restore it.

Send Comment: