Jotform makes it easy to connect your AI Agent to WhatsApp so you can chat with customers and answer their questions right where they already communicate. Once connected, your AI Agent can handle conversations and provide information through WhatsApp without requiring customers to visit another platform.
Whether you’re answering common questions, helping customers find information, or providing support, connecting your AI Agent to WhatsApp gives your customers a quick and familiar way to interact with your business.
Connecting an Existing WhatsApp Business Account
If you already have a WhatsApp Business account, you can connect it to your WhatsApp Agent through Meta. Here’s how:
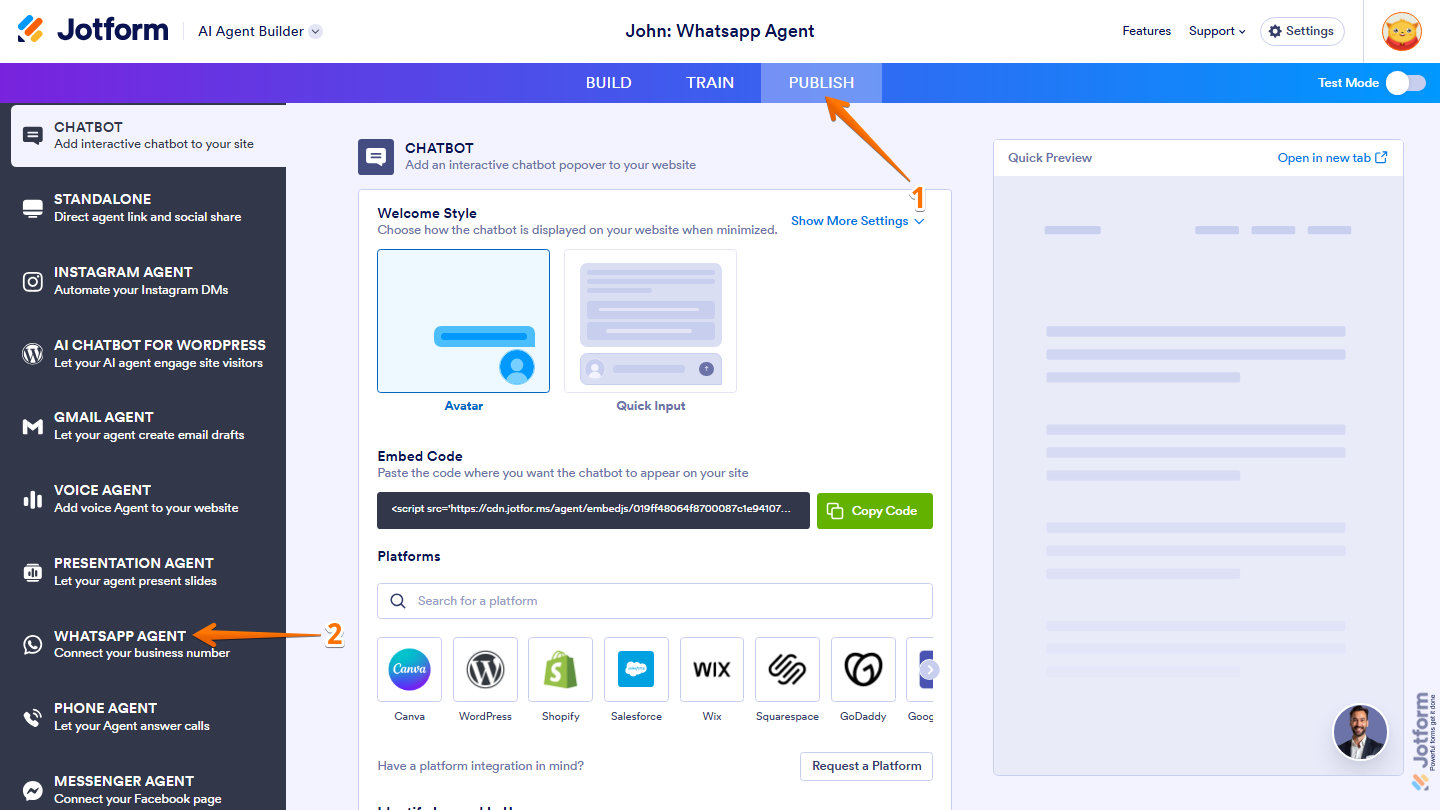
- In AI Agent Builder, in the blue navigation bar at the top of the page, click on Publish.
- Then, in the menu on the left, click on WhatsApp Agent.
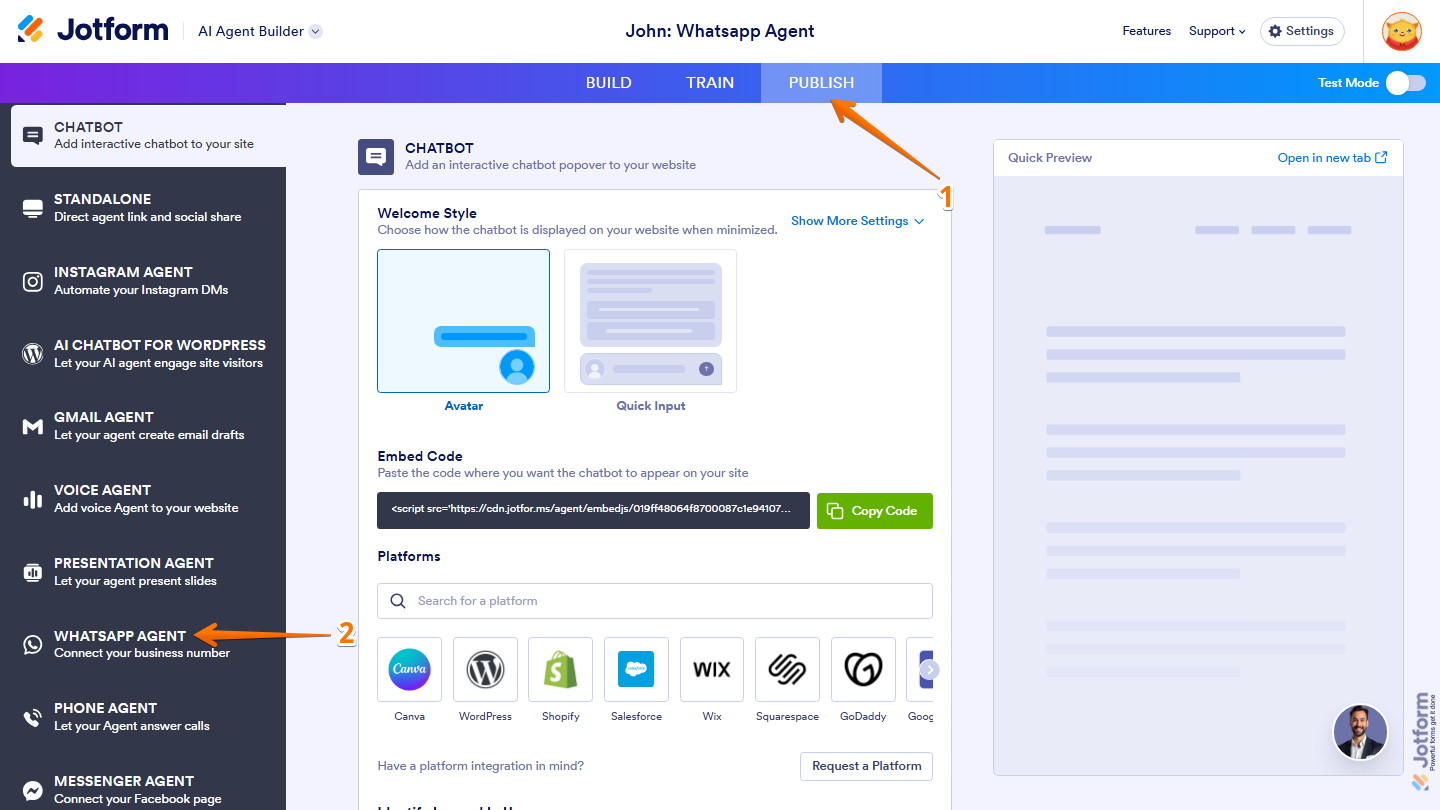
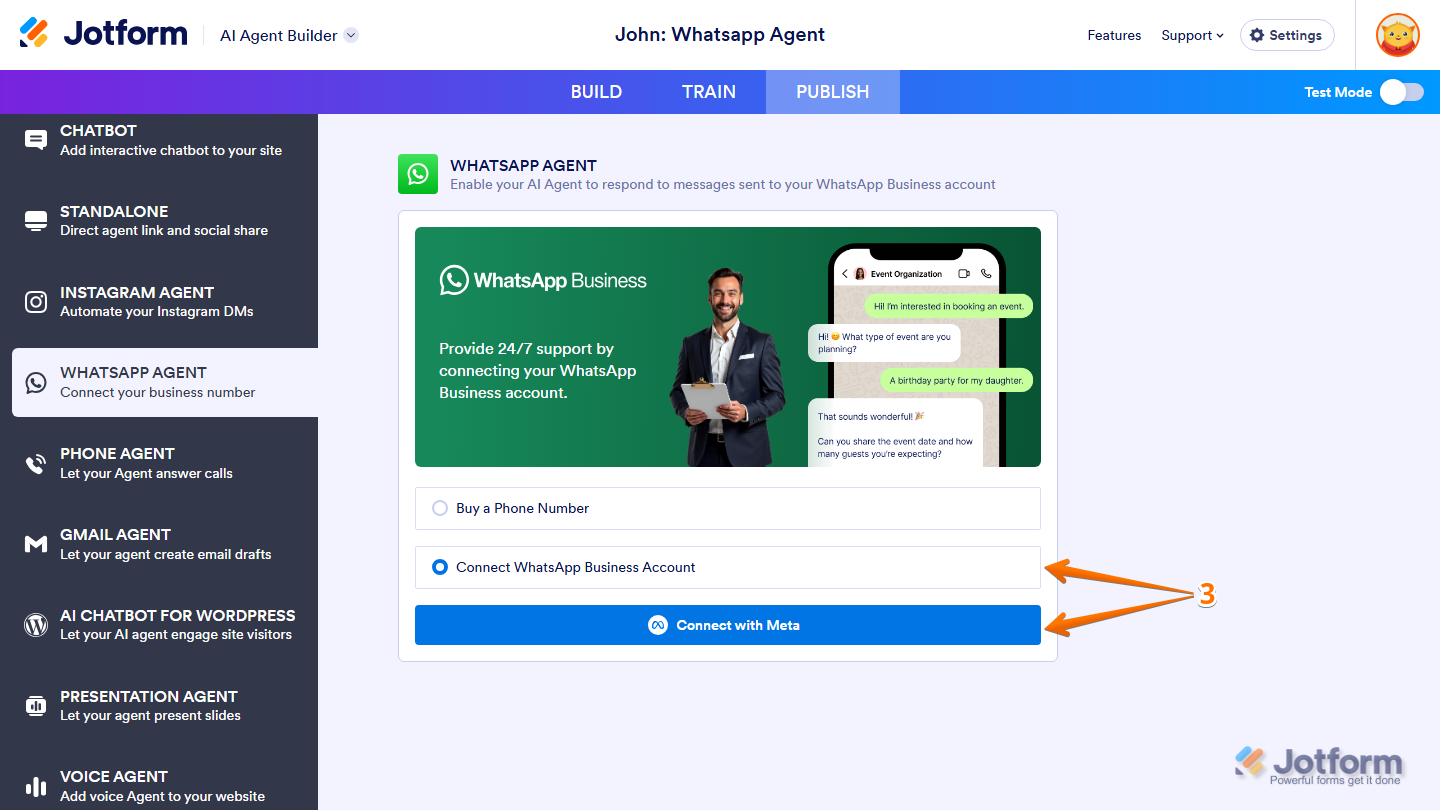
- Now, select Connect WhatsApp Business Account and then click on Connect with Meta.
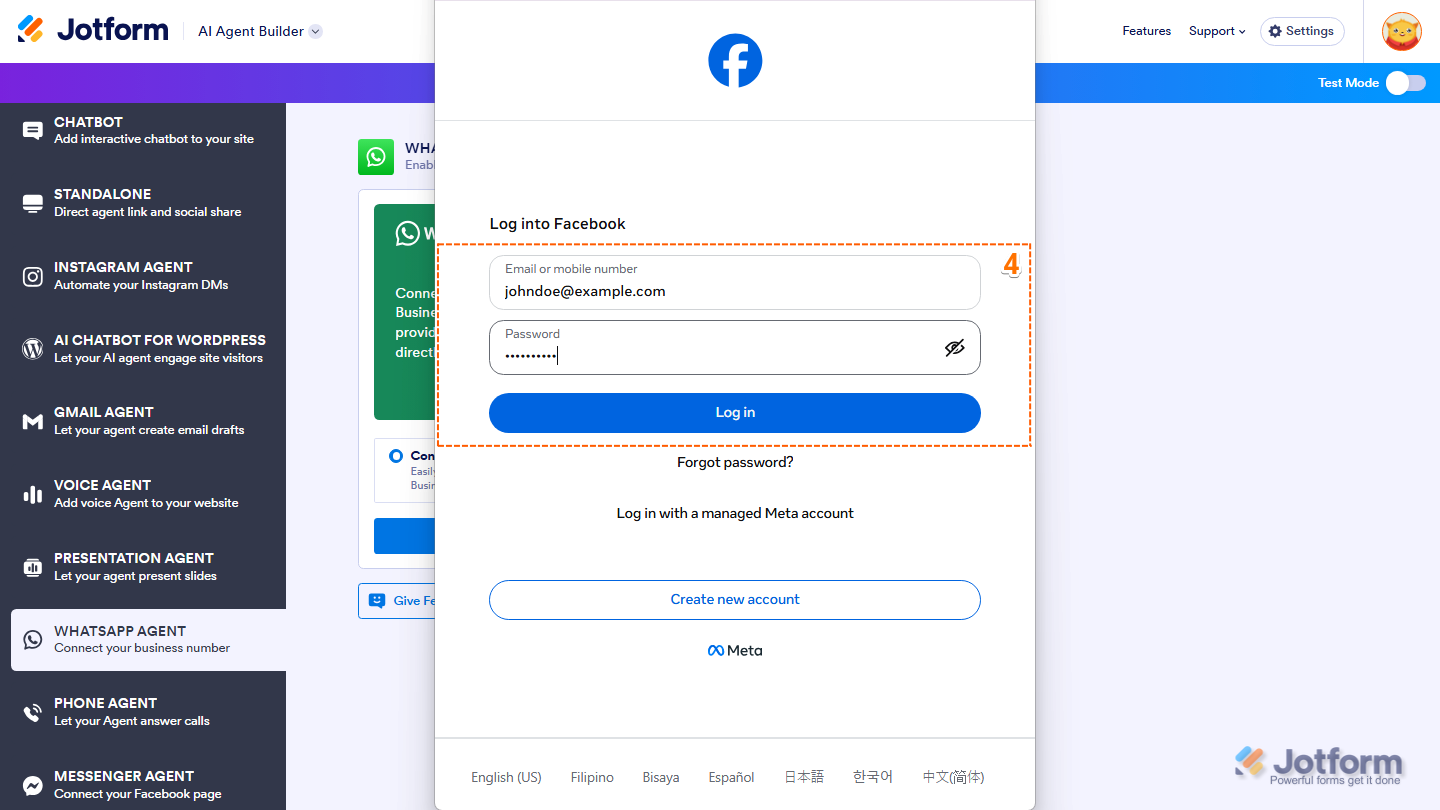
- Next, in the Facebook Login window that opens, enter your Email Address and Password, and then click on Log In.
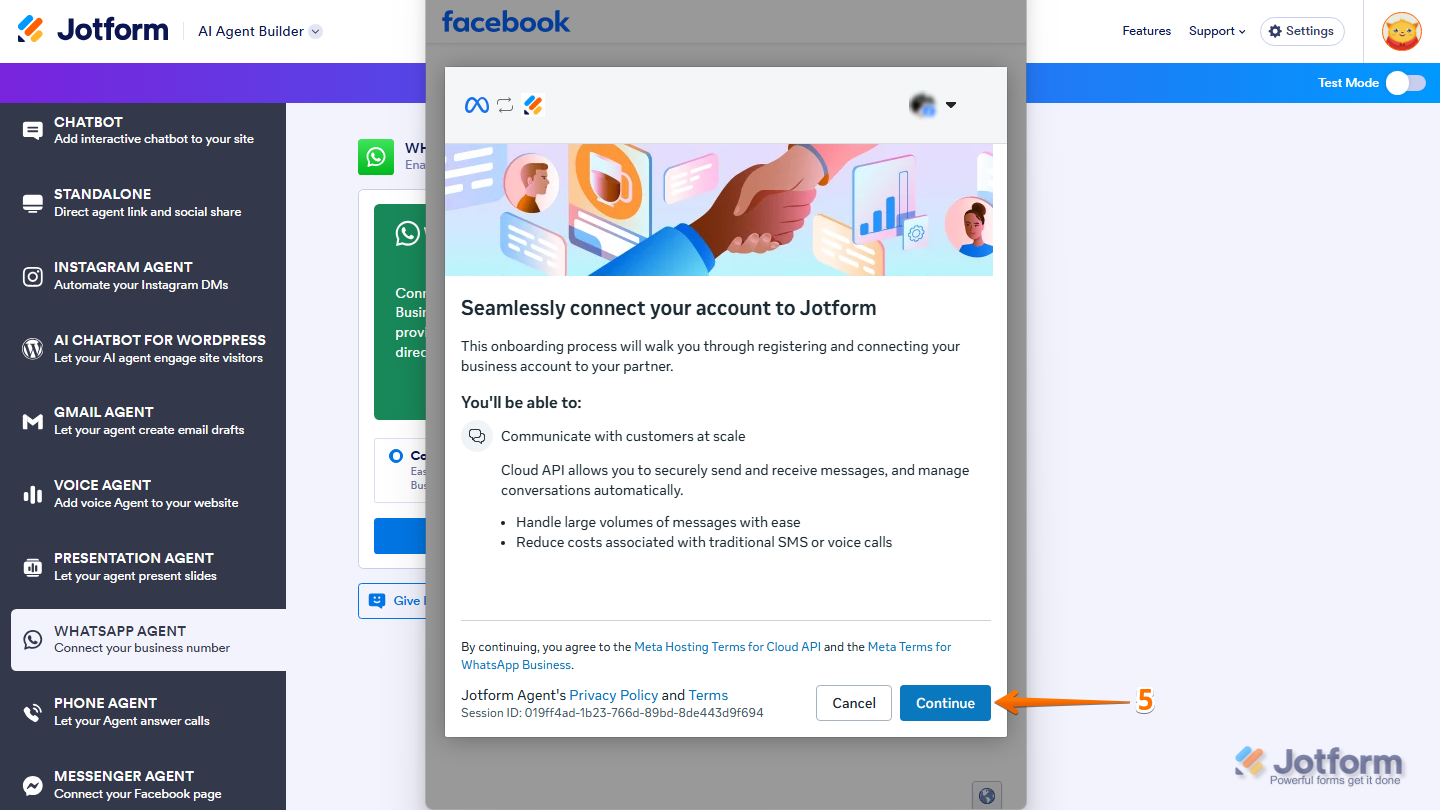
- Once you’re logged in, review the information, and then click on Continue.
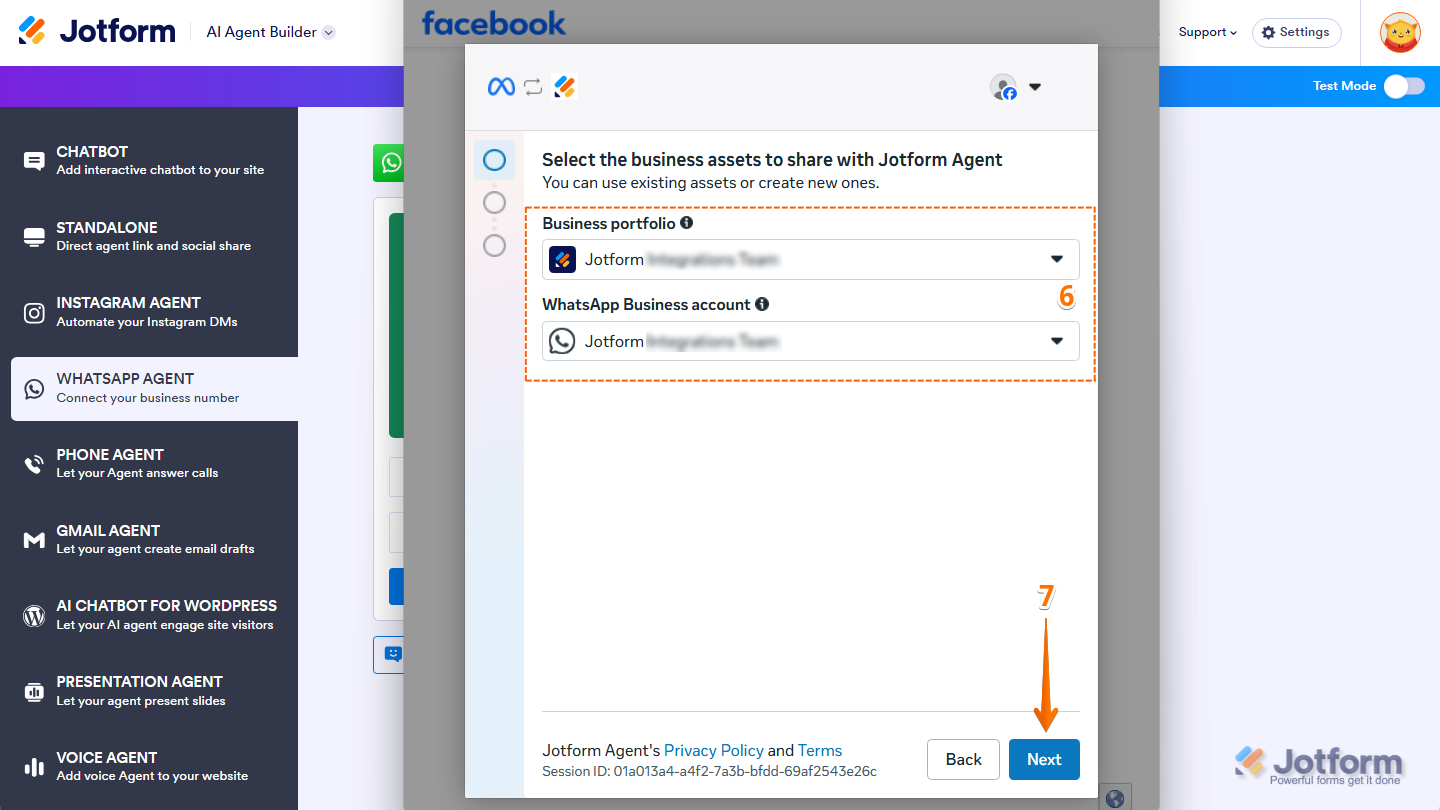
- Now, set up these things:
- Business Portfolio — Select the business portfolio you want to connect.
- WhatsApp Business Account — Select an existing WhatsApp Business account, or click on Create New WhatsApp Business Account to set up a new one.
- Then, click on Next.
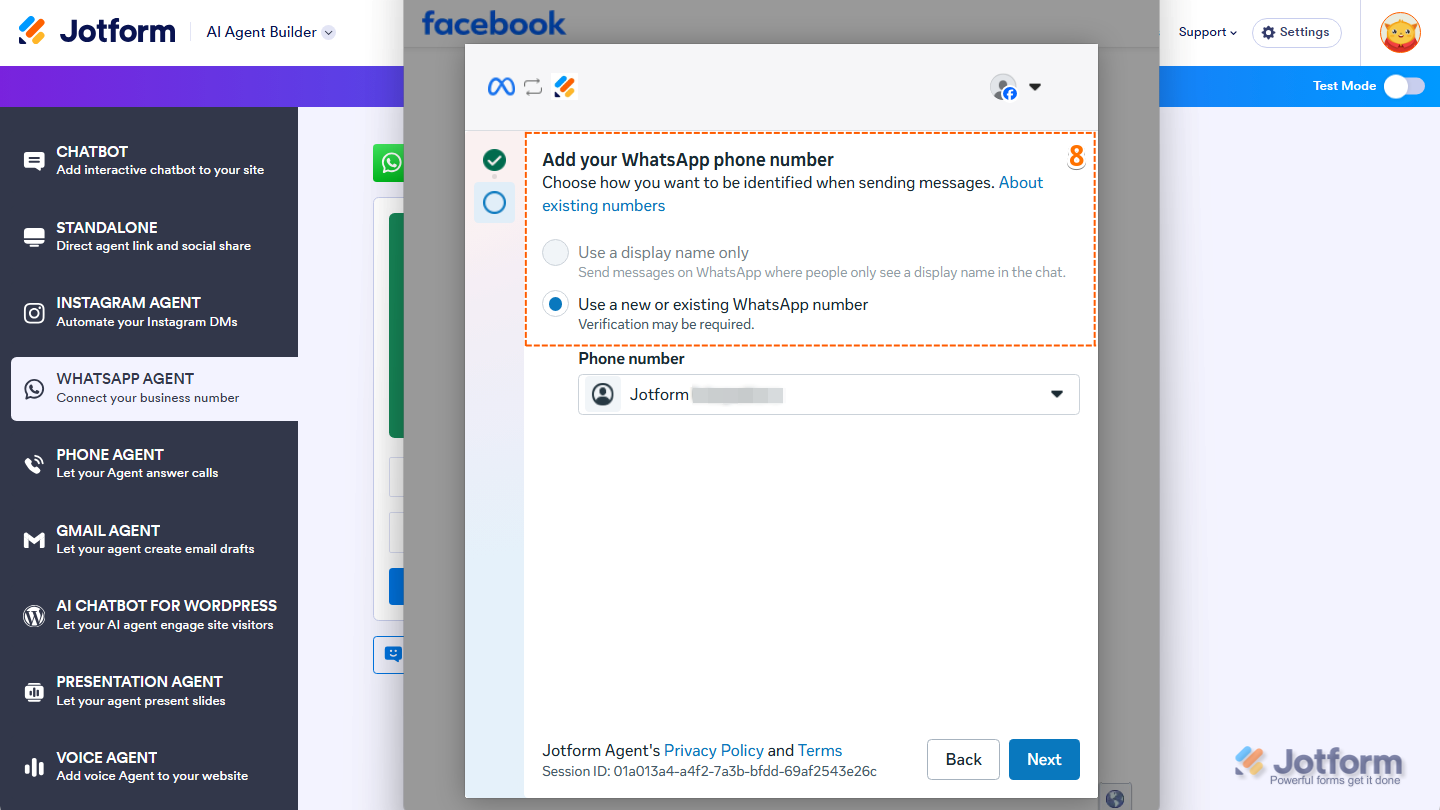
- Next, in the Add your WhatsApp Phone Numbersection, choose one of the following options:
- Use a Display Name Only — Send messages on WhatsApp using a display name without showing a phone number in the chat.
- Use a New or Existing WhatsApp Number — Use a new or existing WhatsApp number to send messages. Verification may be required.
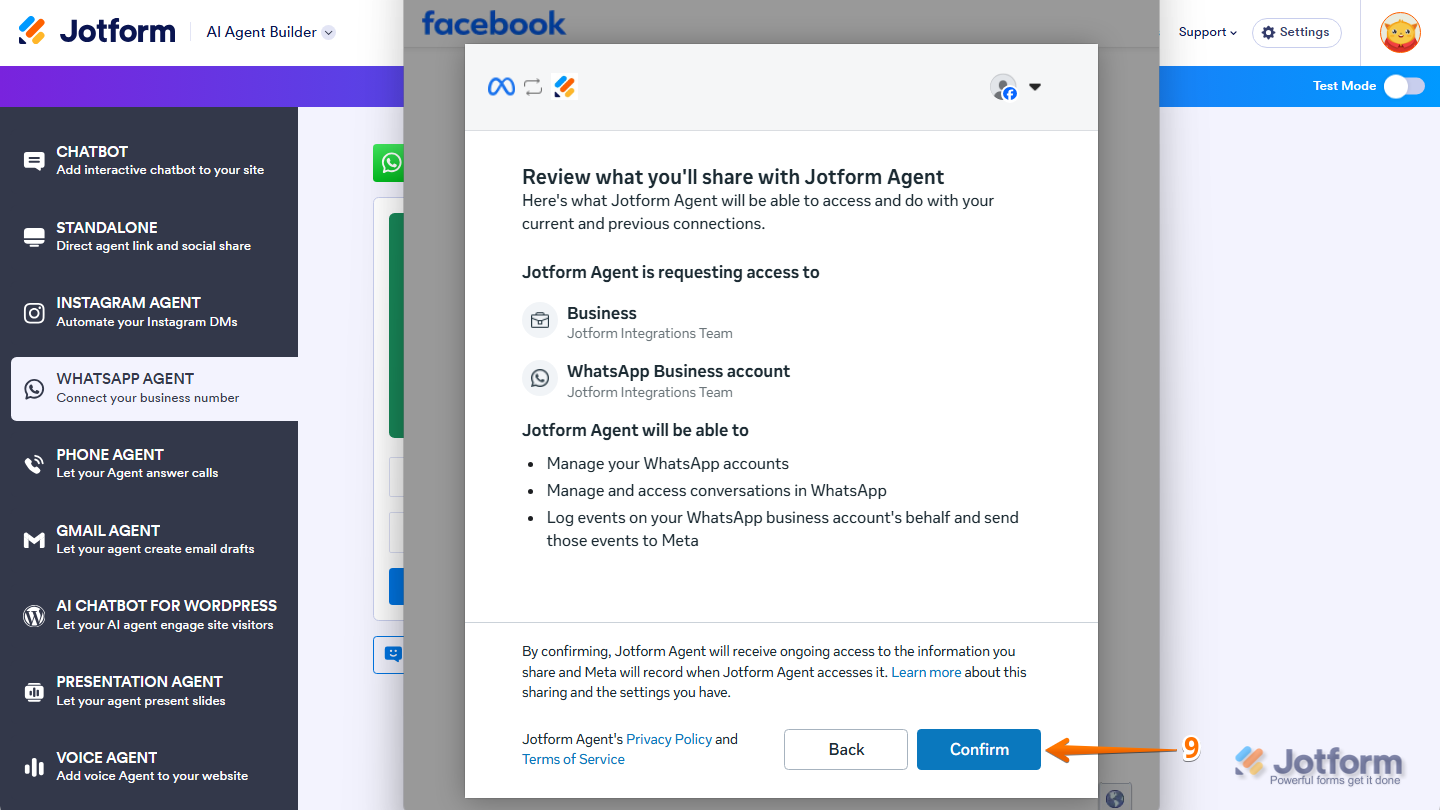
- Now, review the permissions that Jotform Agent is requesting, then click on Confirm to continue.
- Once your account is connected, click on Finish.
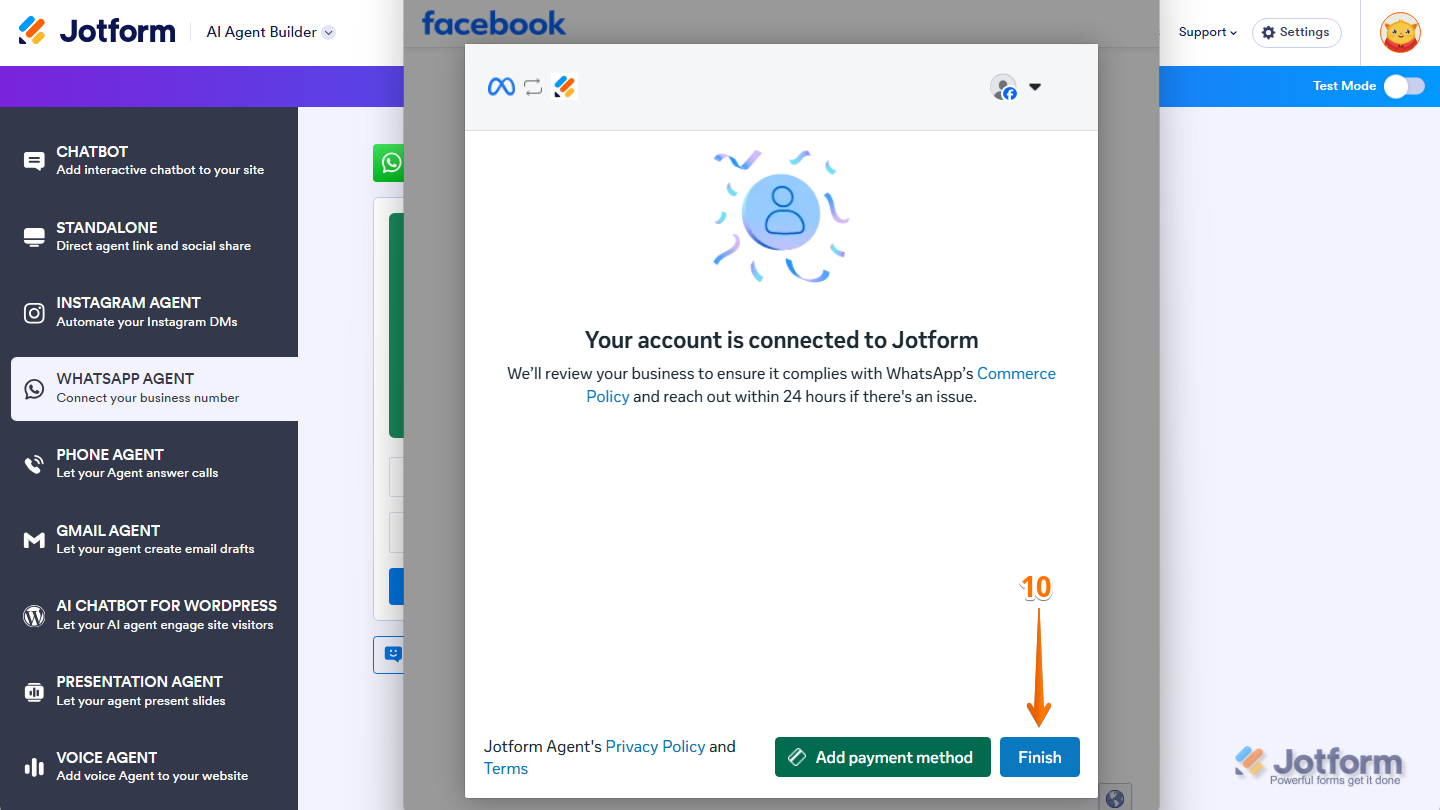
Pro Tip
You can also click on Add payment method to add a payment method to your account.
- Then, under the Select the Phone Number You Would Like to Connect section, select the phone number you want to connect to your WhatsApp Agent.
- Now, click on Connect Agent, and you’re done.
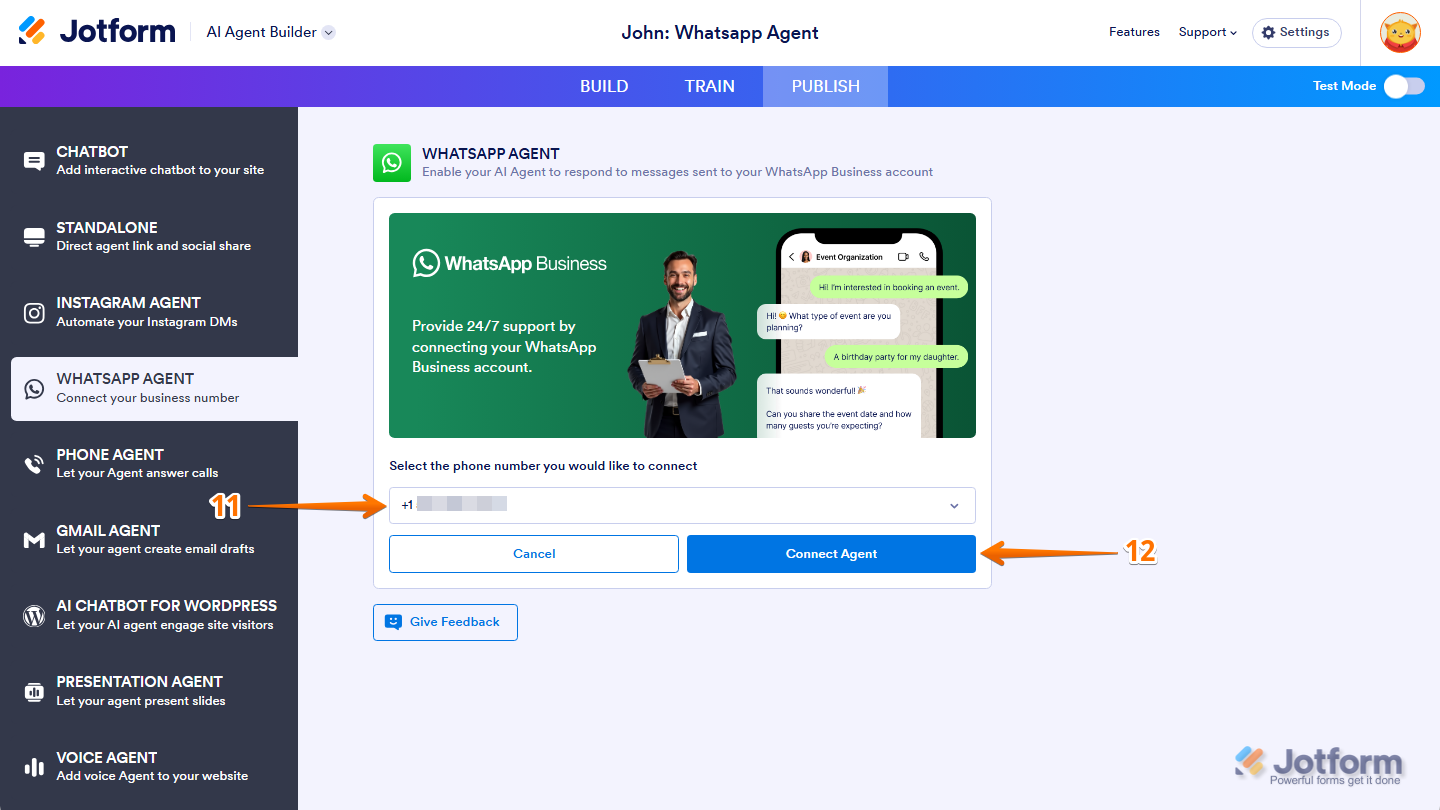
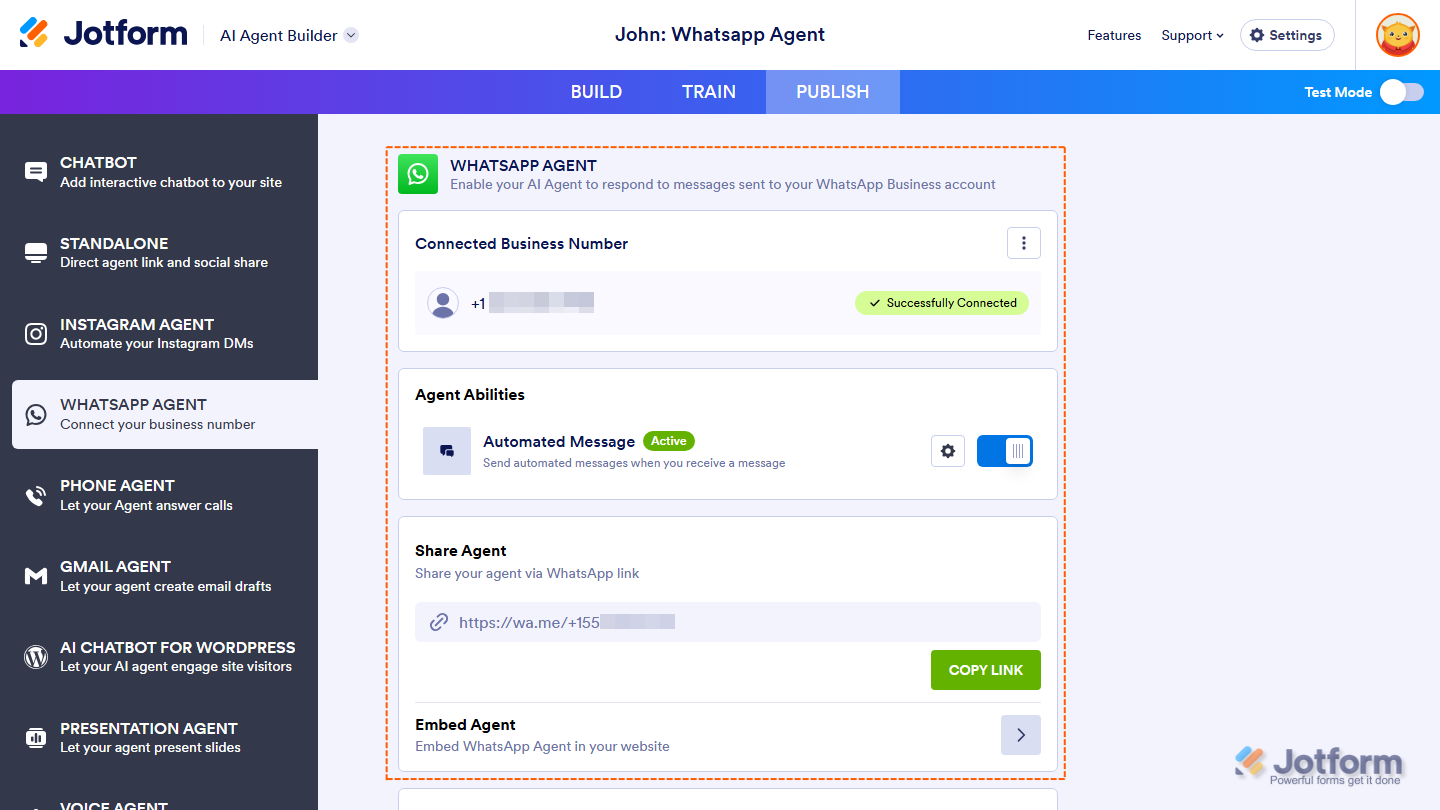
Once your WhatsApp Business number is successfully connected, you can now manage and share your WhatsApp Agent from the WhatsApp Agent page.
Buying a Phone Number for Your WhatsApp Agent
If you don’t have an existing WhatsApp Business account to connect to, you can buy a phone number for your WhatsApp Agent instead. Here’s how to get going:
- In AI Agent Builder, in the blue navigation bar at the top of the page, click on Publish.
- Then, in the menu on the left, click on WhatsApp Agent.
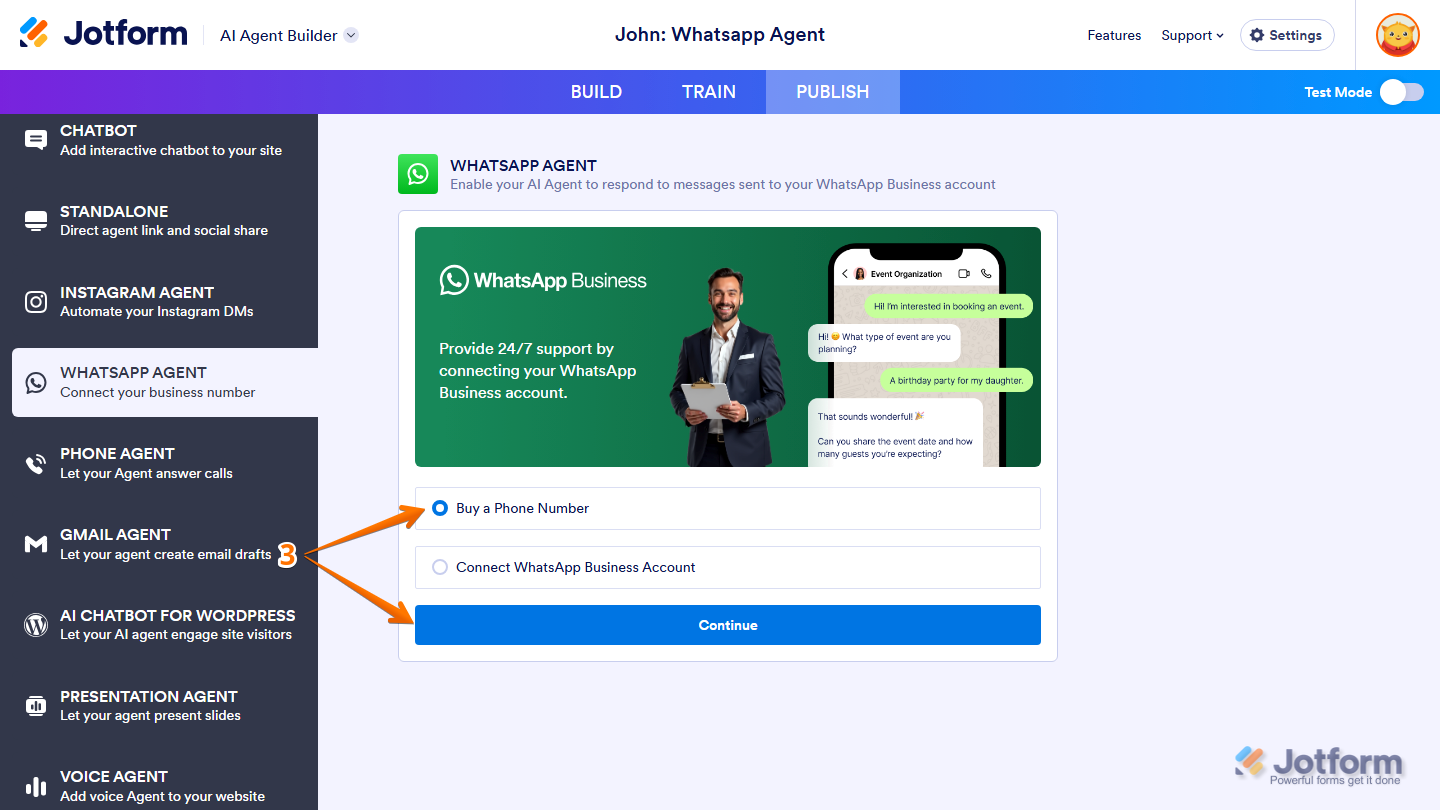
- Now, select Buy a Phone Number and then click on Continue.
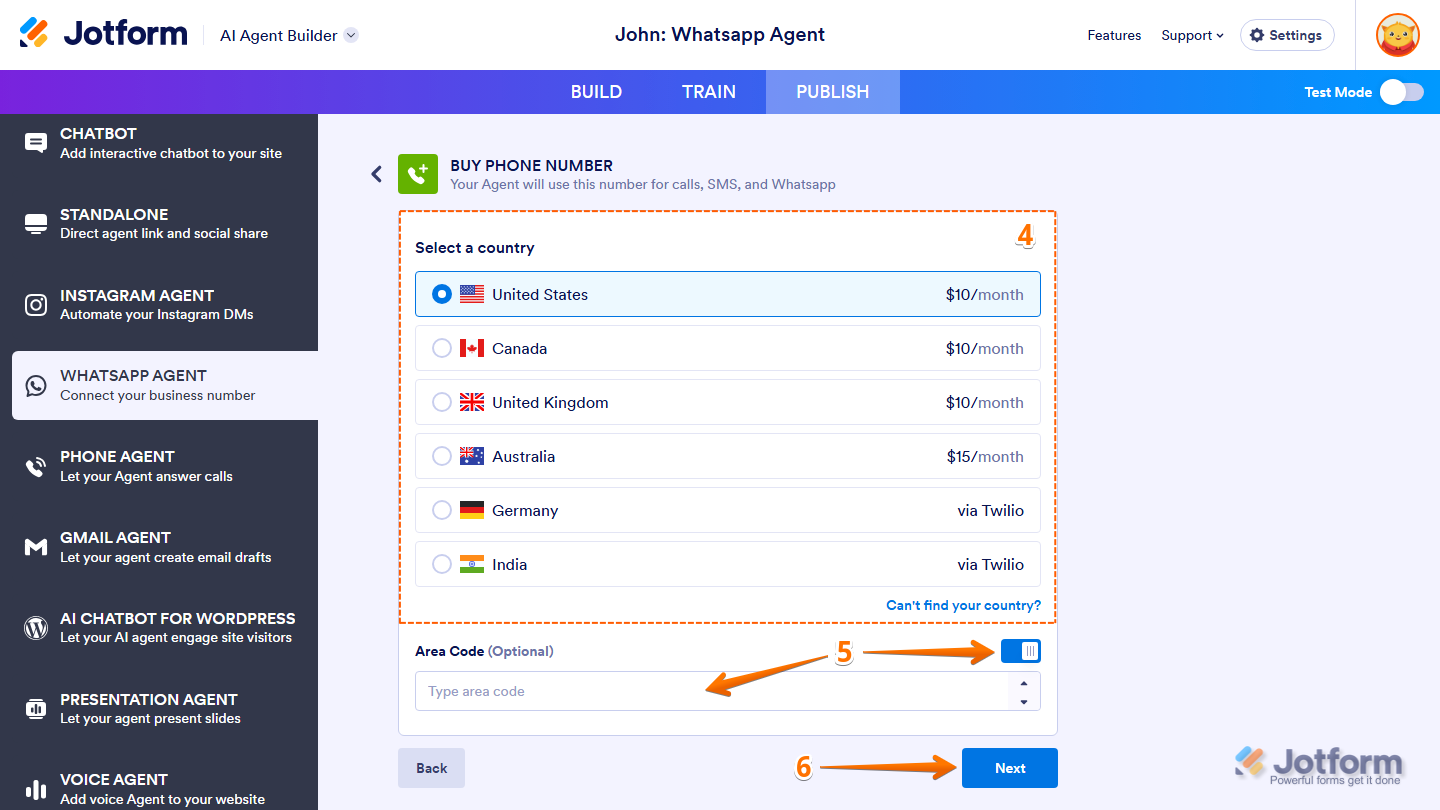
- Next, under the Select a Country section, select the country where you want to buy a phone number.
- If needed, toggle on Area Code and then enter your preferred area code.
- Then, click on Next.
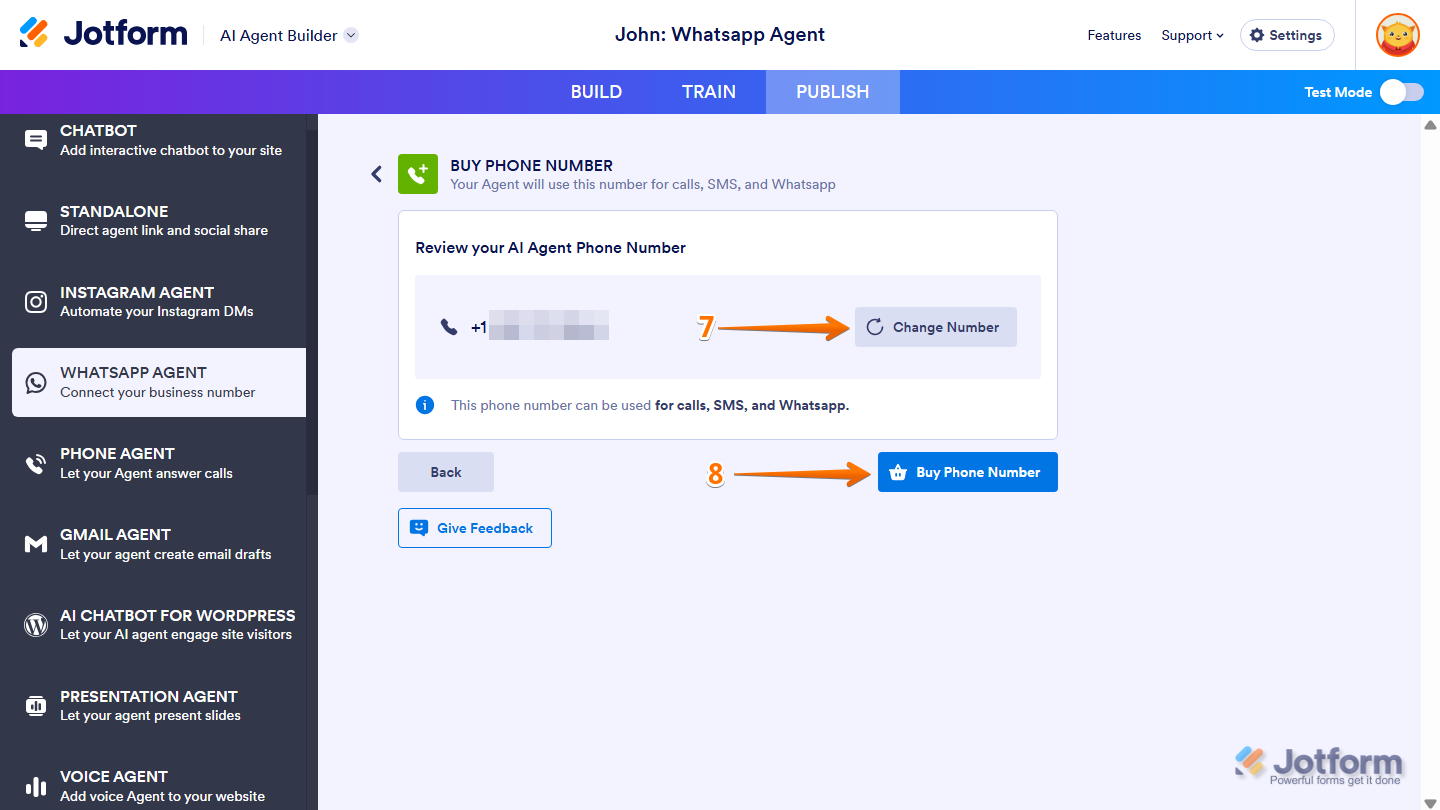
- Now, review the phone number shown under Review your AI Agent Phone Number, and if you want to choose a different number, click on Change Number.
- Once you’ve reviewed the assigned phone number, click on Buy Phone Number.
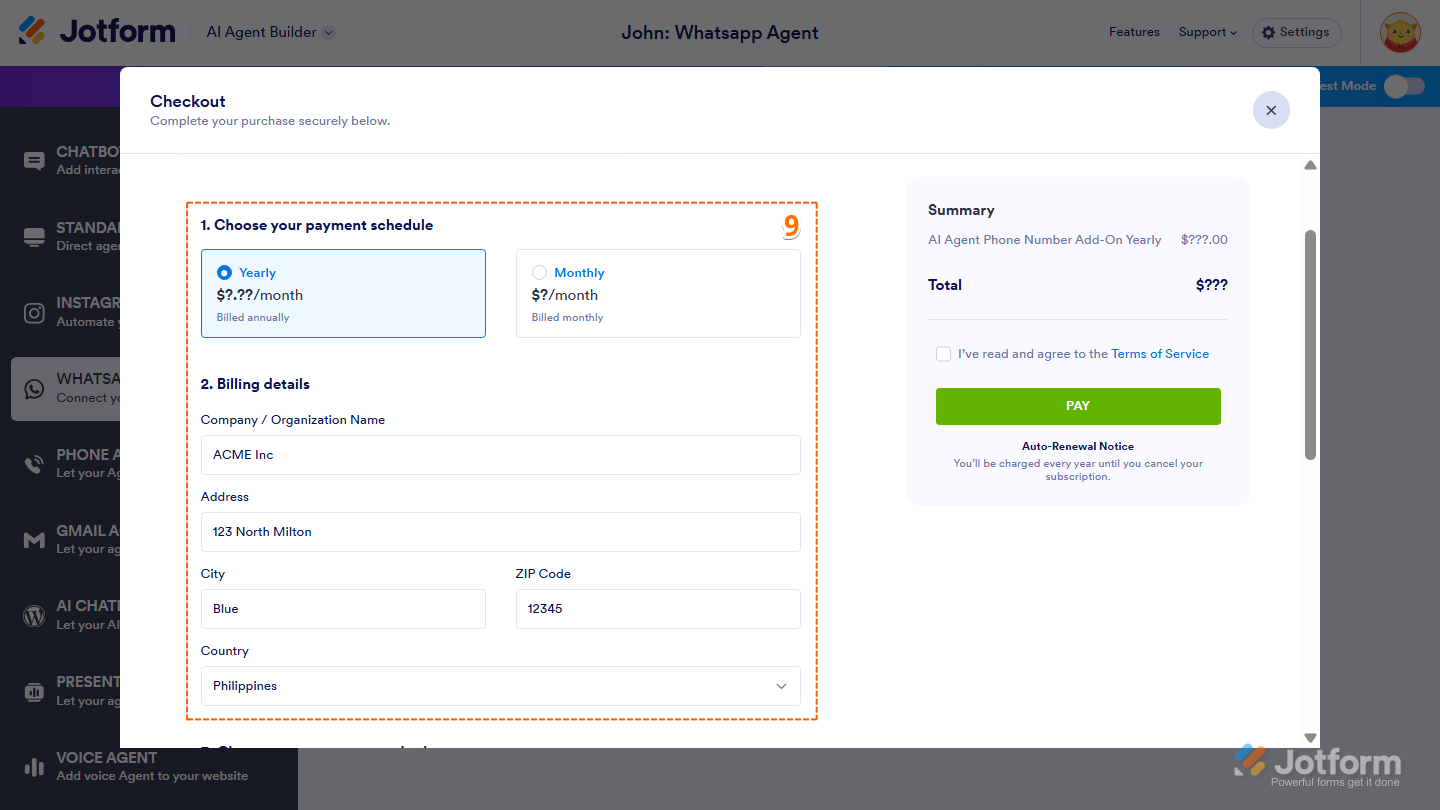
- Next, in the Checkout window, choose either a Monthly or Yearly payment schedule and then enter your Billing details.
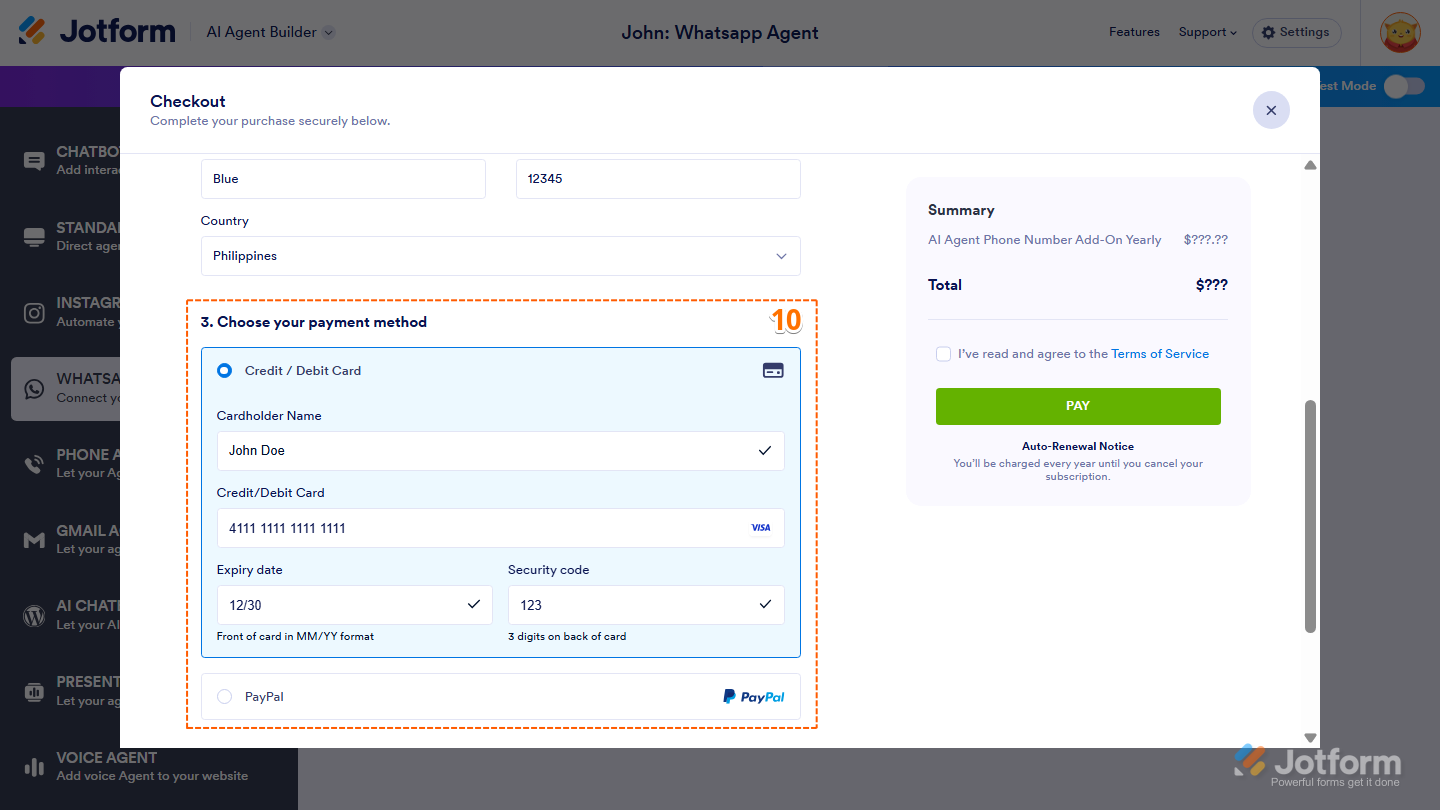
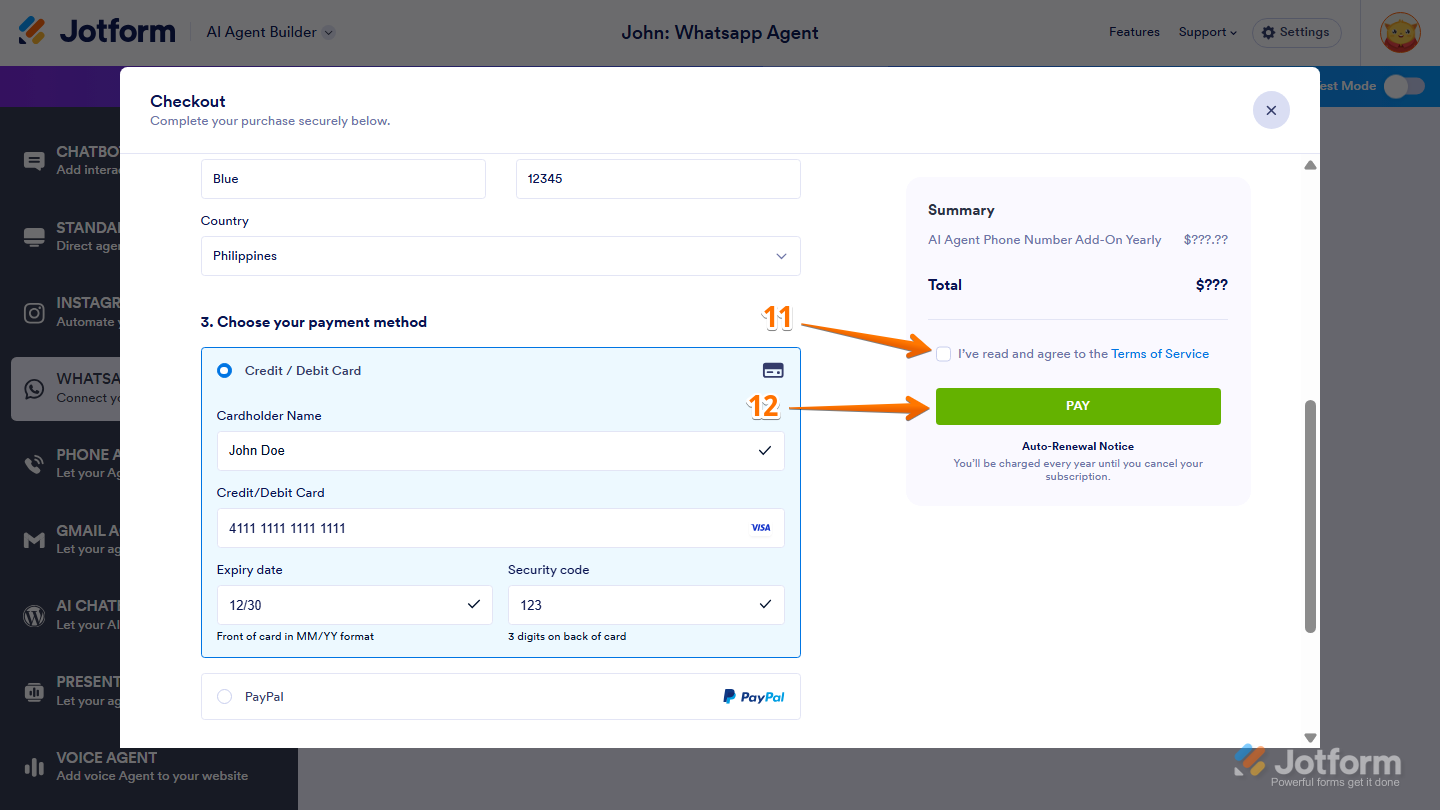
- Then, scroll down and choose either Credit/Debit Card or PayPal as the payment method you want to use.
Note
If you selected Credit/Debit Card, enter your card details in the fields provided. If you selected PayPal, follow the on-screen instructions to complete your payment through PayPal.
- Now, in the Summary section on the right, review the Terms of Service, then tick the checkbox next to it to agree.
- Finally, click on Pay to complete the checkout.
That’s it! Your WhatsApp Agent is now connected and ready to use. You can start sharing your agent with users and managing its WhatsApp experience. If you want to manage your WhatsApp Agent further, check out our How to Manage Your AI WhatsApp Agent to learn more.

Send Comment:
1 Comment:
February 10, 2026
Is WhatsApp chatbot ai agent service still available, because meta new AI service through WhatsApp policy is banning such service