To accept payments in Jotform using Authorize.Net as your payment gateway, you’ll need to get the required credentials from your account to set up the payment integration in your form. These credentials allow your payment gateway and forms to communicate securely, so transactions can be processed safely online. Whether you’re setting up payments for the first time, switching from another gateway, or managing integrations, knowing where to get these details helps you keep your payment setup running smoothly.
Getting Your API Login ID and Transaction Key
The API Login ID and Transaction Key are essential credentials that let your forms communicate securely with Authorize.Net. The API Login ID identifies your account, while the Transaction Key adds an extra layer of authentication for each transaction. Finding them is quick and easy. Here’s how to do it:
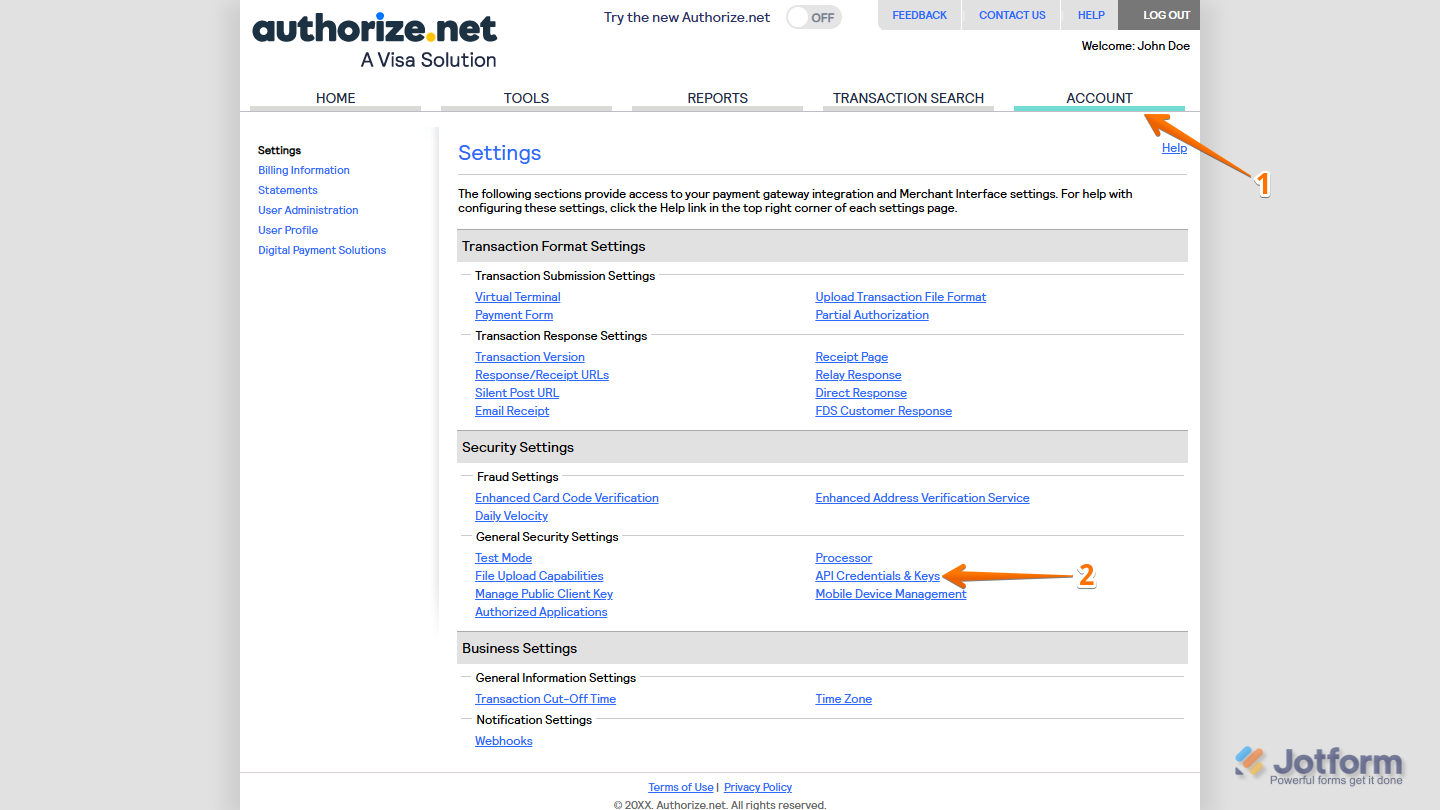
- Log in to Authorize.Net and, in the navigation bar at the top of your Merchant Interface, click on Account.
- Now, in the Settings section, in General Security Settings, click on API Credentials & Keys.
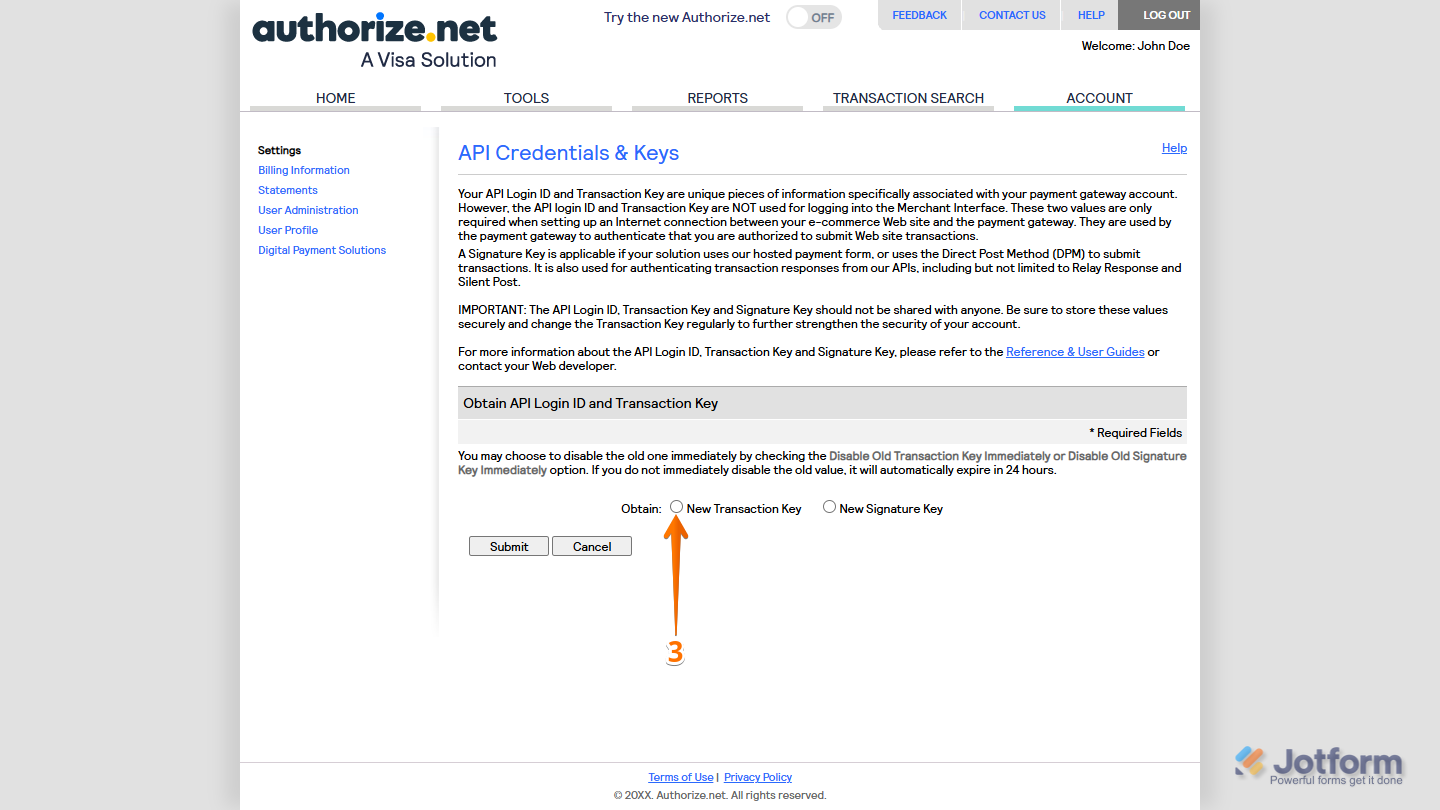
- Then, in the API Credentials & Keys section, in Obtain API Login ID and Transaction Key, select the New Transaction Key option.
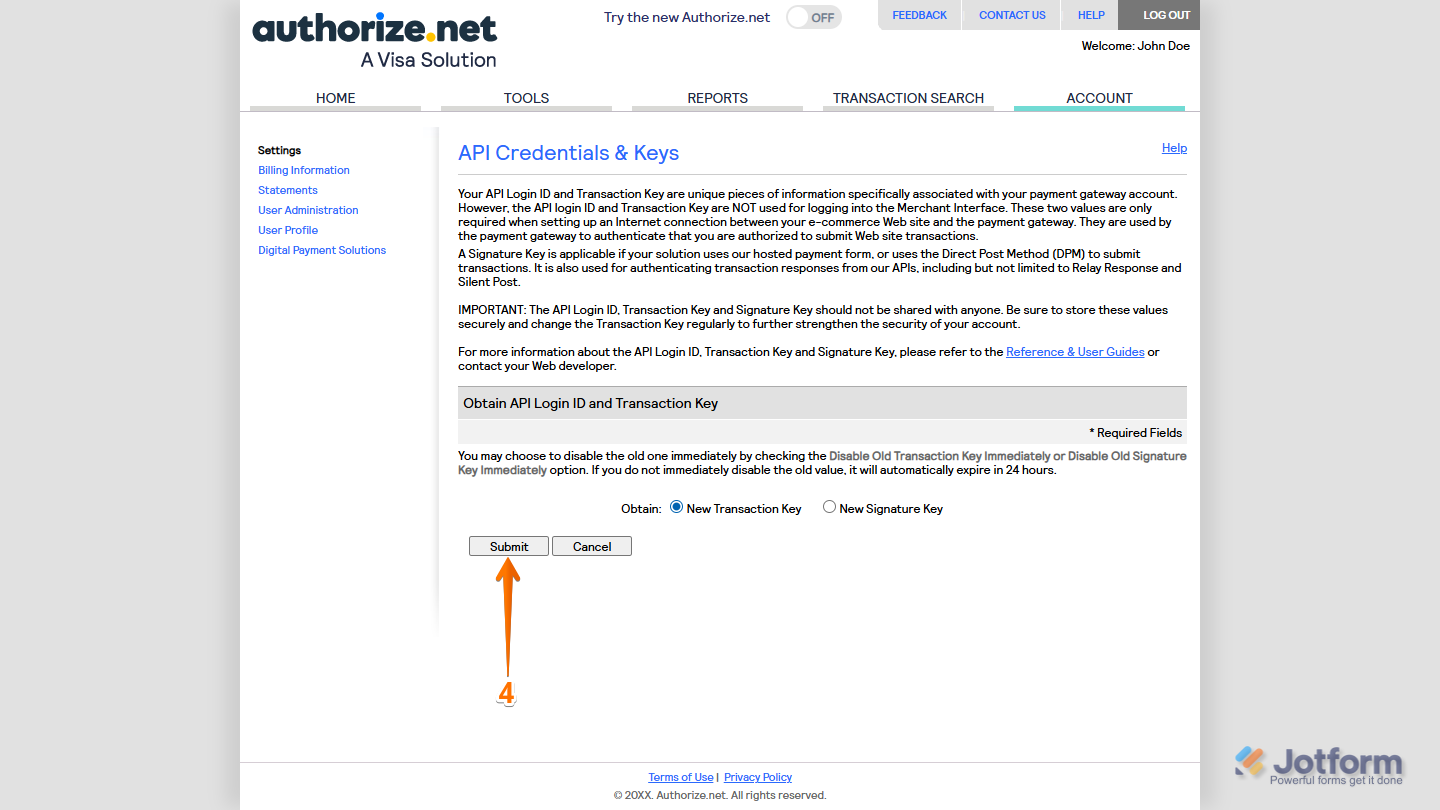
- Next, click on Submit.
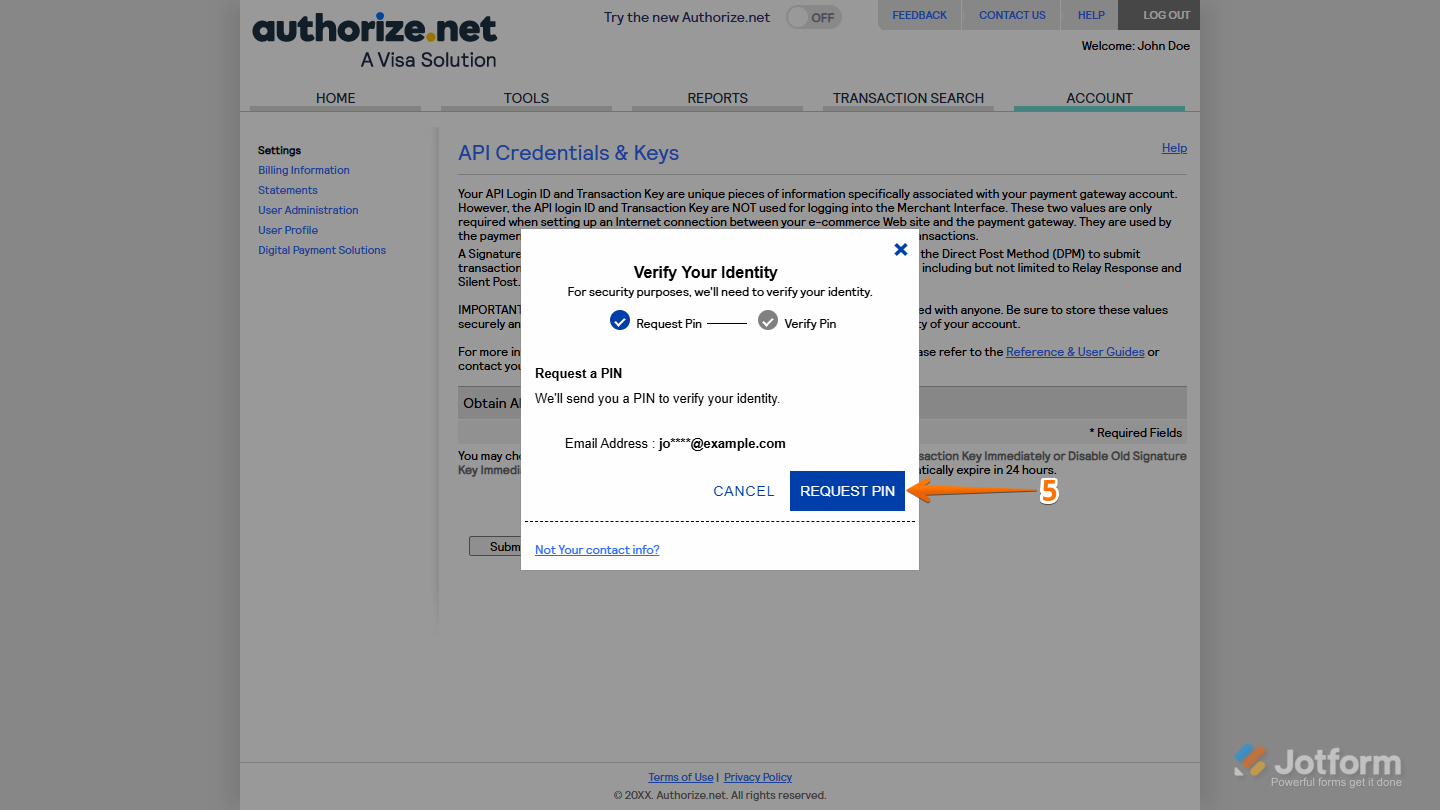
- In the Verify Your Identity window that pops up, click on Request PIN.
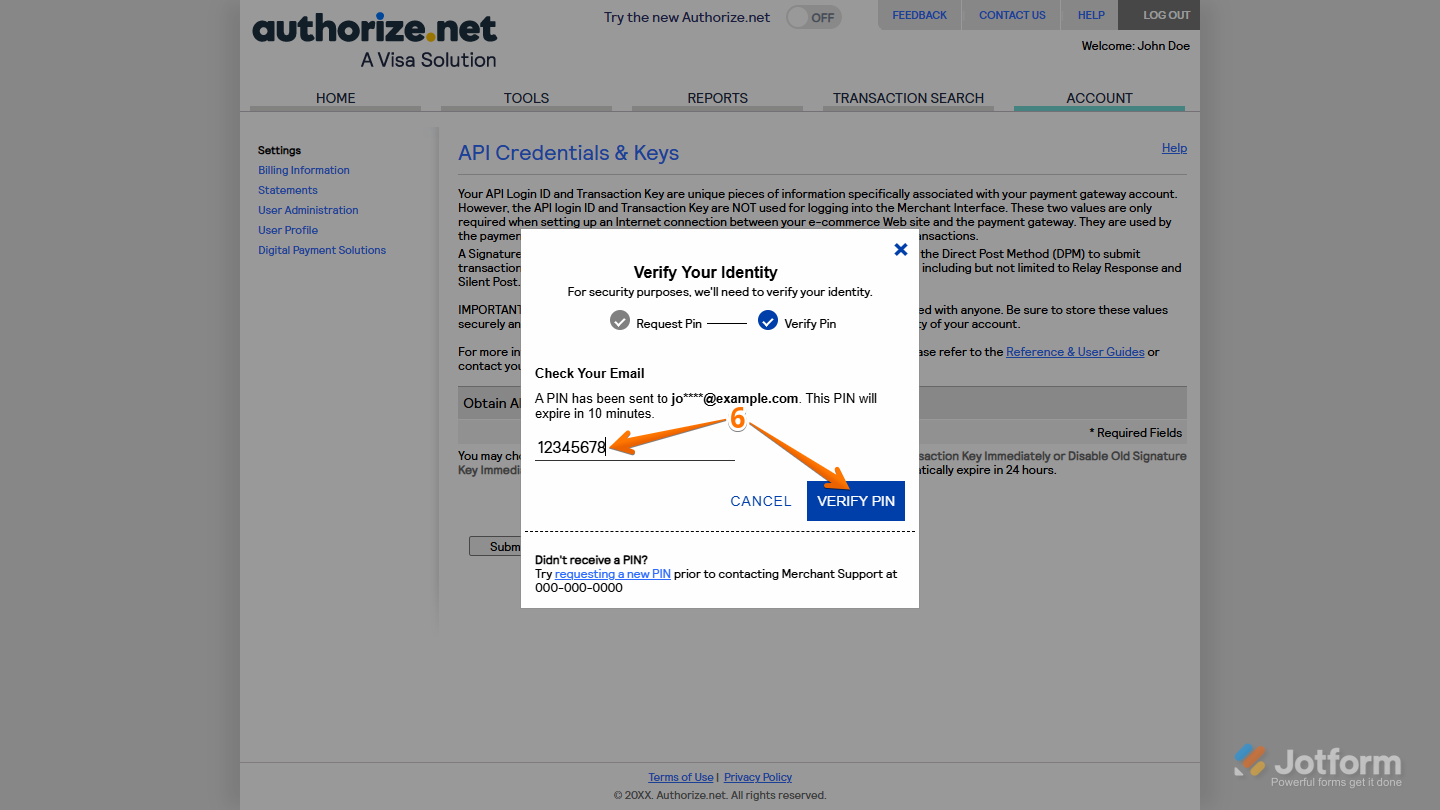
- Now, enter the PIN sent to your Authorize.Net Account Email Address, then click on Verify PIN.
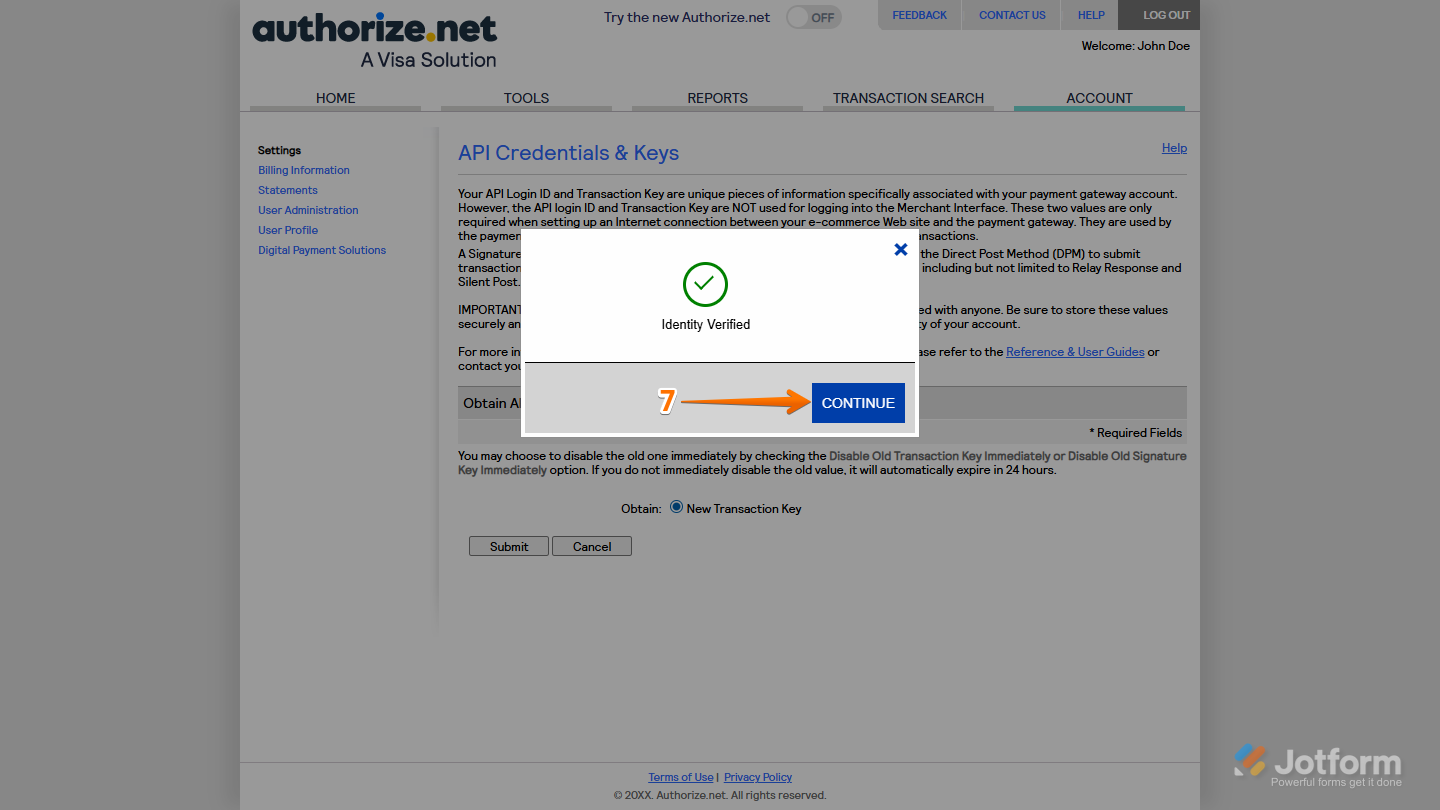
- Next, click on Continue.
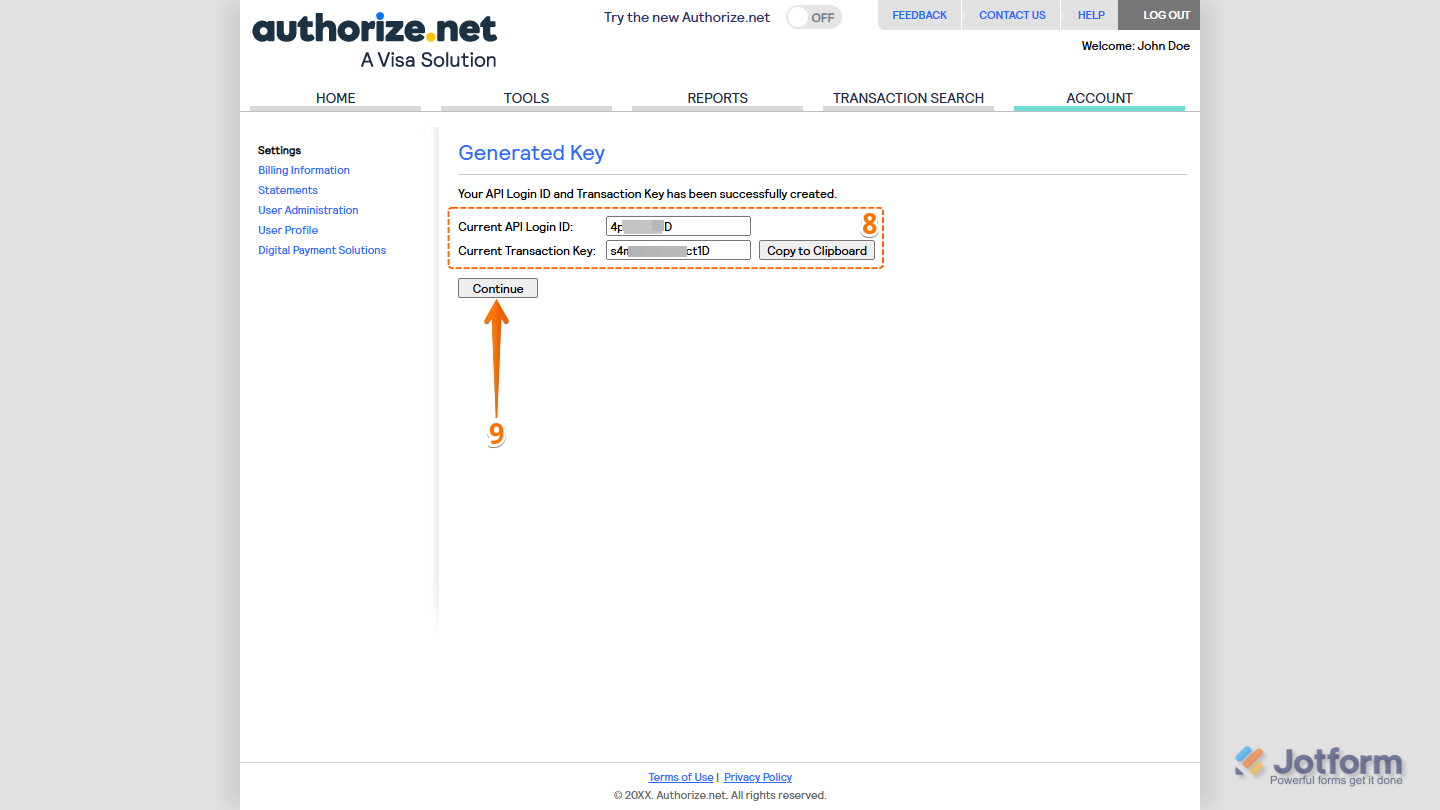
- Now, in the Generated Key section, copy your current API Login ID and Transaction Key.
- Once you’re done, click on Continue.
That’s it! You’re now ready to use your API Login ID and Transaction Key to connect Authorize.Net to your form.
Note
Your Transaction Key is shown only once, so keep it somewhere safe and easy to find. If you ever need to replace it, you can generate a new one.
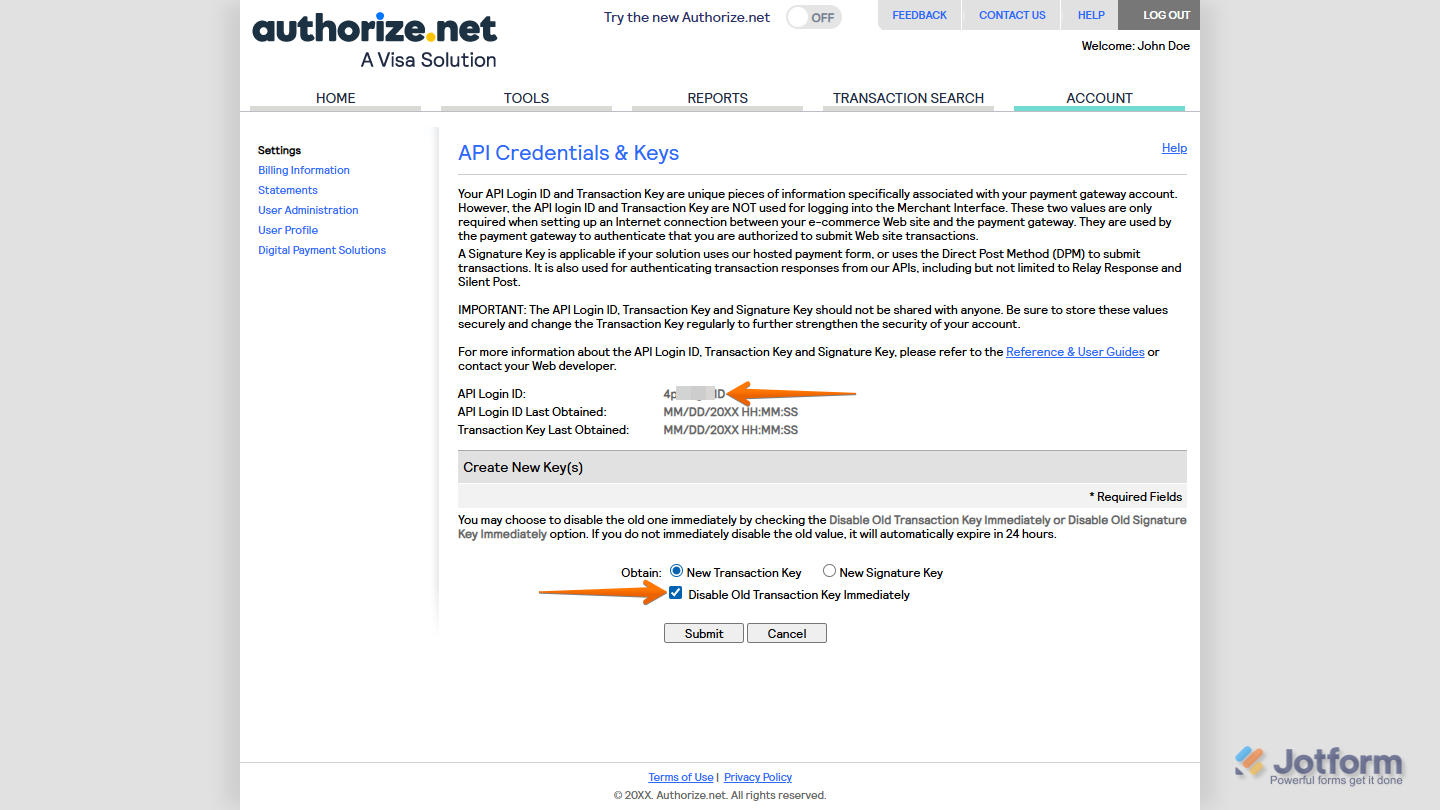
If you’ve already generated a Transaction Key for your account before, you’ll see and be able to copy your API Login ID in the API Credentials & Keys section right away. You can also choose to let your previous key remain active for 24 hours after creating a new one, or put a check in the box next to the Disable Old Transaction Key Immediately option in the Create New Key(s) section to deactivate it as soon as the new key is generated.
Getting Your Client Key
Creating your Client Key, which helps your form connect safely to Authorize.Net, is simple, too. You’ll just need to follow these simple steps:
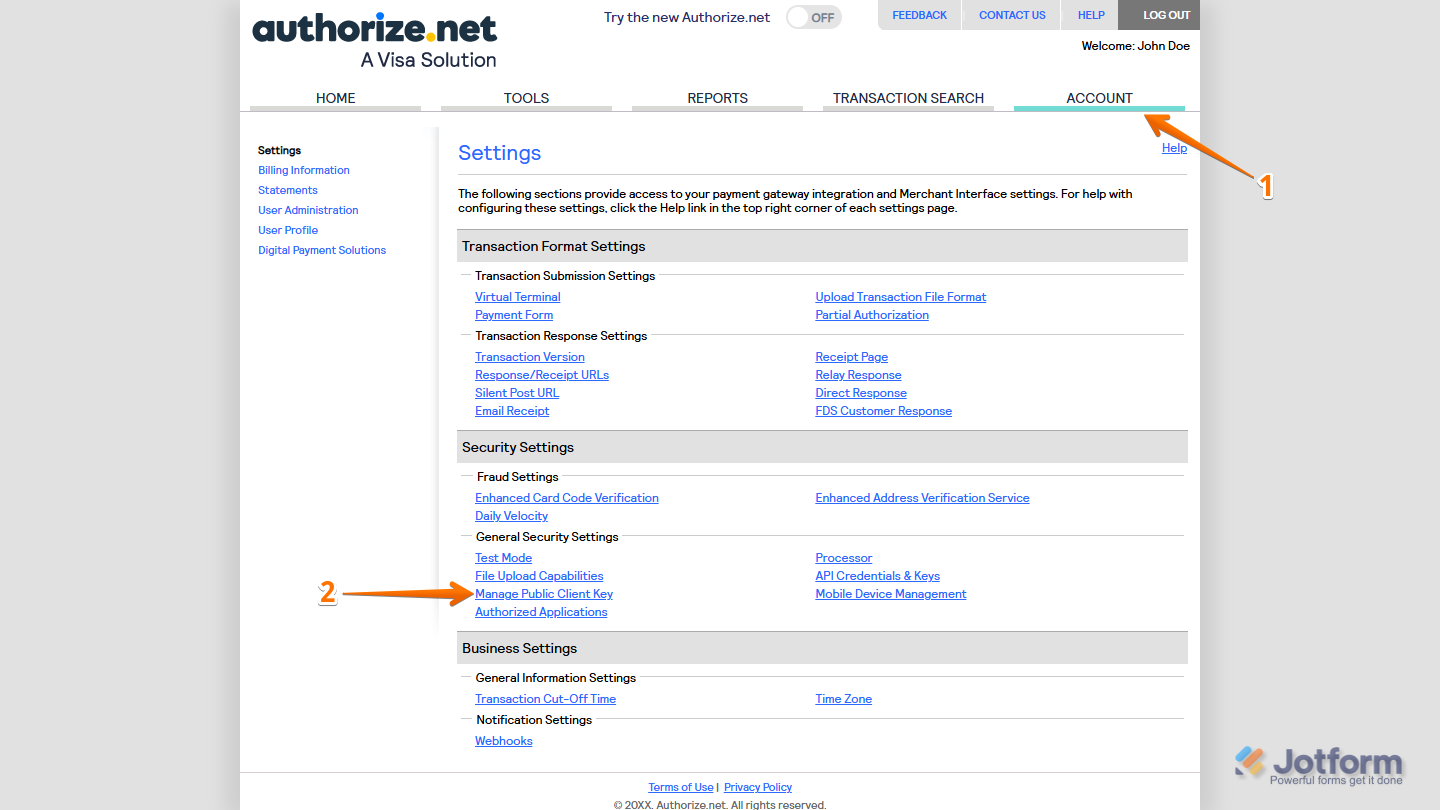
- Log in to Authorize.Net and, in the navigation bar at the top of your Merchant Interface, click on Account.
- Now, in the Settings section, in General Security Settings, click on Manage Public Client Key.
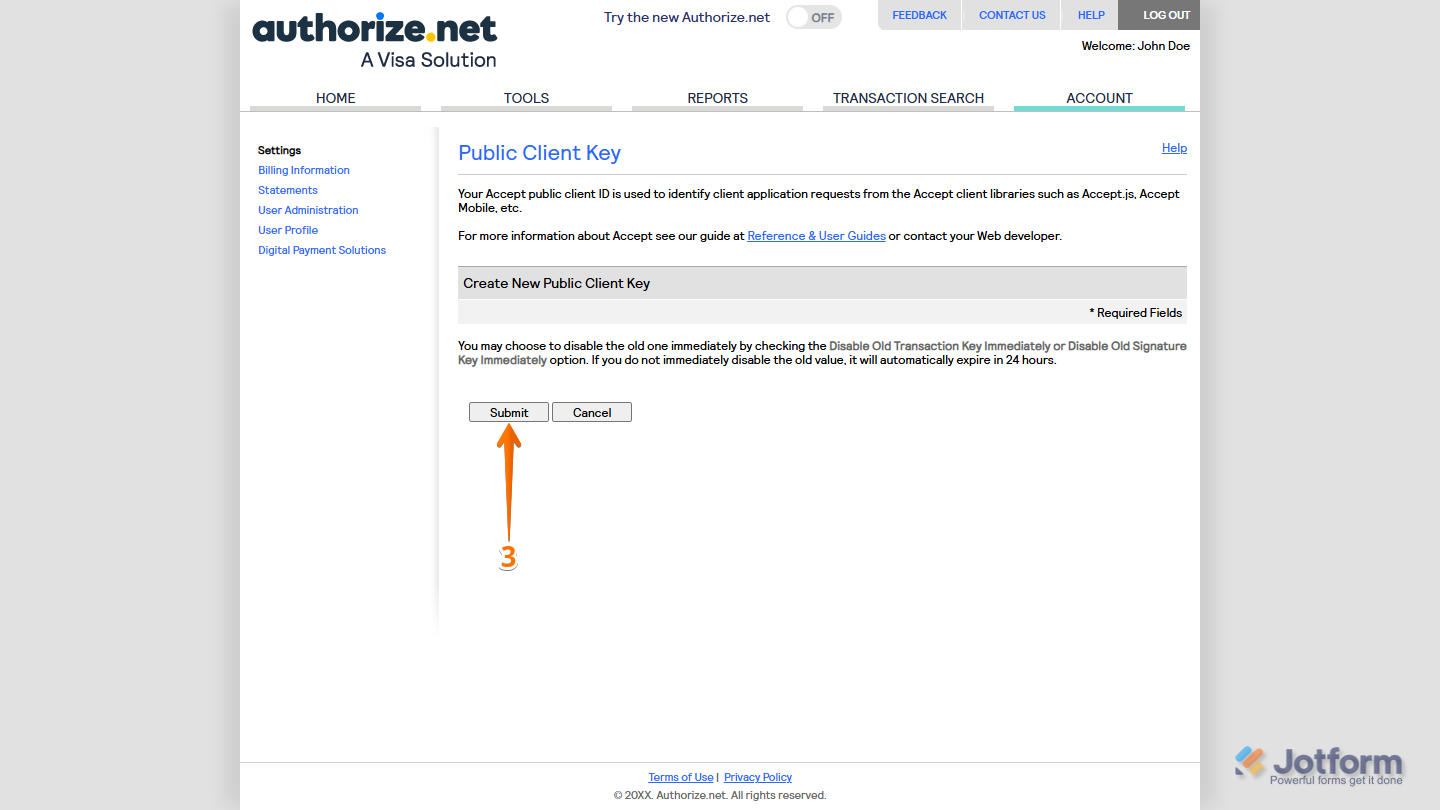
- Then, in the Public Client Key section, in Create New Public Client Key, click on Submit.
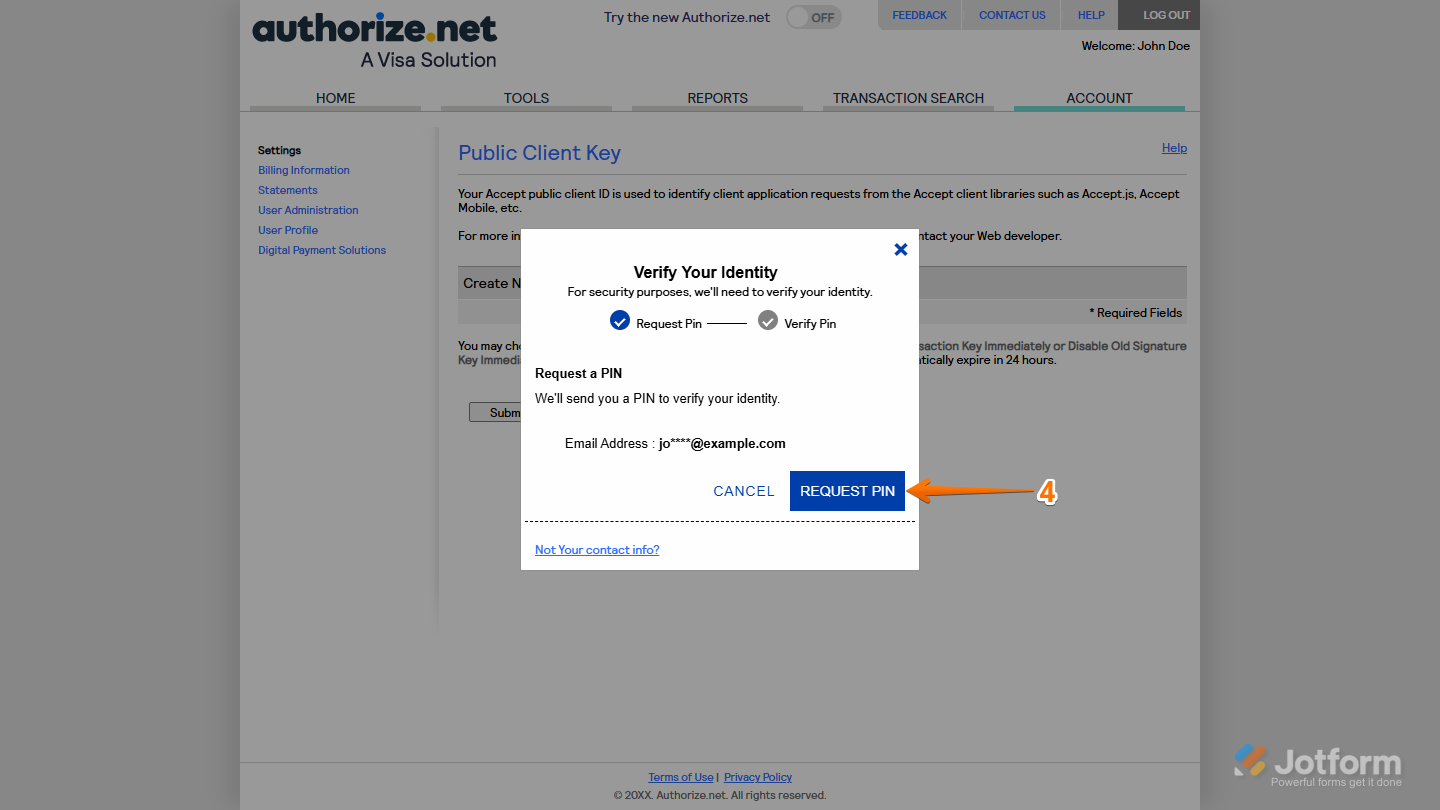
- In the Verify Your Identity window that pops up, click on Request PIN.
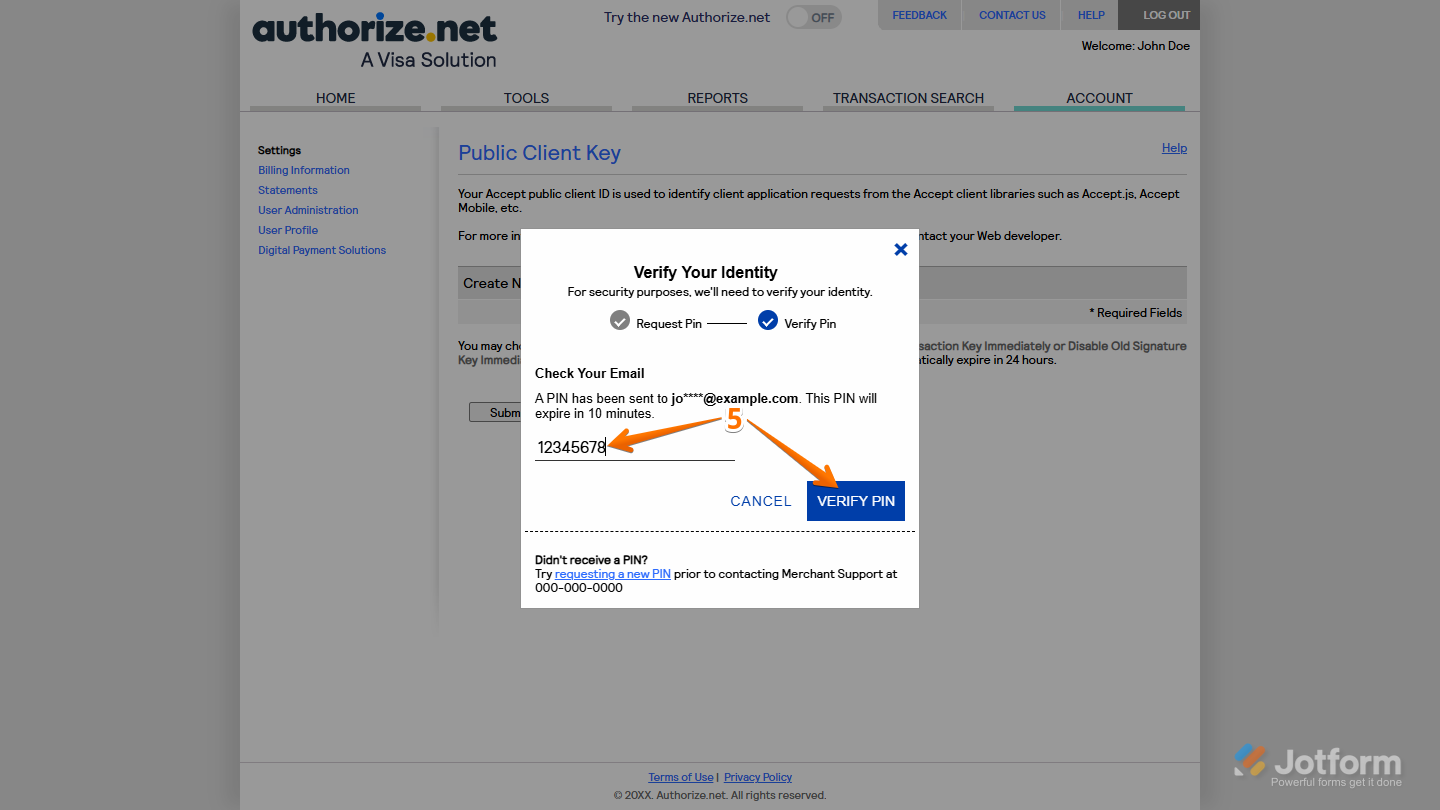
- Now, enter the PIN sent to your Authorize.Net Account Email Address, then click on Verify PIN.
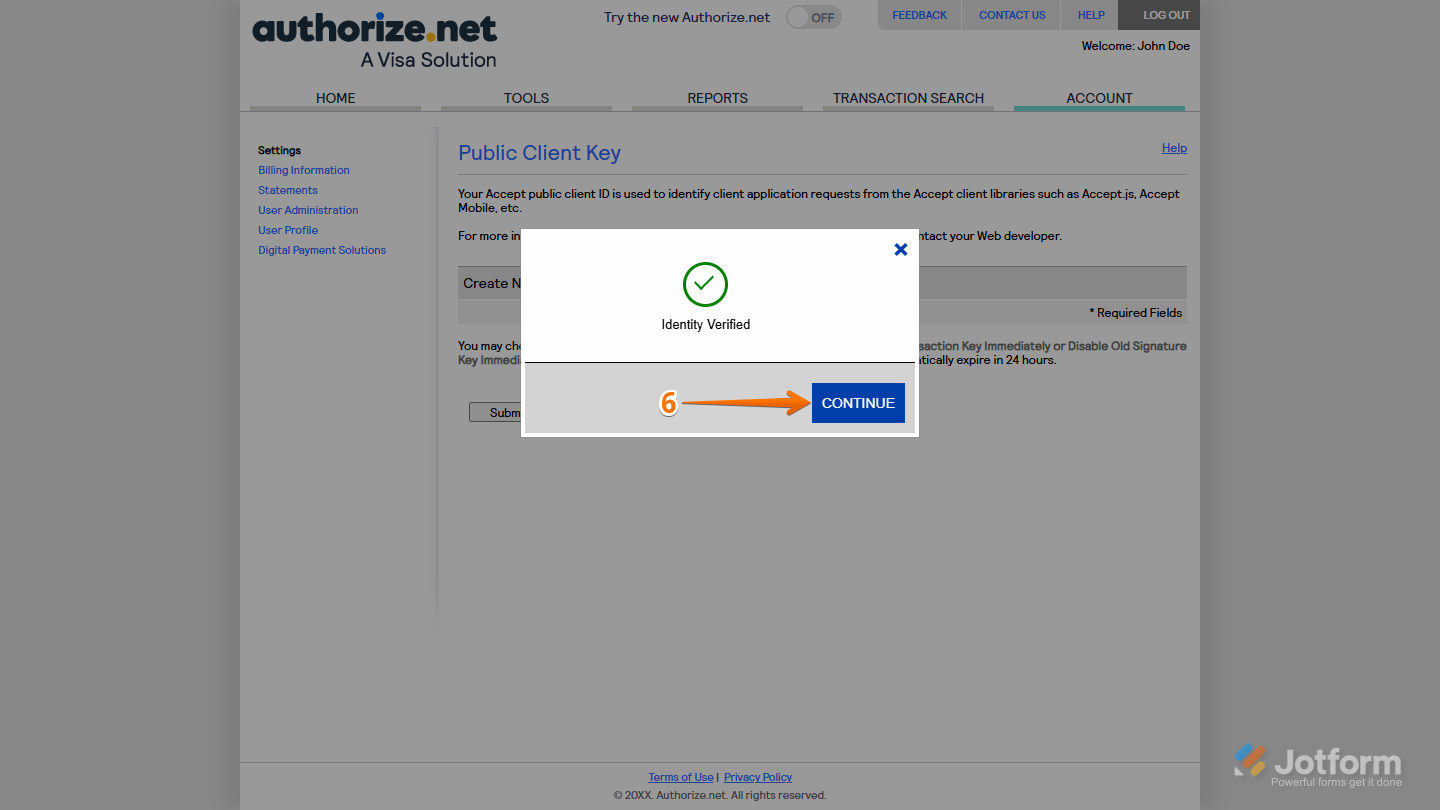
- Next, click on Continue.
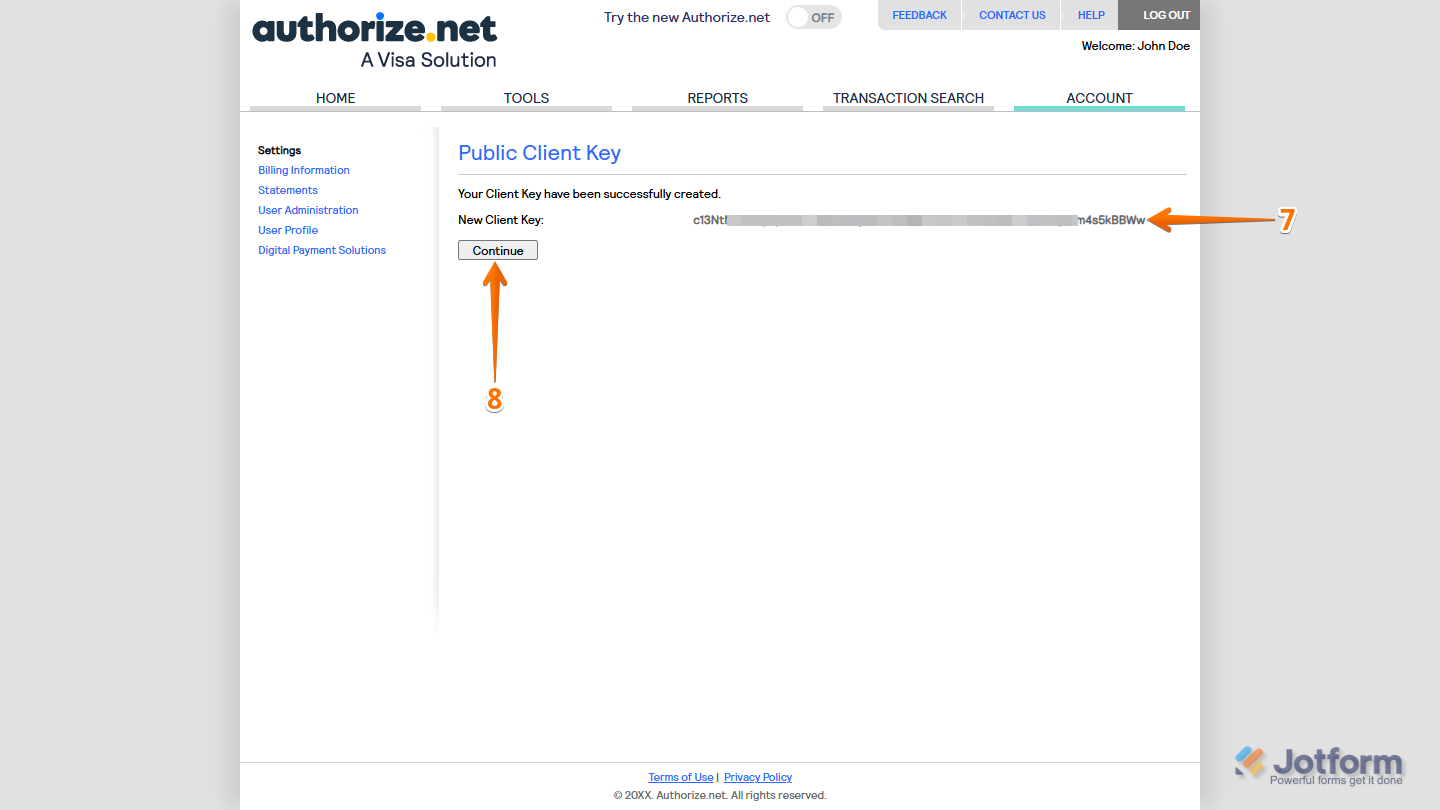
- Now, in the Public Client Key section, copy your new Client Key.
- Once you’re done, click on Continue.
That’s it! Now you can use your Client Key to connect your form to Authorize.Net securely.
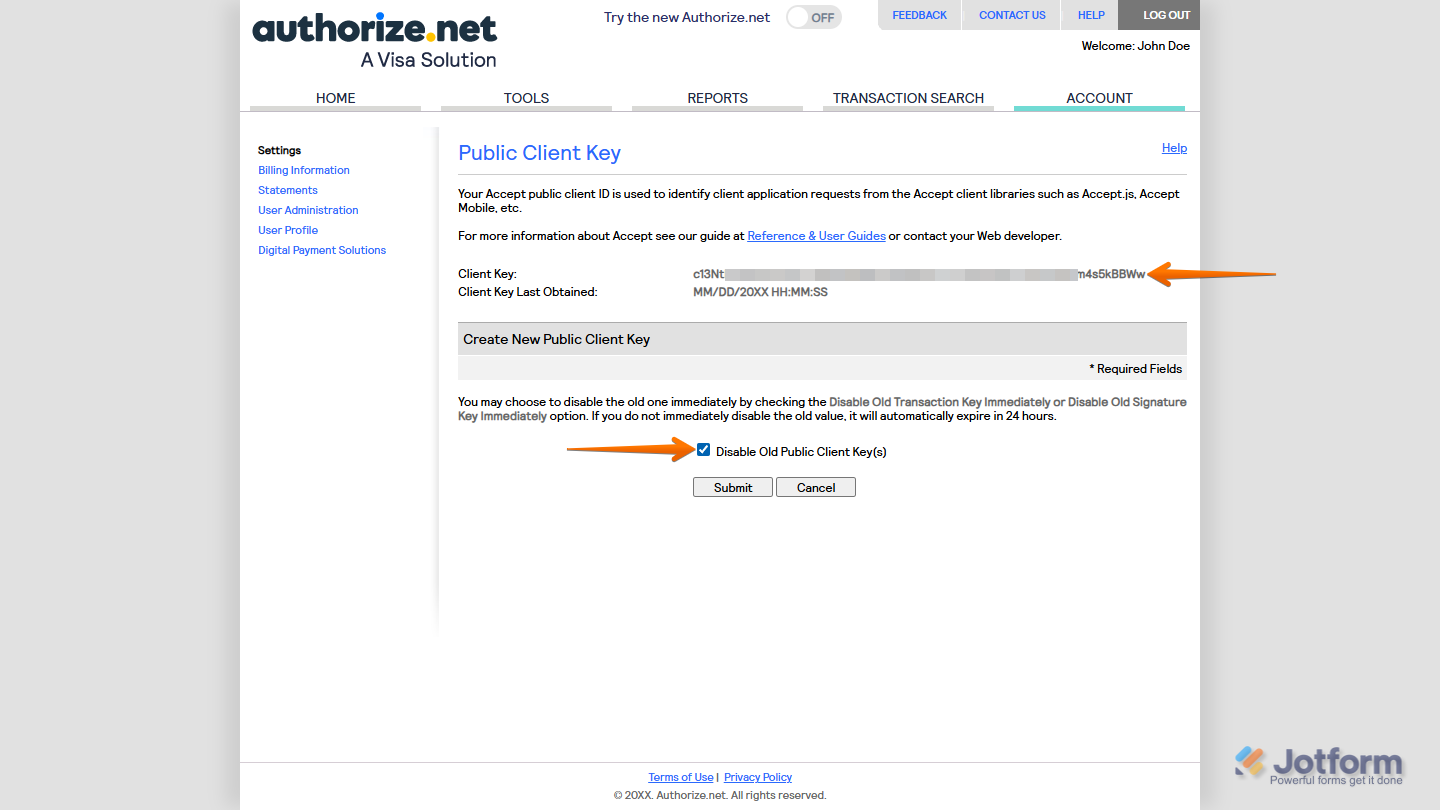
If you’ve already generated a Client Key for your account before, you’ll see and be able to copy it in the Public Client Key section right away. You can also let your previous key remain active for 24 hours after creating a new one, or put a check in the box next to the Disable Old Public Client Key(s) option to deactivate it as soon as the new key is generated.

Send Comment:
1 Comment:
April 18, 2024
I'm getting this message:
Error during transaction
The merchant login ID or password is invalid or the account is inactive.
Go Back and Fix
How do I fix this?