With Workflows, it’s important to keep everyone informed and ensure they receive timely reminders about upcoming tasks, deadlines, or scheduled events. Scheduled reminder emails help you do just that by automatically notifying the right people at the right time, so everyone can stay on track and avoid missing important updates. Set up your workflow to send reminders according to your preferred schedule and keep your processes running smoothly.
Adding and Setting Up the Scheduled Email Element
The Scheduled Email element lets you configure reminder emails within your workflow and control when they are sent. Setting it up takes no time at all—here’s how:
- In Workflow Builder, under the Basic tab of the Workflow Elements menu on the left, drag and drop the Scheduled Email element to the Add Element Here placeholder on your workflow connections.
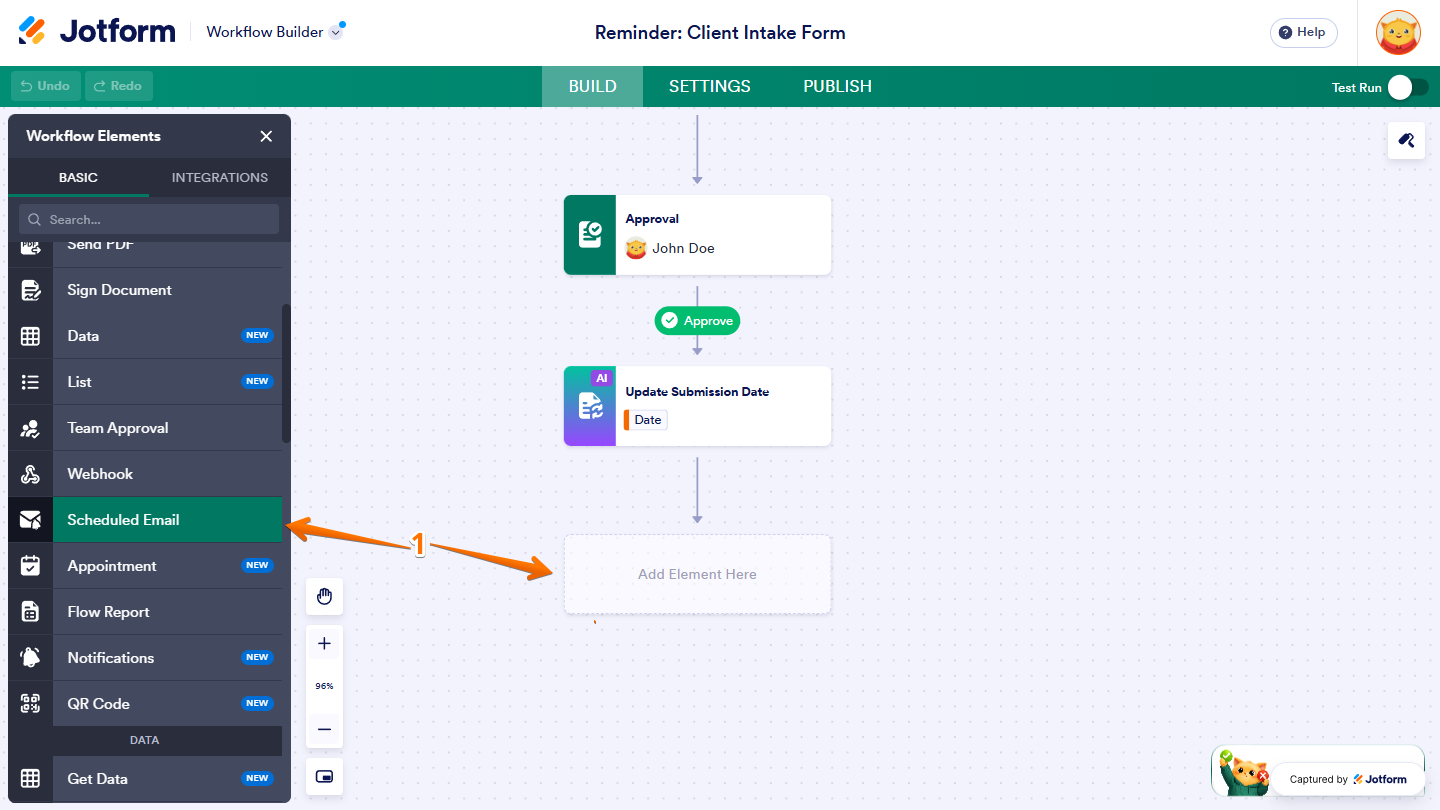
- Then, click on the added Scheduled Email element in your workflow.
- Next, click on the Gear icon to open the Settings menu.
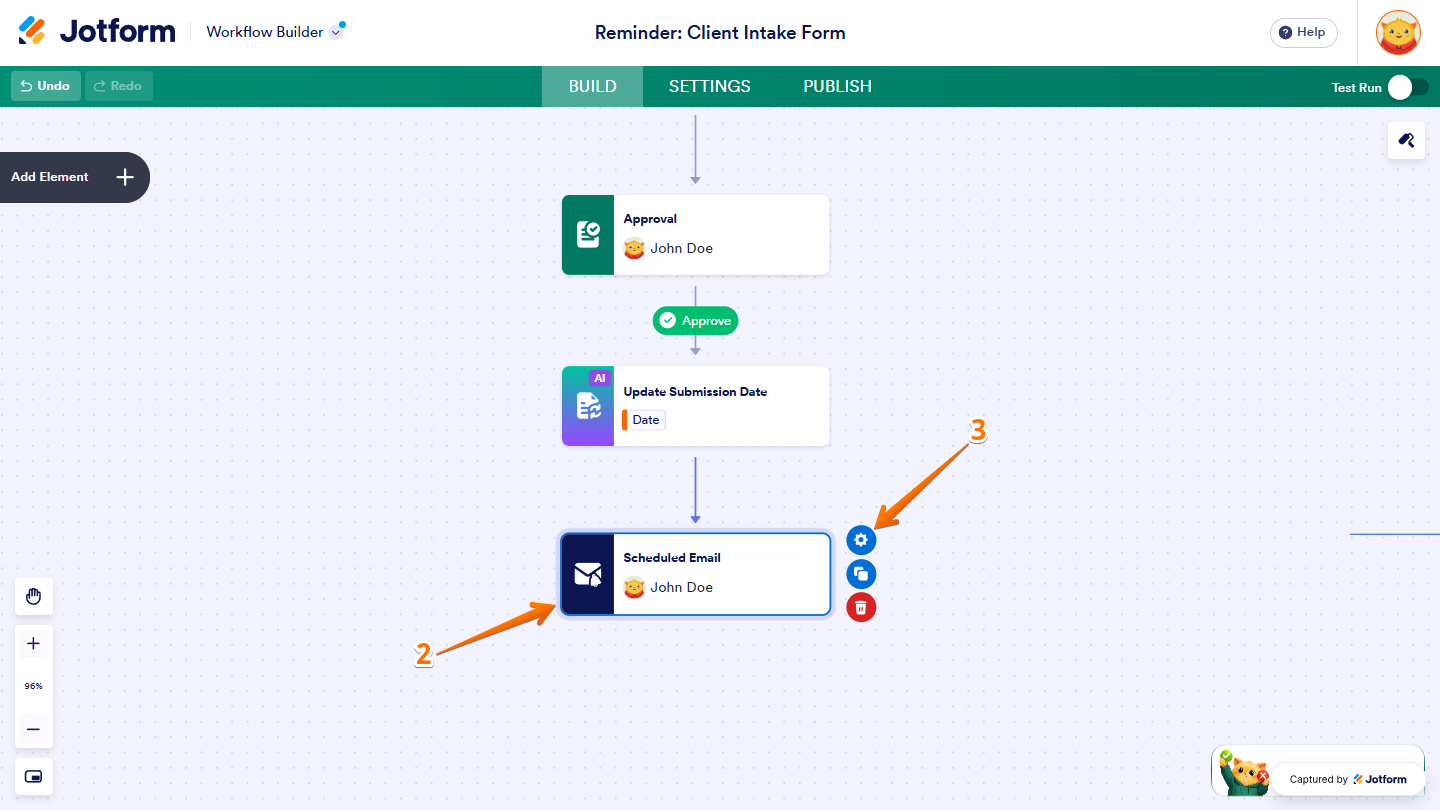
- Now, in the Scheduled Email menu on the right side of the page, in the Recipients section, add the email addresses of the intended recipients.
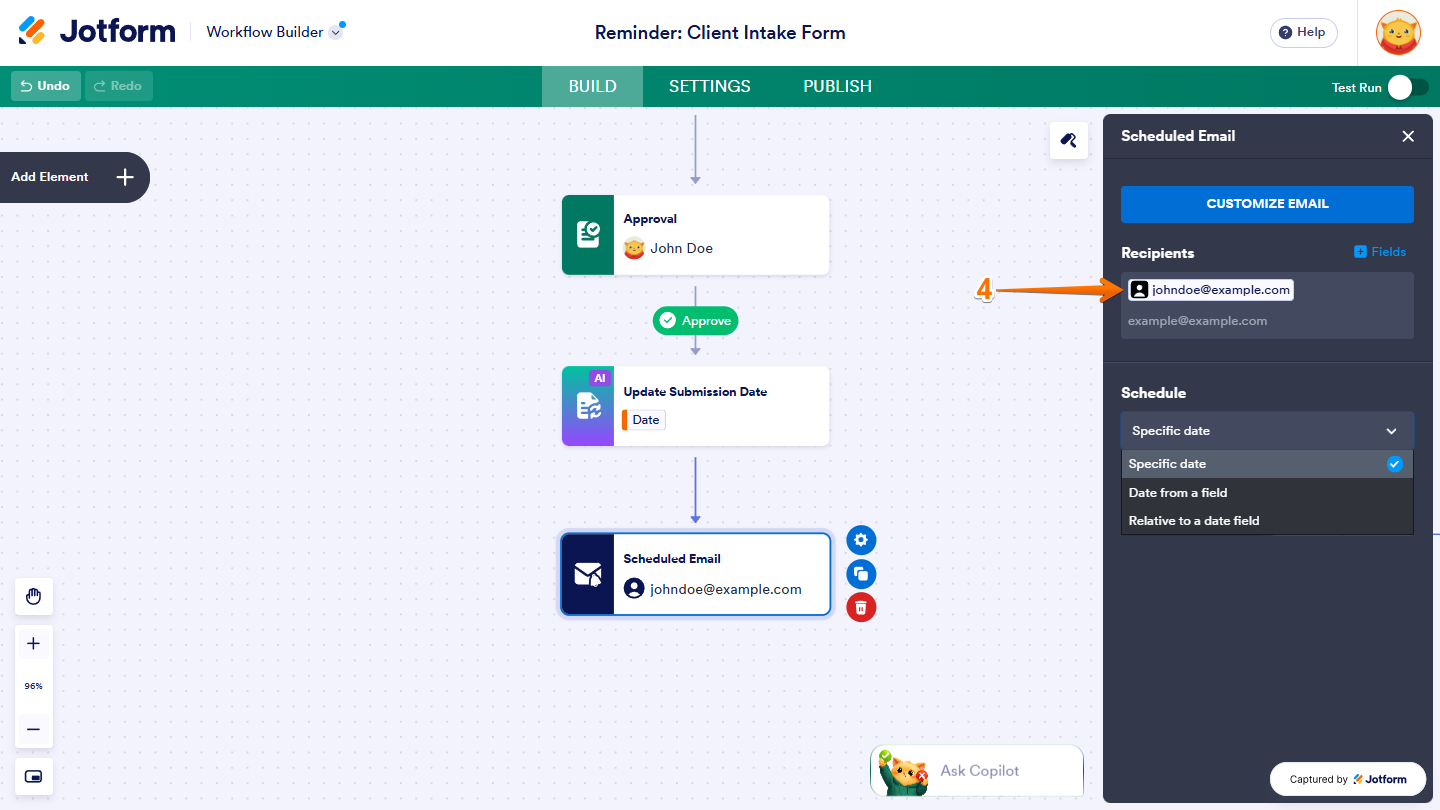
- Or, click on Fields on the right side of the Recipients section, then in the Dropdown menu that opens, select the Email field to assign recipients dynamically based on the email address entered in your form.
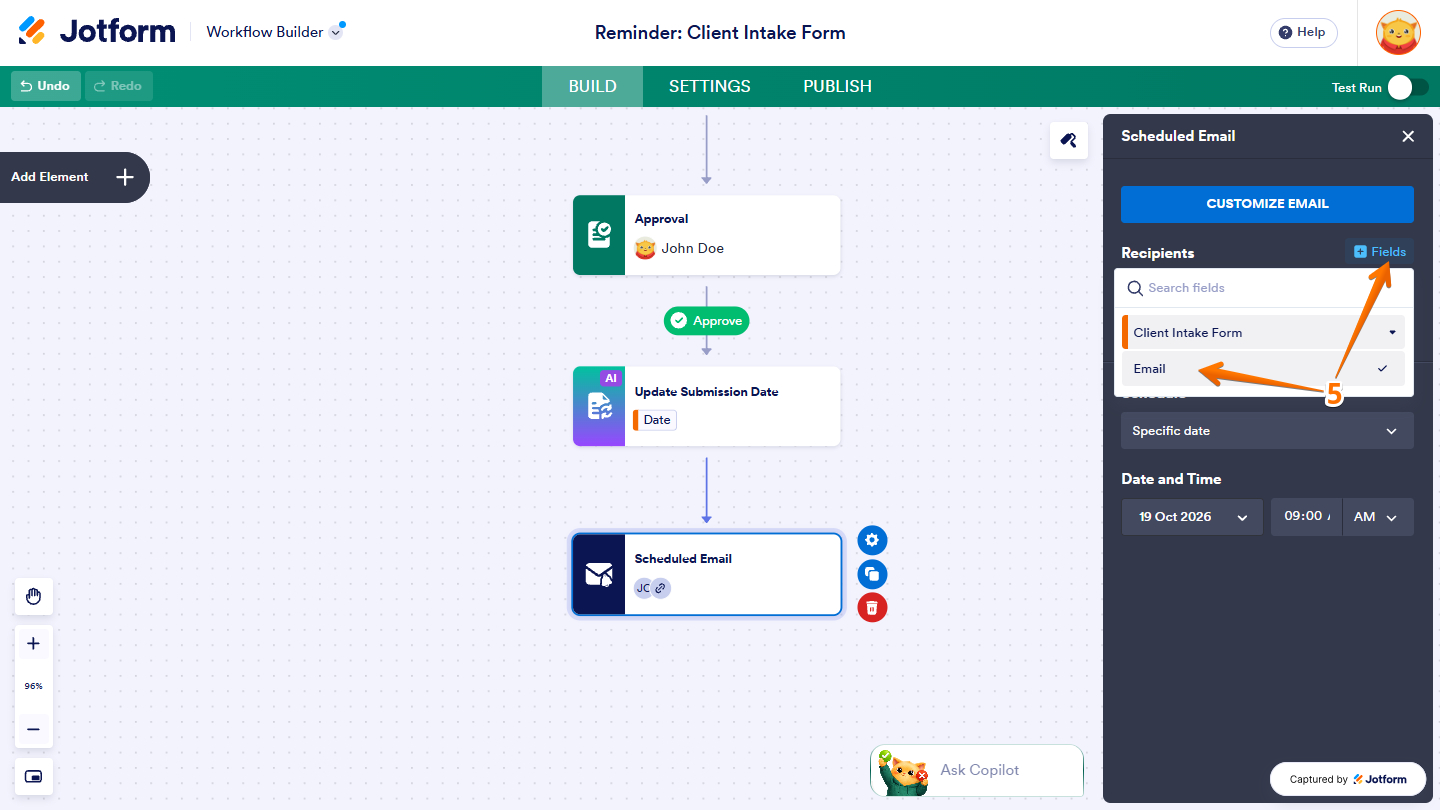
- Then, click on the Downward Arrow icon on the right side of the Schedule section, then in the Dropdown menu that opens, select an option: Specific Date, Date From a Field, or Relative to a Date Field.
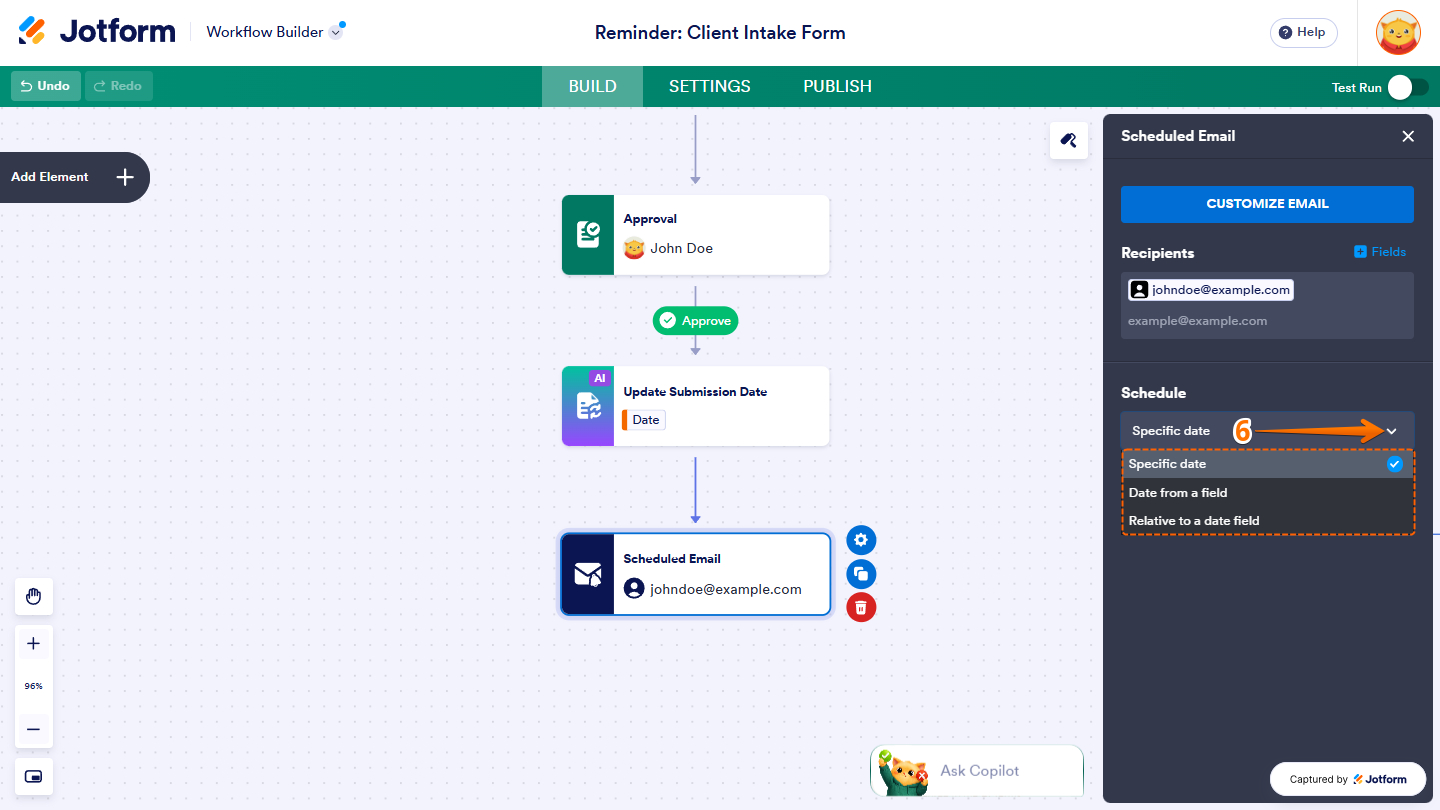
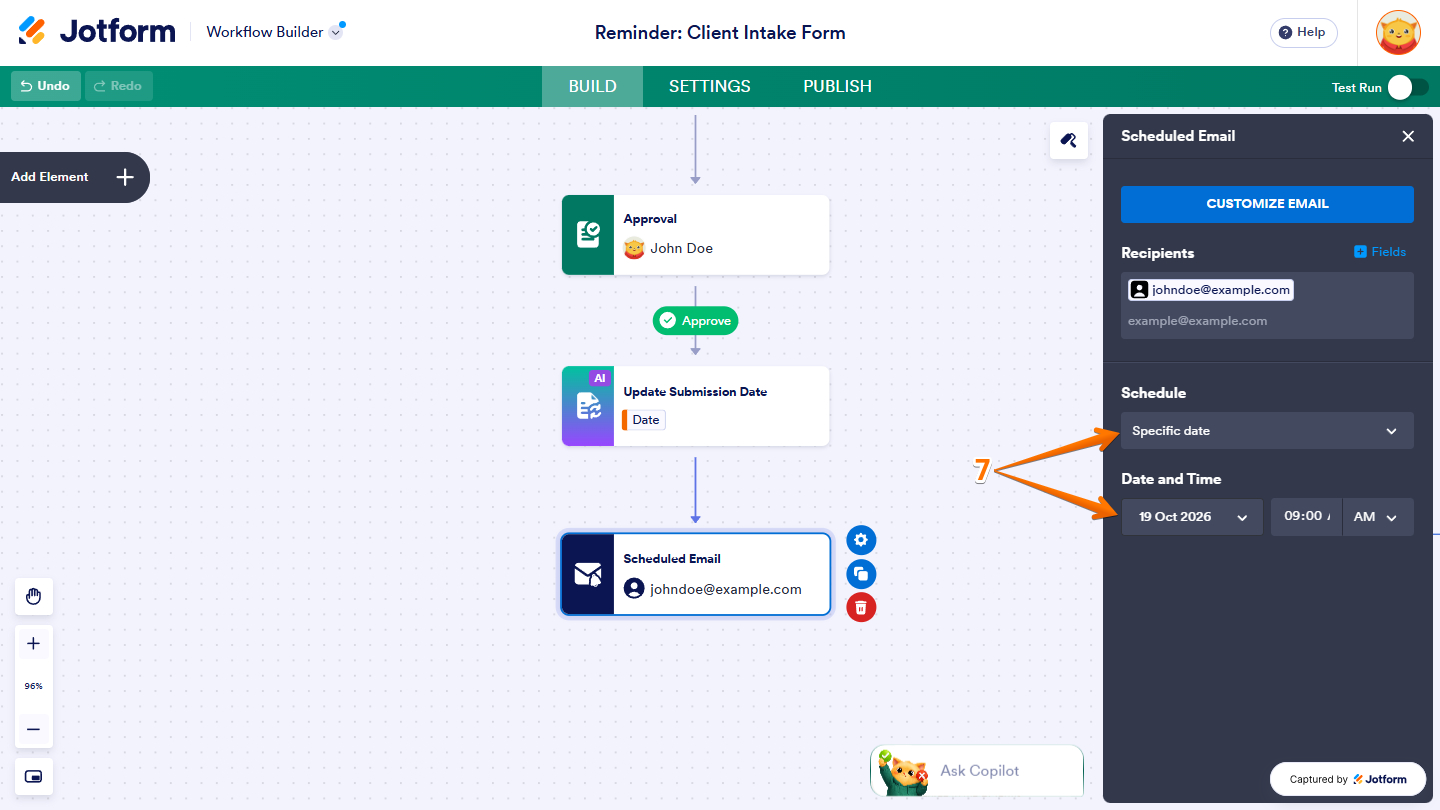
- If you select Specific Date, set the exact date when the email should be sent in the Date and Time field.
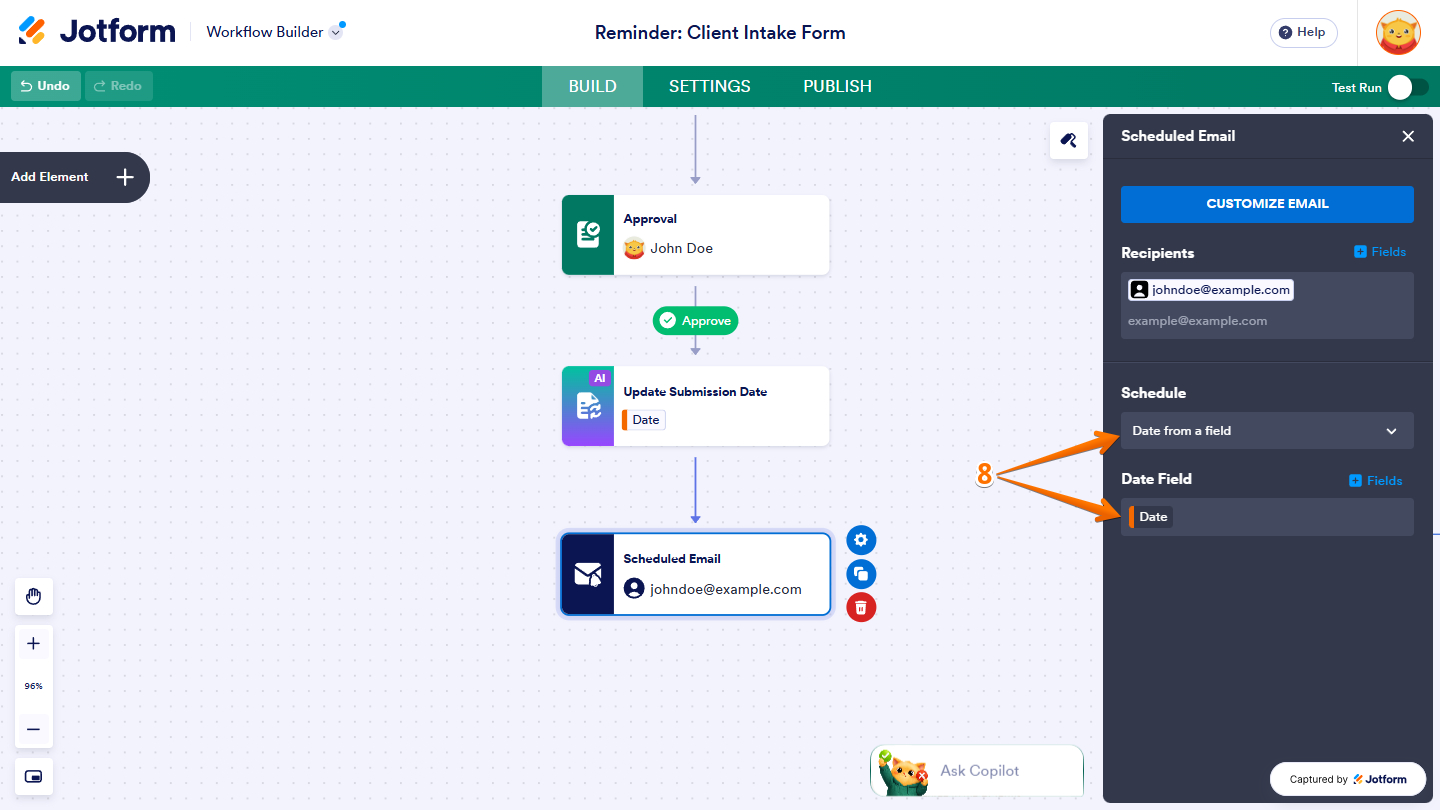
- Or, if you select Date From a Field, select a date field from the Date Field dropdown menu.
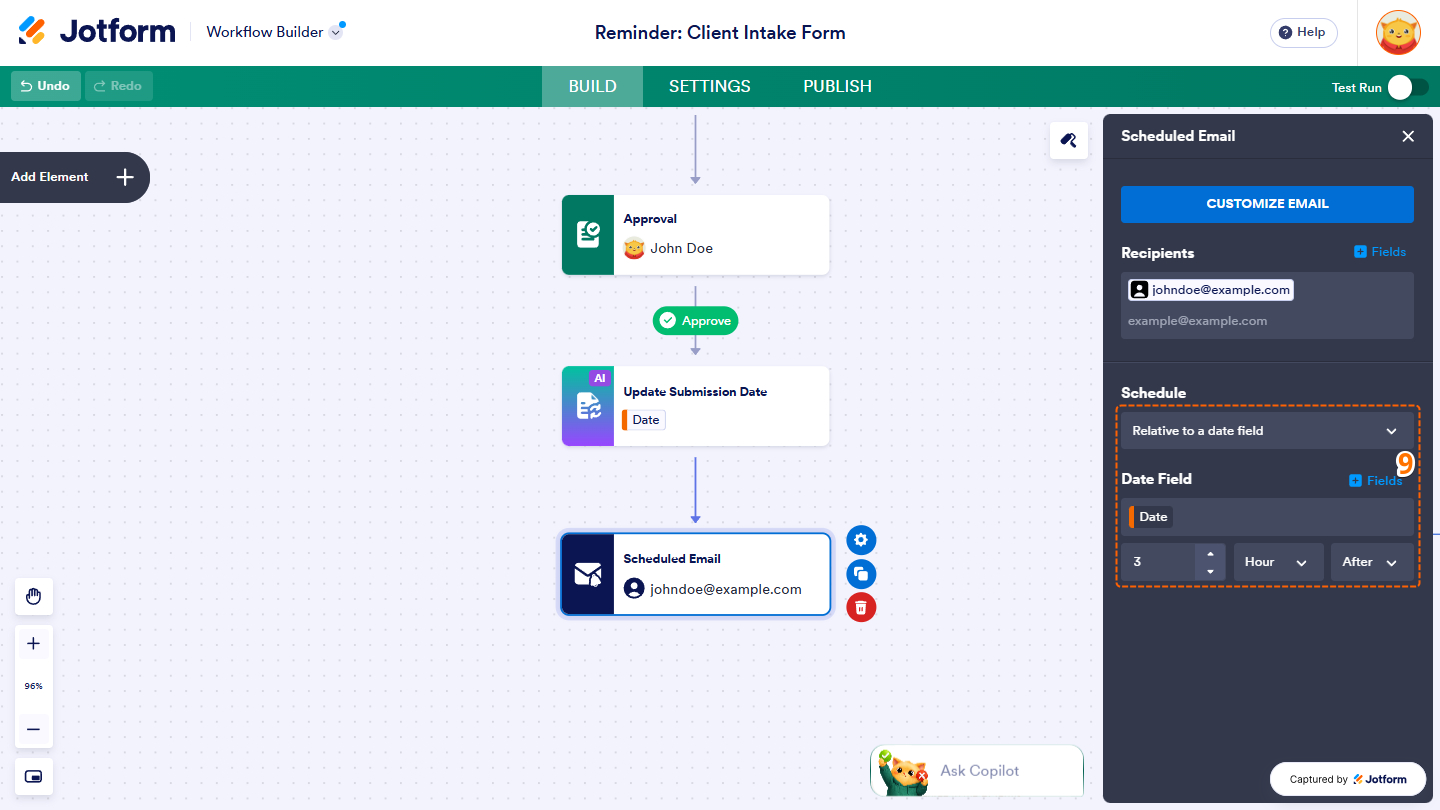
- Or, if you select Relative to a Date Field, select a date field from the Date Field dropdown menu, then specify the number of hours, days, or weeks, and set whether the email should be sent before or after the given date.
That’s it! You’ve now configured the basic settings of your Scheduled Email element. You can continue customizing the email content, recipients, and other options to ensure your reminders reach the right people at the right time.
Customizing the Scheduled Email
While the default email works for most situations, you can customize it to suit your workflow’s needs better. Personalize the subject line and message body, include relevant details, add attachments, or adjust the content to make your reminders clearer and more useful to recipients. Here’s how to get going:
- In the Scheduled Email menu on the right side of the page, click on Customize Email.
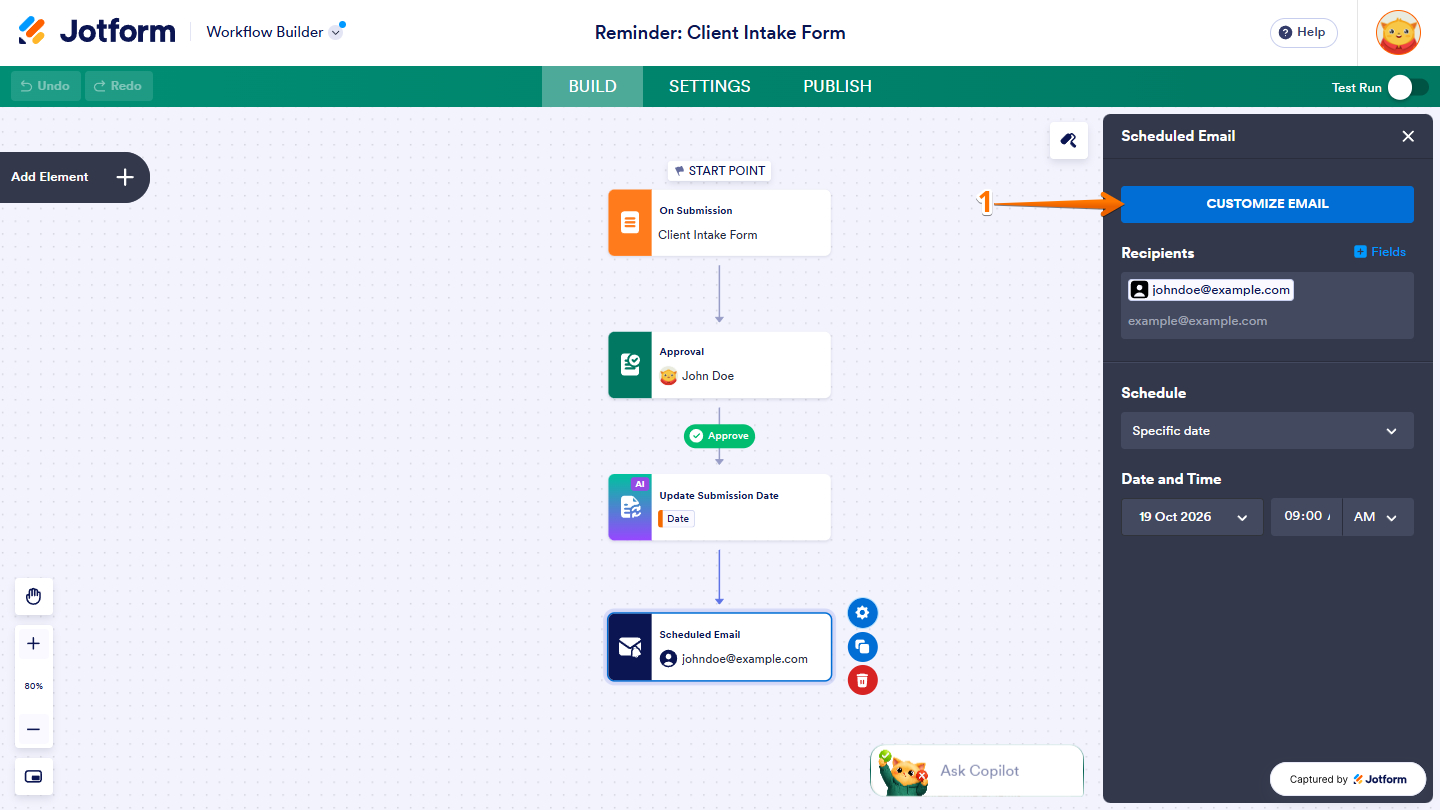
- Then, in the Scheduled Email window that opens, click on the To field and enter the recipient’s email address.
- Next, click on Cc and Bcc to send someone a carbon copy or blind carbon copy of the Scheduled Email.
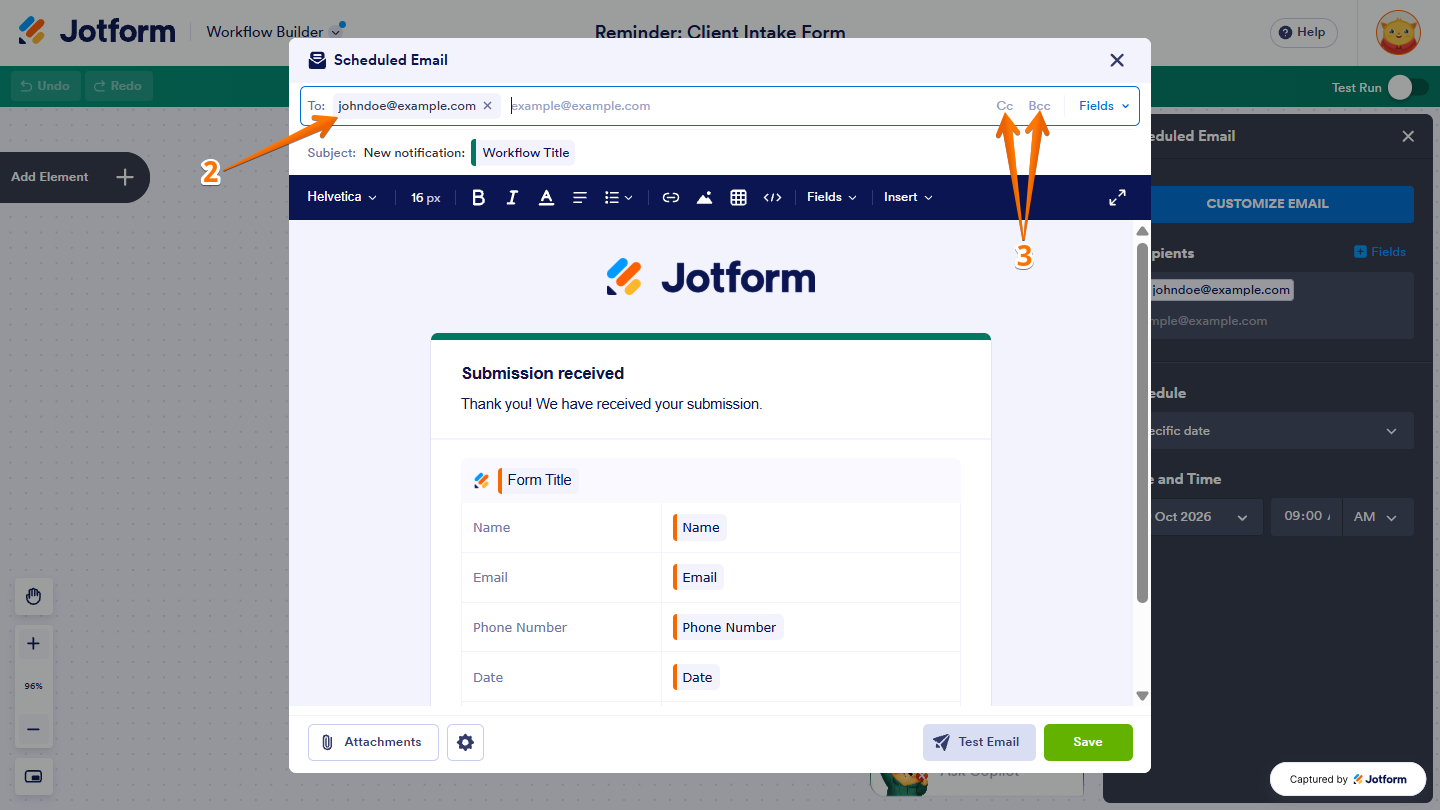
- If you want to use an email field as the recipient, click on Fields, then select the email address field from the Dropdown menu that appears.
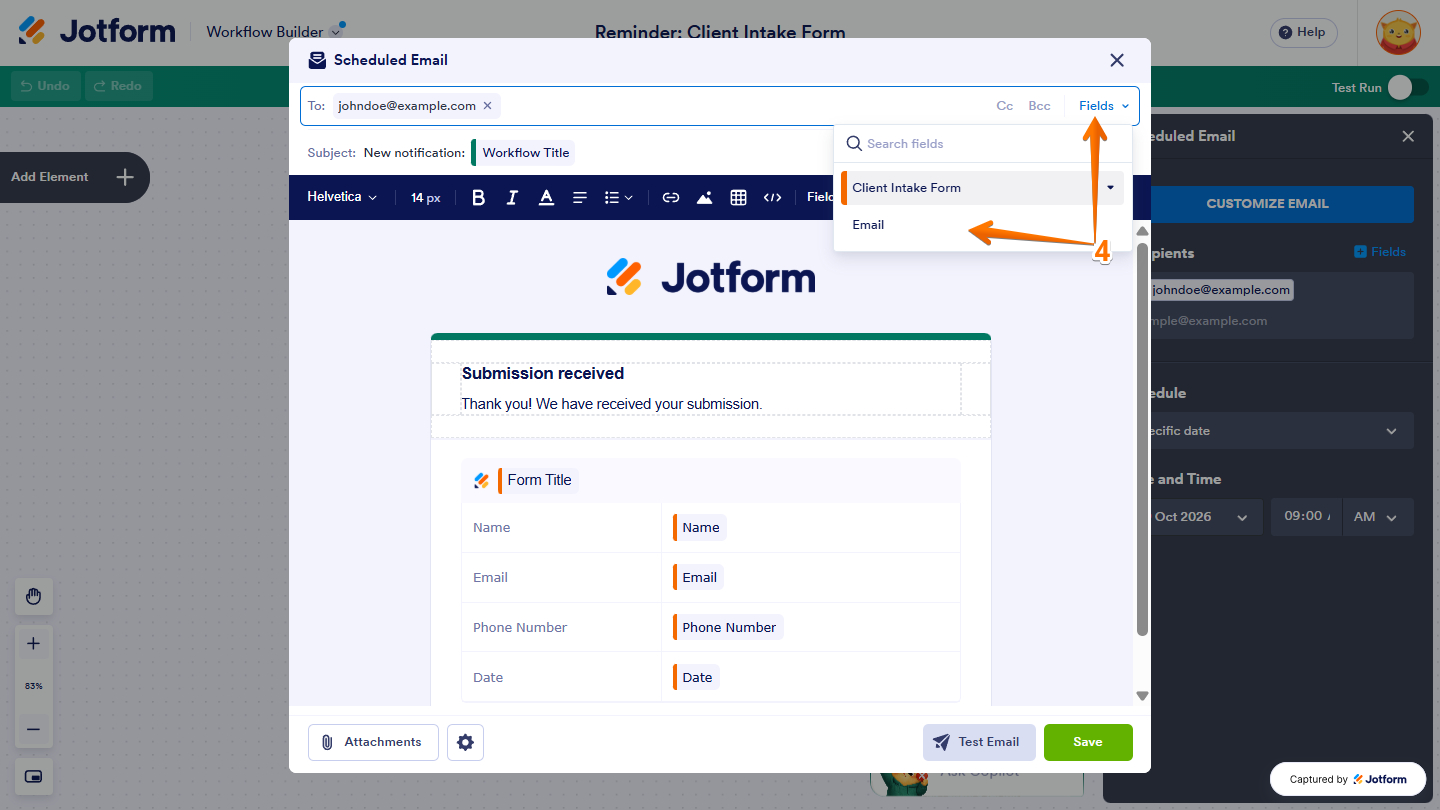
- Now, click on the Subject field, and keep the current subject line or enter a new one.
- If you want to personalize the Subject field with data from your form, workflow, or even your AI elements, click on Fields on the right side of the Subject field, and select the fields to add.
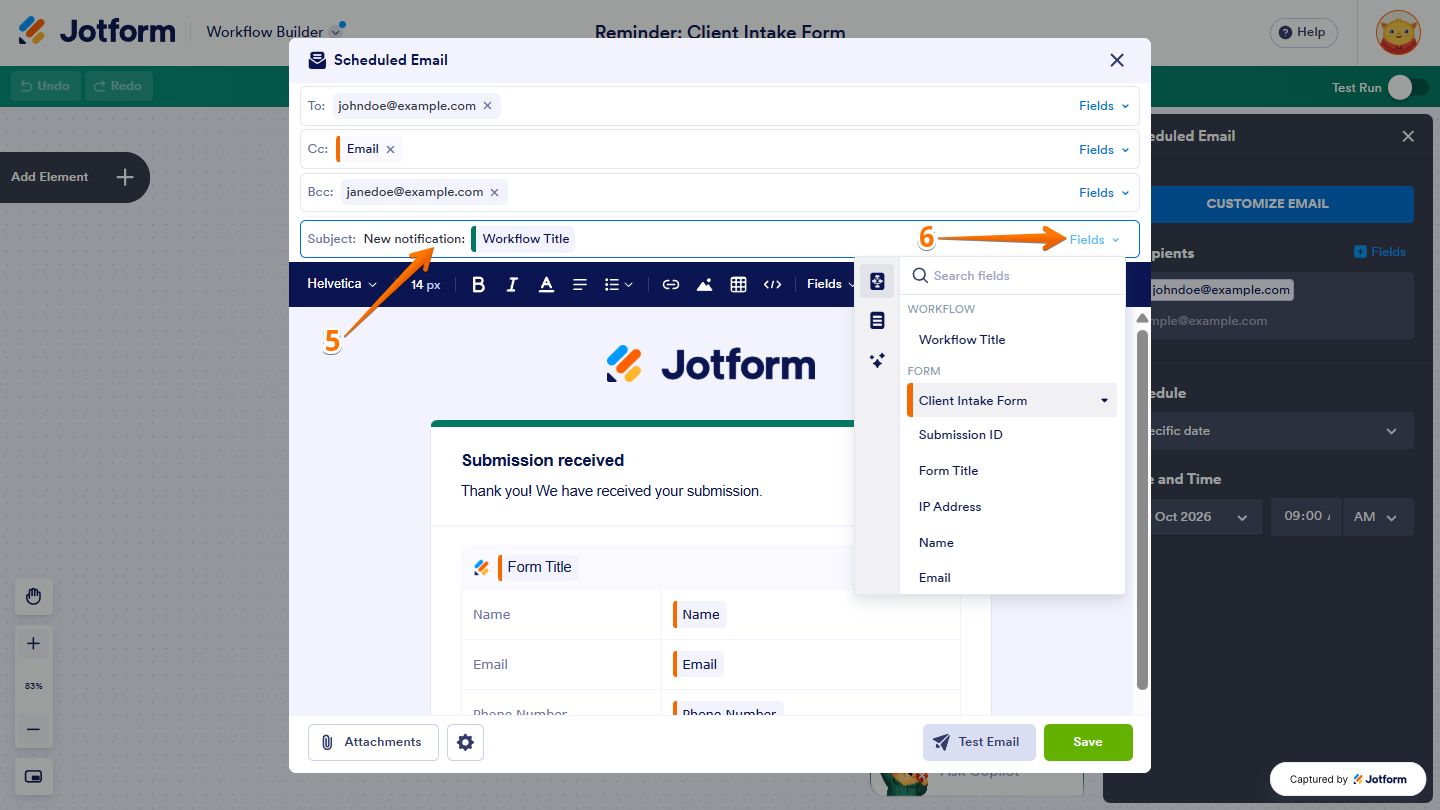
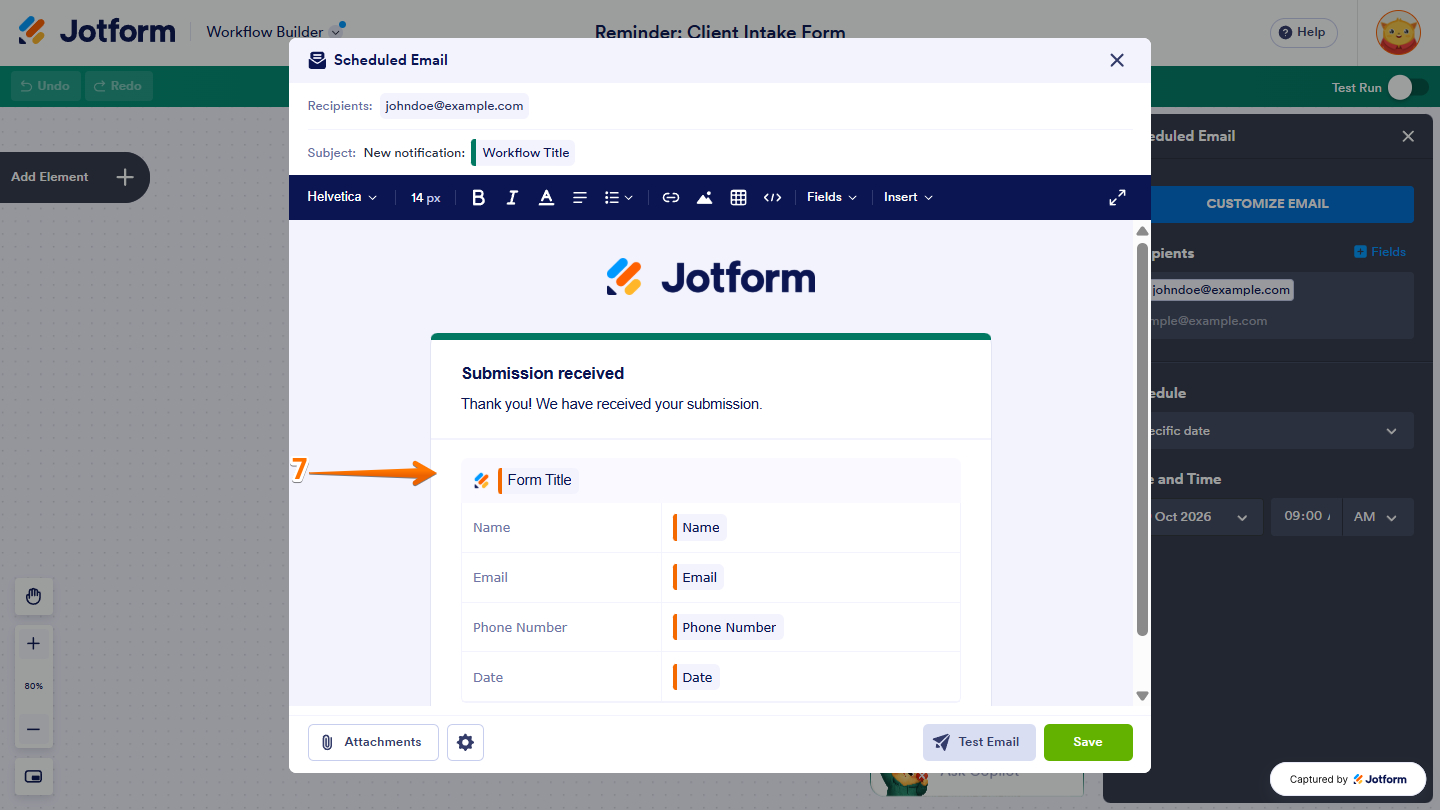
- Then, in the body of the email template, customize the message to your liking.
Notes
- To personalize the email content, click on Fields in the top toolbar and insert values from your form, workflow, or AI elements.
- You can also use the top toolbar to format the text and add images, links, and tables to your reminder email.
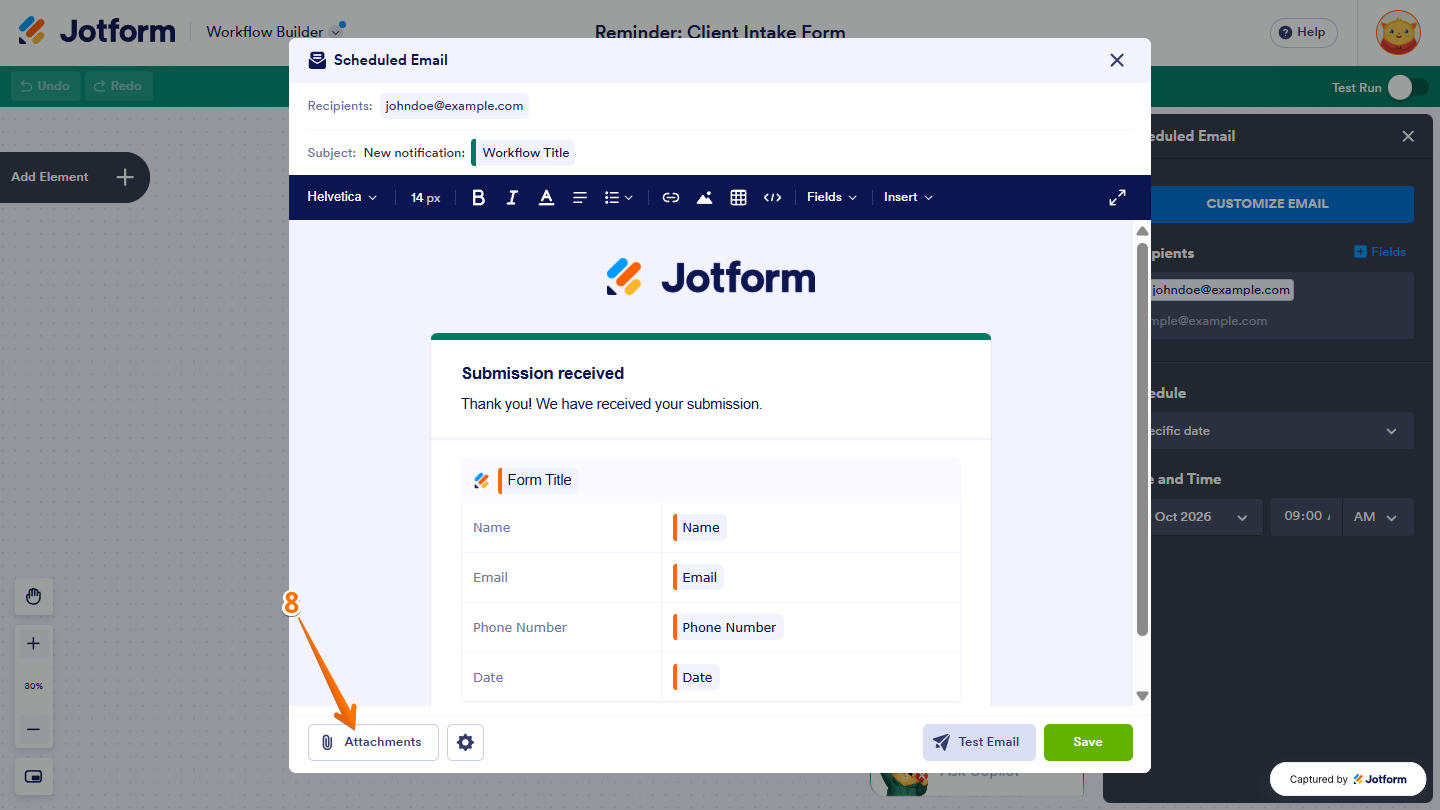
- Next, click on Attachments to add files to the Scheduled Email.
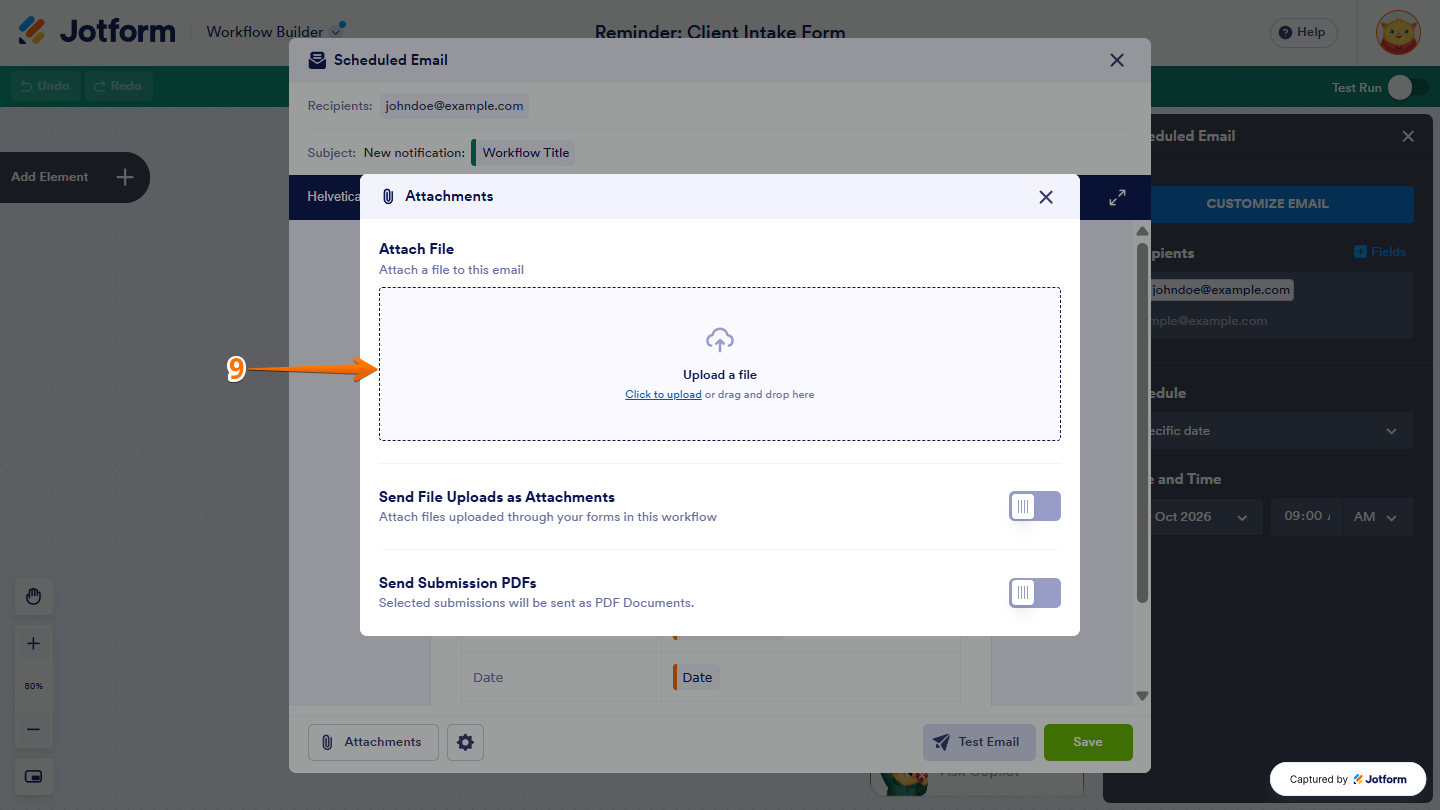
- Now, in the Attachments window that opens, click on the Upload a File box to select your file. You can also drag and drop the file into it.
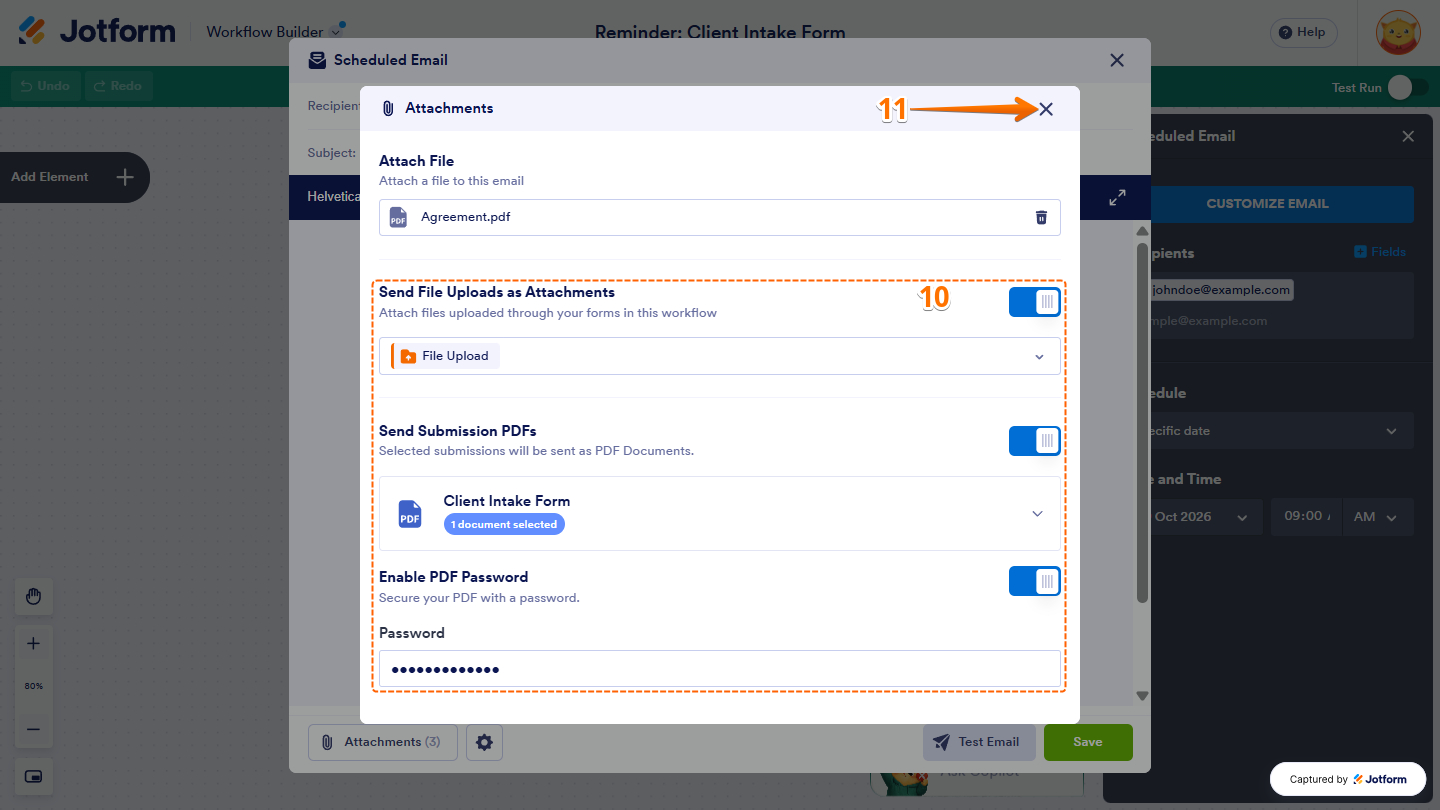
- Then, after uploading the file(s), optionally set up the following things:
- Send File Uploads as Attachments — Toggle this on to include files uploaded through your form as attachments in the scheduled email.
- Send Submissions PDFs — Toggle this on to select a PDF copy of your submissions as an attachment.
- Enable PDF Password — When Send Submissions PDFs is enabled, toggle this on to password-protect the attached PDF(s).
- Password — Enter the password recipients will need to open the attached PDF(s).
- Next, click on X at the top-right side of the menu to close it.
- Now, click on the Gear icon to update your Sender Settings.
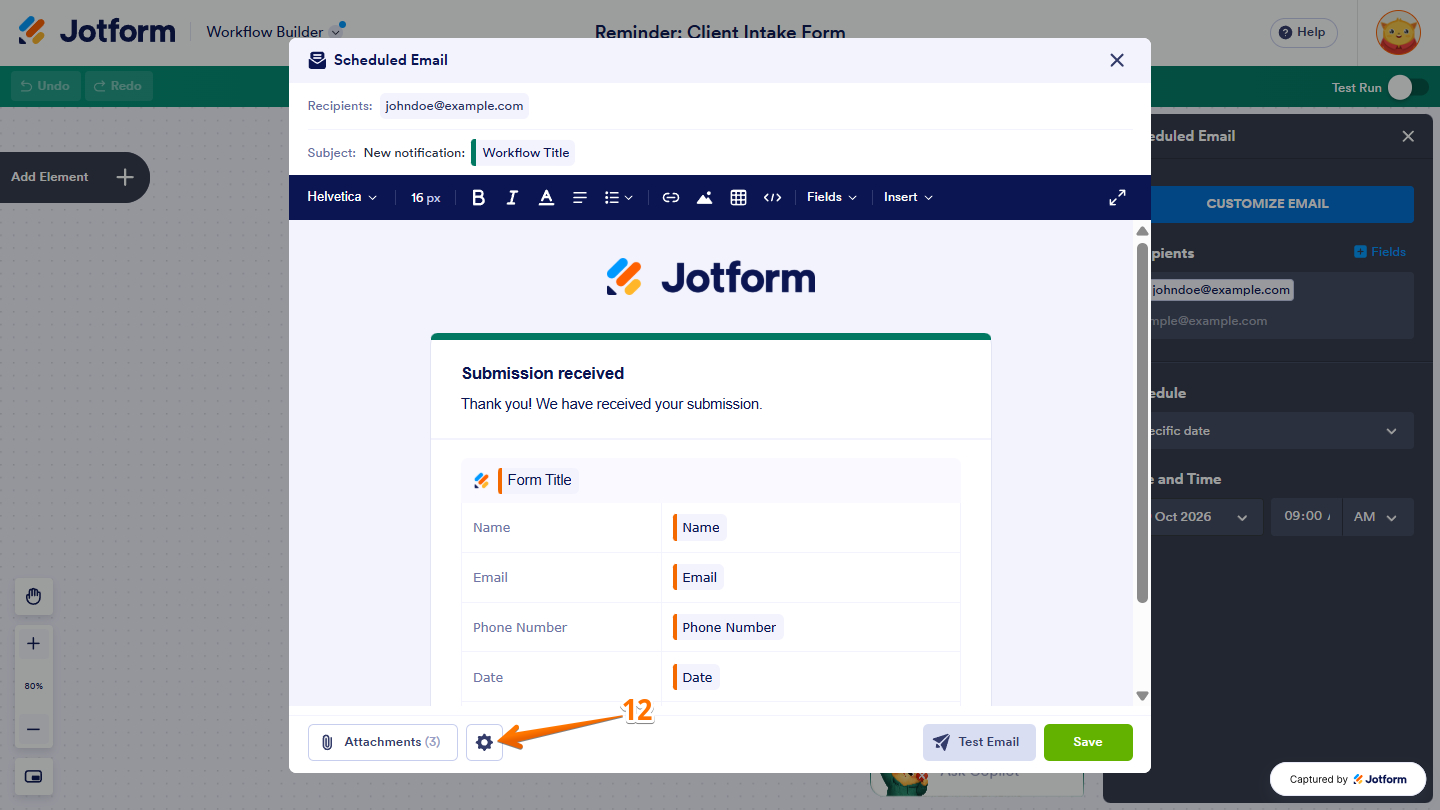
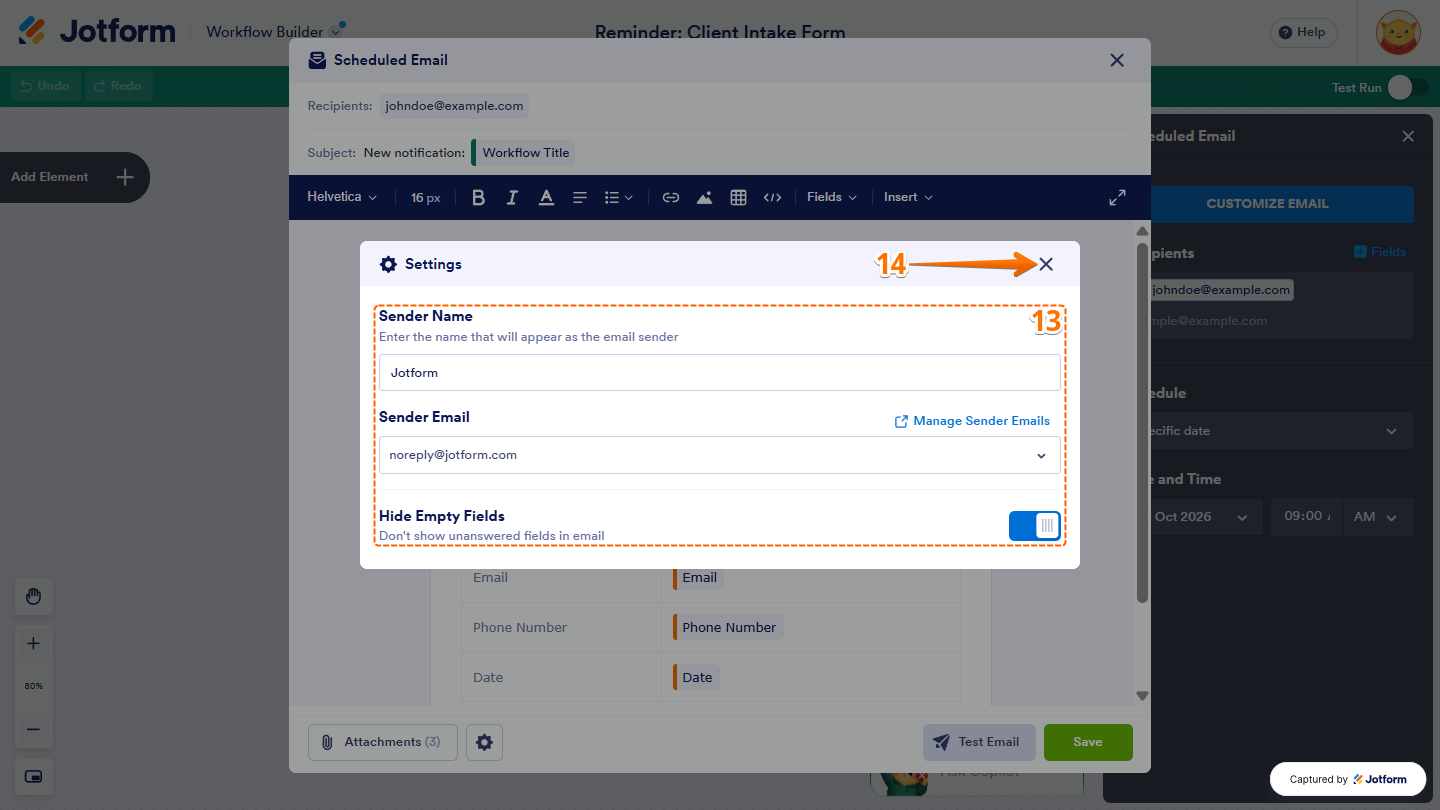
- Then, in the Settings menu that opens, configure these things:
- Sender Name — Enter the name that will appear as the sender of the reminder email.
- Sender Email — Enter the email address that will appear as the sender of the reminder email.
- Hide Empty Fields — Keep this toggled on to automatically hide unanswered form fields in the reminder email.
Note
You can use a custom sender email address for reminder emails by configuring an SMTP server. Check out our guide on How to Set Up a Custom Sender Email with SMTP to learn more.
- Next, click on X at the top-right side of the menu to close it.
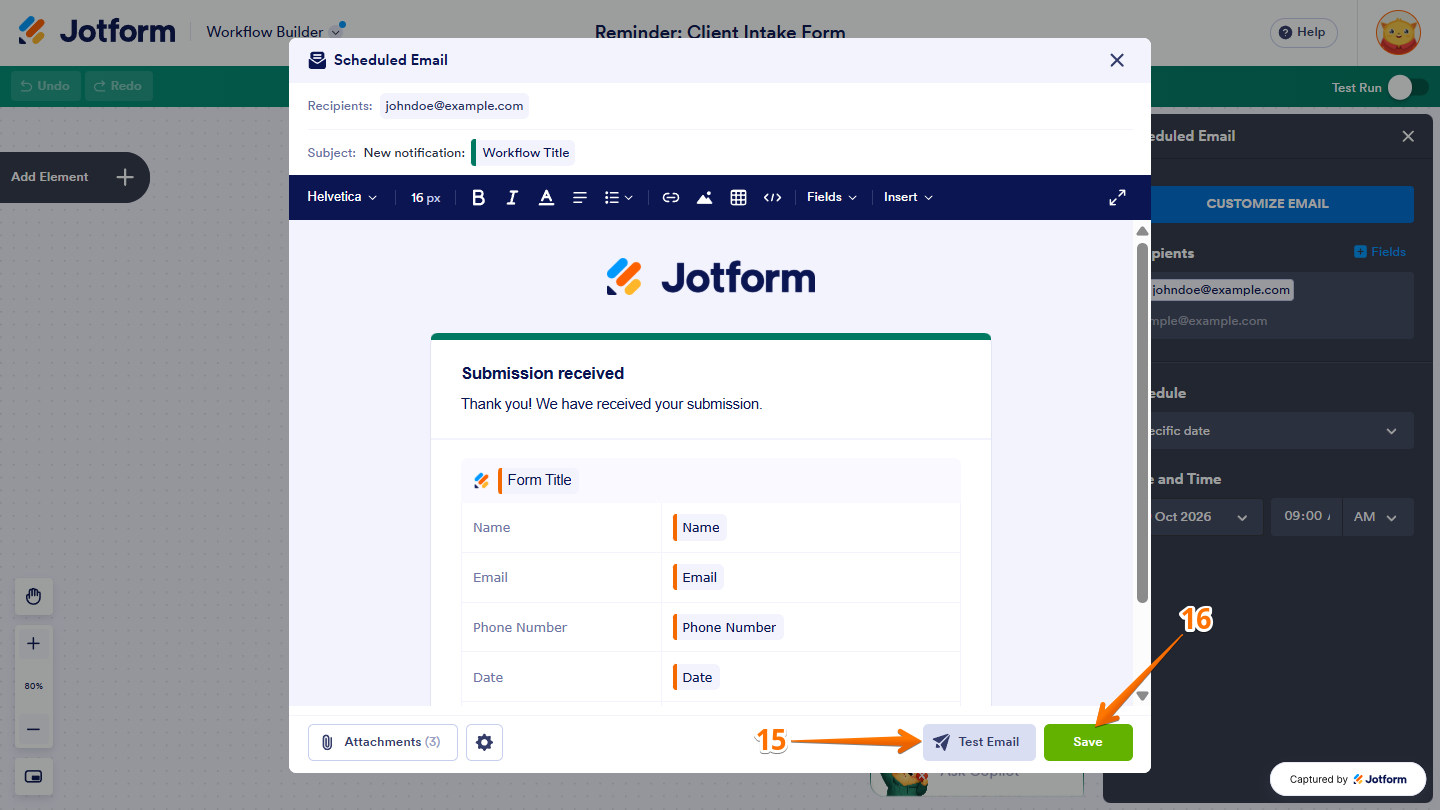
- Now, click on Test Email to confirm your settings are working.
- Once everything’s set, click on Save to apply your settings to the Scheduled Email element.
That’s it! Your Scheduled Reminder Email is now set up in your workflow and ready to send reminders at the scheduled time. This helps keep everyone informed and ensures important reminders reach your recipients when they need them.

Send Comment: