You can share the apps you create in your organization’s App Builder in several ways. Share them through a direct link or email, download a QR code for kiosk or embedded use, or post your app directly on social media.
Sharing an App
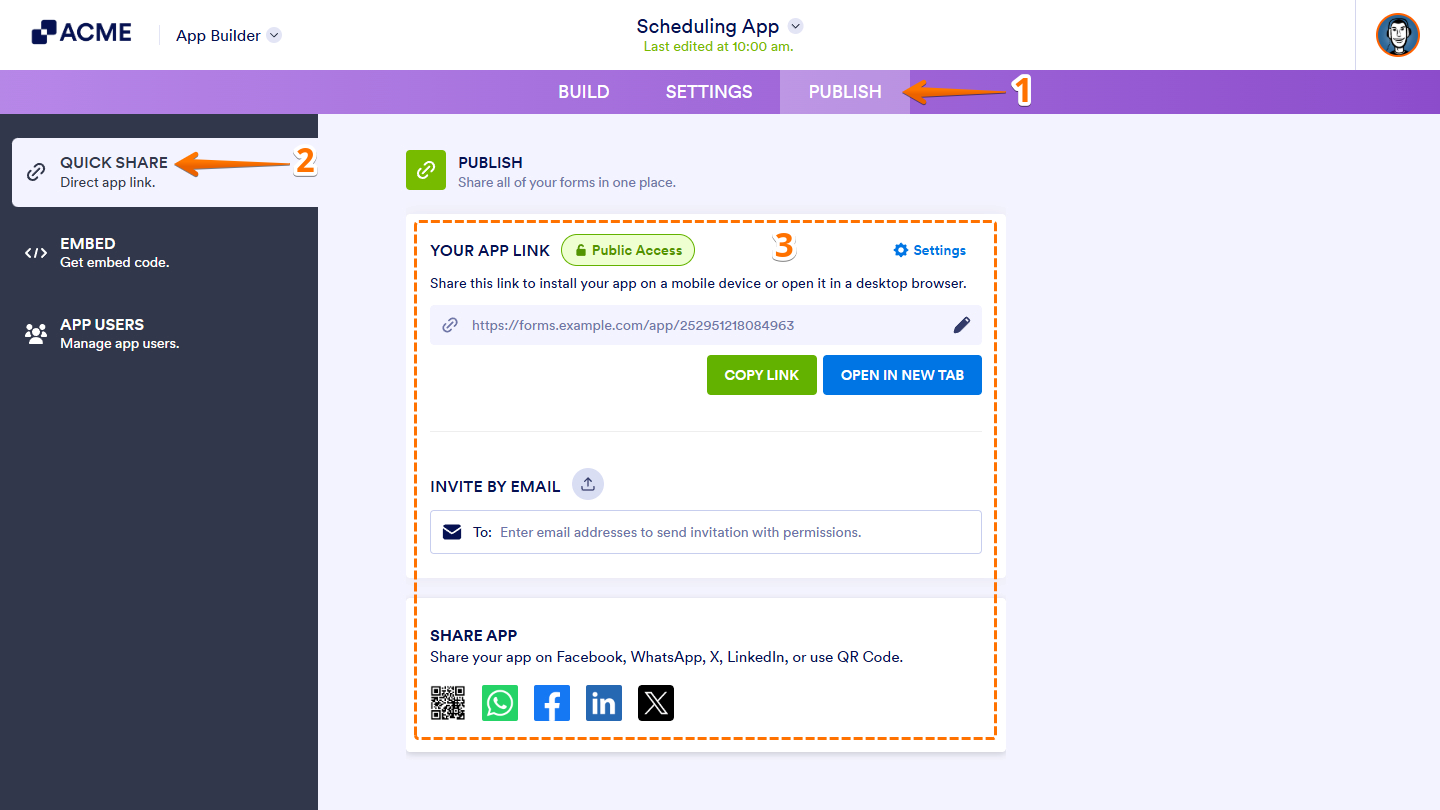
After creating your app, you can begin sharing it with others. Here’s the quick way to do it:
- In App Builder, at the top navigation bar, click on Publish.
- Then, in the menu on the left, click on Quick Share.
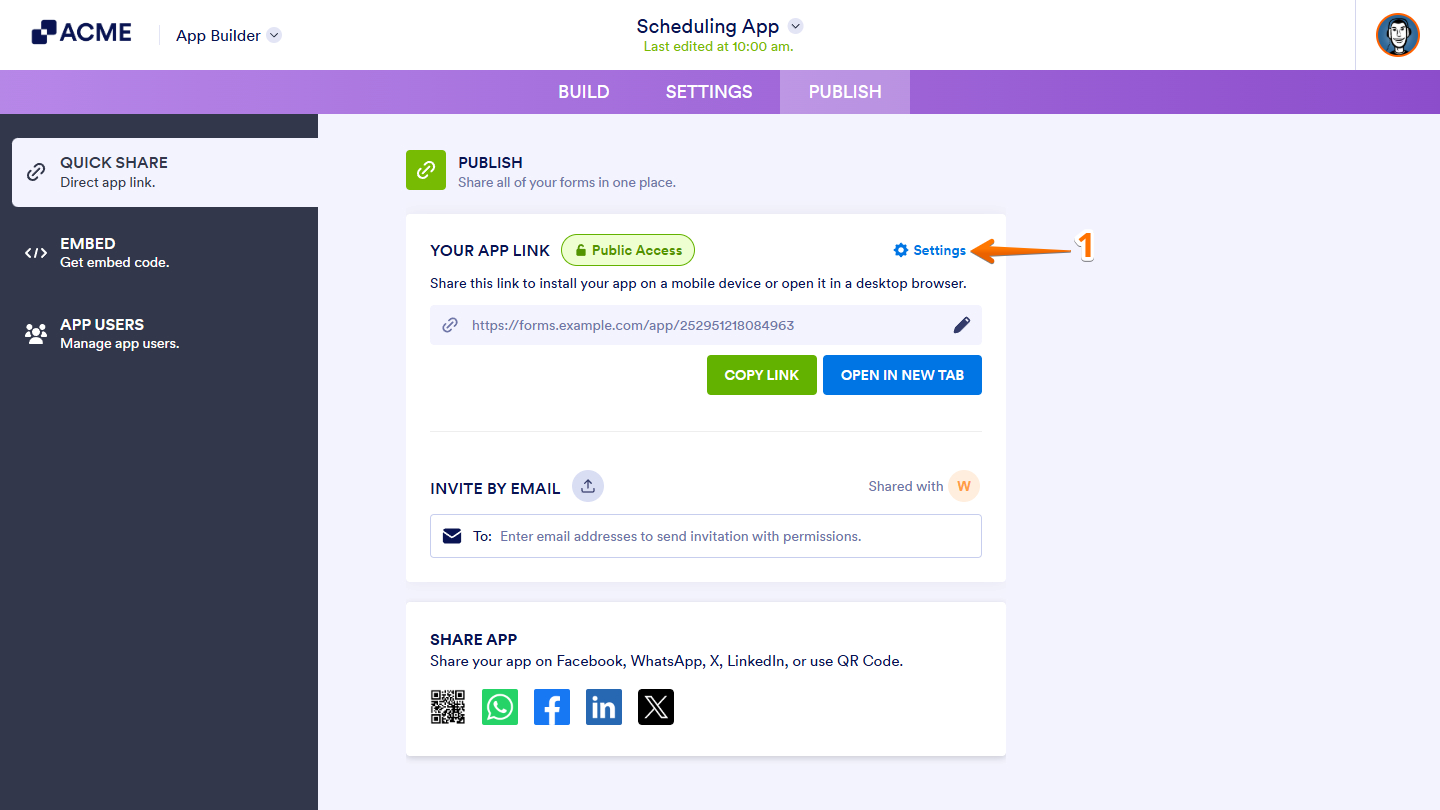
- Now, share your app as follows:
- Your App Link — Copy the app’s URL to share it manually across other platforms.
- Invite by Email — Send email invitations to share your app directly with others.
- Share App — Post your app on social media or download a QR code for easy access and kiosk sharing.
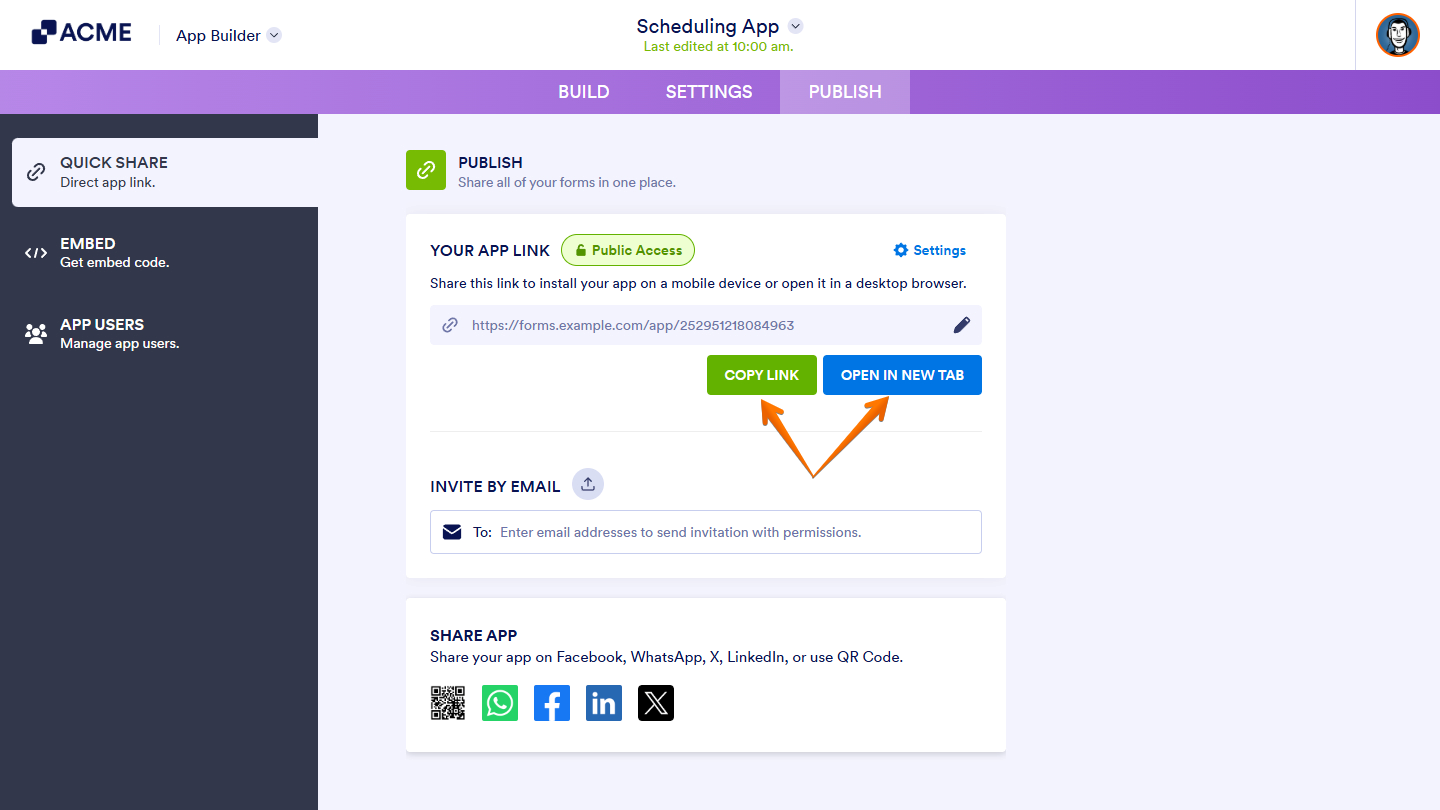
Share by App Link
Each app you create has a unique URL that you can easily share outside the platform. By default, the app is set to Public Access. To share it, simply click the Copy Link or Open in New Tab button.
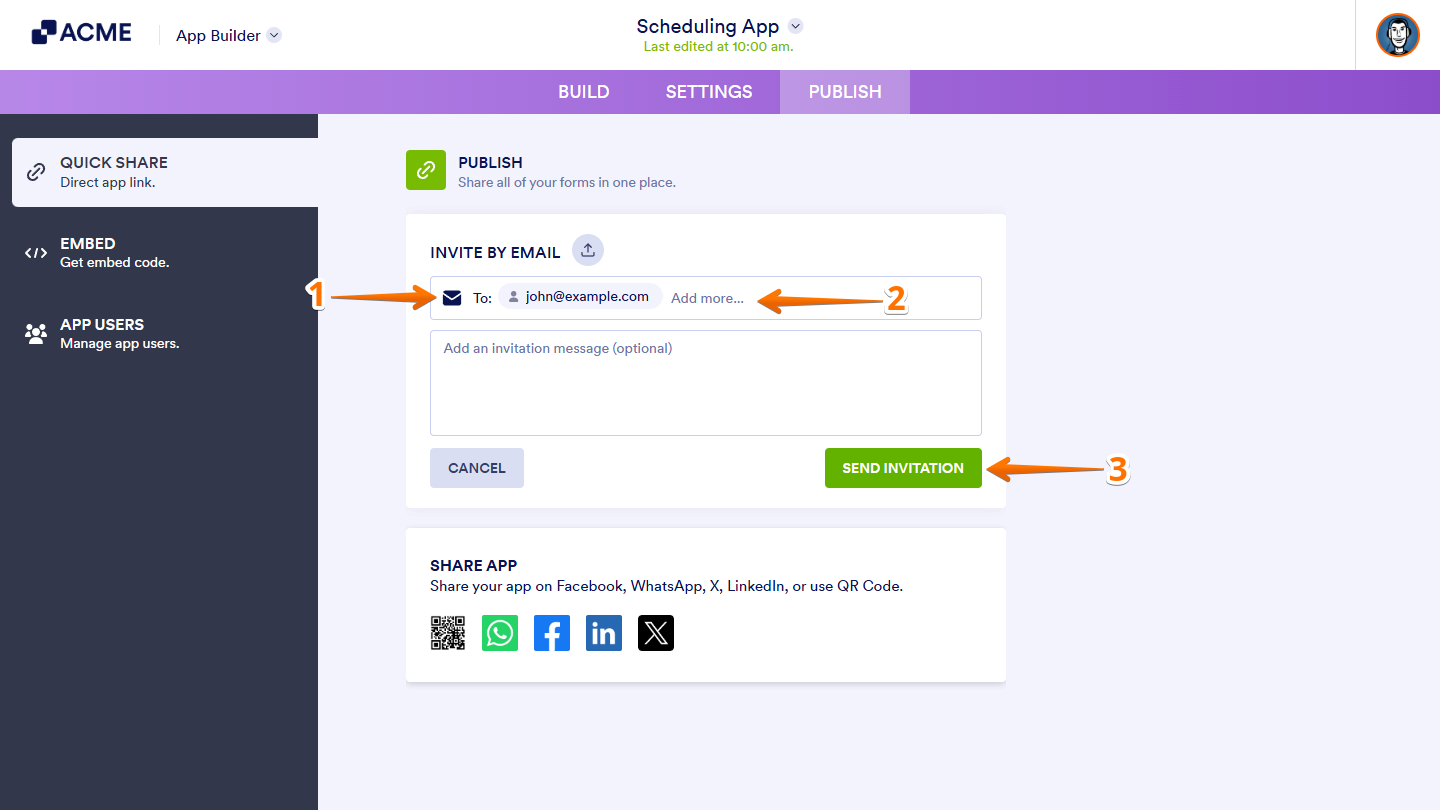
Share by Email
You can share your app directly via email and send invitations to multiple users at once. Here’s what to do:
- In the Invite by Email section, click on the To box.
- Then, enter the recipient’s email address.
- Now, click on Send Invitation.
Notes:
- You can invite multiple users at once, though it’s recommended to send invitations to no more than 10 users at a time.
- You can also upload a CSV file by clicking the Upload icon beside the Invite by Email option.
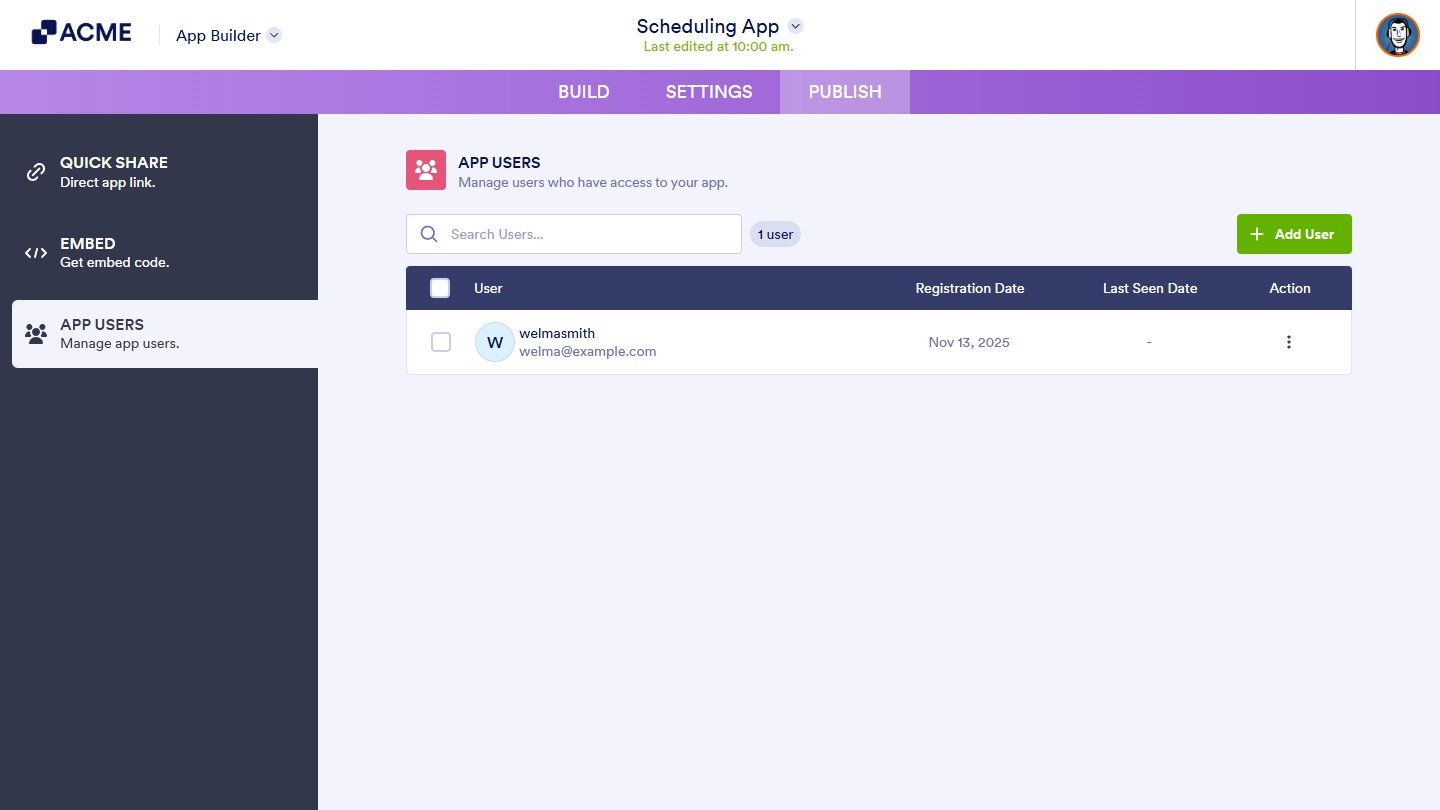
Invited users will receive an email containing a button that directs them to open the app.

You’ll also see the invited users through the App Users page.
Share App on Social Media
In the Share App section, you can share your app on various social media platforms or download a QR code for easy mobile access. You can share your app on the following platforms:
- X

Changing Access Settings of the App
The Access Settings allow you to control how your app is accessed and used by others. Here’s how to set it up:
- In the Quick Share section of the App Builder, click on Settings.
- Then, in the Settings window that opens, under the Access Settings section, choose from the following options:
- Private — Limits access to invited users only. This requires users to have an account within your organization.
- Public — The default setting. Anyone can access the app, and you can optionally require users to register with your organization before viewing it.
- Company Access — Restricts access to users who log in or sign up using their organization’s email address or through your organization’s SSO setup.

Note: Each access setting includes an Options section where you can configure additional controls. Depending on the selected setting, you may enable features such as Require Registration, Allow Users to Request Access, and Set a Custom Expiration Date for the Share Link.

Send Comment: