
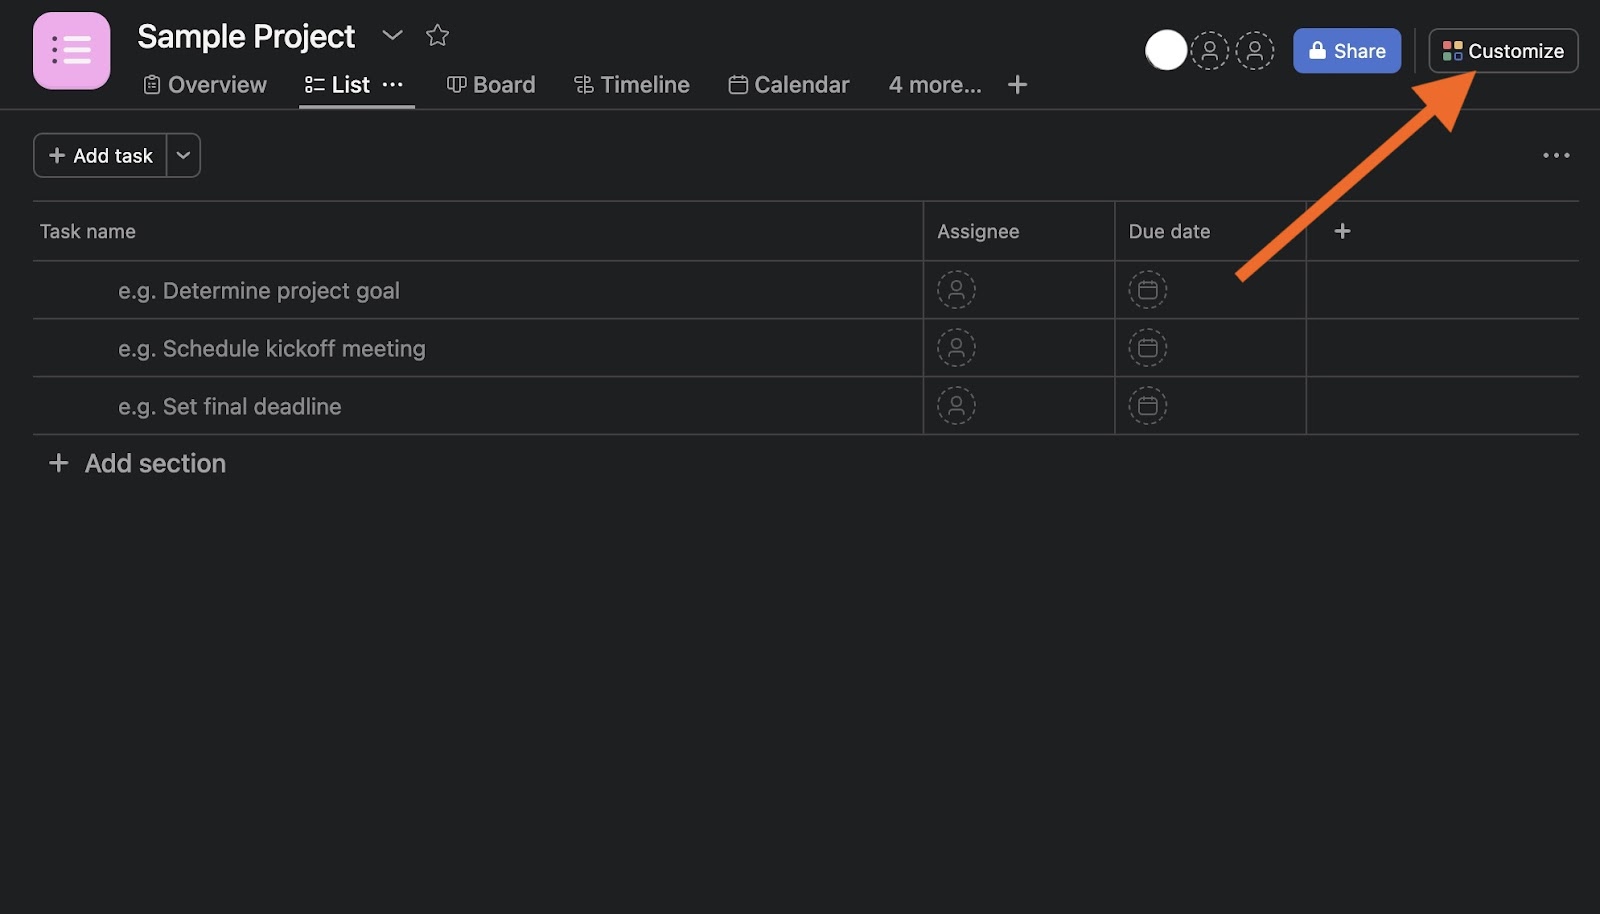
How to create forms in Asana
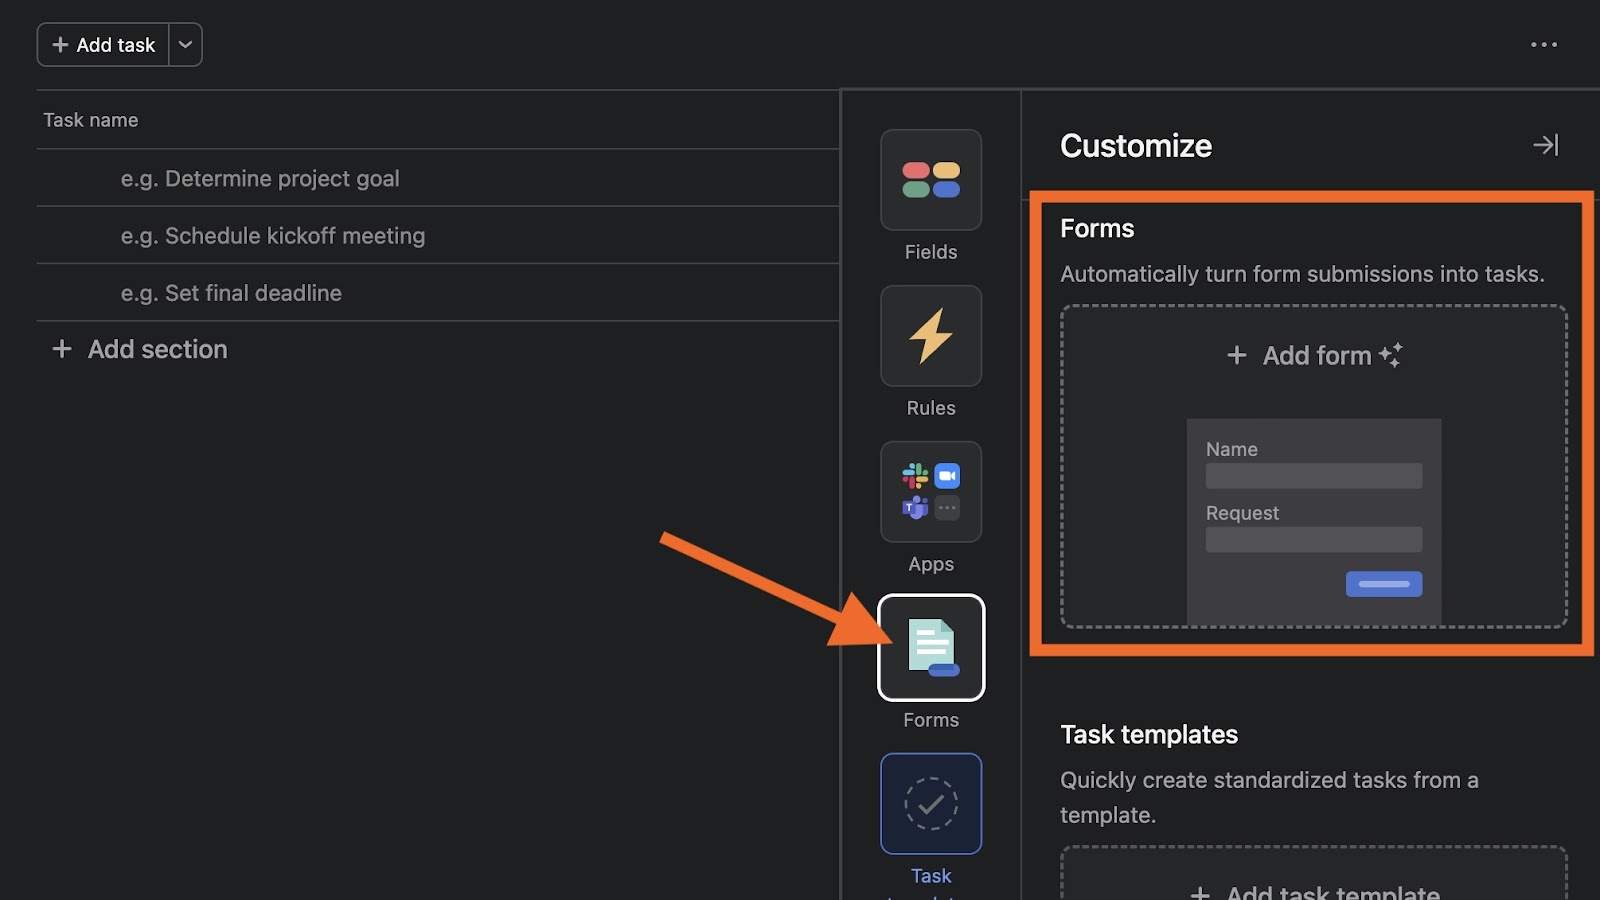
- Navigate to the Customize tab
- Click Add form to create, edit, and share your form
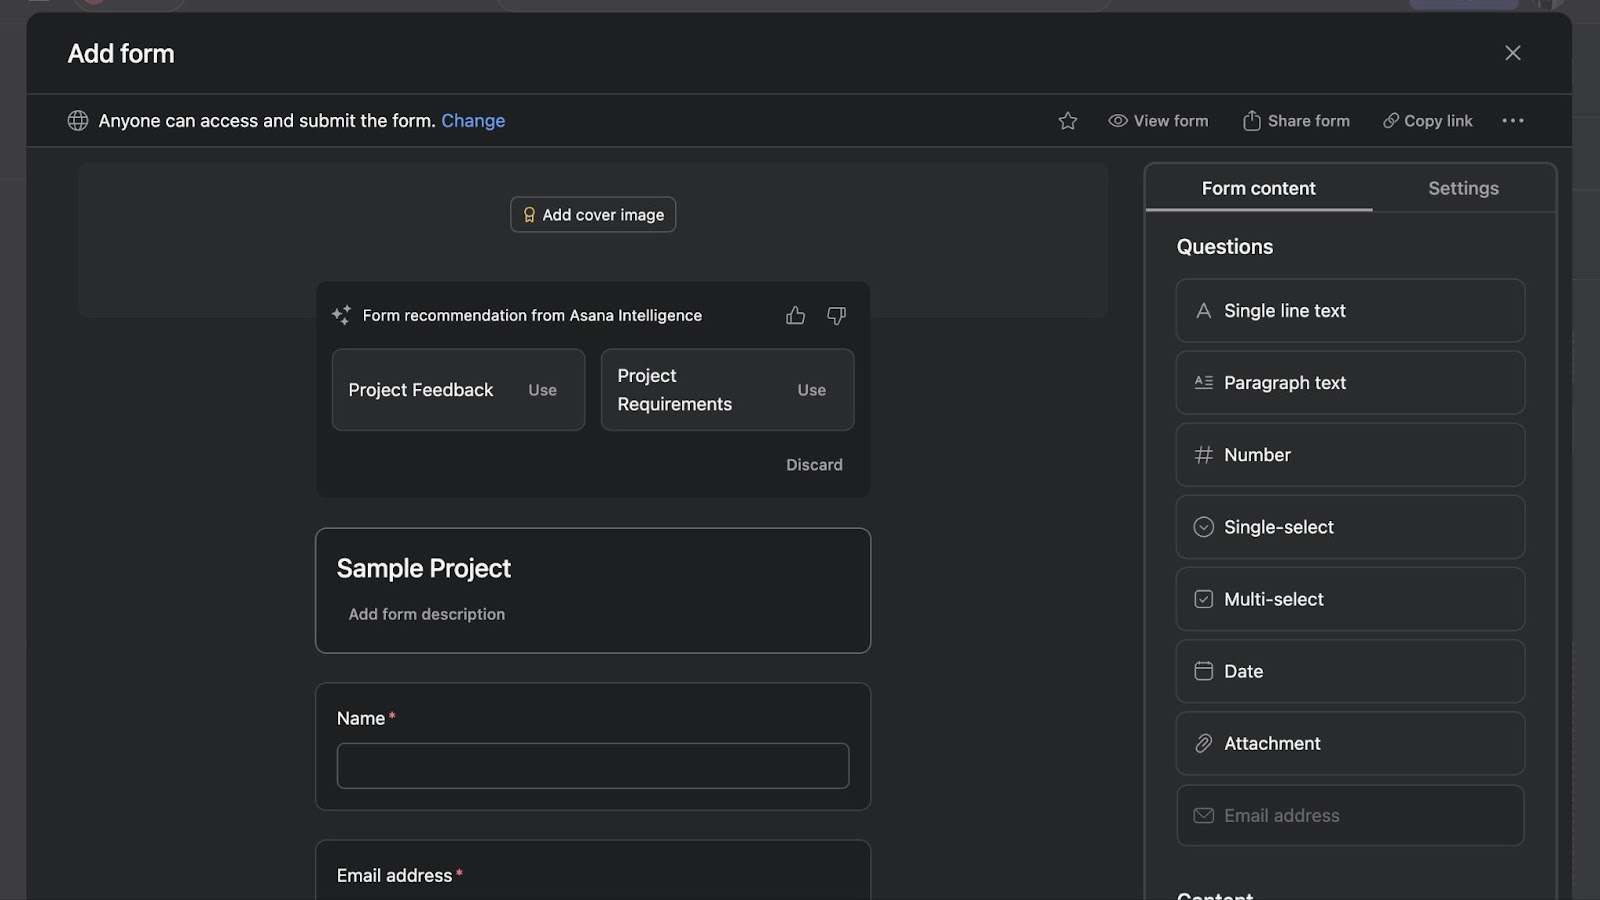
- Add a name, email address, or additional questions
- You can customize your form
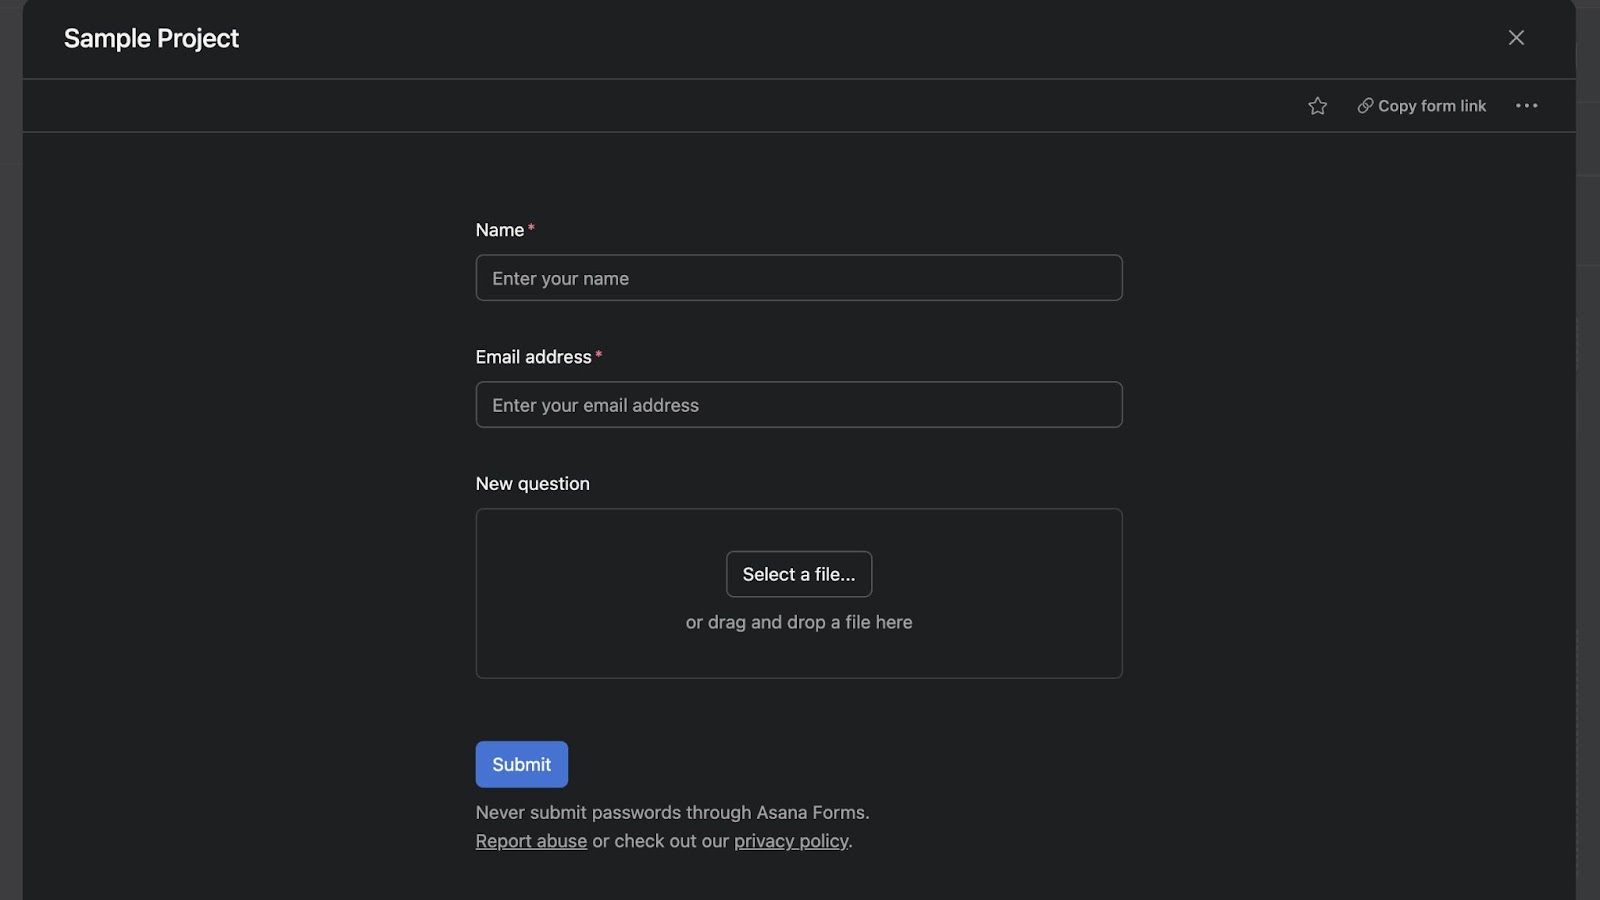
- Preview the form by clicking View Form
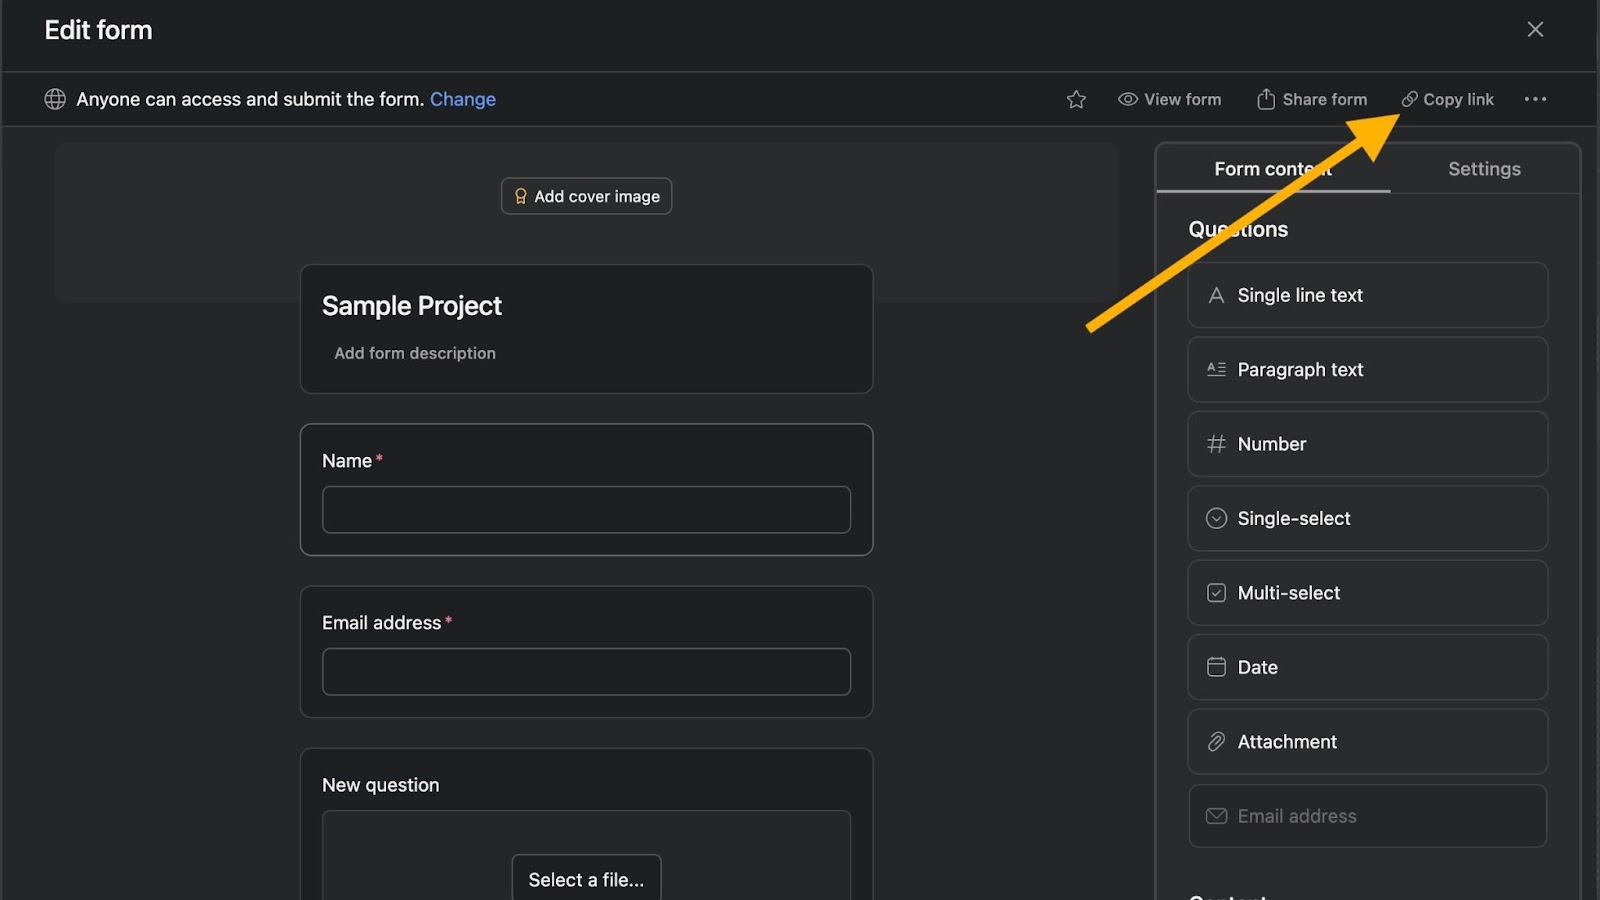
- Click the Copy link button
Whether your business is a small startup, a large enterprise, or something in between, you need a project management solution to keep everyone organized, communicating, and collaborating on all tasks and projects.
Project management software — like Asana — lets users say goodbye to lengthy email chains and siloed tracking systems and hello to clearly defined tasks and responsibilities in addition to improved project planning and scheduling.
With Asana, you can track your work on kanban boards, create automated processes using its powerful workflow builder, and see actionable data in real time on customizable, shareable charts and dashboards. It’s also user-friendly and includes all the tools you need to manage tasks and projects — thanks to its growing list of app integrations — without ever having to leave the app.
Another important feature in Asana is the ability to create forms to delegate tasks or standardize data collection for projects (in an employee or customer feedback survey, for example). It’s especially critical to understand how to create forms in Asana because they can be used to add new tasks to a project. When someone fills out your form, it shows up as a new task in the parent project.
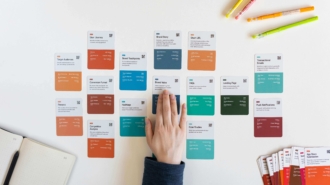
Collaborate on Tasks with Jotform Boards
How to create forms in Asana
Forms are included with Premium, Business and Enterprise plans. Here’s how to create forms in Asana’s Premium plan, which is one tier up from its Basic package:
- Access your project in Asana and navigate to the Customize tab on the right side of the screen.
- Click Forms to create, edit, and share your form. You can update the name of the form or add a description.
- Add a name, email address, or additional questions from the form window.
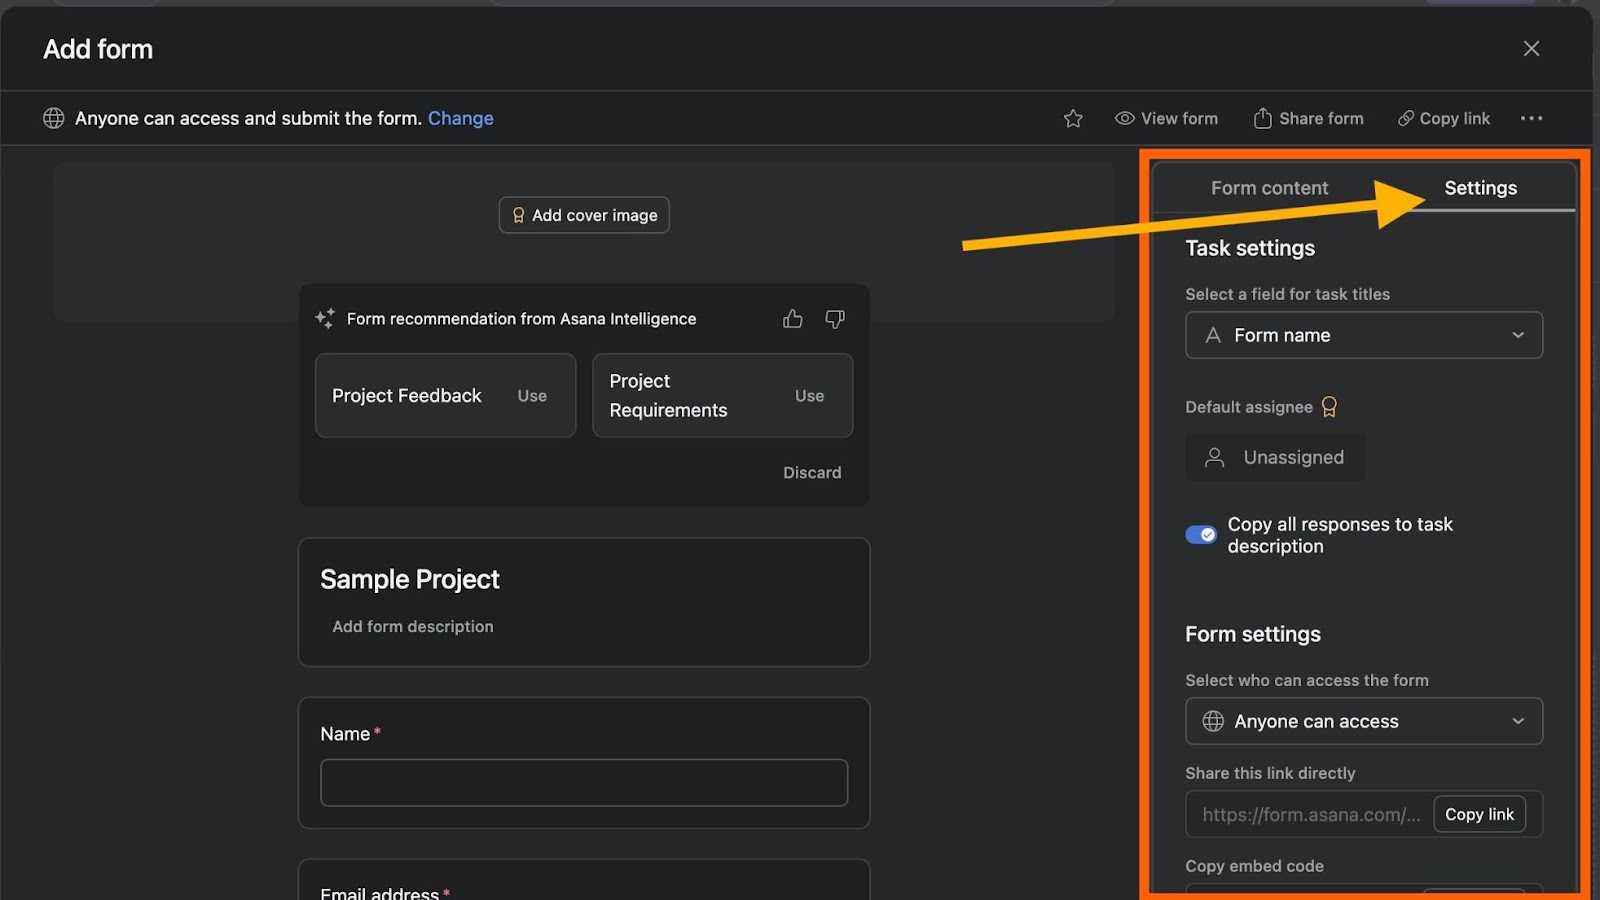
- To add additional questions, click the Settings tab on the right sidebar.
- Under this tab, you can also adjust Task settings, like selecting a default team member to assign each form submission to or copying all answers to the task description. Below Form settings, you can also include a button enabling users to easily complete another submission.
- After you’ve added your questions, you can customize your form further.
- Change or edit the question name and add a question description.
- Add attachments — like briefs, images, and documents — by clicking on the Attachment button under the Questions tab. (Once your form is submitted, any attachment included will subsequently attach to the task that’s created in your project.)
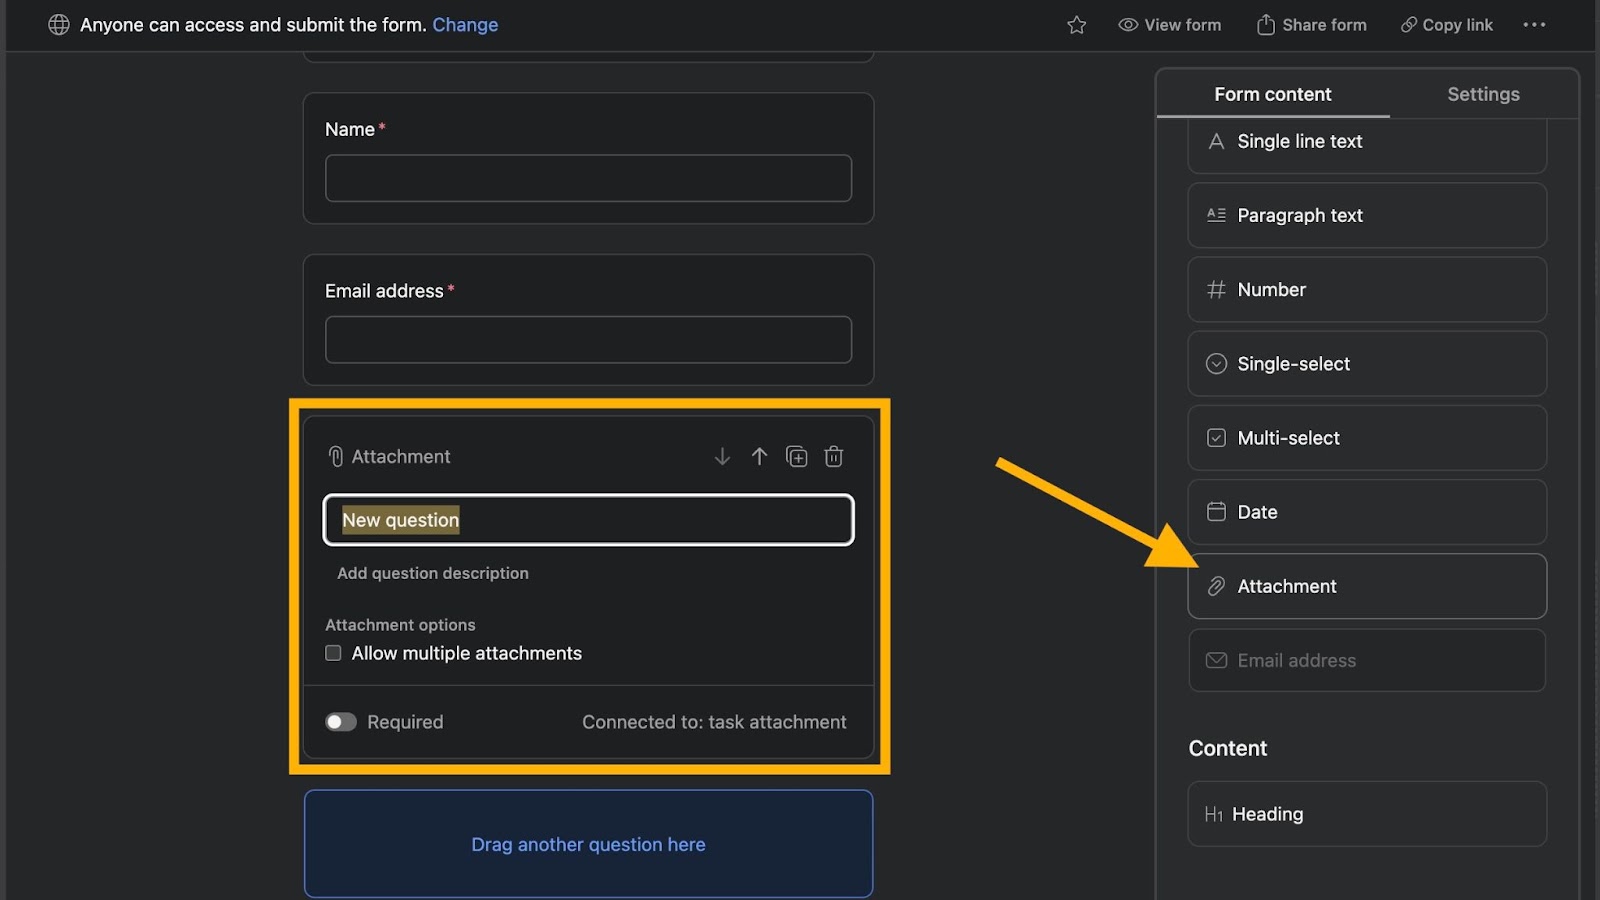
- Decide which fields are required.
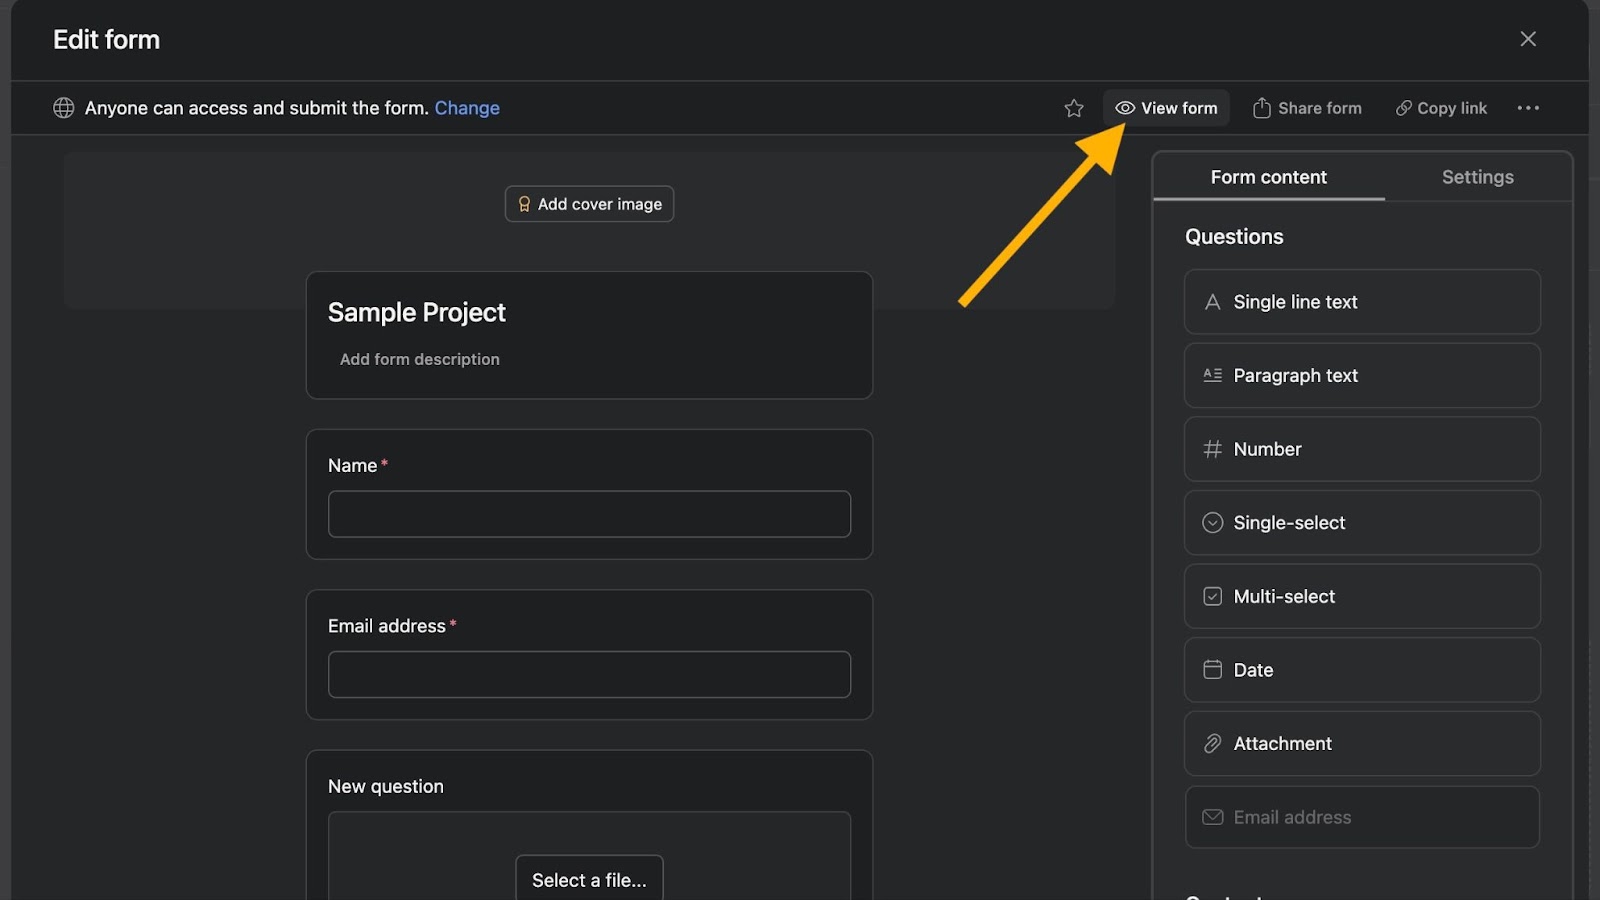
- Preview the form to see how it will appear to submitters by clicking View Form above the Questions tab.
- When you’re ready to share the form, click the Copy link button to copy it to your clipboard. You can share your form link with any of your colleagues in Asana as well as those without an Asana account.
- Once the submitter completes the form, you’ll see their submission as a new task in your project, where you can prioritize it or change task details.
Some form features are only available to Business and Enterprise users. If you need more functionality, try a full-featured, online form builder like Jotform, which has no customization limitations for forms — no matter what type of account you have.
Limitations of Asana forms
Although Asana is capable of quite a bit, its forms are primarily for entering tasks. If you want to create a variety of forms, like surveys and appointment forms, you may want to consider another form builder. Here are some things about Asana forms to keep in mind:
- Limited customization options. The form customization options that Asana offers is to add a header image and company logo. Using a custom header image, however, is only available to Advanced users, and including your logo is only for Enterprise plans.
- Limited conditional logic options. Advanced form settings like conditional logic are fairly limited on Asana’s forms. The only type of logic available is branching logic, meaning users can get directed to certain questions based on their answers. However, this feature is also only available to users with Enterprise plans.
- Limited form analytics. If your form isn’t getting a lot of submissions, or people aren’t completing it fully, looking at a form’s analytics can help you understand why. That way, you can make changes to your form to improve its performance. Asana forms don’t offer comprehensive respondent data, though, which makes it difficult to identify areas of improvement.
- Lack of payment processor integrations. If you want to collect payments with your forms, you’ll need to choose another tool. Asana forms don’t offer that option.
Pro Tip
Jotform has custom CSS customization, advanced settings such as conditional logic and form pre-fill, integrations with over 30 payment processors, and form analytics features.
Why you should use Jotform with Asana
As a no-code online form builder, Jotform lets users create and share customizable forms that collect and track valuable data and streamline workflows — regardless of their programming expertise. It’s powerful, intuitive, and packed with design features and widgets to use in more than 20,000 form, table, PDF, and app templates to match any business or industry need.
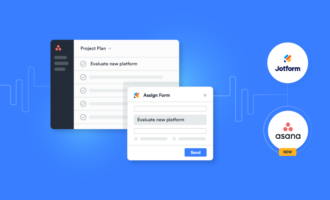
Jotform integrates seamlessly with Asana for better team collaboration, productivity, and project management. Plus, because you can use forms in any project within Asana, it only makes sense to integrate with Jotform to create and customize stunning forms with no limitations or need for coding knowledge.
How to use Jotform within Asana
Here’s how to set up the Jotform integration within Asana:
- Log in to Asana and find the project with which you’d like to enable the integration.
- Click on Customize, located in the upper right corner.
- Scroll down to the Apps section and click +Add app.
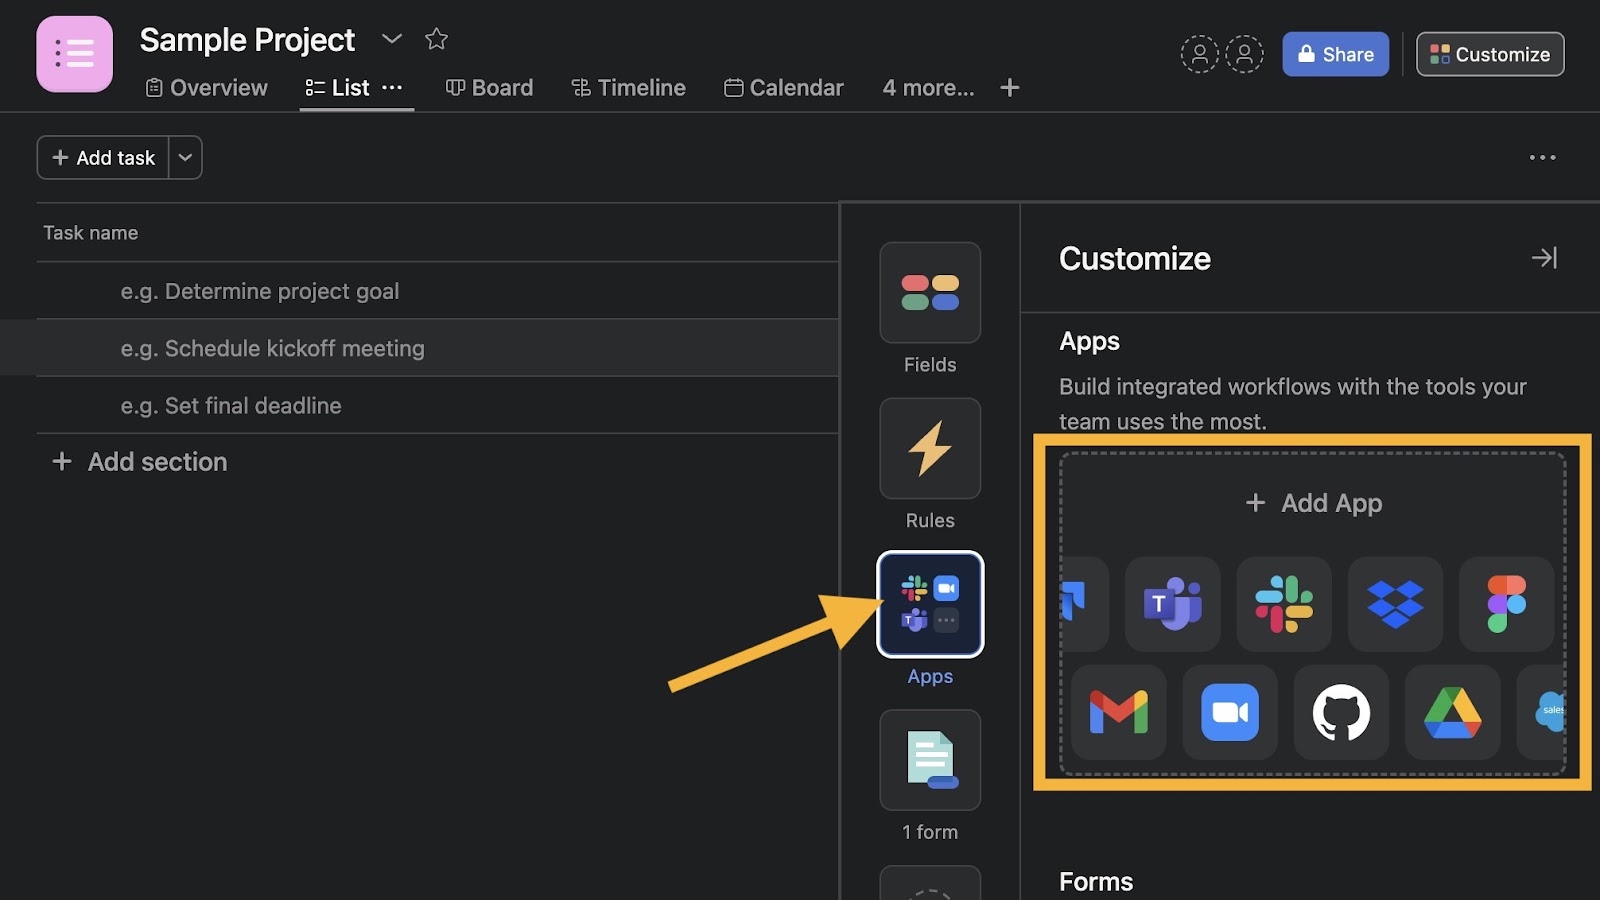
- Select Jotform.
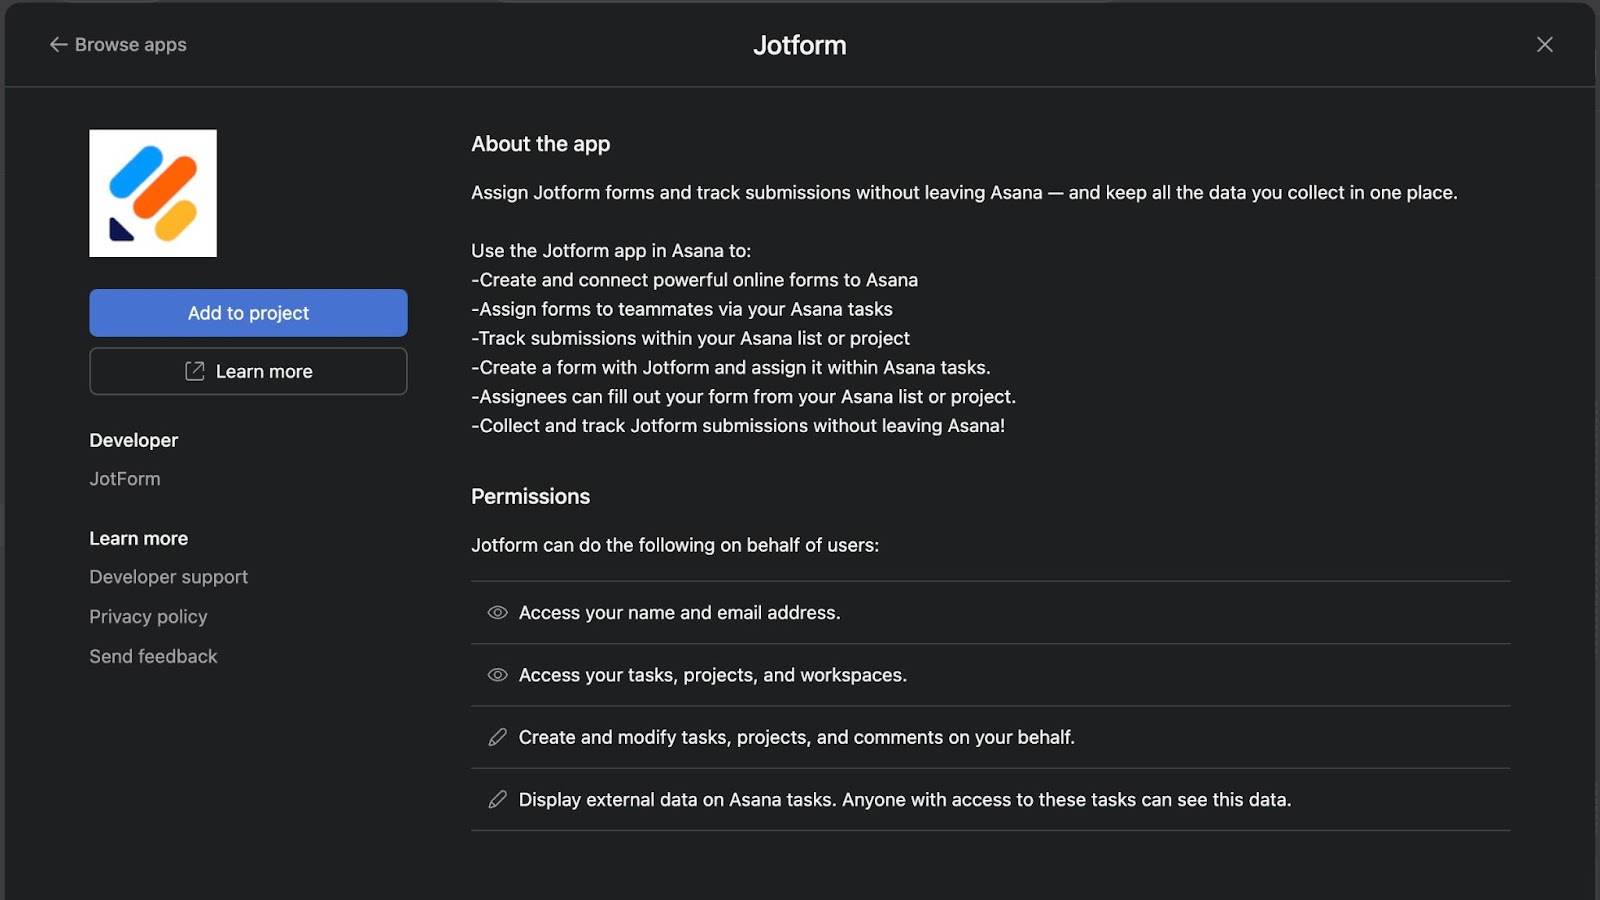
- Follow the on-screen instructions to log in to your Jotform account.
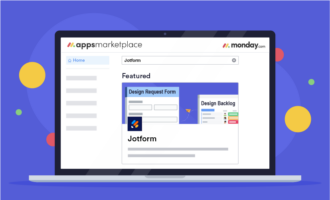
And here’s how to set it up within Jotform:
- Navigate to the Form Builder and either create your form from scratch or use one of the 20,000-plus ready-made templates to get started.
- Click on the Settings tab.

- Select Integrations from the left sidebar.
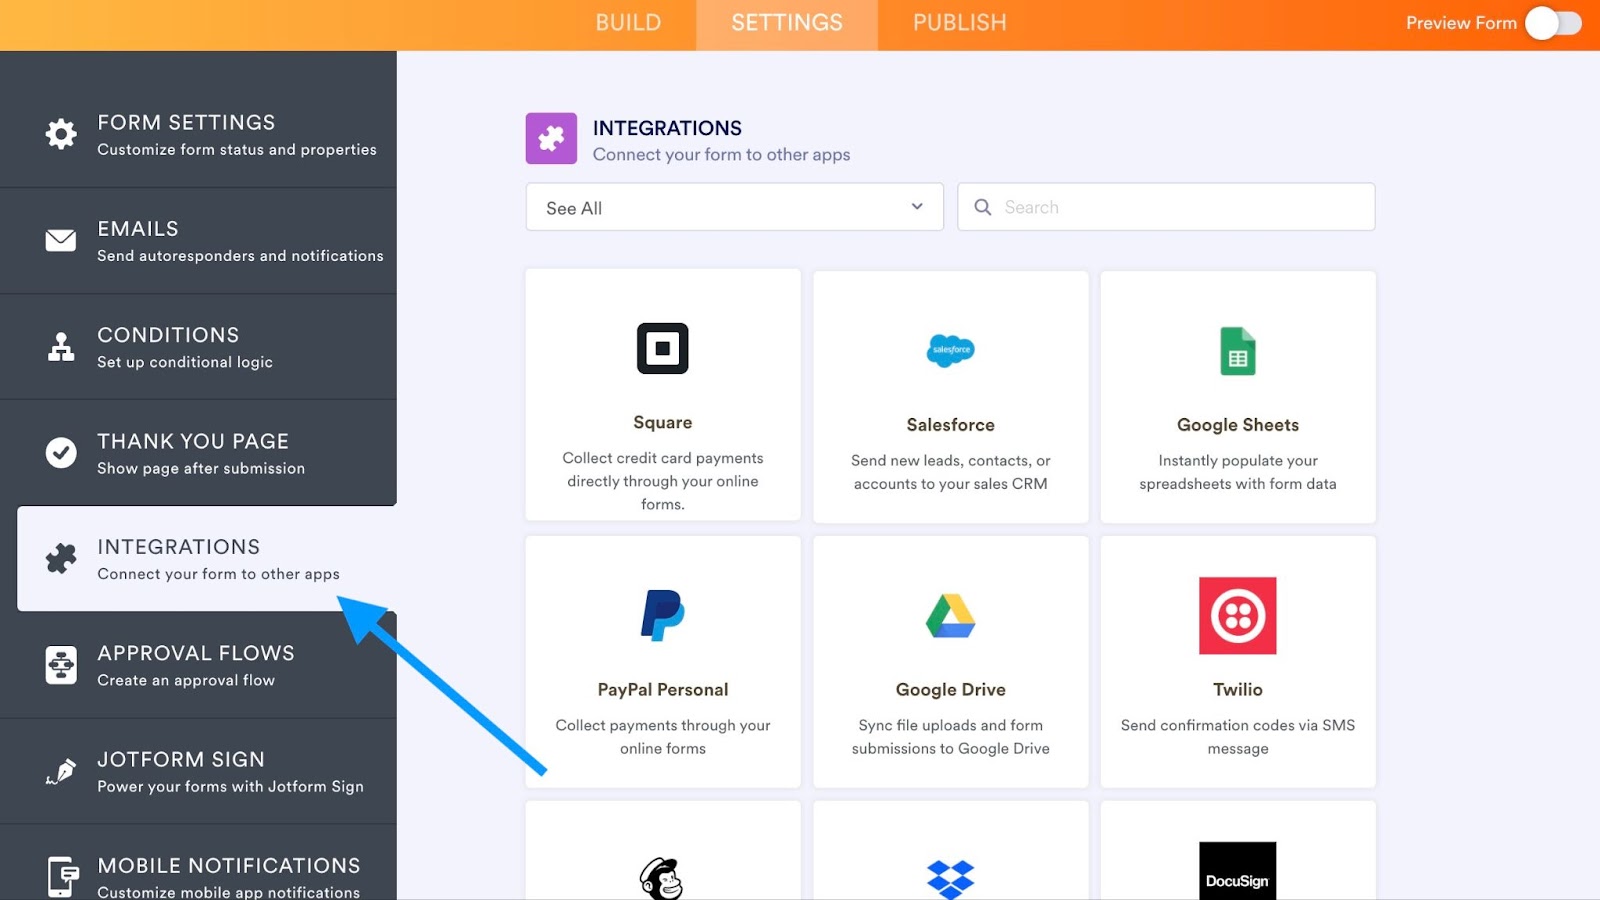
- Scroll down to search for Asana or type it in the search bar.
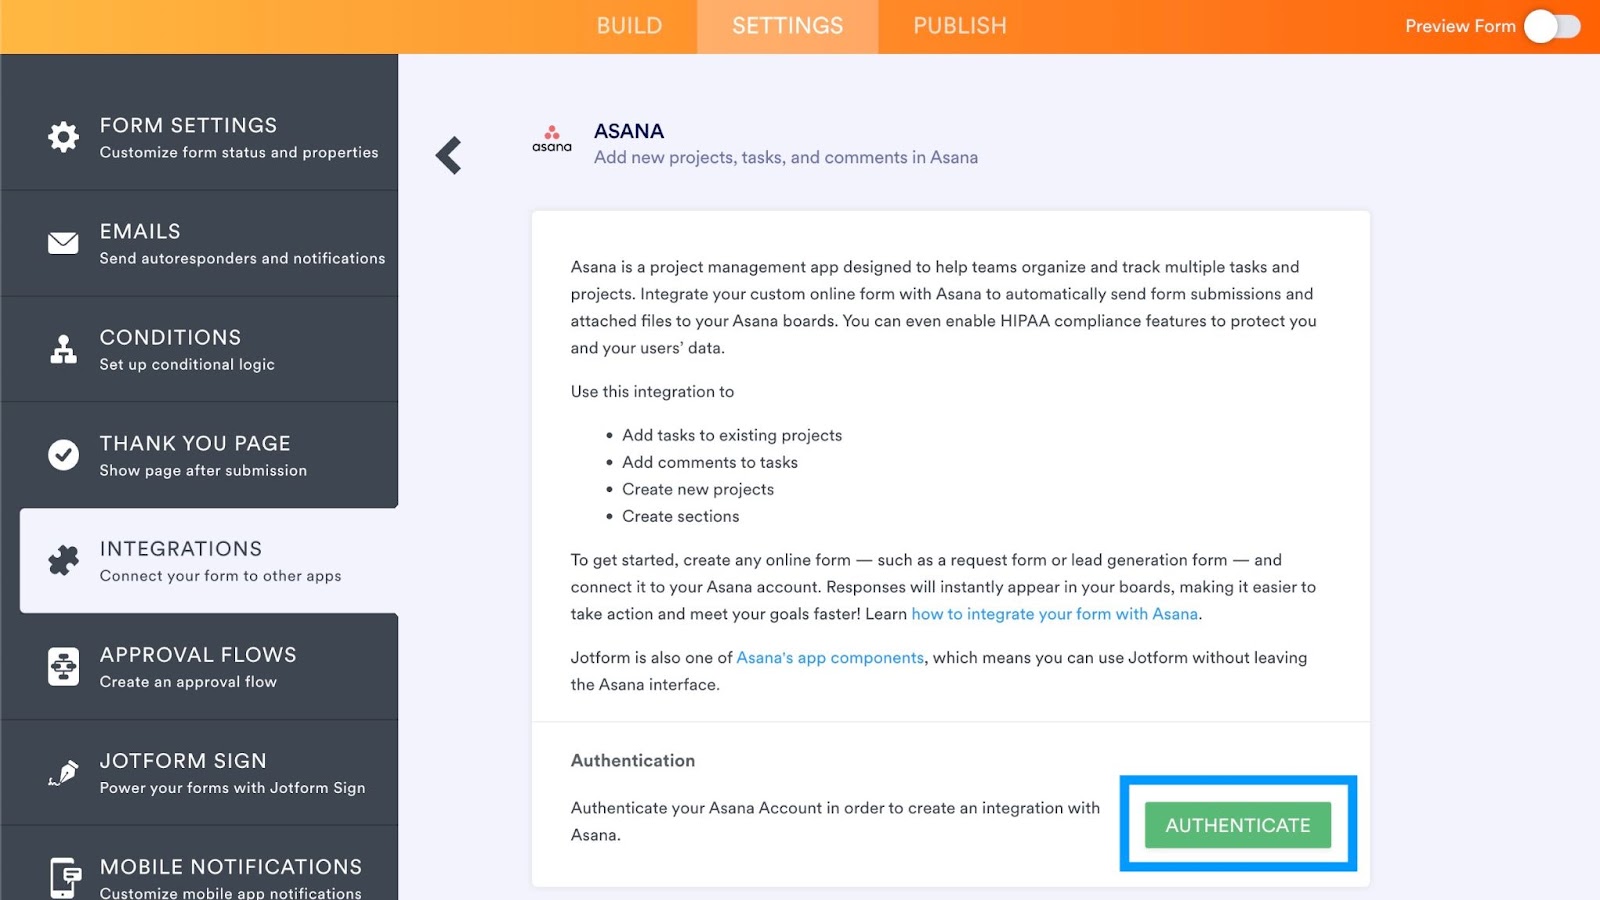
- Click the Asana field and then the green Authenticate button to input your Asana login credentials.
- Select an integration action, such as create a new task, project, or section.
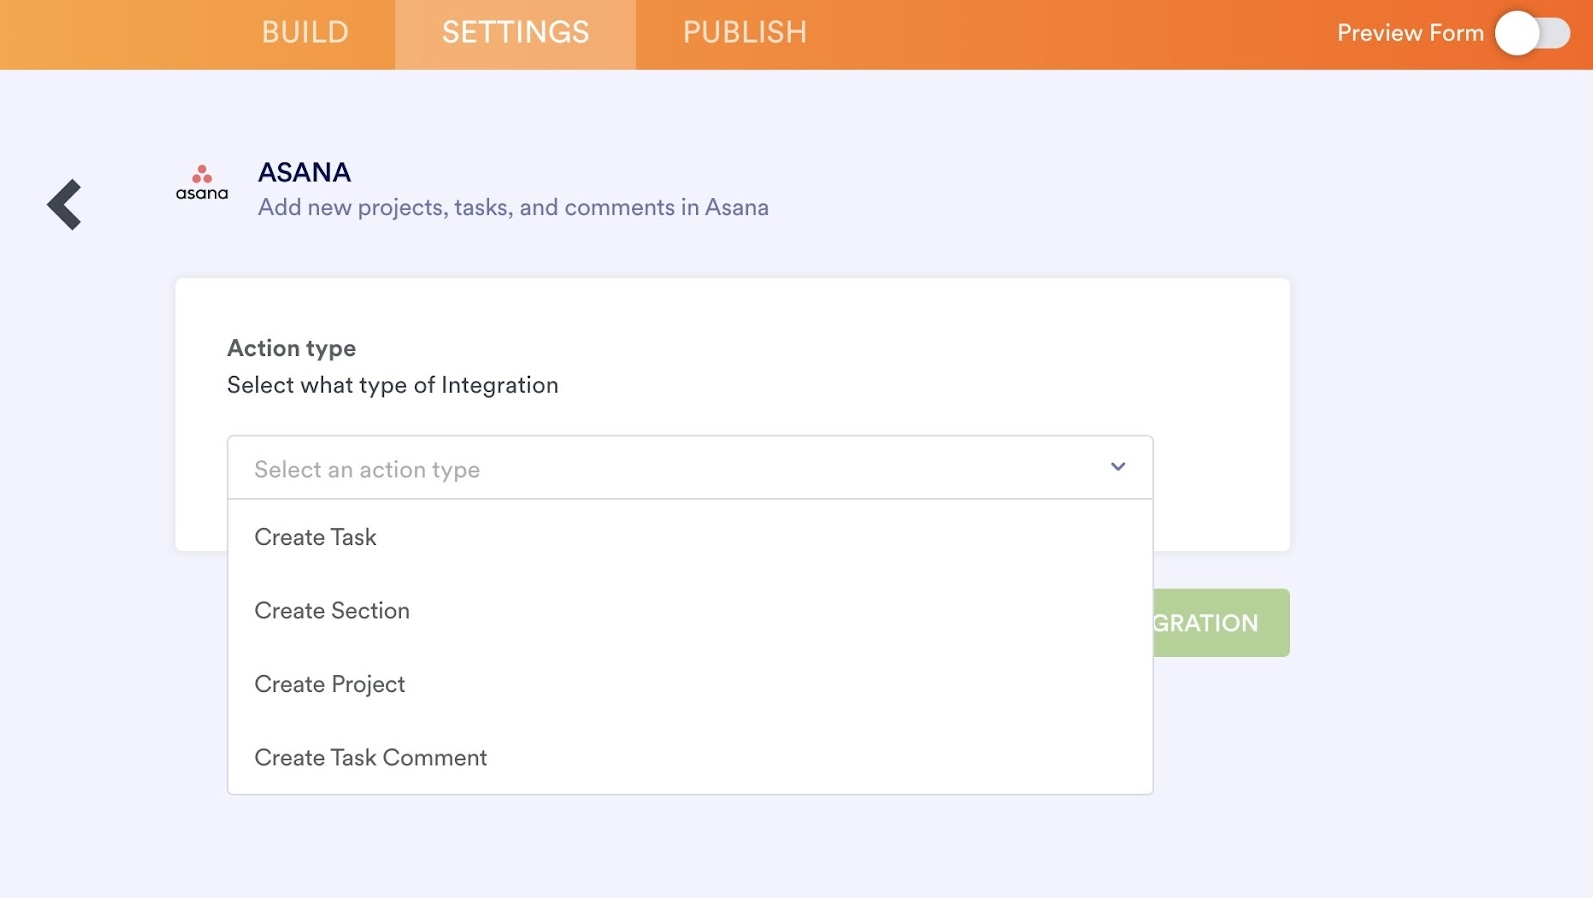
- Choose your workspace, team, and project.
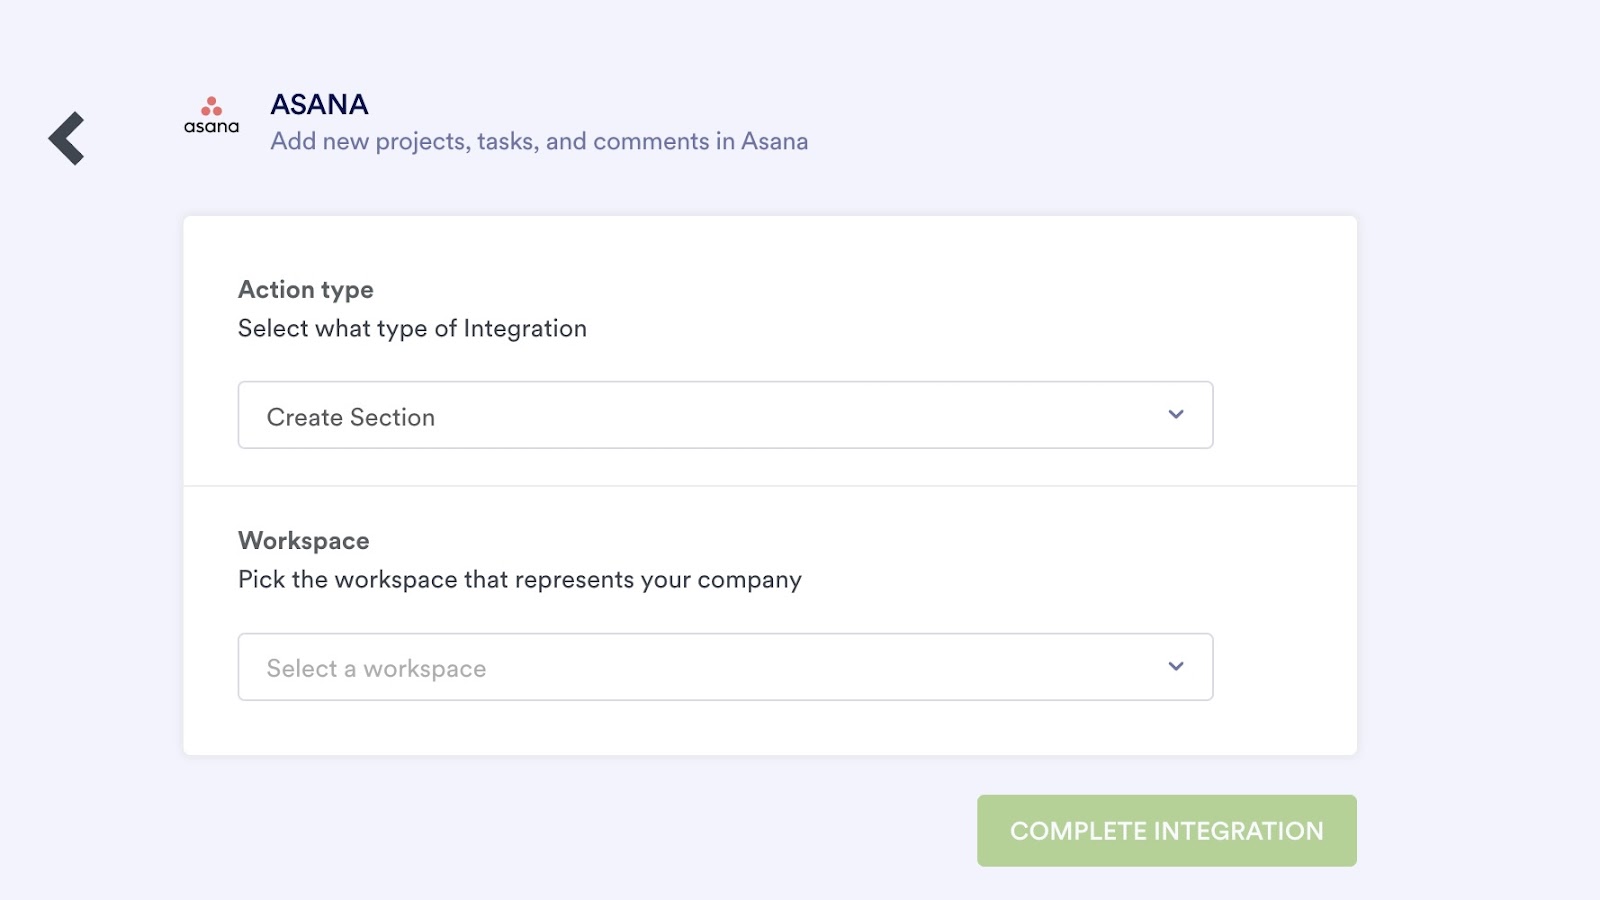
- Next, match your form fields to Asana.
- Click the Finish button to complete the integration.
With a powerful project management tool like Asana, you save time, money, and resources by keeping everyone organized and on the same page for every project and work request — especially when you now know how to create forms in Asana.
And for even more fully customizable forms, improved team collaboration, and workflow automation, connect Asana with Jotform. It’s easy to use, easy to set up, and most importantly, easy for your team to implement to enhance their processes, productivity, and overall efficiency day after day.
Collaborative project management with Jotform Boards
Jotform Boards provides a visual, collaborative space to manage tasks, track workflows, and streamline processes—all in one place. Whether tasks originate from form submissions, AI Agent interactions, or workflow automations, Jotform Boards makes it easy to organize and act on them efficiently.
By integrating forms, workflows, and AI Agents, Jotform Boards eliminates the need for multiple tools and platforms. Tasks are automatically generated, categorized, and assigned based on your business needs. The intuitive kanban-style interface enables effortless task tracking, while customization options—such as board themes, task fields, and automated triggers—enhance flexibility.
With Jotform Boards, teams can collaborate more effectively, ensuring that every request is captured and resolved without missing a step.


Send Comment: