Stripe is a popular payment processing platform that allows businesses and individuals to quickly and securely accept payments online. Since its founding, Stripe has quickly become one of the world’s most widely used payment platforms, with thousands of businesses of all sizes relying on its services to process transactions.

Jotform now brings the power of Stripe to your forms. Jotform’s Stripe integration lets you create a professional-looking credit card form in minutes. You can use the integration to accept payments for your products or services or set it up to collect donations for your charity. You can also configure Stripe to process recurring billings.
Integrating Stripe with your form is relatively easy! Let’s start!
Adding and Setting up Stripe Integration
Create a new or edit an existing form and follow the steps below to integrate Stripe into your form.
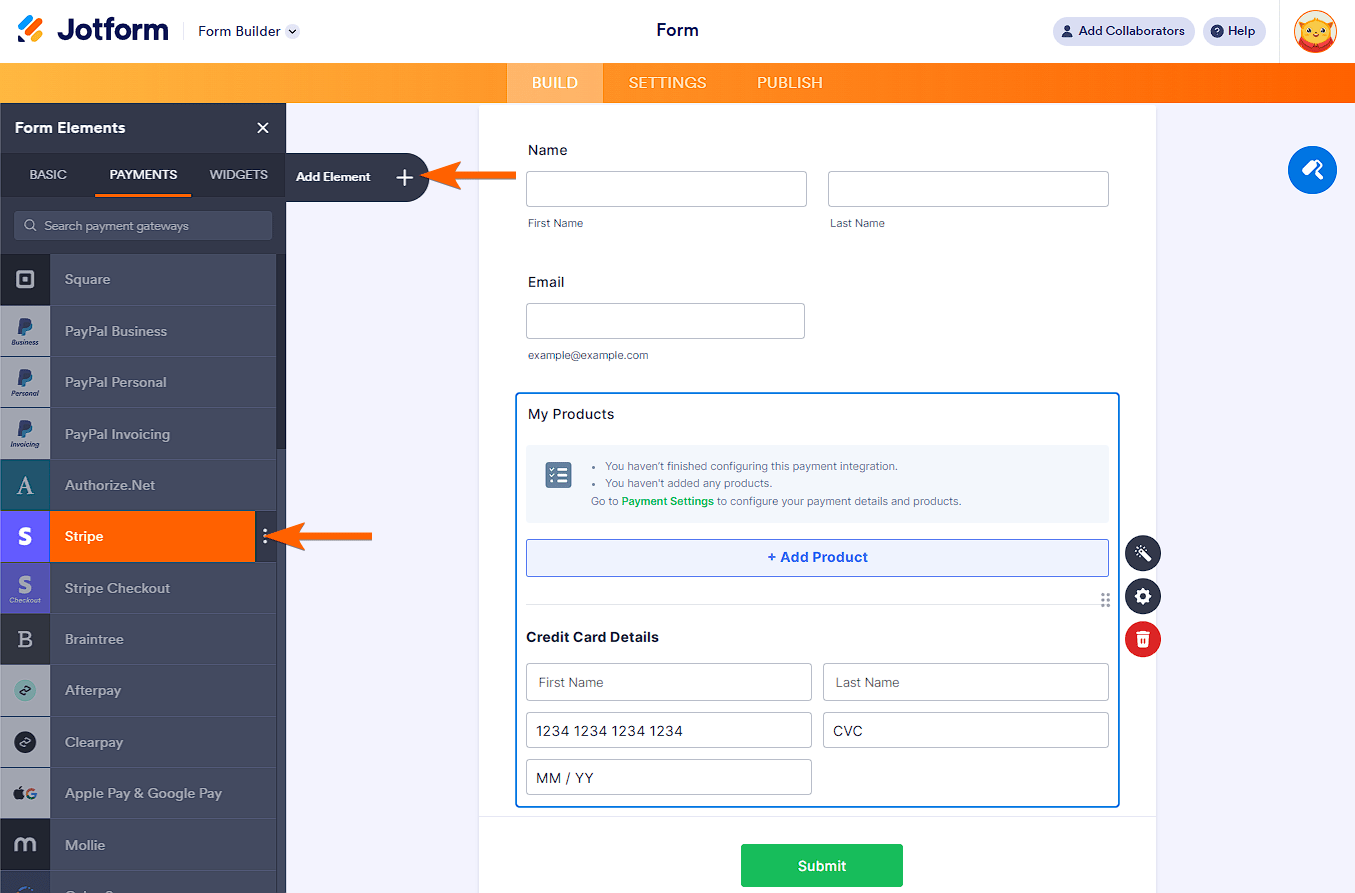
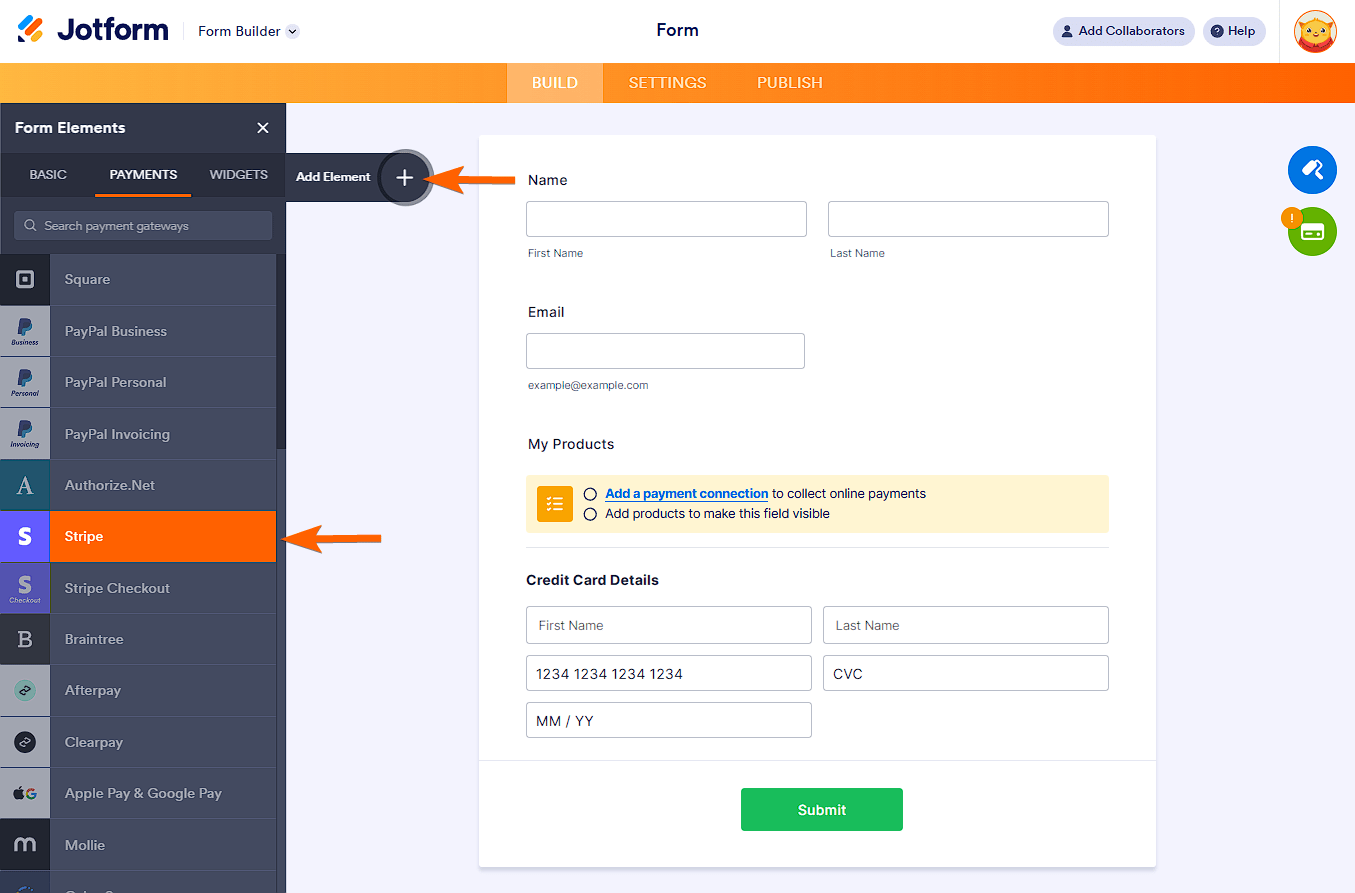
- In the Form Builder, click the Add Element button on the left side of the screen.
- Go to the Payments tab.
- Search and click Stripe. You can also drag and drop it to the form to add.
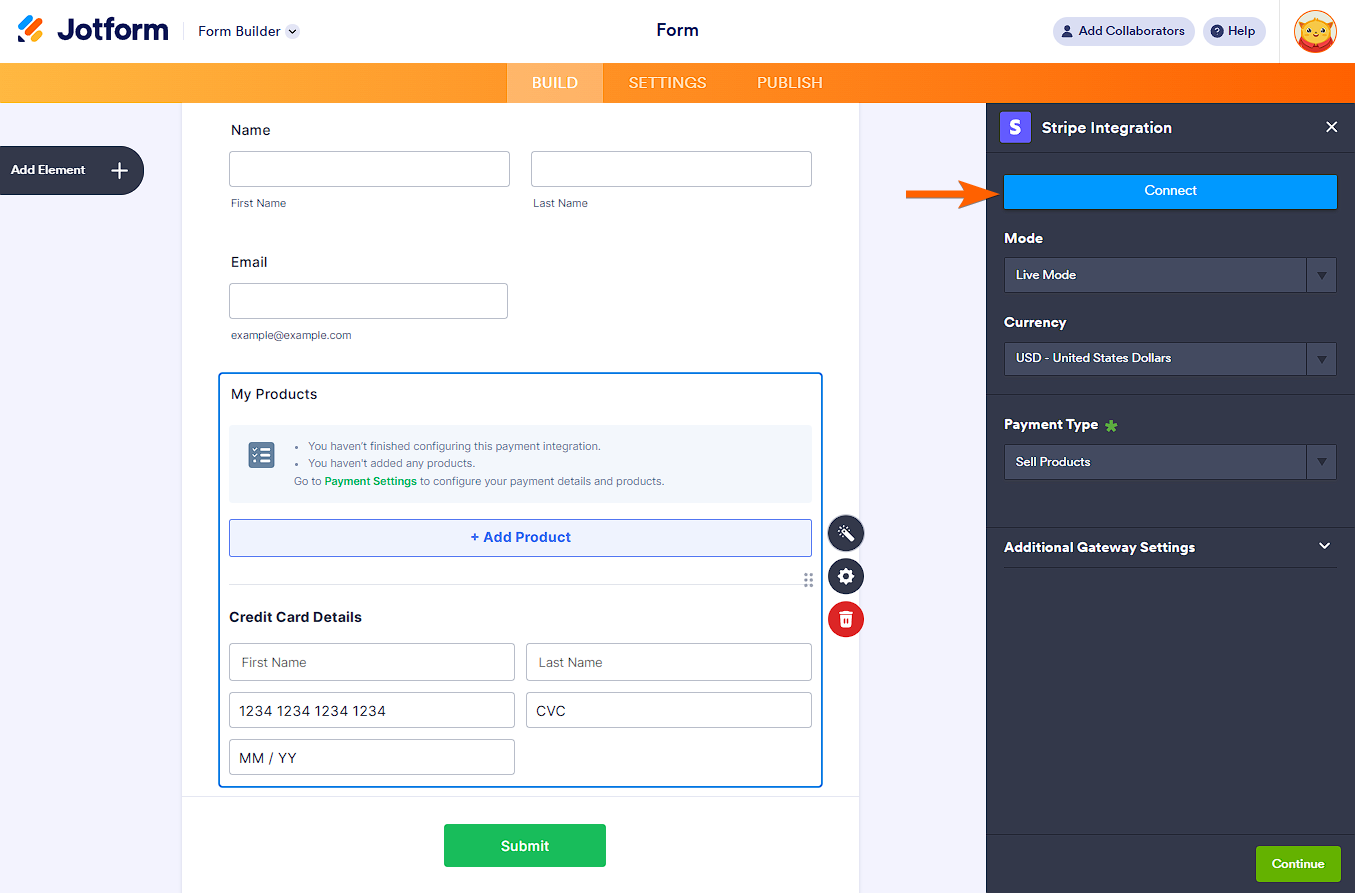
- In the Payment Settings, you must choose the Mode first. This option determines the type of Stripe account you’re using. Live means your registered and activated Stripe business. Test means your Stripe sandbox account. Switching modes requires you to connect again.
- Now that you’ve chosen the Mode, click the Connect button and connect your Stripe account.
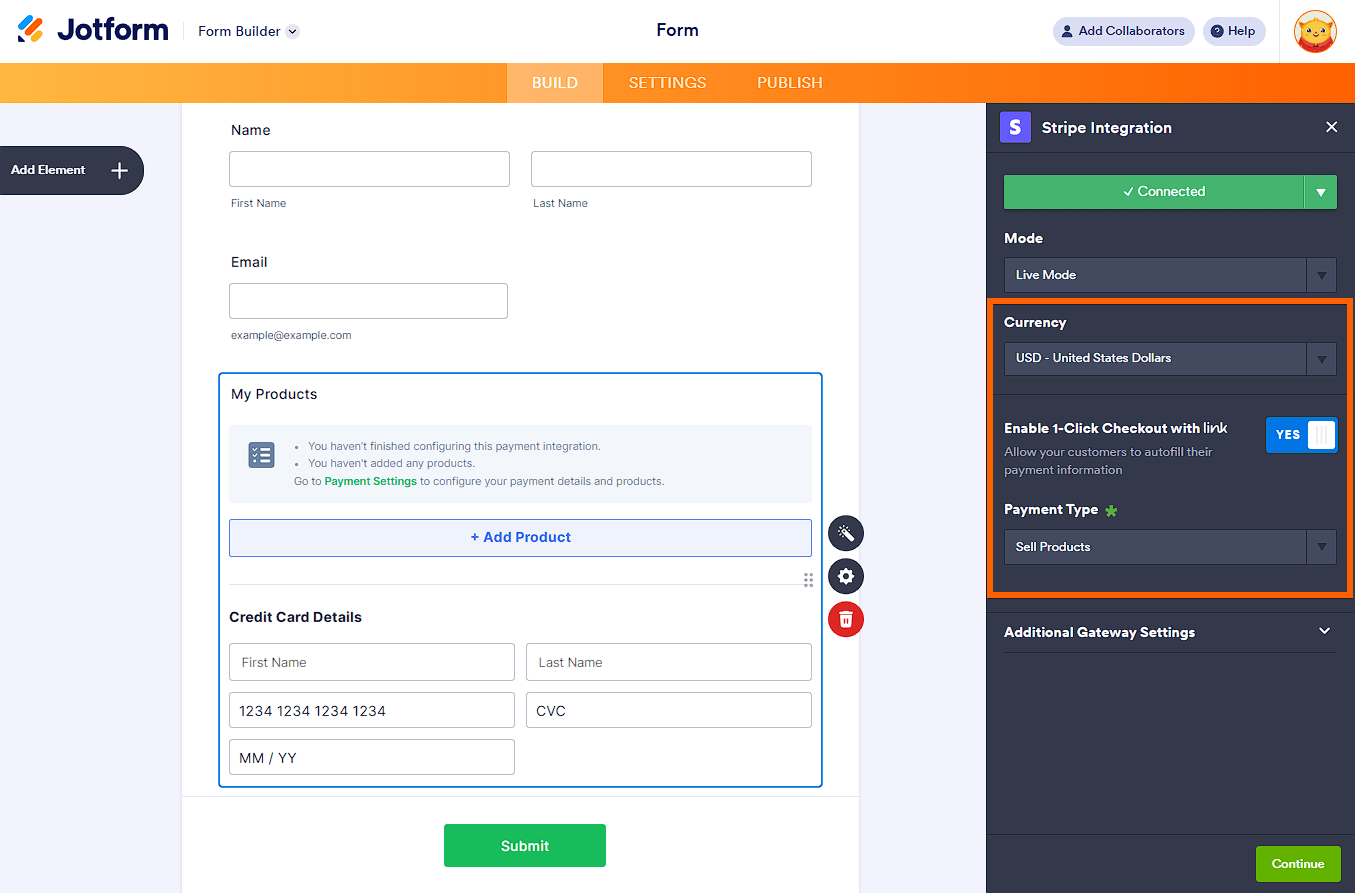
- Once connected, set up the other Stripe options accordingly:
- Currency — Stripe supports multiple currencies. See Supported Currencies for more details. The prices and amounts displayed on the form are based on the selected currency.
- Enable 1-Click Checkout with Link — Link lets you save and autofill your payment information on your next purchases through Link-enabled sites. Scroll below for more details.
- Payment Type — With Stripe, you can sell products or subscriptions, collect donations, or allow user-defined amounts.
Under the Additional Gateway Settings, you can set up a few additional options, which include the following:
- Ask Billing Information to Customer — When toggled to Yes, you can select which field to be the customer email, billing & shipping addresses, phone, and a custom field. These details are sent to Stripe.
- Send Email to Customer — Automatically email the customer when 3D Secure authentication problems occur in the form.
- Create Stripe Customer Record — Choosing For Each Unique Customer option means Stripe will only store one customer record based on the combination of unique email addresses and cards they used for payment. The For Each Submission option means Stripe will record each submission, which creates a duplicate for the same customer who submits the form.
- Charge Customer Immediately — Stripe supports Payment Authorization. Toggle this to No if you want to charge customers at a later date.
Note
If you turn off Charge Customer Immediately, keep the Create Stripe Customer Record setting set to either For Each Submission or For Each Unique Customer. This ensures the Charge Now button in Tables will still function when you use it later.
- Fetch Coupons from Stripe Account – You’ll see this toggle when you select Sell Subscription from the Payment Type. When toggled, it will fetch and display all the coupons from the connected Stripe account. Please keep in mind that this overrides the current coupons created through Jotform. For more information, please visit our help guide on How to Fetch Coupon Codes From Stripe.
- Fetch Subscriptions from Stripe Account – When selling subscriptions, you can toggle this to fetch your subscription items from your Stripe account.
- Show Fetched Coupons from Stripe Account – Choose whether to display the coupons when you opt to Fetch Coupons from your Stripe account.

- If you’ve selected Sell Products or Sell Subscriptions from the Payment Type, click the Continue button to add your product or subscription items. If you’ve chosen to set up donations or user-defined amounts, click the Save button to complete the integration.
See also:
- Setting Up Your First Order Form
- How to Set Up a Recurring Payment Option
- How to Add Coupon Code to Payment Forms
- How to Add Shipping Cost to Payment Forms
- How to Add Tax to Your Payment Form
- How to Add Options to Payment Forms
- How to Generate an Invoice for Your Payment Form
Setting up Stripe with Reusable Payment Connections
Reusable Payment Connections is Jotform’s feature that allows you to set up payment integrations like Stripe and reuse the same configuration on your other forms or apps created with Jotform Apps without setting it up again.
To set up Stripe
- In the Form Builder, click the Add Element button.
- Search for Stripe and click it from the Payments tab. You can also drag/drop it to add.
- In the Payment Properties, click the Plug icon next to the Stripe label, as pointed out in the below image:
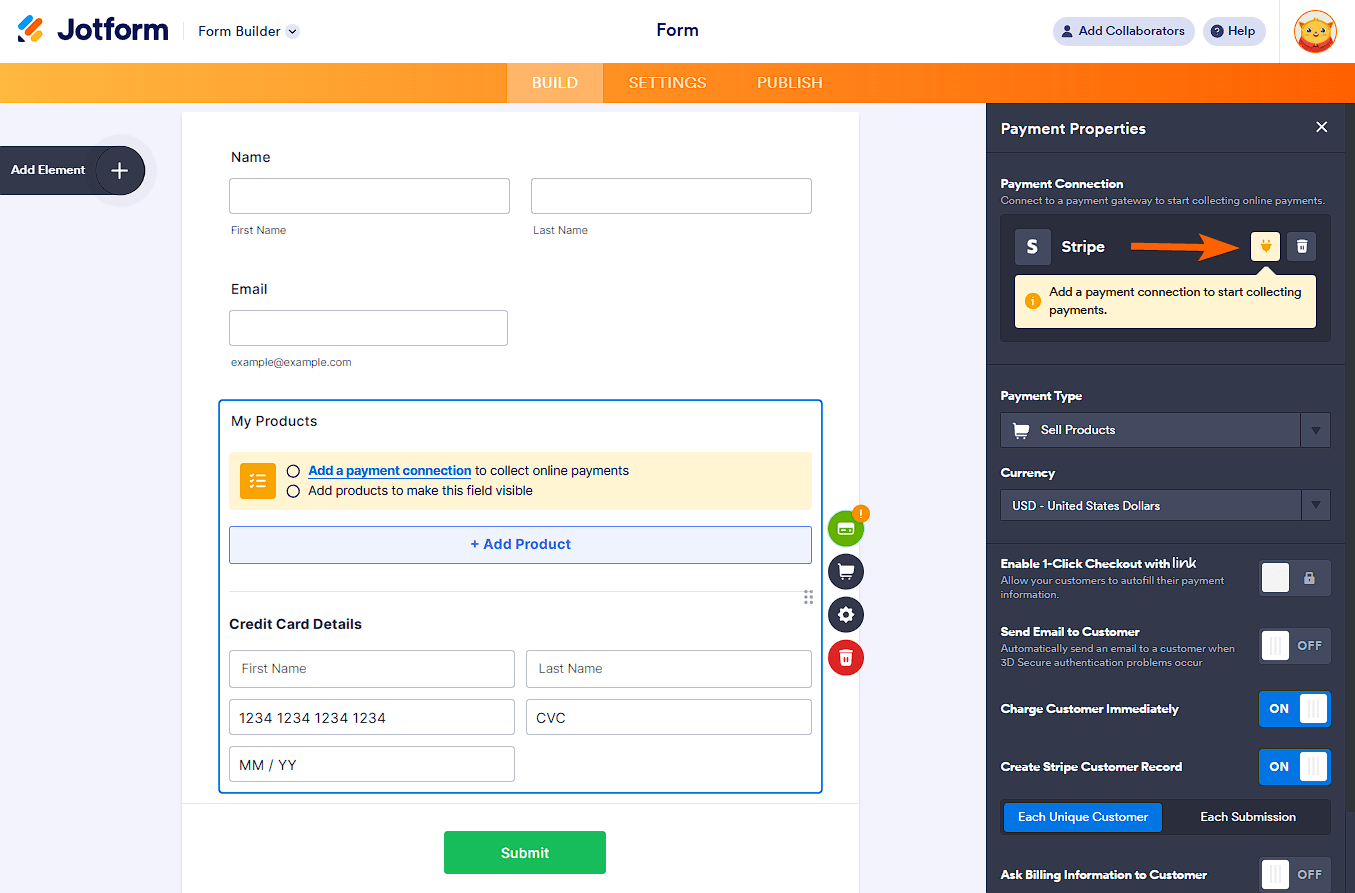
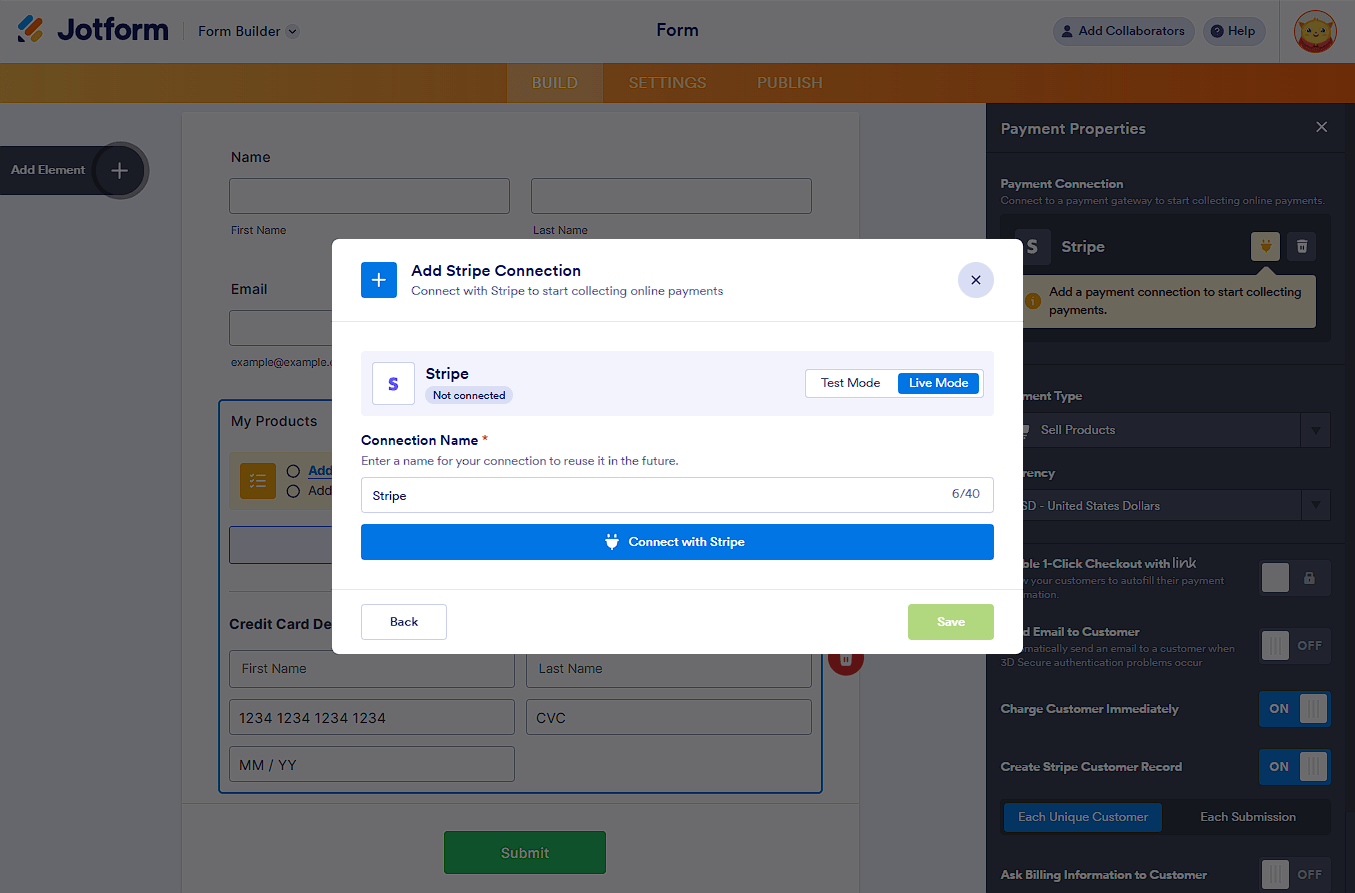
- In the Payment Connection settings, select and do the following:
- Mode — Select to connect a Sandbox account (Test Mode) or an approved Stripe account (Live Mode).
- Connection Name — Provide a name for your connection. You can label it with the gateway’s name or personalize it with your form’s name to easily manage it later.
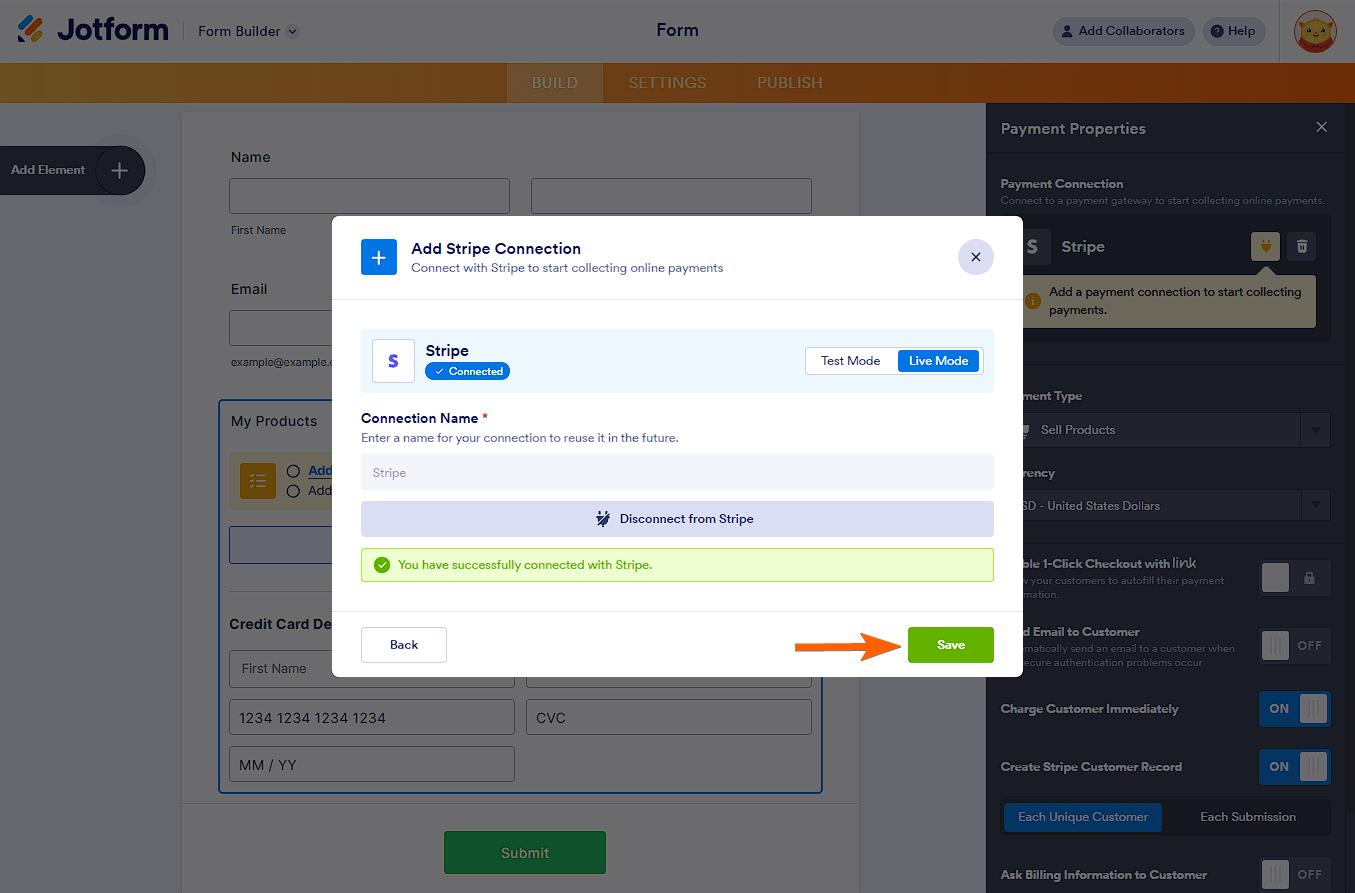
- Connect with Stripe — Click this button to link your Stripe account.
- Click the Save button to complete the Reusable Payment Connection for Stripe.
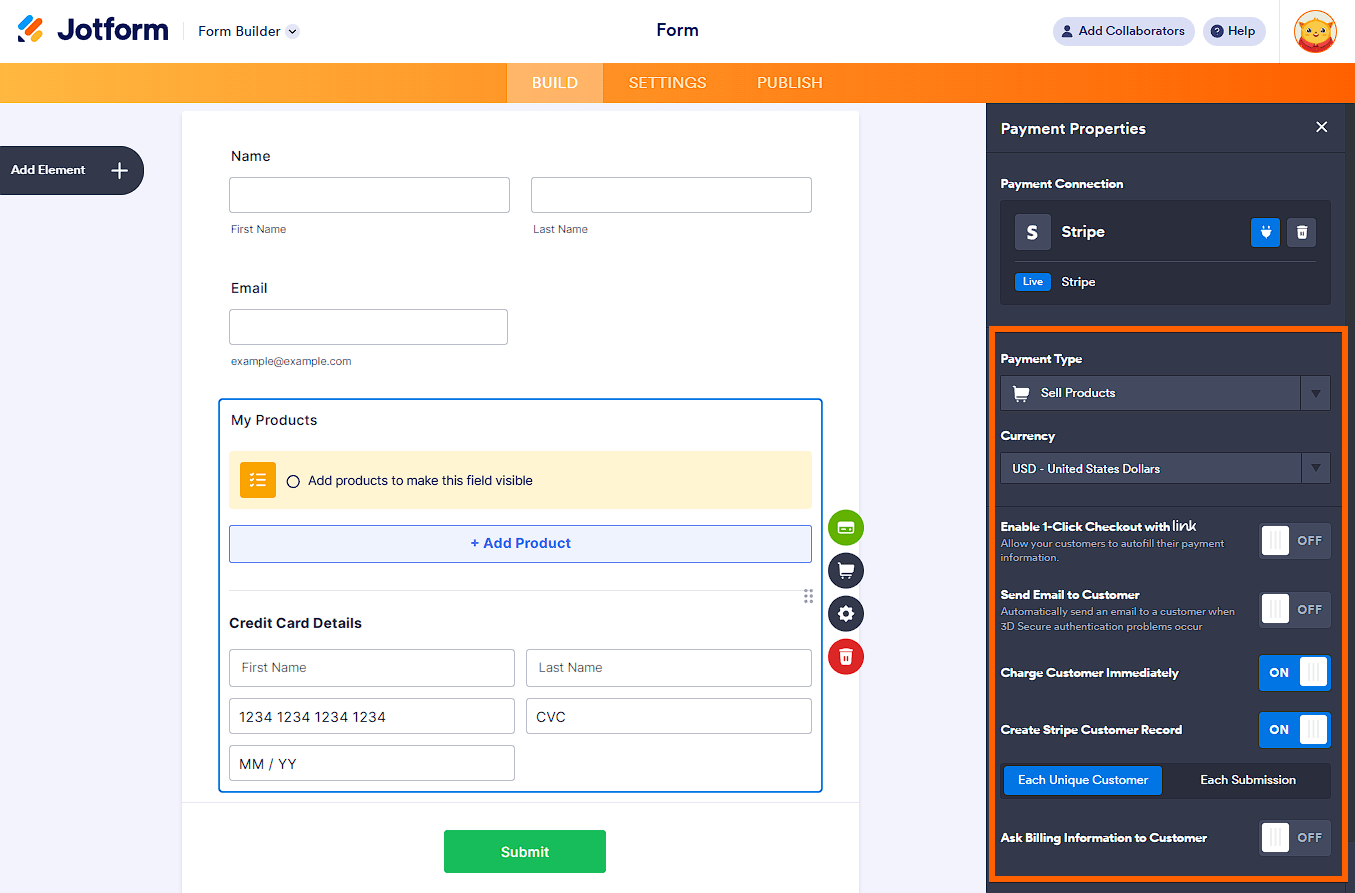
- Now, set up the other options accordingly:
- Payment Type — With Stripe integration, you can sell products and subscriptions, allow user-defined amounts, or collect donations.
- Currency — Stripe supports multicurrency. See Supported Currencies for more details.
- Enable 1-Click Checkout with Link — Link lets you save and autofill your payment information on your next purchases through Link-enabled sites. Scroll below for more details.
- Send Email to Customer — Automatically email the customer when 3D Secure authentication problems occur in the form.
- Charge Customer Immediately — Stripe supports Payment Authorization. Toggle this to No if you want to charge customers at a later date.
- Create Stripe Customer Record — Choosing For Each Unique Customer option means Stripe will only store one customer record based on the combination of unique email addresses and cards they used for payment. The For Each Submission option means Stripe will record each submission, which creates a duplicate for the same customer who submits the form.
- Ask Billing Information to Customer — When toggled to Yes, you can select which field to be the customer email, billing & shipping addresses, phone, and a custom field. These details are sent to Stripe.
Note
When you turn off Charge Customer Immediately to use the Charge Later feature, be sure to keep Create Stripe Customer enabled. This creates a customer ID along with the approved payment method ID, which is required to capture payments later with the Charge Customer Now button in Tables.
When you select Sell Subscription from the Payment Type, the following options will appear:
- Fetch Coupons from Stripe Account – When enabled, it will fetch and display all the coupons from the connected Stripe account. Please note that this overrides the current coupons created through Jotform. For more information, please visit our help guide on How to Fetch Coupon Codes From Stripe.
- Fetch Subscriptions from Stripe Account – Toggle this to fetch your subscription items from your Stripe account.
- Show Fetched Coupons from Stripe Account – Choose whether to display the coupons when you opt to Fetch Coupons from your Stripe account.

The Form Builder automatically saves the changes after selecting the options from each dropdown mentioned above.
Making Payment With Link
Link works like MasterPass. You can save your credit card details on Link and use them on other Link-enabled websites without entering your card details again. You only need to enter your registered Link email address, verify it through SMS or Email, and pay with your saved payment details from Link.
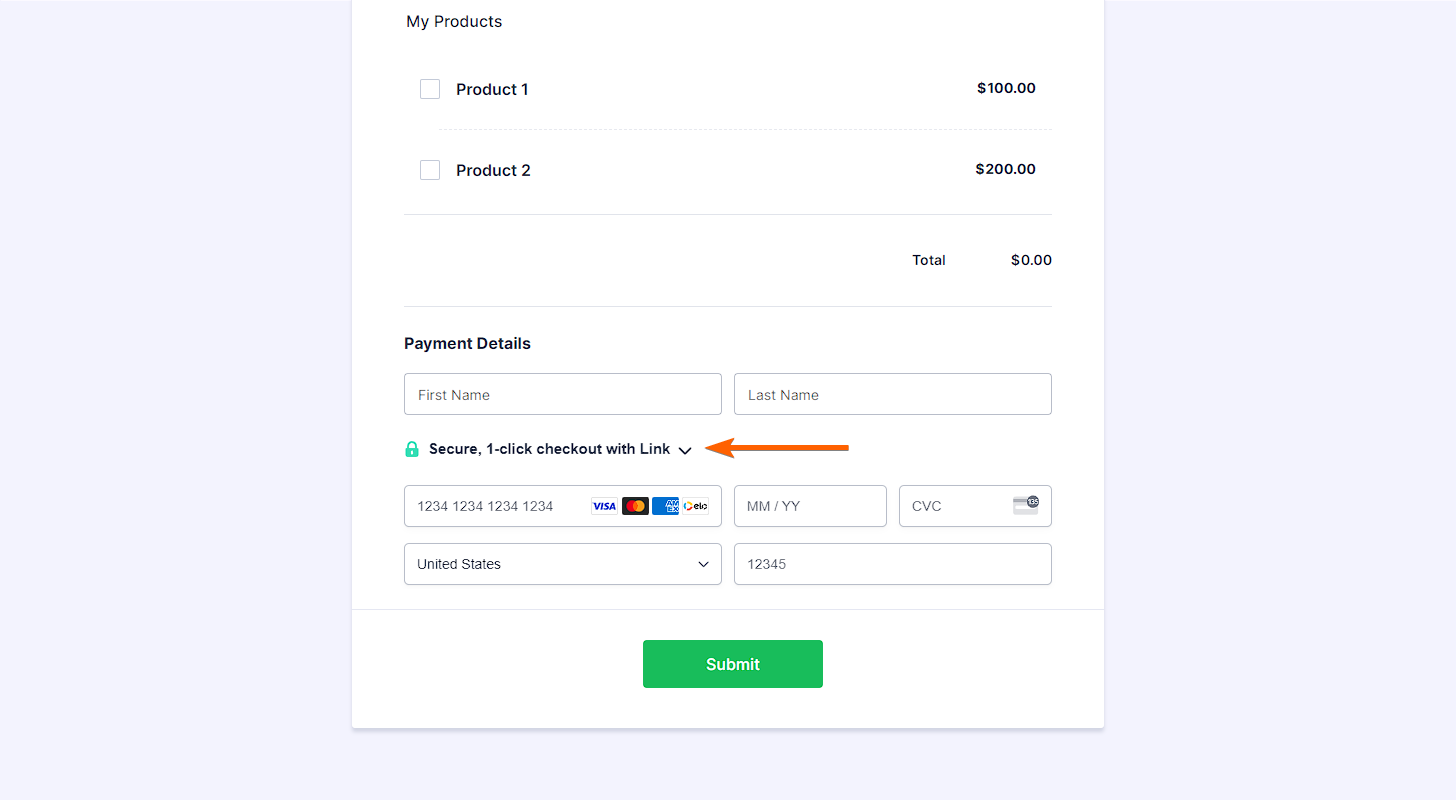
To pay with Link, click the Secure, 1-click checkout with Link.
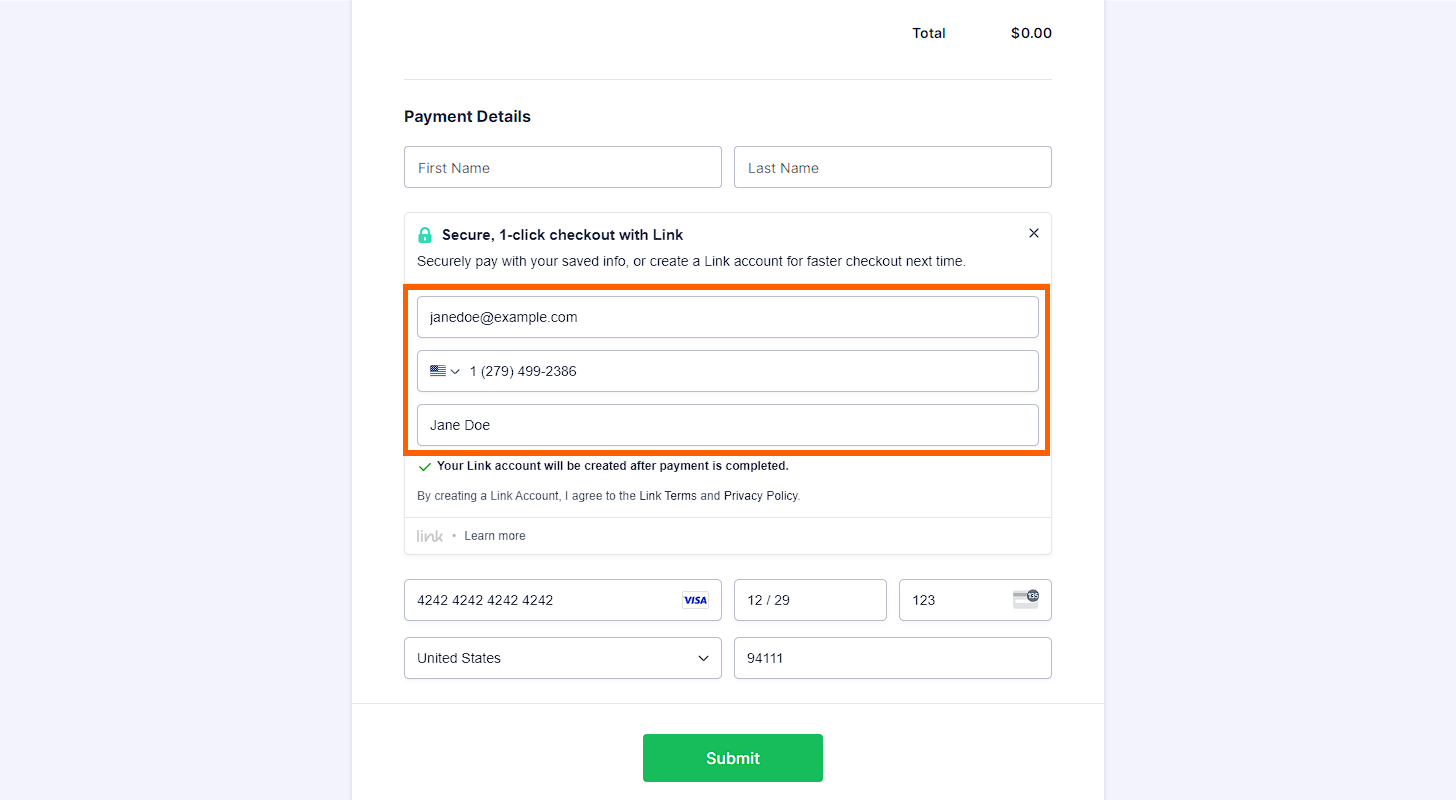
Link will automatically determine if you’ve already registered your email address with them or if you need to create an account. If you’re not yet registered with Link, it will ask you to provide other details, such as your Phone Number and Full Name, along with the card details. You must submit the form to complete the payment and create your Link account.
If you’ve already registered with Link, it will ask you to verify your account through Phone (default) or Email, as shown in the image below:

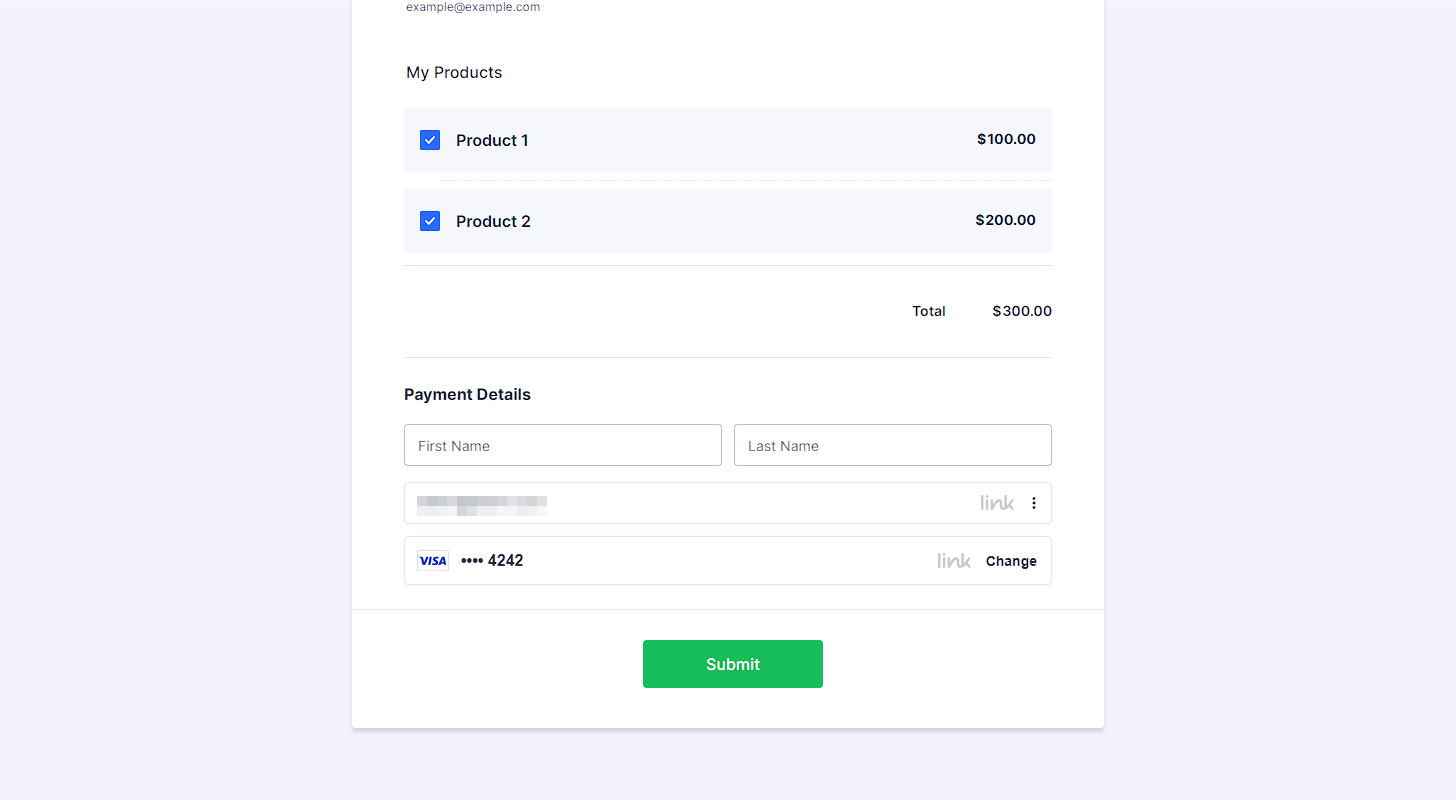
After verifying your Link account, you will see your default payment method. You can now submit the form to complete your payment.
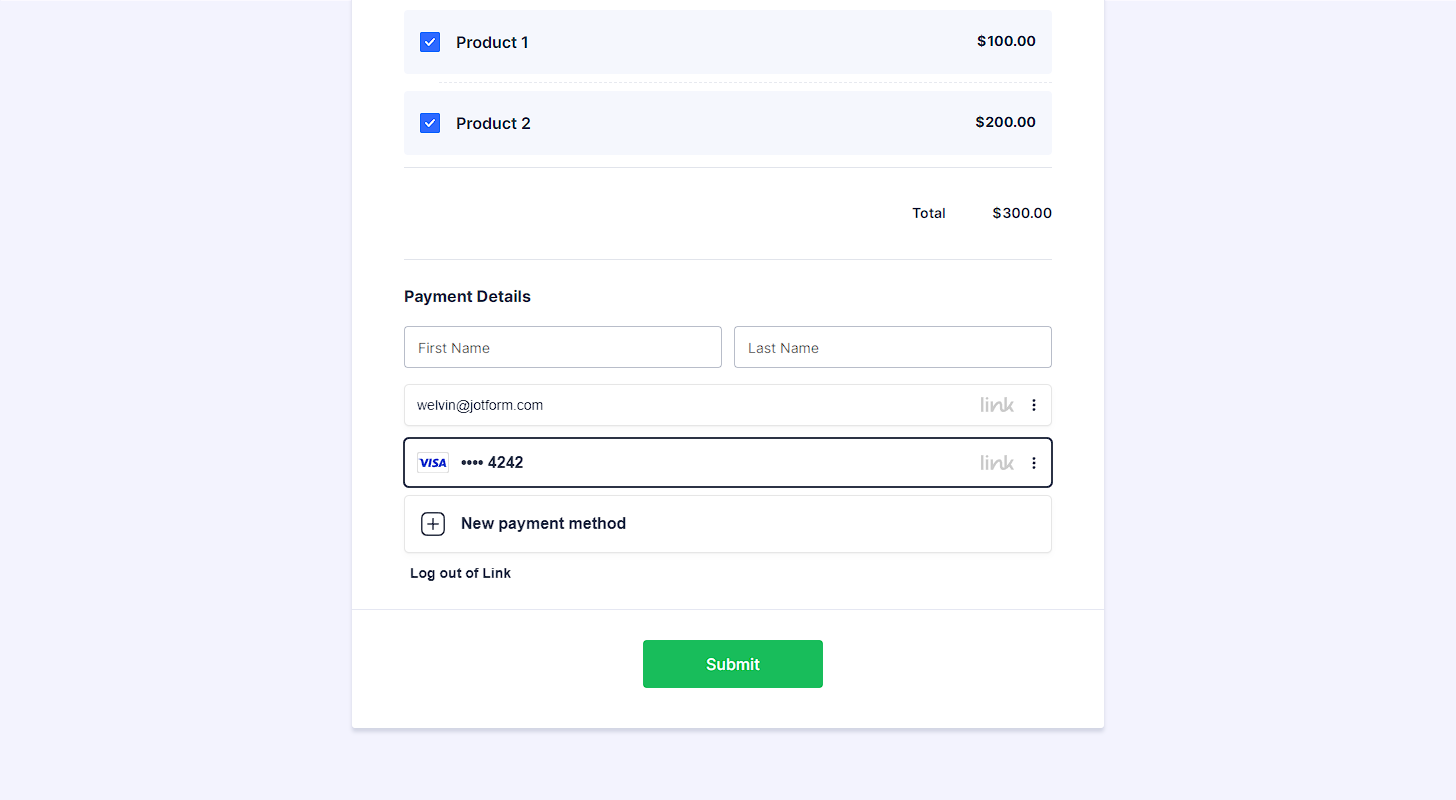
Clicking the Change text on the right side of the default payment method allows you to use a different card saved on your Link account or add a new payment method. You can also log out if you wish to.

Send Comment:
4 Comments:
More than a year ago
How do I set up sliding scale using stripe? I use their sliding scale item now, and I like that there is a default that the visitors can edit within limits.
More than a year ago
Sometimes these Stripe payments don't go through. The form is then saved in "Pending Payment". The issue is, nobody is notified, so we have client's that sign up, their payment doesn't go through, and then they just leave. Nobody knows to follow up with them because there is no email sent and the form is not submitted. I know how to view the pending payments, but that doesn't help me if I don't know that there is a form waiting for me there.
How can I automatically be notified if a payment fails and the form goes in hiding in the "pending payments" section?
More than a year ago
Stripe is not connection. It's asking me to create a new Stripe account.
More than a year ago
I am trying to create a jotform integrated with Stripe that would allow up to put in the different amount of copays and deductibles owed for medical visit fees