Automated Clearing House (ACH) payments let you securely accept payments from a customer’s bank account, offering a convenient alternative to credit and debit cards. ACH transactions typically have lower processing fees, making them a cost-effective option for many businesses. You can accept ACH payments on your form using Stripe, which lets you do the following things:
- Sell online products
- Sell merchandise
- Collect donations online
- Accept custom payments
Notes
- Eligibility Requirements — ACH payments are available for eligible Stripe accounts in supported regions.
- Bank Account Verification — Stripe Financial Connections enable instant bank account verification and may automatically use micro-deposit verification when instant verification is unavailable.
- Simple Setup — If you’re already using the standard Stripe integration, you can enable ACH payments directly from your Stripe settings without installing any additional ACH-specific integration.
- Supported Connection Types — ACH payments are supported through both the Legacy Payment Integration and Reusable Payment Connections. For new setups, Reusable Payment Connections is recommended, as the Legacy Payment Integration is available only to Jotform Enterprise users.
Setting Up a Stripe ACH Legacy Payment Integration
Whether you’re setting up a new form or updating an existing one, setting up Stripe to accept ACH payments using the Legacy Payment Integration takes no time at all—here’s how to do it:
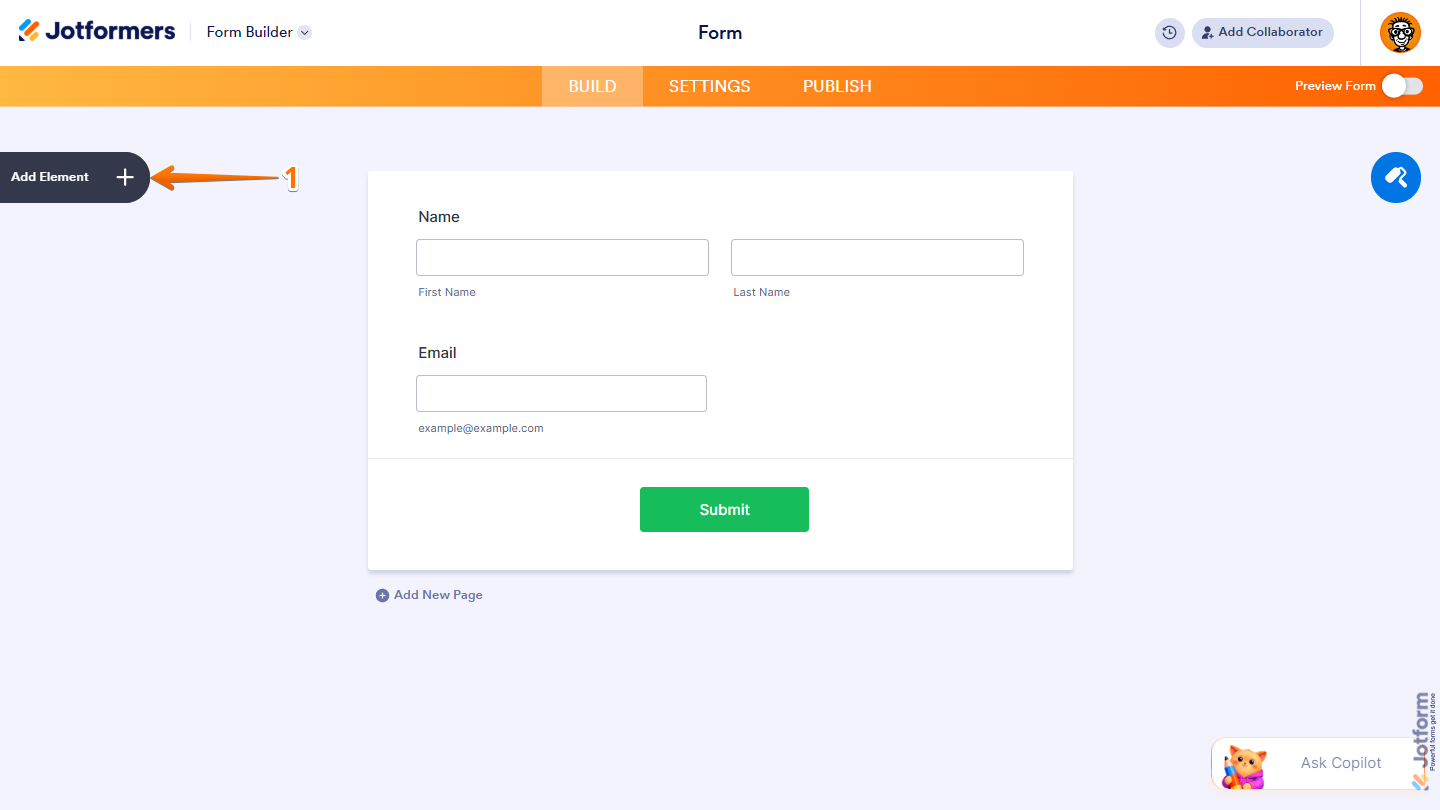
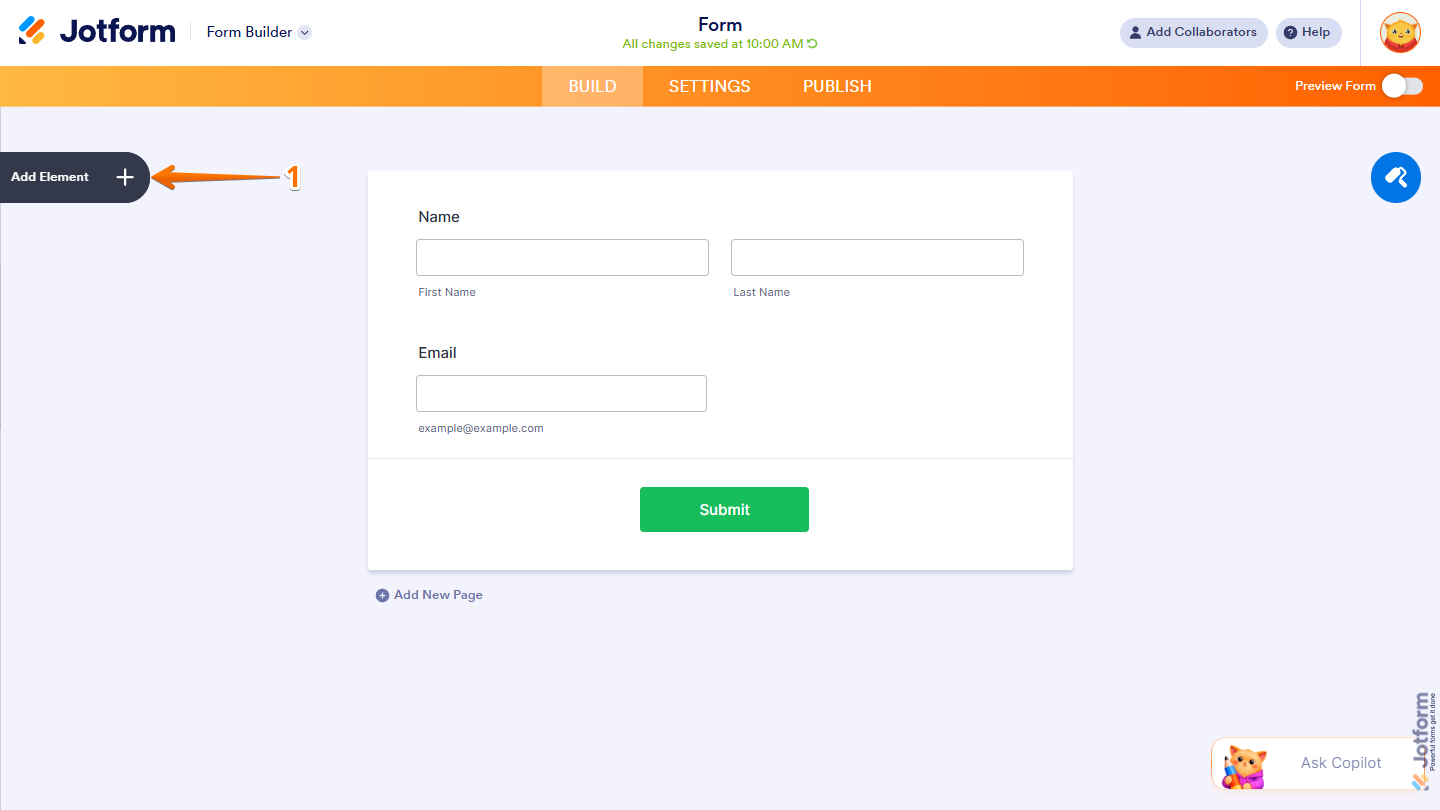
- In Form Builder, click on Add Element on the left side of the page.
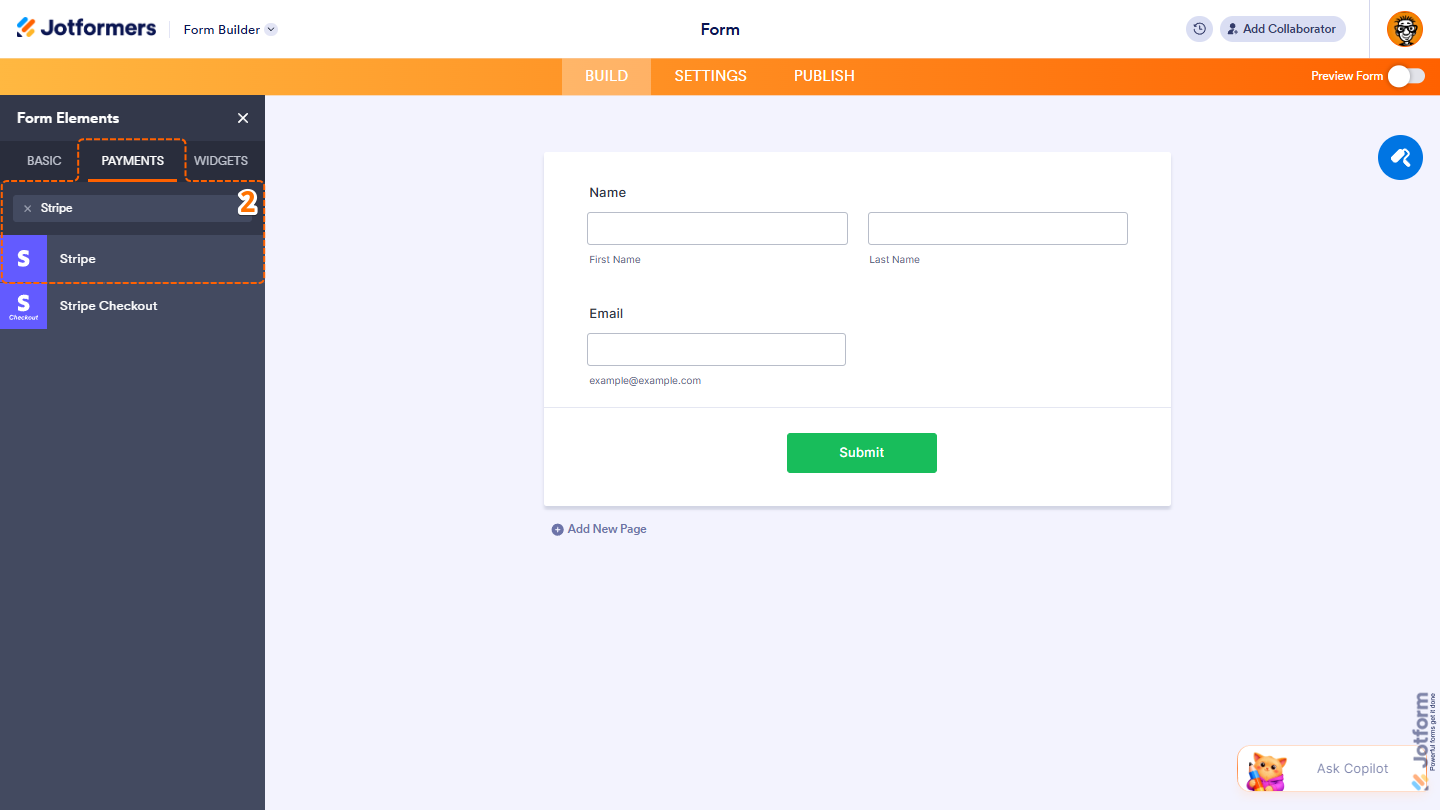
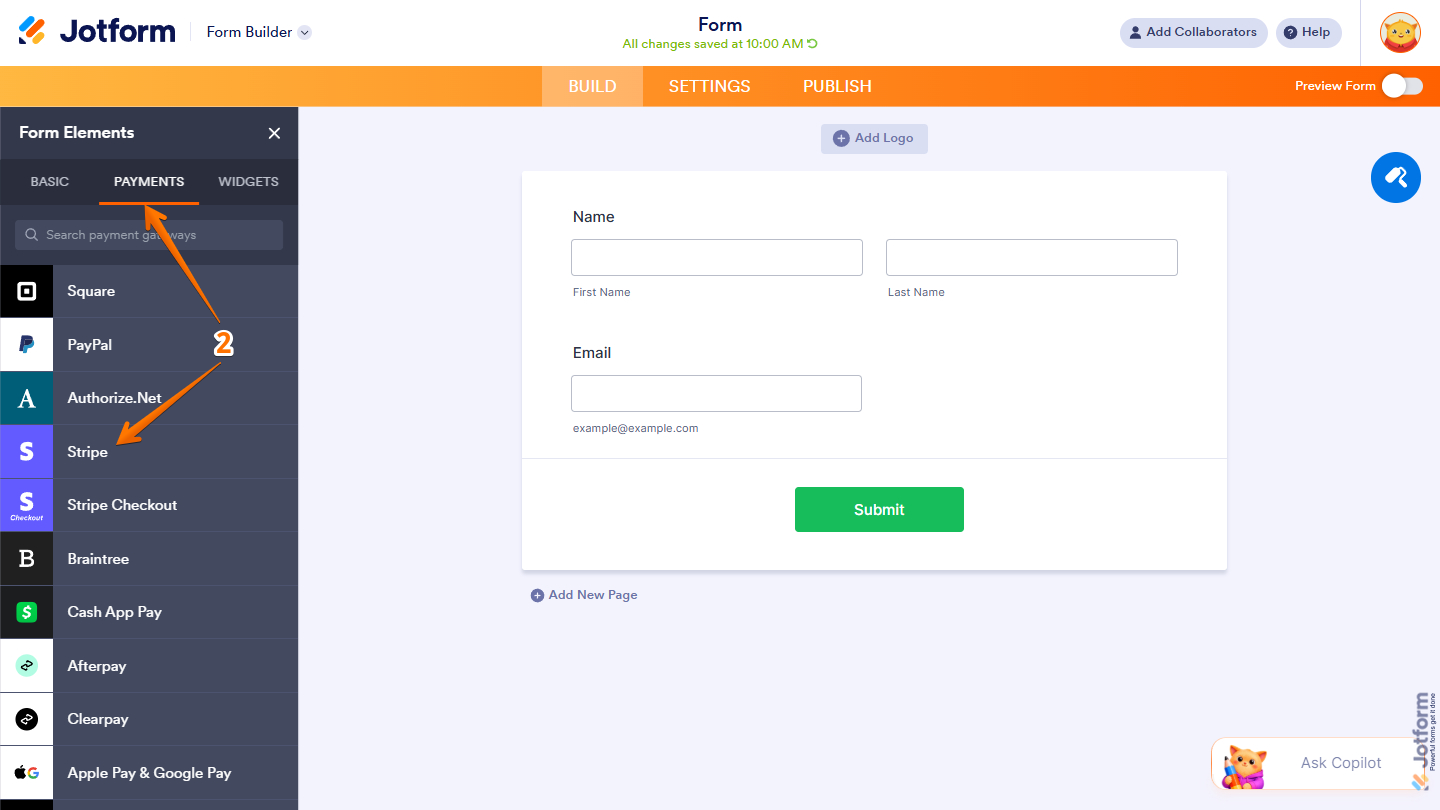
- Then, in the Form Elements menu, under the Payments tab, search for Stripe and click on it. Or just drag and drop it to where you want it on your form.
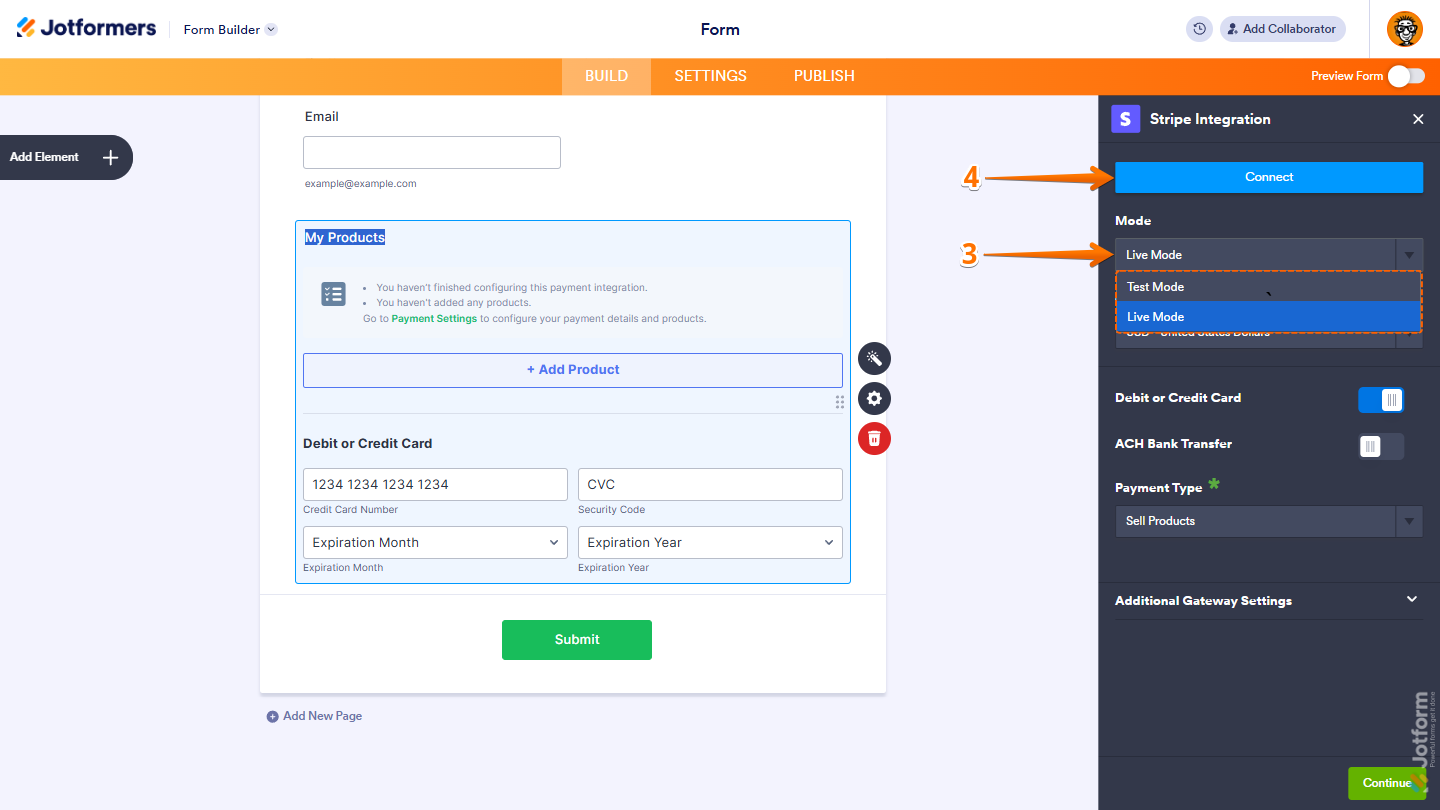
- Next, in the Stripe Integration menu that opens on the right side of the page, click on the Mode Dropdown menu and select the one you want the integration set to:
- Live Mode — Use this when you’re ready to collect real payments. Customers will be charged, and the funds will be deposited into your Stripe account.
- Test Mode — Use this to test your setup before going live. You can run test payments using your Sandbox account or test cards, and no actual charges will be made.
- Now, click on Connect.
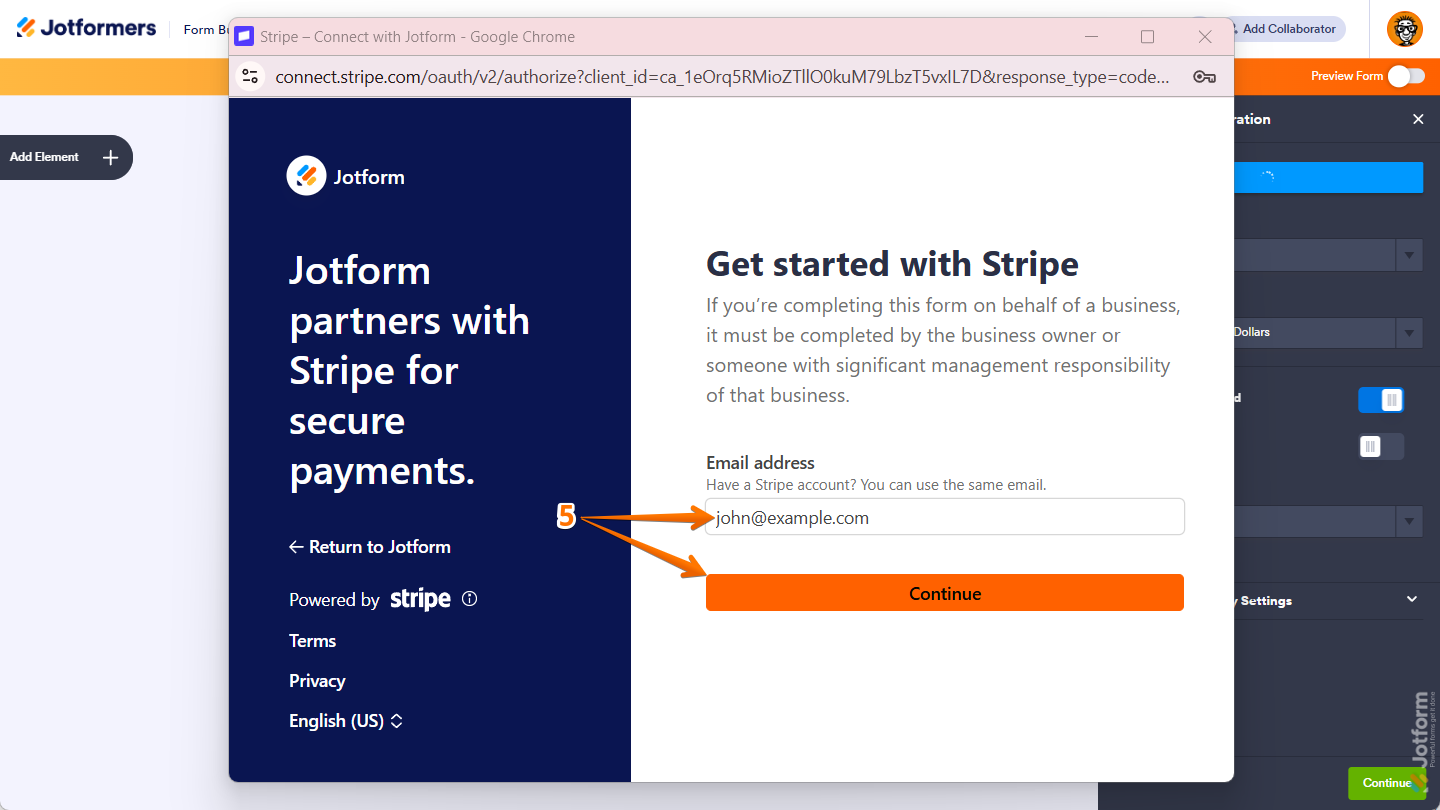
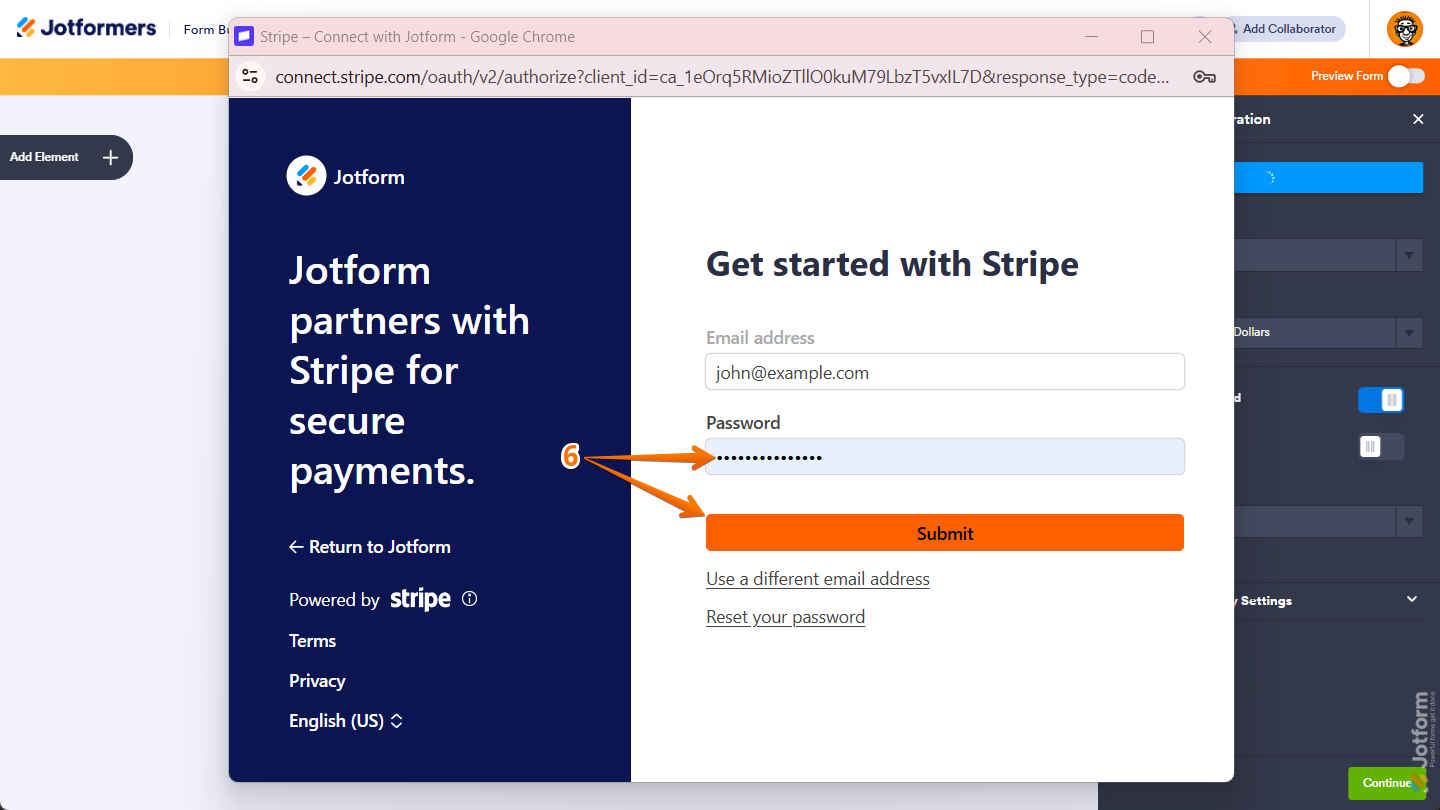
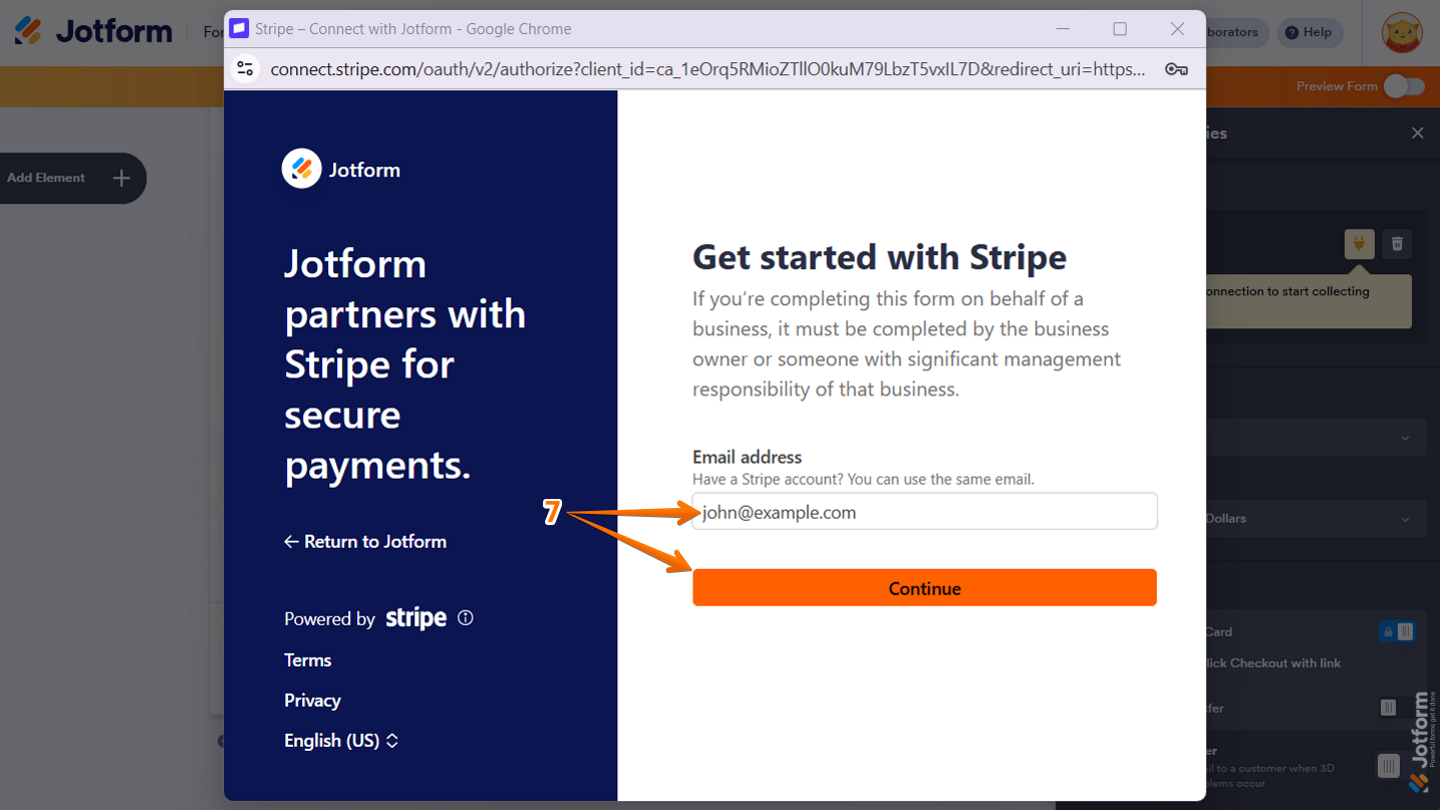
- In the pop-up window, under the Get Started with Stripe section, enter your registered Stripe Email Address in the Email Address field and then click on Continue.
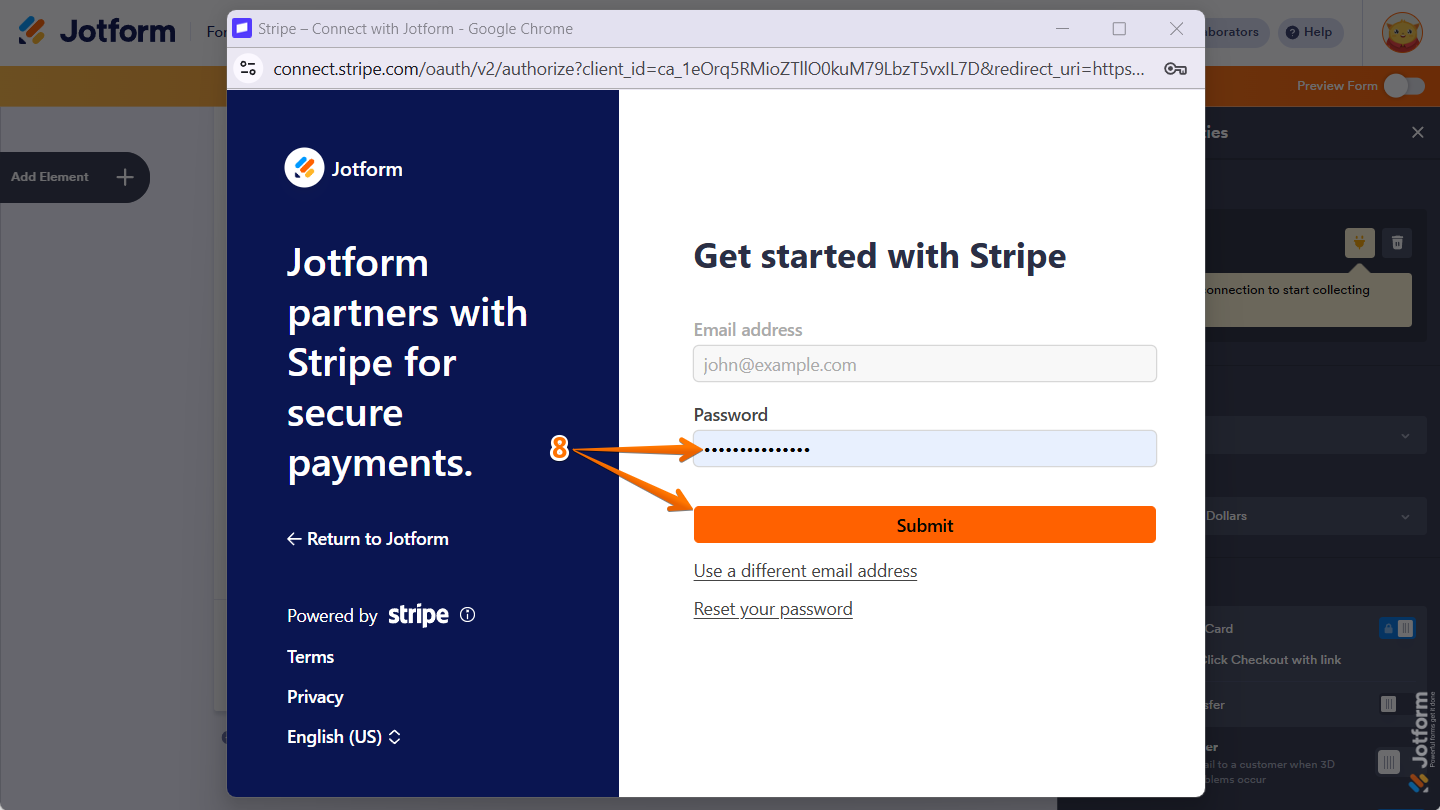
- Then, on the next screen, enter your password in the Password field and click on Submit.
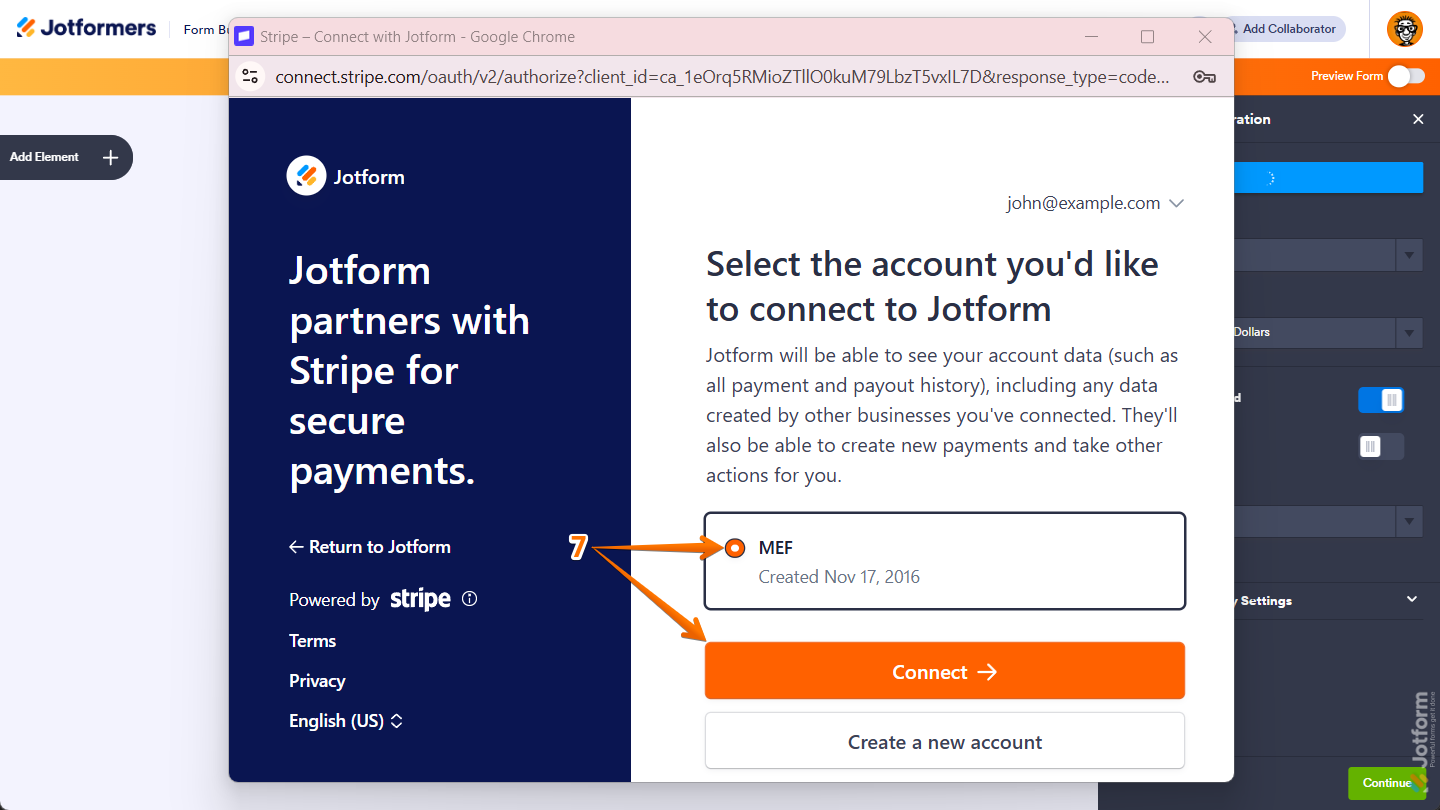
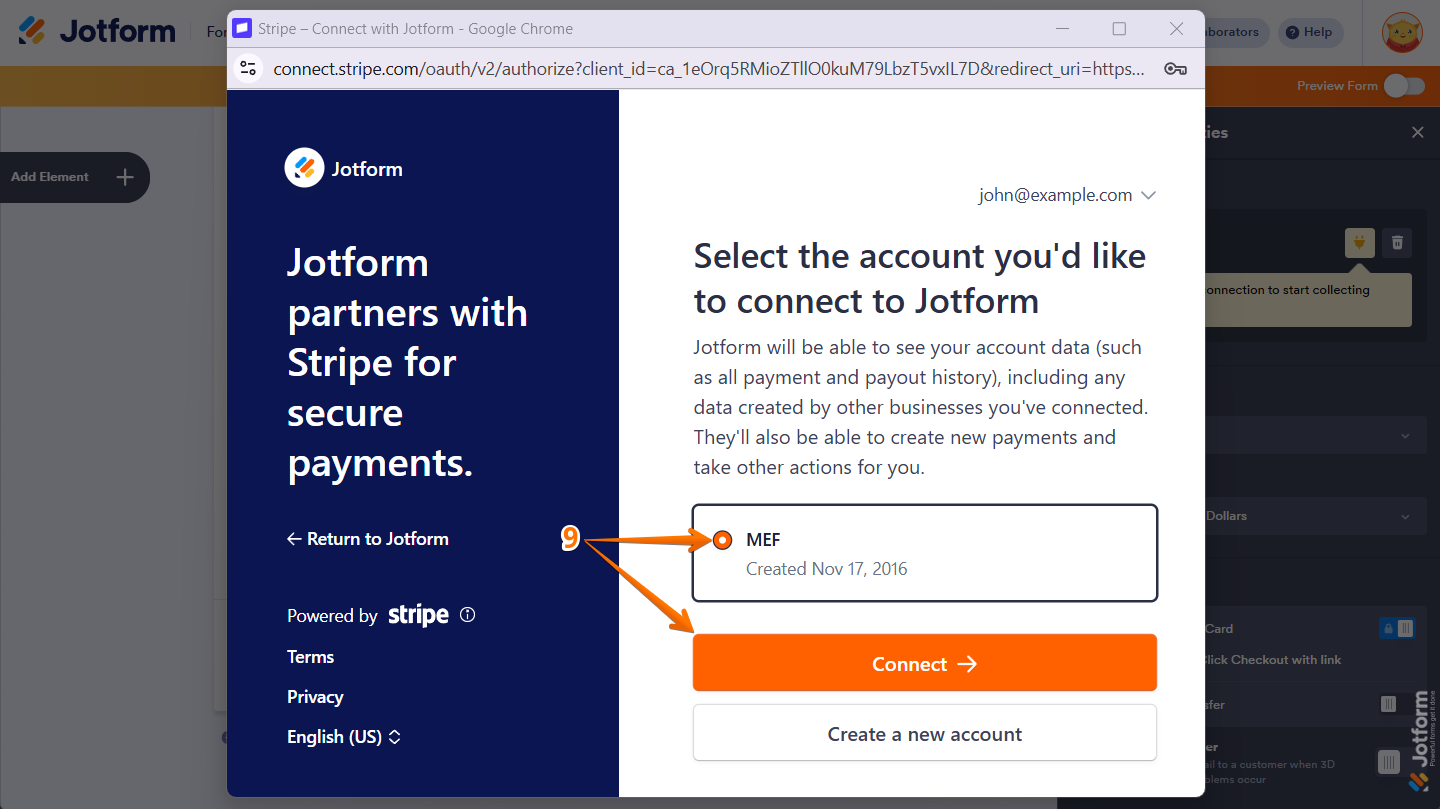
- Once you’ve logged in, select the account you want to connect to Jotform and click on Connect.
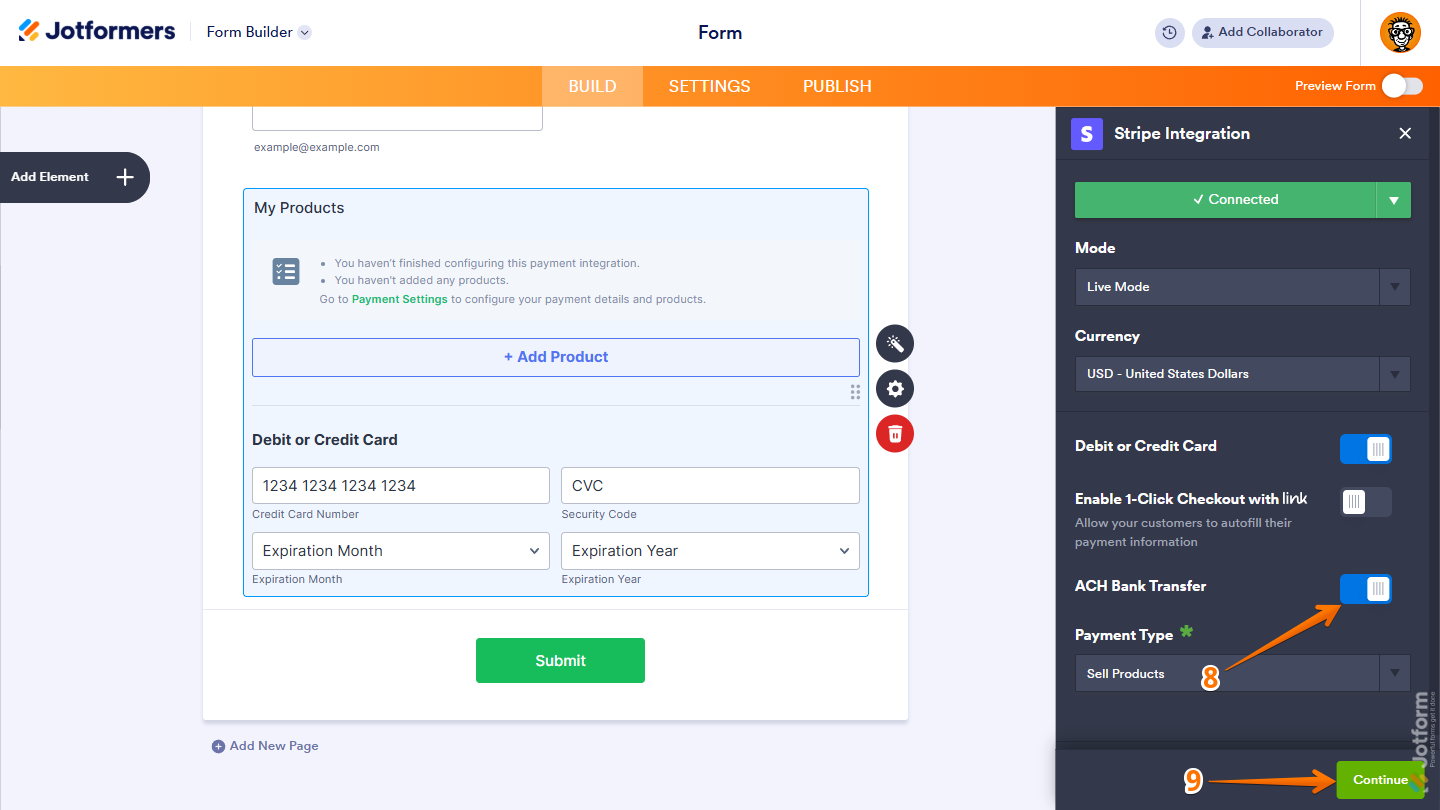
- Now, toggle on ACH Bank Transfer to enable ACH payments.
- Once everything is set for the Sell Products or Sell Subscription payment types, click on Continue.
- Then, for the User Defined Amount and Collect Donations payment types, just click on Save at the bottom.

That’s it! Your form is now set up to accept ACH payments through Stripe. When completing the payment process, users can select ACH Bank Transfer to securely pay from their bank account.
Note
For a full breakdown of how to set up Stripe payments, including the Currency, Payment Type, Additional Gateway Settings, etc., head over to our guide on How to Integrate Stripe on Your Form.
Setting Up a Stripe ACH Reusable Payment Connection
Reusable Payment Connections allows you to create a Stripe connection once and reuse it across multiple forms. This streamlined approach simplifies payment setup and management while making it easier to maintain your payment integrations.
Whether you are creating a new form or updating an existing one, you can add a payment field and set up a Stripe Reusable Payment Connection in just a few easy steps. Here’s how to do it:
- In Form Builder, click on Add Element on the left side of the page.
- Then, in the Form Elements menu, under the Payments tab, click on Stripe to add it to your form. Or just drag and drop it to where you want it on your form.
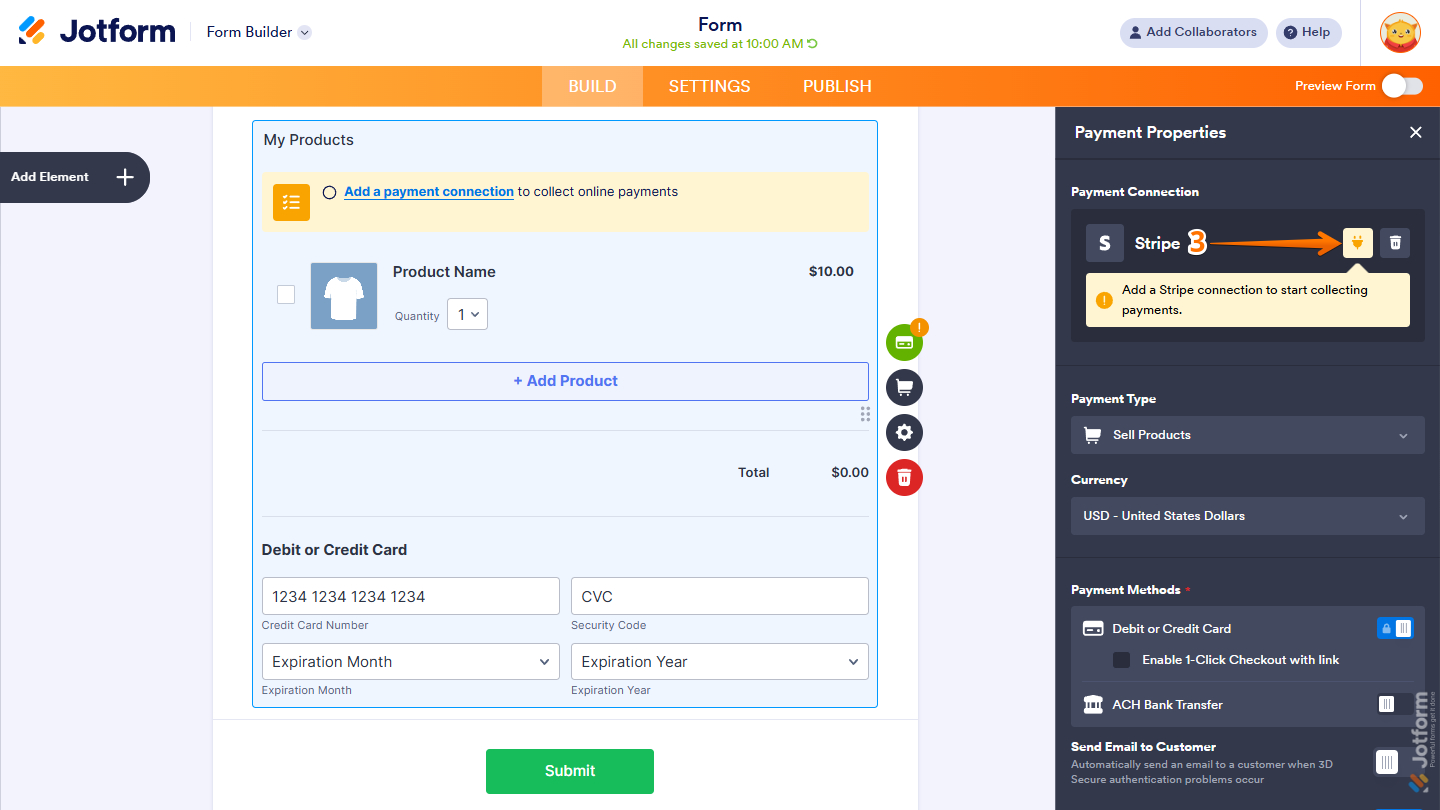
- Next, in the Payment Properties menu that opens on the right side of the page, click on the Plug icon to use a Reusable Stripe Payment Connection.
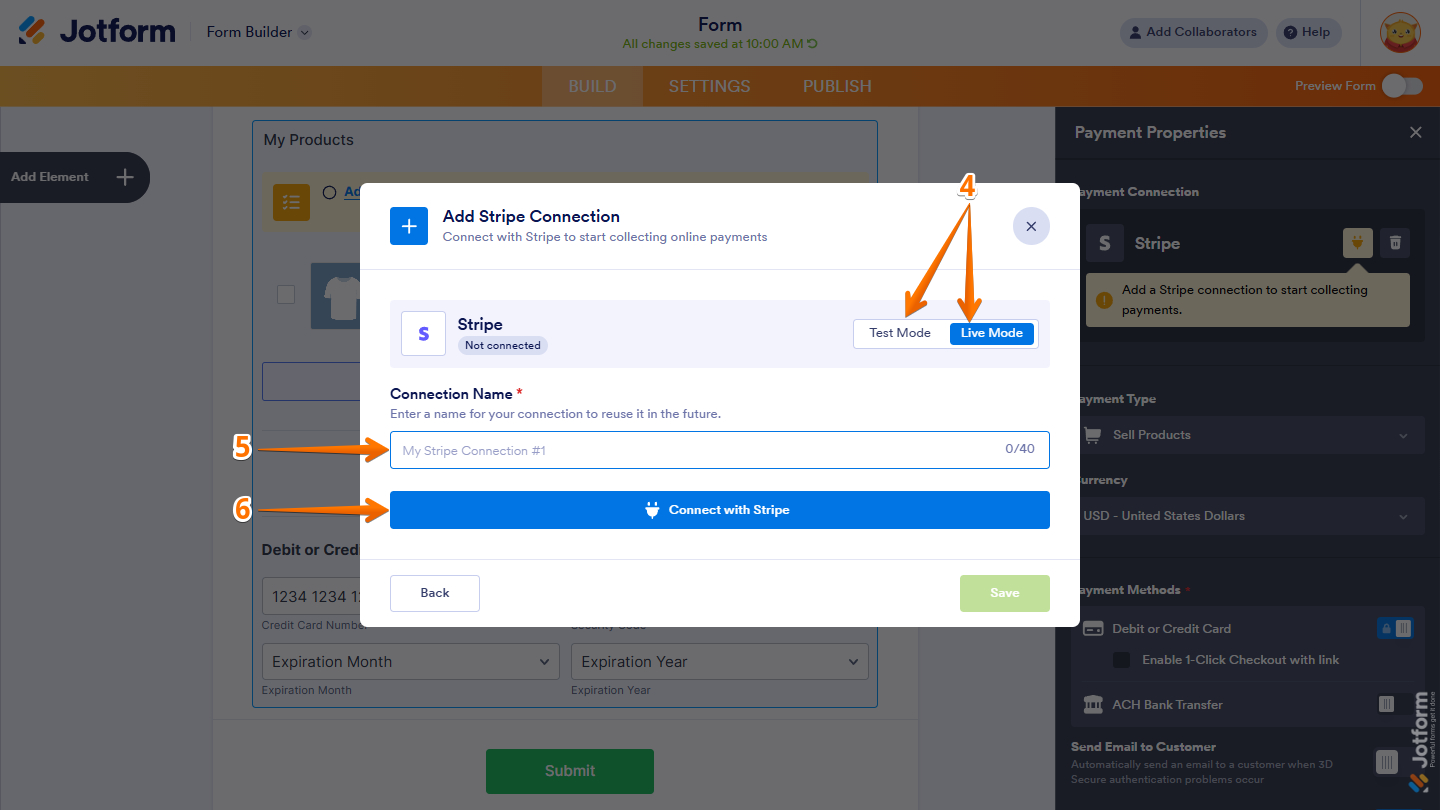
- At the top of the Add Stripe Connection window, click on Test Mode or Live Mode to select the environment you’re adding a payment connection for.
- Enter a name for it in the Connection Name field.
- Then, click on Connect with Stripe.
- In the pop-up window, under the Get Started with Stripe section, enter your registered Stripe Email Address in the Email Address field and click on Continue.
- Then, on the next screen, enter your password in the Password field and click on Submit.
- Once you’ve logged in, select the account you want to connect to Jotform and click on Connect.
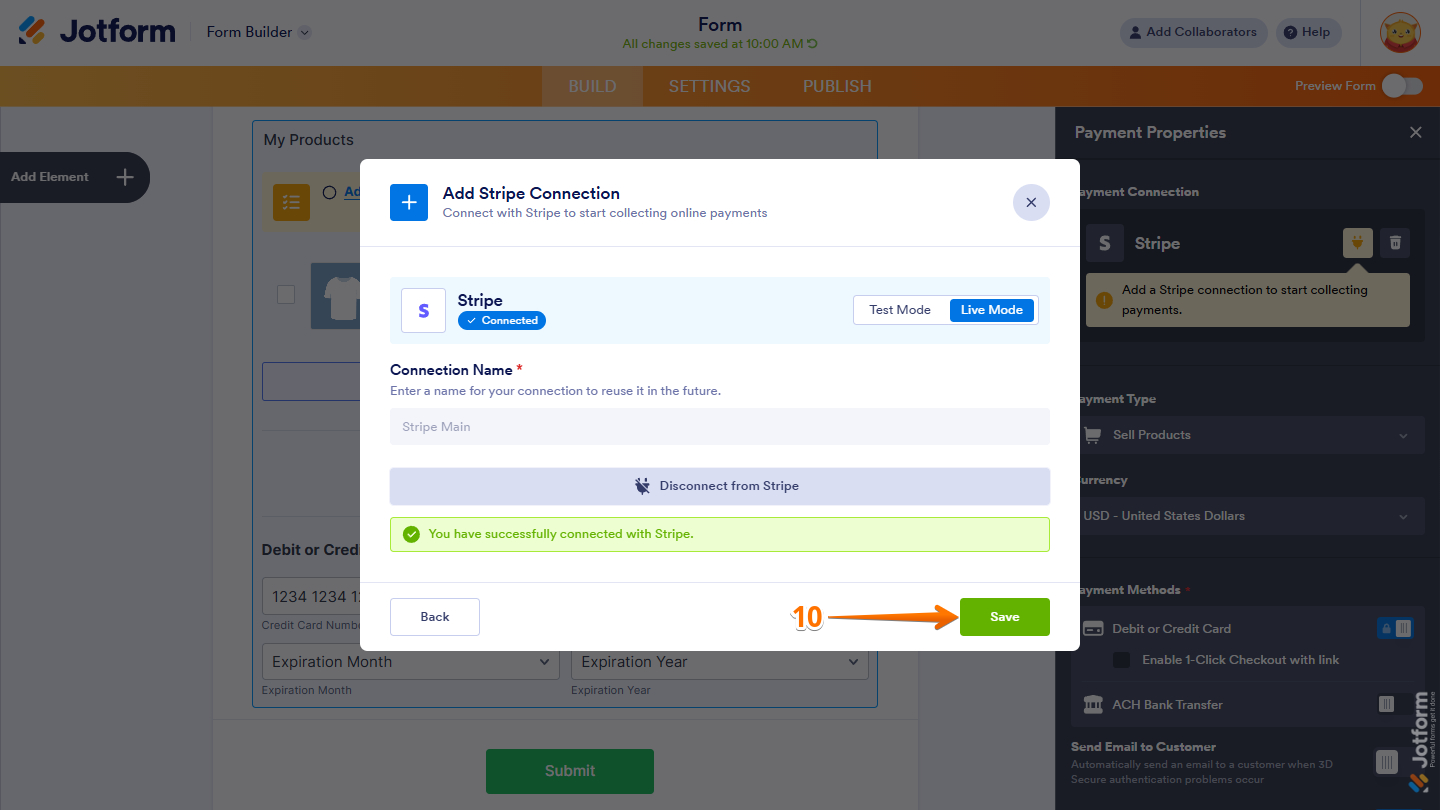
- Now, click on Save at the bottom to add the Reusable Payment Connection to your account.
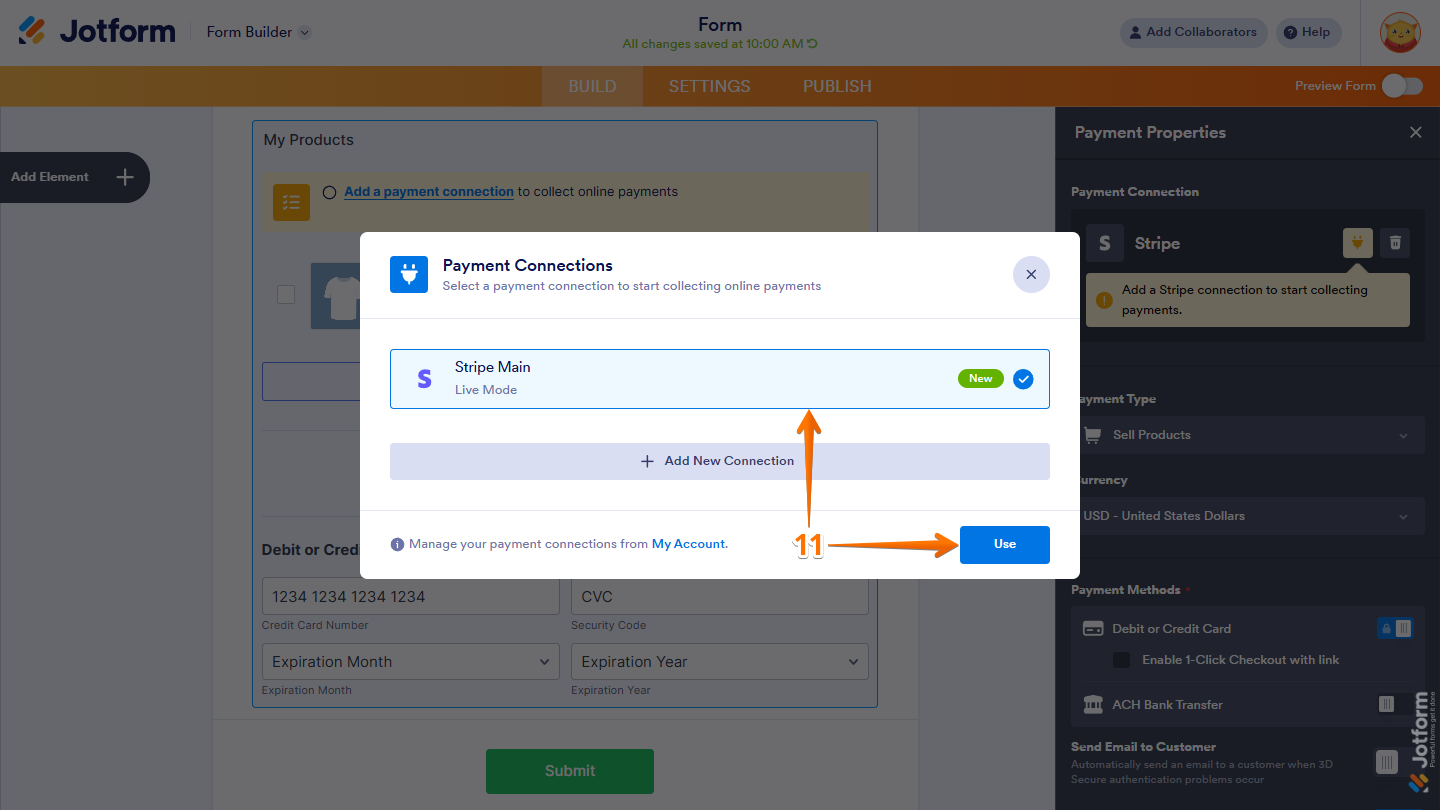
- In the Payment Connections window, select the Stripe Payment Connection you just added, and then click on Use at the bottom.
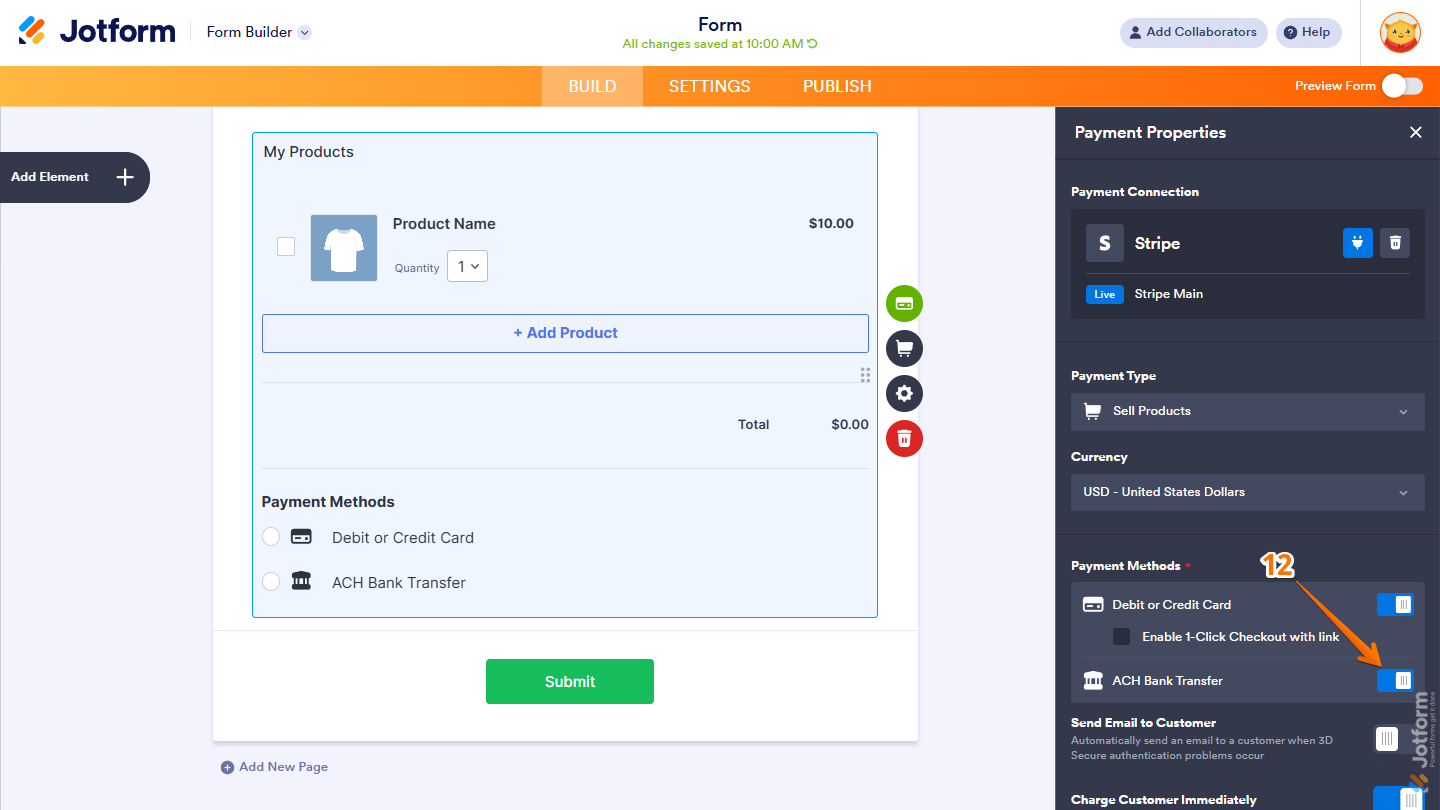
- Now, in the Payment Methods section, toggle on ACH Bank Transfer, and it should appear immediately in the Payment field.
Pro Tip
For a full breakdown of how to set up Stripe payments using the Reusable Payment Connection, which includes the Currency, Payment Type, Billing Information, etc., head over to our guide on How to Integrate Stripe on Your Form.
That’s it for setting up your Stripe integration to accept ACH payments. Your form is now ready to securely receive ACH bank transfer payments through Stripe.
Making Payments with Stripe’s ACH Bank Transfer
When completing a form, users can select ACH Bank Transfer, verify their bank account, and submit their payment directly from their account. Depending on the verification method used, payment processing and confirmation may take longer than standard card transactions.
Note
The payment flow below uses Stripe’s test banking credentials to demonstrate how it works. The experience for customers using real bank accounts is very similar, with only minor differences depending on the bank and verification method used.
Selecting Your Bank to Process the ACH Payment
Here’s how to select your bank and pay with Stripe’s ACH Bank Transfer:
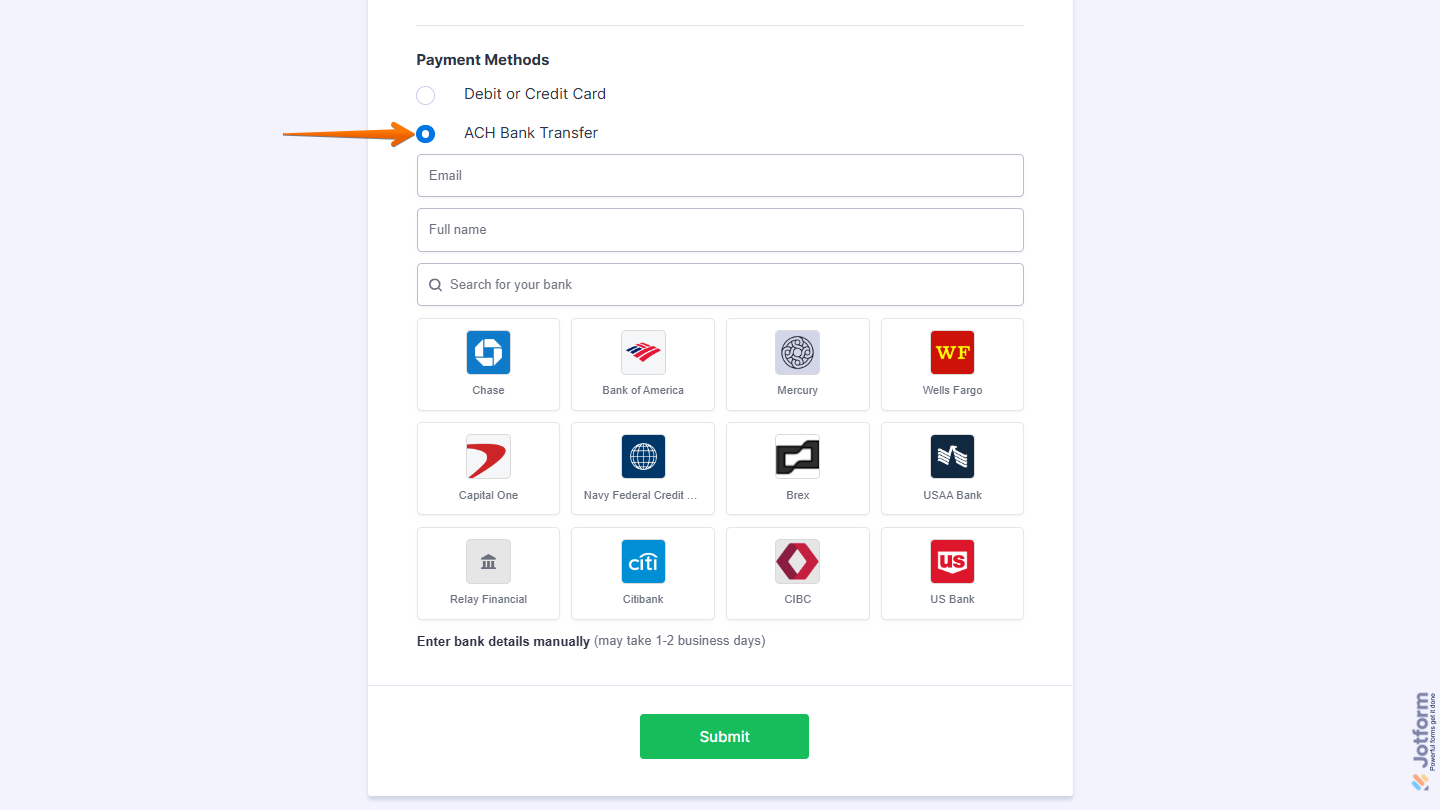
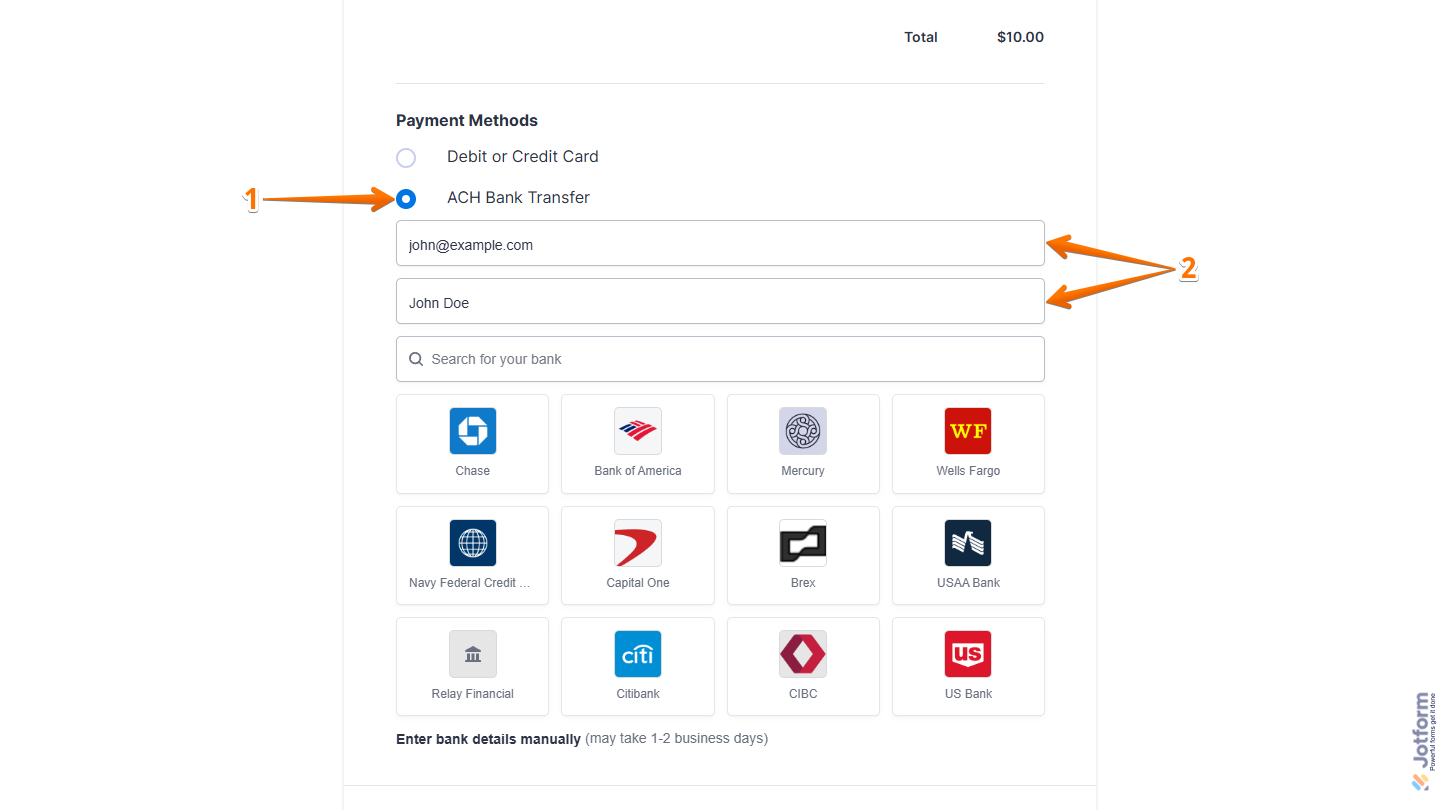
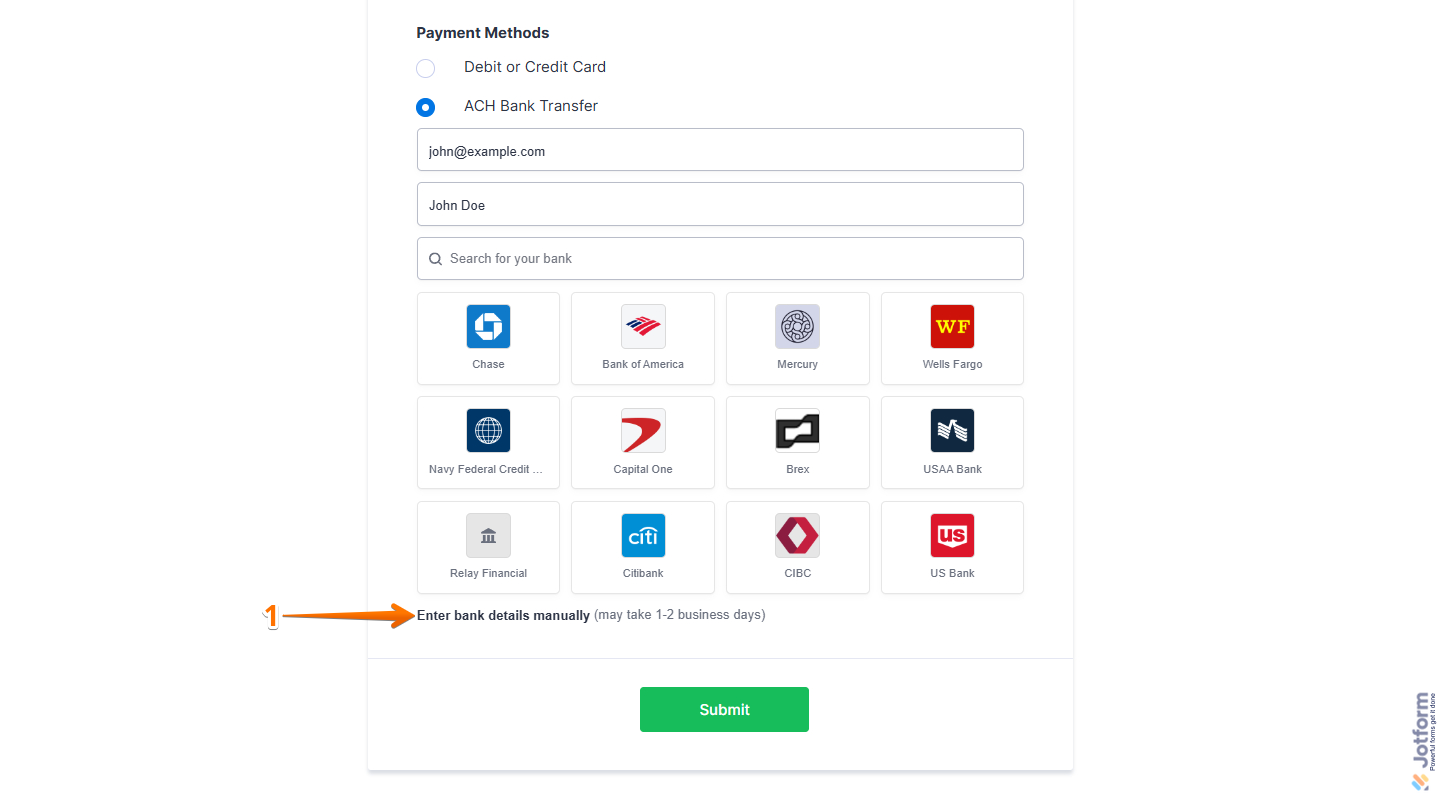
- Under the Payment Methods of your Stripe payment form, click on ACH Bank Transfer.
- Then, fill in these details:
- Email Address — Enter your valid email address for the ACH payment.
- Full Name — Enter your full legal name.
Note
If you’ve disabled credit card payments in your Stripe settings, ACH Bank Transfer will be displayed automatically as the available payment method.
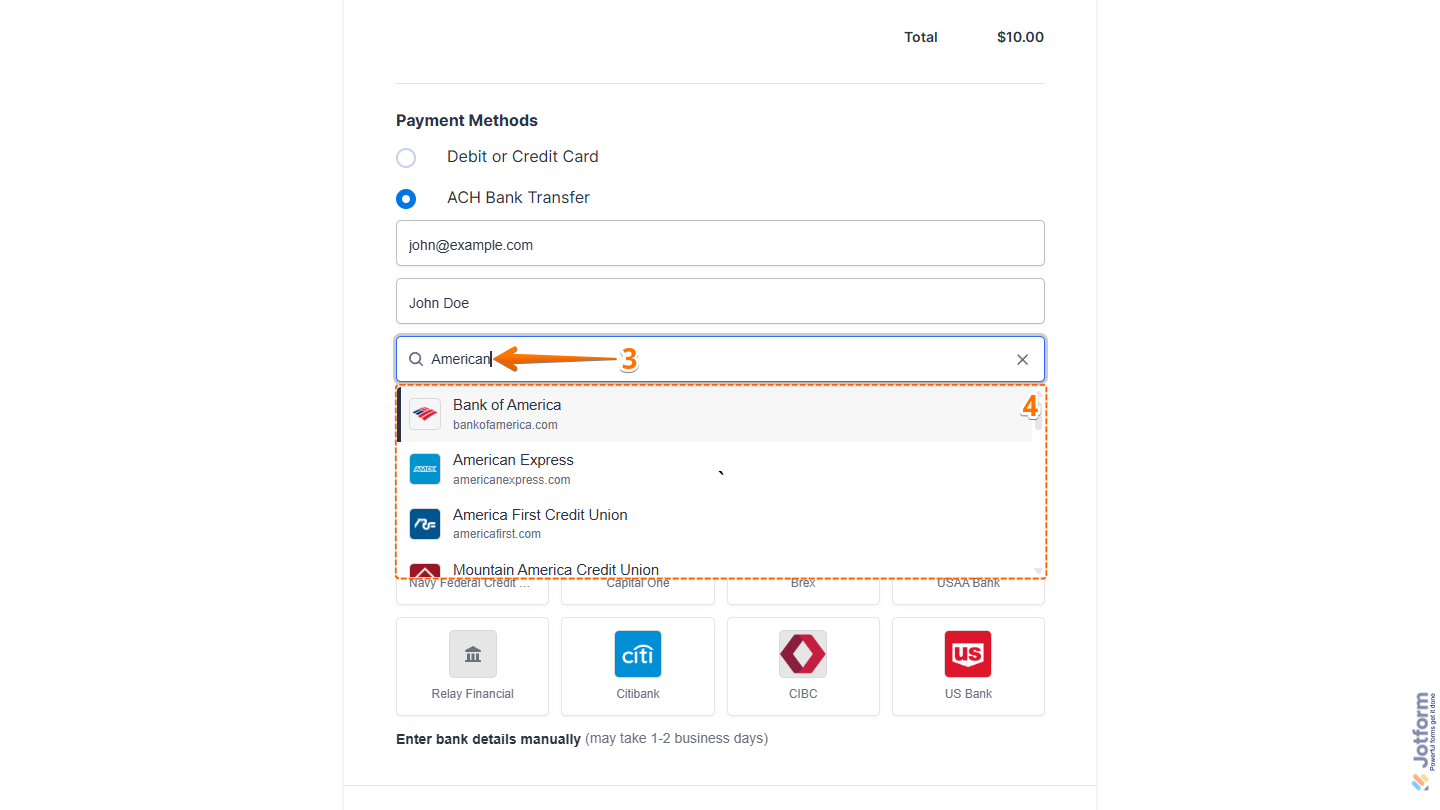
- In the Search for Your Bank field, enter the name of your bank.
- Now, in the Dropdown menu that opens, click on that bank in the list. Some major banks are displayed by default. If your bank is listed, click its logo to continue.
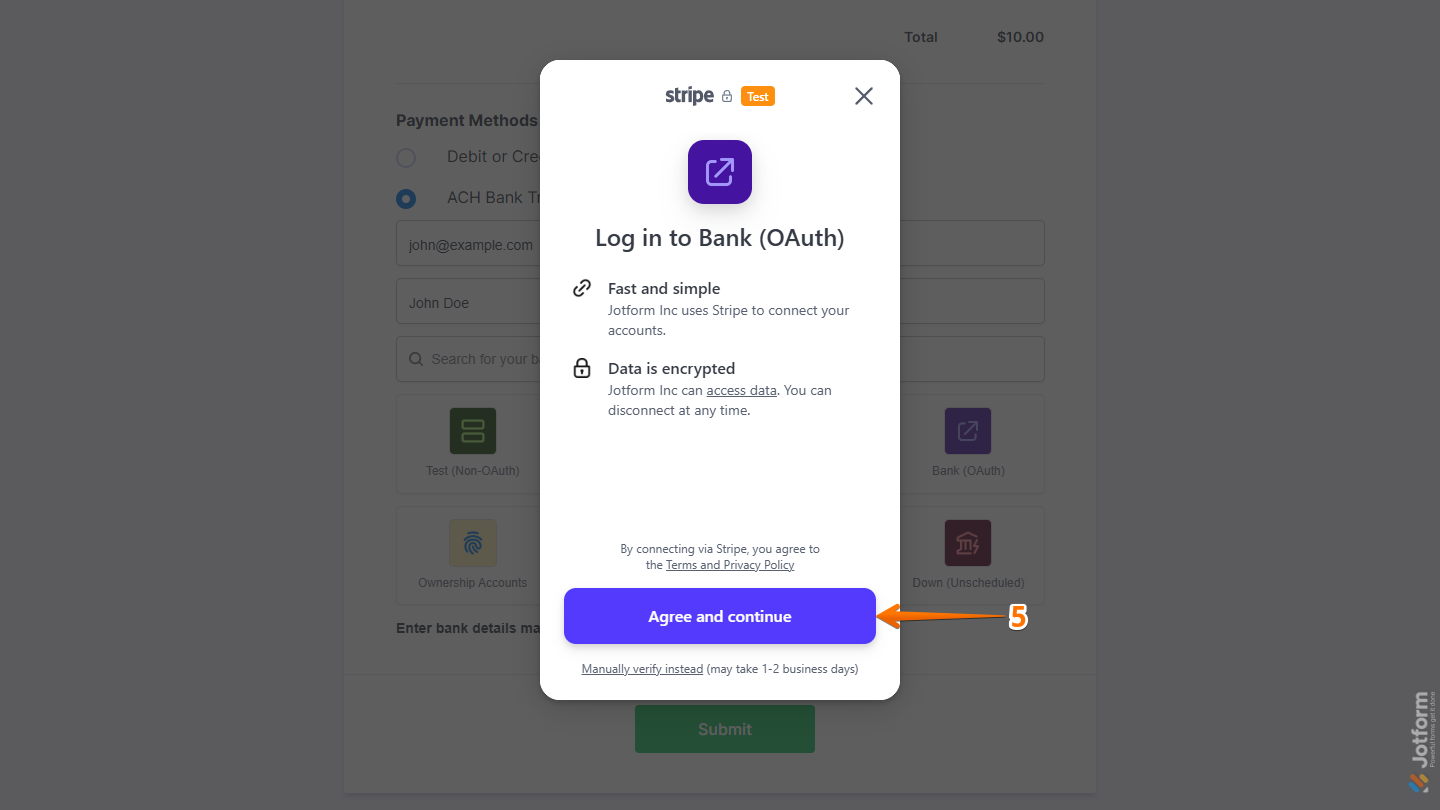
- In the Log in to Bank window that opens, click on Agree and Continue.
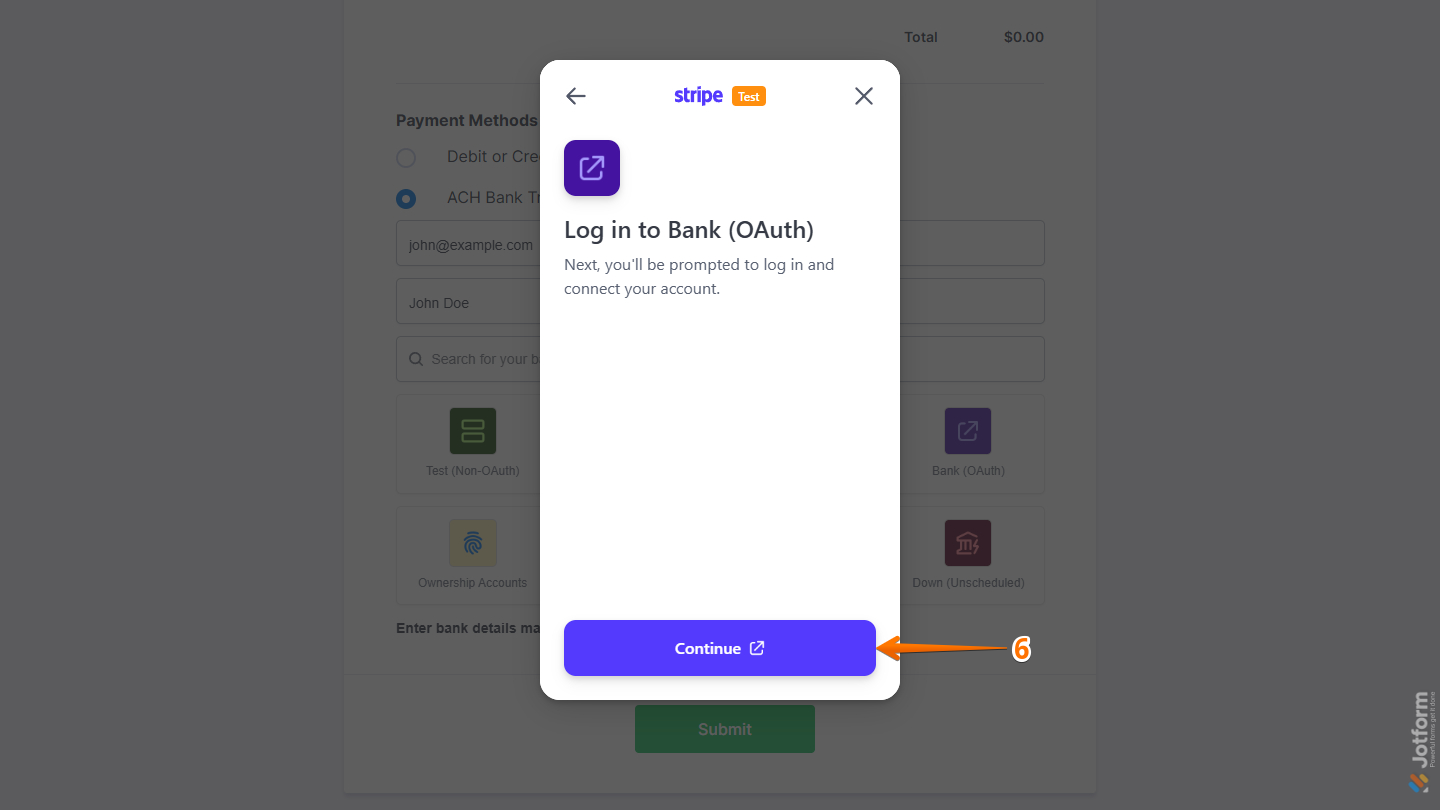
- Then, click on Continue and log in to your Bank account.
Note
If 1-Click Checkout with Link is enabled under the Payment Methods of your Stripe configuration, you might see it as an option to log in to your Bank account.
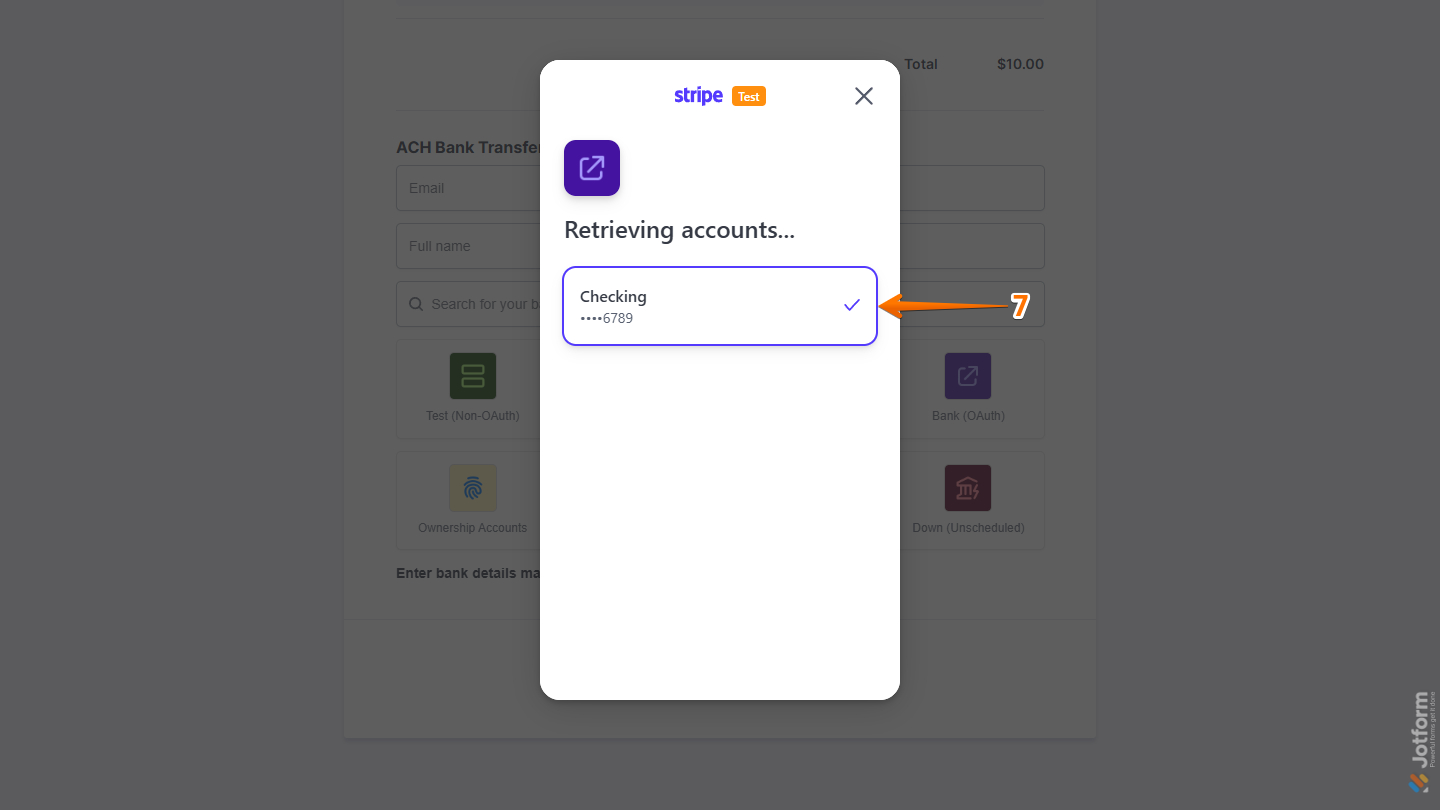
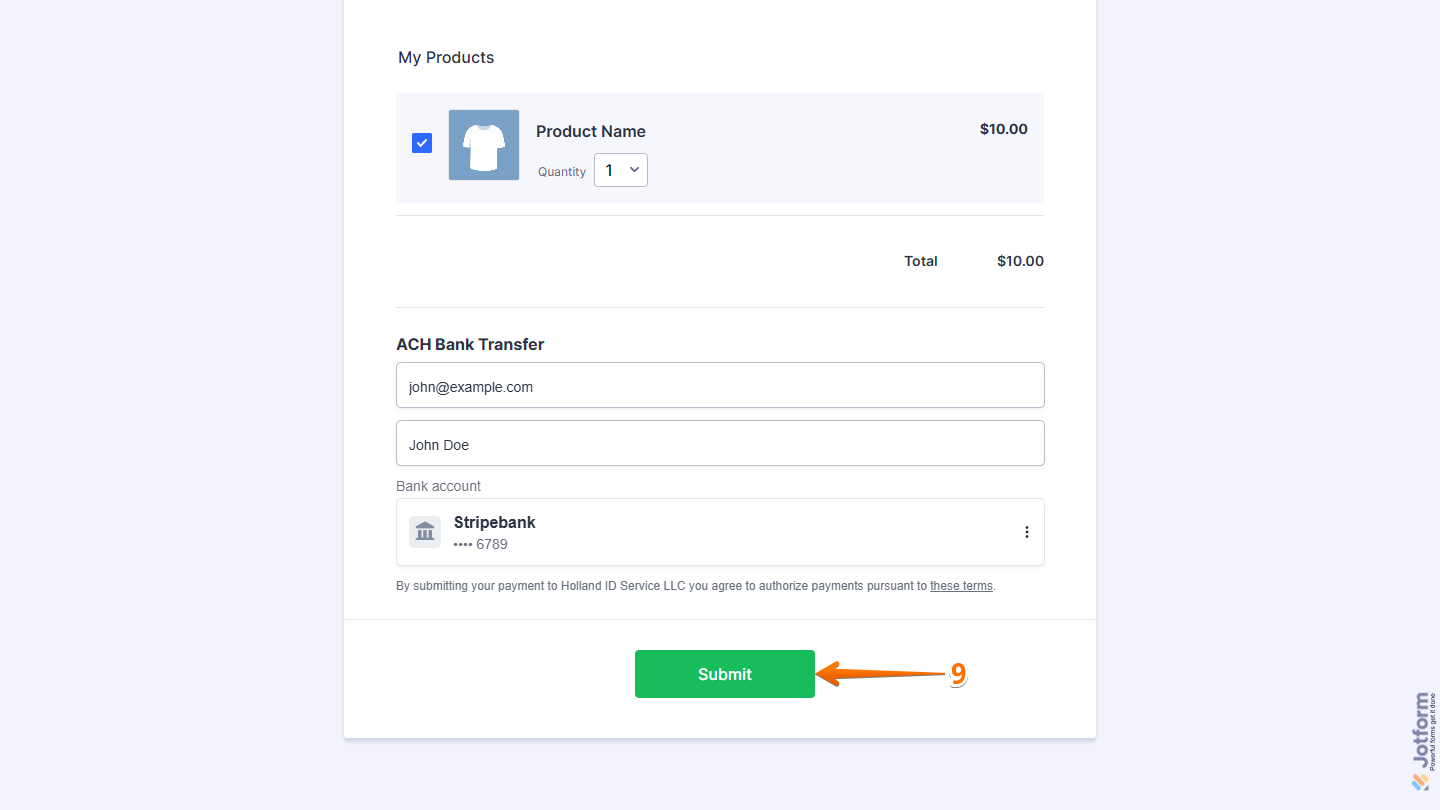
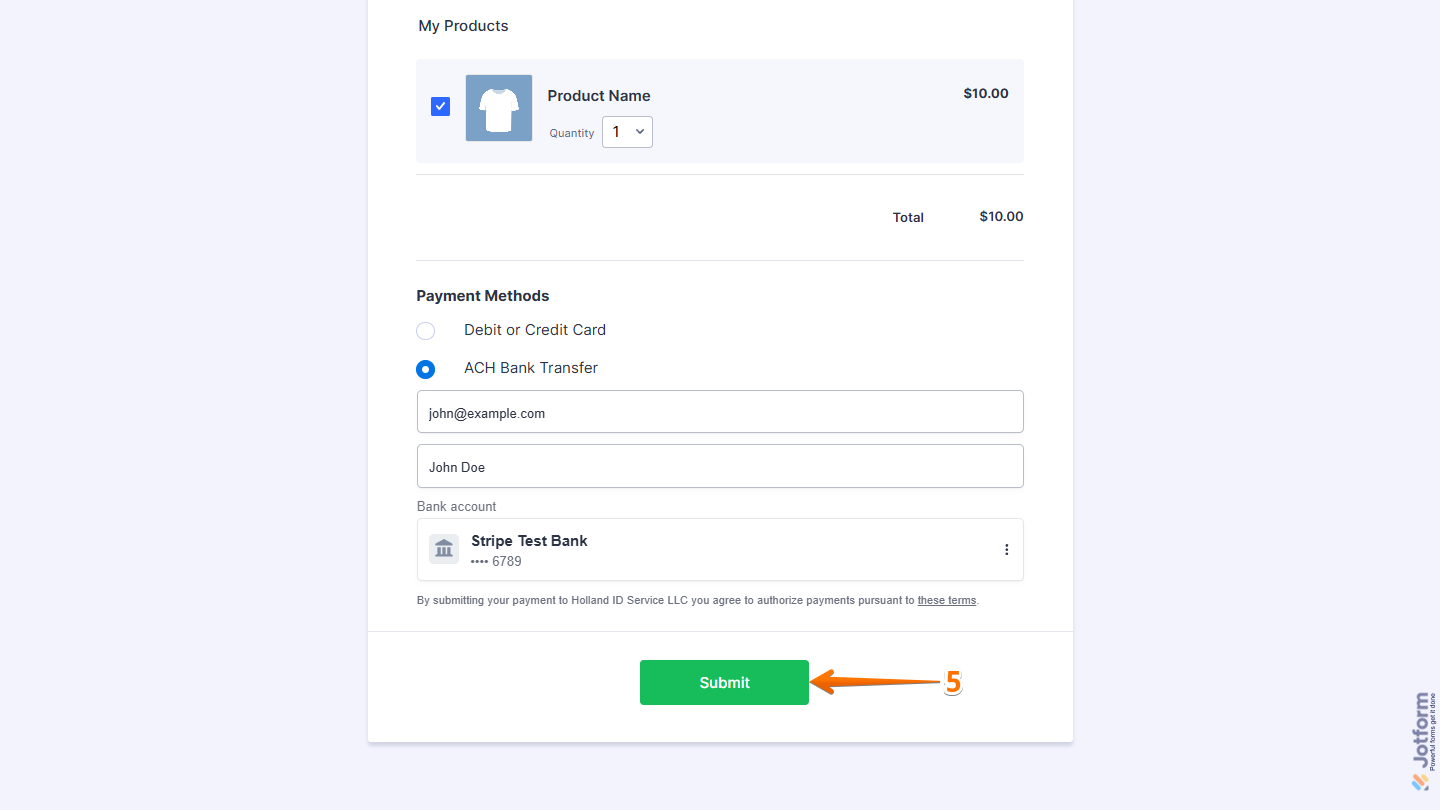
- After logging into your bank account and being redirected back to the Stripe setup, select that Bank account in the Retrieving Accounts list.
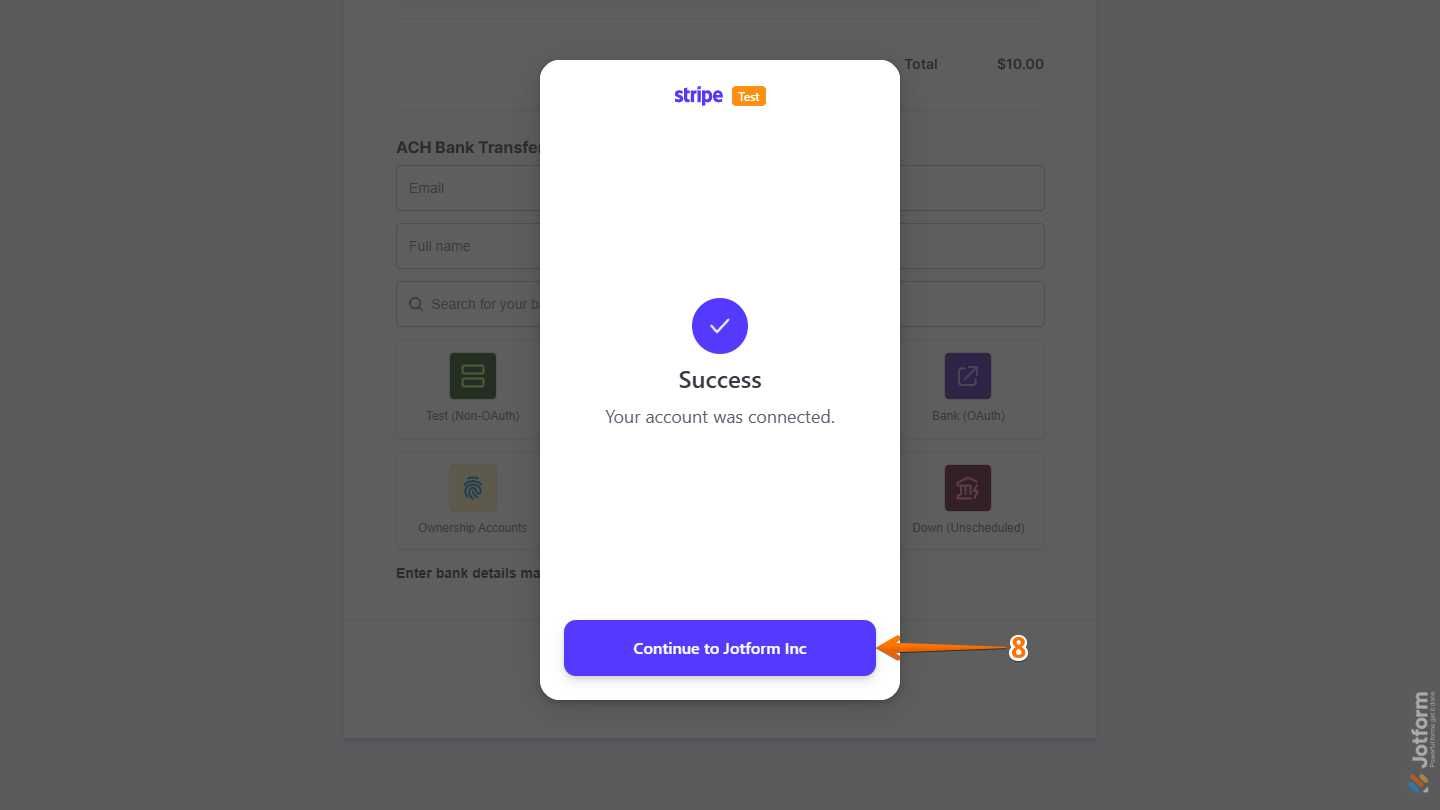
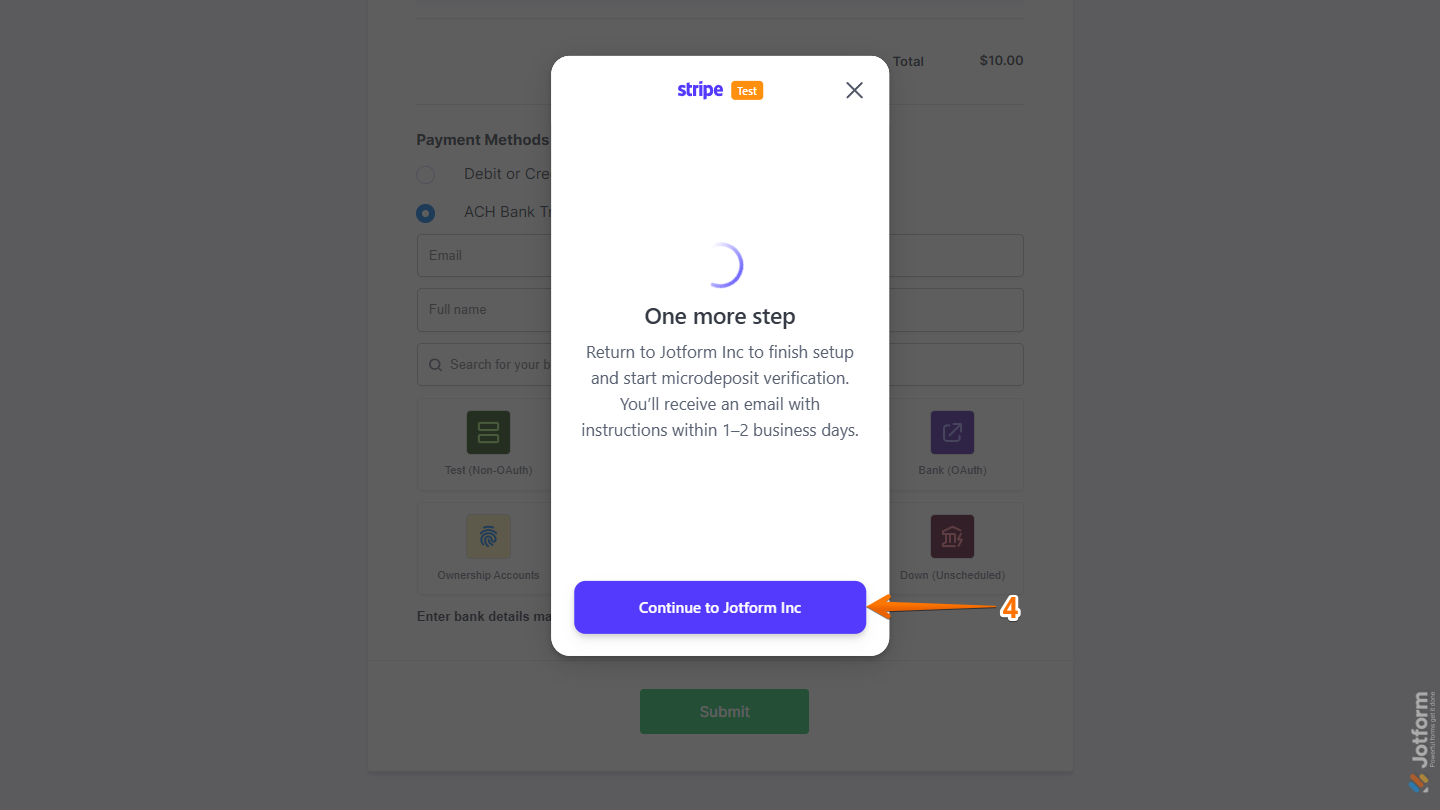
- Now, click on Continue to Jotform Inc. at the bottom.
- Once your Bank account is authorized, click on Submit, and that’s it!
Manually Entering Your Banking Details to Process the ACH Payment
Manually entering your banking details and paying with Stripe’s ACH Bank Transfer is simple. Here’s what you’ll do:
- After selecting ACH Bank Transfer and entering both your Email Address and Full Name, click on Enter Bank Details Manually.
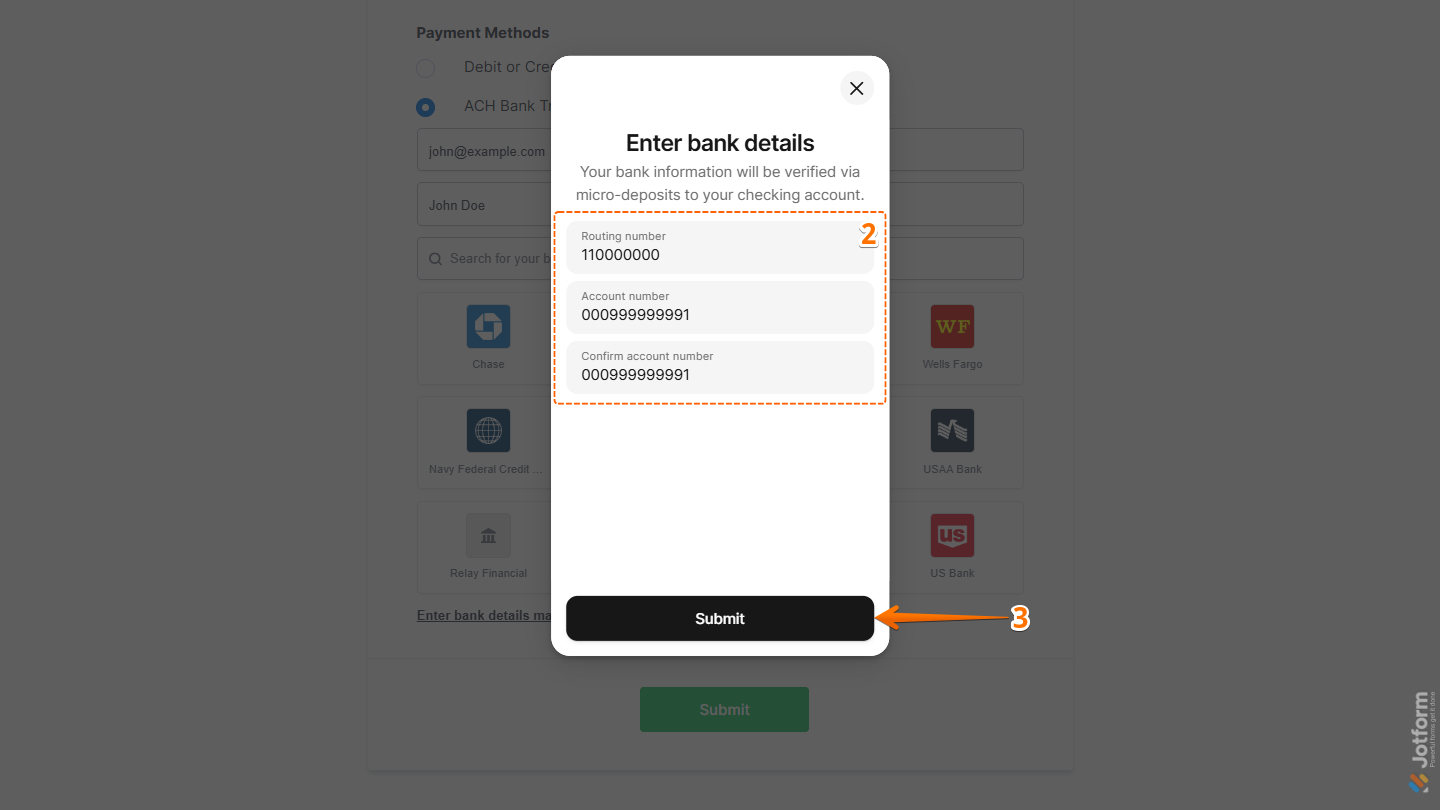
- Then, in the Enter Bank Details window that opens, fill in these details:
- Routing Number — Enter the 9-digit routing number of the bank account you want to use for the payment. This number identifies the financial institution where the account is held.
- Account Number — Enter the number for the bank account that the payment will be withdrawn from. Be sure to enter it exactly as it appears on your bank account.
- Confirm Account Number — Re-enter the bank account number to verify that it was entered correctly. The values in both account number fields must match before the payment can be processed.
- Next, click on Submit at the bottom.
- Now, also at the bottom, click on Continue to Jotform Inc.
- Once everything’s set, click on Submit.
That’s it! You can now start accepting ACH payments through Stripe, giving your customers a secure and convenient way to pay directly from their bank accounts.

Send Comment:
7 Comments:
September 23, 2024
how do I give a refund on a purchase?
May 23, 2024
Thank you so much for your help!!!!!!
February 14, 2022
I'm doing a Stripe ACH with Plaid. Everything works well except: The account name after connection says "Test", and when I go to Stripe Payments under Customer it says "None".
How do I get the Account name to show up on the Jotform after the connection and before the Submit, and also have the name show up in Stripe Payments???
Thanks.
February 2, 2021
Hi there,
Can you use this integration to verify the bank account and charge Zero dollars/ or hide the chargeable amount while completing the form but use Stipe to charge the customer the billable amount later on??
TIA.
Adrian
December 21, 2020
I too had questions about which "Event" should be selected for my webhook endpoint. After looking at all my options on Stripe, I chose order.created. I think that's the most logical one. I'm open to be told a better option.
Note: you can always go back and change the event.
September 16, 2020
When adding the webhook end point, which Events to send should be selected?
October 30, 2018
What about starting a monthly subscription with the customer? Possible using your form? Thanks