With Jotform, you can easily connect your online forms with iContact to keep your email marketing efforts moving smoothly. iContact is a powerful email marketing platform that helps you create personalized emails and stay connected with your audience, and this integration makes it simple to send form responses straight to your email lists.
By linking your form with iContact, you can collect new email addresses and contact details in one place and keep your lists up to date without extra manual work. It’s a great option for anyone looking to grow their audience, organize subscriber data, and make the most of their email campaigns—all while keeping things simple and efficient.
What You Need for This Setup
- iContact Account Username — This is the email address associated with your iContact account.
- iContact API Password — This isn’t your account password. It’s the password you set for the Application ID used to allow Jotform to access your iContact account. If you’re not sure how to do this, check out Setting Your iContact API Password for Jotform below.
Setting Up the Integration
Setting up your form to send form data to iContact is quick—here’s how:
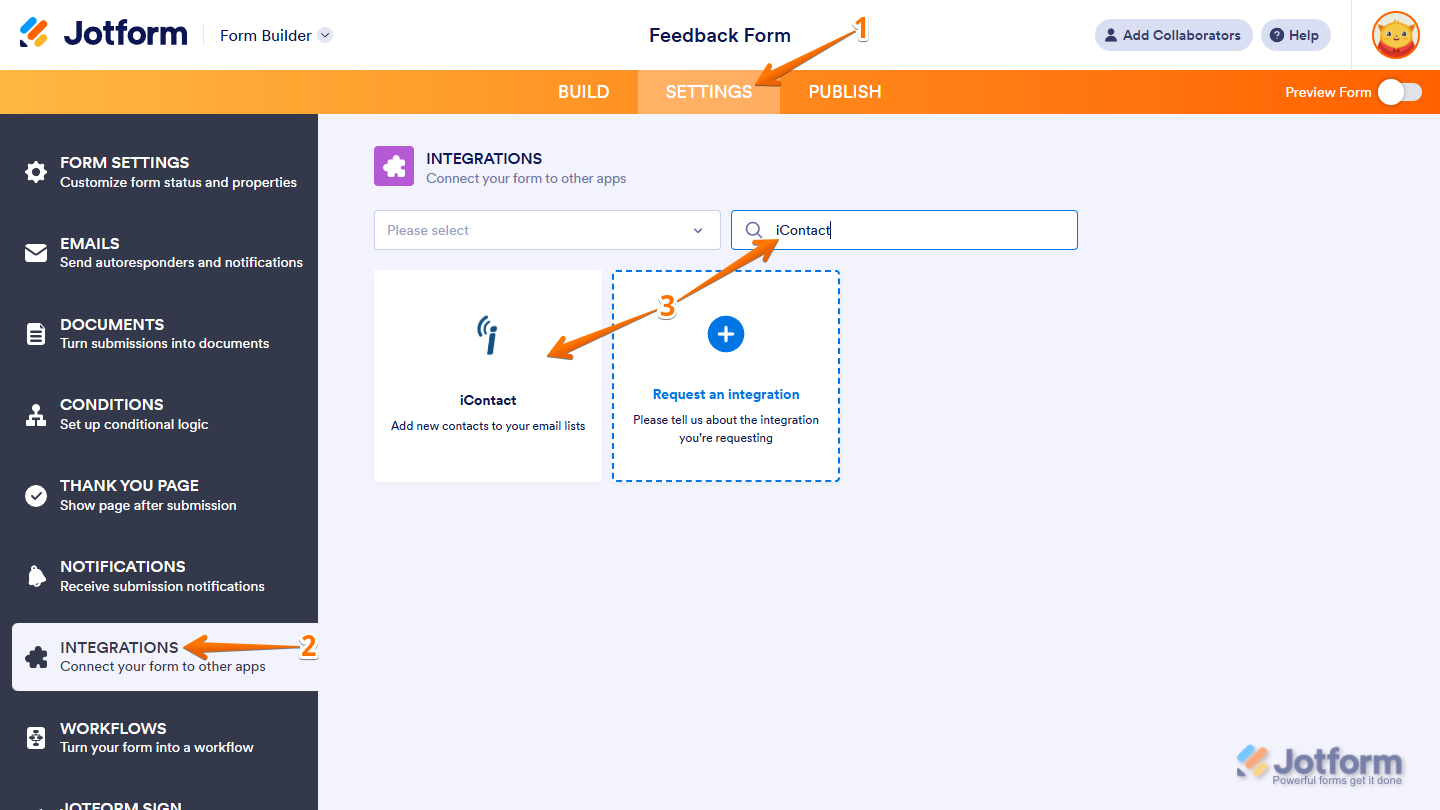
- In Form Builder, in the orange navigation bar at the top of the page, click on Settings.
- Now, in the menu on the left side of the page, click on Integrations.
- Then, in the Integrations section on the right, search for iContact and click on it.

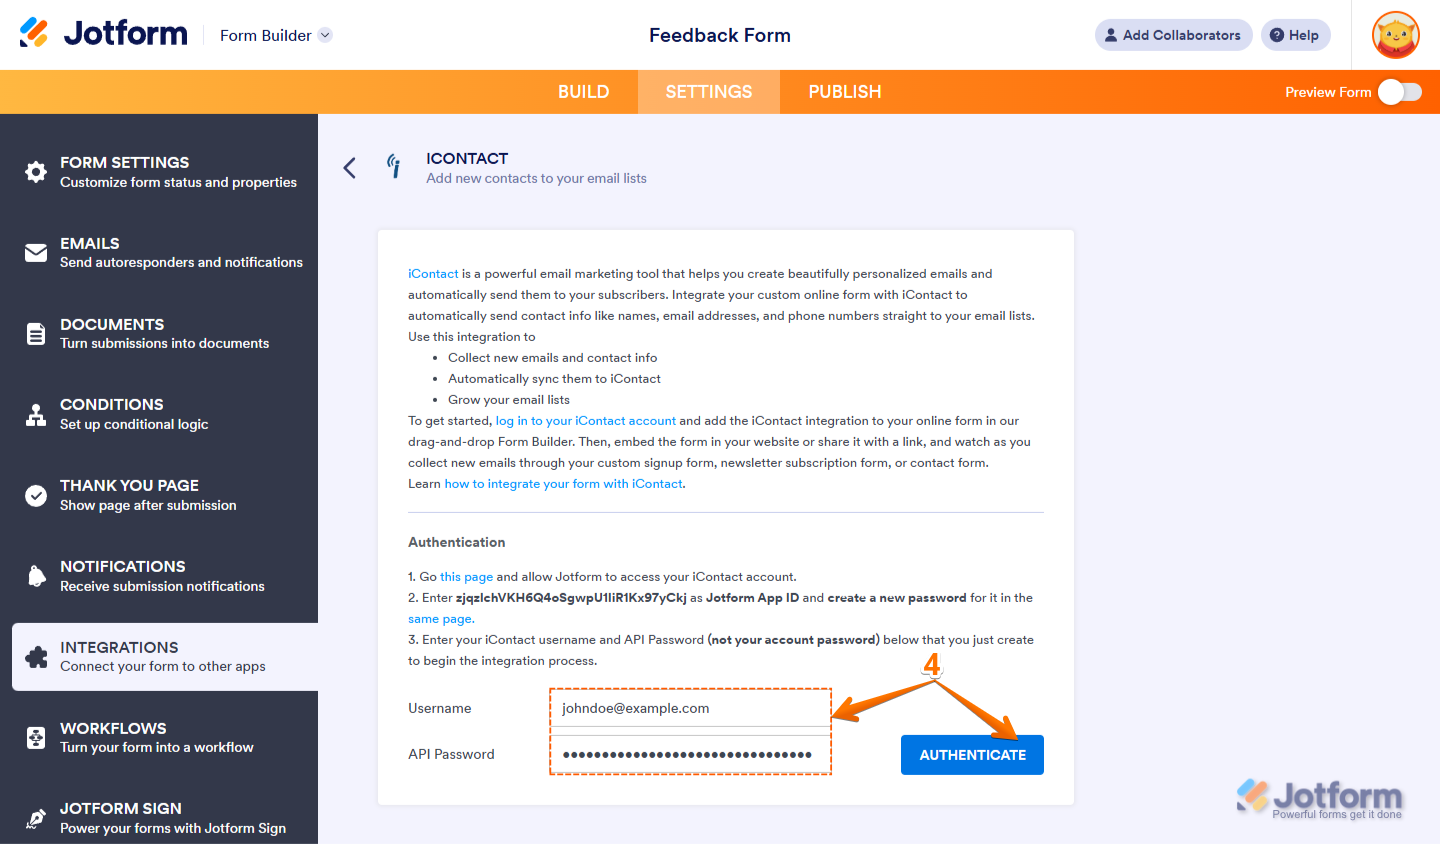
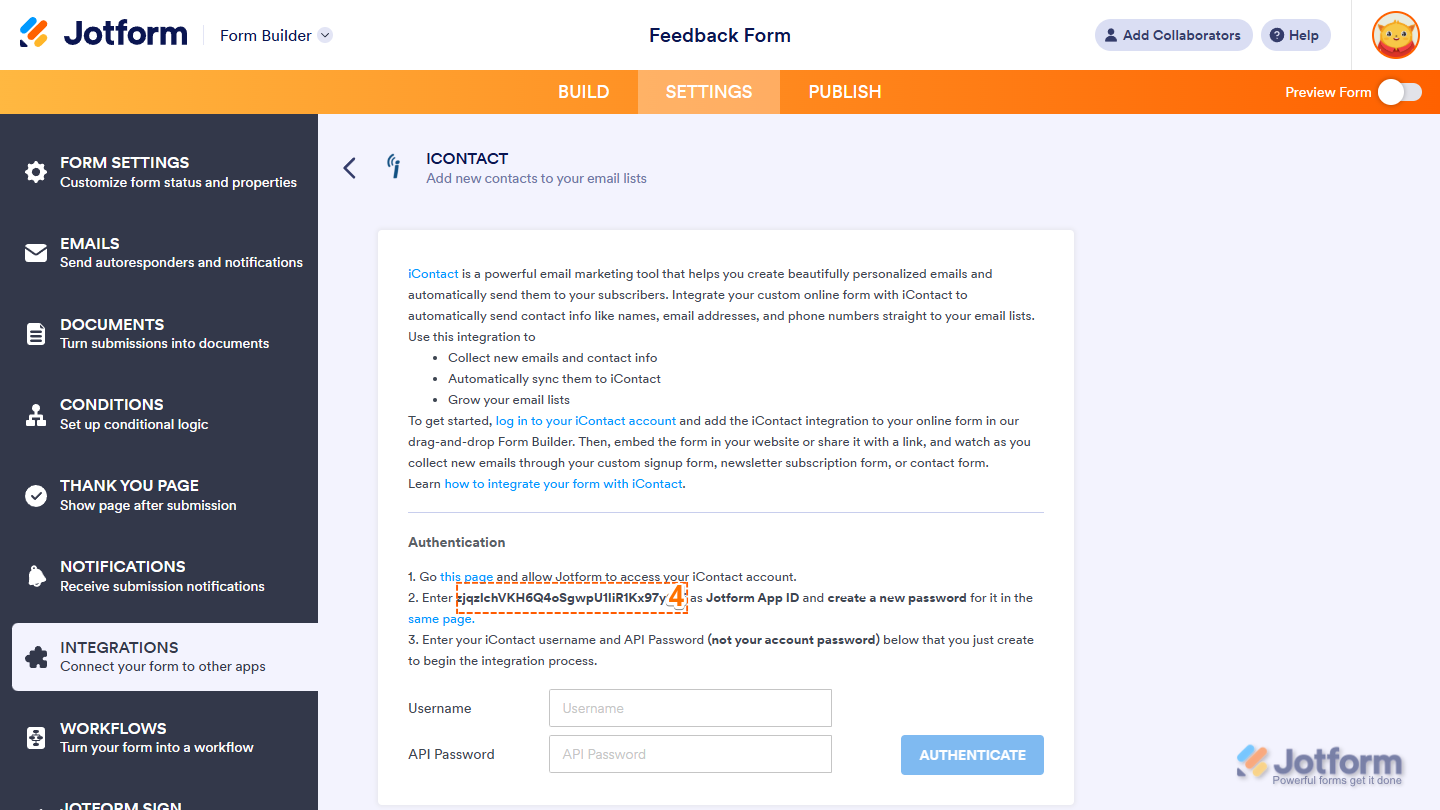
- Next, in the iContact section, enter your iContact Account Username and API Password, and then click on Authenticate.
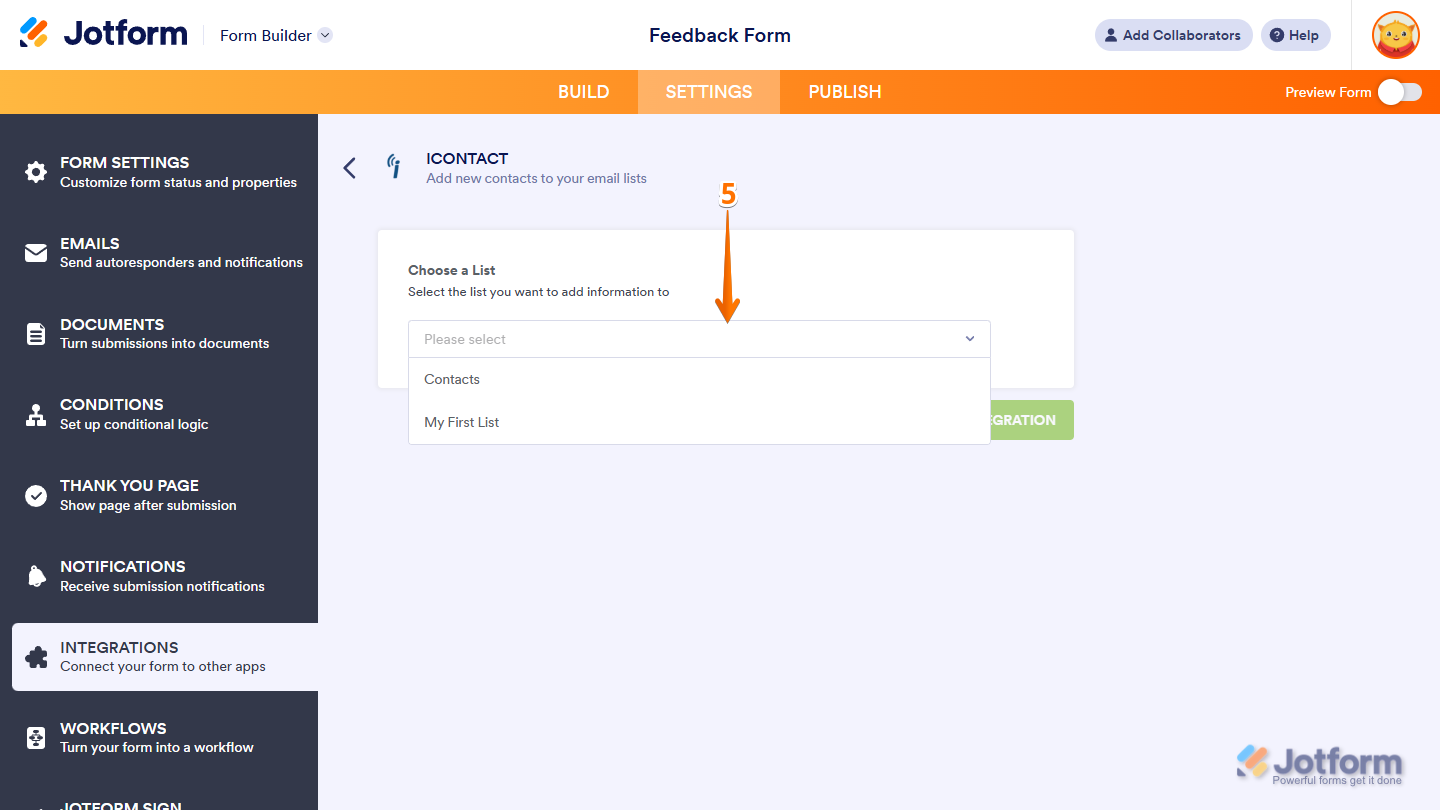
- Now, in the Choose a List section, click on the Dropdown menu, and then select the list you want to add information to.
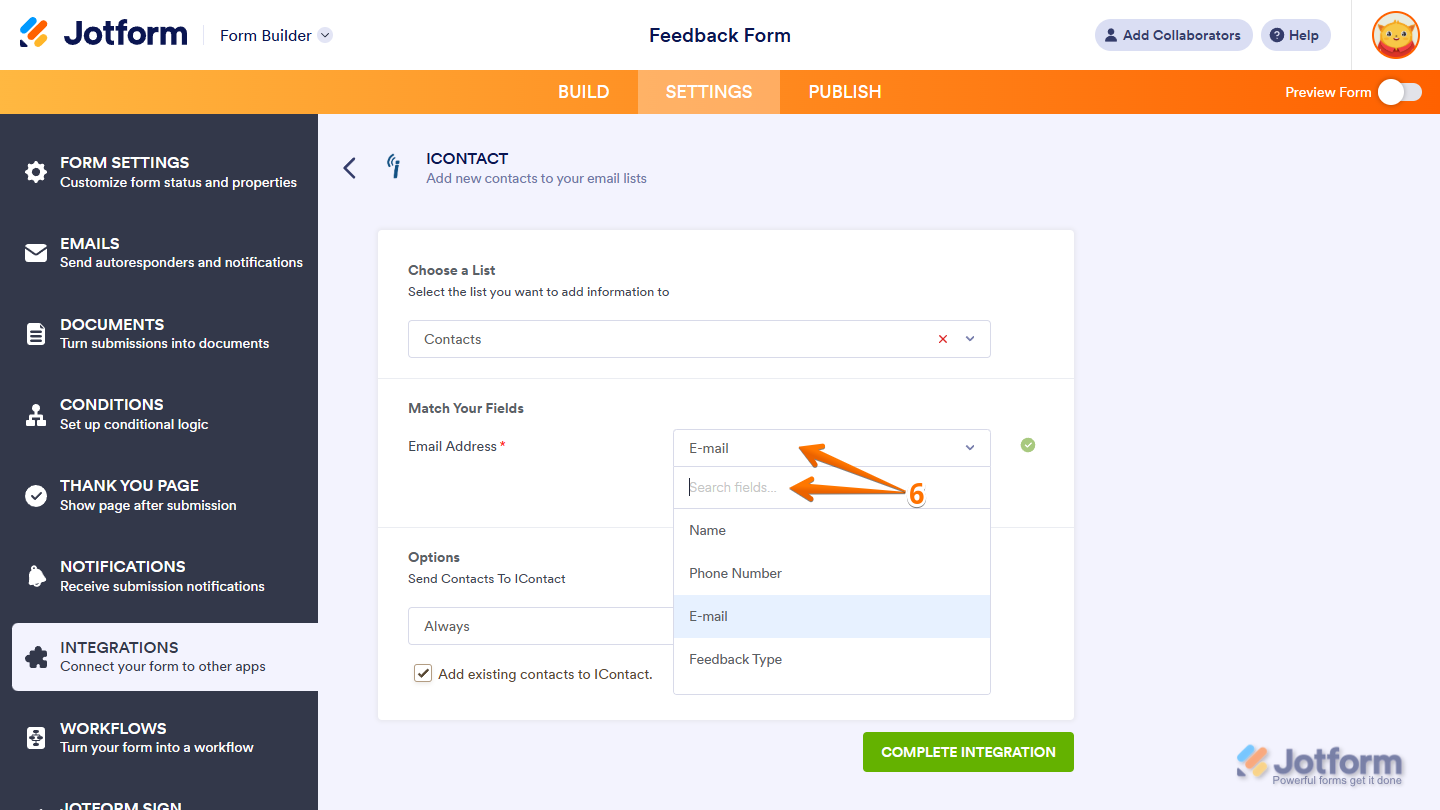
- Next, in the Match Your Fields section, click on the Dropdown menu next to the required Email Address field from iContact, and then select a supported form field to match it. You can use the Search bar at the top of the menu to find a specific one easily.
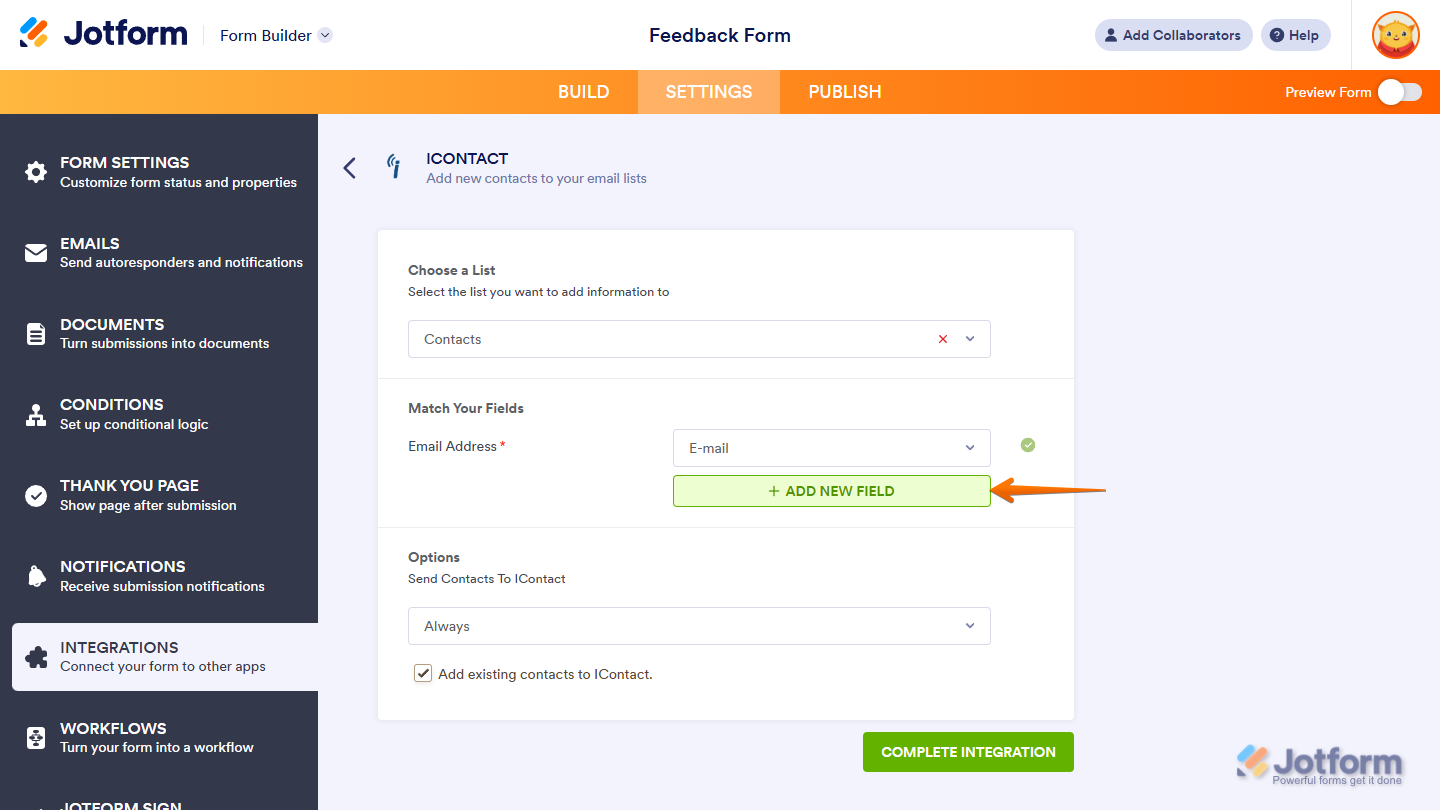
You can click on the Add New Field button below the last dropdown menu to map additional fields.
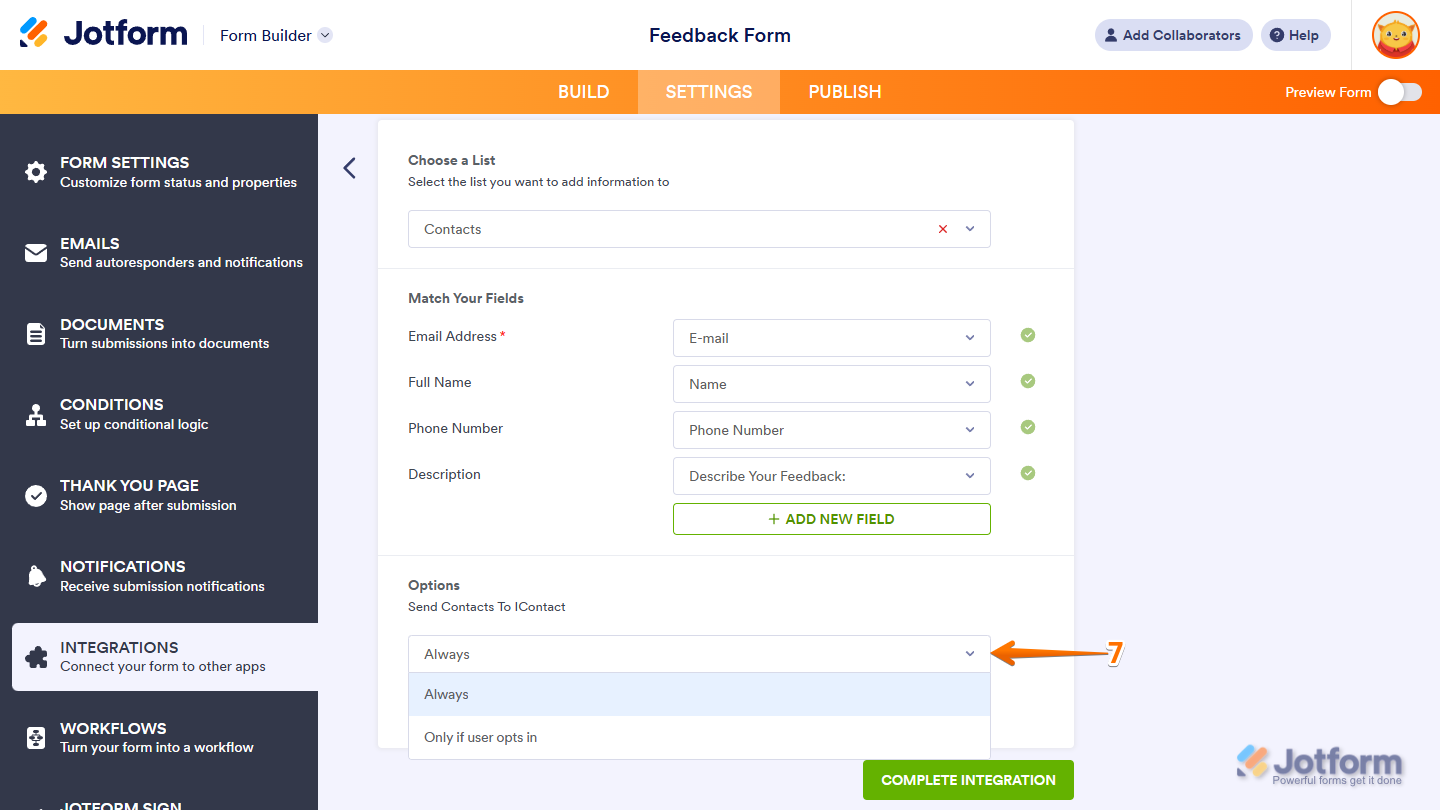
- Then, in the Options section, click on the Dropdown menu and select one of the following options:
- Always — Select this option if you want to send every submission to iContact.
- Only If User Opts In — Select this option if you want to send submissions to iContact only when respondents check the box in your form’s Newsletter field.
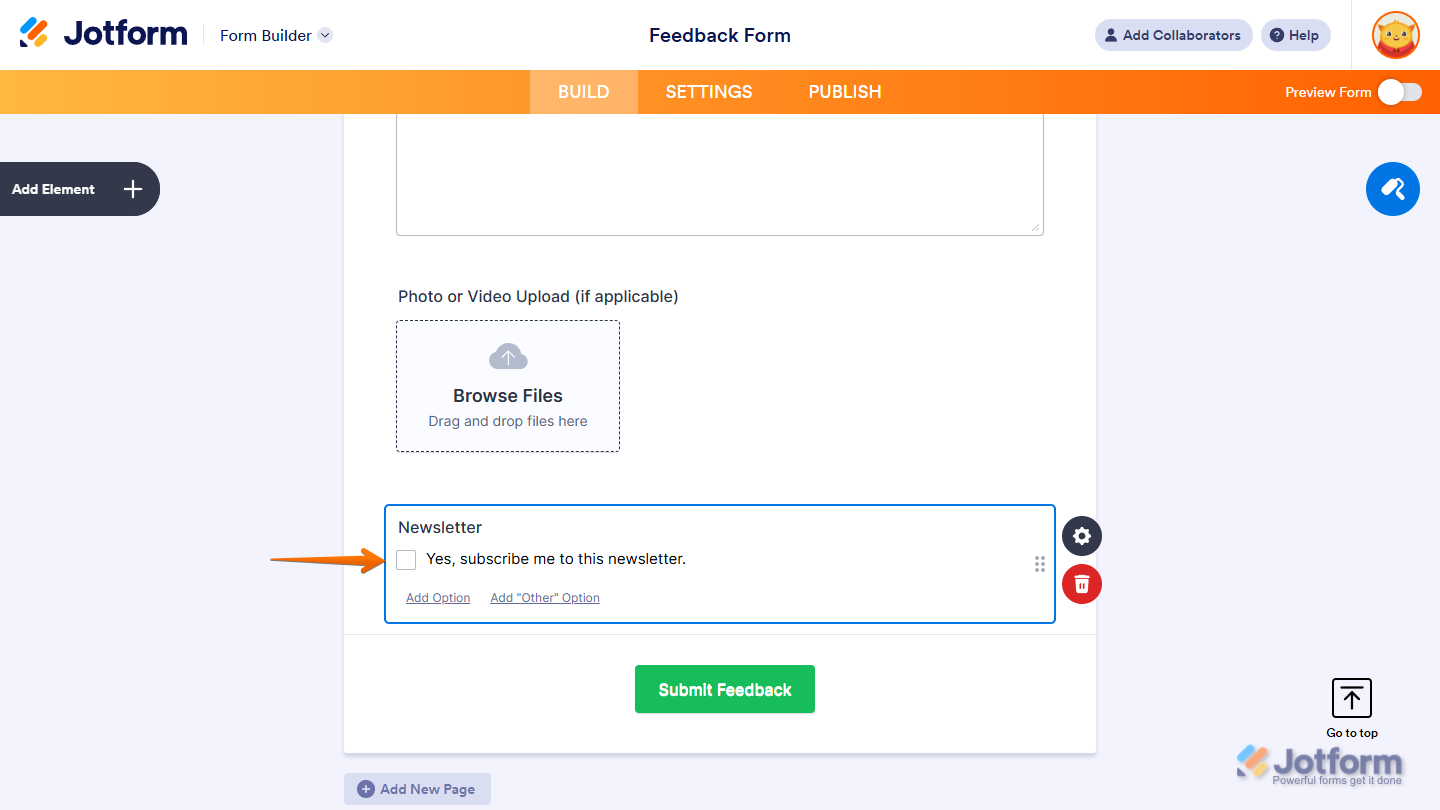
A new Newsletter field will be added to the bottom of your form when you complete the integration with the Only If User Opts In option selected.
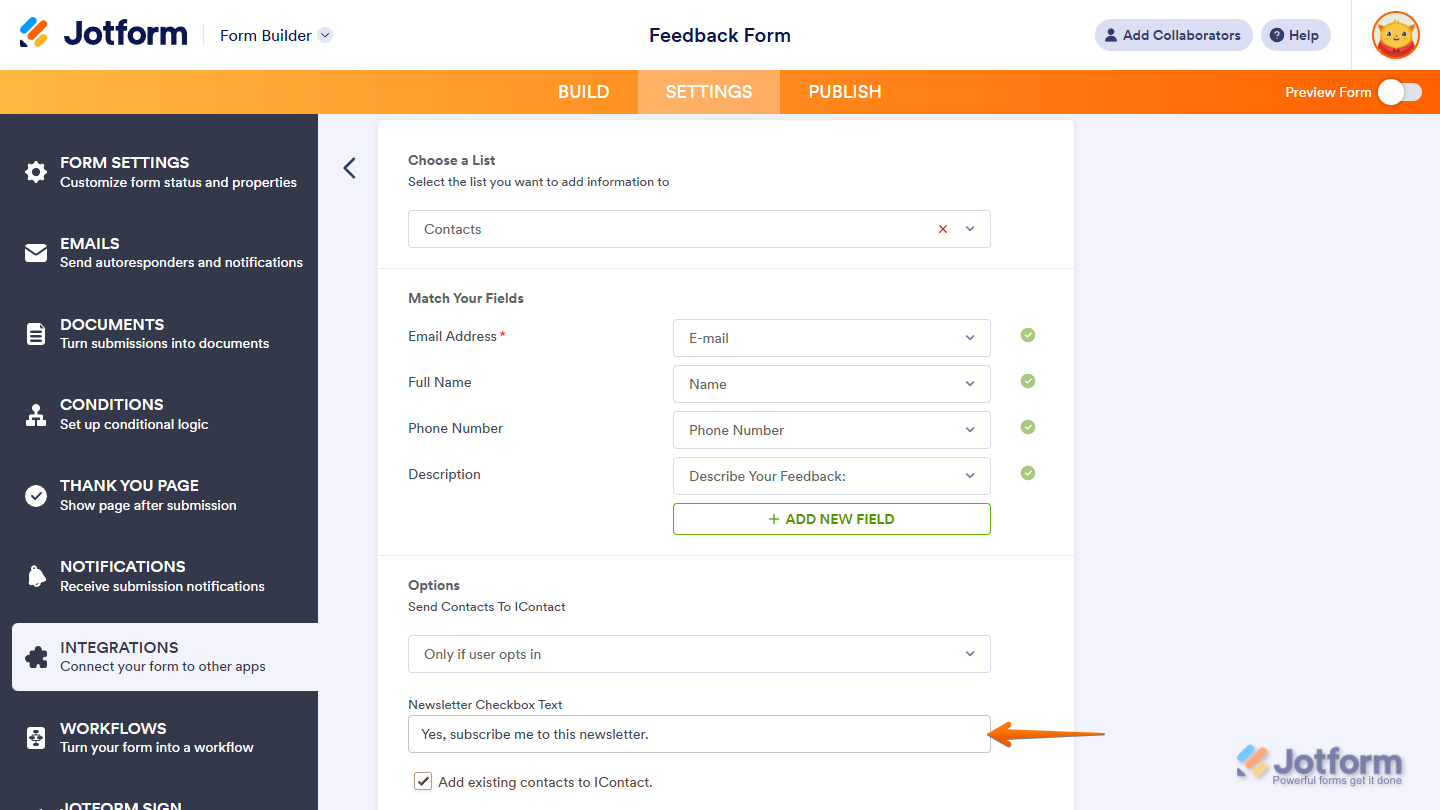
The option also shows the Newsletter Checkbox Text setting, which allows you to change the default label of the checkbox option in your form’s Newsletter field.
Notes
- The Newsletter field won’t be deleted if the iContact integration it was added for is removed from your form.
- If the Newsletter field that was originally added by the integration is deleted, future submissions will be sent to iContact.
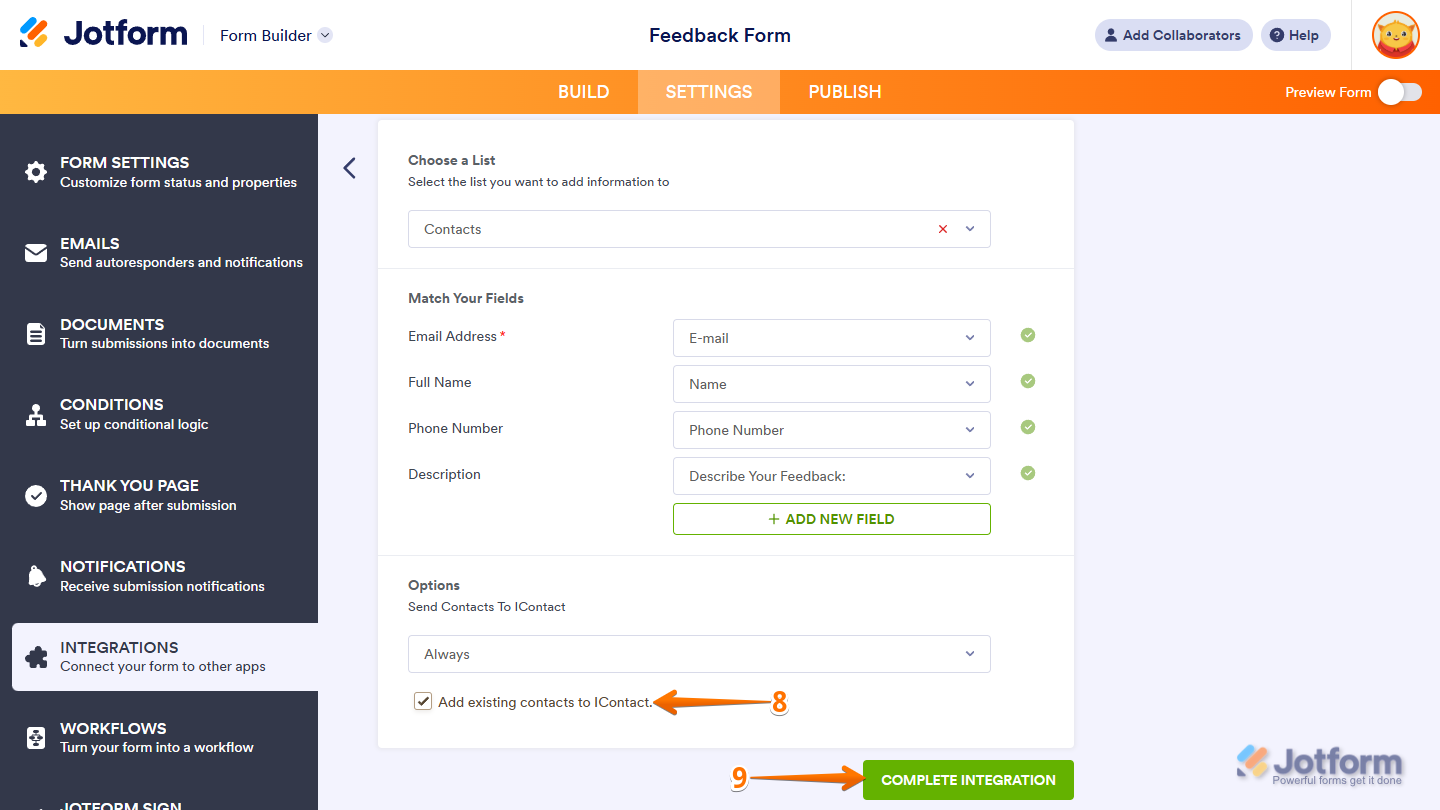
- Next, remove the check in the box next to Add Existing Contacts to iContact if you only want to send new submissions to iContact. Or, keep it checked if you also want to send existing submissions. This option only appears if your form had submissions before setting up the integration.
- Once everything’s set, click on Complete Integration.
- Finally, click on Finish.
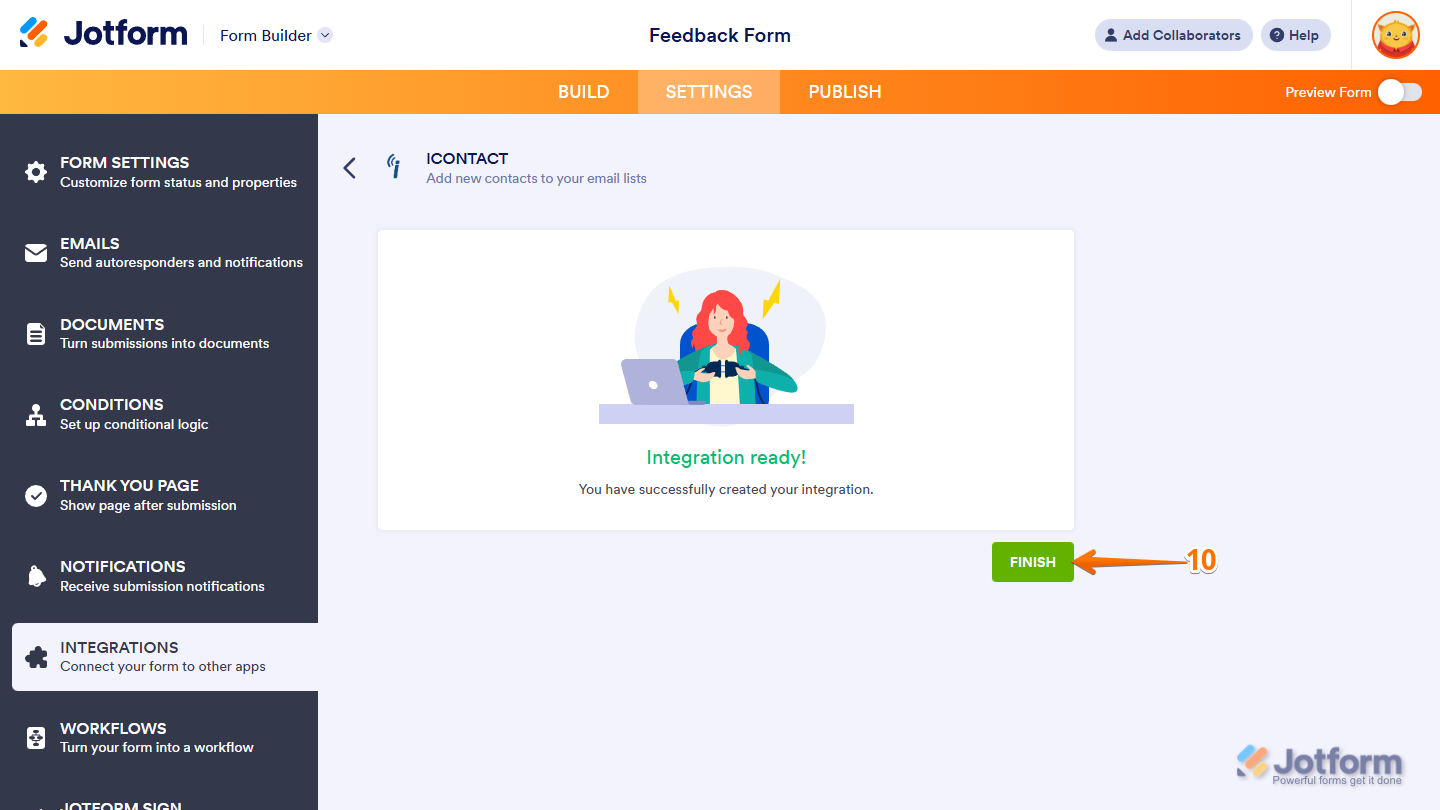
That’s it. Now, contacts will be saved in iContact with each form submission.
Setting Your iContact API Password for Jotform
You need to create an API password that you’ll use to connect your form to iContact. Once you’ve set it up with the Jotform App ID, you can use it to give the integration access and allow it to make changes to your iContact list.
Getting Your Jotform App ID
Getting the Jotform App ID that you’ll need to create an API password in iContact is easy. Here’s how to do it:
- In Form Builder, in the orange navigation bar at the top of the page, click on Settings.
- Now, in the menu on the left side of the page, click on Integrations.
- Next, in the Integrations section on the right, search for iContact and click on it.
- Then, in the iContact section, copy the Jotform App ID from the Authentication steps.
That’s it. Once you have the App ID, you’re ready to create a password in iContact.
Creating a Password for Your Jotform App ID
Once you have your Jotform App ID, you can easily set a password for it in your iContact account in just a few steps. Here’s how:
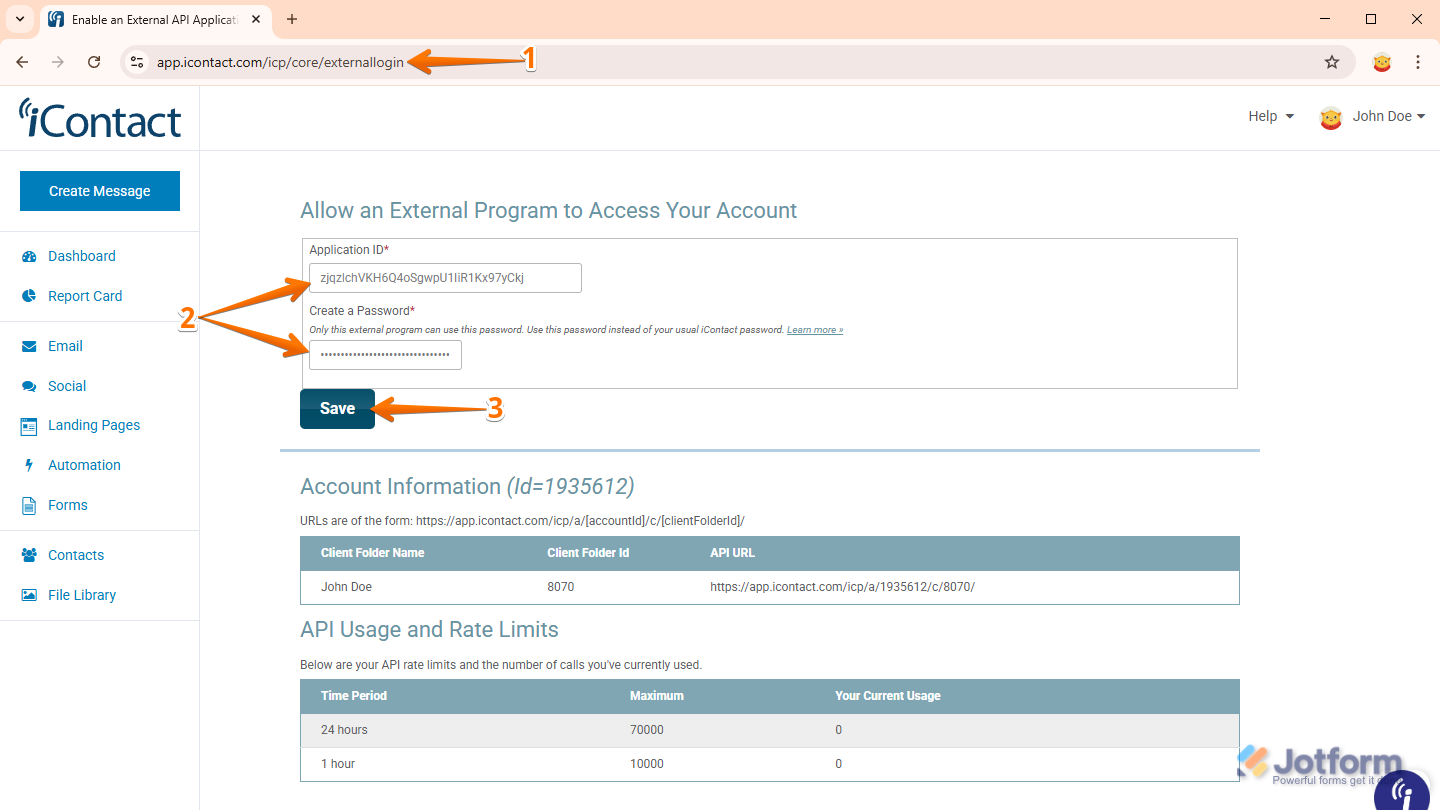
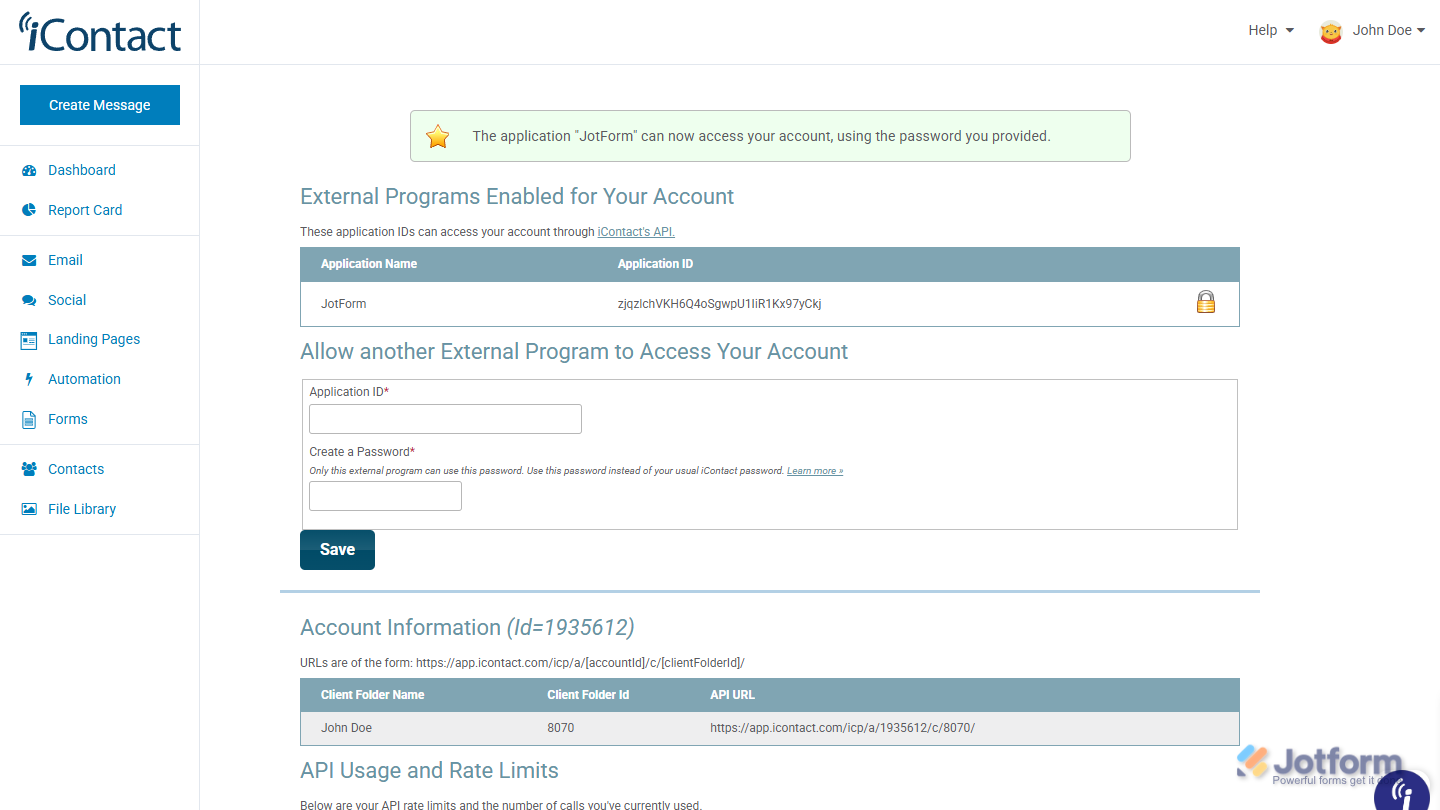
- Log in to iContact and then go to this page.
- Next, in the Allow an External Program to Access Your Account section, paste the Jotform App ID into the Application ID Input box, and then, in the Create a Password Input box, enter the password you want to use in setting up the integration.
- Once everything’s set, click on Save.
That’s all it takes to set a password for the Jotform App ID and link it to your account. Now, you’re ready to connect your form to iContact.

Send Comment: