Previously, workflows could only start with a form submission. With Jotform Workflows, you can now start a workflow using different trigger types, including Schedule, Integrations, third-party triggers, Emails, and Webhooks.
The Switch Start Point feature lets you change the trigger of an existing workflow without rebuilding the entire workflow. Depending on your workflow setup, you may see a warning if existing steps or conditions depend on the current start point. You can then select a new trigger and configure it while keeping the rest of the workflow.
Workflows can start in different ways depending on the trigger you choose:
- Schedule — Run the workflow on a recurring schedule.
- Integrations — Trigger the workflow when a connected app sends data.
- Email — Trigger the workflow when a new email is received.
- Webhook — Run the workflow when an HTTP request is received.
Notes
- Before making any changes to the Start Point of your workflow, download your existing submissions from Jotform Inbox and Tables to keep a copy of your data. Check out these guides for more details: How to Download Form Submissions as Excel, CSV, or PDF and How to Download Submissions in Jotform Inbox.
- Changing the Start Point can disconnect the workflow from its original form and affect steps or conditions that depend on the previous Start Point. If you change the Start Point back to Form and select the original form, the Start Flow button will be available in the Jotform Inbox for existing submissions, allowing you to start the workflow again.
Changing the Start Point to Schedule
You can change the start point of an existing workflow to Schedule. Follow these quick steps to get started:
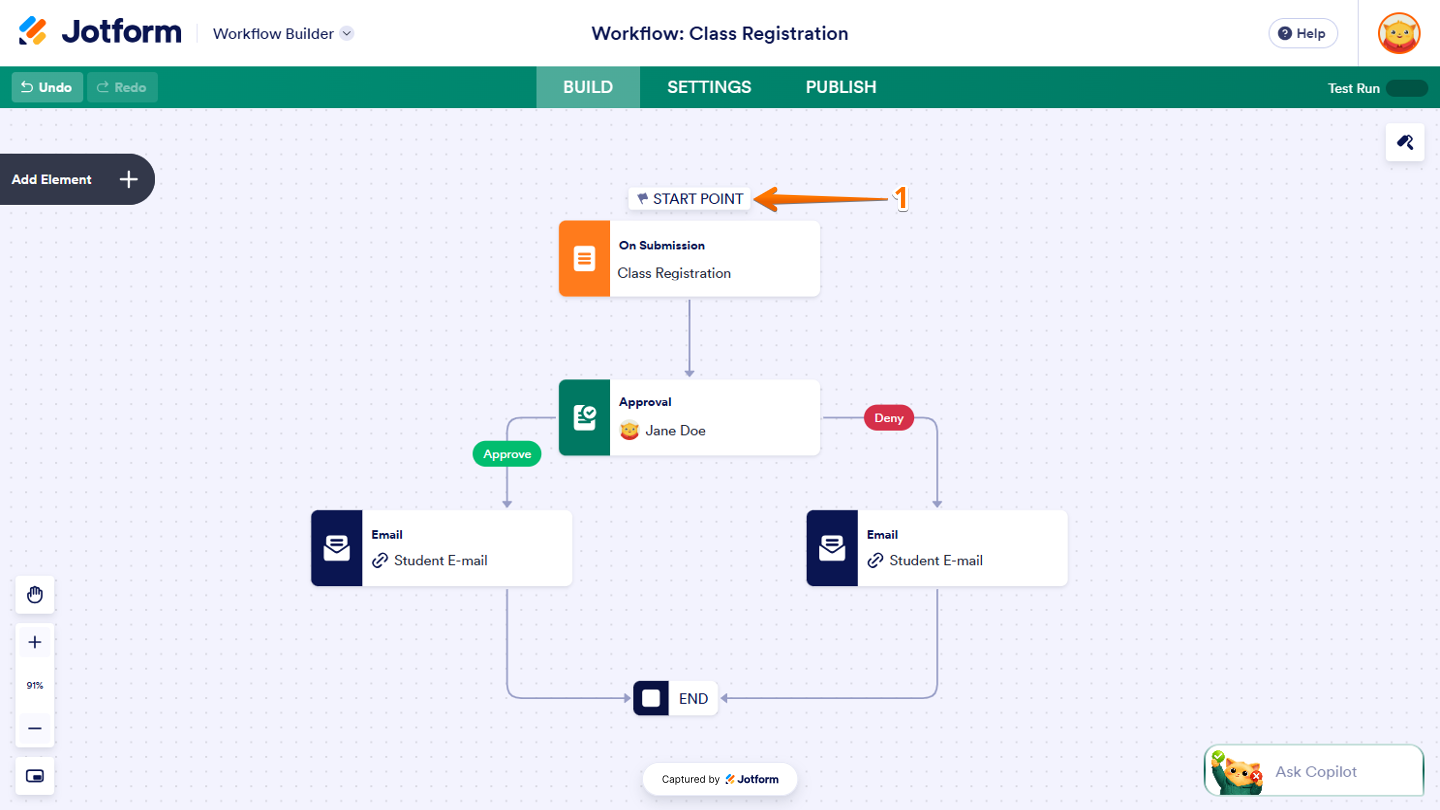
- In Workflow Builder, click on Start Point at the top of the Form element.
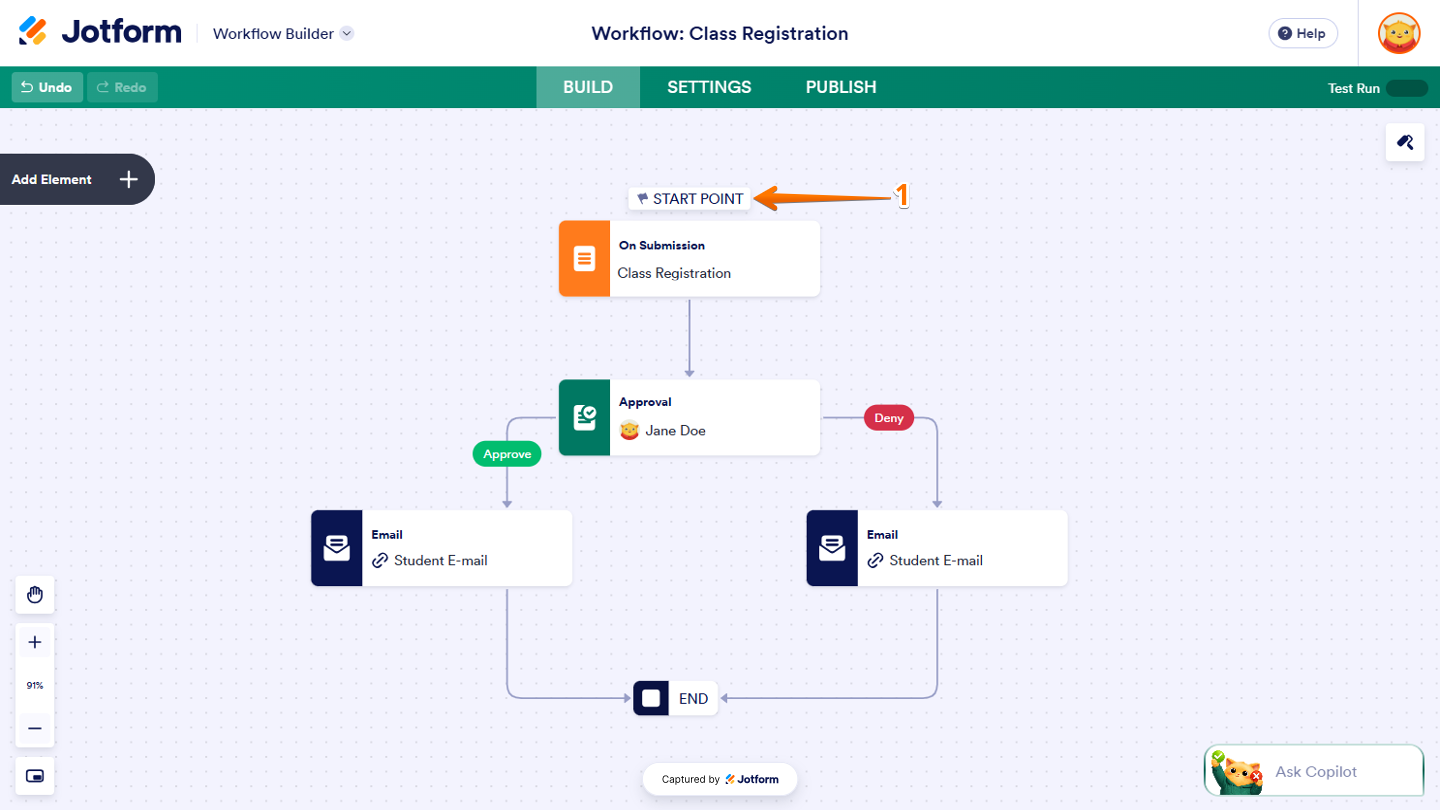
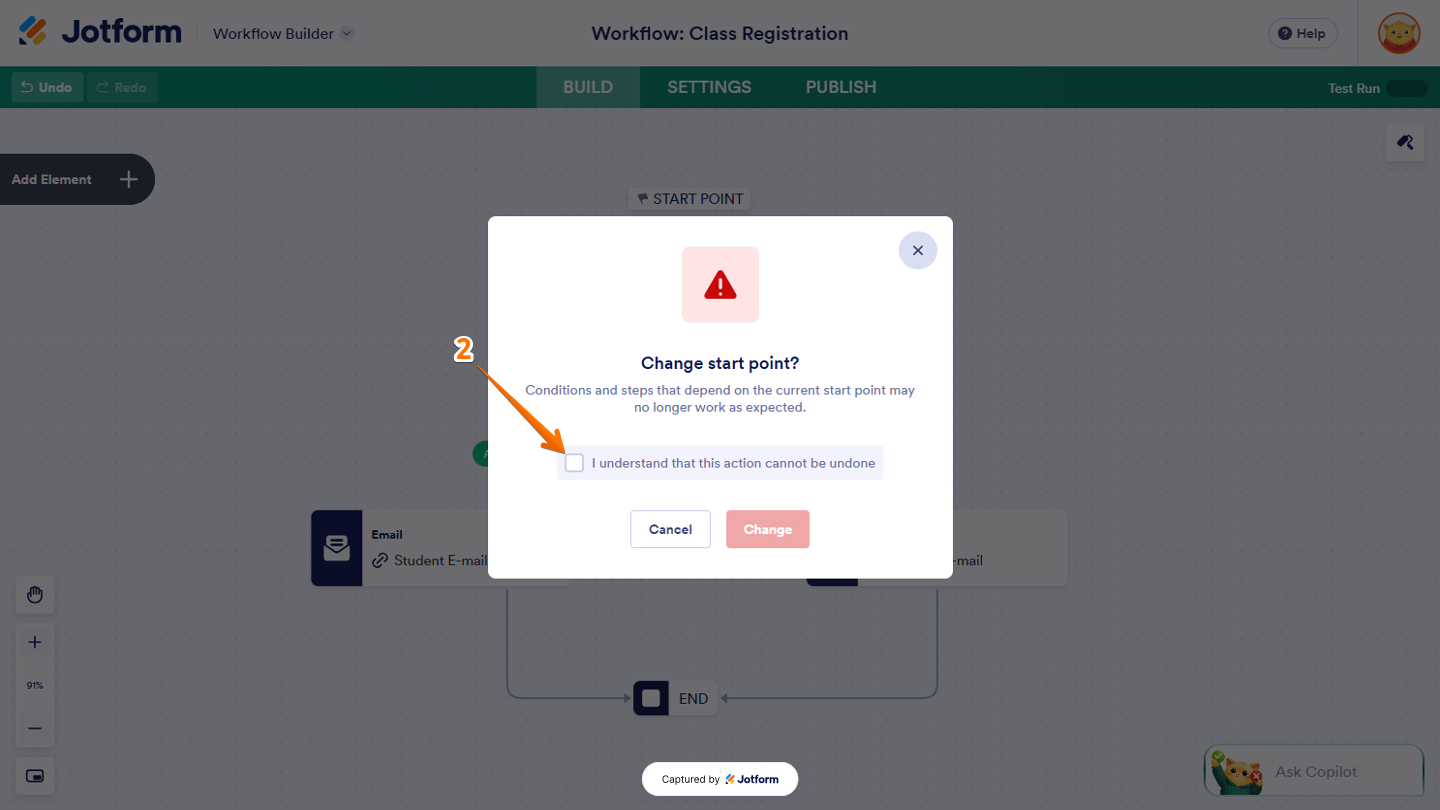
- Then, in the Confirmation window that opens, tick the box next to I Understand that this Action Cannot be Undone.
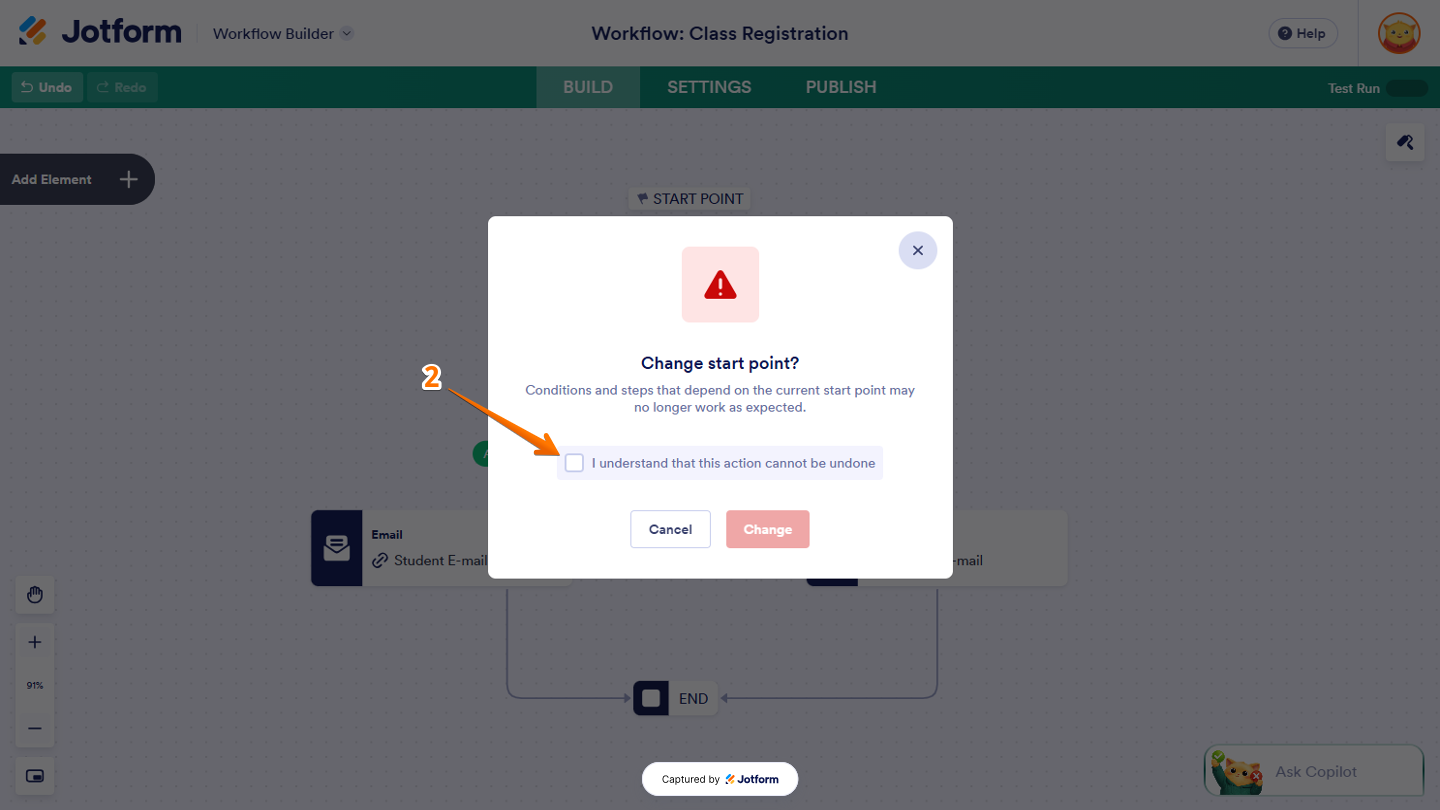
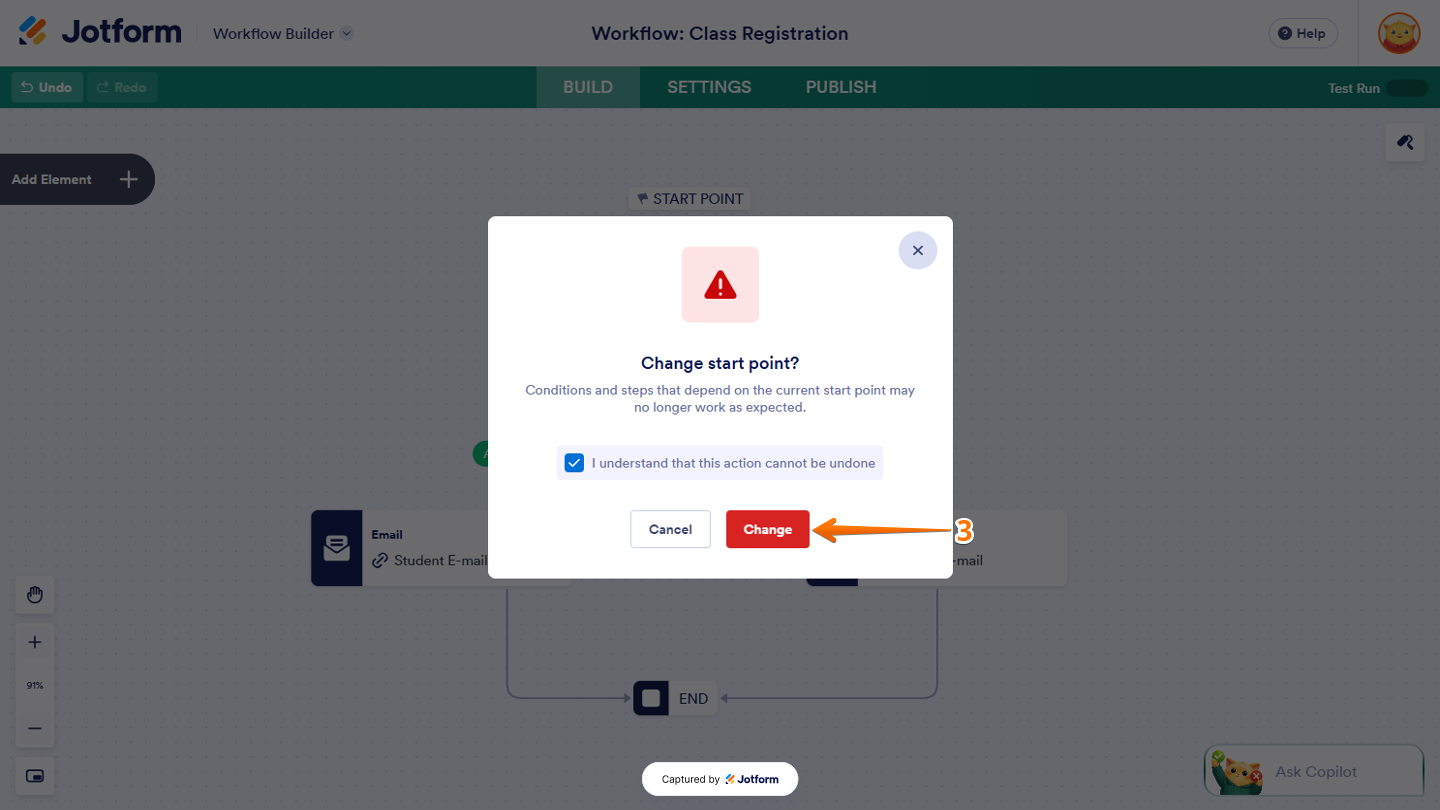
- Now, click on Change.
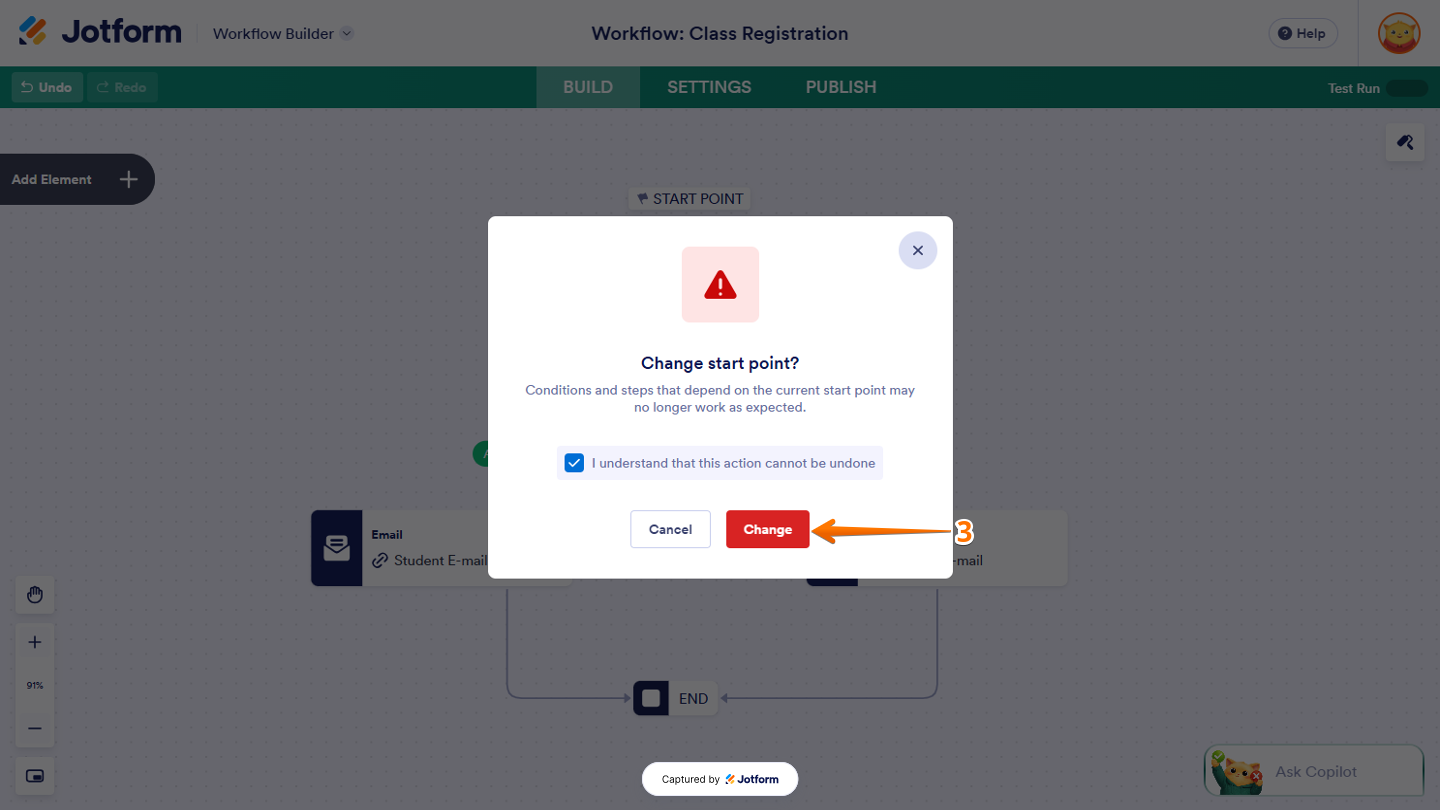
- Next, in the Start Point window that opens, select Schedule.
- Now, click on Next at the bottom of the window.
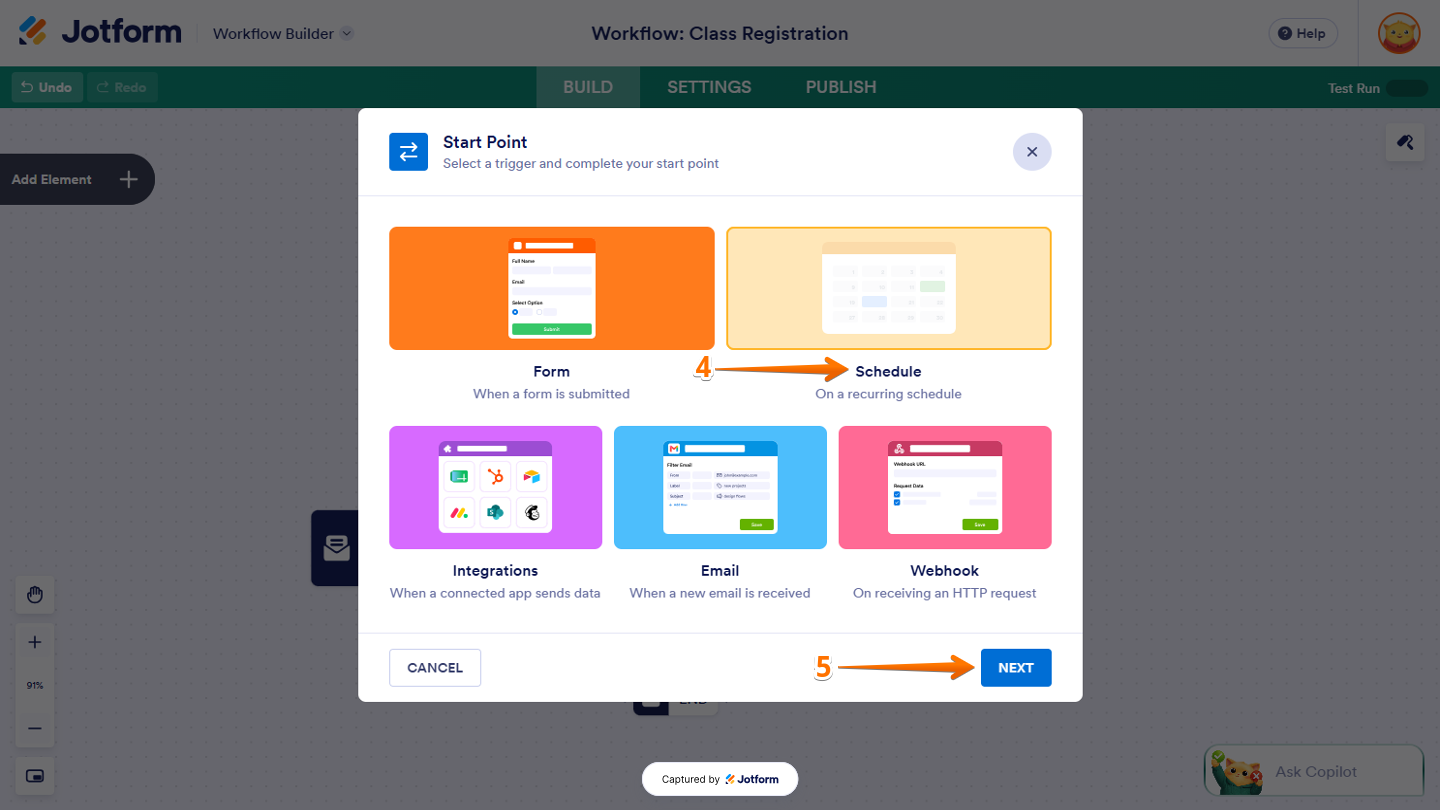
- Then, in the Schedule window that opens, configure the following:
- Repeat — Click on the Downward Arrow icon and select how frequently you want the workflow to run from the Dropdown menu: Hourly, Daily, Weekly, Monthly, Yearly, or Never.
- Starts — Select the Date and Time when you want the workflow to start running.
- Ends — Select when you want the schedule to stop.
- Never — Keep the workflow running without an end date.
- Exact Date & Time — Select the date and time when you want the schedule to end.
- Number of Runs — Enter the number of times you want the workflow to run.
- When everything is set, click on Save.
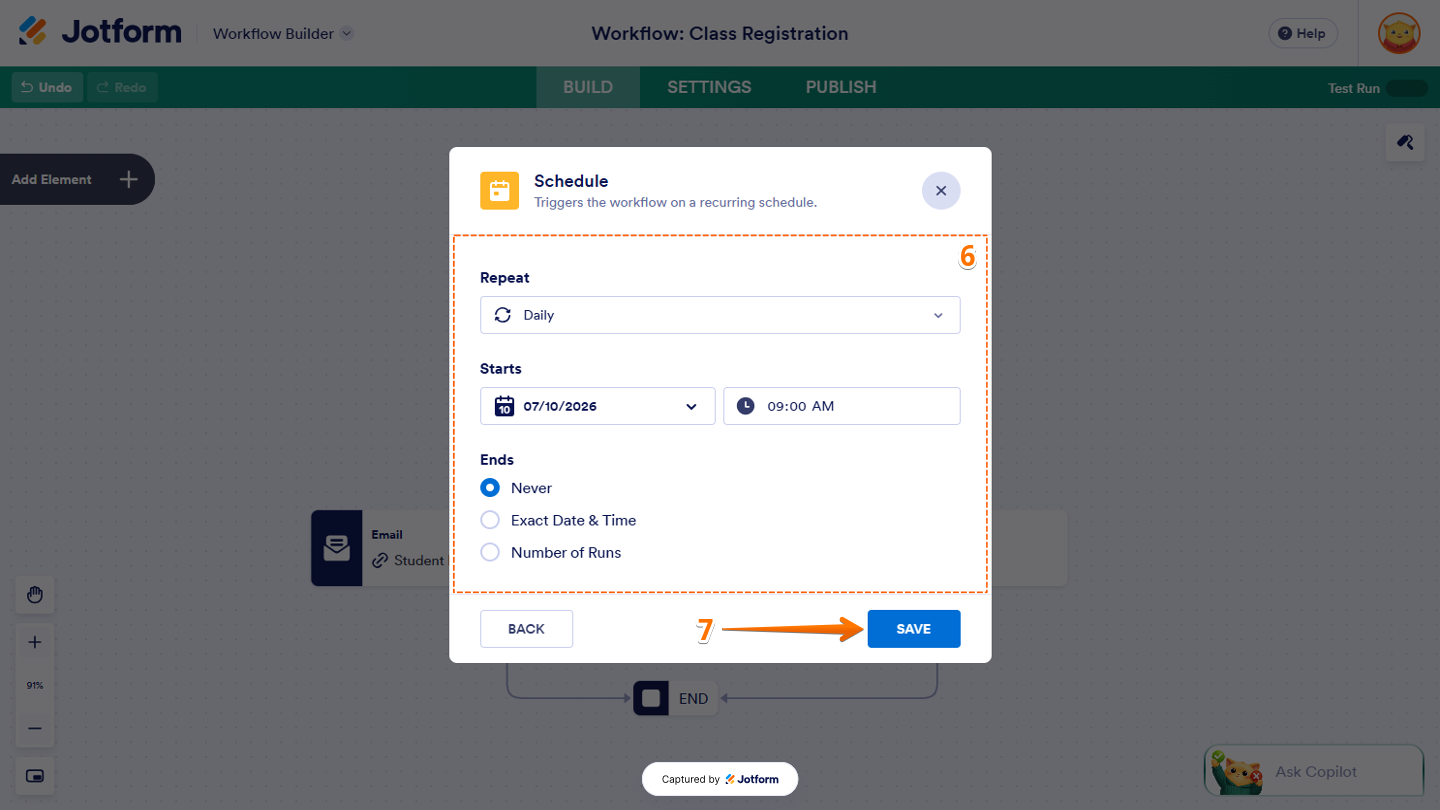
That’s it. Your workflow will now start based on the Schedule settings you configured.
Switching the Start Point to Integrations
With the Integrations Start Point, you can trigger an existing workflow when data is sent from a connected app. You can then choose which app you want to use as the trigger. Here’s how to set it up:
- In Workflow Builder, click on Start Point at the top of the Form element.
- Then, in the Confirmation window that opens, tick the box next to I Understand that this Action Cannot be Undone.
- Next, click on Change.
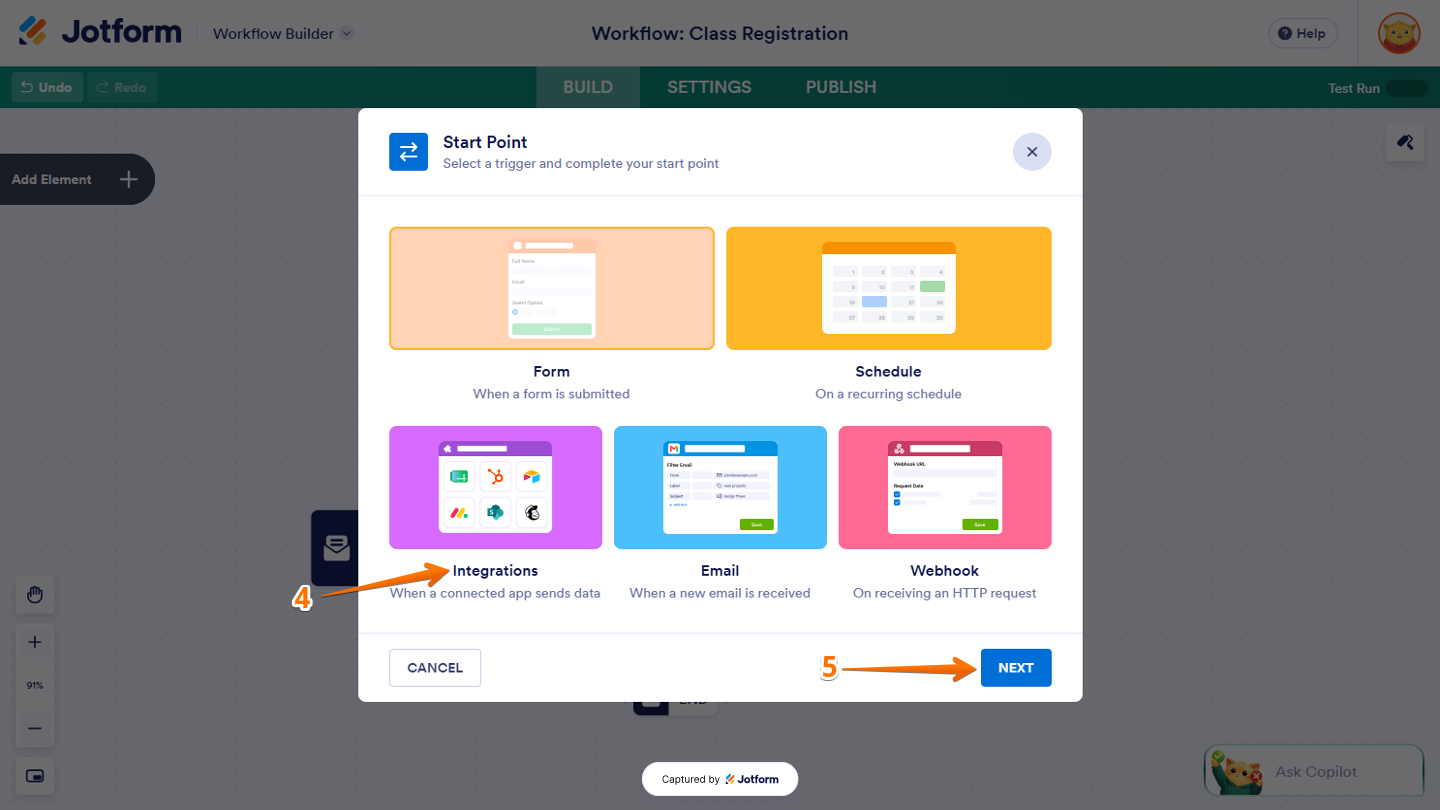
- Now, in the Start Point window that opens, select Integrations.
- Then, click on Next at the bottom of the window.
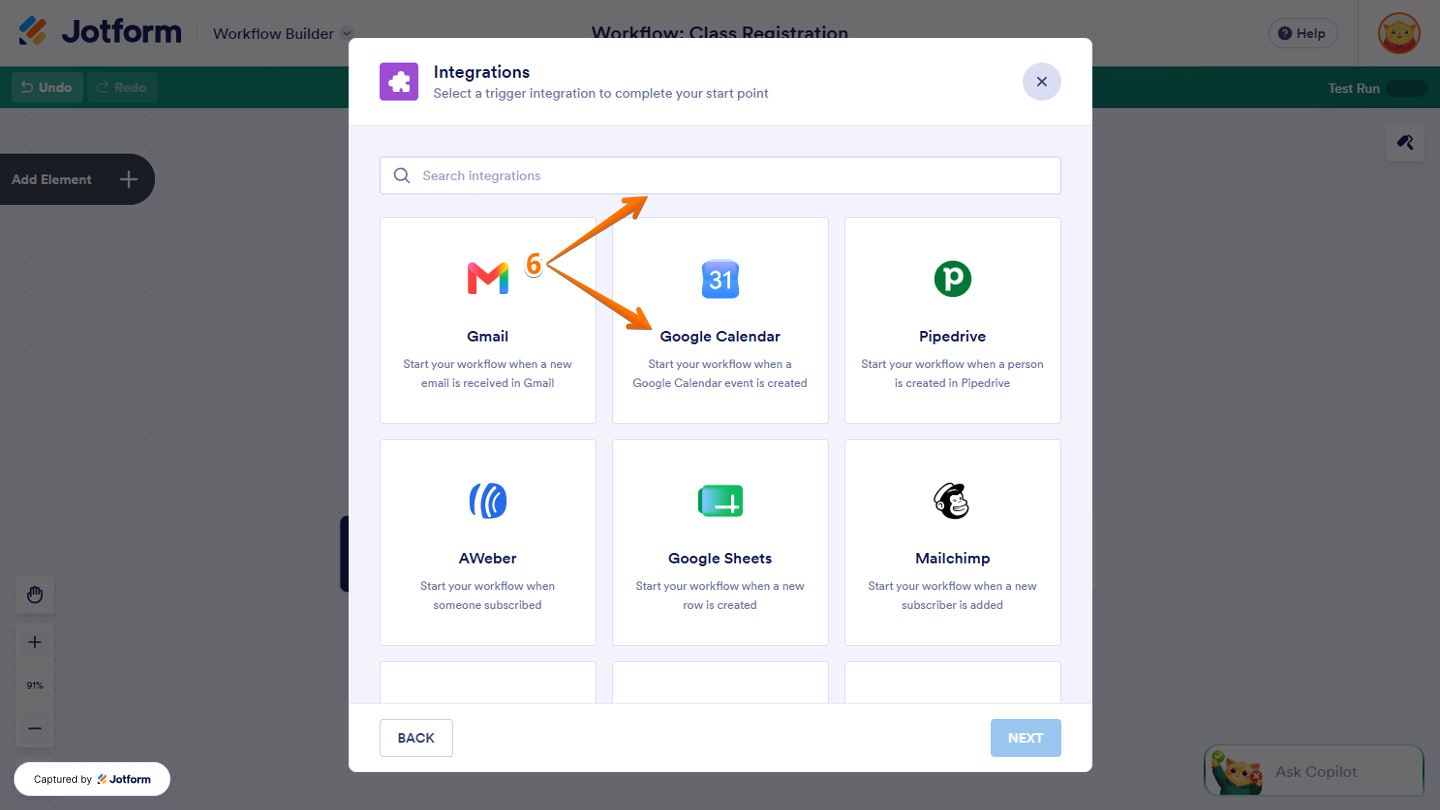
- In the Integrations window that opens, use the Search Bar to look for the integration you want, or select an app you want to connect with Jotform, like Google Calendar.
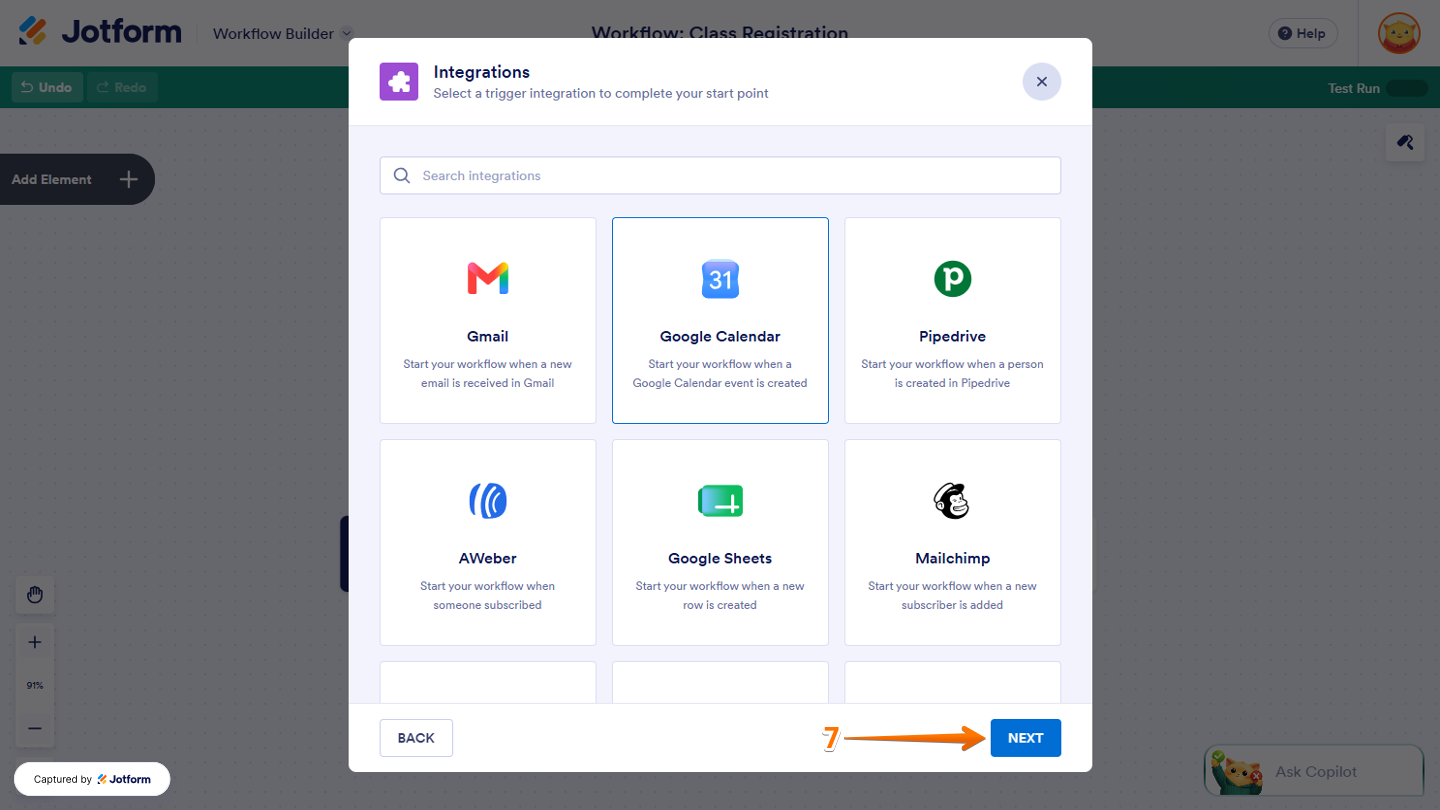
- Now, click on Next at the bottom of the window.
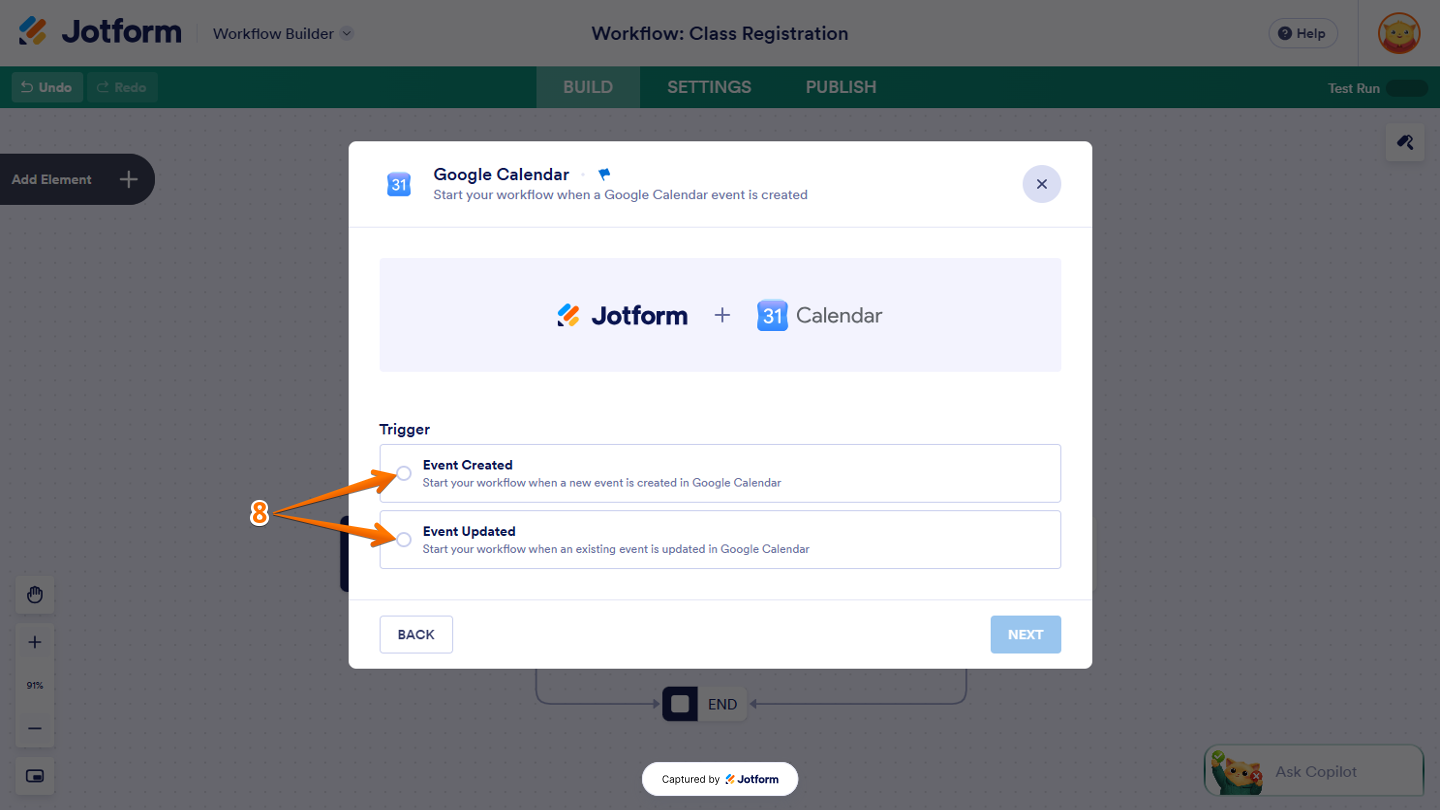
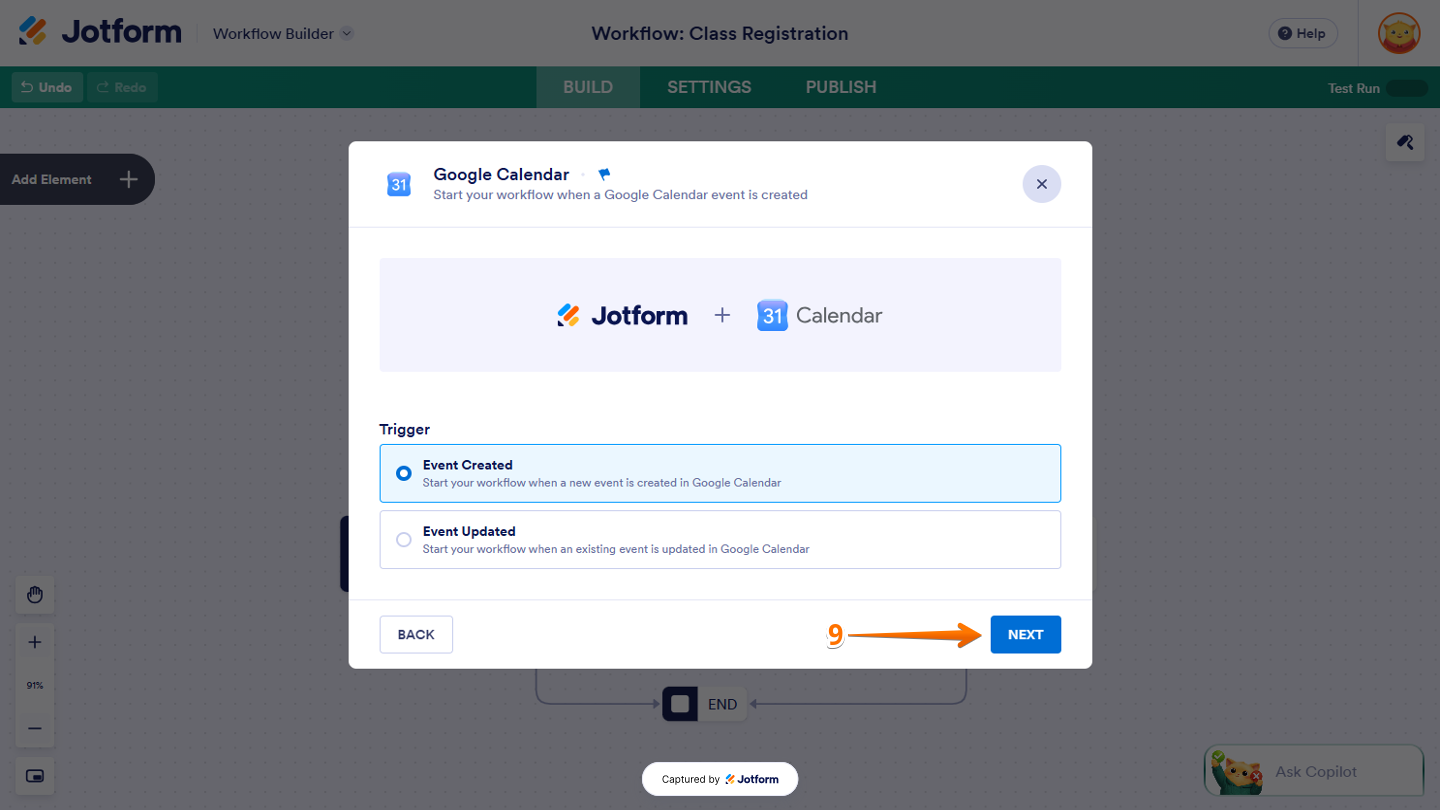
- In the Google Calendar window that opens, select the Trigger that you want:
- Event Created — Start your workflow when a new event is created in Google Calendar.
- Event Updated — Run your workflow when an existing event is updated in Google Calendar.
- Then, click on Next at the bottom of the window.
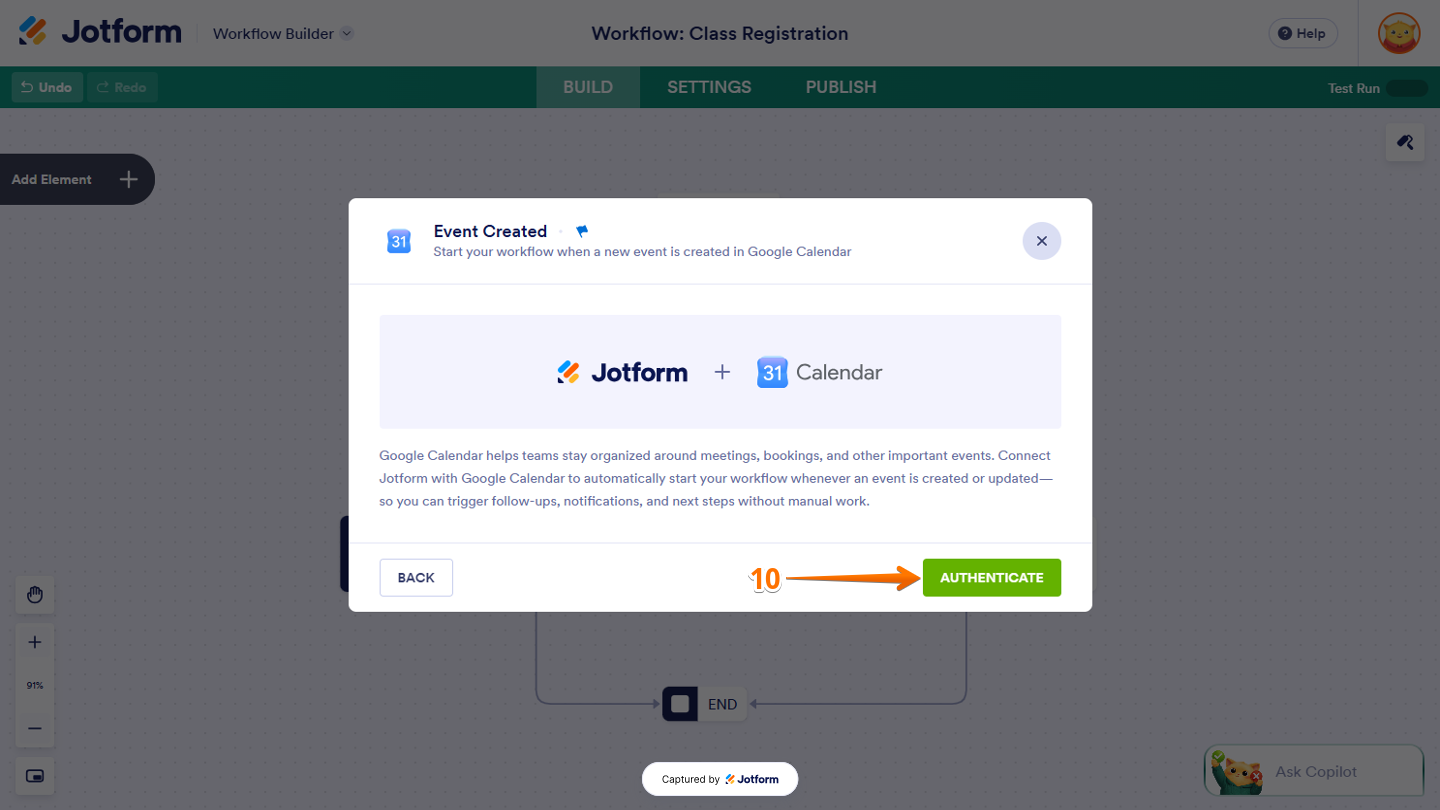
- In the window that opens, click on Authenticate and log in to your Google account.
- Now, in the window that opens, click on Save.
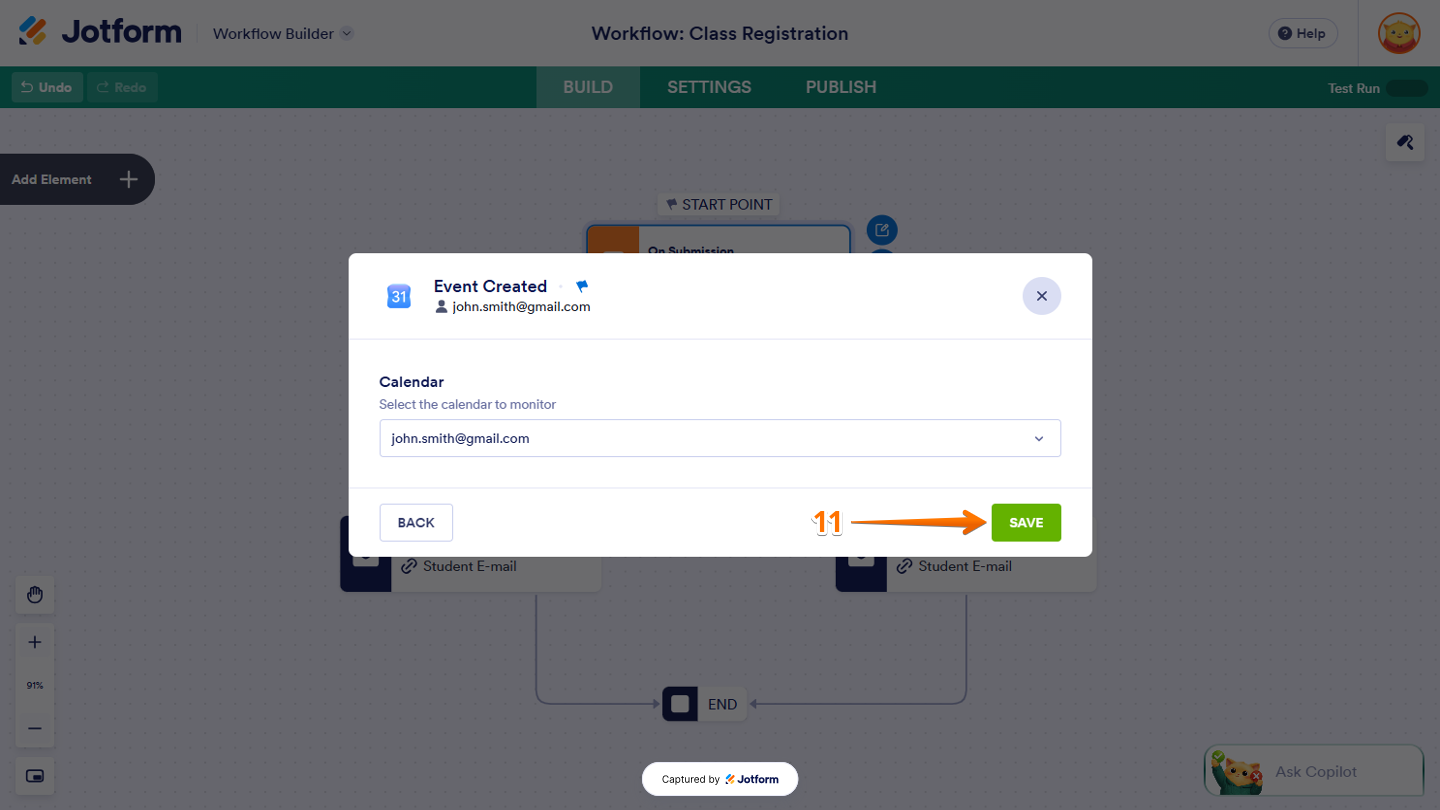
You’re all set. Your workflow will now start when the selected integration trigger occurs. Creating or updating an event in Google Calendar will automatically trigger your Jotform Workflow.
Updating the Start Point to Email
With the Email Start Point, you can trigger an existing workflow when a new email comes in. You can then choose the email settings for your workflow. Here’s how to get going:
- In Workflow Builder, click on Start Point at the top of the Form element.
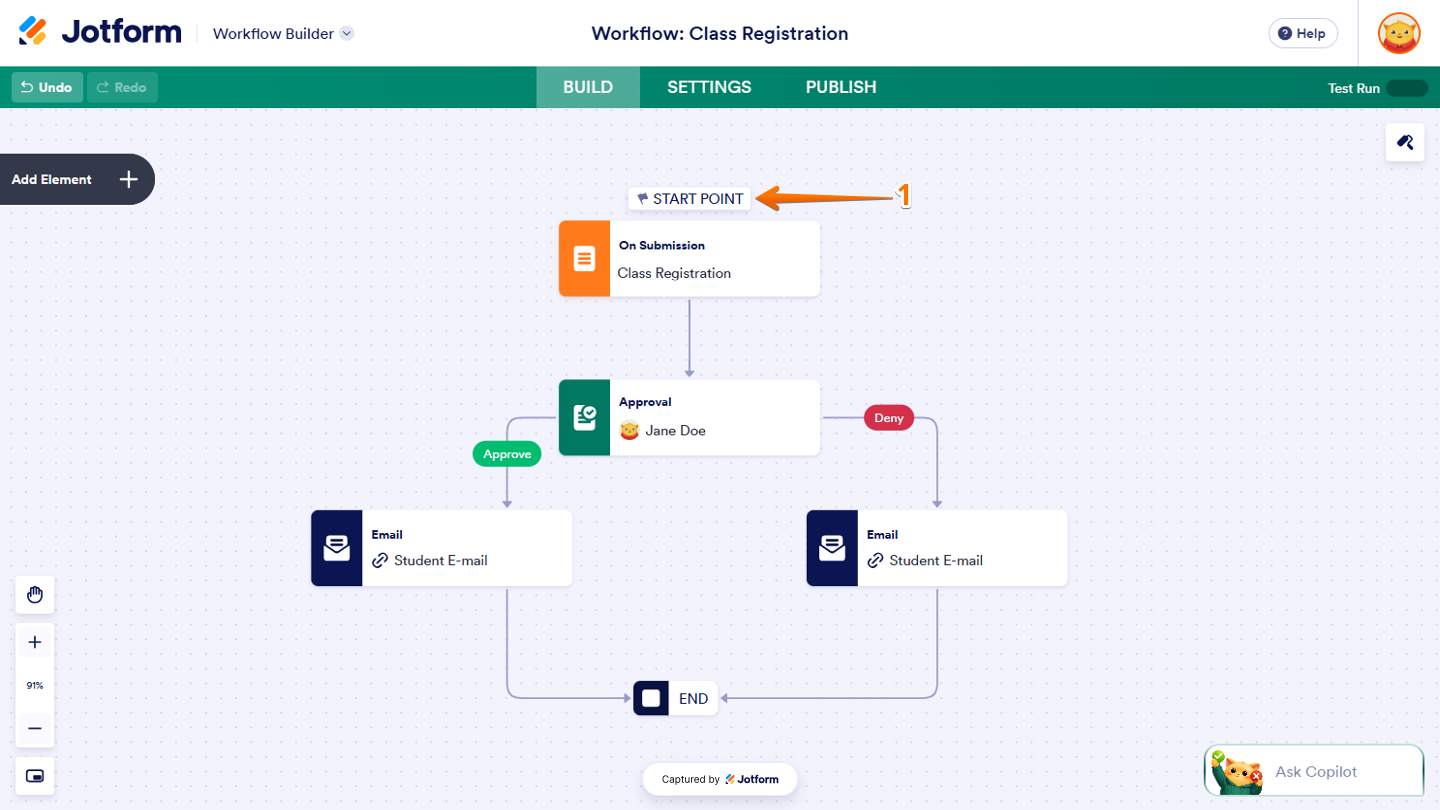
- Then, in the Confirmation window that opens, tick the box next to I Understand that this Action Cannot be Undone.
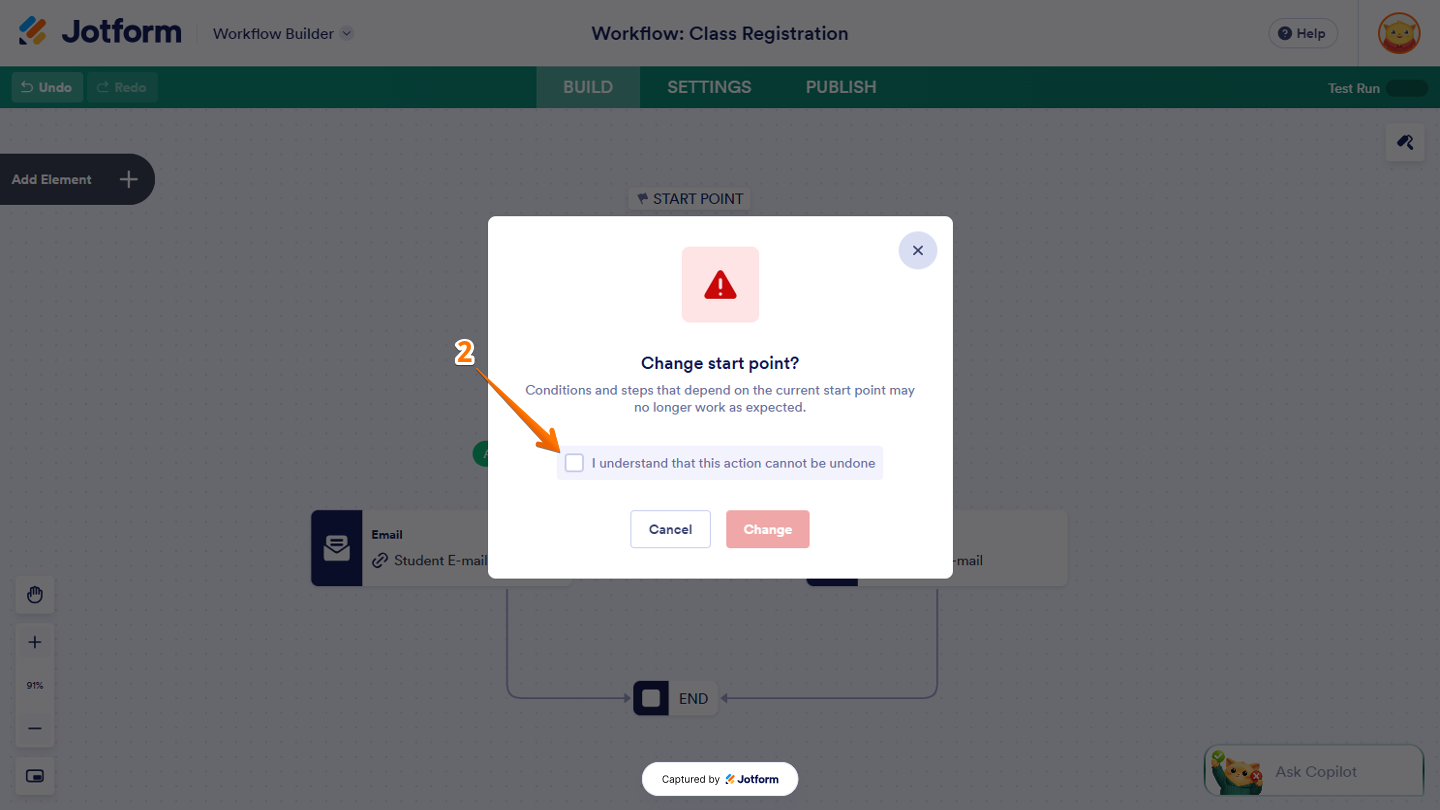
- Next, click on Change.
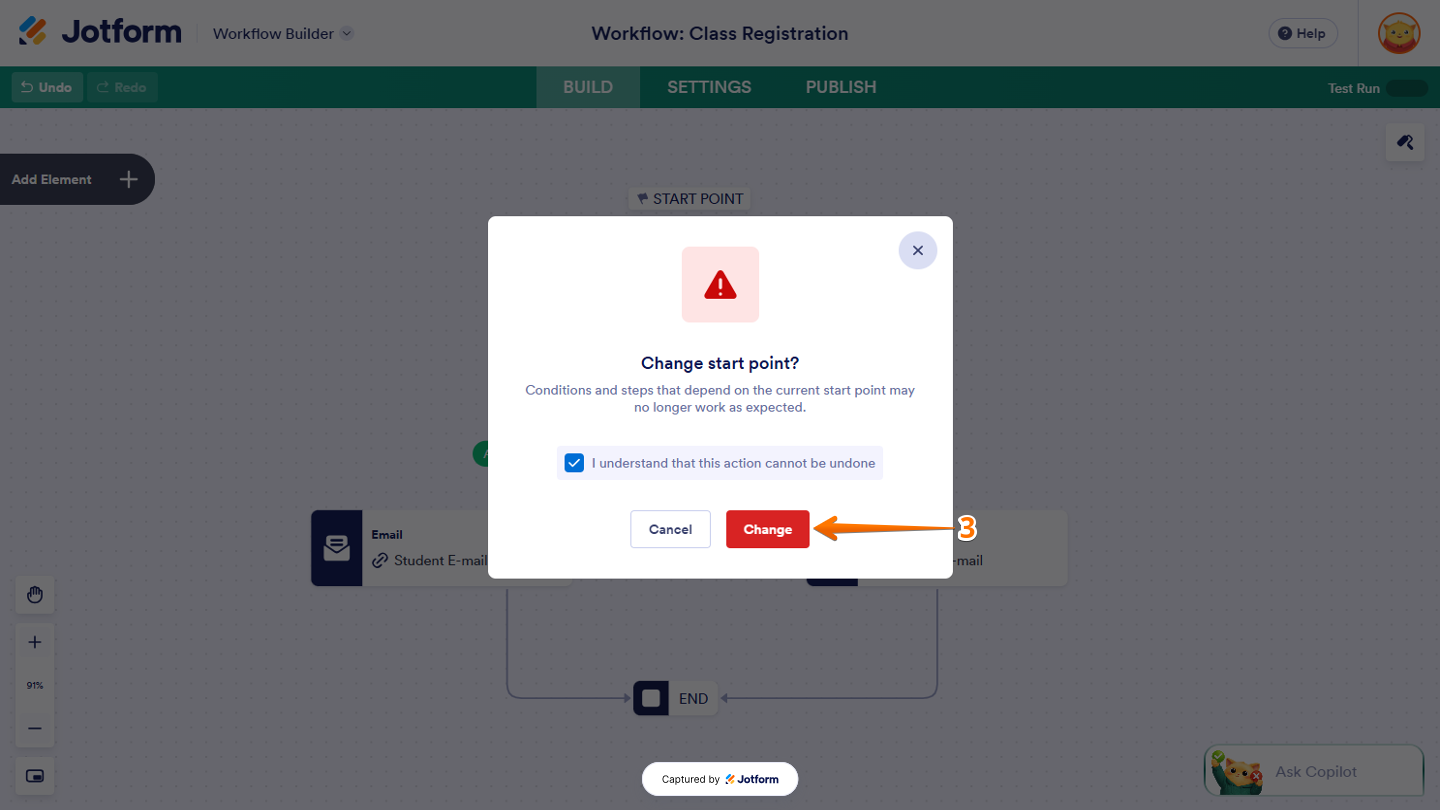
- Now, in the Start Point window that opens, select Email and then click on Next.
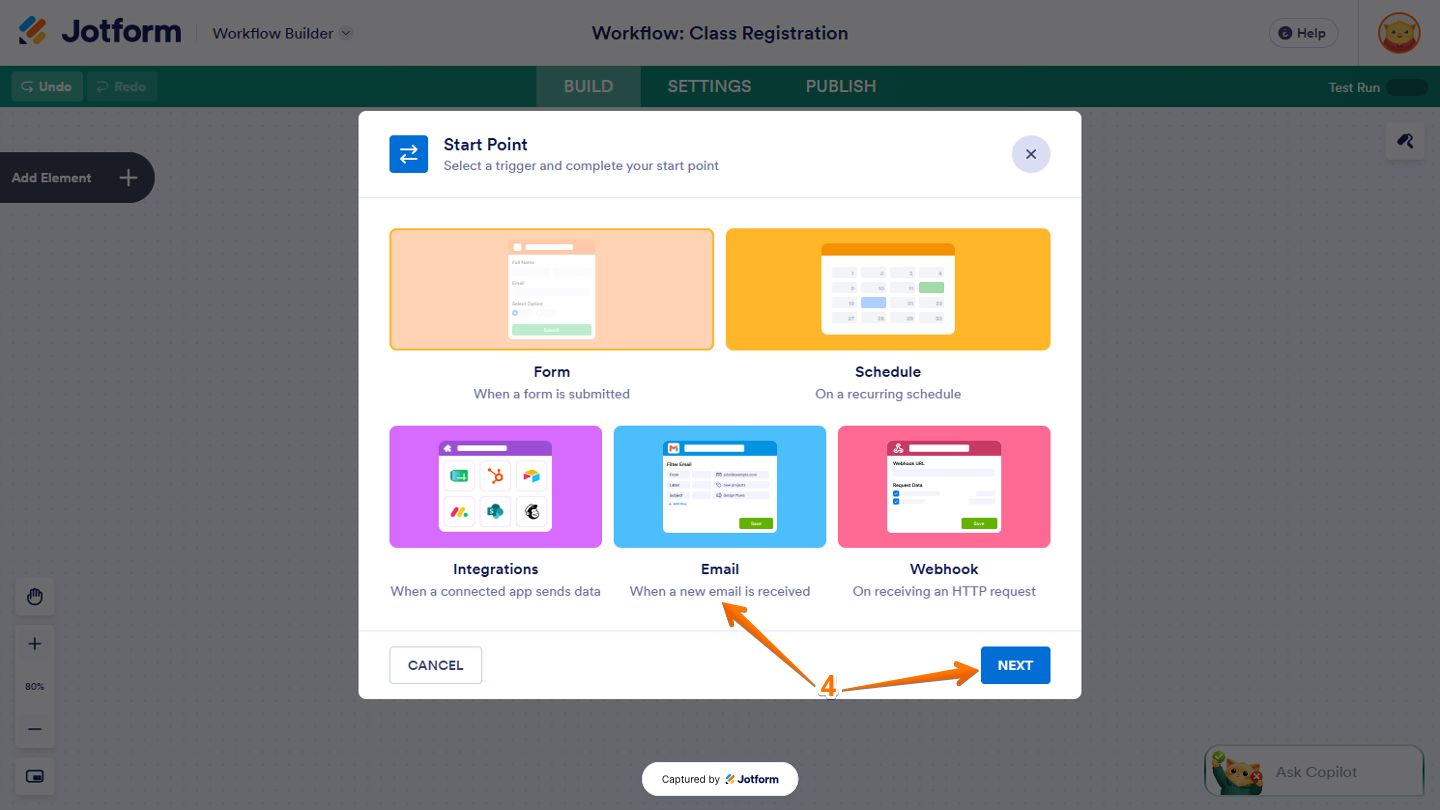
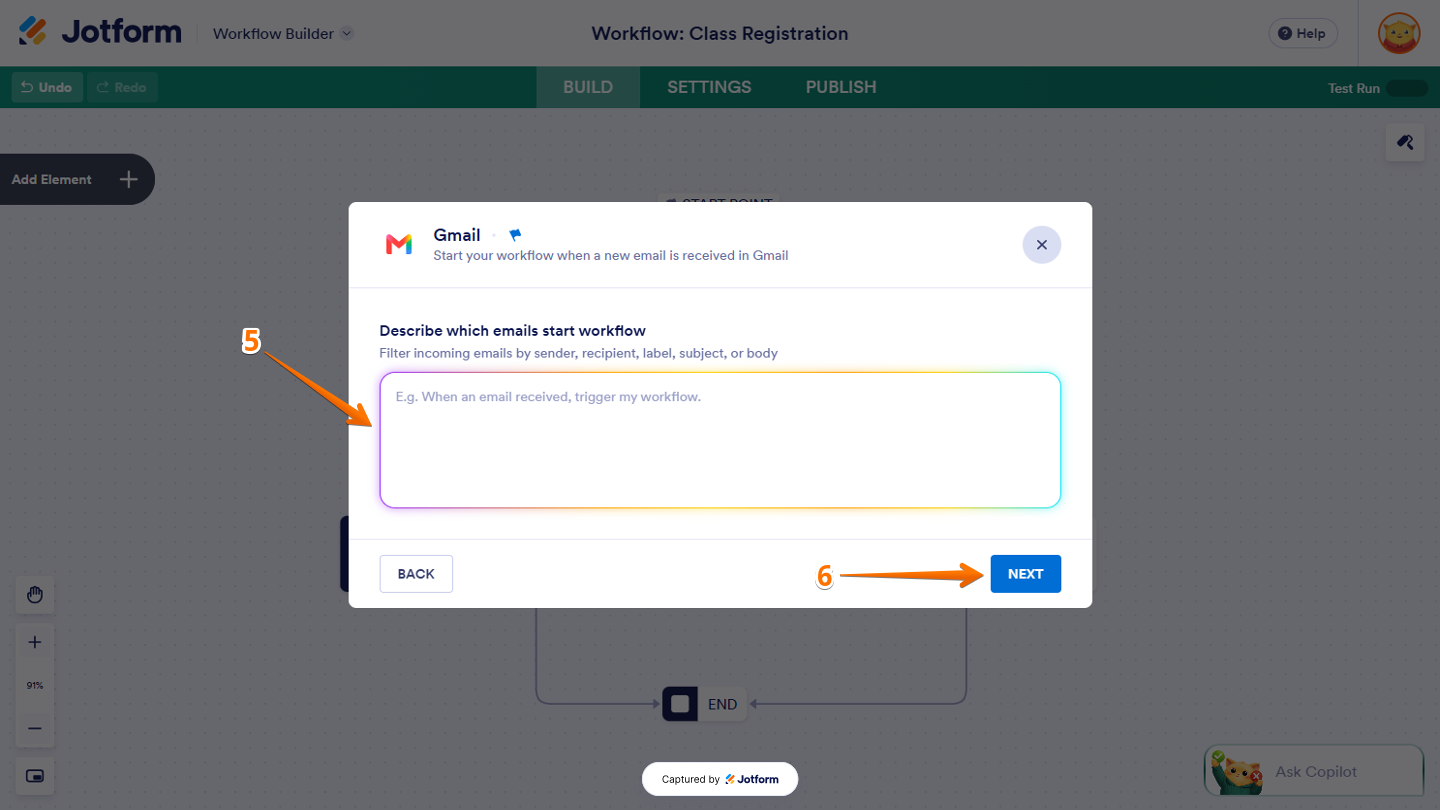
- In the Gmail window that opens, under the Describe Which Emails Start Workflow section, enter a short description of the emails that should trigger your workflow.
- Then, click on Next at the bottom of the window.
- In the new window that opens, click on Next.
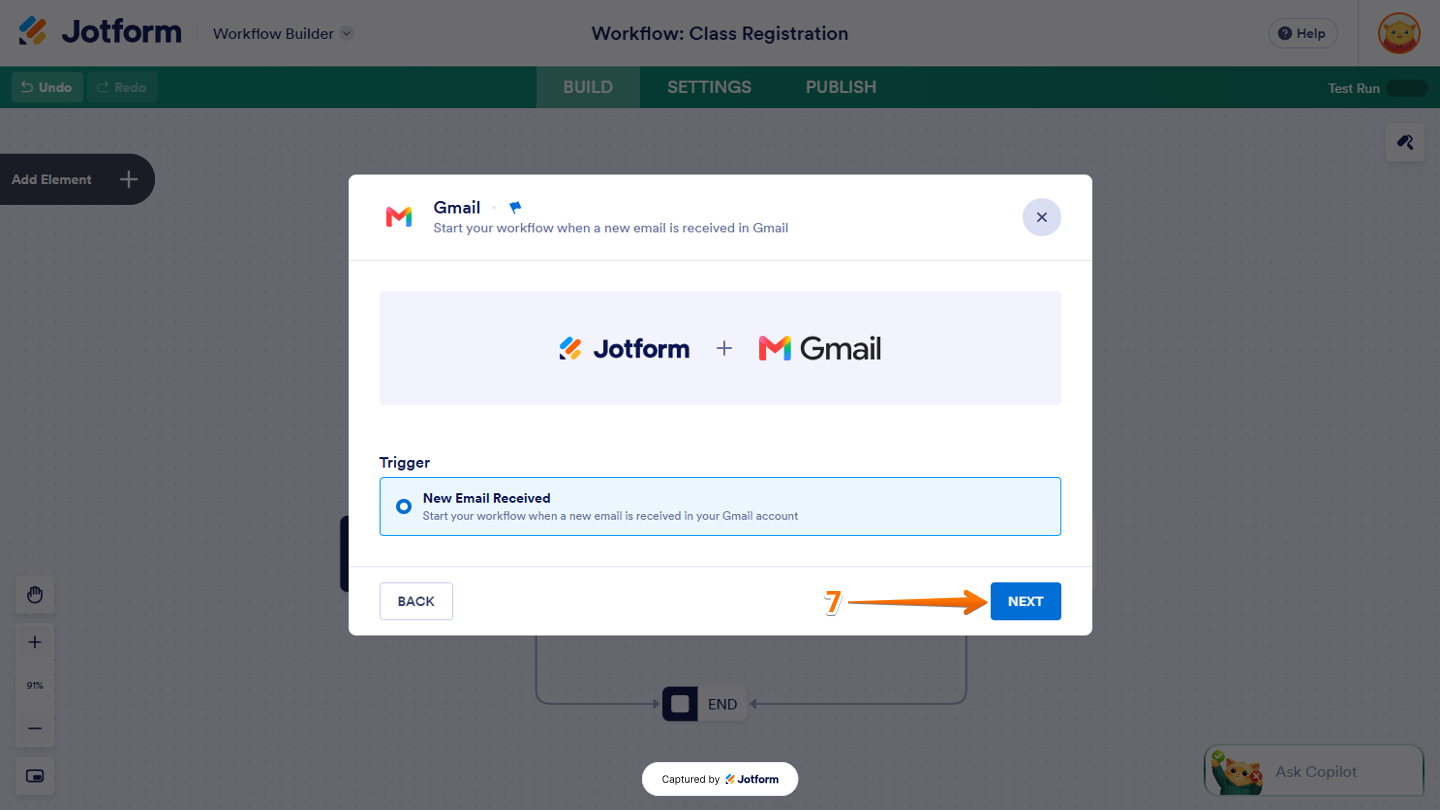
- Next, in the New Email Received window that opens, click on Authenticate.
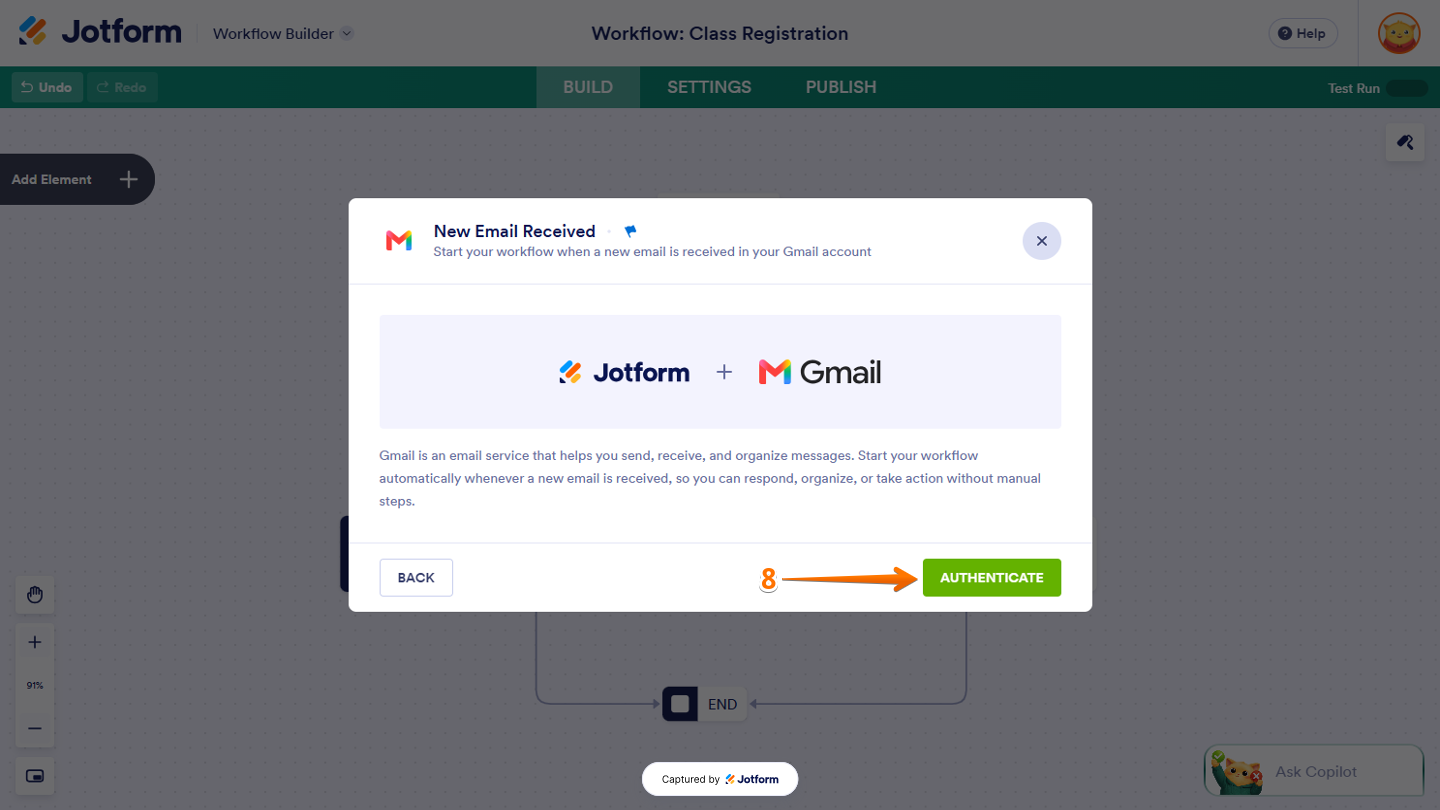
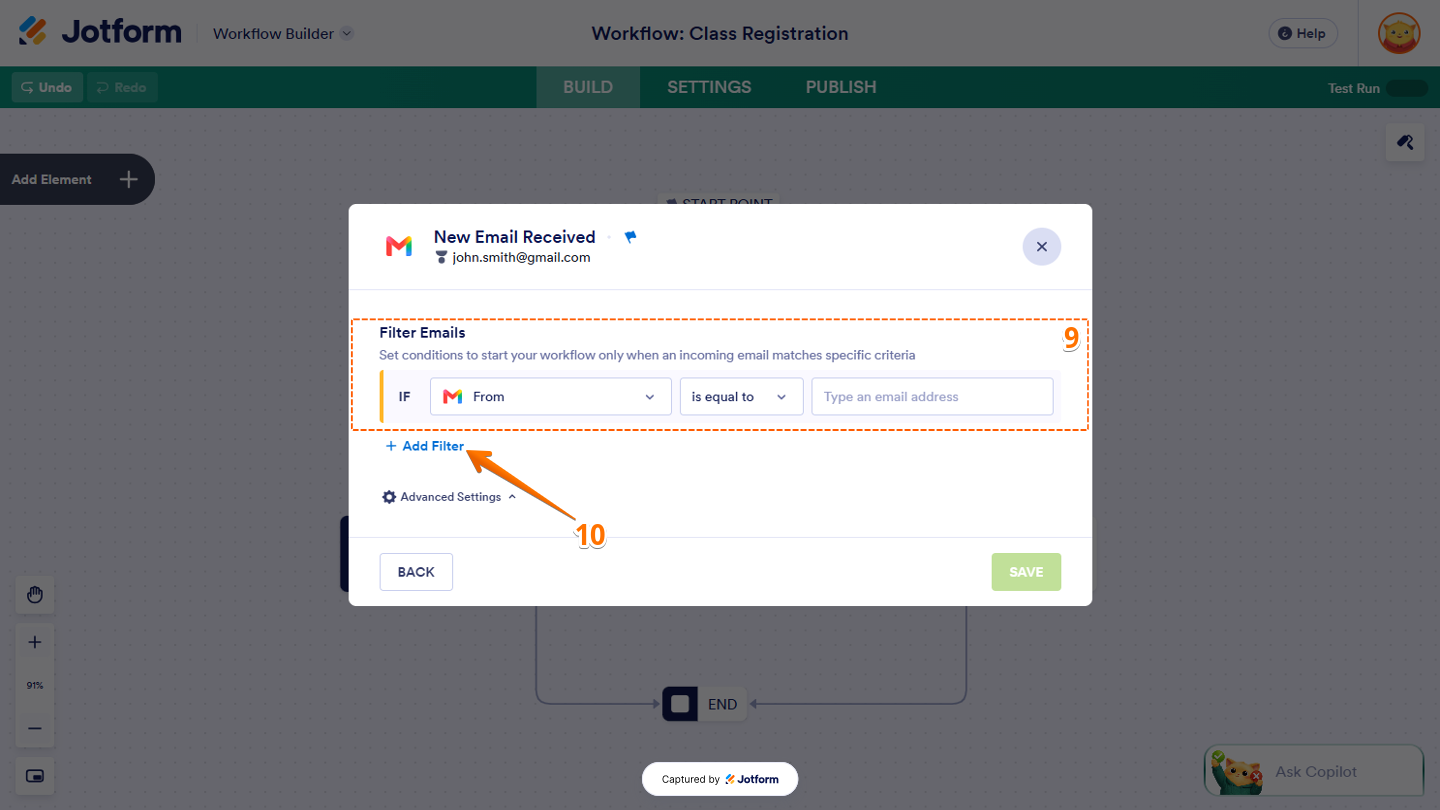
- Now, in the next window that opens, under the Filter Emails section, configure the condition:
- IF — Click on the Downward Arrow icon and select Label, From, Subject, To, or Body.
- Condition — Click on the Downward Arrow icon next to Is Equal To and select Is Not Equal To or Contains.
- Value — Enter the email address that you want to use for the filter.
- Then, click on Add Filter to add another condition.
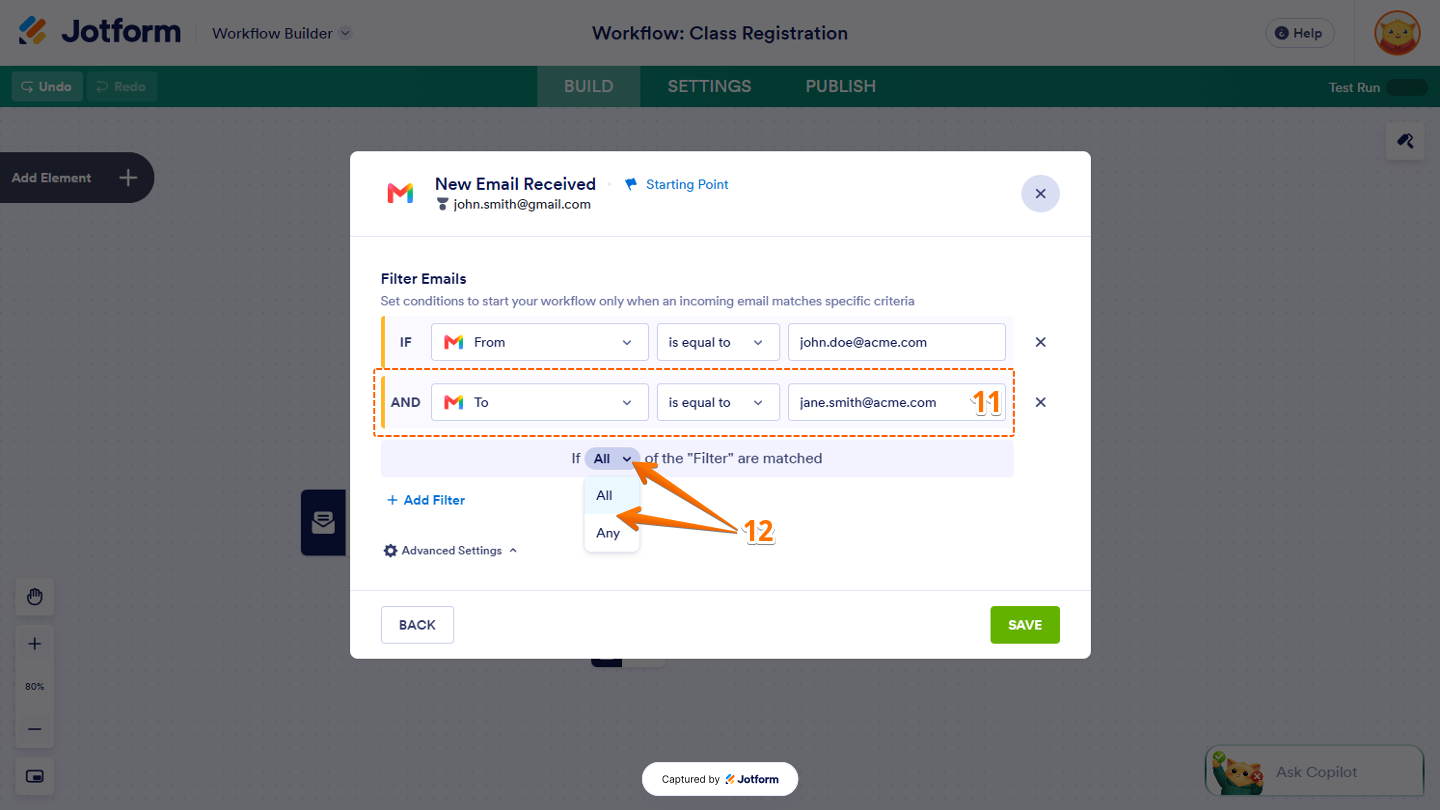
- Now, set up the new condition the way you want.
- Next, click on the Downward Arrow icon and, in the menu that opens, select All if you want every condition to match, or Any if only one condition needs to match.
- Next, click on the Upward Arrow icon next to Advanced Settings to use specific email details in your workflow.
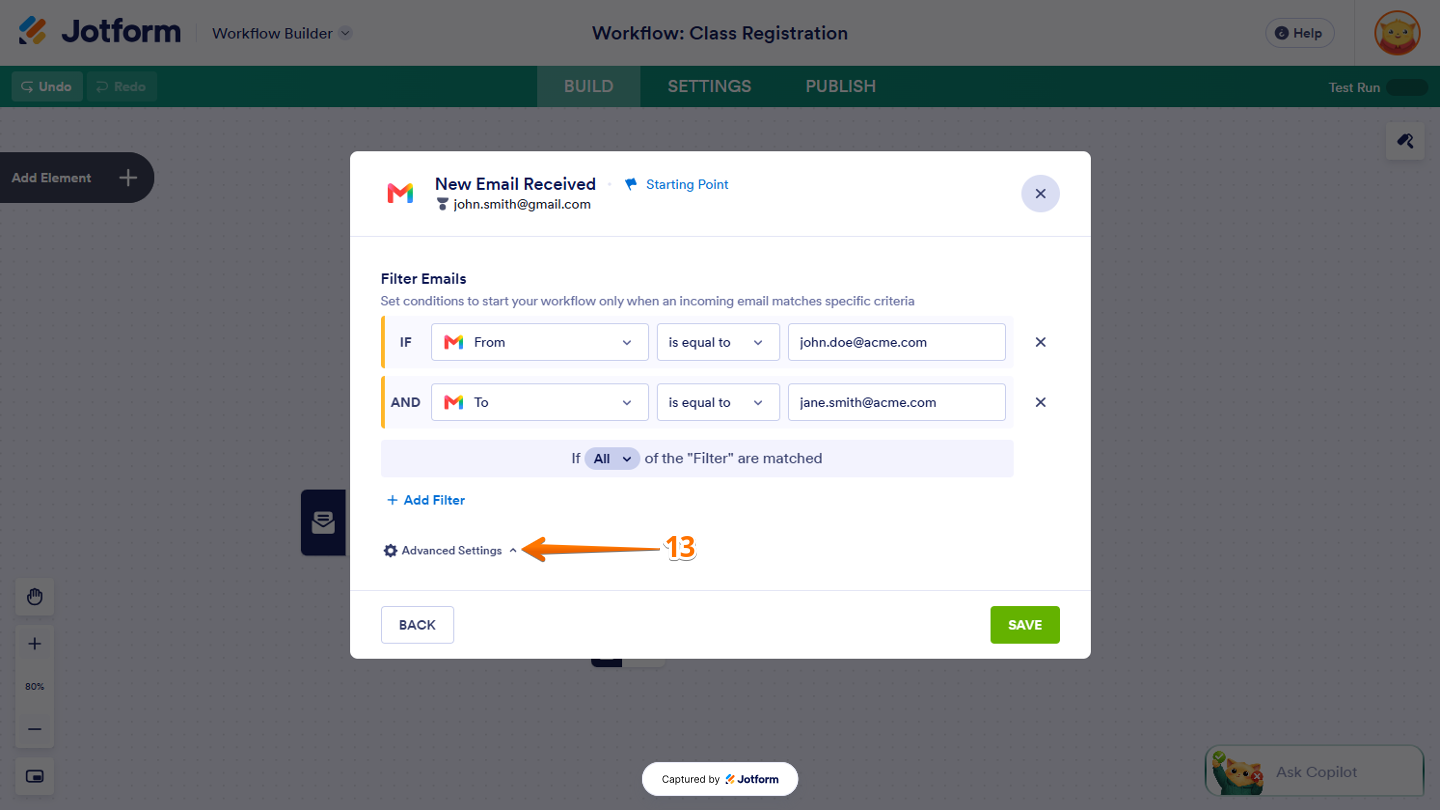
- Under the Email Fields section, click on the Downward Arrow icon.
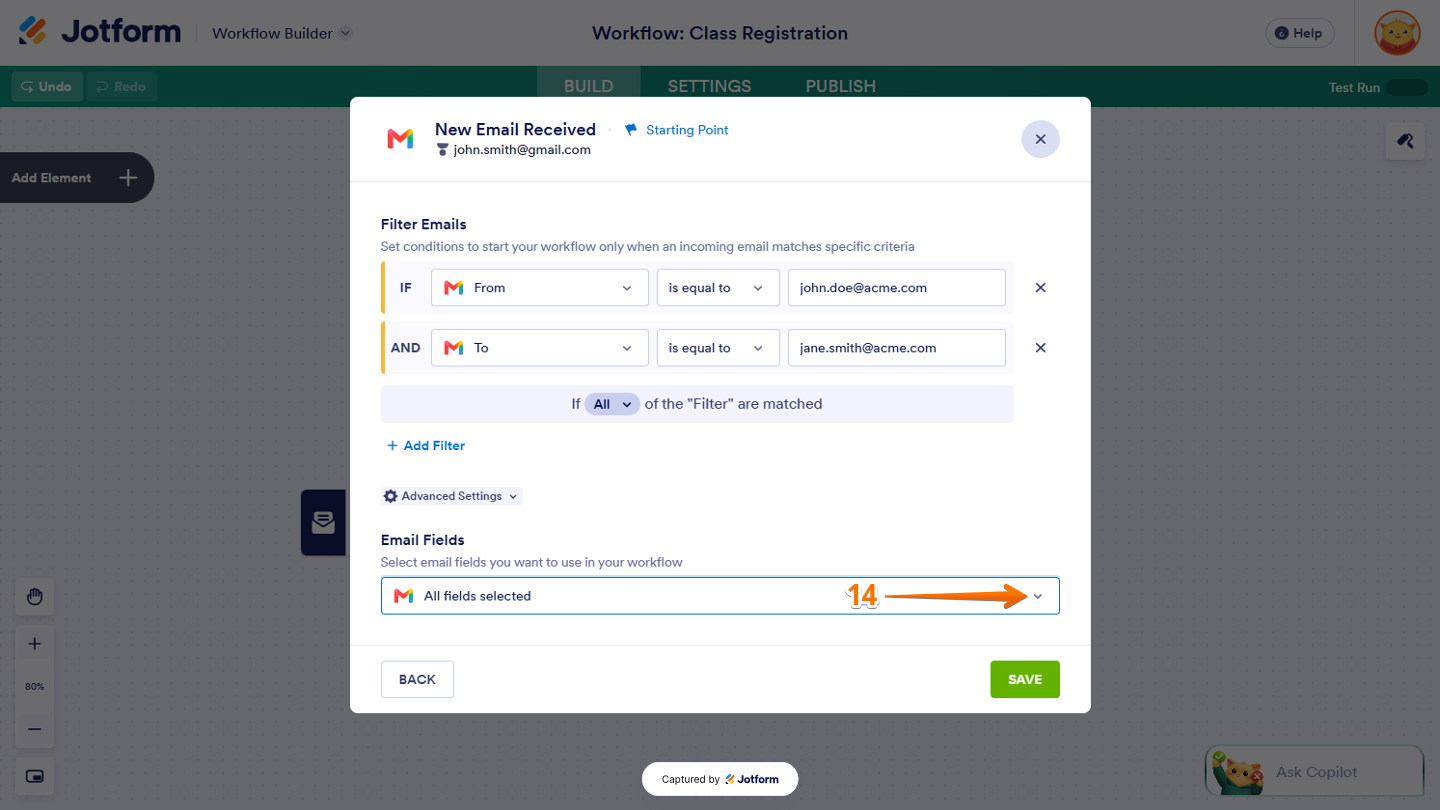
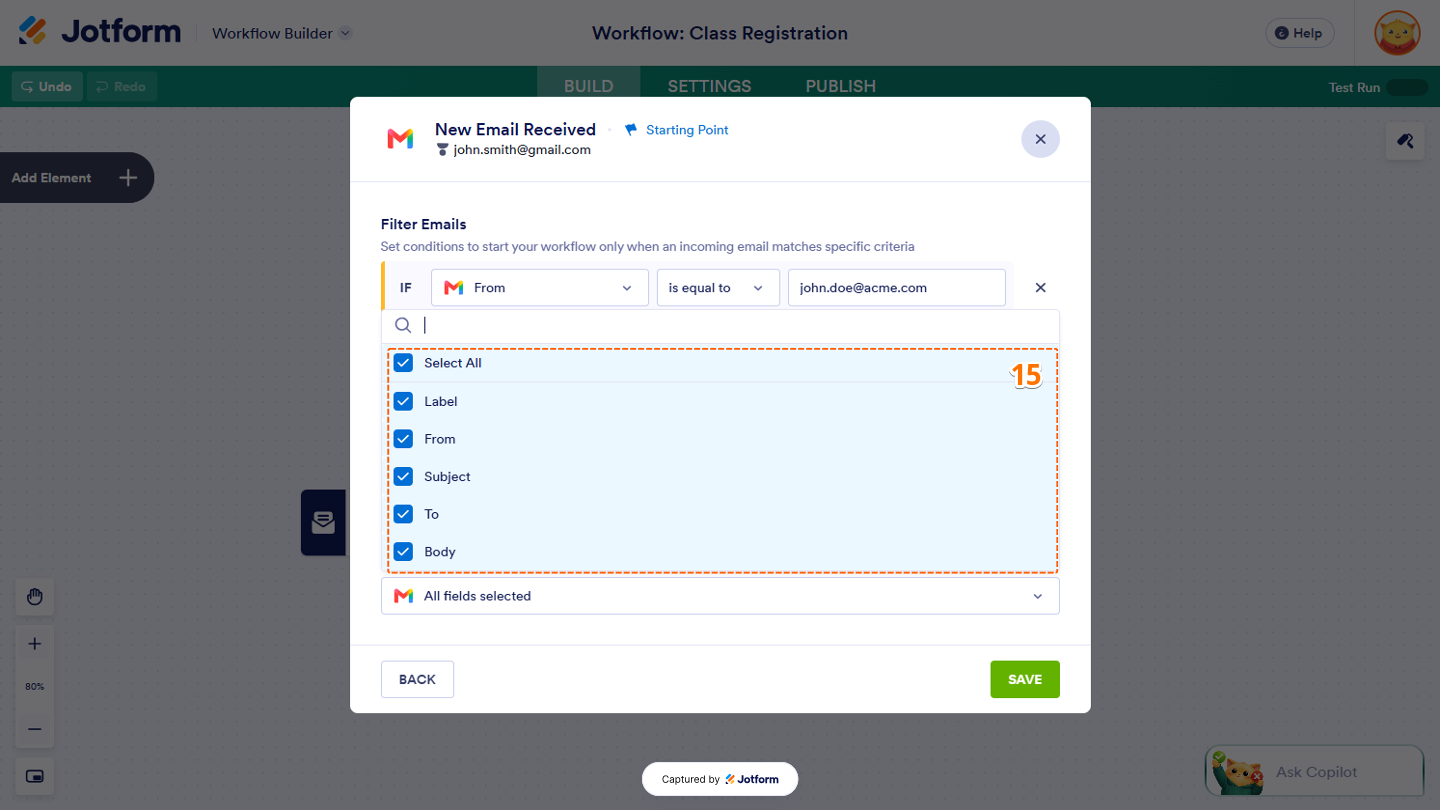
- Now, in the menu that opens, select the email fields you want to use, such as Label, From, Subject, To or Body.
- Once you’re done, click on Save.
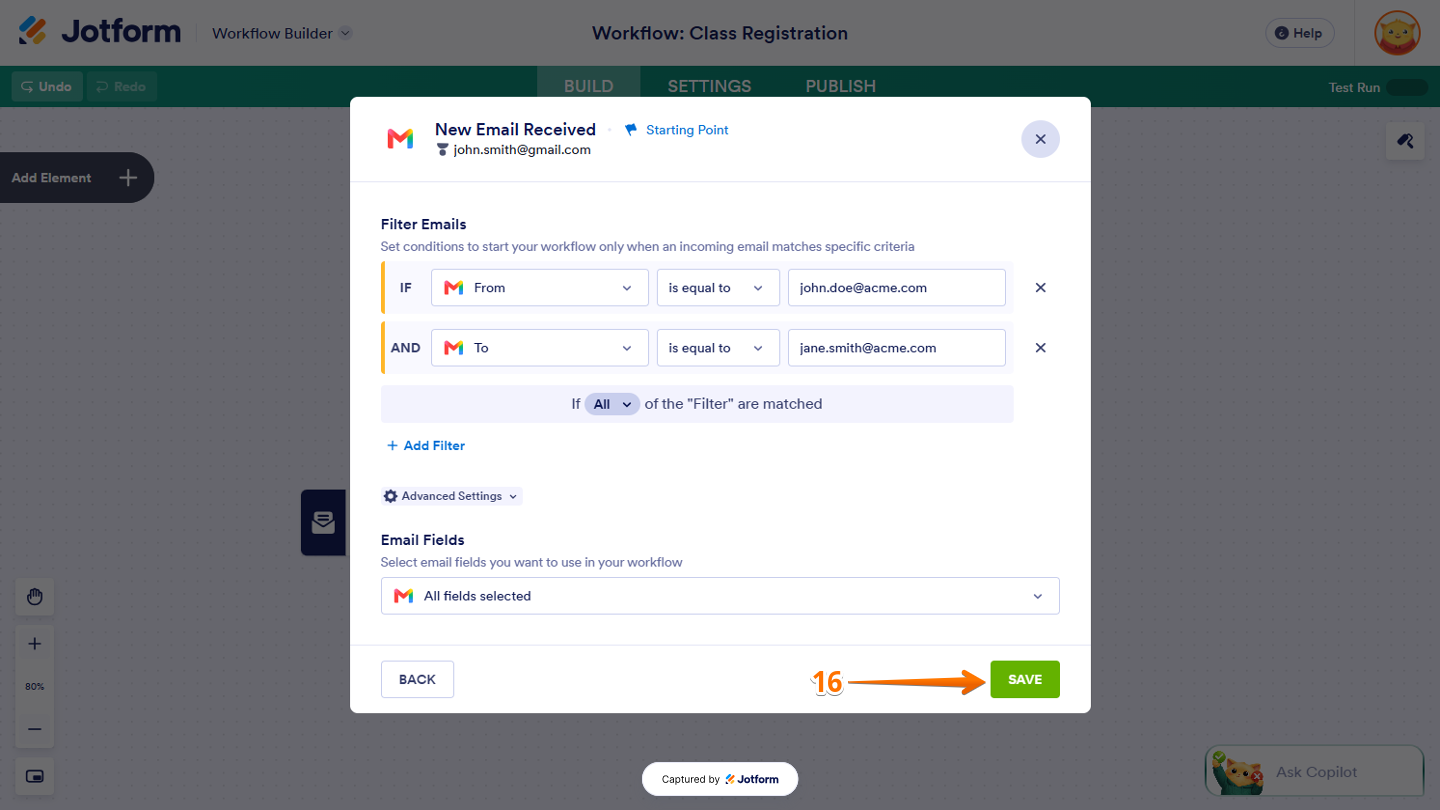
Your workflow is ready to go! It will now start whenever a new email matching your settings comes in.
Setting the Start Point to Webhook
With the Webhook Start Point, your workflow will run whenever it receives an HTTP request. You can set up the webhook and choose the details you want to use in your workflow. Here’s how to set it up:
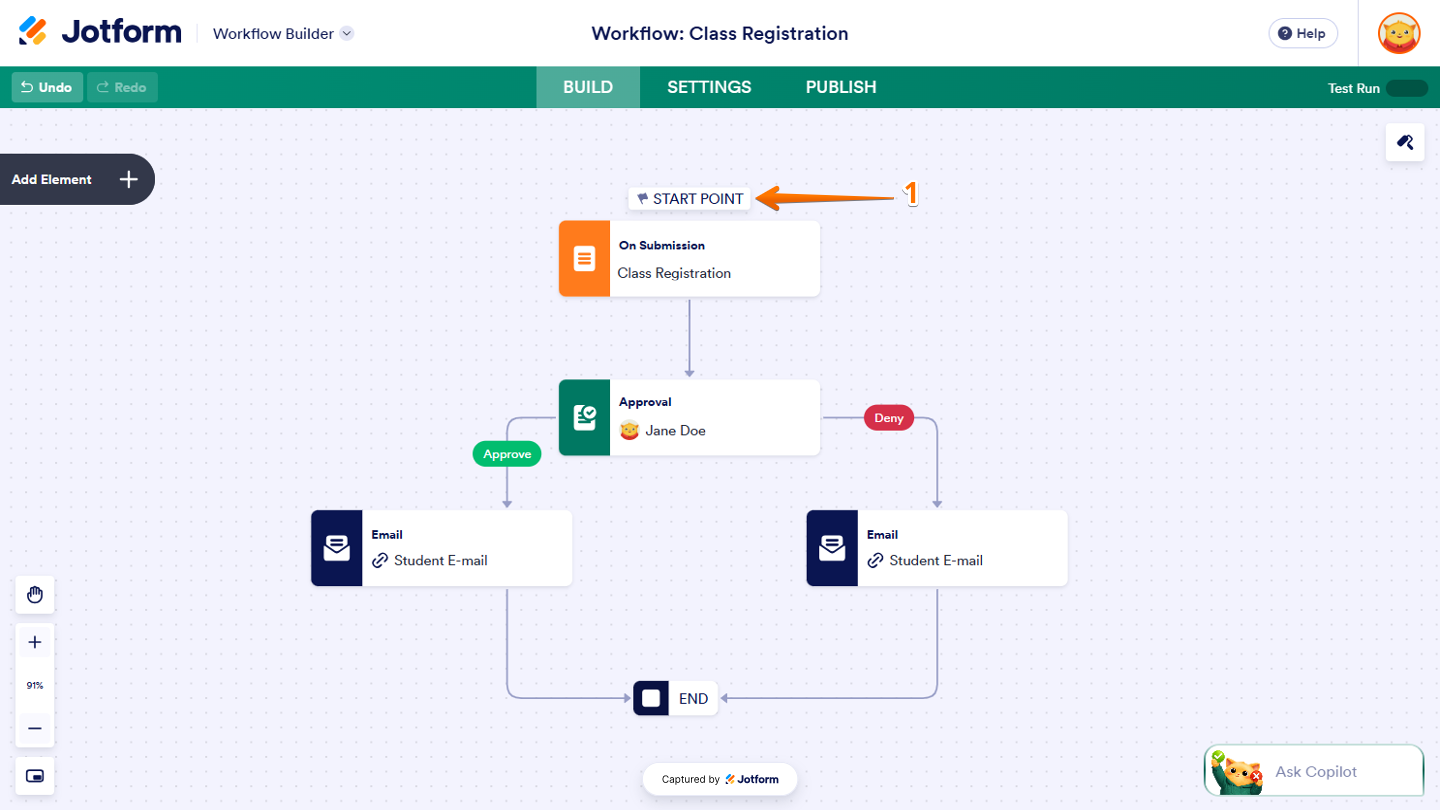
- In Workflow Builder, click on Start Point at the top of the Form element.
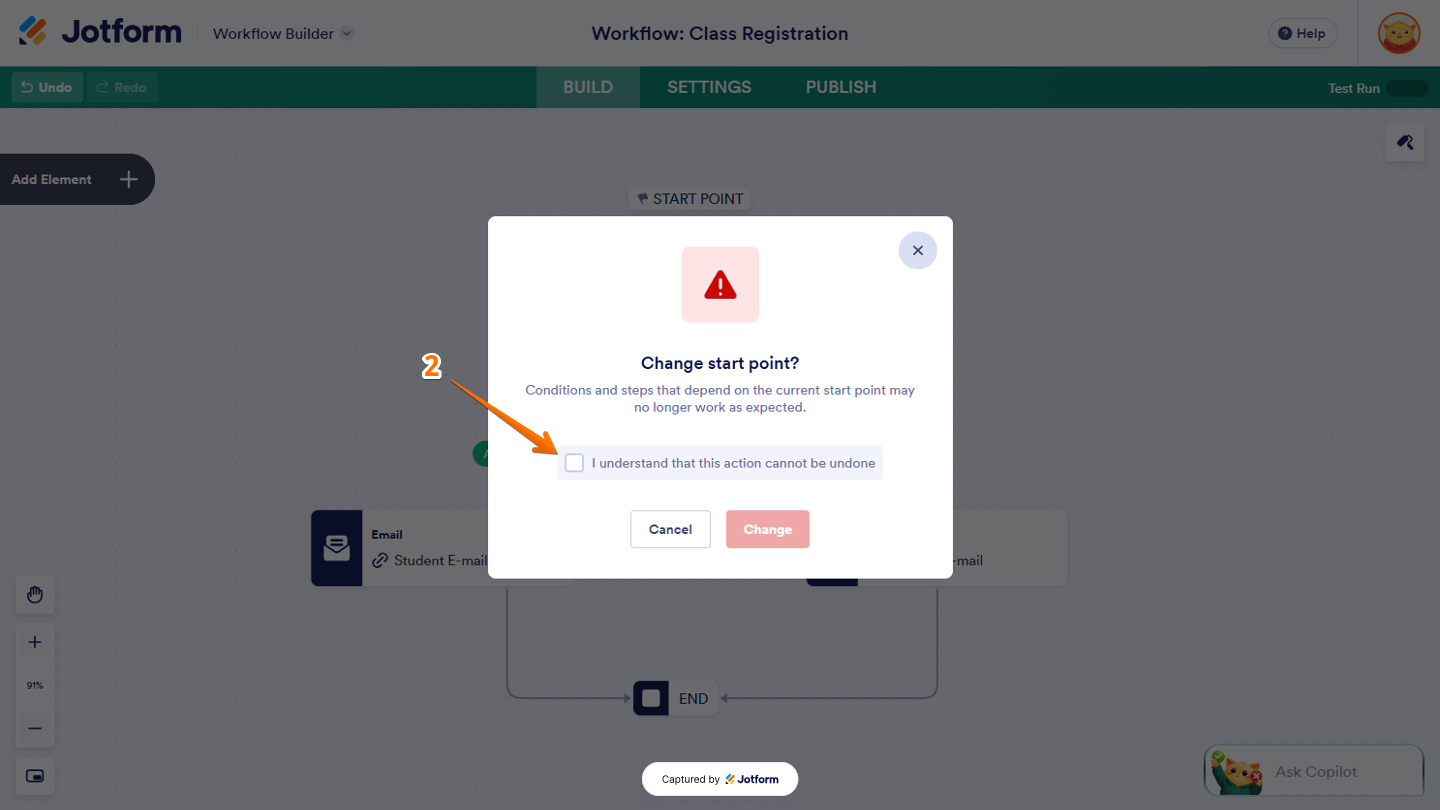
- Then, in the Confirmation window that opens, tick the box next to I Understand that this Action Cannot be Undone.
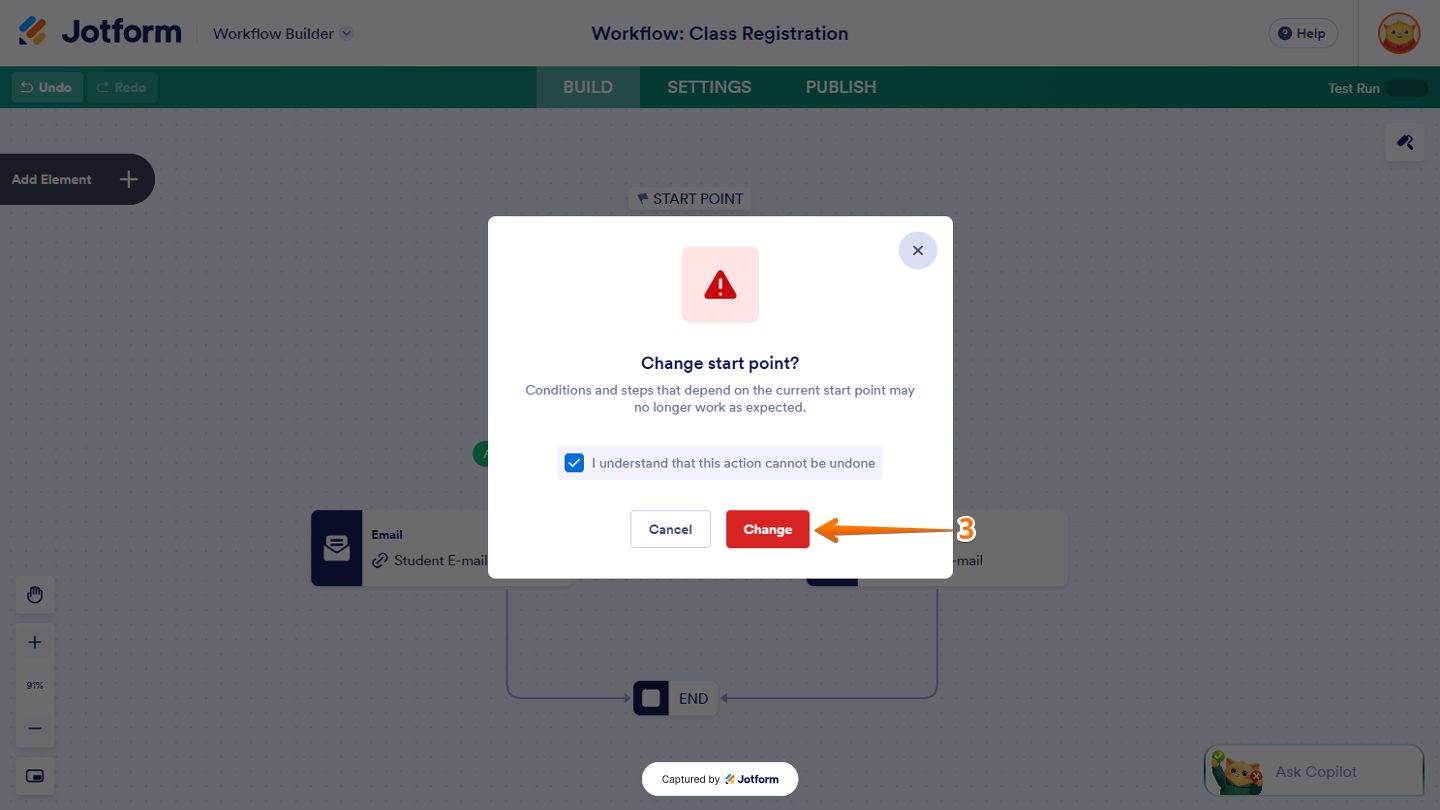
- Next, click on Change.
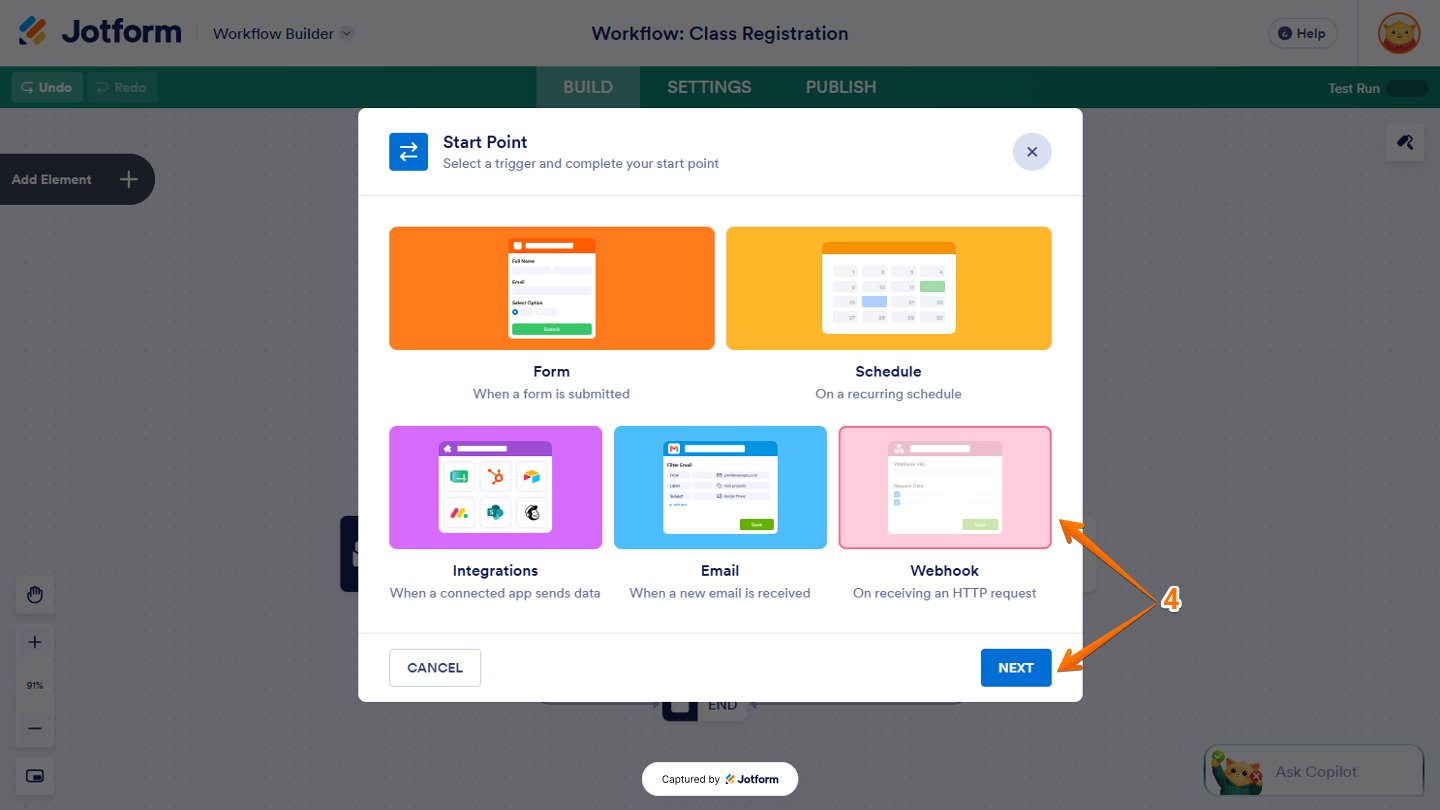
- Now, in the Start Point window that opens, select Webhook and then click on Next.
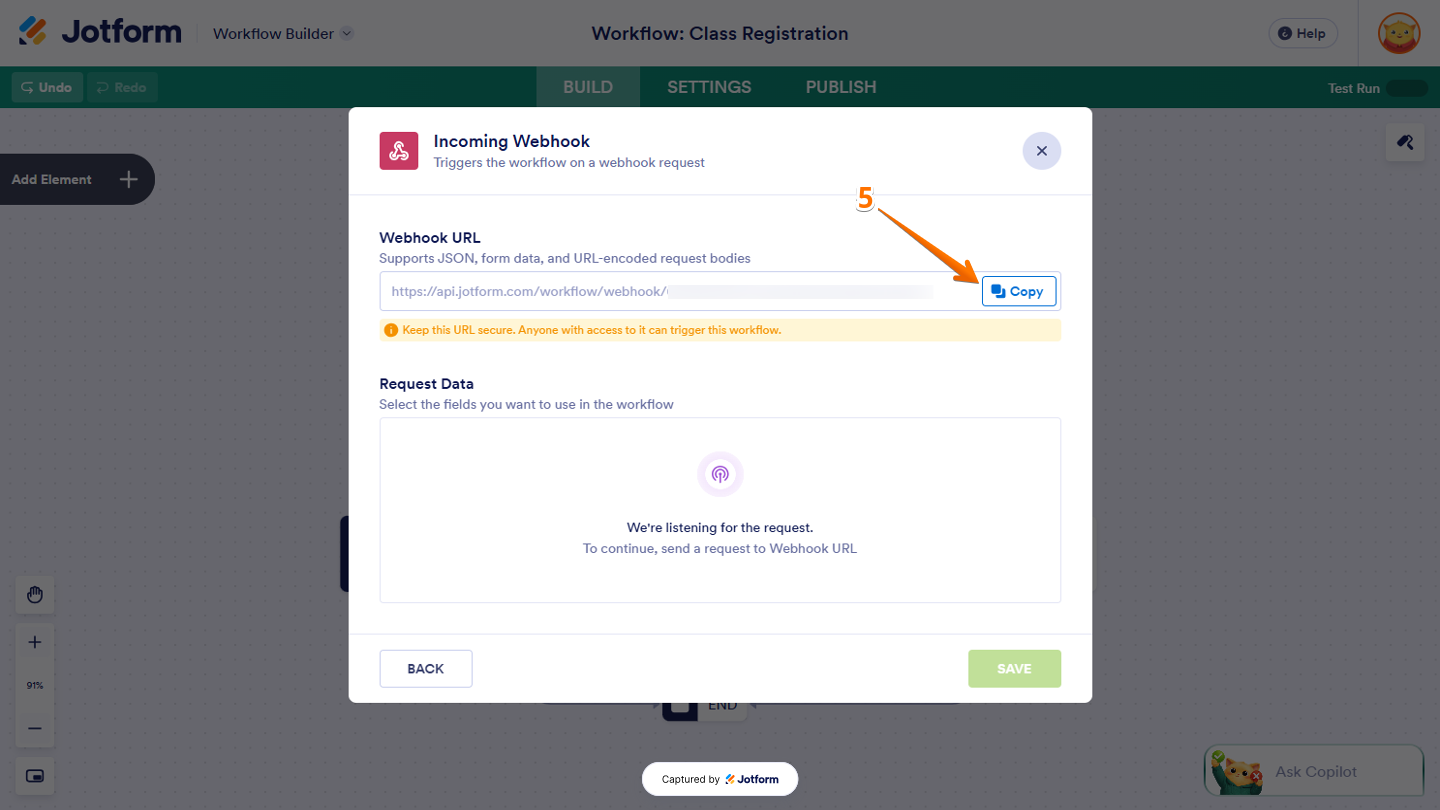
- In the Incoming Webhook window that opens, under the Webhook URL section, click on Copy and then send a test request to the generated Webhook URL.
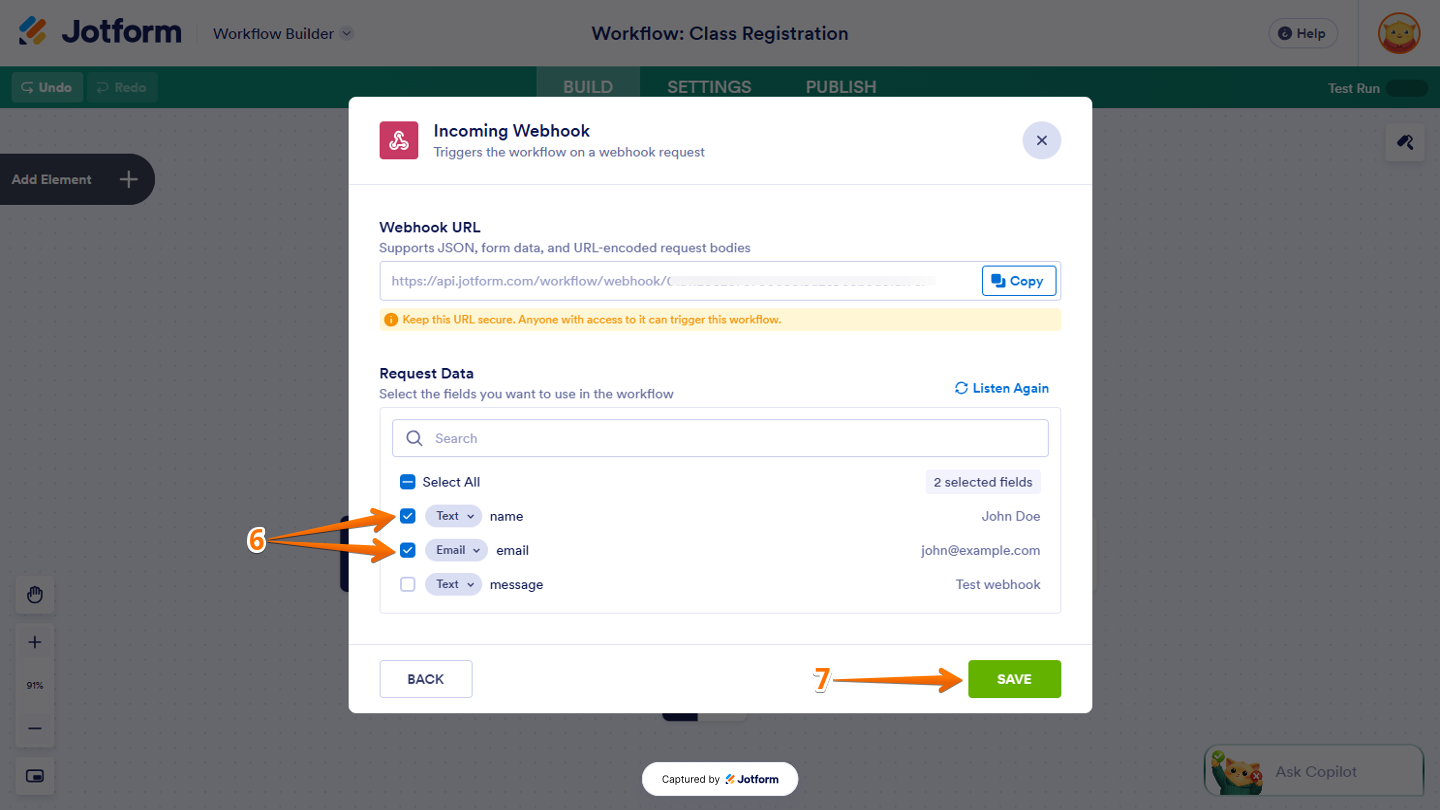
- Then, under the Request Data section, tick the box next to the fields you want to use in the workflow.
- Once you’re done, click on Save.
That’s it! It will now start whenever an HTTP request is received through the webhook. You can try this in Postman.com or another tool that supports sending HTTP requests. If you are using Postman, you can use the following sample JSON in your request. Select raw as the body type, then enter the JSON below:
{
  "name": "John Doe",
  "email": "john@example.com",
  "message": "Test webhook"
}
Send Comment: