The Jotform Feedback Button plugin adds a floating, always-visible tab to your website, enabling visitors to quickly open and submit your form without leaving the page. This makes it easy to collect feedback, inquiries, or reports at any time while keeping users engaged with your content.


Installing the Feedback Button Plugin
First, you’ll need to install the Feedback Button Plugin directly within your WordPress dashboard. Installing the plugin takes no time at all—here’s how:
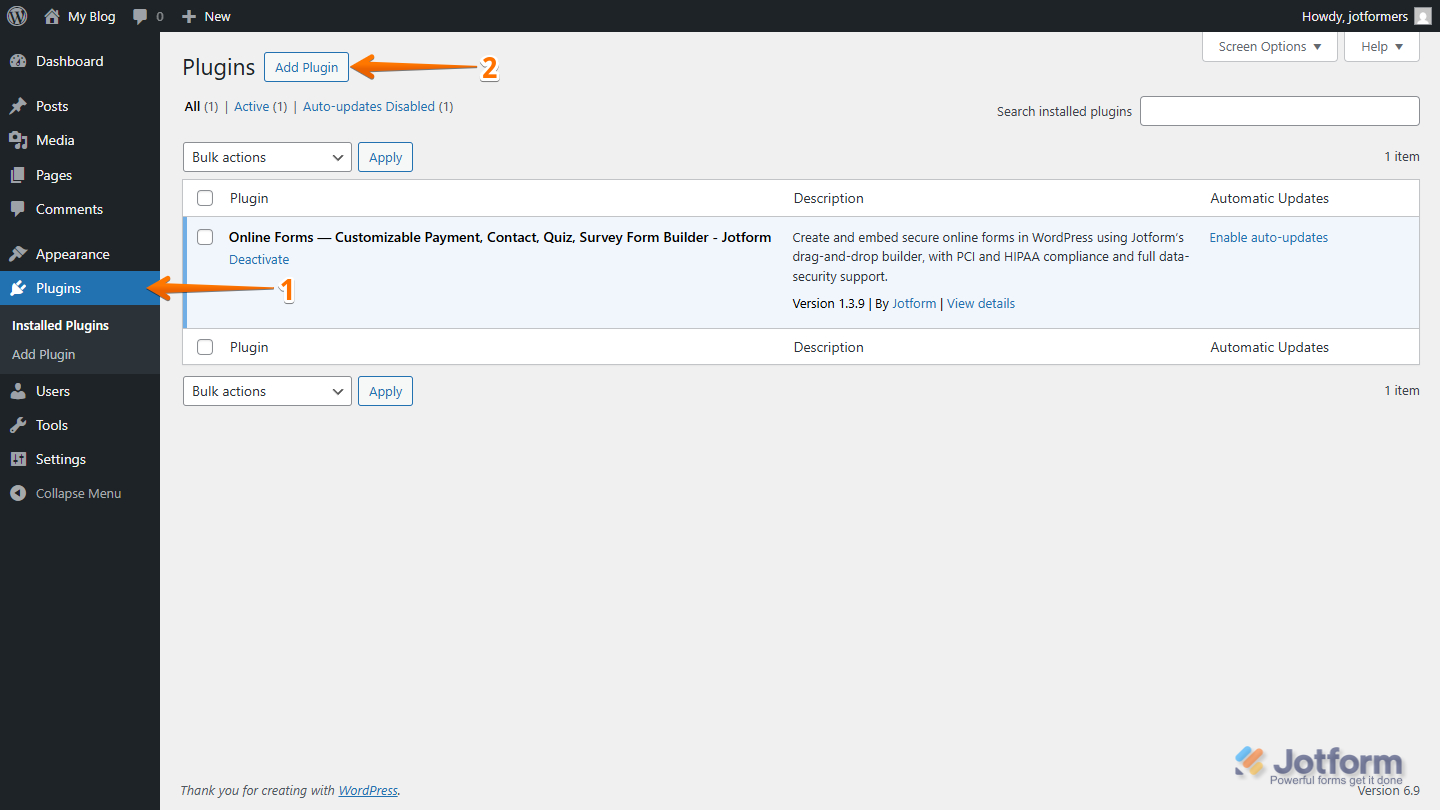
- Log in to your WordPress Admin Dashboard page, and in the menu on the left, click on Plugins.
- At the top of the Plugins page, click on Add Plugin.
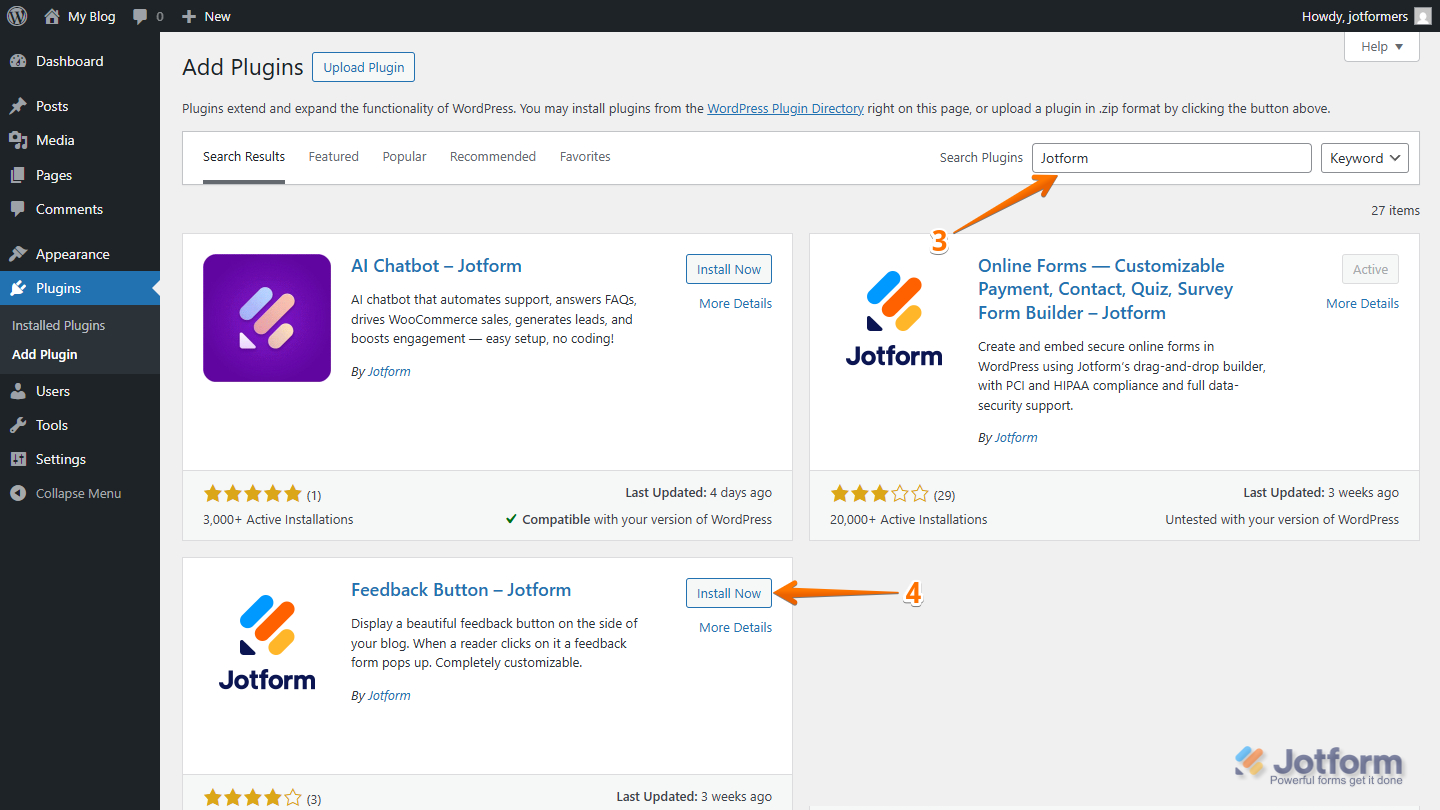
- Then, on the Add Plugins page, in the Search Plugins field, enter Jotform.
- Next, under the Search Results tab, look for Feedback Button – Jotform, and click on Install Now.
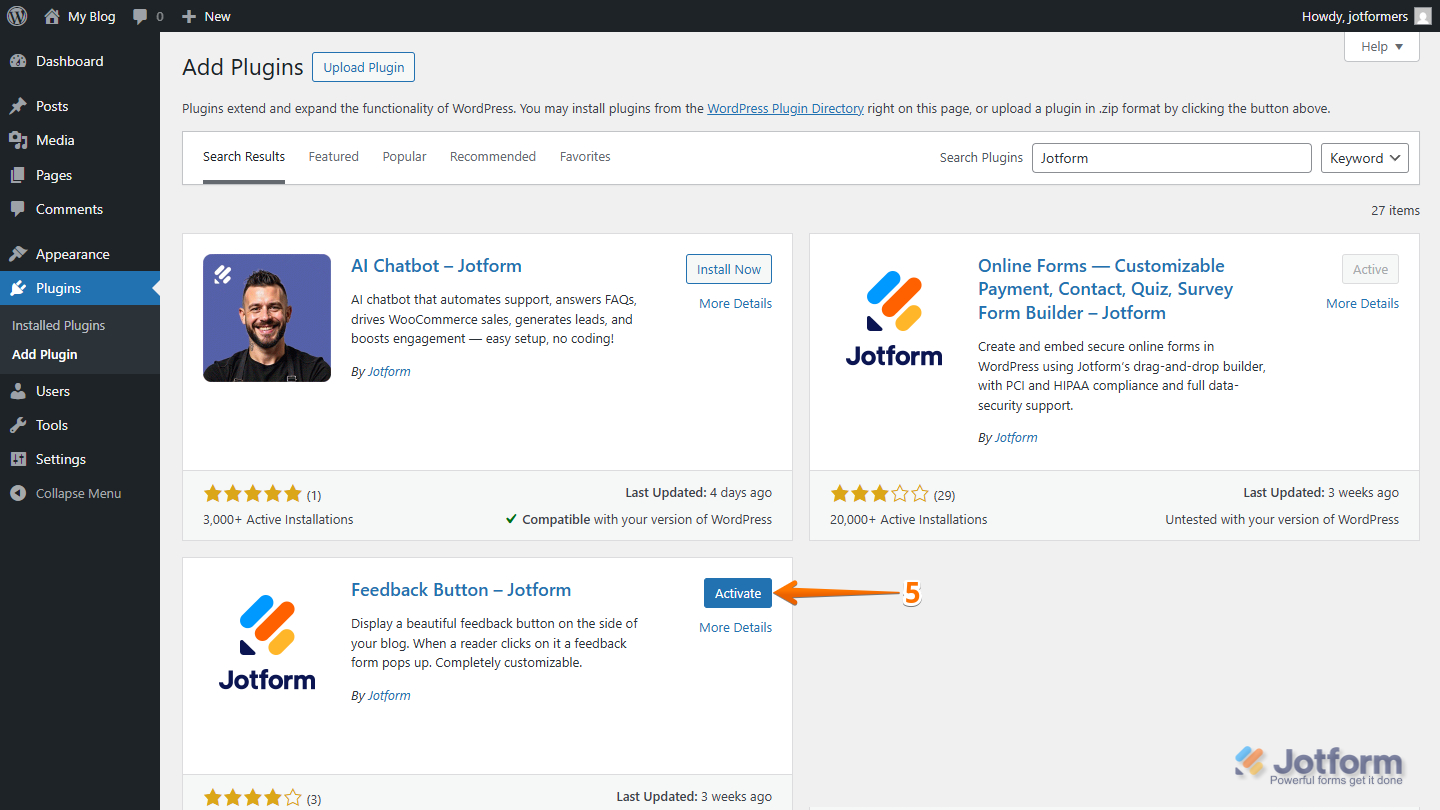
- Now, click on Activate.
That’s all there is to installing and activating the plugin. With the plugin now enabled, you can begin setting it up and customizing the appearance of the Feedback Button on your site.
Setting up the Feedback Button Plugin
Now that the plugin is installed and activated, the next step is to configure the Feedback Button Plugin. Here’s how to get going:
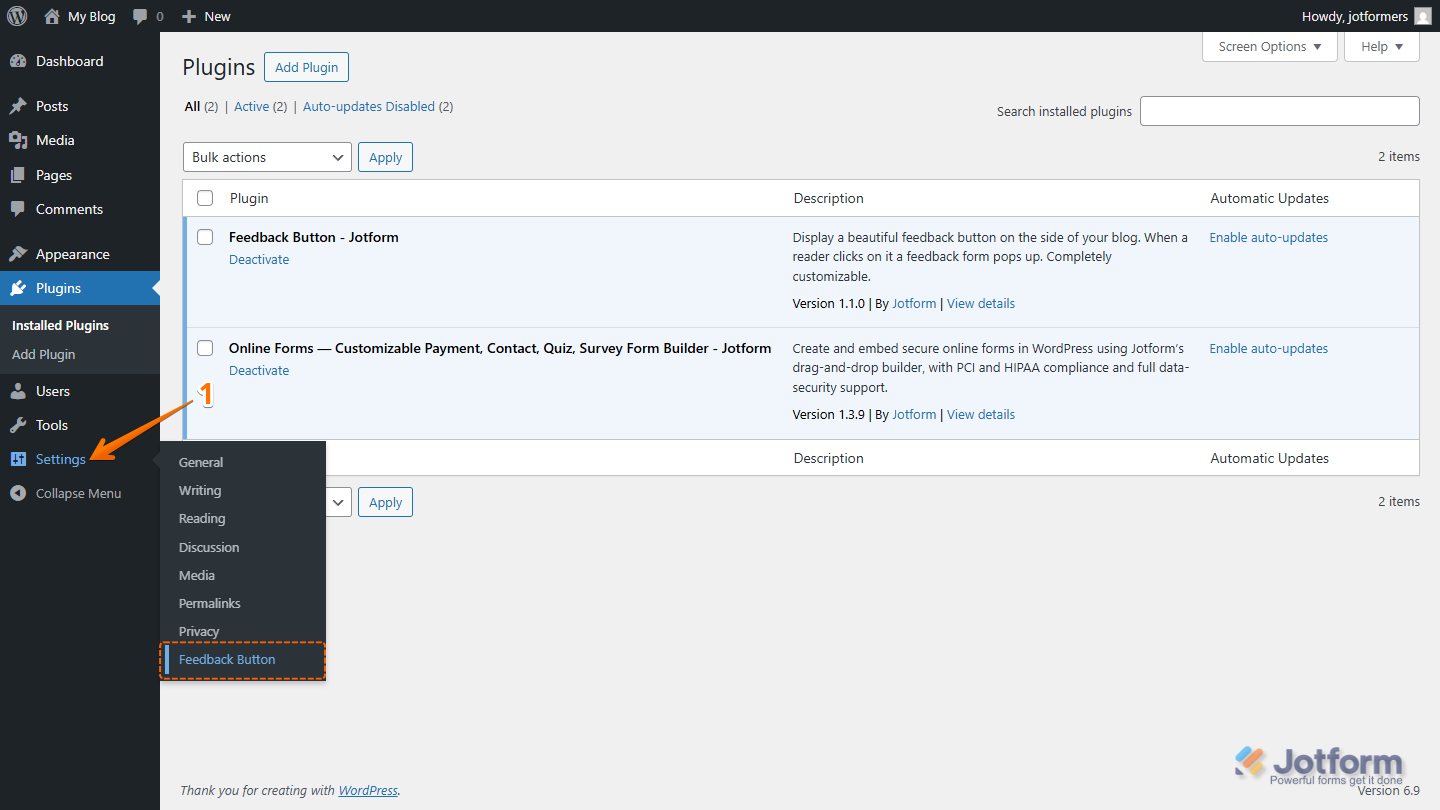
- On your WordPress Admin Dashboard page, hover your mouse over the Settings menu on the left, and click on the Feedback Button option.
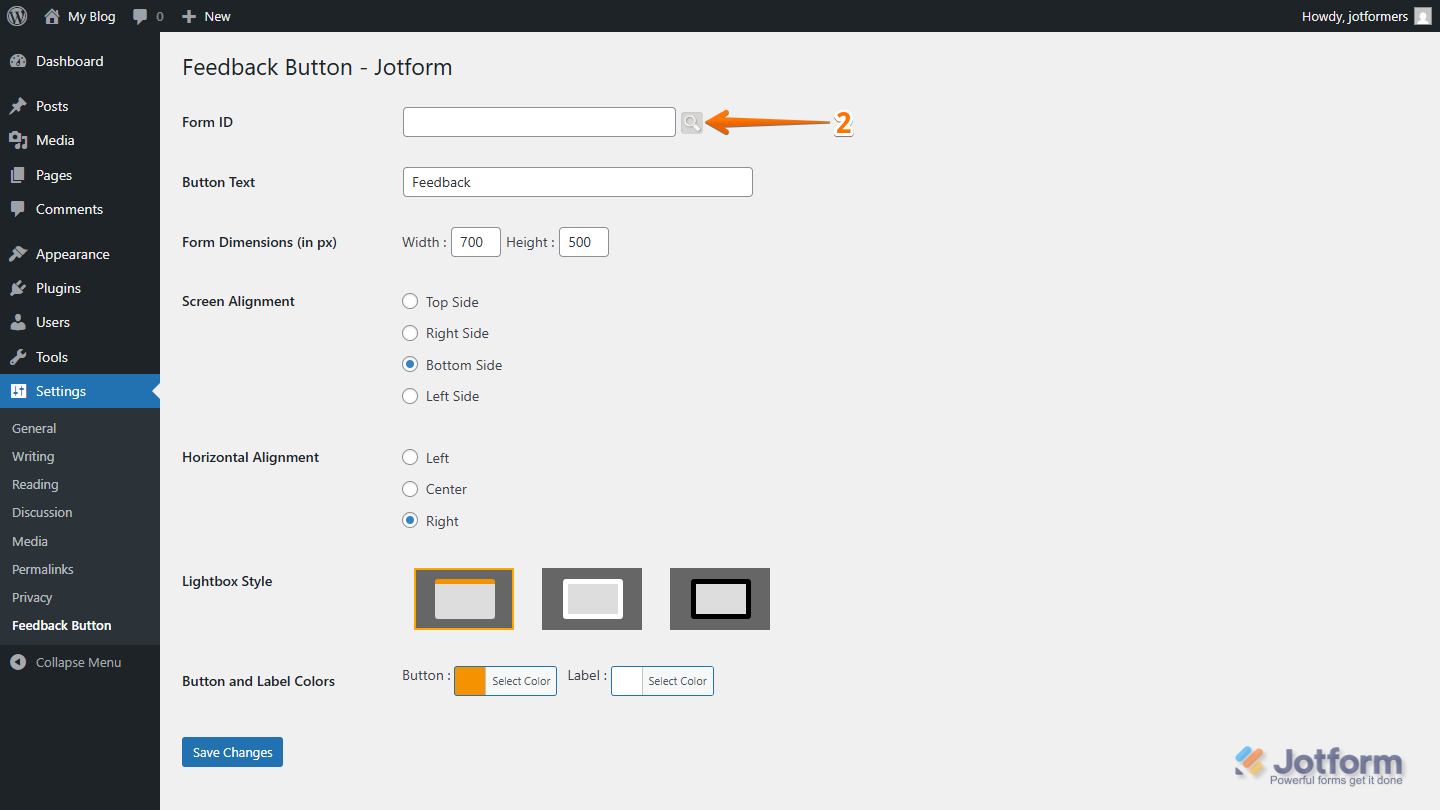
- Then, on the Feedback Button – Jotform page, click on the Search icon on the right side of the Form ID field.
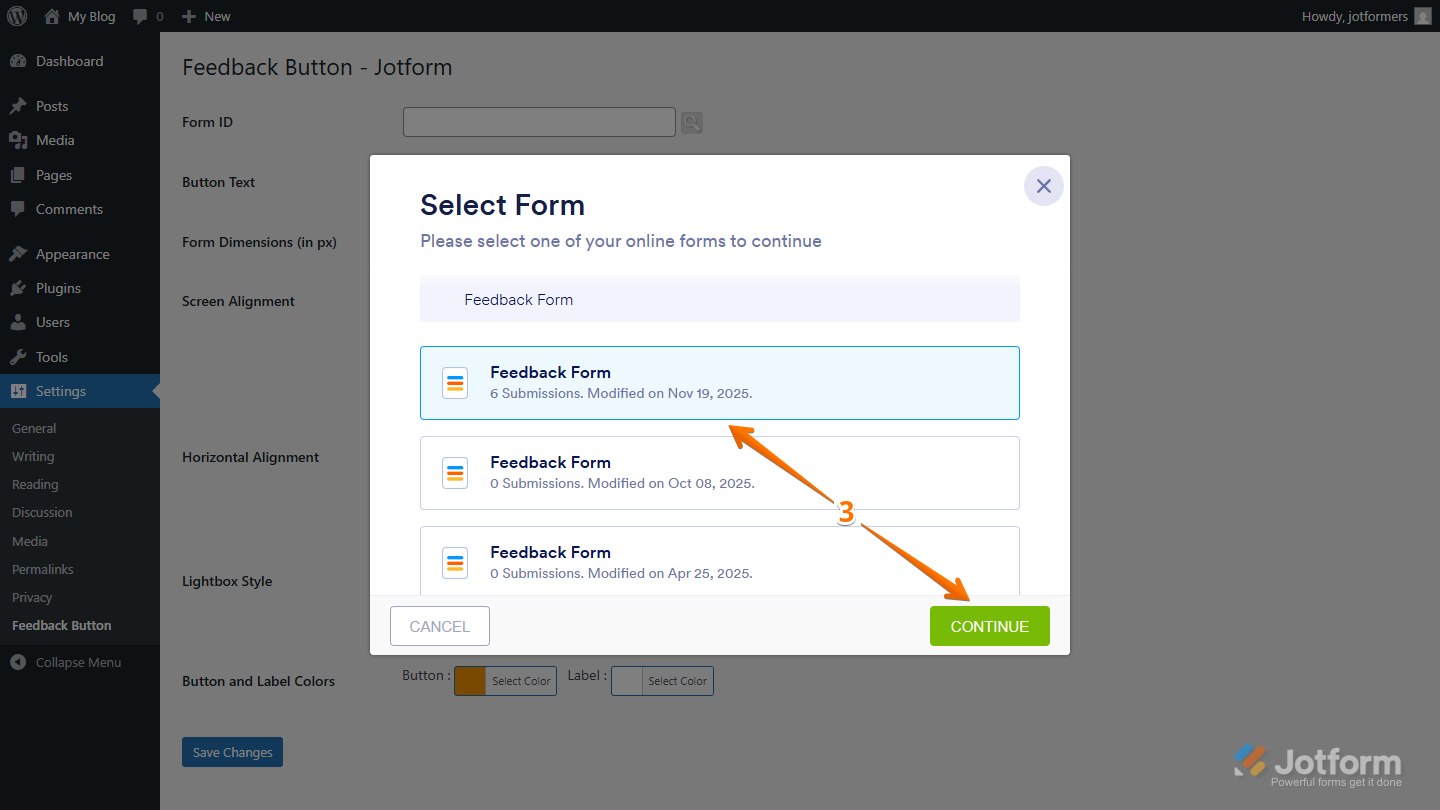
- Next, in the Select Form window that opens, select the form to embed, and then click on Continue.
Notes
- The Select Form window will show up only if you’re already logged in to your Jotform account in the same browser where you installed the WordPress plugin. If not, you’ll be asked to log in first before you can choose a form.
- If you have several forms, you can use the search bar in the Select Form window to quickly find the one you want to embed.
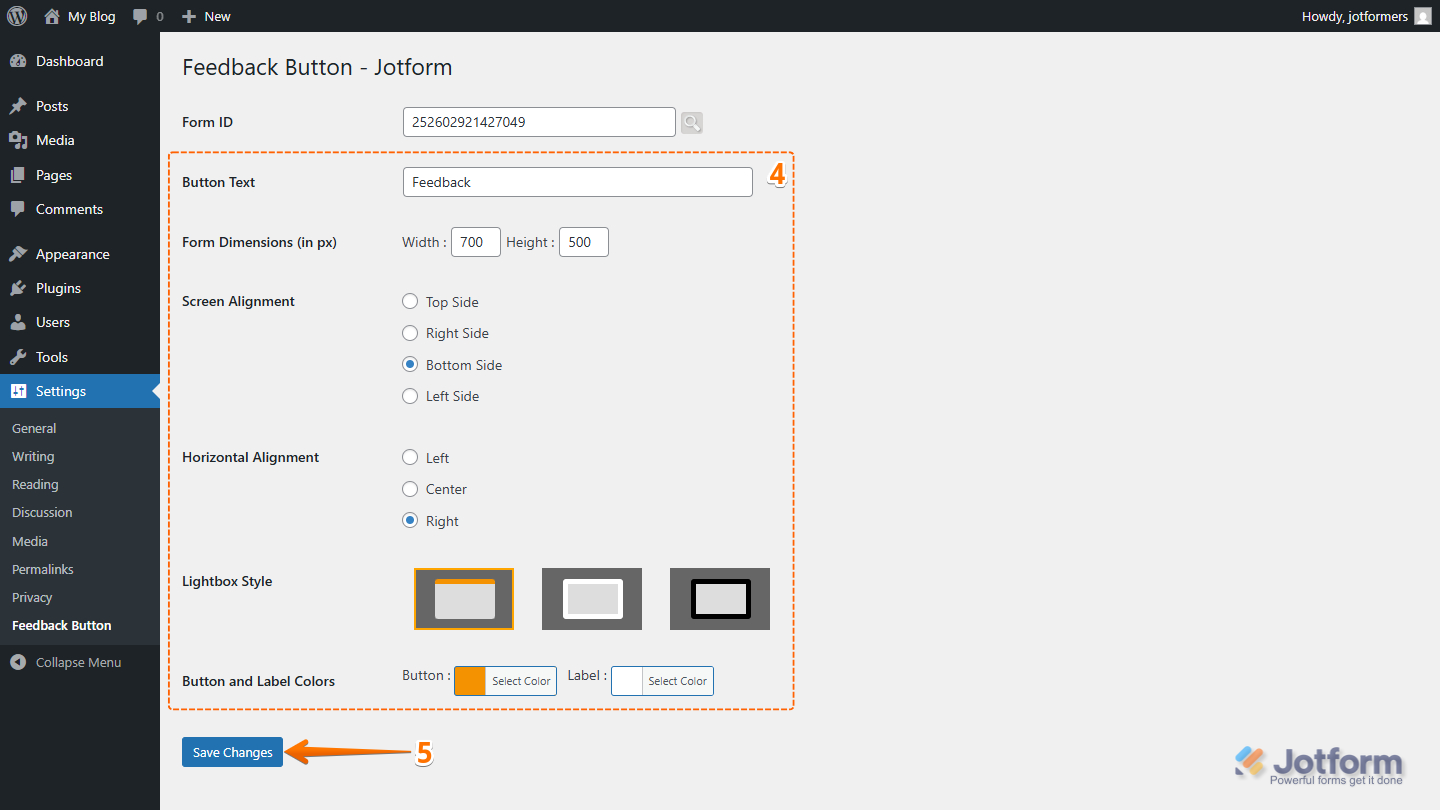
- Now, complete these fields:
- Button Text — Set the label that appears on the floating button.
- Form Dimensions (in px) — Define the width and height of the form window when it opens.
- Screen Alignment — Choose where the button appears on the screen: Top, Right, Bottom, or Left.
- Horizontal Alignment — Adjust the button’s horizontal position to Left, Center, or Right.
- Lightbox Style — Pick from Default, White, or Black Accent to match your site’s look.
- Button and Label Colors — Customize the colors of buttons and text to match your branding.
- Finally, click on Save Changes to complete the setup.
Here’s an example of how the Feedback Button is displayed on your WordPress website:
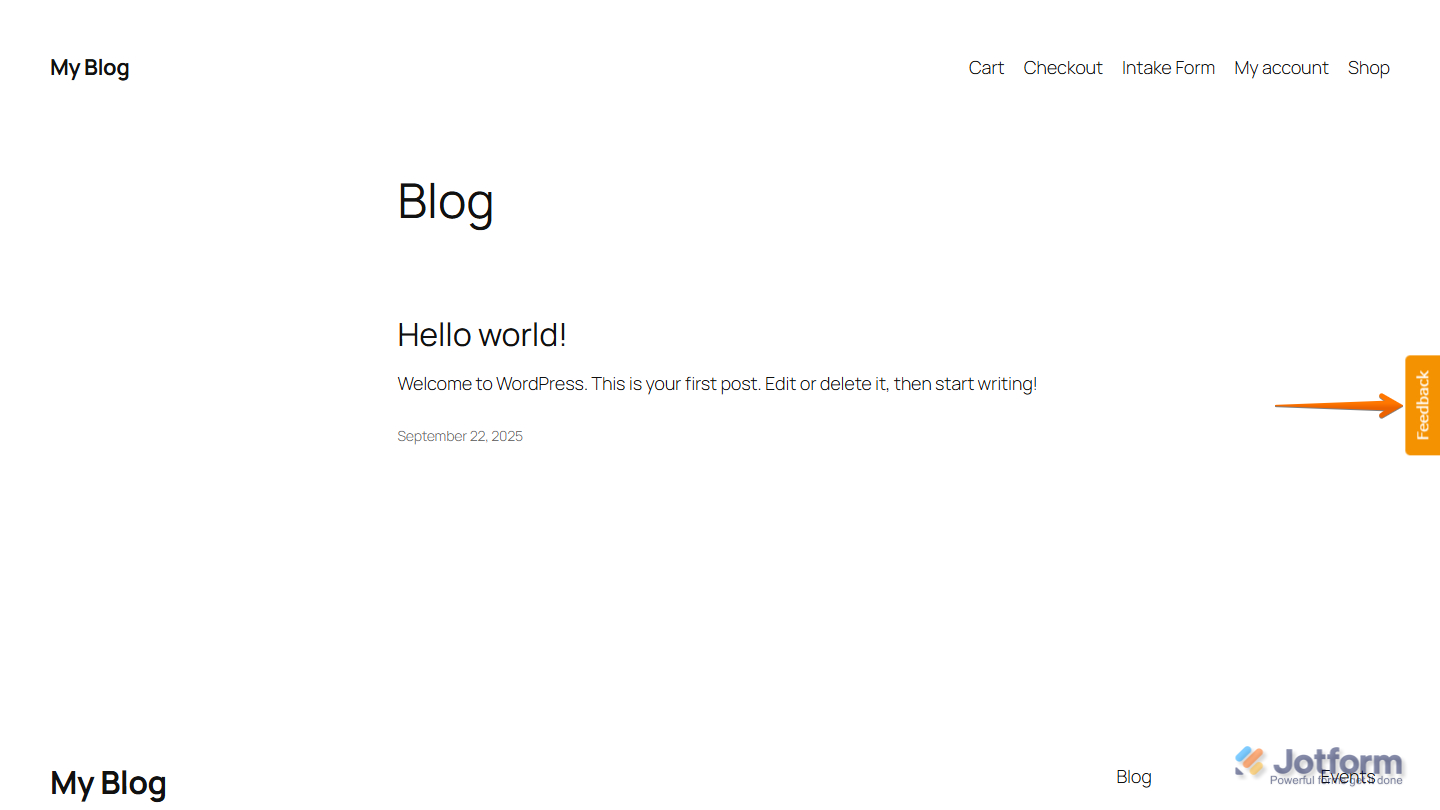
That’s it for installing and setting up the Jotform Feedback Button plugin for WordPress. Once everything is in place, your Feedback Button is ready to collect responses and feedback directly from your website visitors.

Send Comment: