With Jotform, you can easily connect your forms to Brevo to keep your customer data organized in one place. When your form is integrated with Brevo, submission data flows directly into your contacts, deals, or companies, helping you stay on top of important information without manual entry.
This is especially useful for teams that collect leads, customer details, or business information through forms and want a more efficient way to manage them. Whether you’re tracking opportunities, building your contact list, or organizing company records, this integration helps reduce repetitive work and keeps your data consistent and up to date.
What You Need for This Setup
You’ll need your Brevo Account API key to authenticate your account and complete this integration. If you’re not sure where to find it, check out Getting Your Brevo API Key below.
Connecting Your Brevo Account
Getting your form ready to integrate with Brevo only takes a few steps. Follow these quick steps to get started:
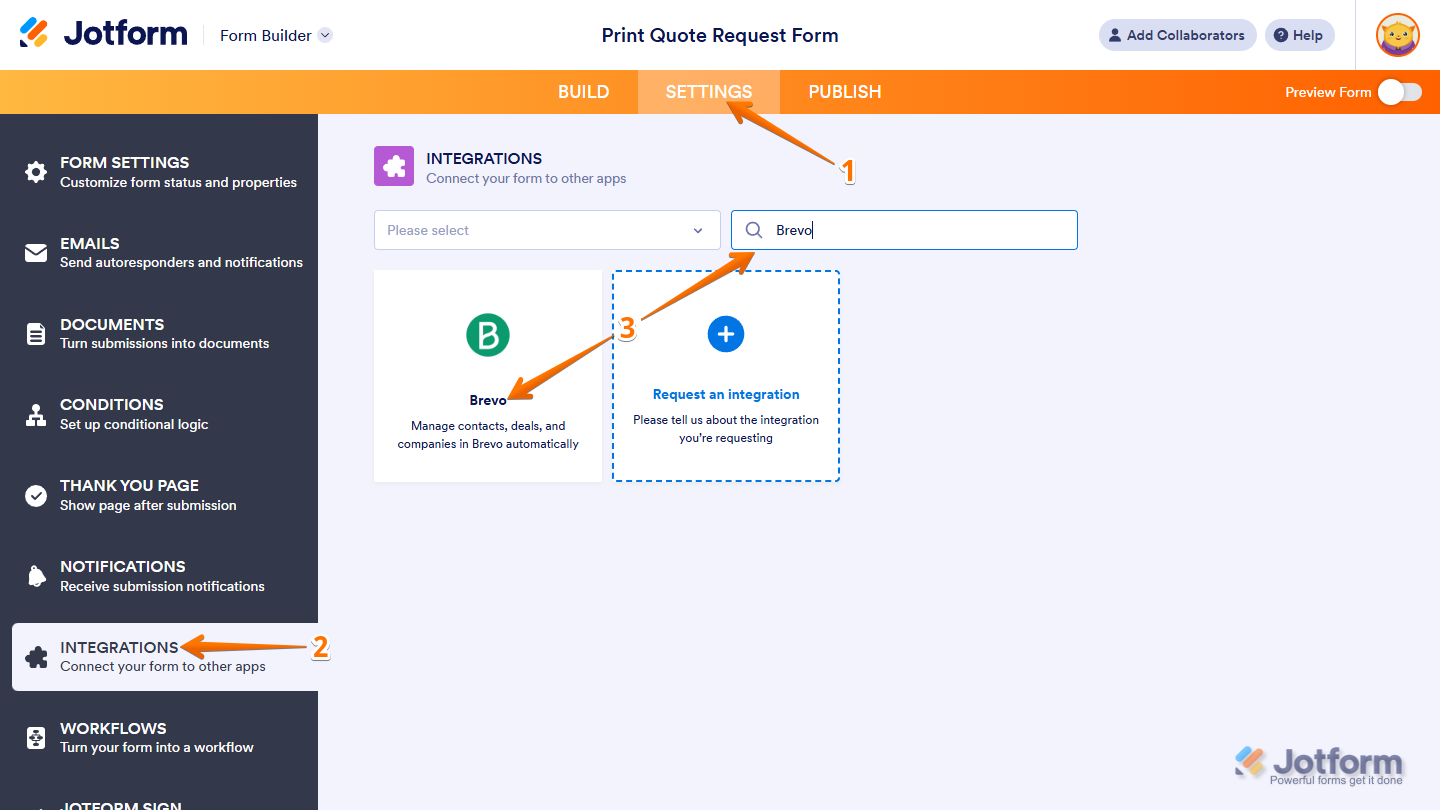
- In Form Builder, in the orange navigation bar at the top of the page, click on Settings.
- Then, in the menu on the left side of the page, click on Integrations.
- Now, in the Integrations section on the right, search for Brevo and click on it.
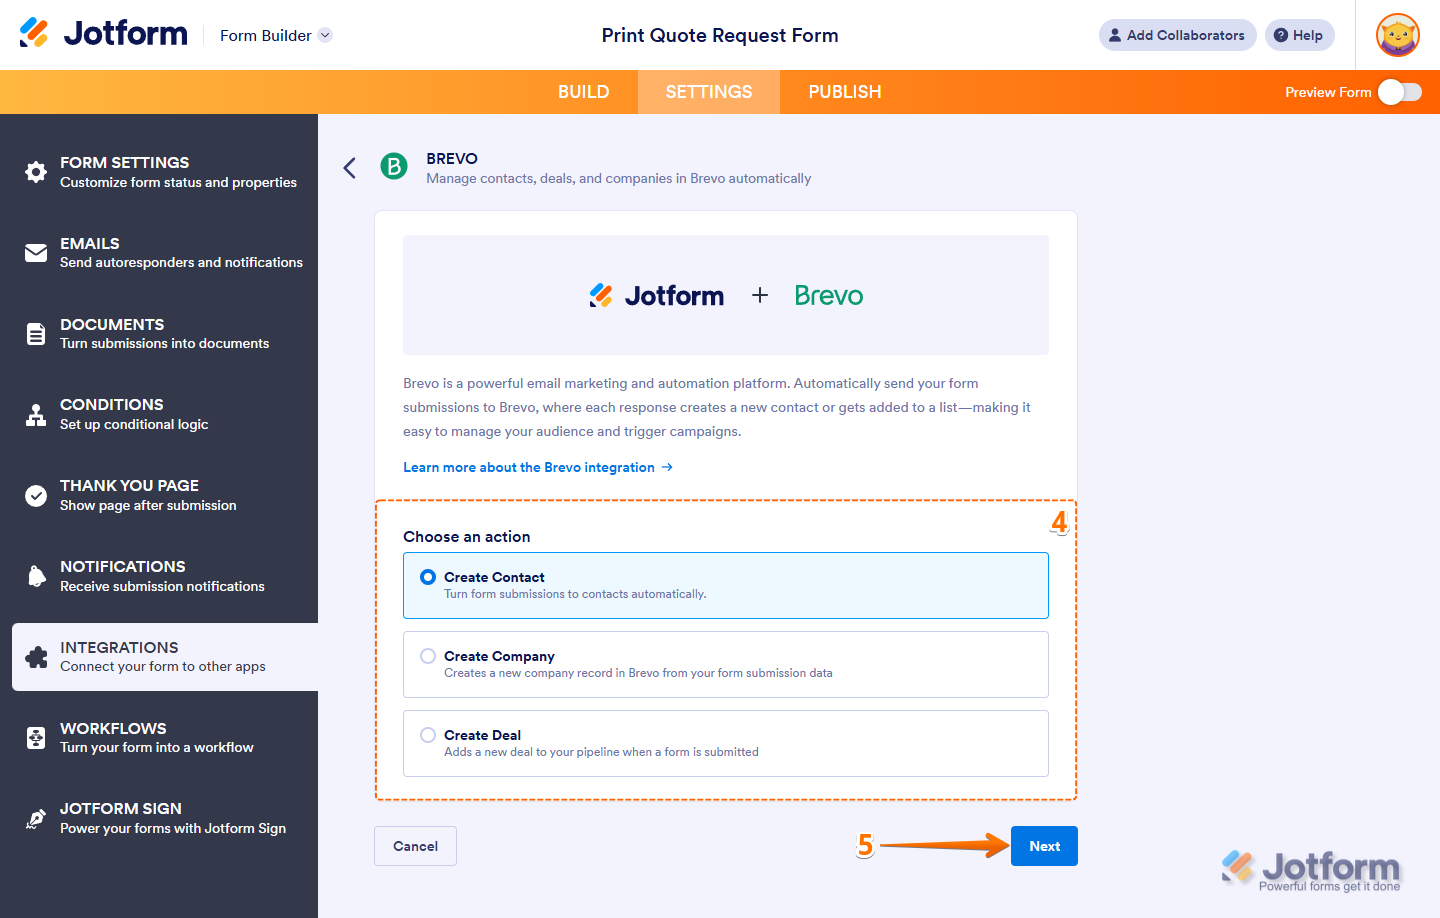
- In the Brevo section, select one of the following actions:
- Create Contact — Creates a new contact in Brevo using your form submission data.
- Create Company — Creates a new company record in Brevo based on the details collected from your form.
- Create Deal — Creates a new deal in Brevo using your submission data to help you track opportunities.
- Then, click on Next.
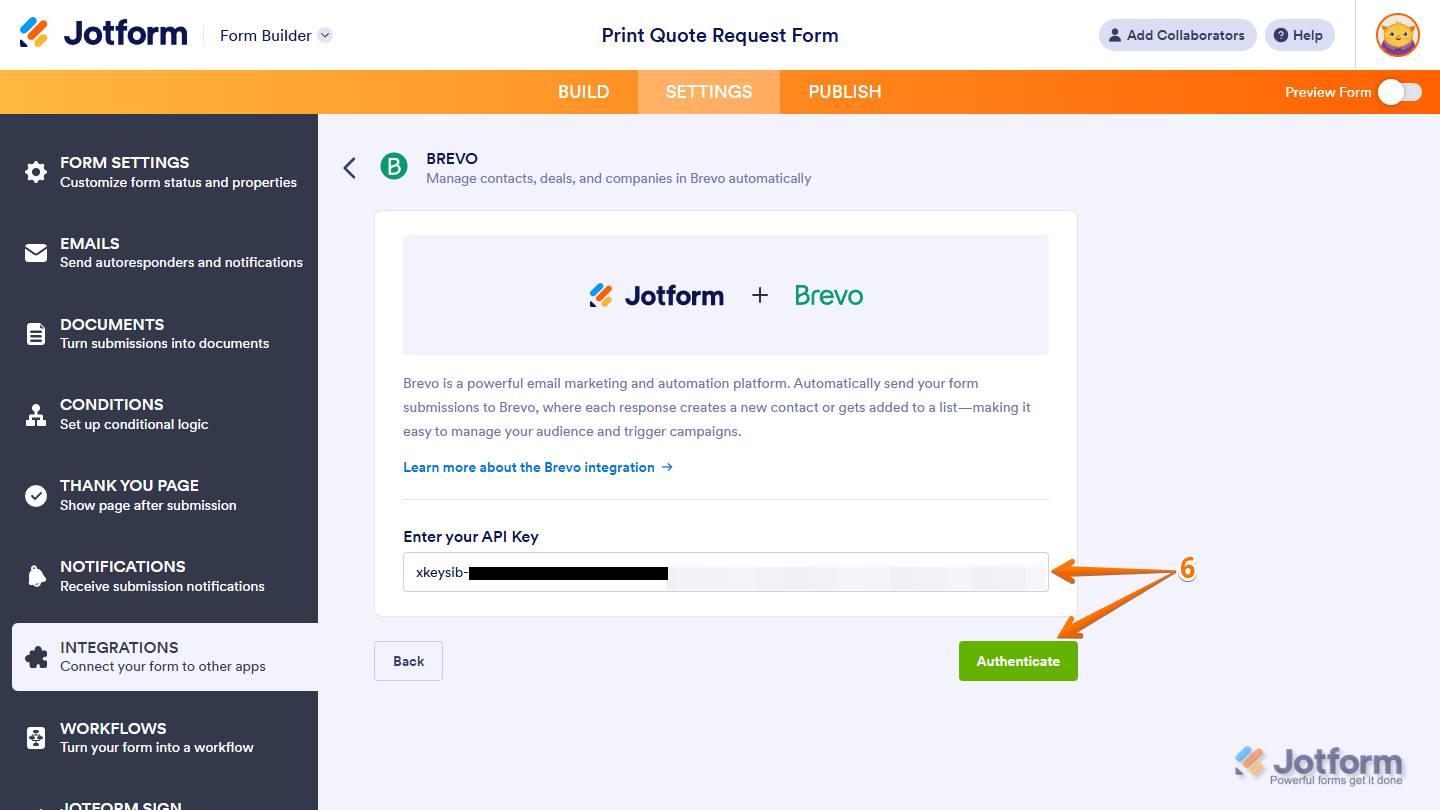
- Now, paste your Brevo Account API key into the Enter Your API Key input box and then click on Authenticate.
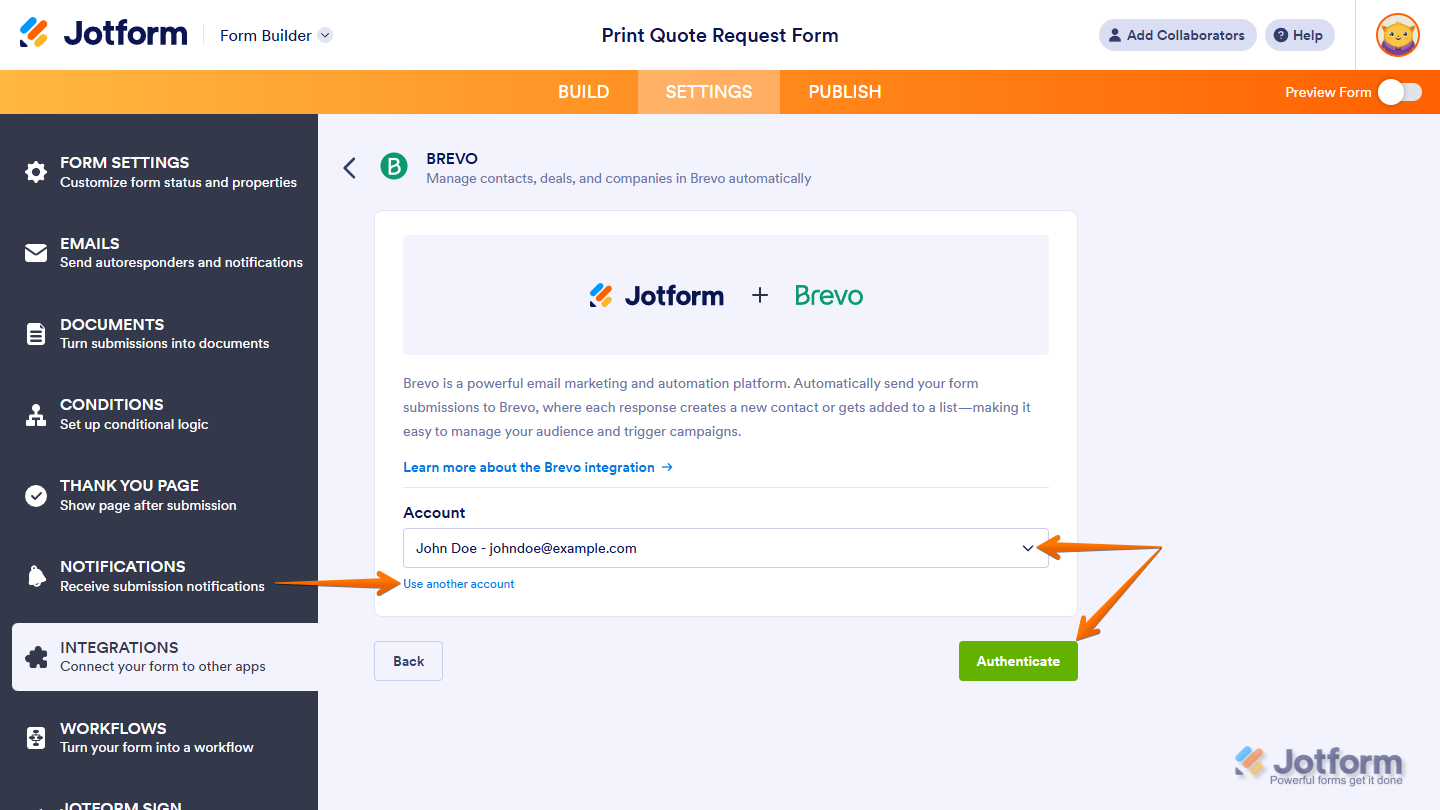
If there is a saved Brevo account you’ve integrated any of your forms with before, you can choose its email address from the dropdown and click on the Authenticate button on the right to use it. Or, you can also click on Use Another Account below the dropdown to use a different Brevo Account API key for the integration.
That’s it. You’ve successfully authenticated your Brevo account. Now, depending on the action you chose, you’ll see the settings for it.
Note
You can use the same or different Brevo accounts for each integration action and each form in your account. This lets you create records in different Brevo accounts using the same form or in the same Brevo account from different forms.
Setting Up Integration Actions
Once your Brevo account is authenticated, you can set up the actions that determine what happens after your form is submitted. Each action lets you automatically create contacts, companies, or deals in Brevo from your form submissions.
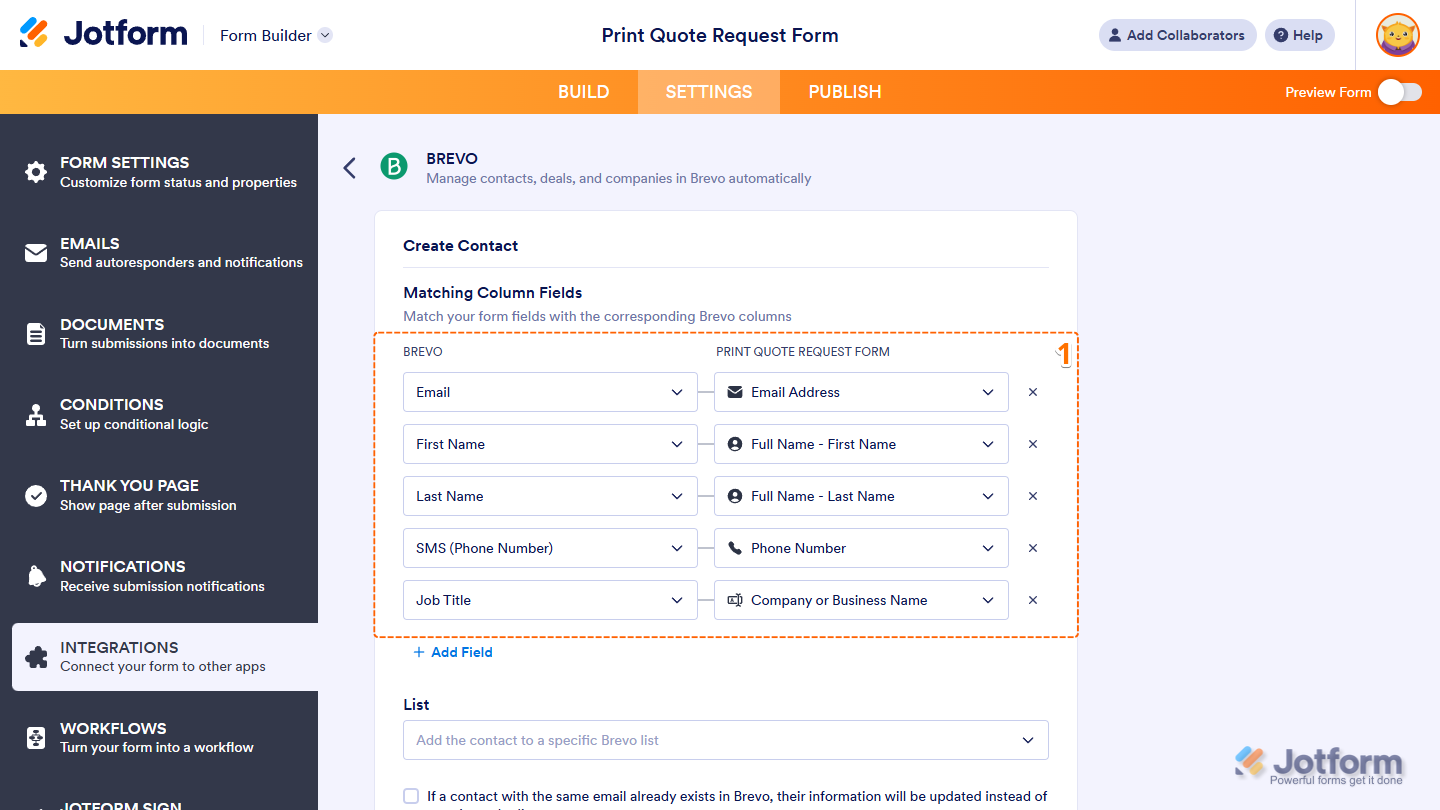
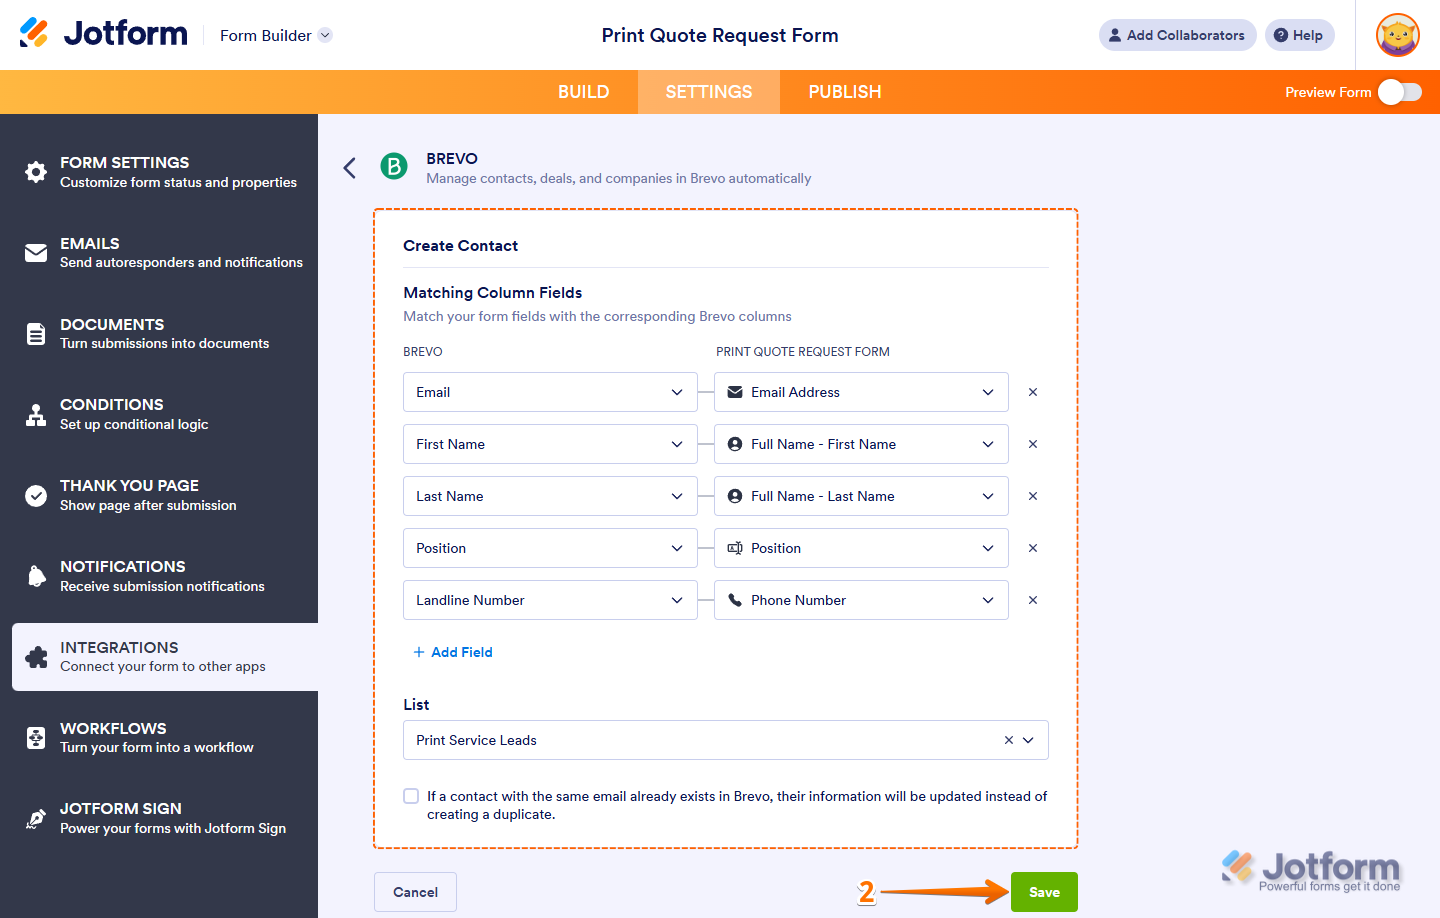
Configuring the Create Contact Action
While you’re in the Brevo section of Integrations, under the Settings tab in Form Builder, you can set up the action to create contacts in just a few steps. Here’s what to do:
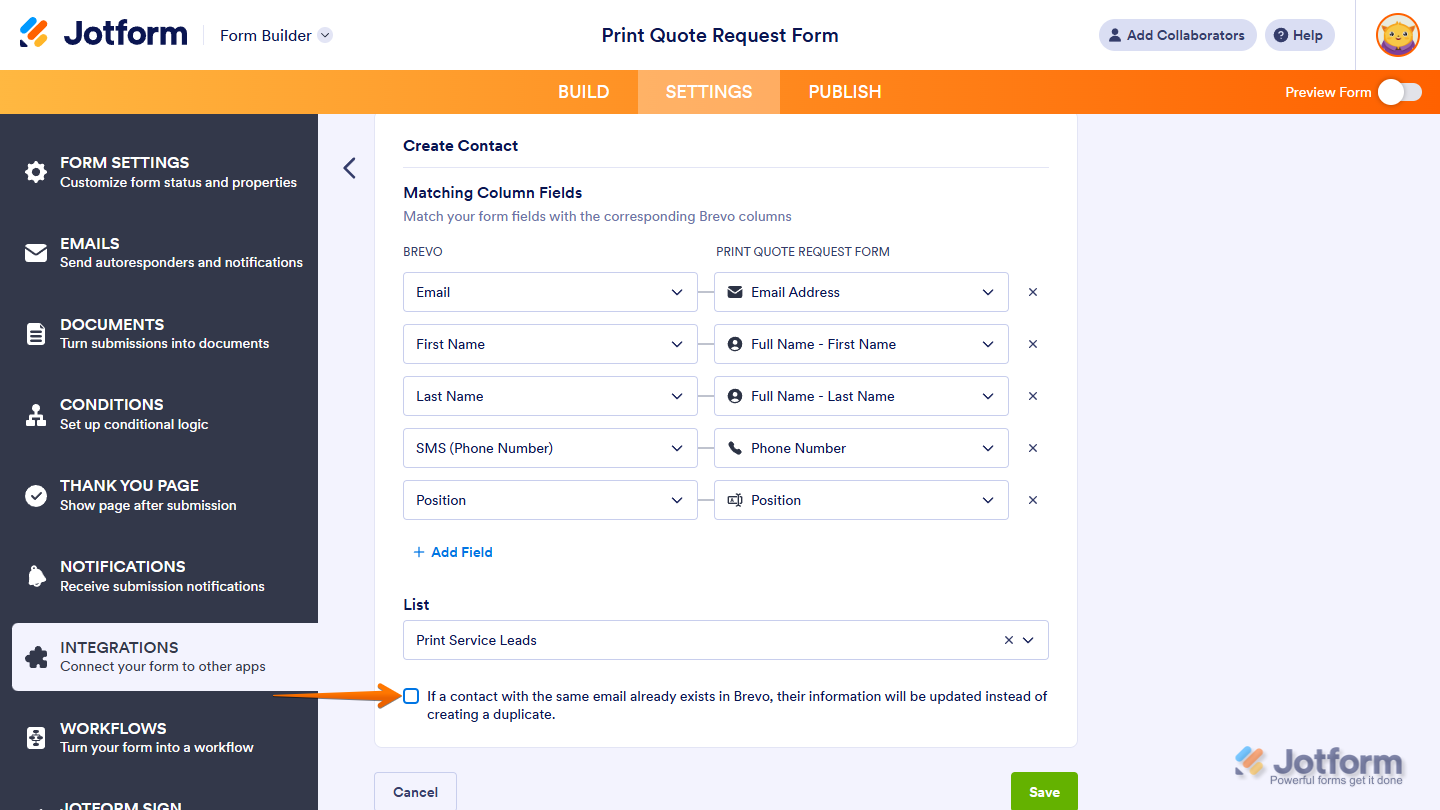
- In the Create Contact section, under Matching Column Fields, click on the Dropdown menu under the Brevo column to select a field from your Brevo account, and then click on the Dropdown menu under your Form column next to it to select the matching form field.
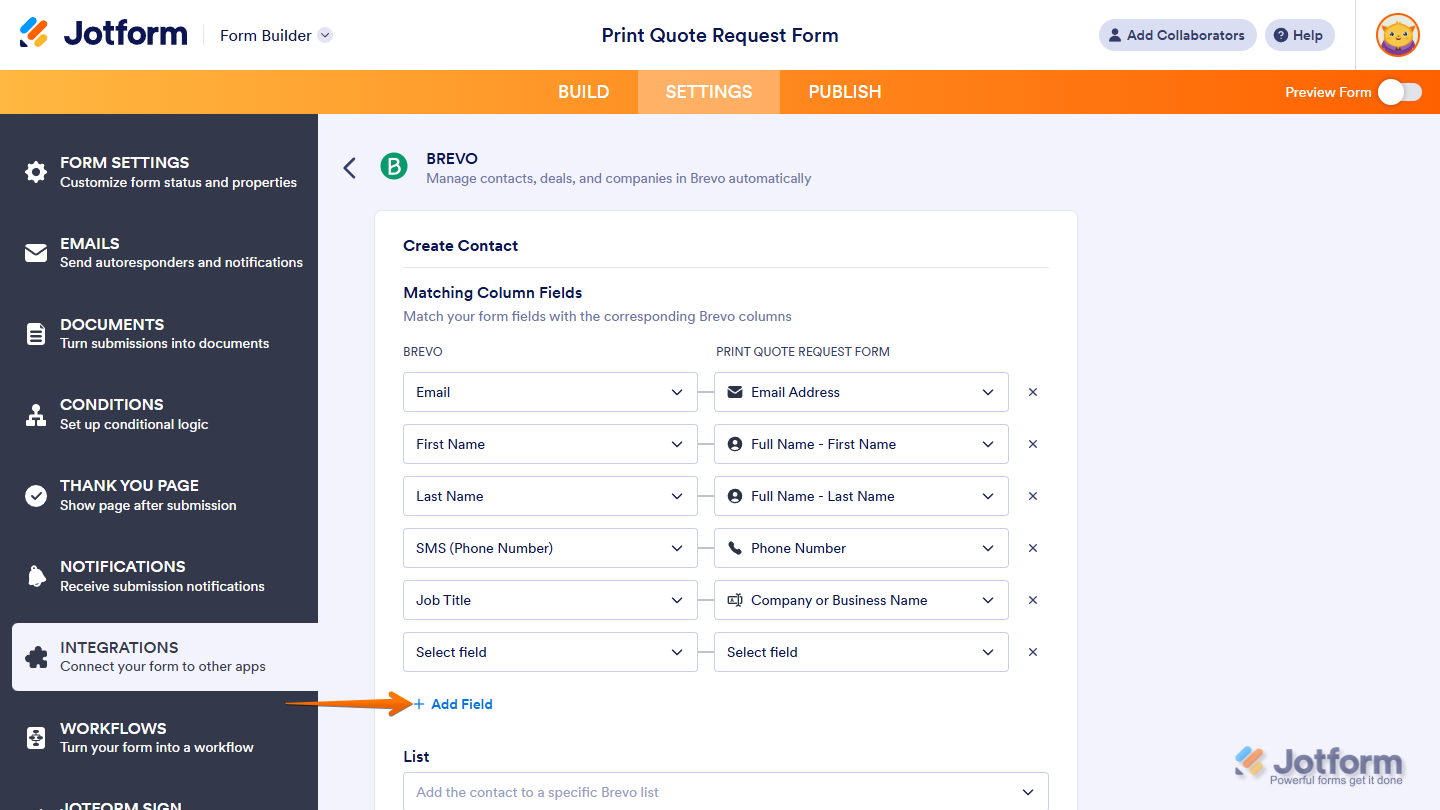
If you want to map additional fields, click on the Add Field button at the bottom of the Matching Column Fields section.
Note
When matching fields for this action, you can make sure contact records are created successfully in your Brevo account by mapping its Contact Email field to a required field in your form so users can’t leave it empty.
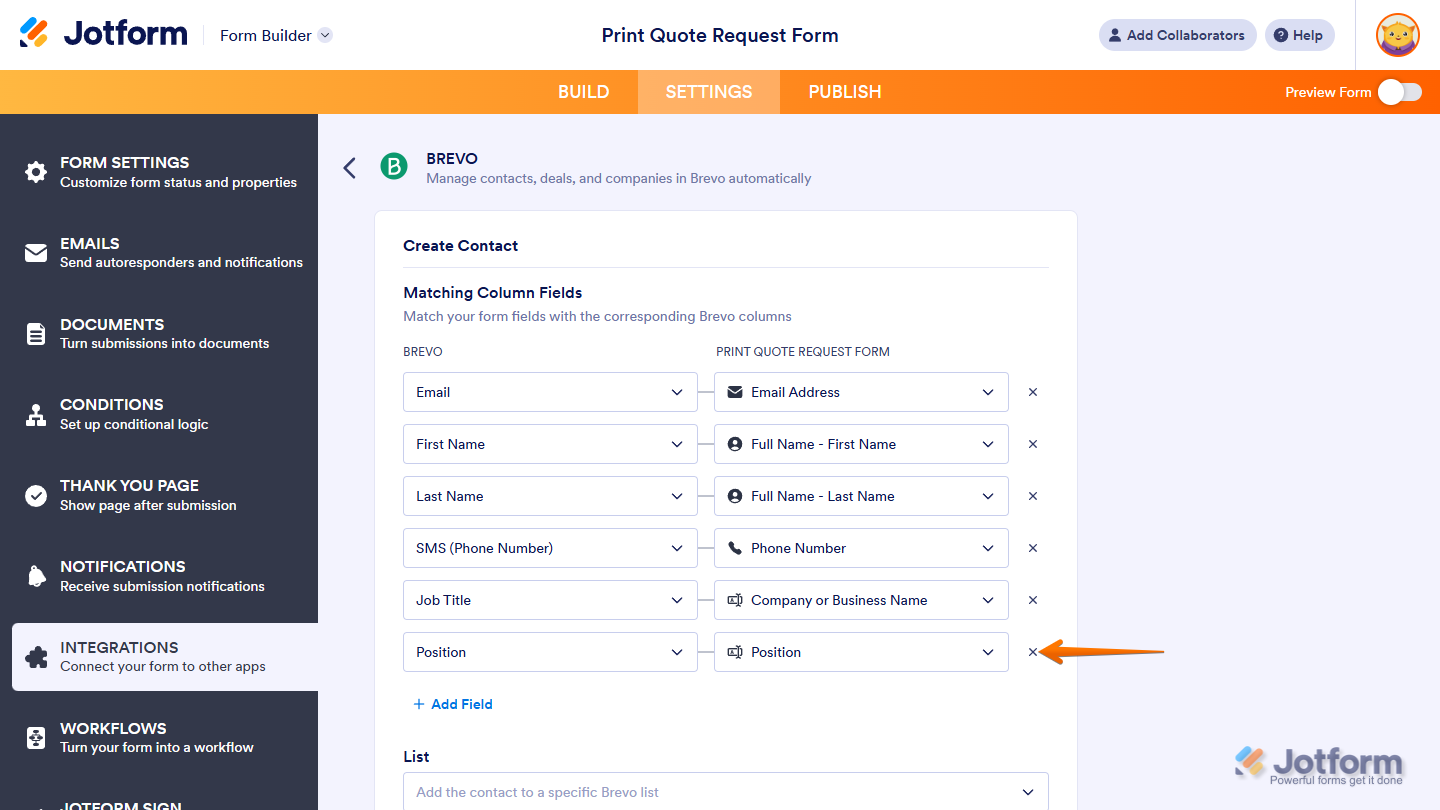
You can click on the X button on the right side of a Dropdown menu under the Form column to remove it.
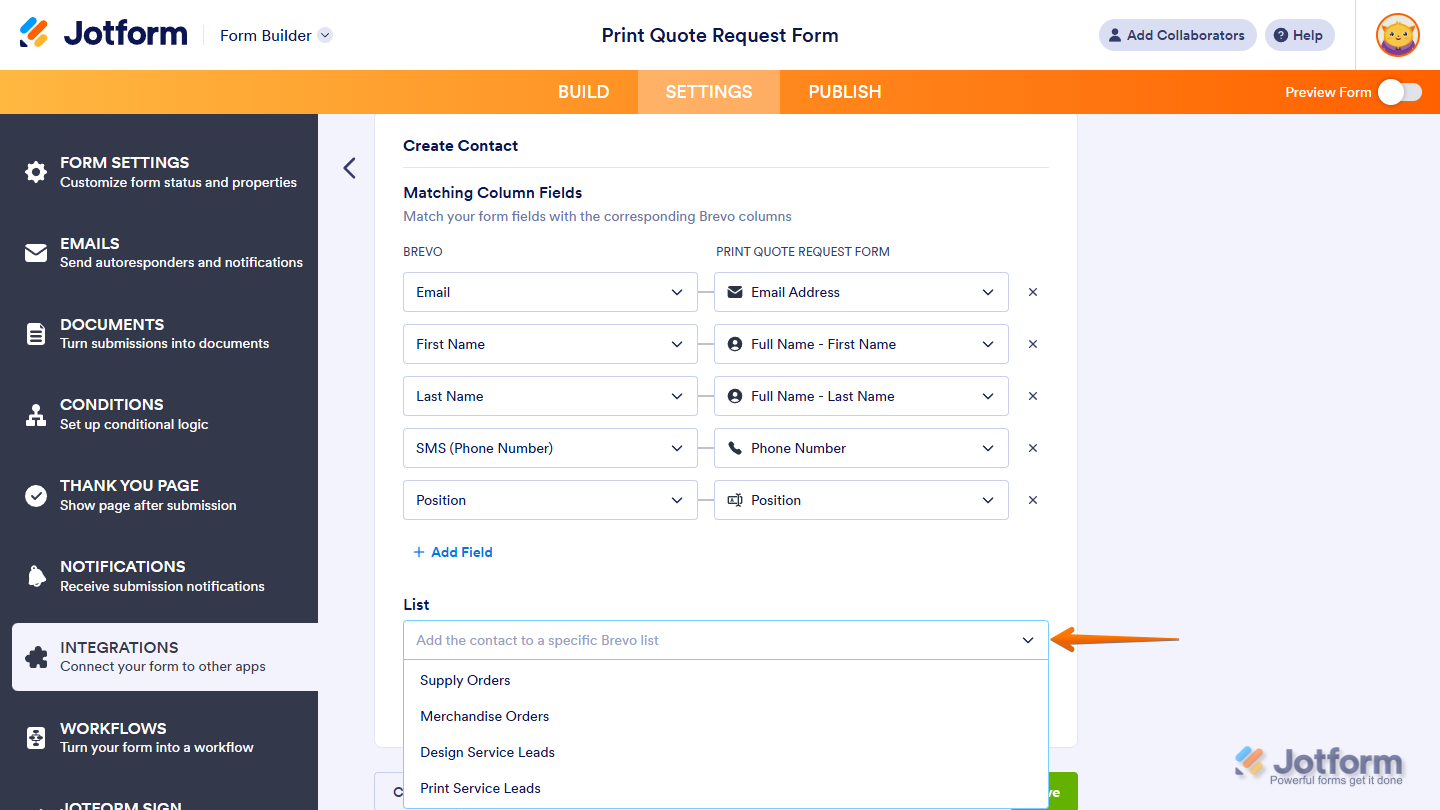
In the List section, click on the Dropdown menu and select a specific list in your Brevo account that you want to add contacts to.
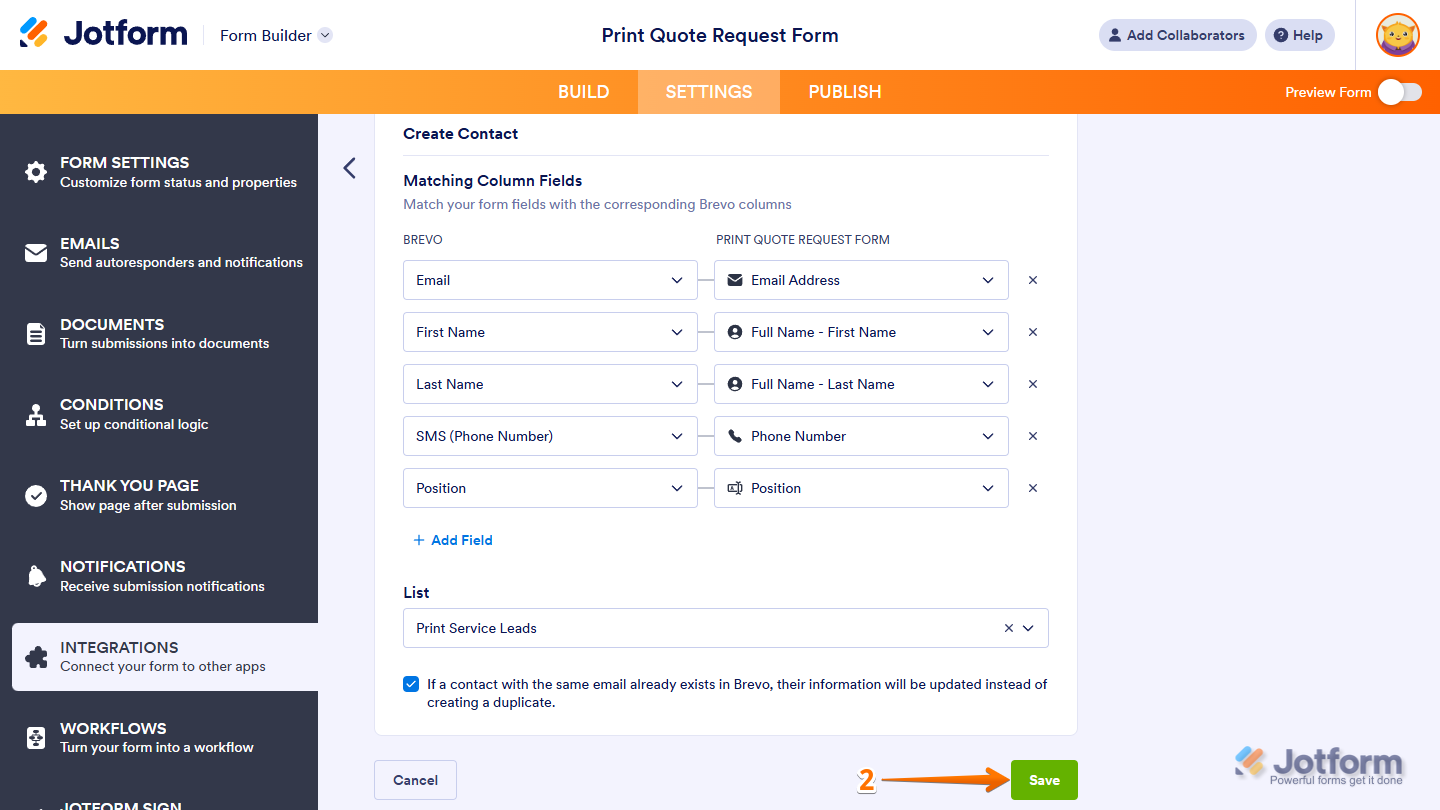
You can put a check in the box at the bottom of the Create Contact section if you want the action to update existing contacts when the email address matches instead of creating duplicate contacts.
- When your settings are ready, click on Save.
That’s it. You’ve successfully set up your form to create contact records in Brevo.

Configuring the Create Company Action
While you’re in the Brevo section of Integrations, under the Settings tab in Form Builder, you can easily set up the action to create companies. Here’s how to do it:
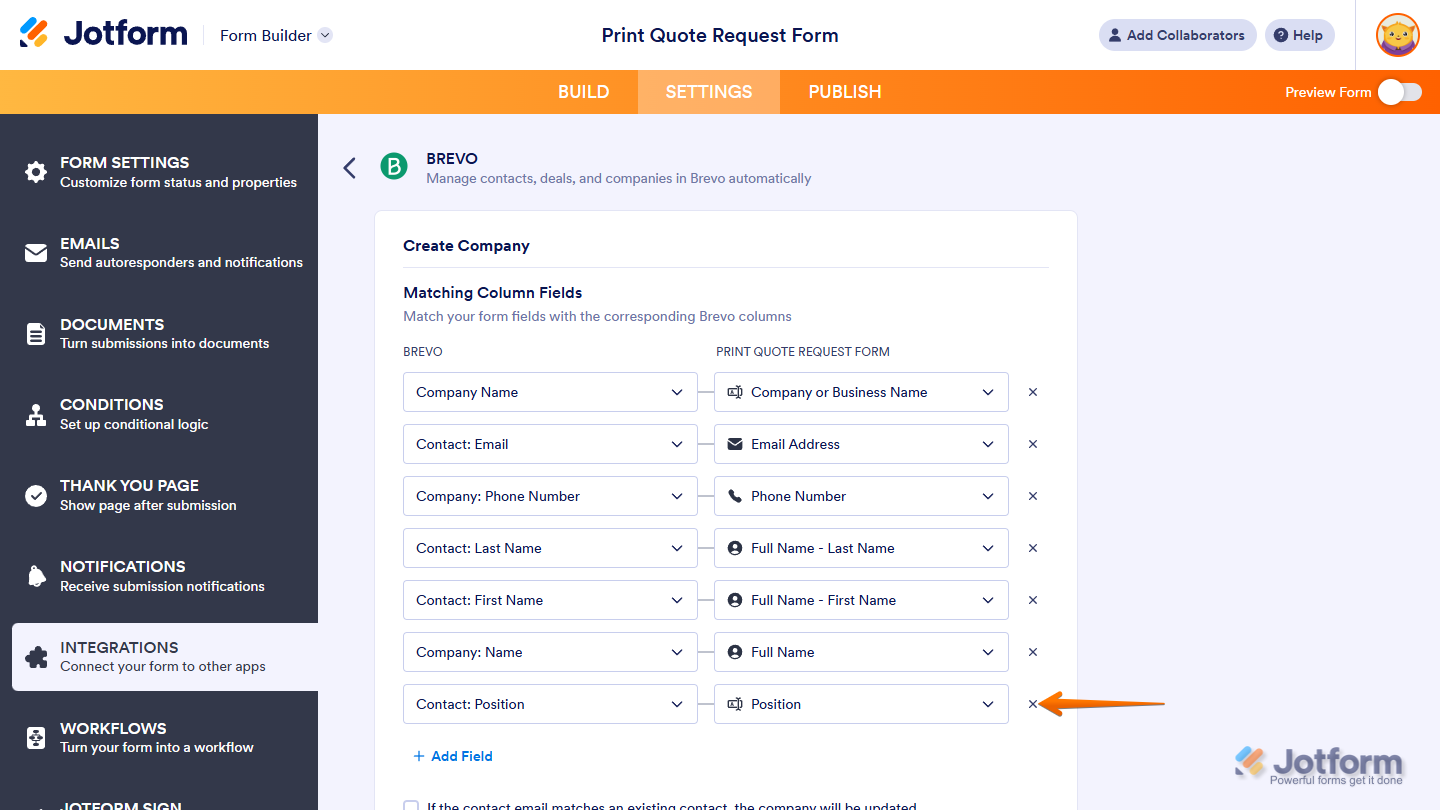
- In the Create Company section, under Matching Column Fields, click on the Dropdown menu under the Brevo column to select a field from your Brevo account, and then click on the Dropdown menu under your Form column next to it to select the matching form field.

If you want to map additional fields, click on the Add Field button at the bottom of the Matching Column Fields section.

Note
When matching fields for this action, you can make sure company records are created successfully in your Brevo account by mapping its Company Name field to a required field in your form so users can’t leave it empty.
You can click on the X button on the right side of a Dropdown menu under the Form column to remove it.
You can put a check in the box at the bottom of the Create Company section if you want the action to update the company when the contact email matches an existing contact instead of creating a duplicate.
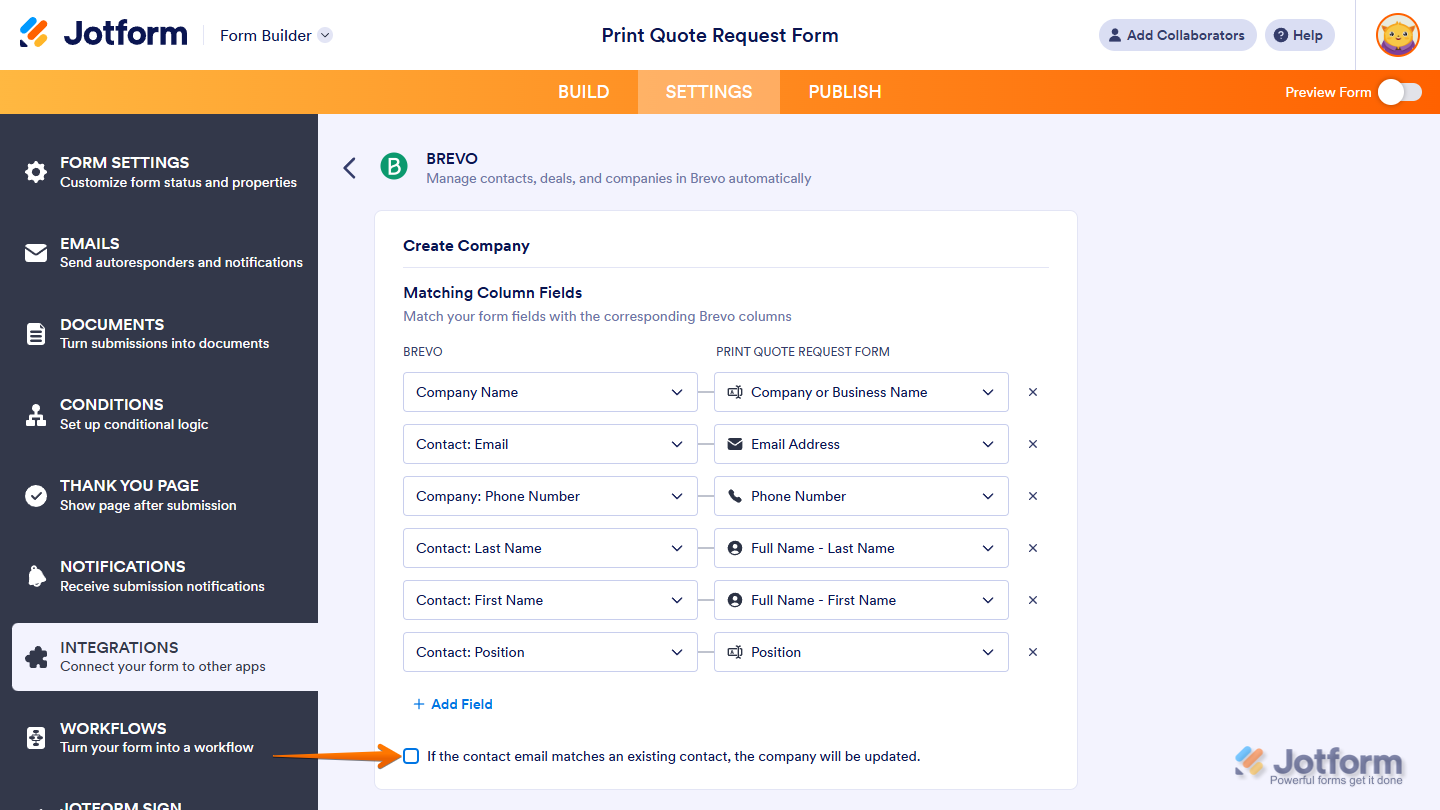
- Once everything’s set, click on Save.

Pro Tip
When the Email field in your Brevo account is mapped to an Email field in your form for this action, it will create a new contact record or update an existing one using the submitted email address and then automatically link it to the company record that this action creates.
That’s it. You’ve successfully set up the action to create company records in Brevo.

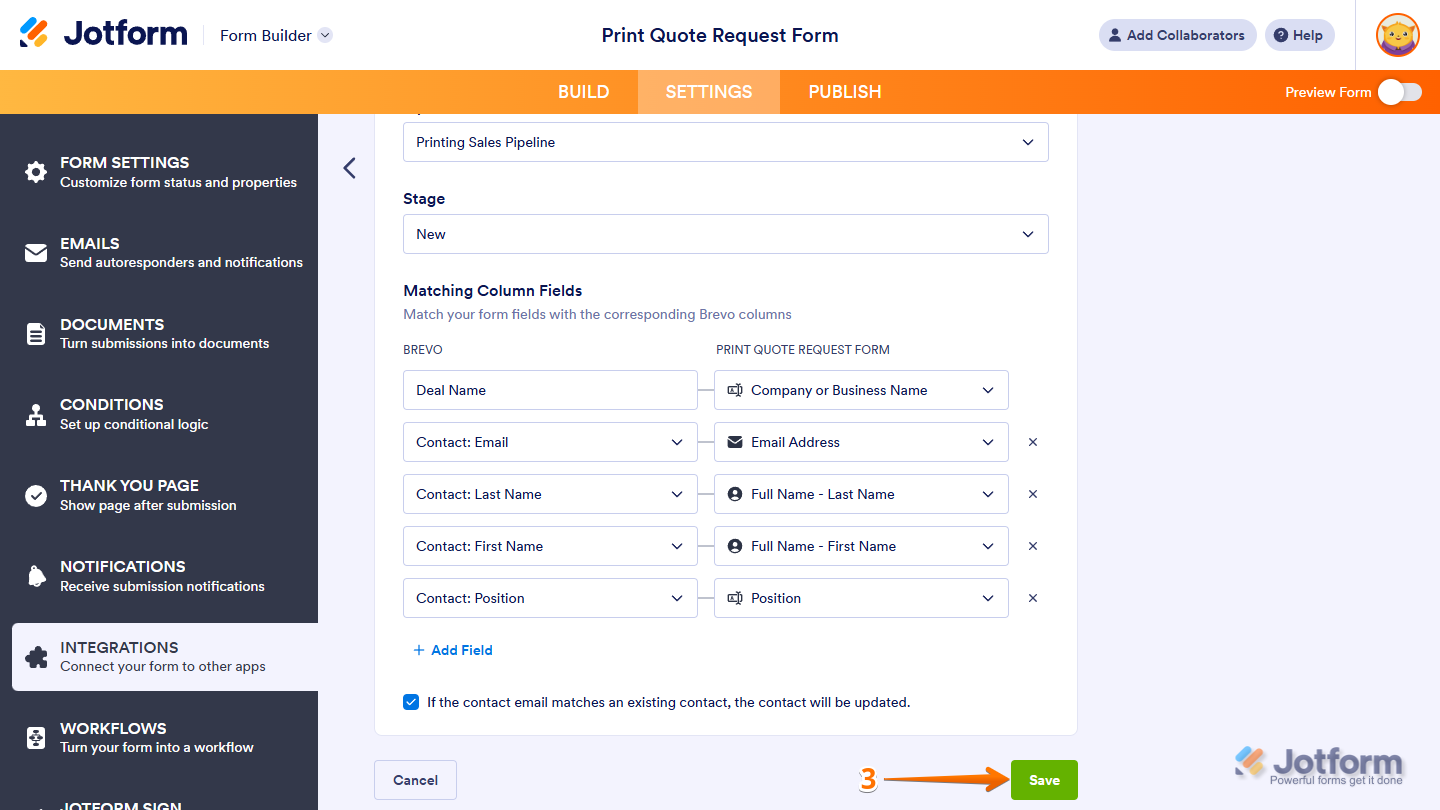
Configuring the Create Deal Action
While you’re in the Brevo section of Integrations, under the Settings tab in Form Builder, setting up the action to create deals is simple. Here’s how to set it up:
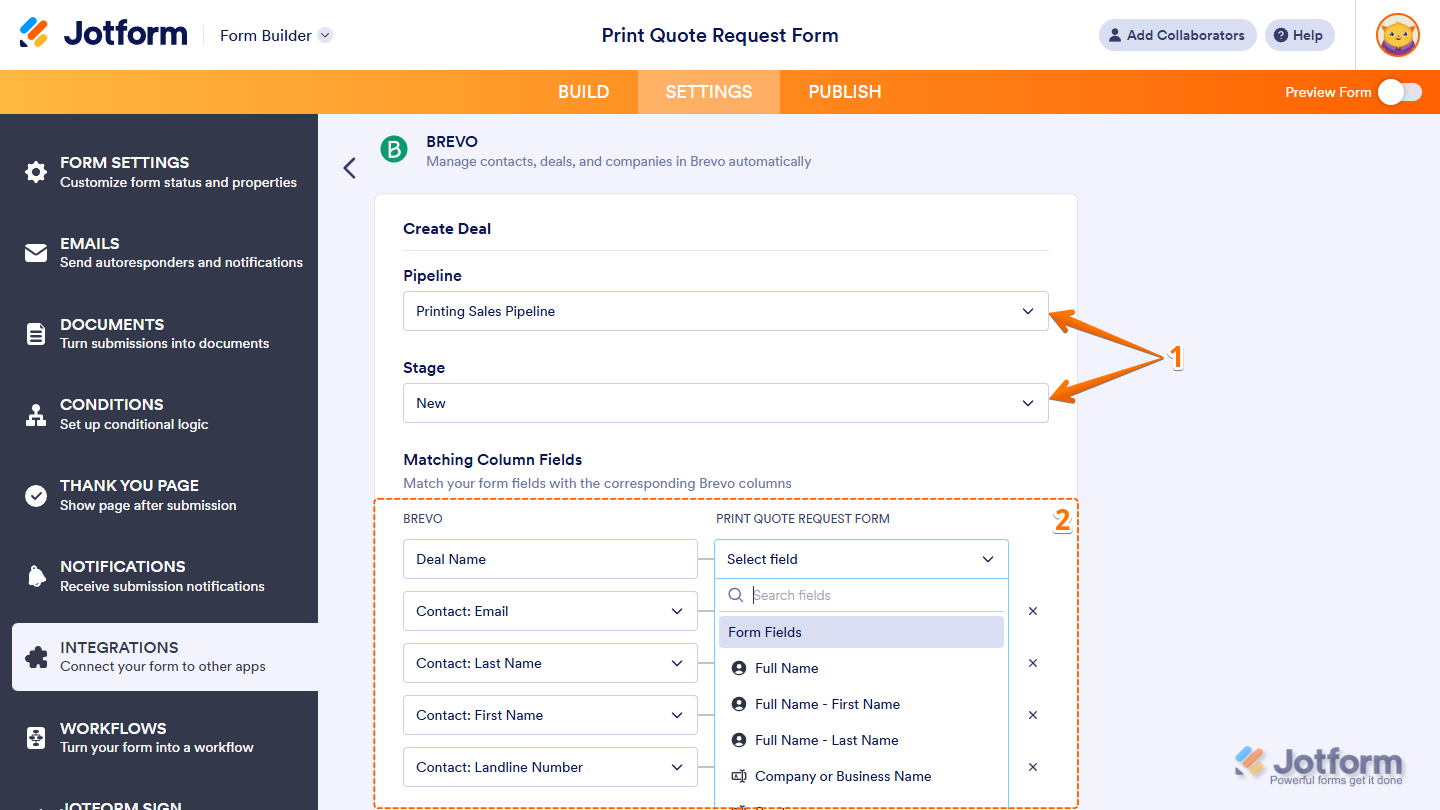
- In the Create Deal section, you’ll see this list of settings you can configure:
- Pipeline — Select a pipeline in the dropdown menu if you want to add the deal to a specific pipeline. Or, keep it blank if you don’t want to assign it to one.
- Stage — This is enabled only when a pipeline is selected. Select the initial stage for the deal added to the selected pipeline, or keep it blank if you don’t want to set one.
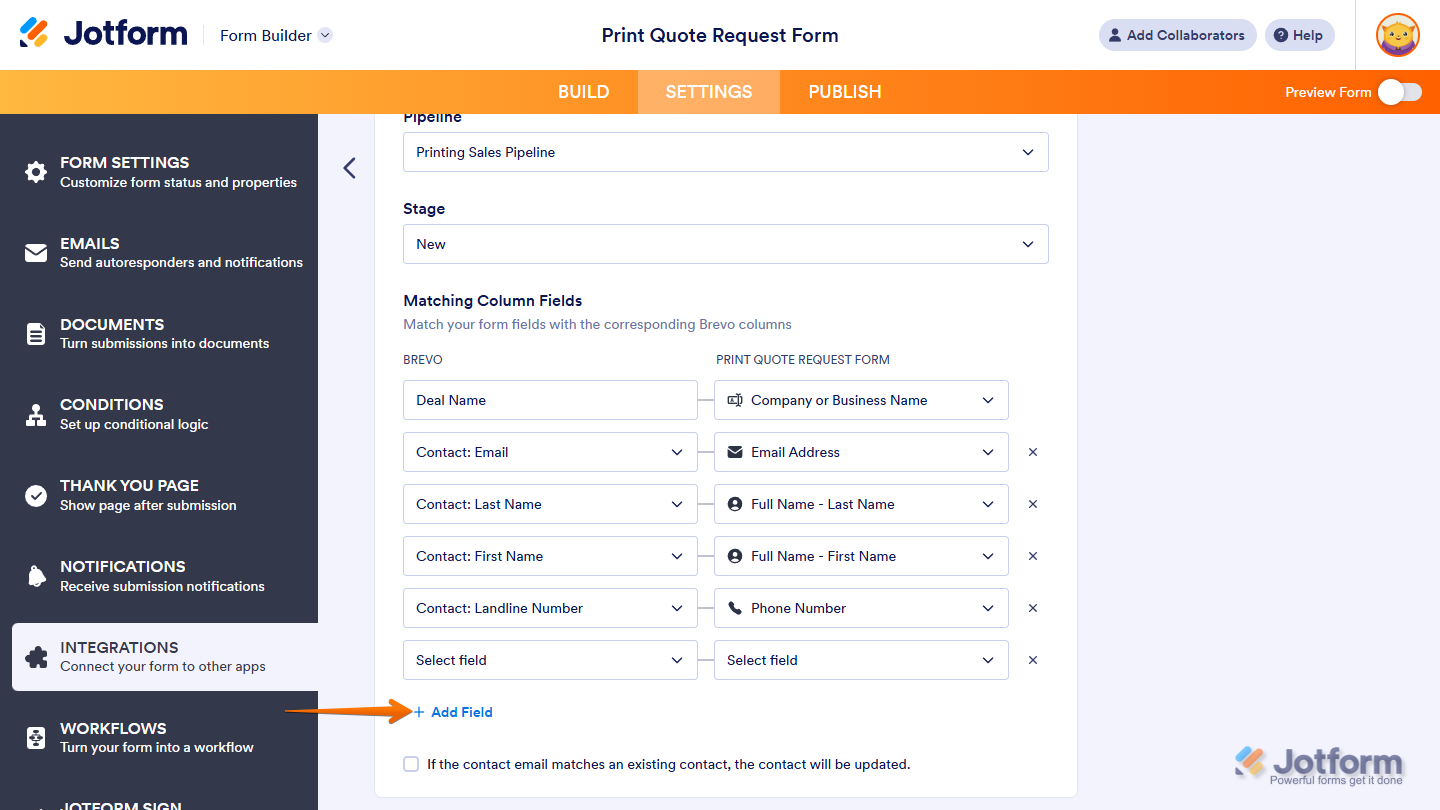
- Then, under Matching Column Fields, click on the Dropdown menu next to the required Deal Name field from Brevo, and then select a supported form field to match it.
If you want to map additional fields, click on the Add Field button at the bottom of the Matching Column Fields section.
Note
When matching fields for this action, you can make sure deal records are created successfully in your Brevo account by mapping its Deal Name field to a required field in your form so users can’t leave it empty.
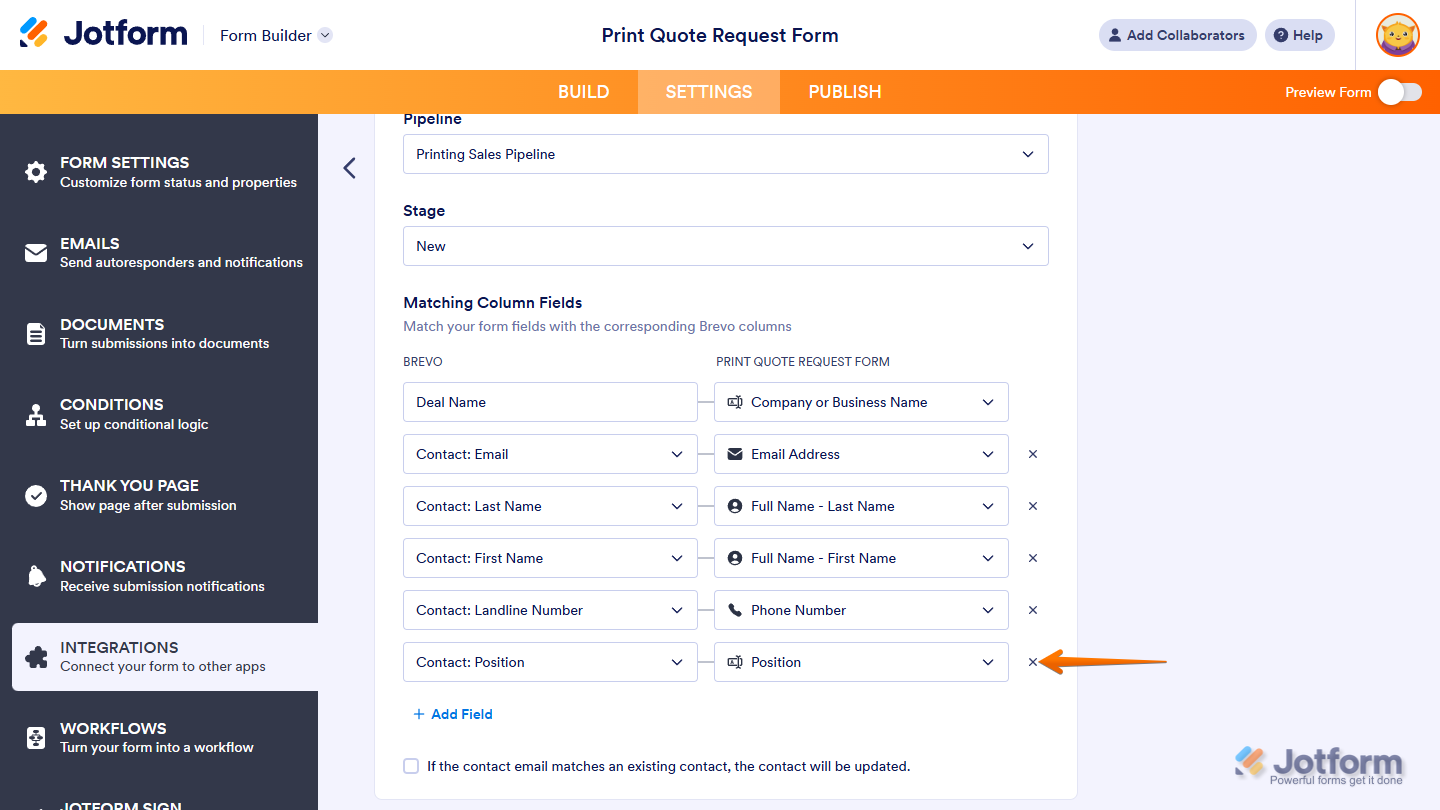
You can click on the X button on the right side of a Dropdown menu under the Form column to remove it.
You can put a check in the box at the bottom of the Create Deal section if you want the action to update the deal when the contact email matches an existing contact instead of creating a duplicate.
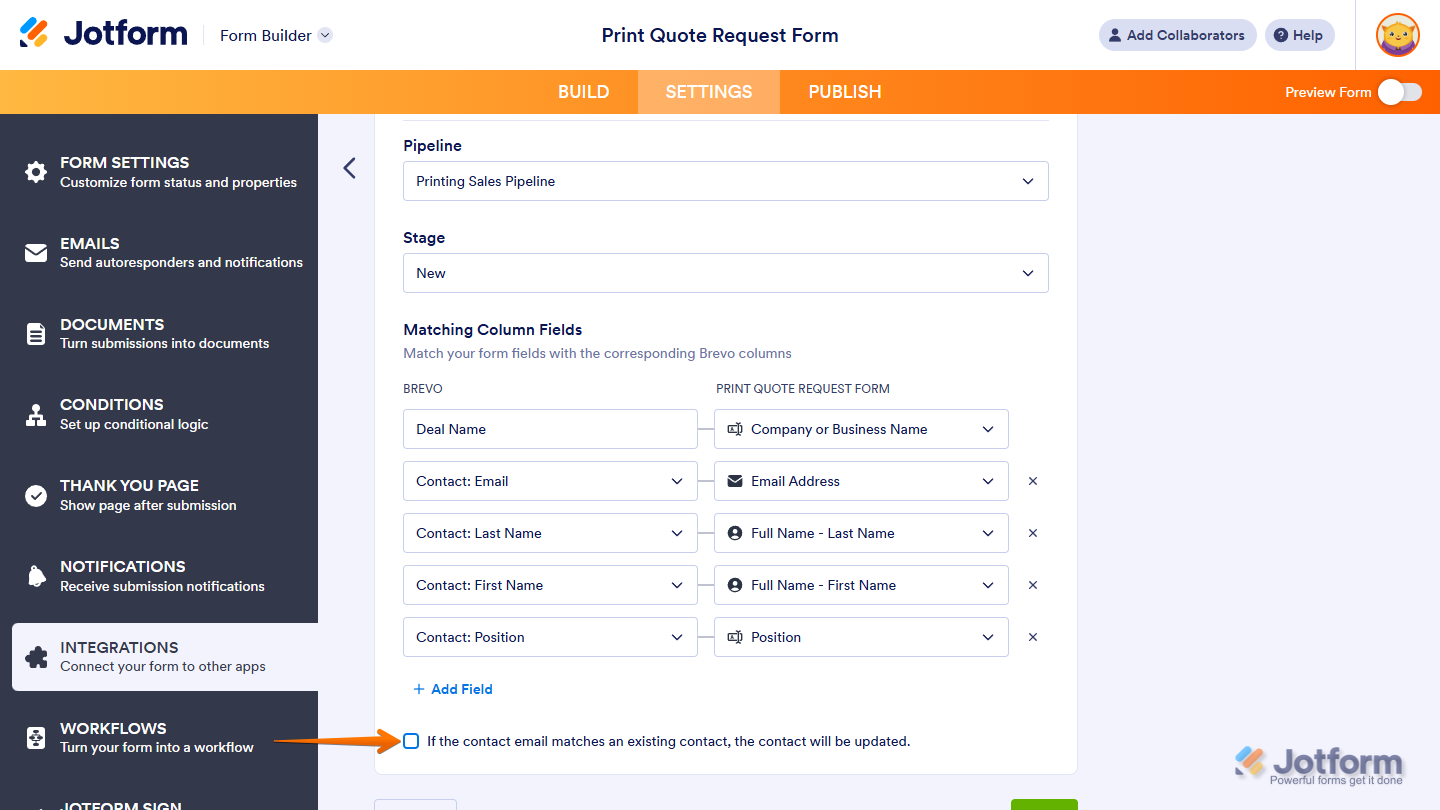
- When everything looks correct, click on Save.
Pro Tip
When the Email field in your Brevo account is mapped to an Email field in your form for this action, it will create a new contact record or update an existing one using the submitted email address and then automatically link it to the deal that this action creates.
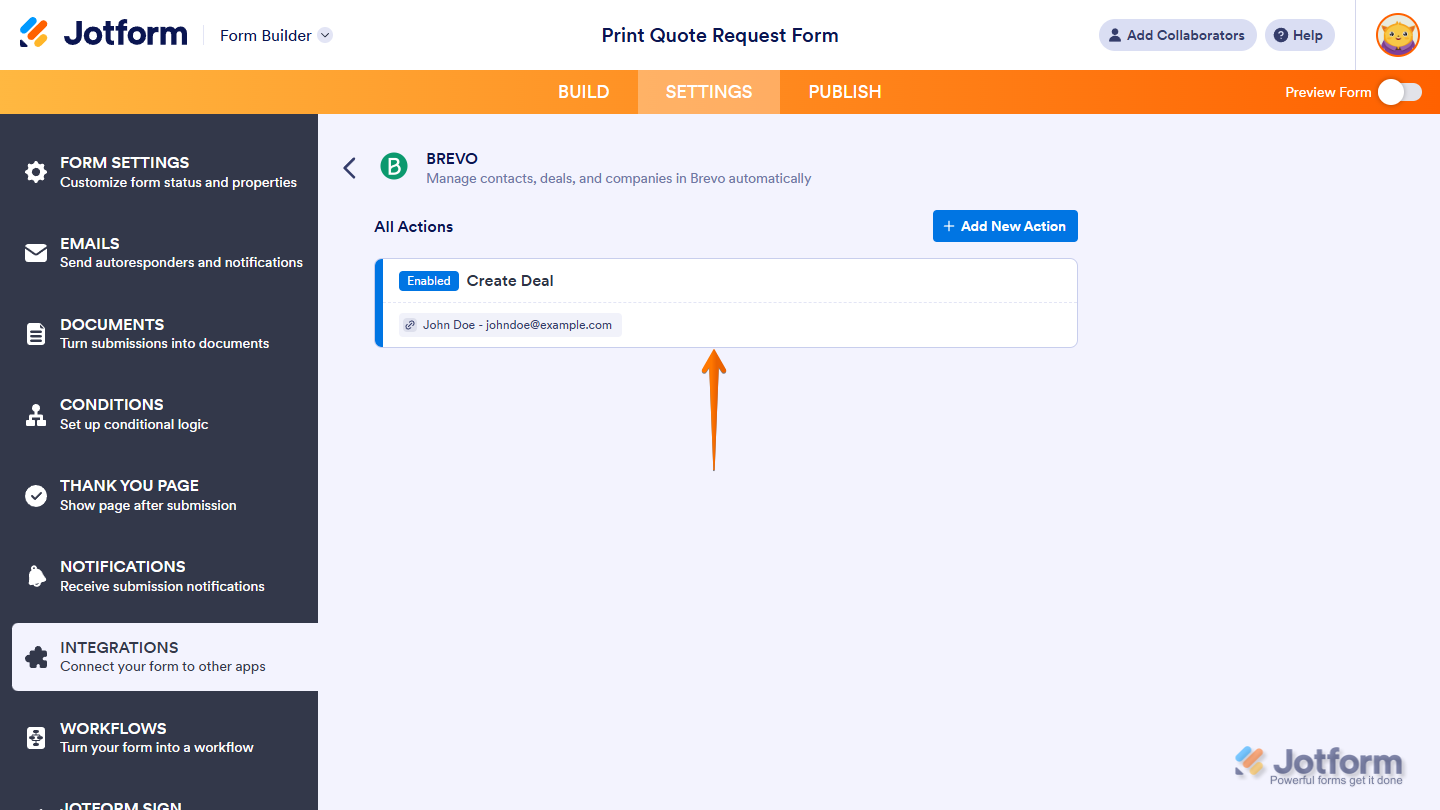
That’s it. You’ve successfully set up your form to create deal records in Brevo.
Notes
- You can create multiple different or the same actions within the same form. If you want to add another one, click on the Add New Action button at the top right of the All Actions section.
- You can test the action you’ve set up by making a test submission on your form. If you want to learn how to view the status of your action runs, see Viewing Action Logs below.
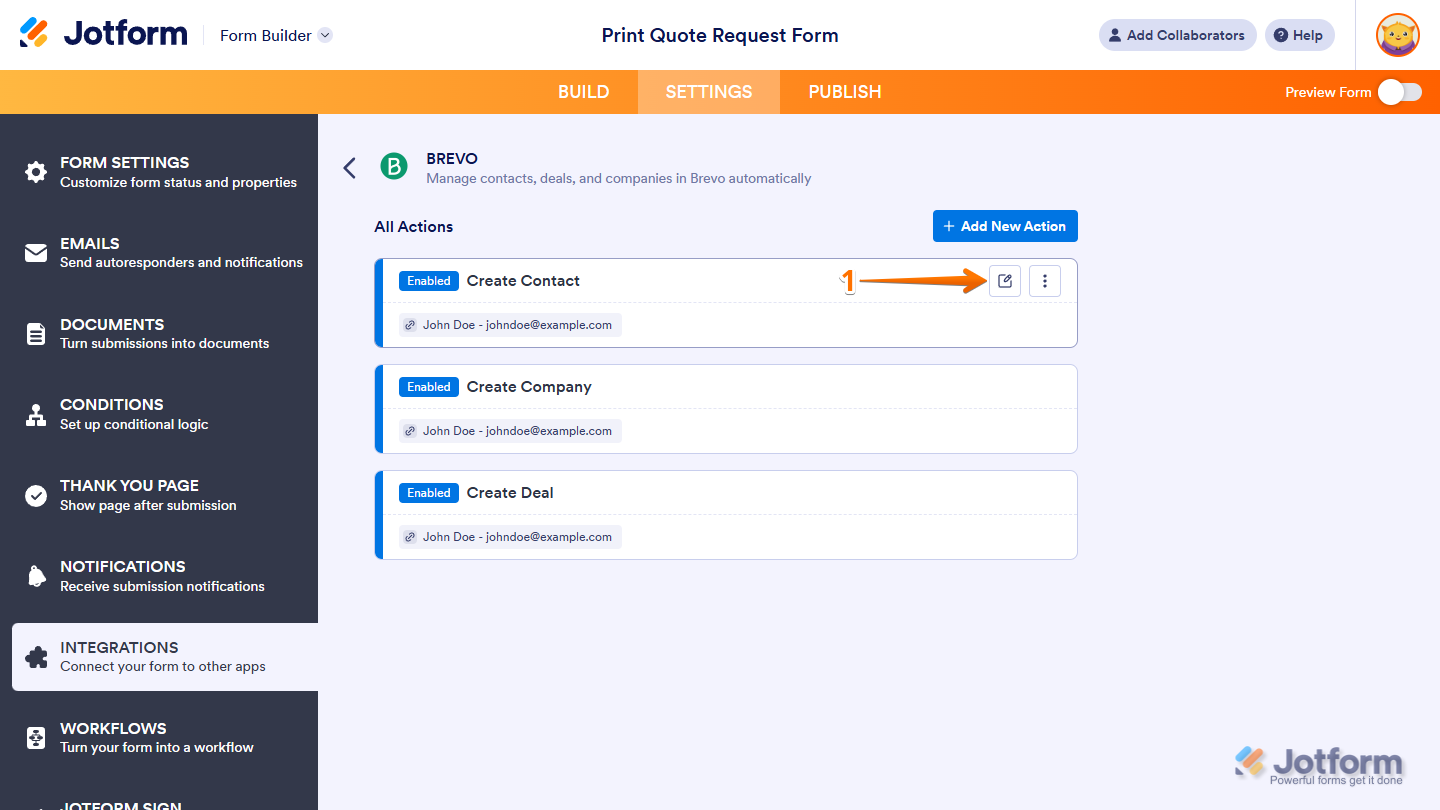
Managing Actions
Once you’ve added your actions, you can manage them anytime to keep things organized and running the way you want. You can edit an action, check its logs, rename it, enable or disable it, or delete it if you don’t need it anymore.
Editing Actions
You can update an existing Brevo action to fine-tune how your form submissions are used or adjust the details it sends. Making changes to an existing action is simple—here’s how:
- While you’re in the All Actions section, hover your mouse over the action you want to edit, then click on the Edit icon on the right side of it.
- Now, in the Integration Settings, make your changes, then click on Save.
That’s it. Your changes have been saved, and the action is now updated.
Viewing Action Logs
You can review a Brevo action’s activity to see how it has run and whether submissions were processed successfully. Viewing your action logs is quick—here’s what to do:
- While you’re in the All Actions section, hover your mouse over the action you want to view action logs for, then click on the Three Dots icon on the right side of it.
- In the menu that comes up, select See Action Logs.

That’s it. This opens the Action Logs window, where you can see successful and failed run logs for the Brevo action from the last seven days.
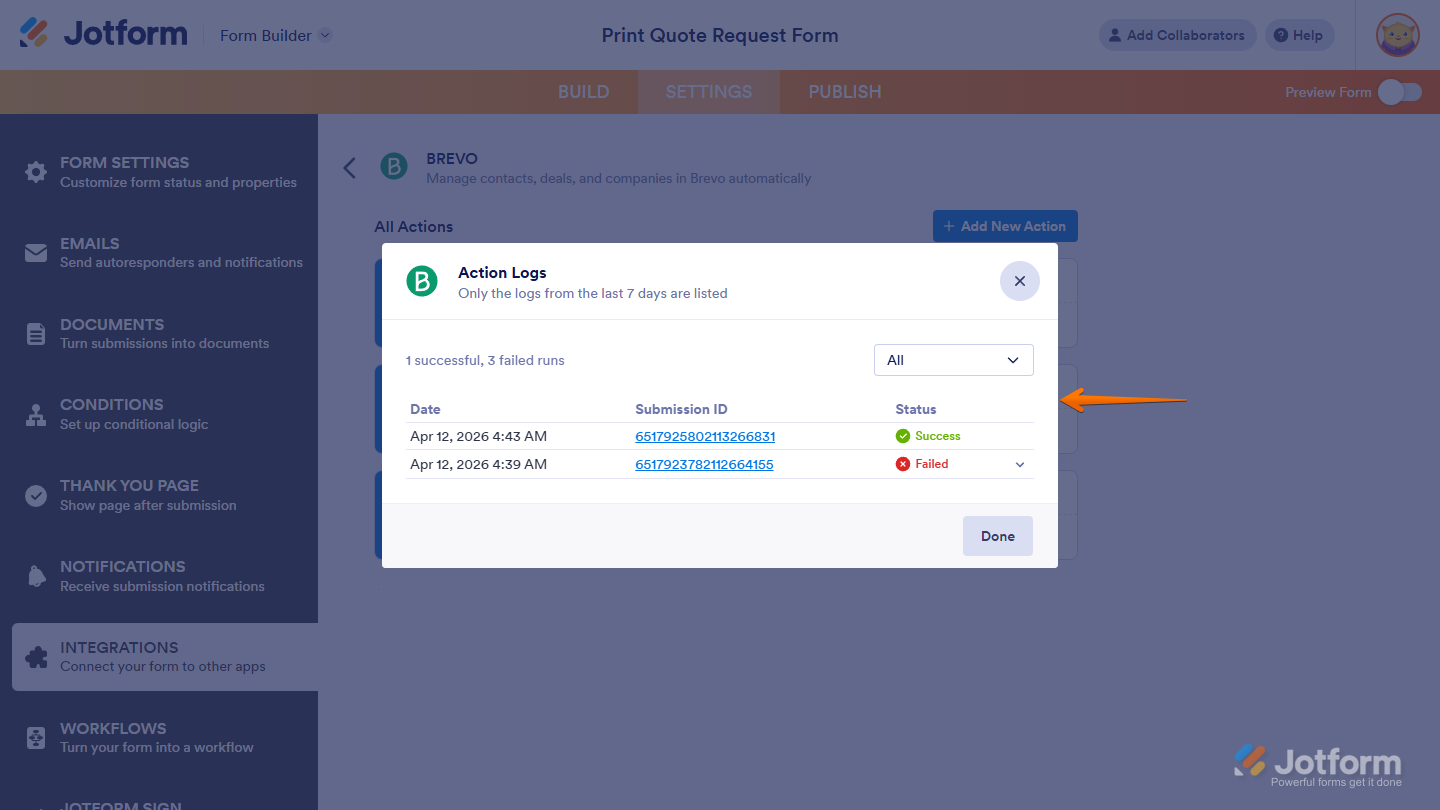
Notes
- Use the dropdown menu on the right side of the Action Logs window to filter logs by All, Successful, or Failed.
- In the Status column, click on the Downward Arrow icon next to Failed to view the error details of a log.
- In the Submission ID column, click on an ID to open and review the details of the submission in another browser tab.
Renaming Actions
You can change the default name of an action to make it easier to identify, reflect workflow changes, and distinguish similar actions in the All Actions section. You can do it in a few simple steps:
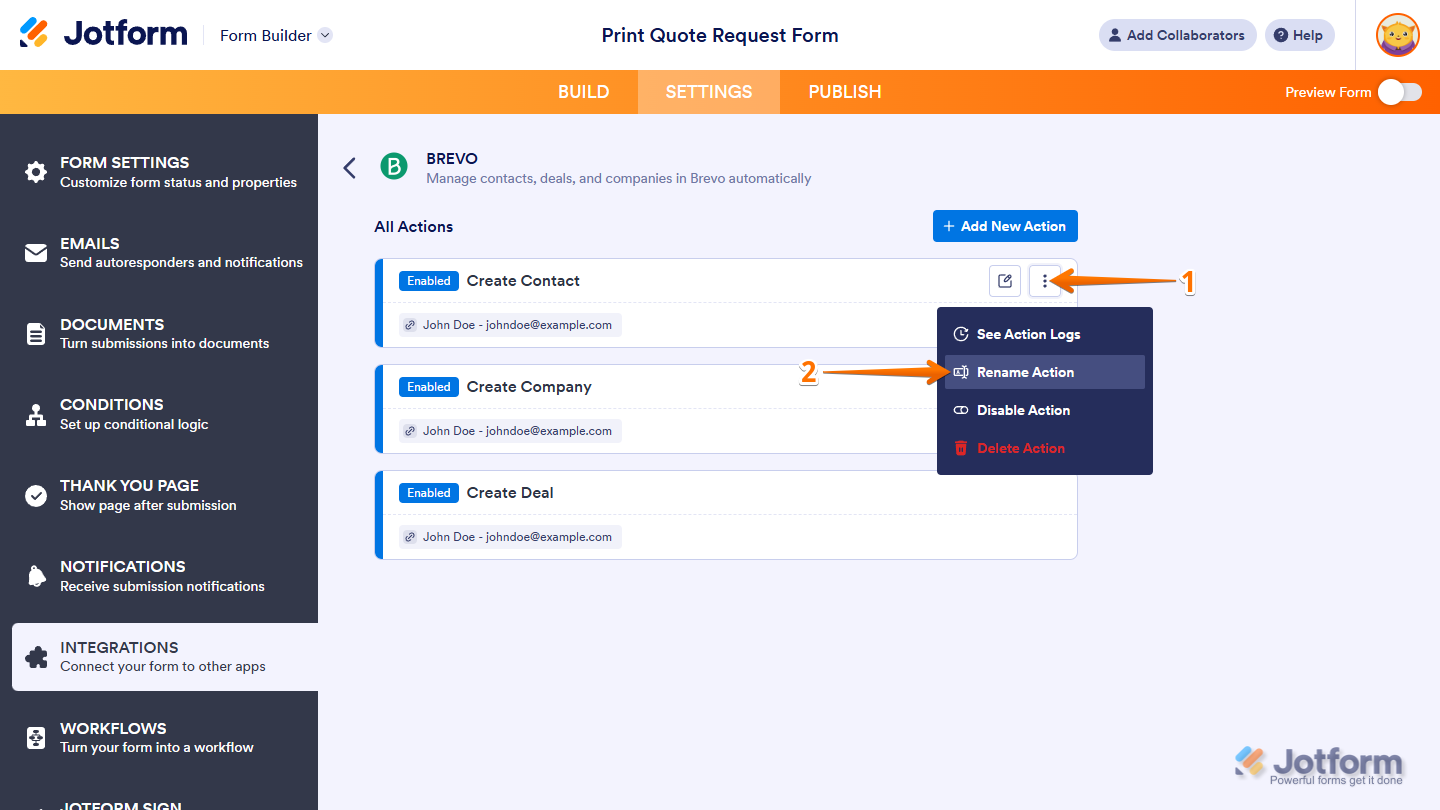
- While you’re in the All Actions section, hover your mouse over the action you want to rename, then click on the Three Dots icon on the right side of it.
- In the menu that comes up, select Rename Action.
- Now, enter a new name for your action and press the Enter key on your keyboard to save your changes.
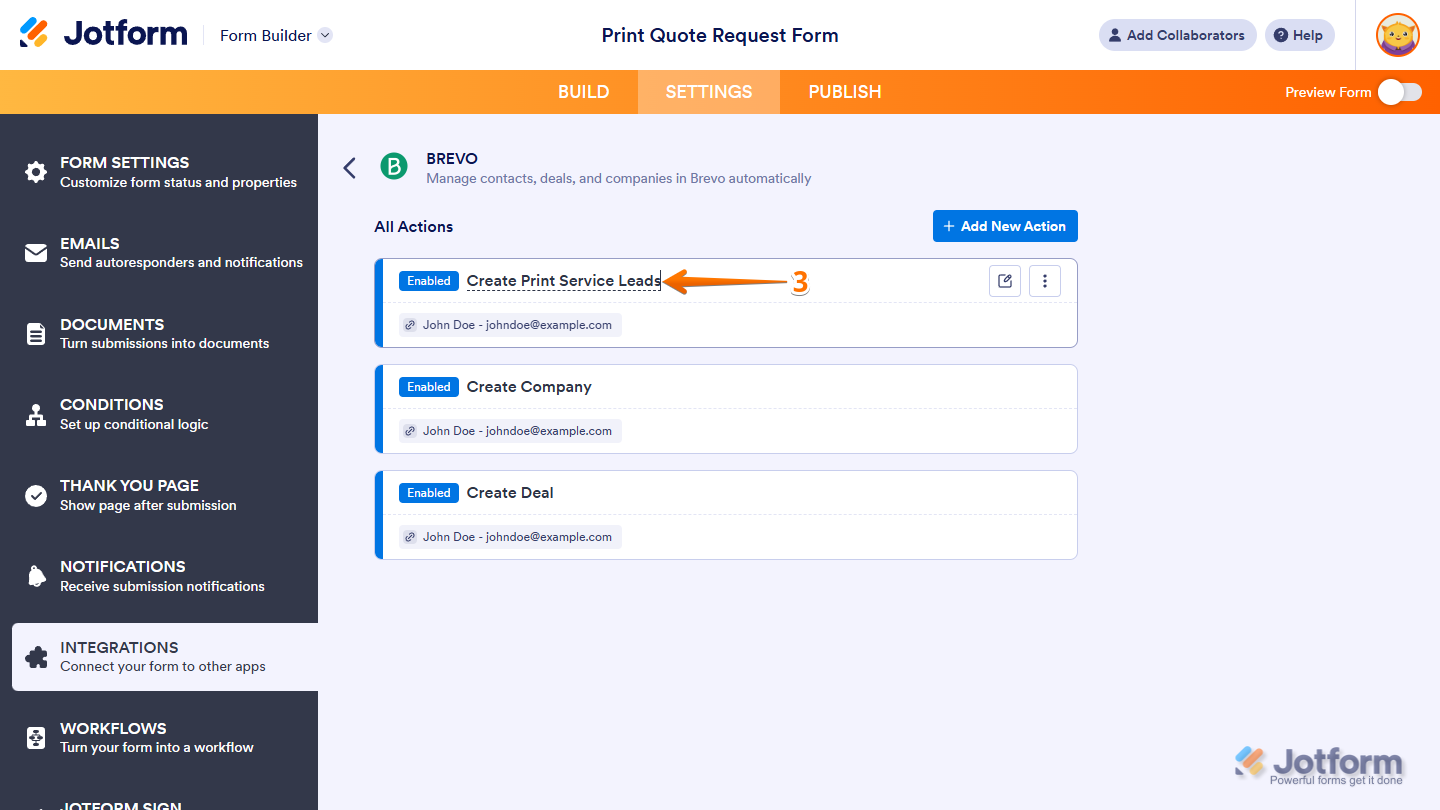
That’s it. Your action has been renamed successfully.
Disabling Actions
You can temporarily stop a Brevo integration action from running. It’s helpful when you want to pause it without deleting it or affecting other actions in the integration. You can do it in just a few steps:
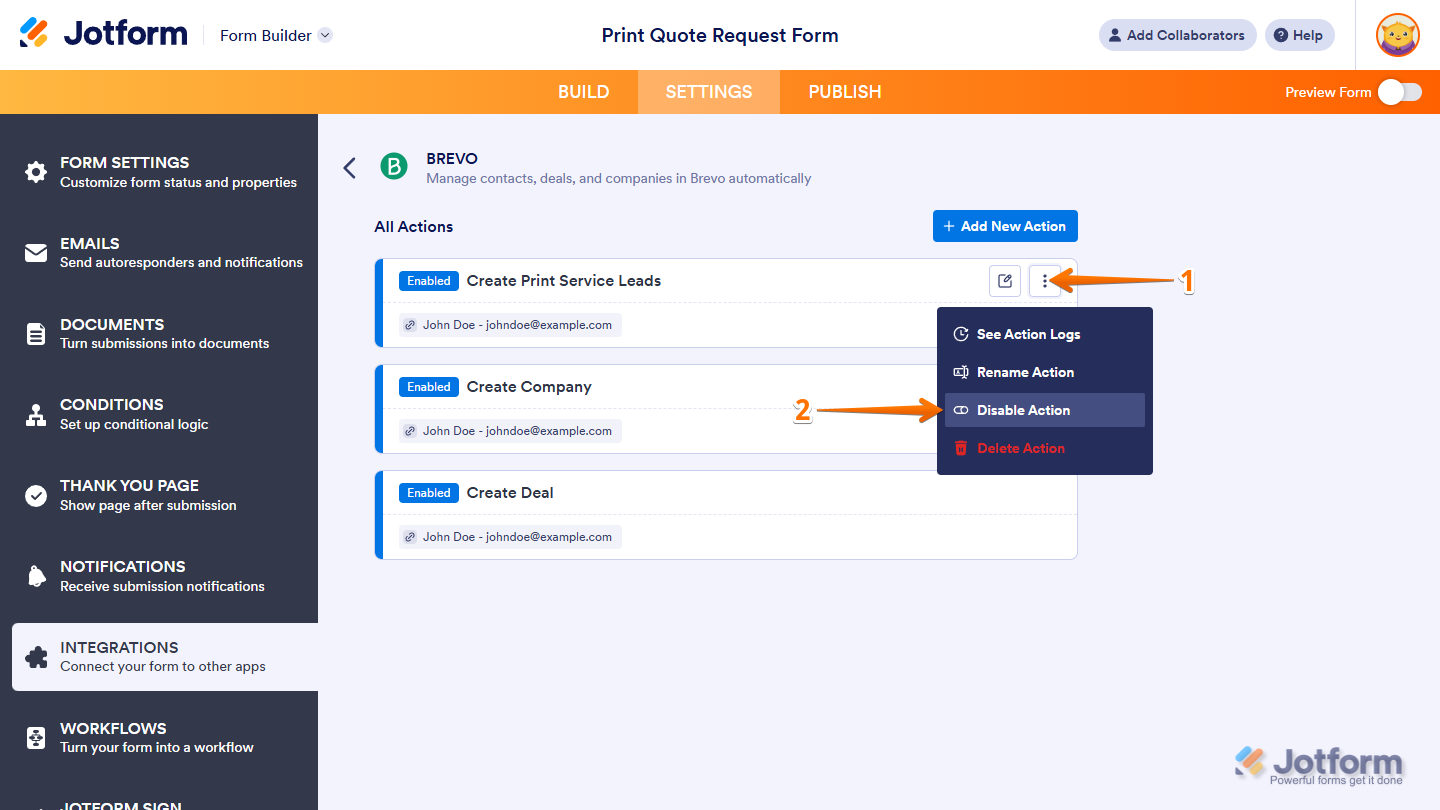
- While you’re in the All Actions section, hover your mouse over the action you want to disable, then click on the Three Dots icon on the right side of it.
- In the menu that comes up, select Disable Action.
That’s it. The action is now disabled and won’t run until you turn it back on. When an action is disabled, the indicator next to its name changes from Enabled to Disabled. To re-enable it, click the three-dots icon again and select Enable Action.

Deleting Actions
You can delete a Brevo integration action to remove it permanently. This helps keep your integration setup clean and organized. Here’s a quick how-to:
- While you’re in the All Actions section, hover your mouse over the action you want to delete, then click on the Three Dots icon on the right side of it.
- In the menu that comes up, select Delete Action.

- Then, in the Delete Integration Confirmation window that pops up, click on Yes, Delete.
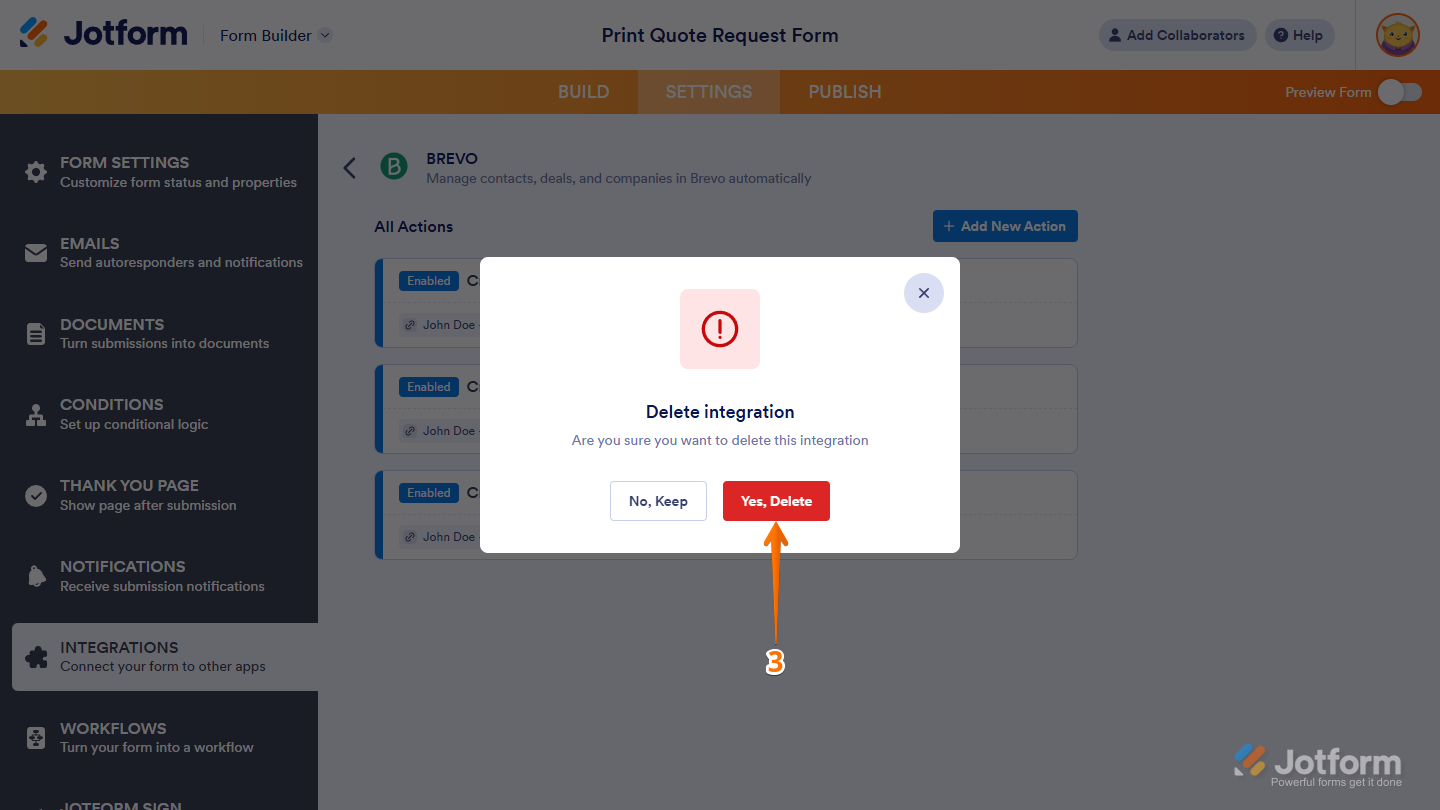
That’s it. The action is removed. If you only want to pause it temporarily, consider disabling it instead.
Getting Your Brevo API Key
To set up this integration, you’ll need your Brevo API key. Here’s how to get it:
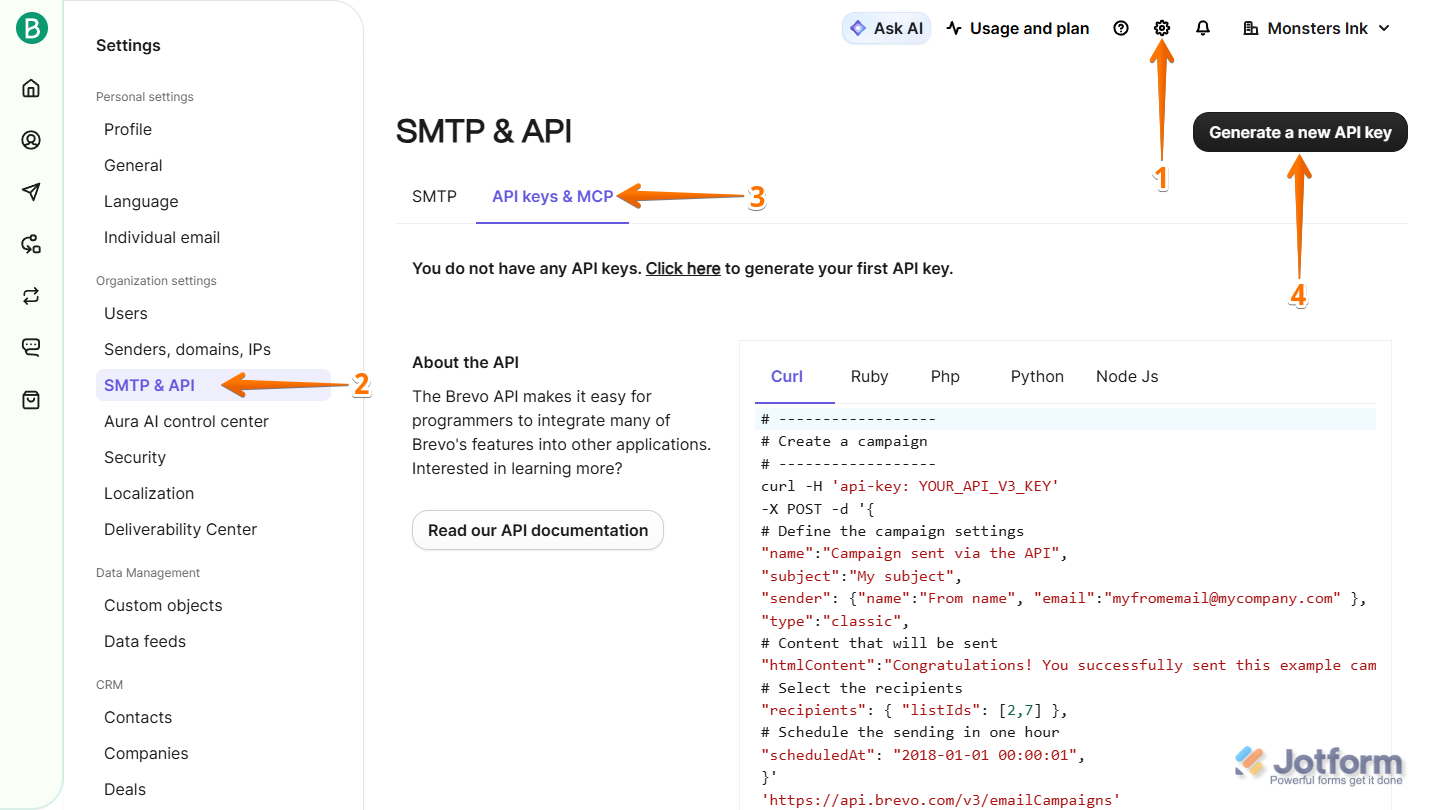
- Log in to Brevo and, on the top-right side of your Home page, click on the Gear icon.
- Now, in the menu on the left side of the Settings page, click on SMTP & API.
- Then, in the SMTP & API section that opens on the right, click on the API keys & MCP tab.
- Next, click on the Generate a New API Key button on the right side of the page.
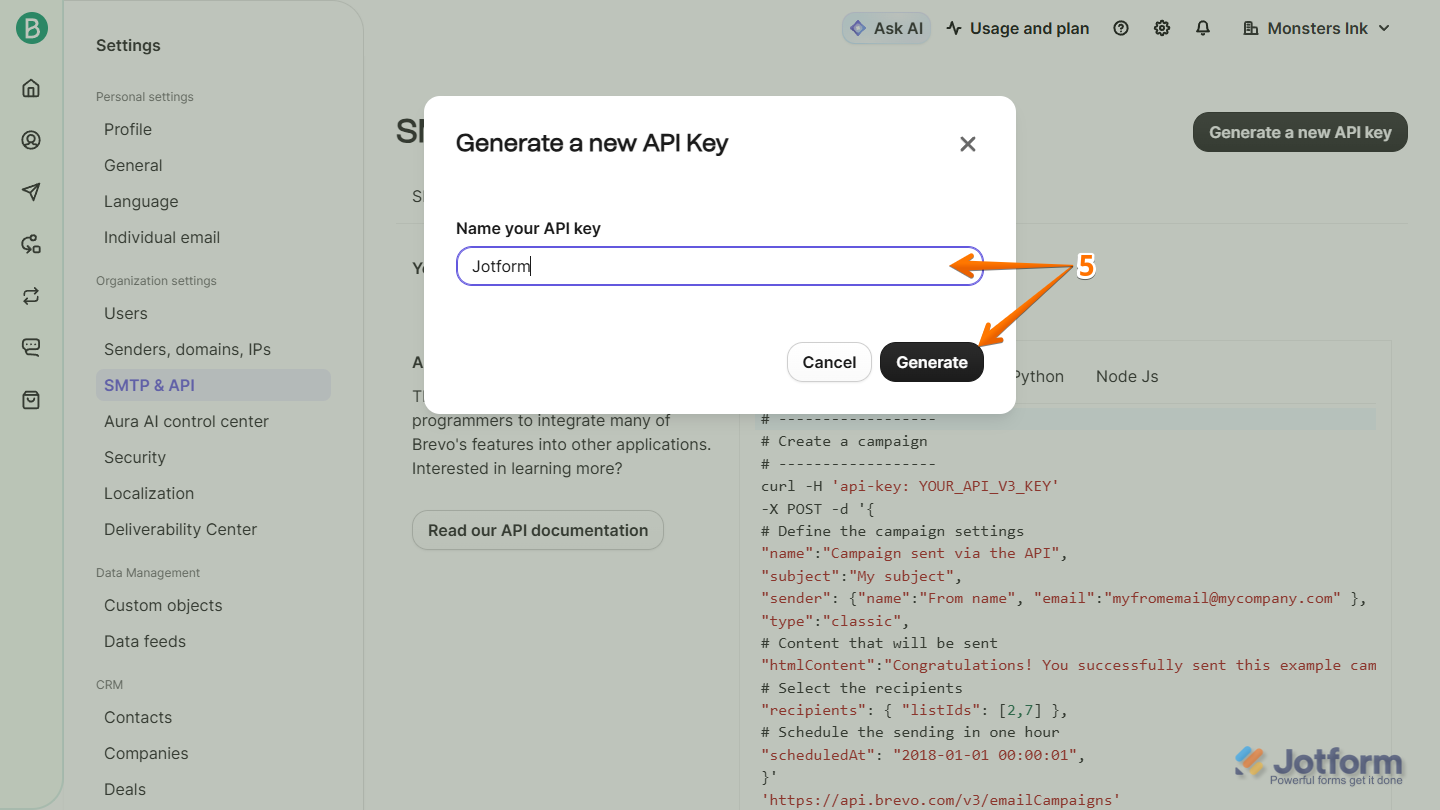
- In the Generate a New API Key window that pops up, enter a name for your API key and then click on Generate.
- Now, in the Your API Key window, click on the Copy icon next to your API key.
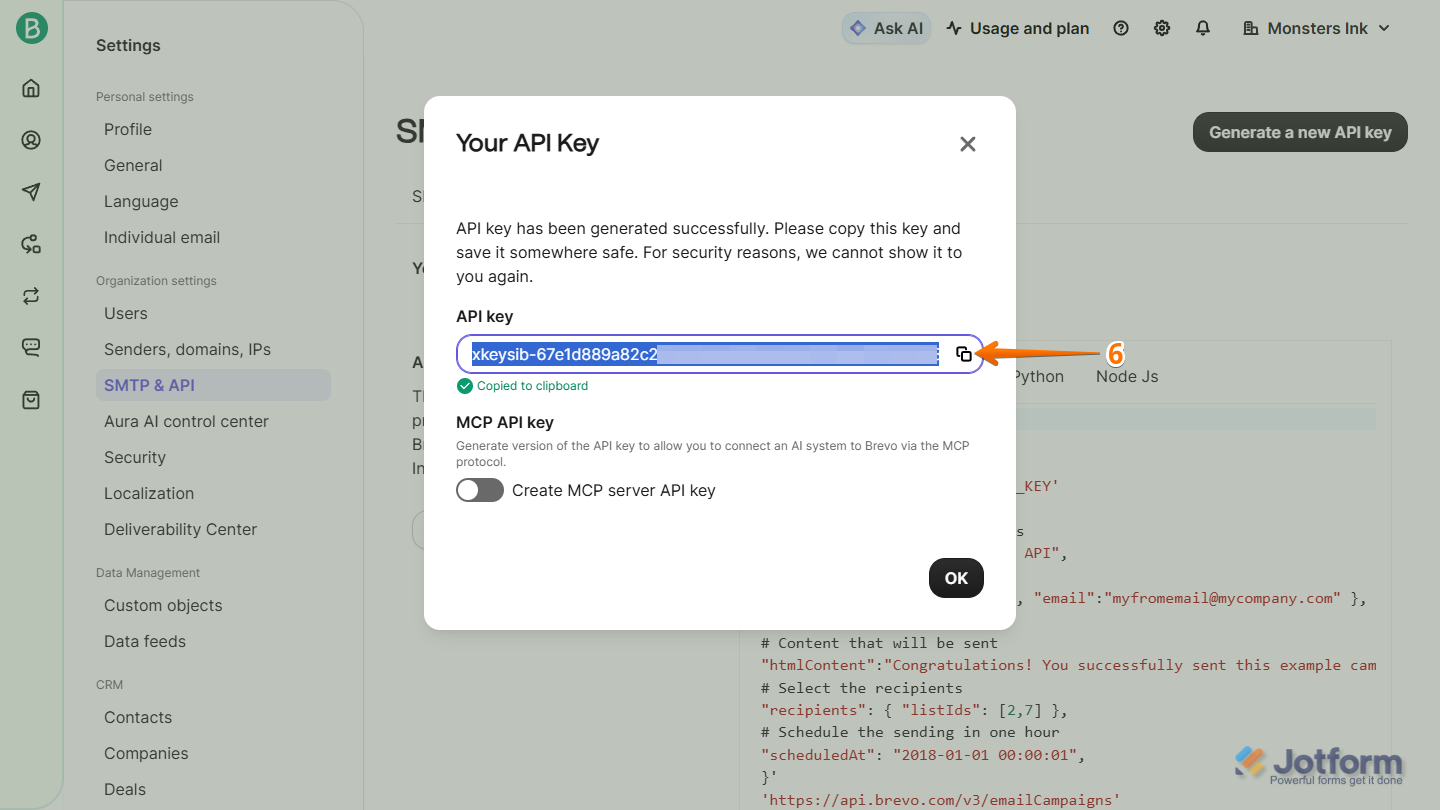
That’s all it takes to get your API key. Now, you’re ready to integrate your form with Brevo.
Note
Your API Key is shown only once, so keep it somewhere safe and easy to find. If you ever need to replace it, you can generate a new one.

Send Comment: