Jira is a powerful project management and issue-tracking tool that agile teams rely on to plan, track, and manage their work. When you integrate Jotform with Jira, form submissions can automatically turn into Jira issues—making it easy to capture bugs, feature requests, or tasks the moment they’re submitted. This removes the need for manual data entry, keeps everything organized in one place, and helps your team respond faster and work more efficiently.
Connecting your Jira Account
Whether you’re setting up a new form or updating an existing one, connecting your Jira account takes no time at all—here’s how:
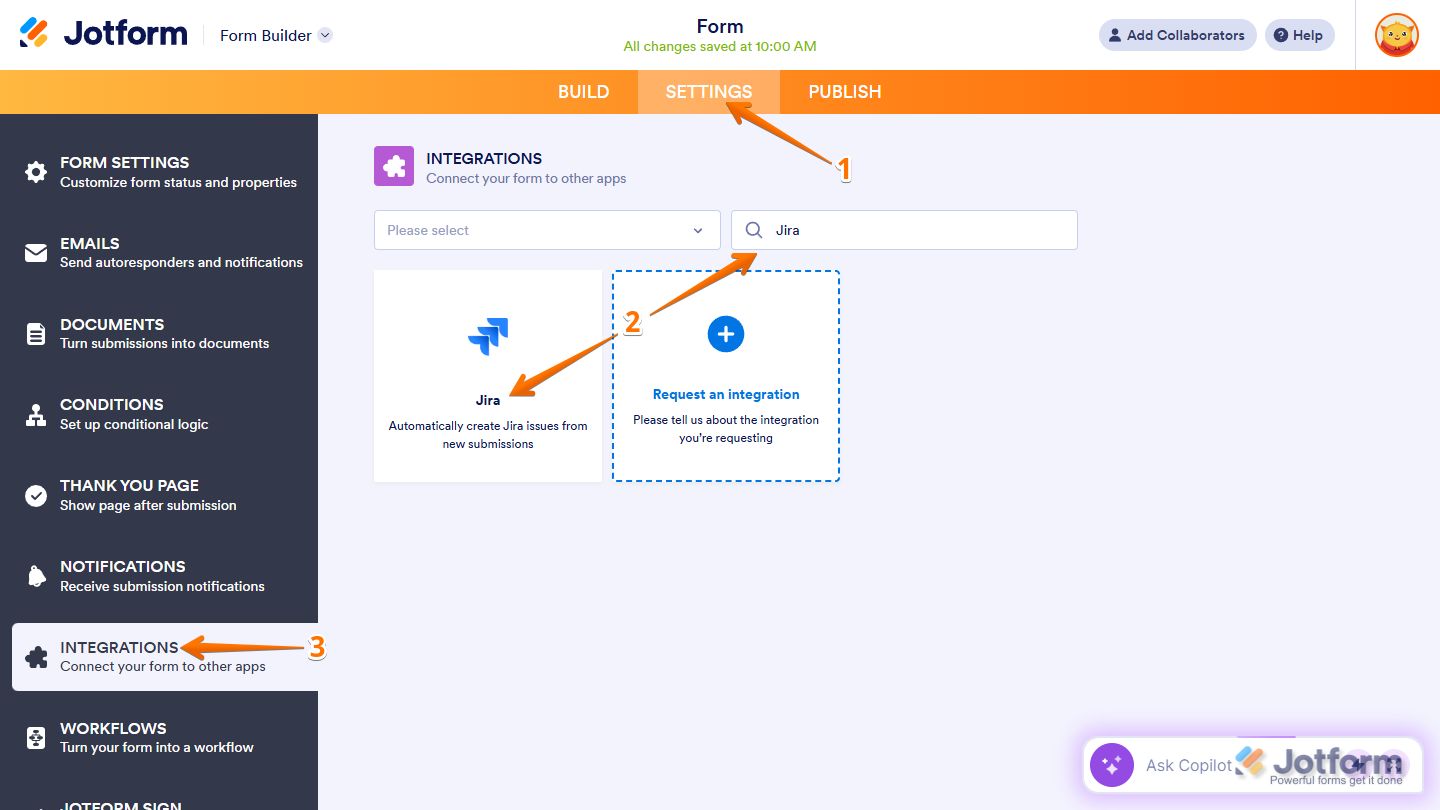
- In Form Builder, in the orange navigation bar at the top of the page, click on Settings.
- Then, in the menu on the left side of the page, click on Integrations.
- Now, in the Integrations section on the right, search for Jira and click on it.
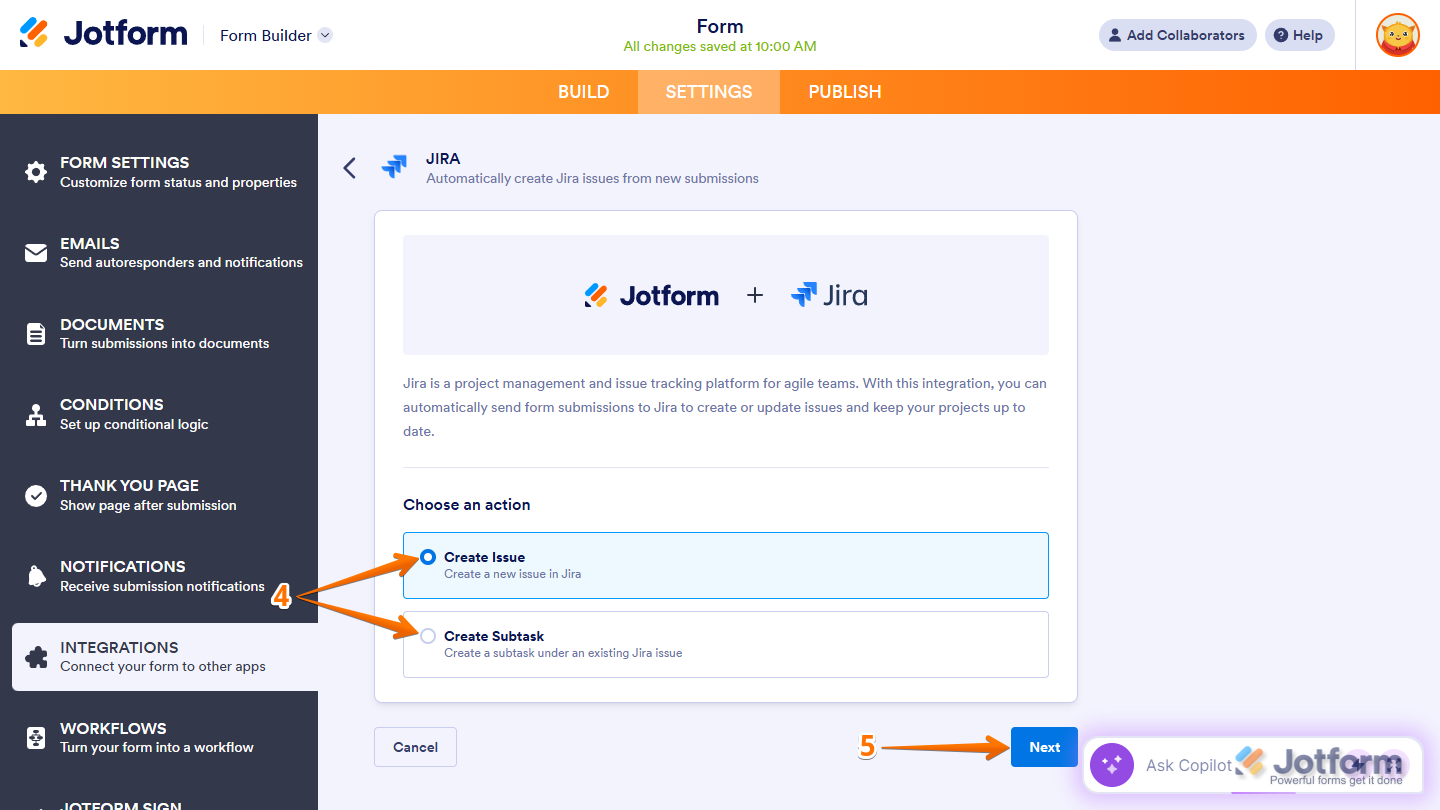
- In the Jira section, select one of the following actions:
- Create Issue — Automatically create a new Jira issue from a form submission to track bugs, requests, or tasks.
- Create Subtask — Automatically create a subtask under an existing Jira issue from a form submission, breaking work into smaller steps.
- Then, click on Next.
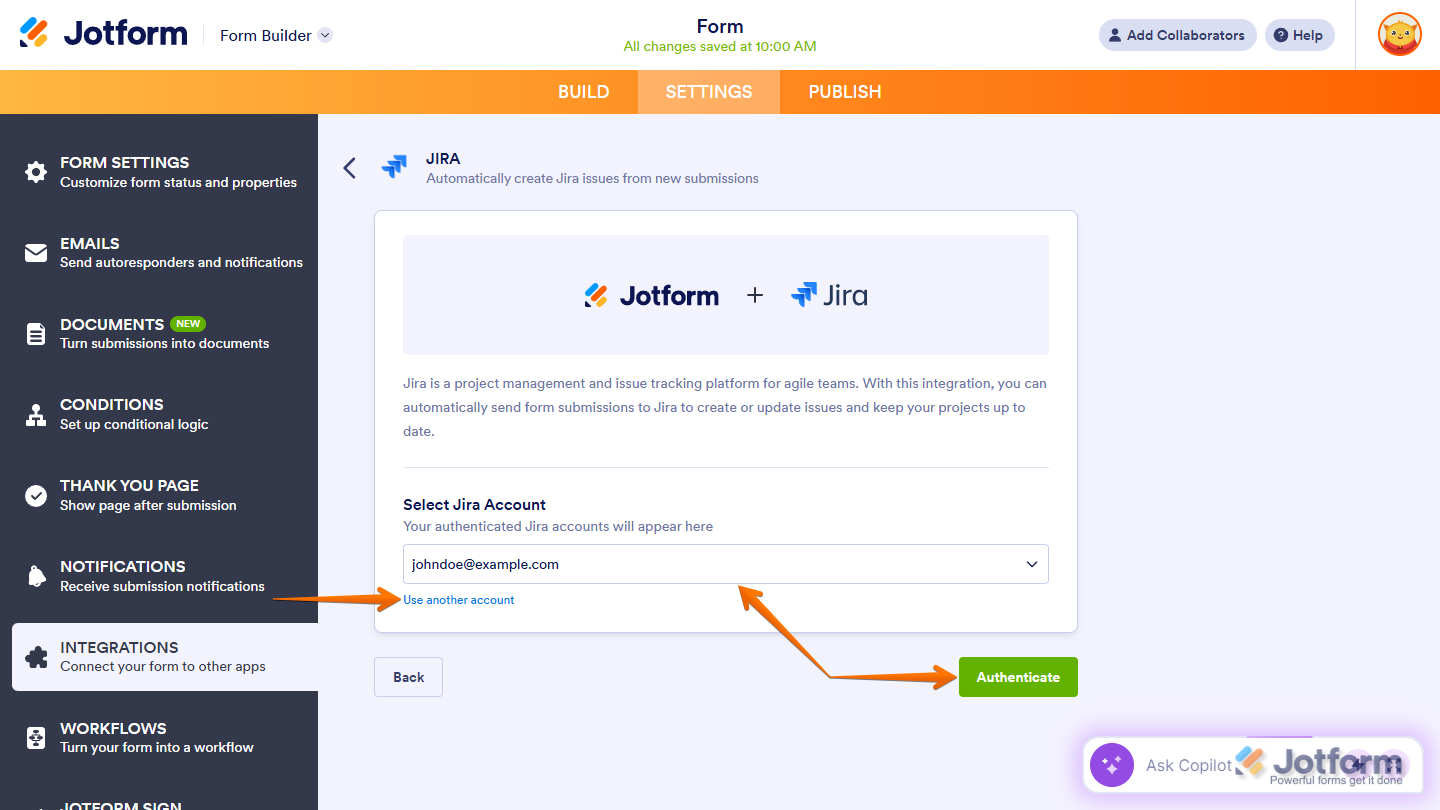
- Now, click on Authenticate. And then, in the pop-up window, log in to your Jira account.

If you’ve logged in before through one of your other forms, you can pick that Jira account from the dropdown, then click on Authenticate. To use a different one, click on Use Another Account.
That’s it. You’ve successfully connected your Jira account. Now, you can proceed with setting up the action you’ve chosen from the first window.
Creating an Issue
Setting up your form to create an issue in Jira takes only a minute—here’s how:
- After selecting Create Issue and authenticating your account, set up the following on the next screen:
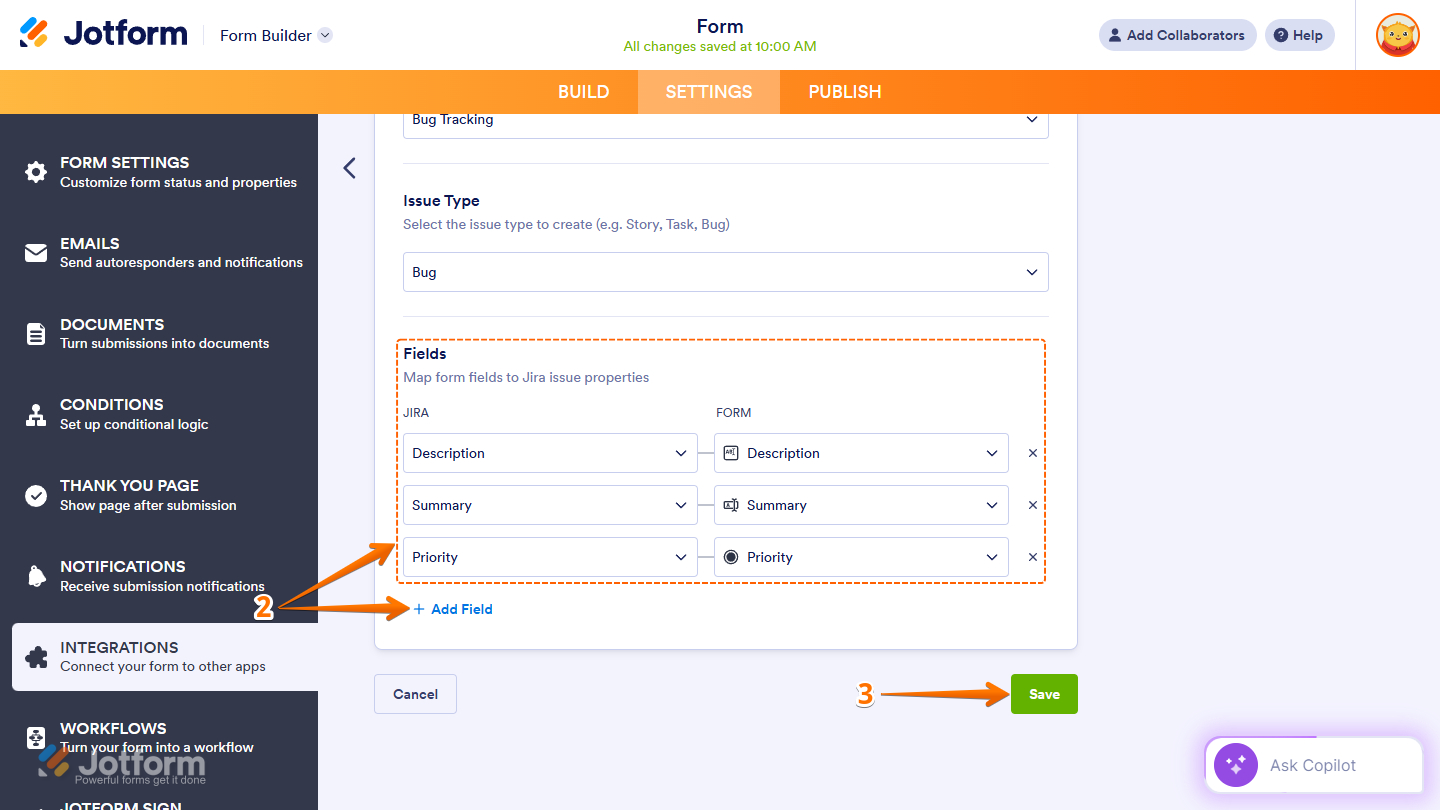
- Space — Select the Jira project where the issue will be created. This determines where the issue lives and which project settings, workflows, and permissions apply.
- Issue Type — Select the type of issue to create within the selected project, such as Bug, Task, or Story. The issue type defines the fields, workflow, and how the issue is tracked in Jira.
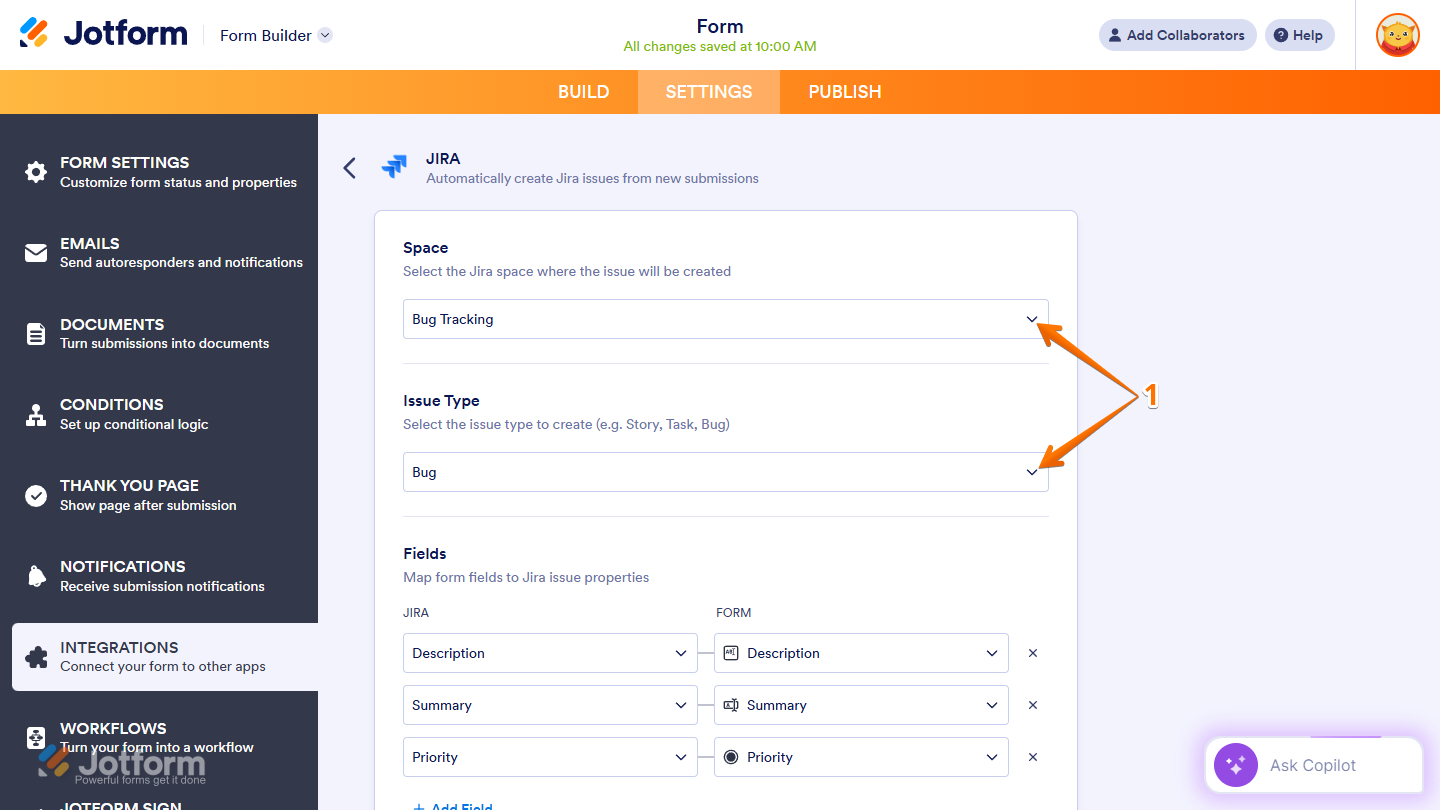
- Then, scroll down to the bottom and map your Jira fields on the left to your Jotform form fields on the right. Click on Add Field at the bottom of this section to map more fields.
- Now, click on Save to complete the integration.
Creating a Subtask
Setting up your form to create a subtask in Jira takes no time at all—here’s how:
- After selecting Create Subtask and authenticating your account, set up the following on the next screen:
- Project — Select the Jira project where the issue or subtask will be created. This defines the project’s workflows, fields, and permissions.
- Parent Issue — Choose the existing Jira issue to which the subtask will belong. The subtask will be linked under this parent issue for better organization and tracking.
- Subtask Type — Select the type of subtask to create within the project. This determines how the subtask is categorized and which fields and workflow apply.
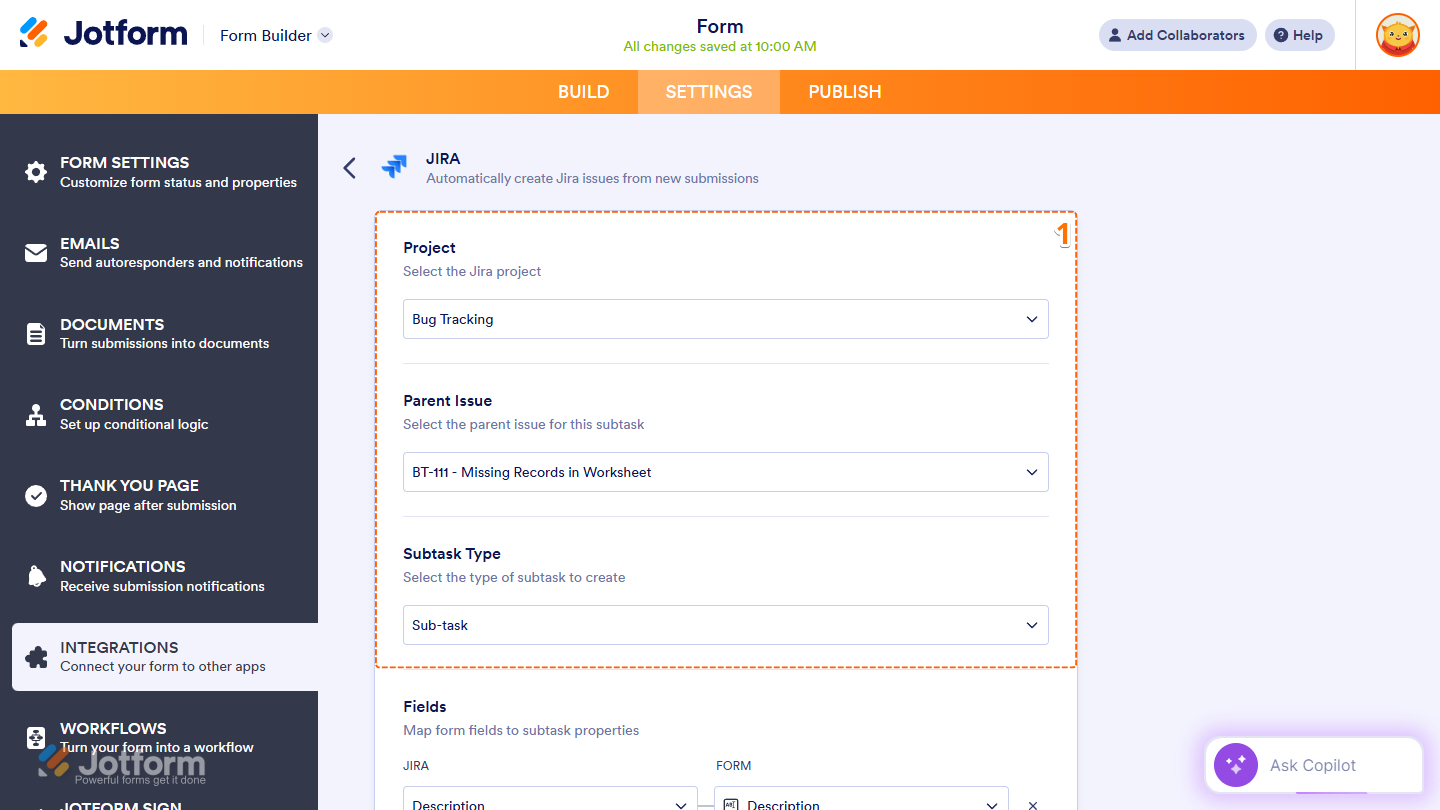
- Then, scroll down to the bottom and map your Jira fields on the left to your Jotform form fields on the right. Click on Add Field at the bottom of this section to map more fields.
- Once you’re done, click on Save to complete the integration.

Managing Jira Integration Actions
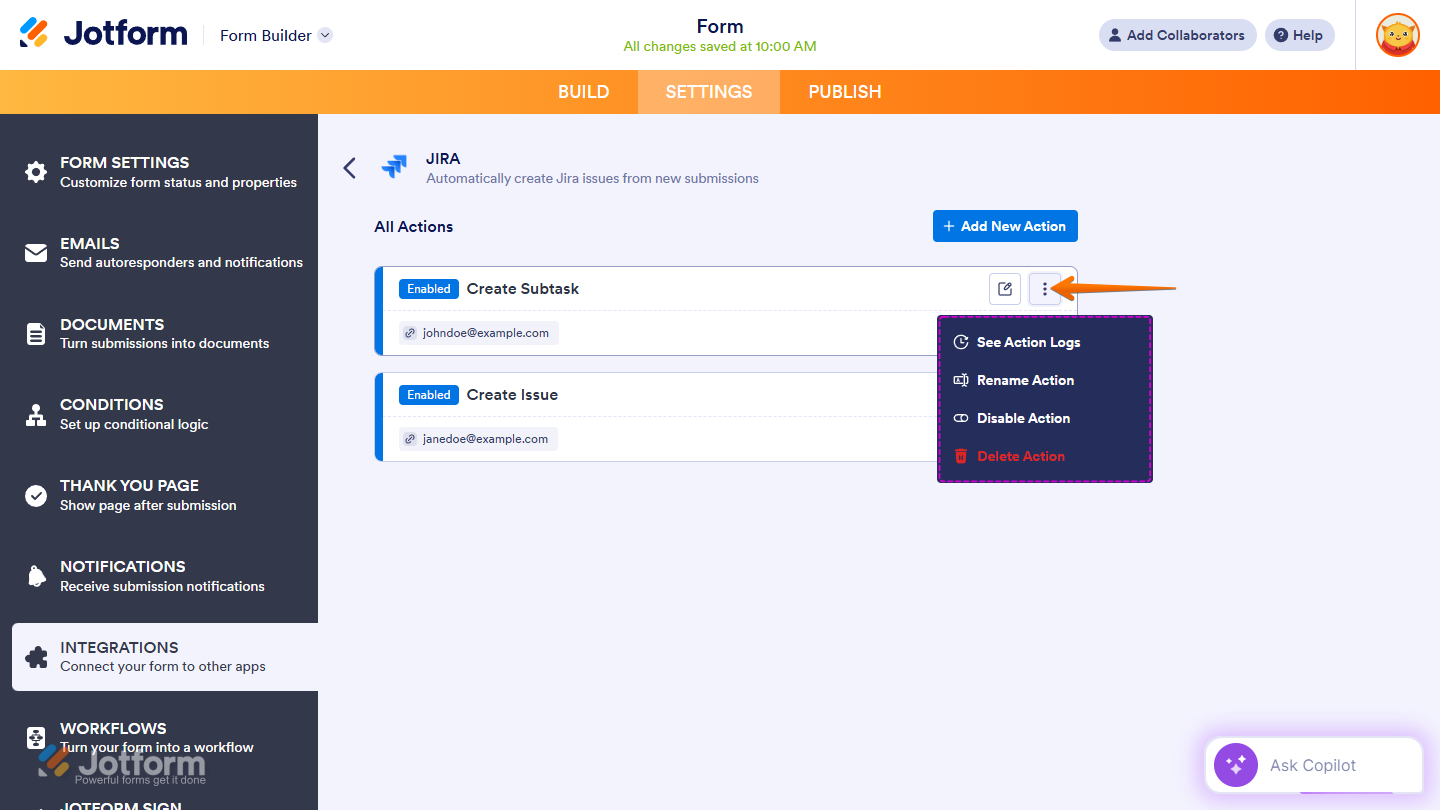
After saving the integration, you’ll see the list of actions you’ve set up and the Add New Action button on the main page. Hover your mouse over an action and click on the Three Dots icon next to it on the right side to access more options:
- See Action Logs — View successful and failed runs, helpful for troubleshooting.
- Rename Action — Change the action’s title.
- Disable Action — Temporarily stop the integration from sending data.
- Delete Action — Remove the action from your form.
That’s it! Your form is now successfully connected to Jira. From now on, every form submission can automatically create a Jira issue or a subtask—helping your team stay organized, move faster, and act on incoming data with less manual work.

Send Comment: