WhatsApp Business in Workflows lets you send messages at specific stages of a process using information generated by previous steps. Beyond form fields, you can personalize your messages with approval results, assigned-user details, lookup results, calculated values, AI Agent outputs, and other workflow data, making it easier to send relevant, context-aware messages at the right time.
Note
The following are required before setting up the integration:
- A WhatsApp Business account connected to a Meta Business account.
- Permission to connect the account and send messages using its approved templates.
- At least one Meta-approved WhatsApp message template. If you have not yet created a template, see Creating and Managing WhatsApp Business Message Templates before continuing.
- A Phone Number field in your form, if you want each message sent to a different recipient.
Integrating WhatsApp Business in your workflow takes no time at all—here’s how:
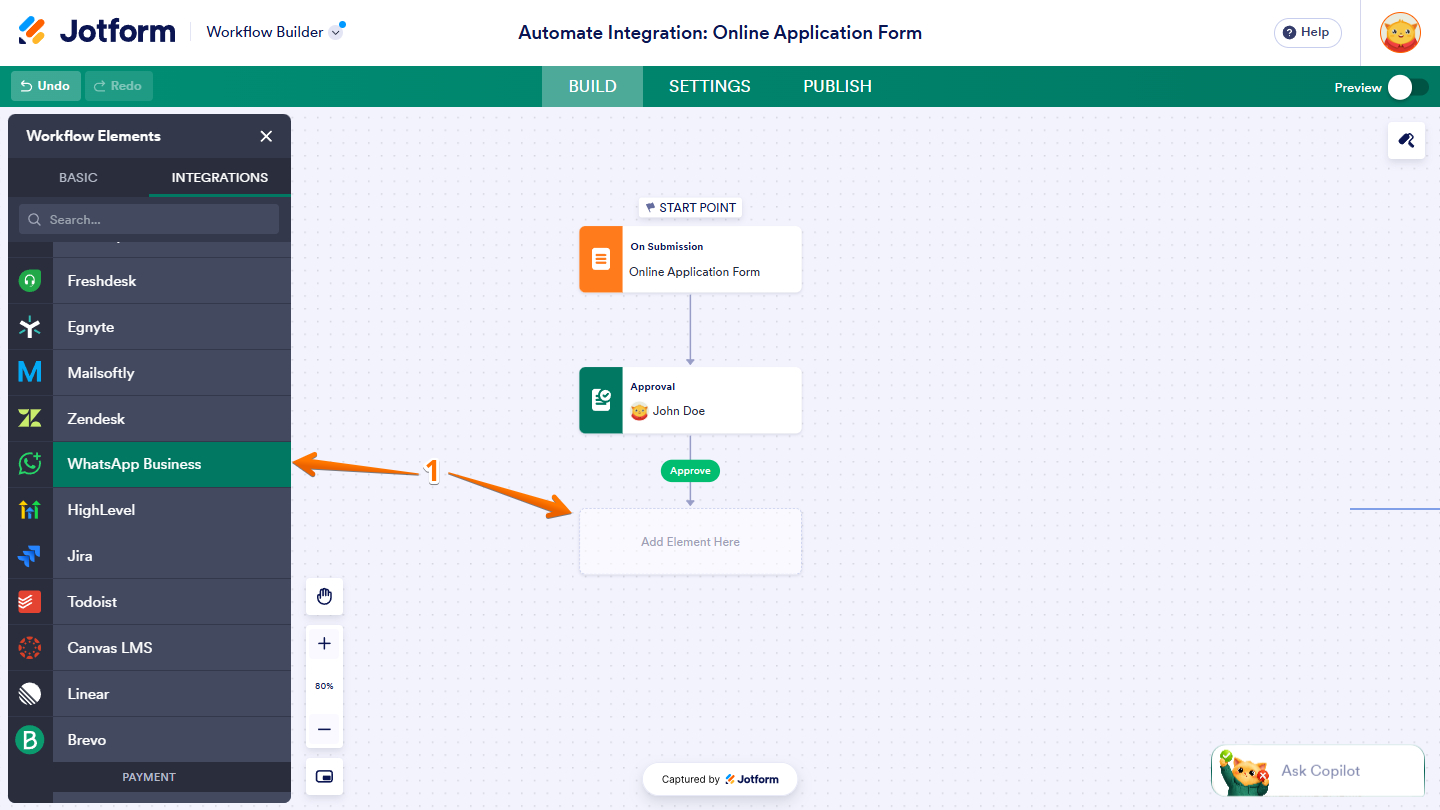
- In Workflow Builder, under the Integrations tab of the Workflow Elements menu on the left, drag and drop the WhatsApp Business element to the Add Element Here placeholder on your workflow connections.
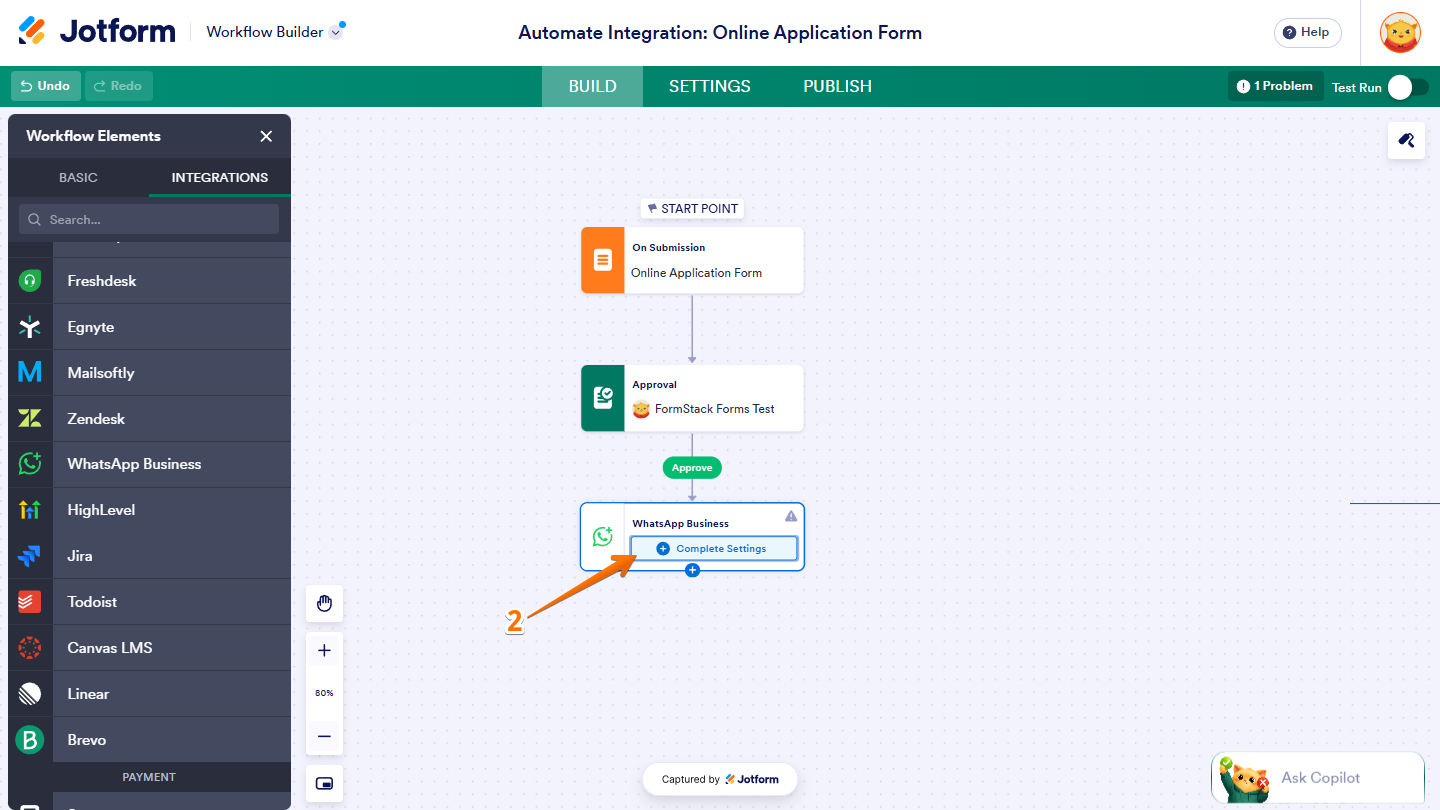
- Then, in the WhatsApp Business element, click on Complete Settings.
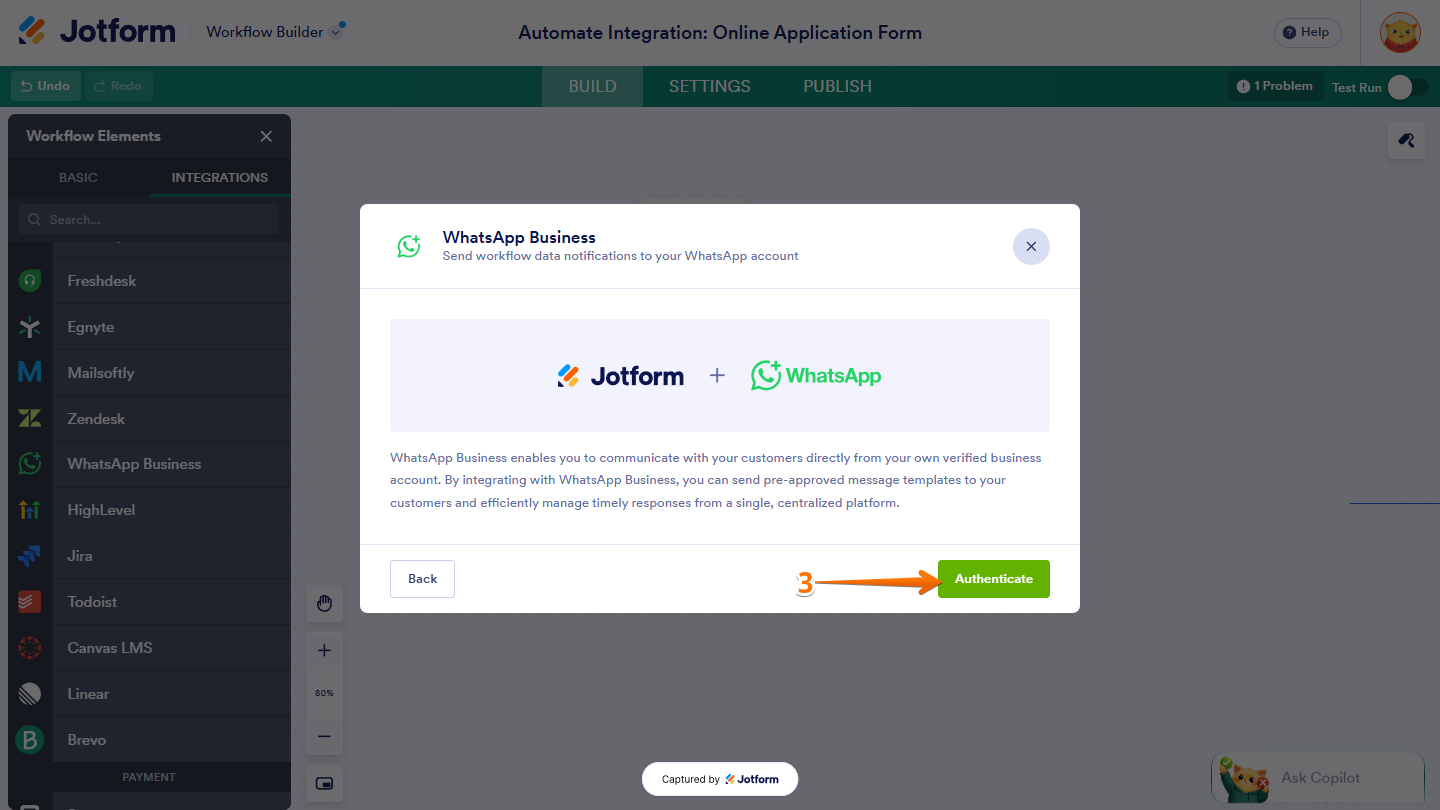
- Next, click on Authenticate.
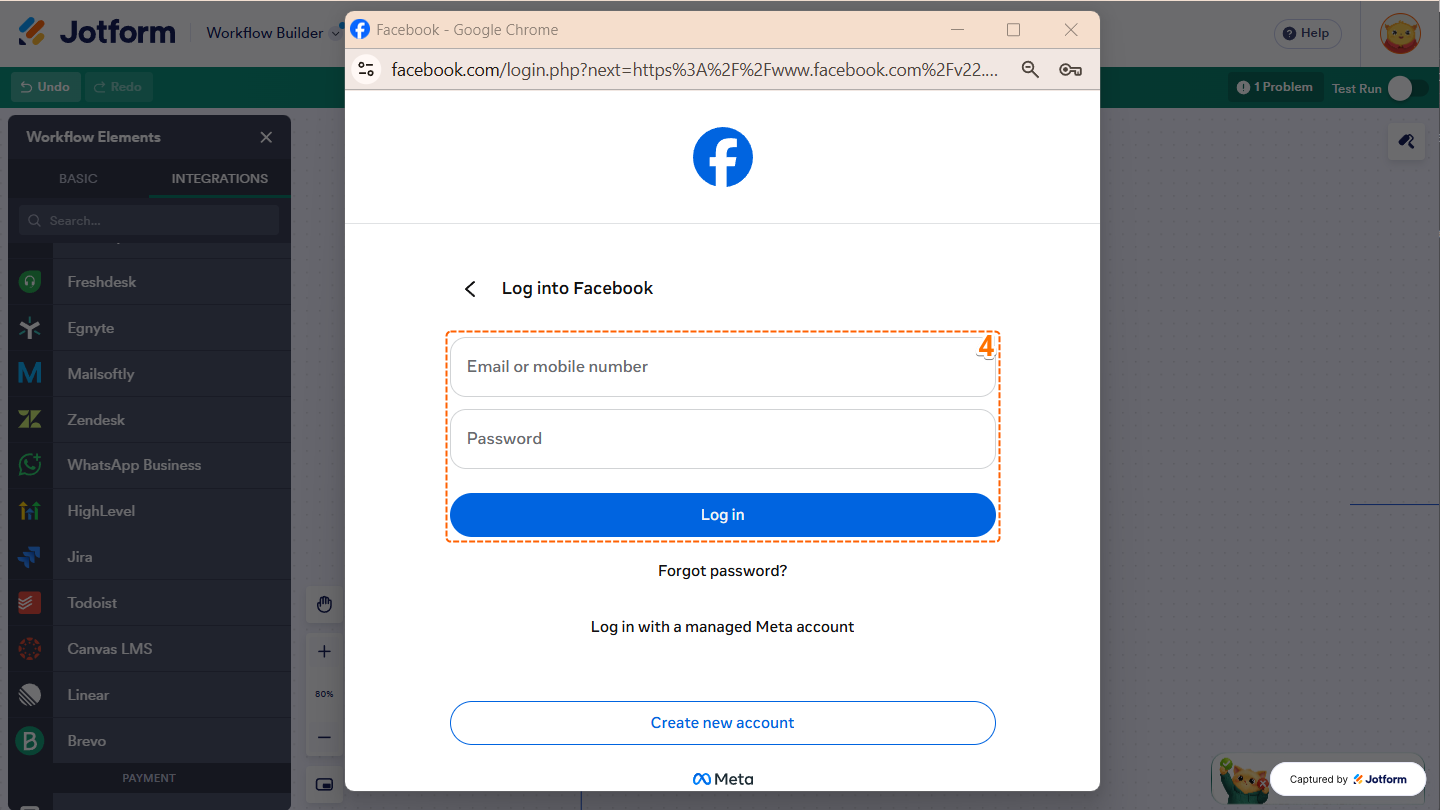
- Then, in the Log in to Facebook window that comes up, enter your Email or Mobile Number and Password, then click on Log in.
- Next, click on Continue.
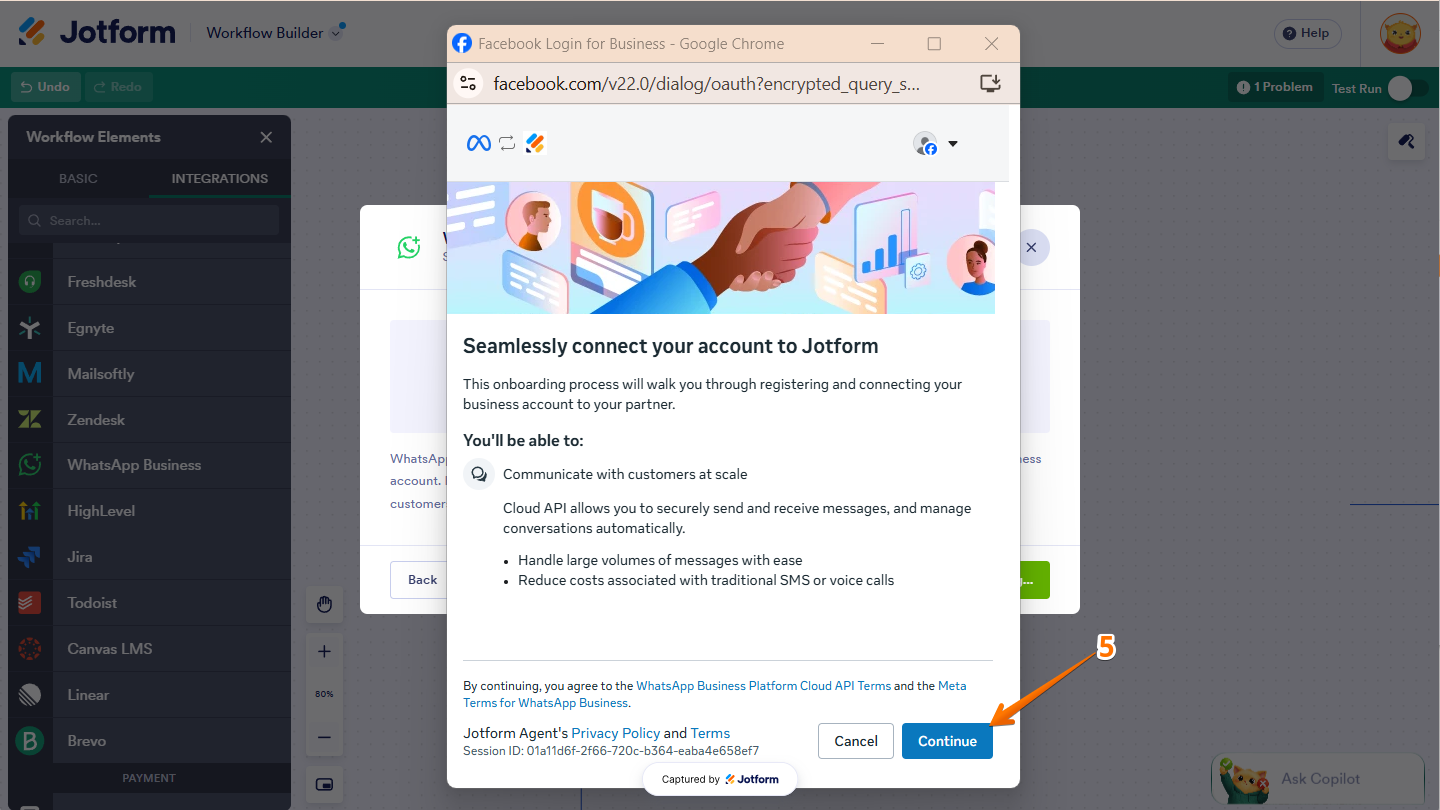
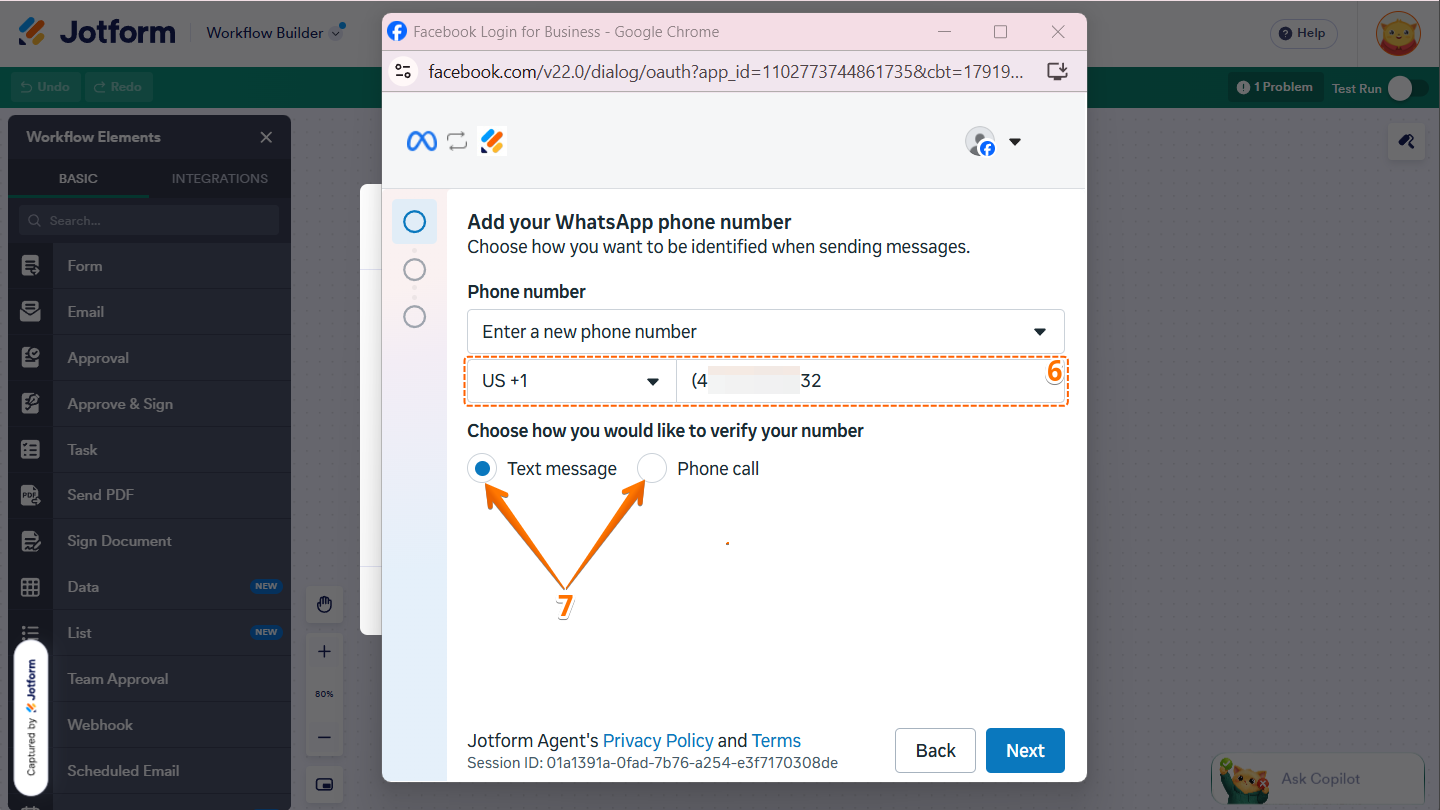
- Now, in the Add Your WhatsApp Phone Number window, under the Phone Number section, select your Country Code in the Dropdown menu, then enter your phone number in the Phone Number box.
- Then, in the Choose How You Would Like To Verify Your Number section, select Text Message to verify your phone number through SMS, or Phone Call to verify it by accepting a call from Meta.
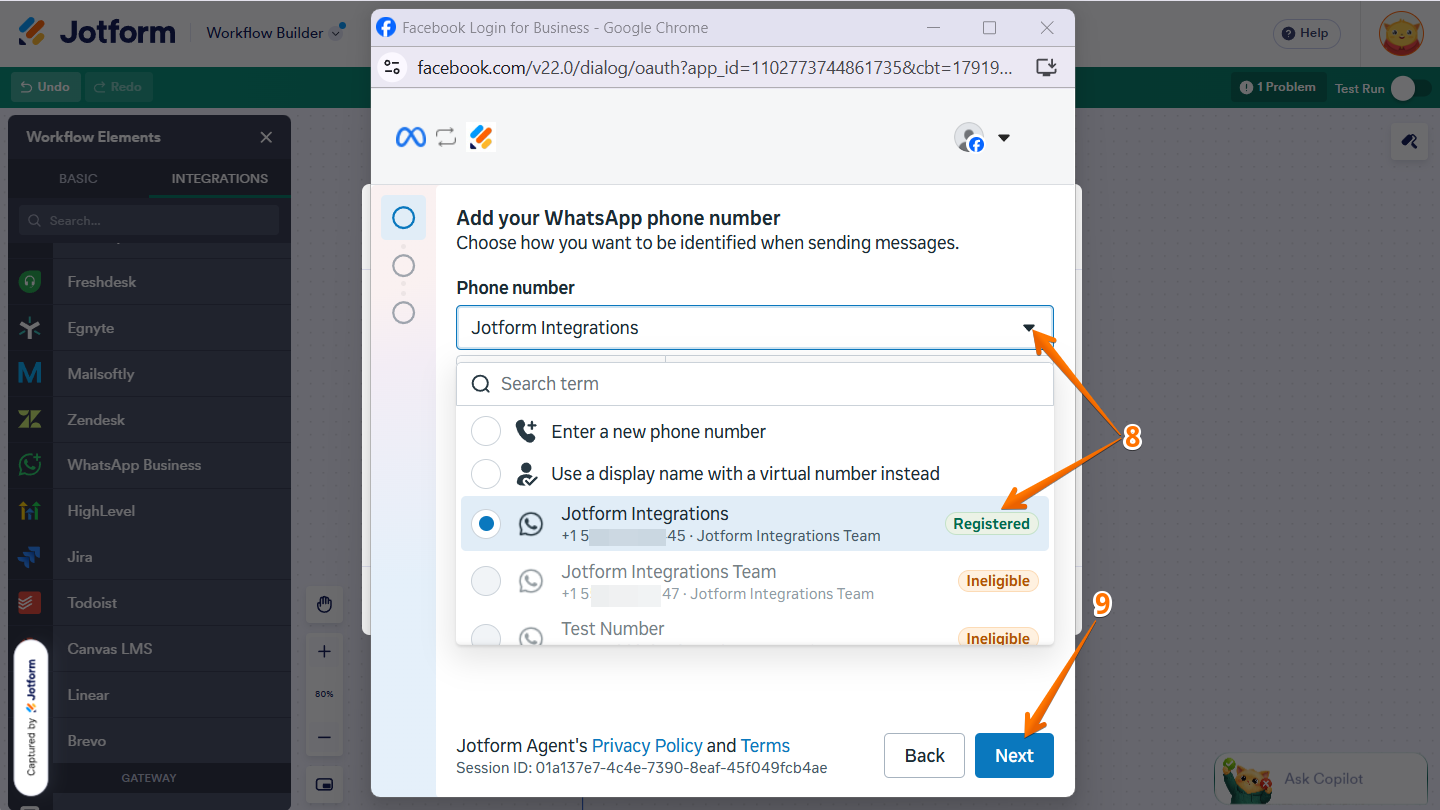
- Or, click on the Downward Arrow icon on the right side of the Phone Number section, then select a verified number
- Then, click on Next.
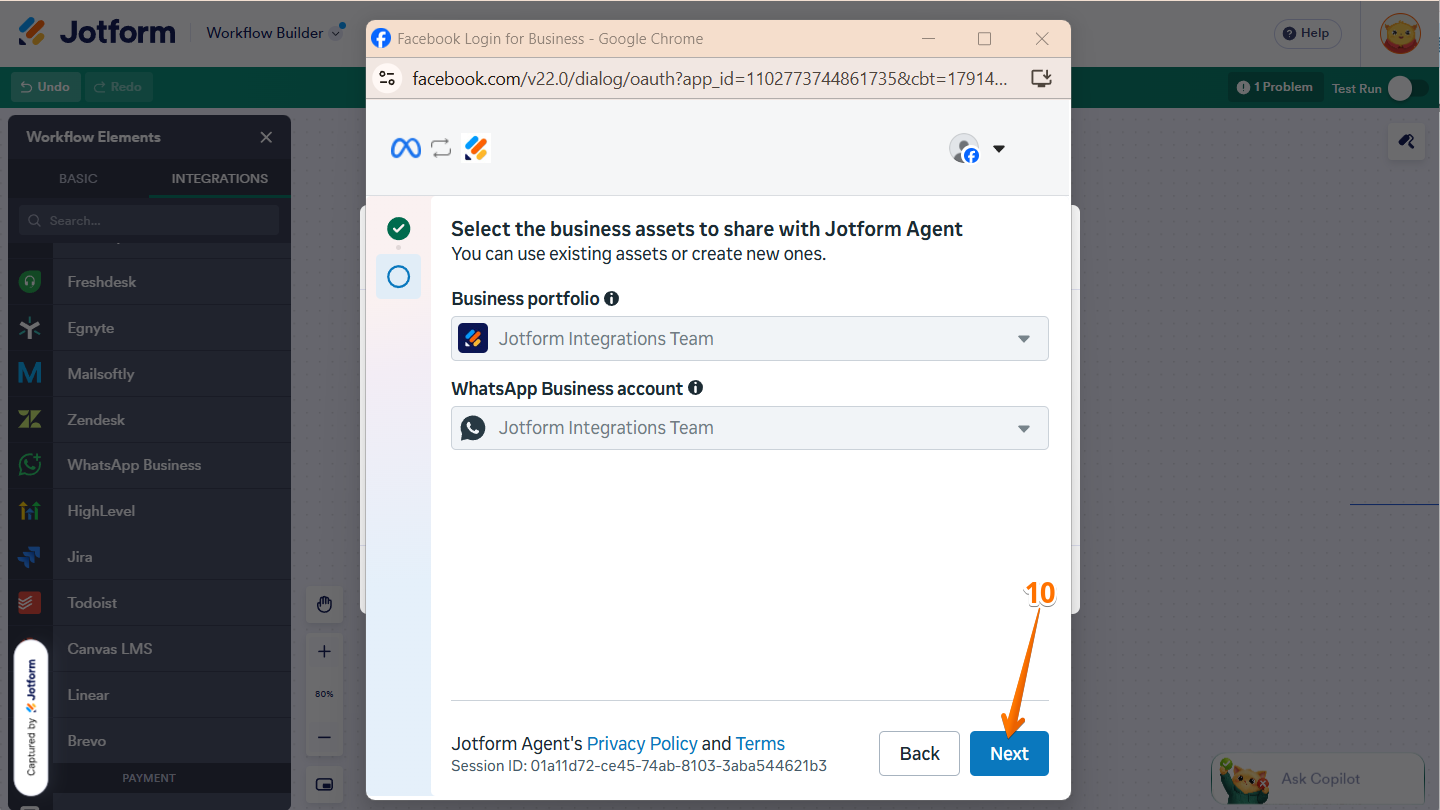
- Then, in the Select the Business Assets To Share With Jotform Agent window, click on Next.
Note
The Business Portfolio and WhatsApp Business Account dropdown menus are automatically populated based on your Meta and WhatsApp settings.
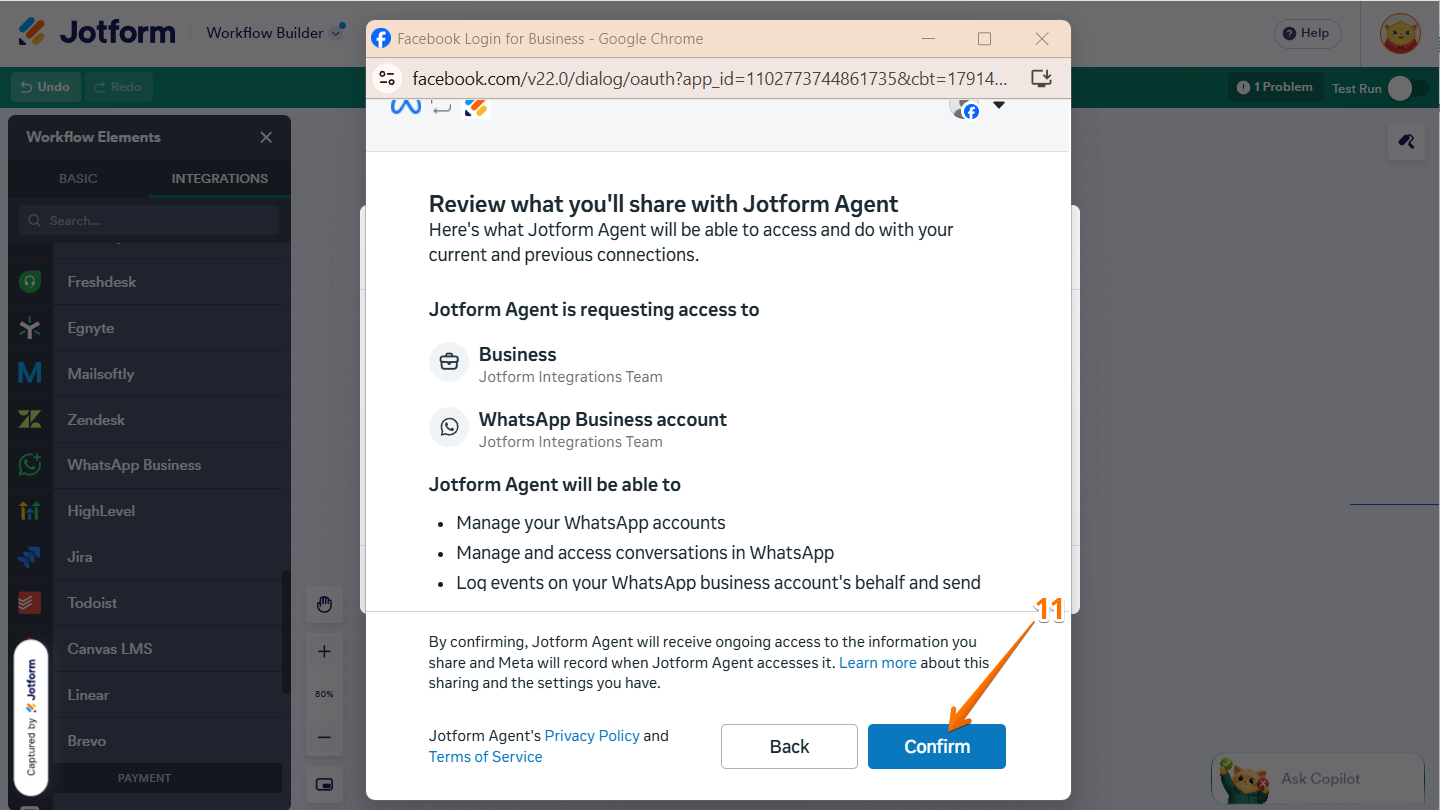
- Next, click on Confirm.
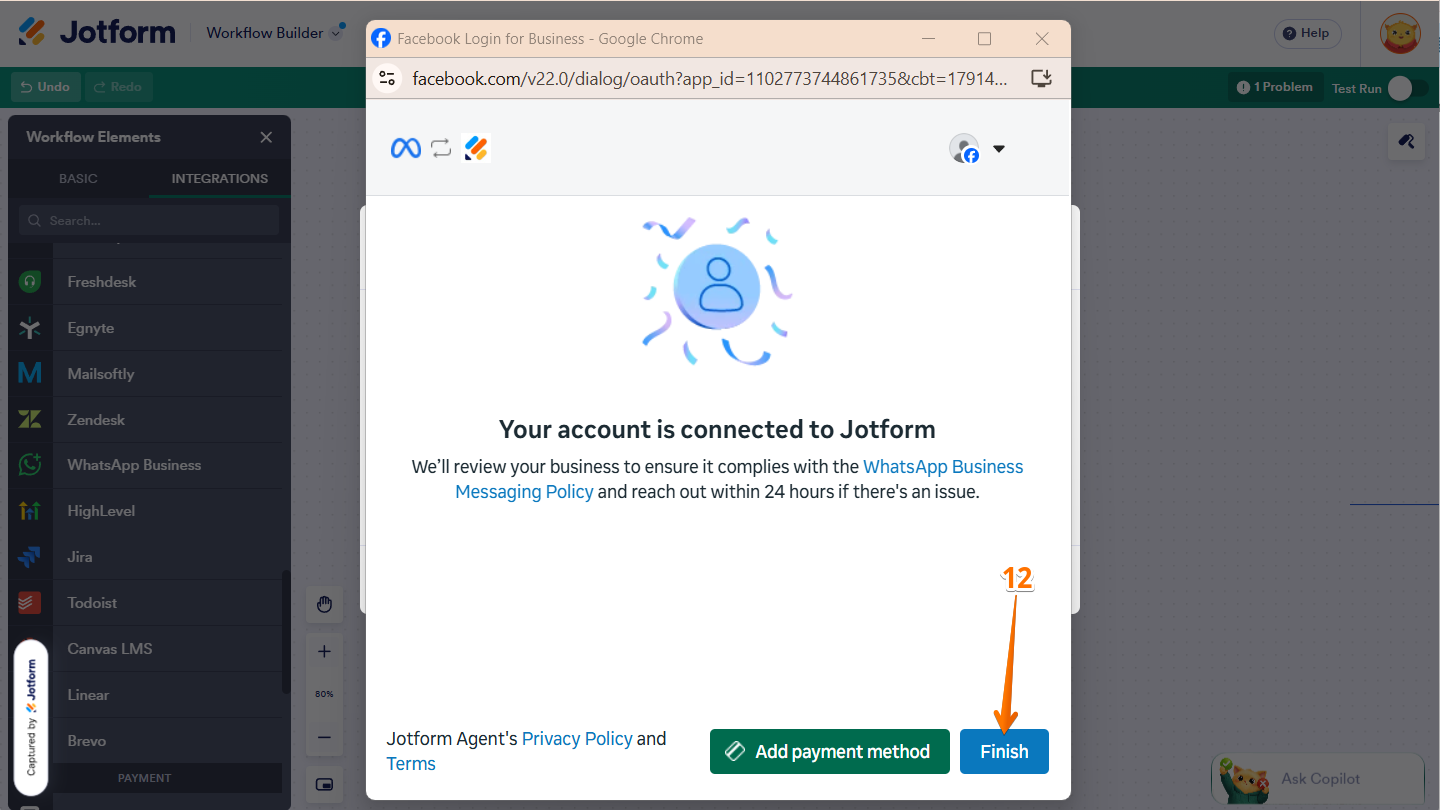
- Now, click on Finish.
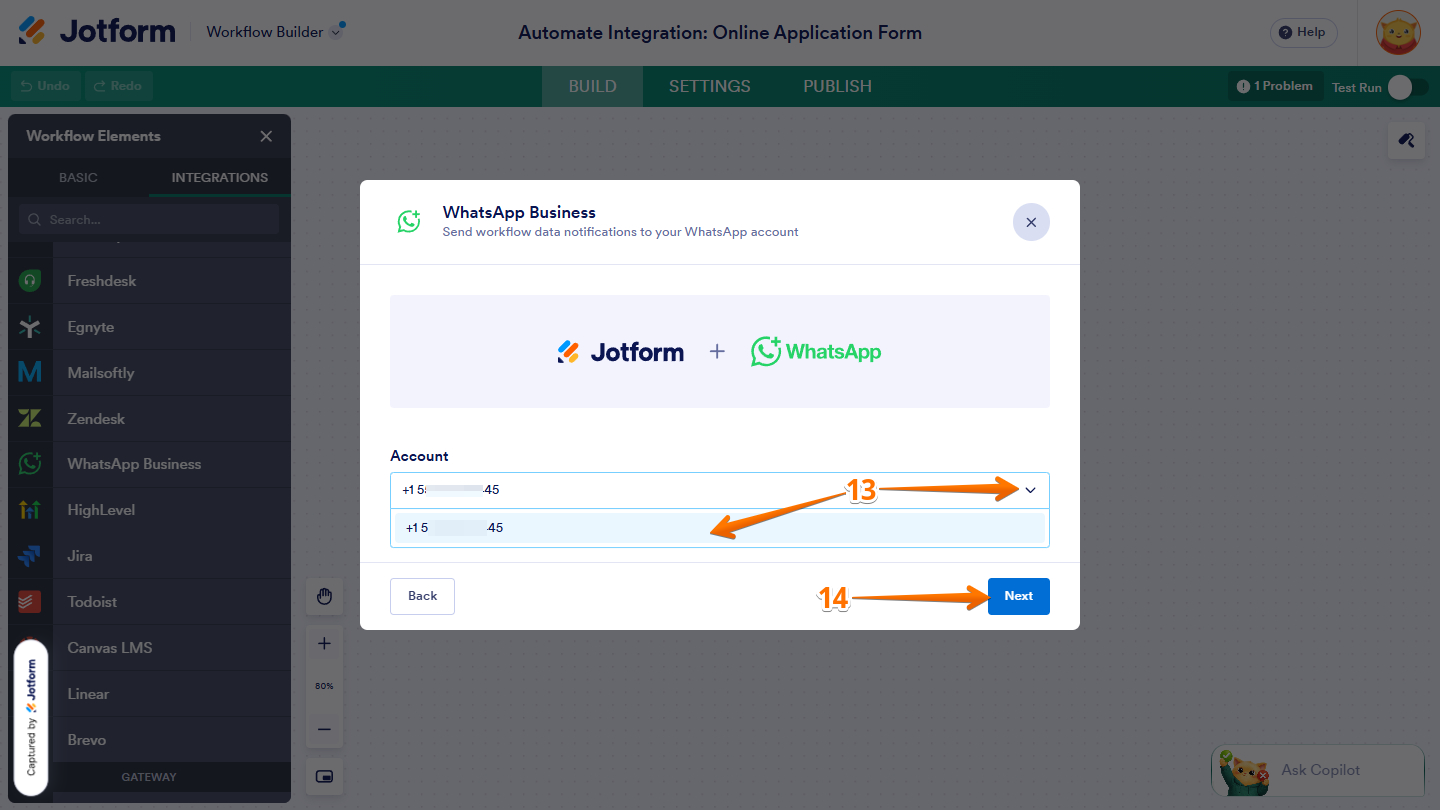
- If you’ve logged in before through one of your other forms, click on the Downward Arrow icon, and in the Dropdown menu that comes up, select that WhatsApp Number.
- Then, click on Next.
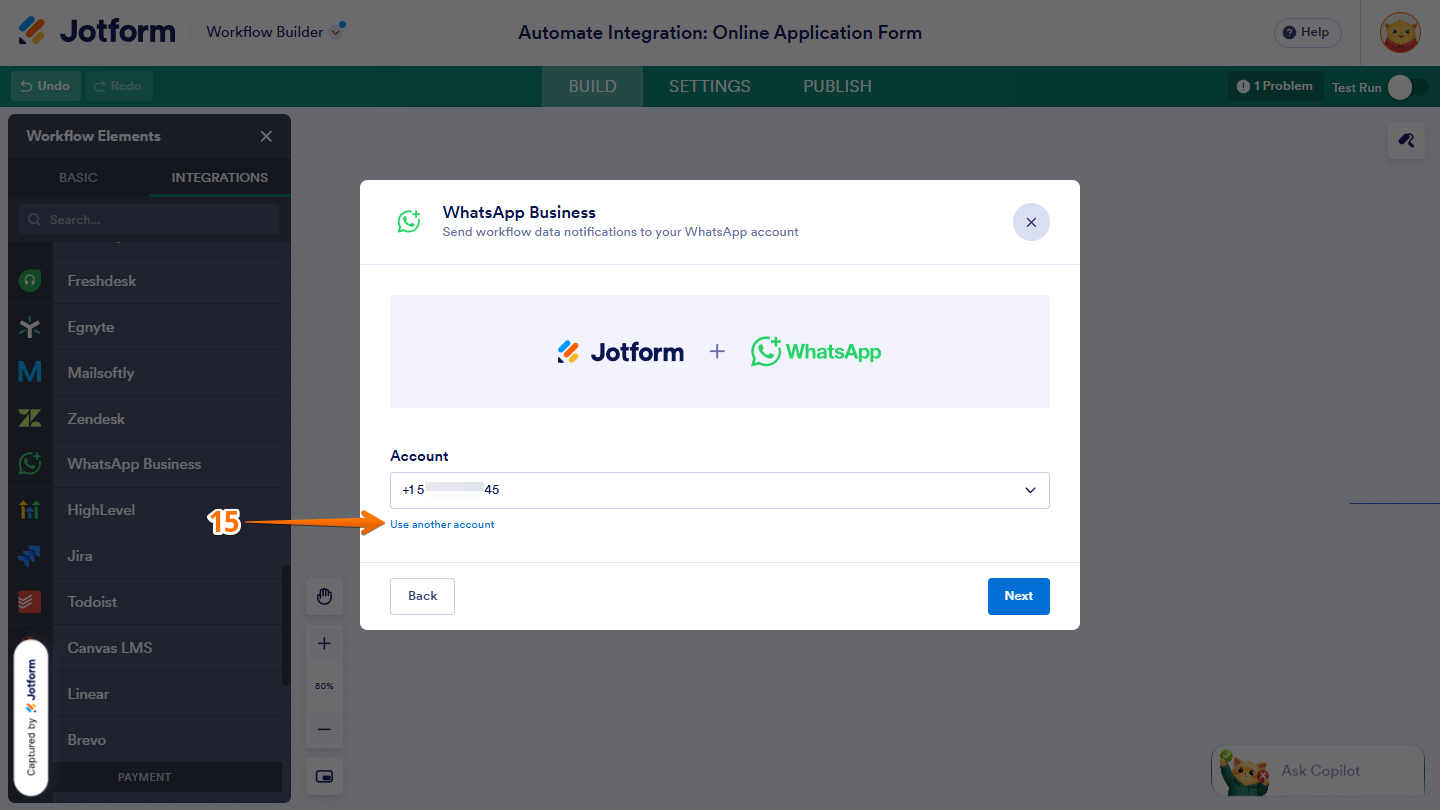
- Or, to use a different one, click on Use Another Account below the dropdown.
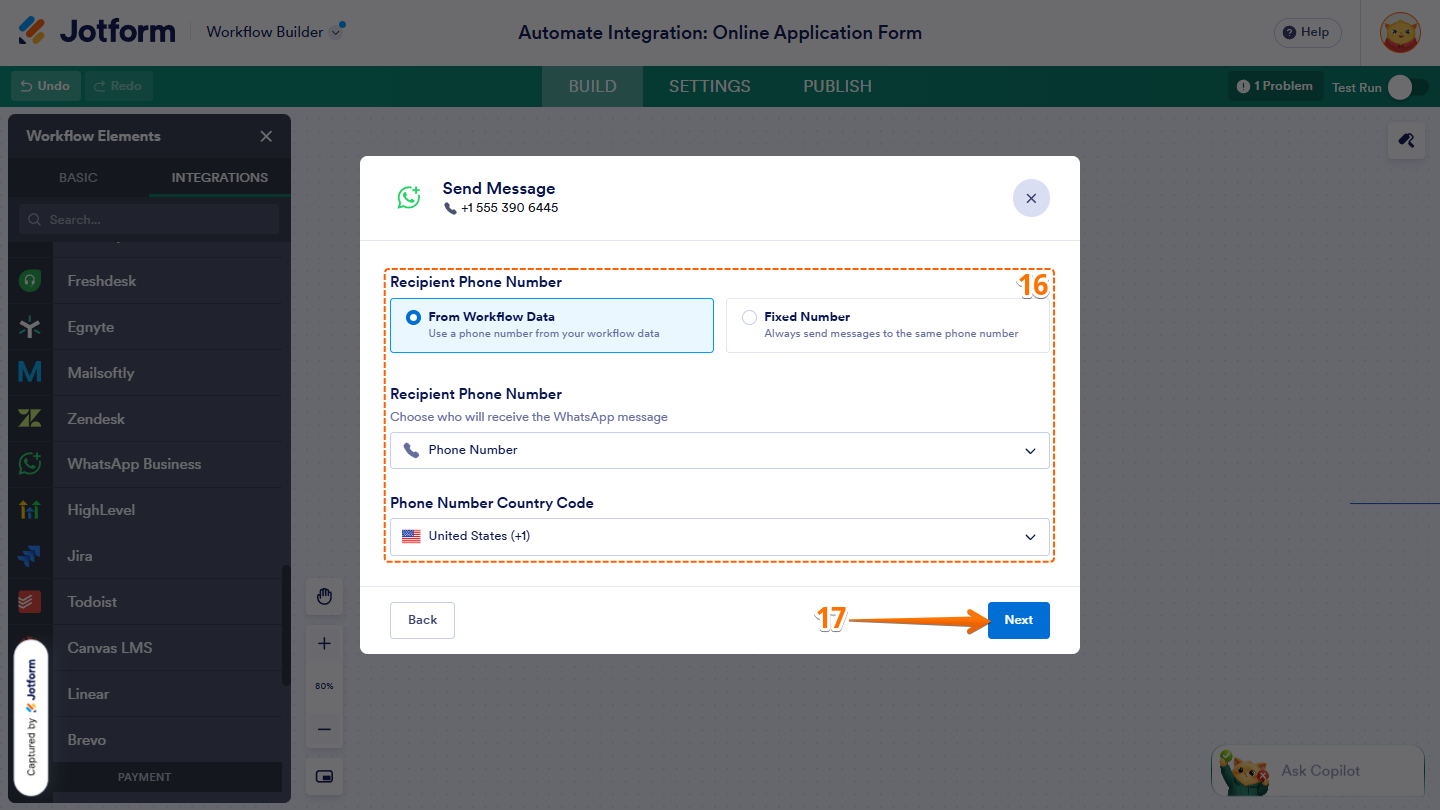
- In the Send Message window, set up these things:
- Recipient Phone Number — Select whether to use a Phone Number field from your form or a fixed phone number as the recipient.
- Recipient Phone Number (Field) — Select the Phone Number field that contains the number where the WhatsApp message will be sent.
- Phone Number Country Code — Select the country code for the recipient’s phone number.
- Then, click on Next.
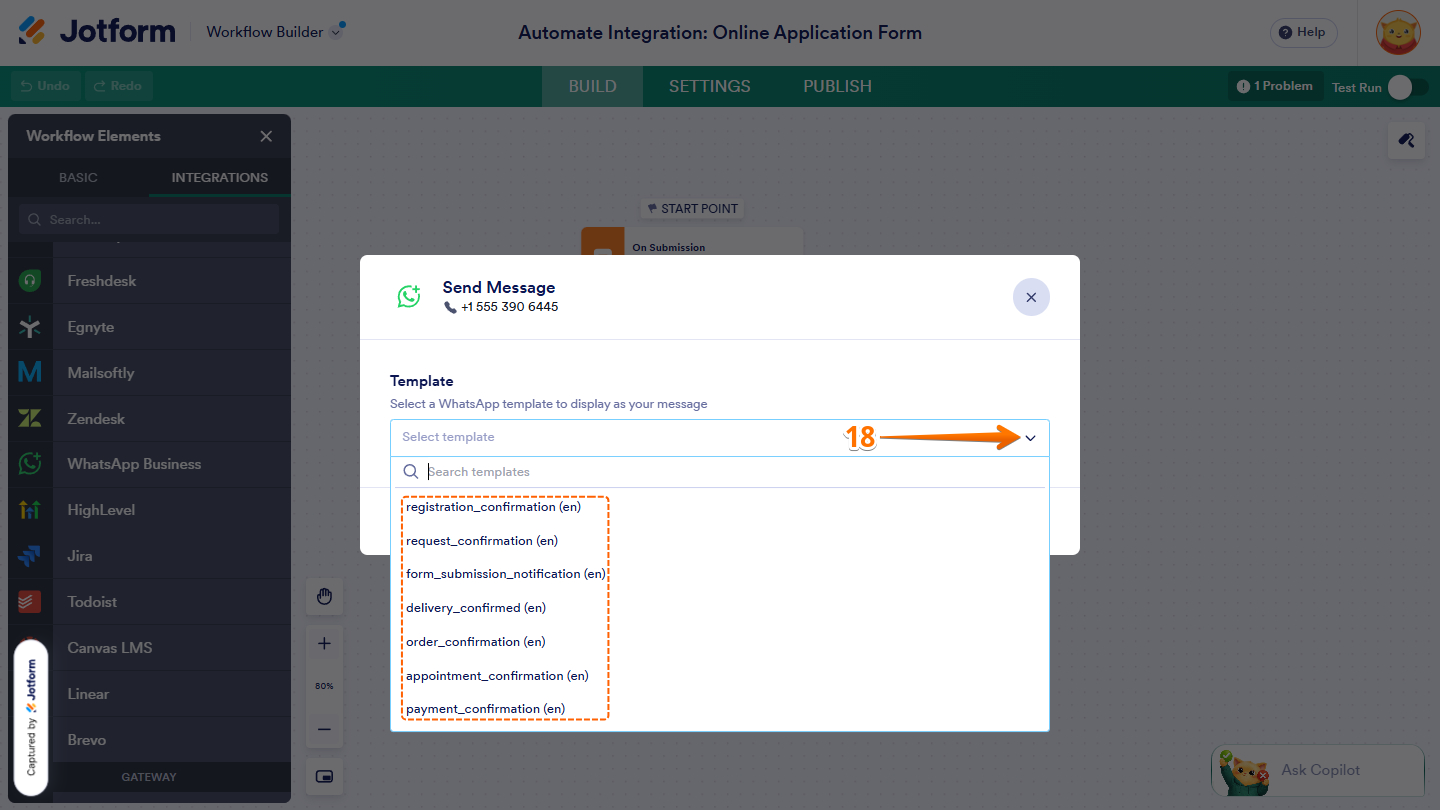
- Next, click on the Downward Arrow icon on the right side of the Template, and in the Dropdown menu that opens, select a WhatsApp template to display as your message.
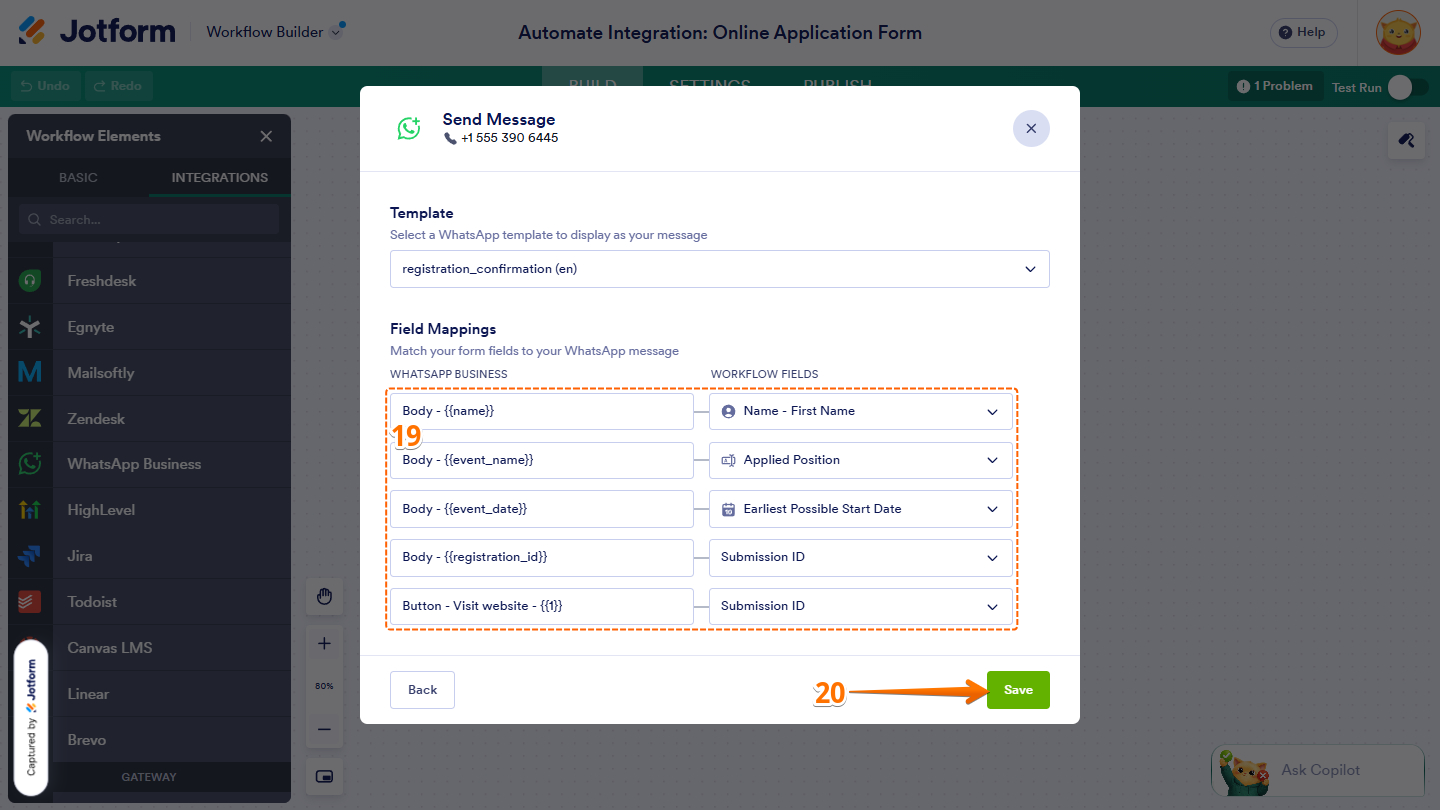
- Now, under Field Mappings, match your WhatsApp Business fields on the left to your Workflow fields on the right.
- Once everything’s set, click on Save.
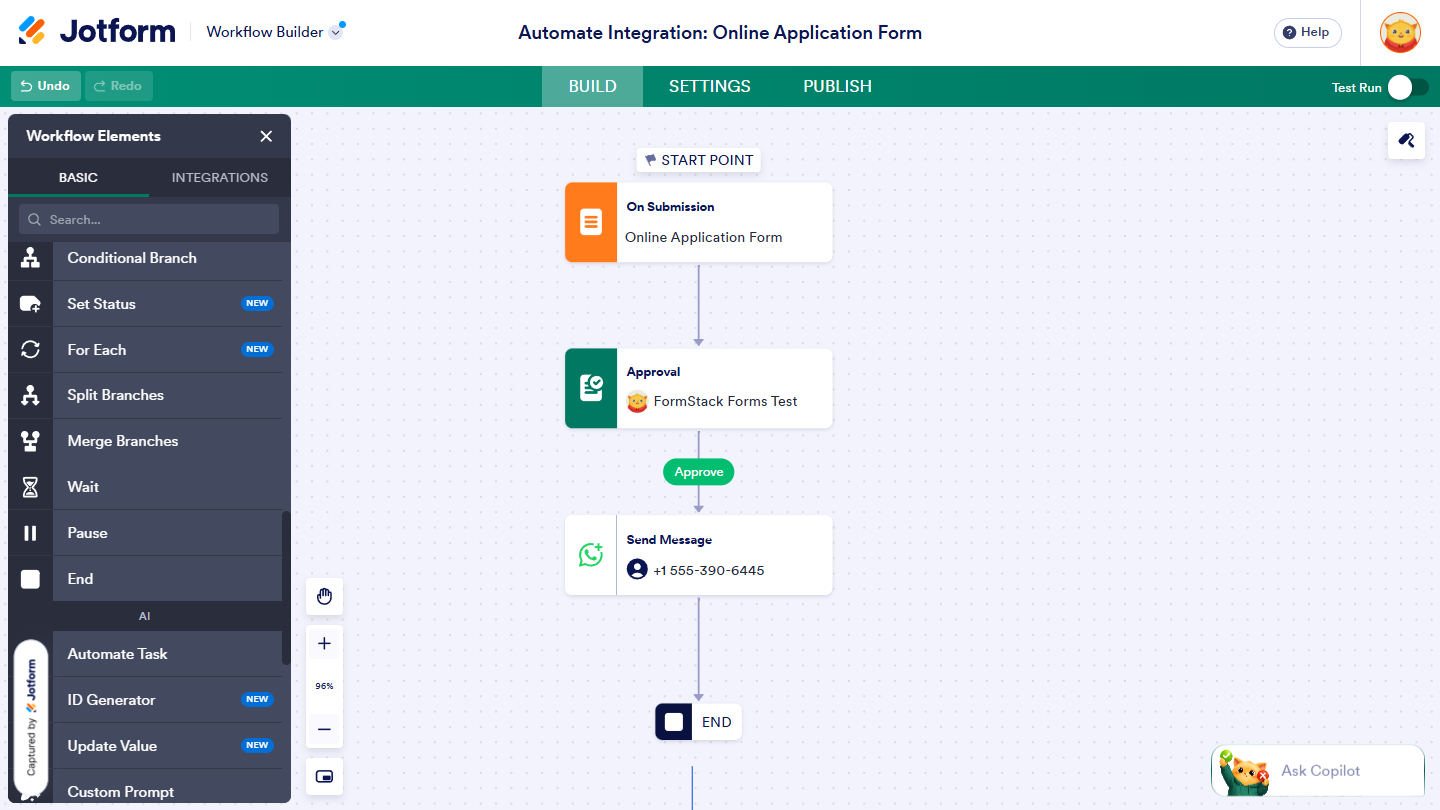
That’s it! Your workflow is now set up with WhatsApp Business. When the workflow reaches the WhatsApp Business action, it will send your configured message using the information and outputs from the preceding workflow steps. This makes it easy to keep your clients, team members, or other recipients informed as your workflow progresses.

Send Comment: