Jotform’s Enterprise Organization helps Admins transfer forms and data from move standard Jotform accounts into their organization’s Enterprise setup. Through Account Migration flow, standard Jotform account owners can review invitation to migrate their account and decide whether and when to migrate.
Here’s what account owners can do to complete Account Migration:
- Review FAQ — Check the information provided in the migration request before proceeding.
- Manage Their Plan — Keep their paid plan or downgrade to Starter plan.
- Choose When to Migrate — Schedule the migration for later or start it right away.
- Accept or Decline the Request — Confirm or decline the request, or return to the Self Migration flow later through their account settings.
Getting Ready for Account Migration
An Enterprise admin starts the Account Migration by sending an invitation from the admin console. Once the invitation is sent, the Standard account owner receives a notification with the migration details and can review the request before deciding how to proceed. Here’s how Admin send an invitation for Account Migration:
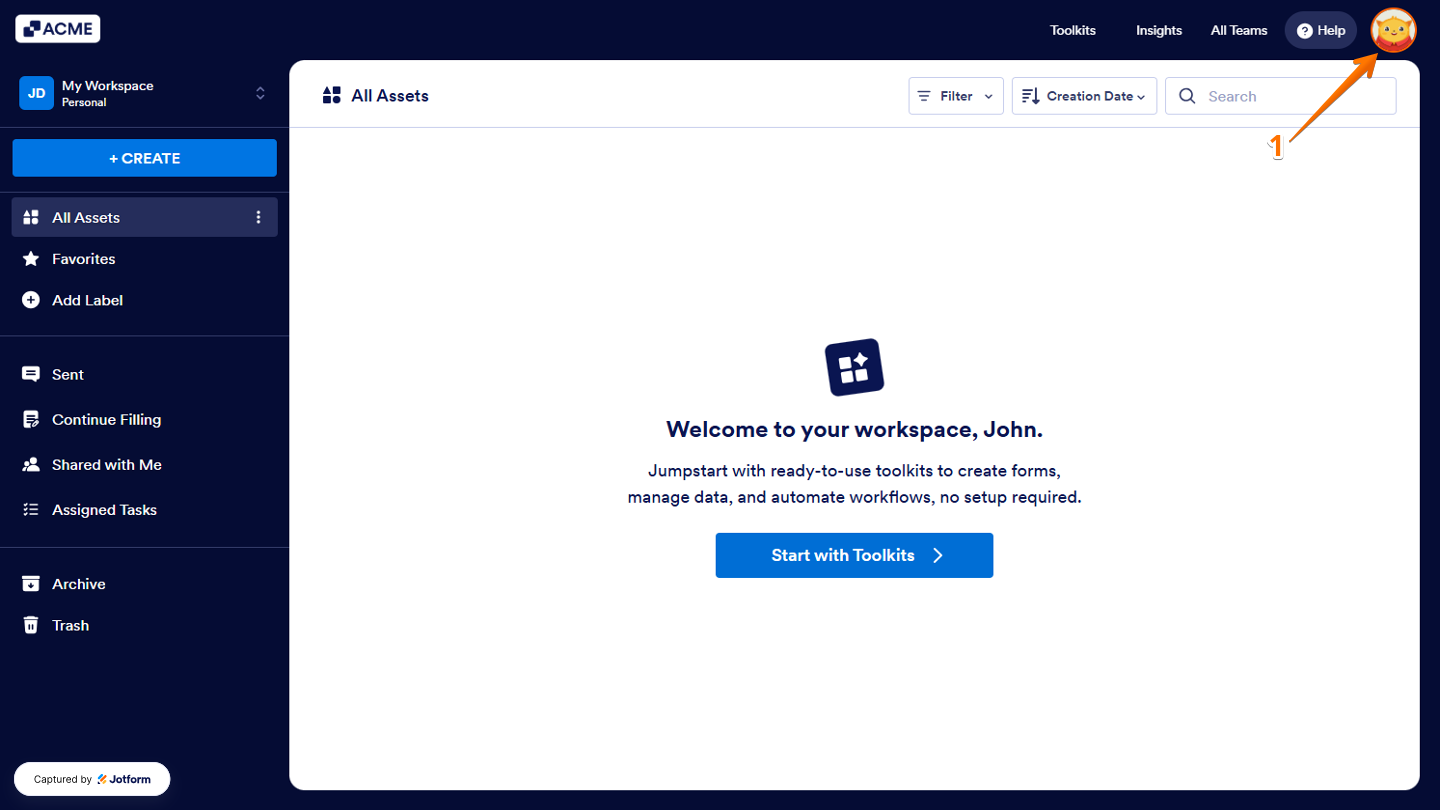
- At the top-right corner of your Workspace page, in your Enterprise account, click on the Profile/Avatar icon.
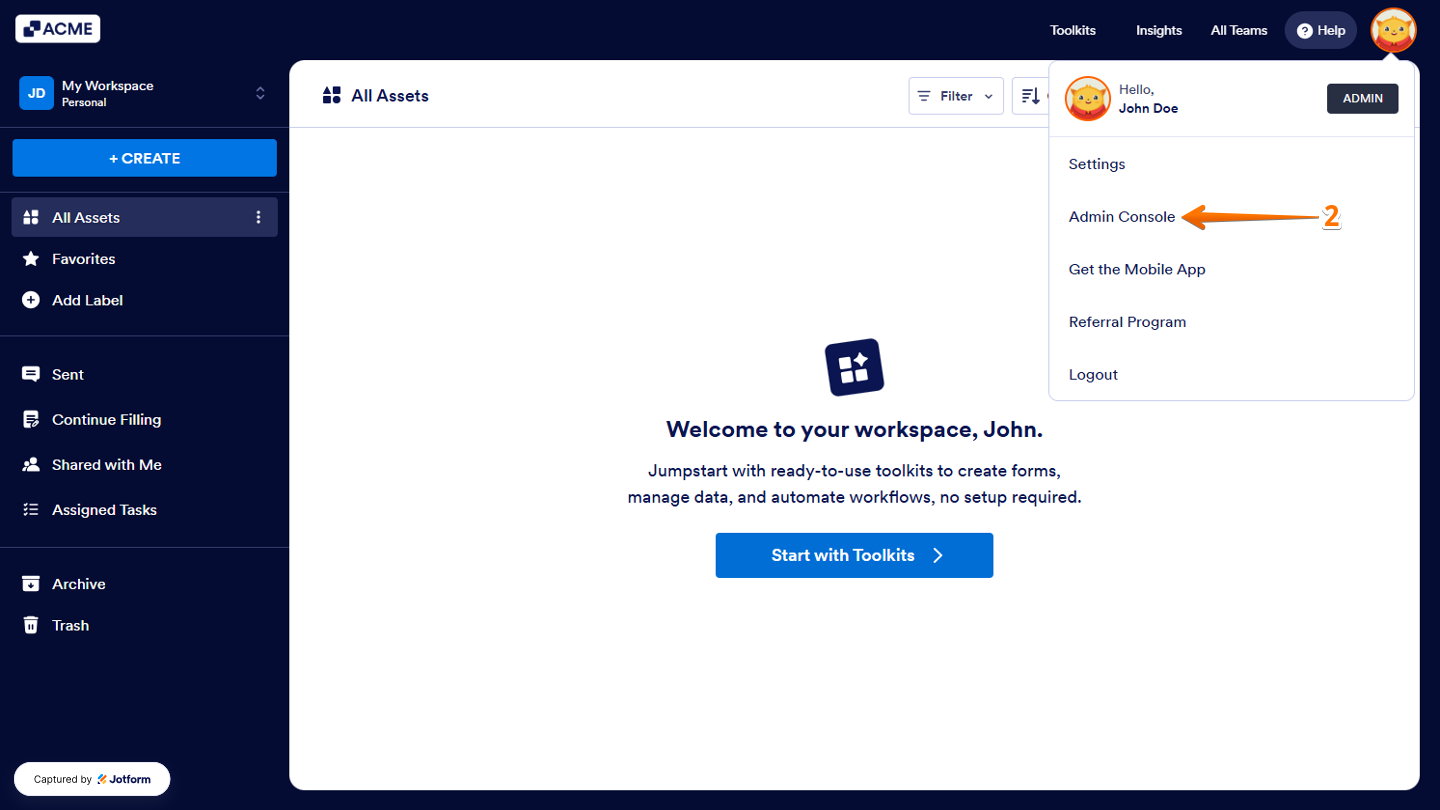
- Then, in the Dropdown menu that opens, select Admin Console.
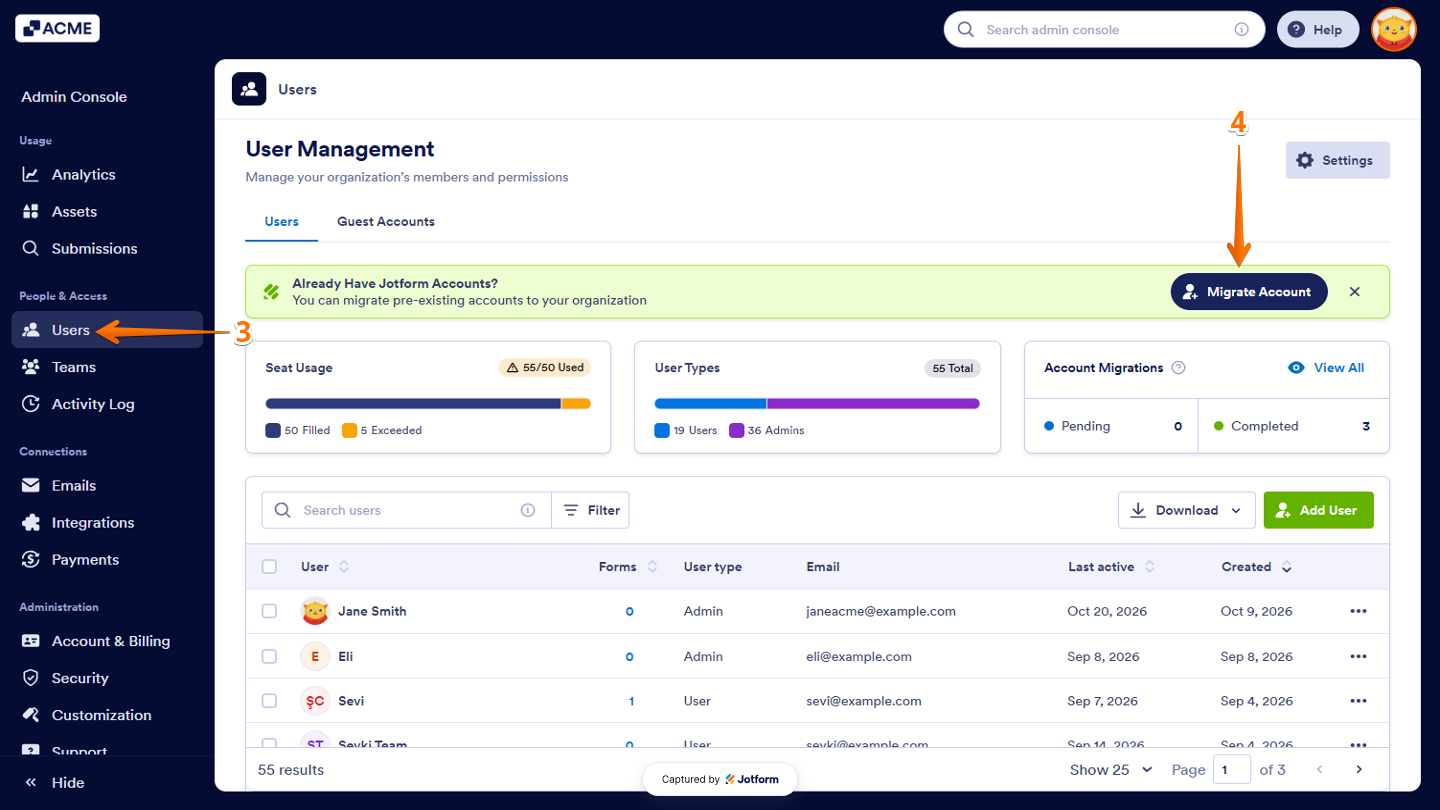
- Next, in the Admin Console page, in the menu on the left side of the page, click on Users.
- Now, under the Users Management section, click on Migrate Account.
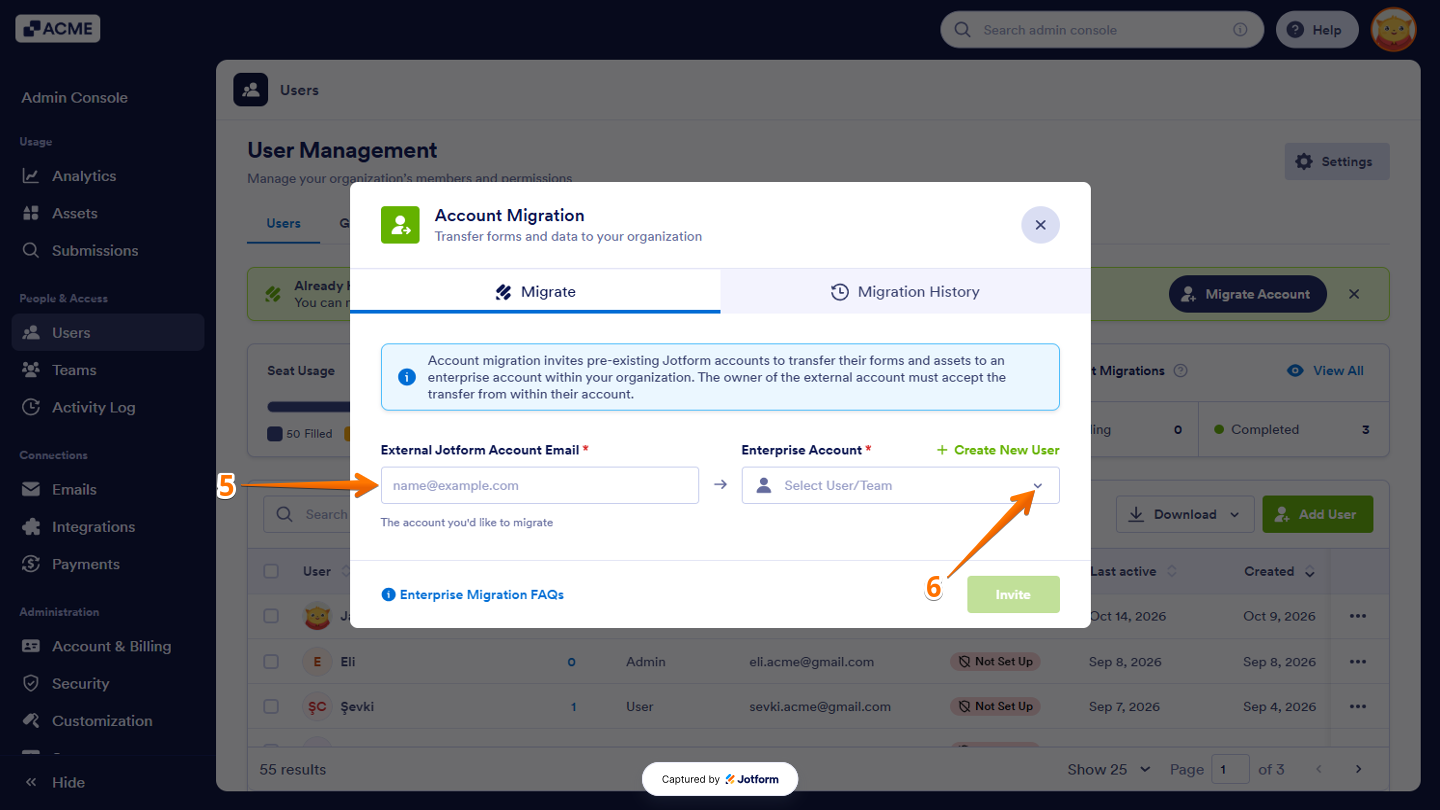
- In the Account Migration window that opens, under the External Jotform Account Email section, enter the email address of the account you want to migrate.
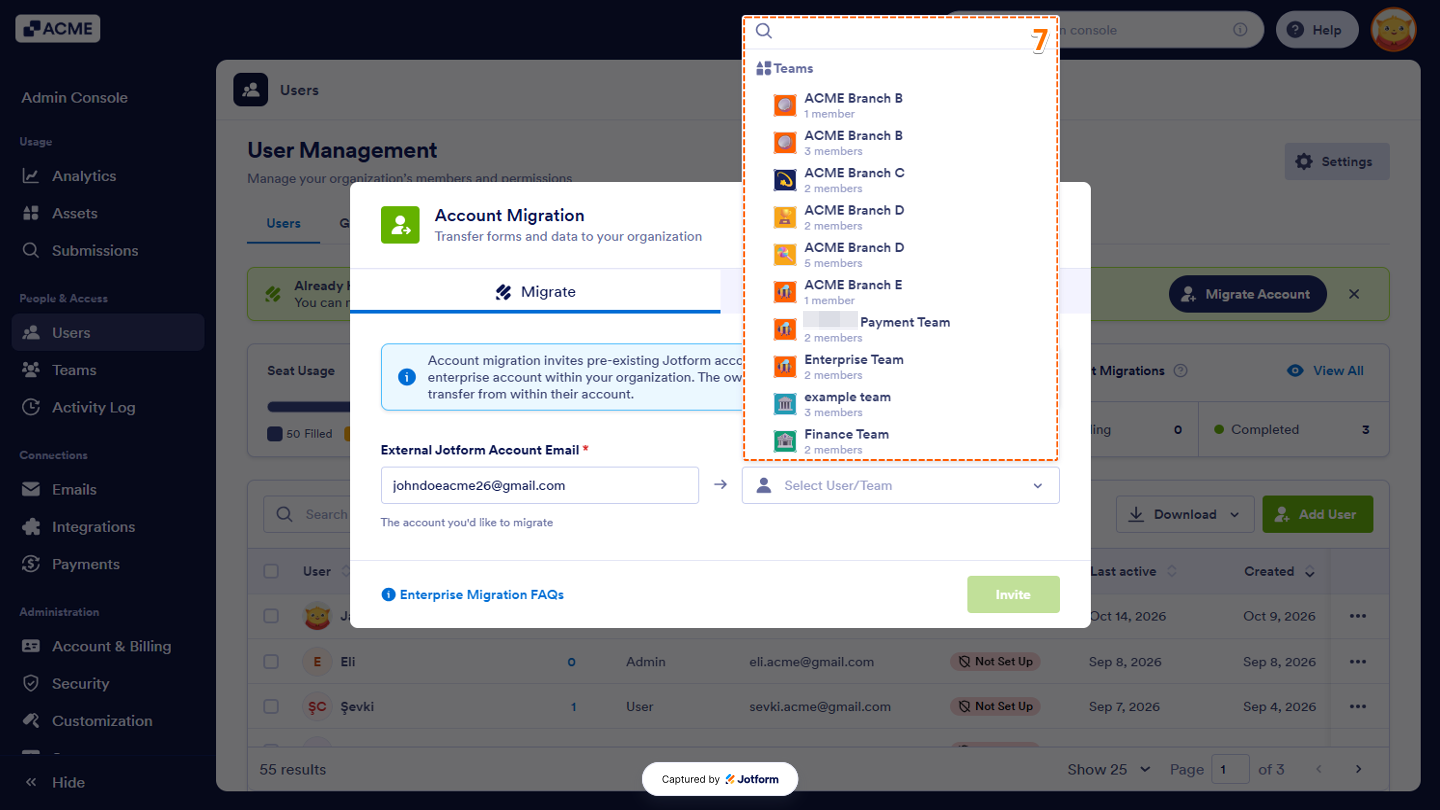
- Then, under the Enterprise Account section, click on the Downward Arrow icon.
- Next, in the menu that opens, search for the user or team you want and then click on it.
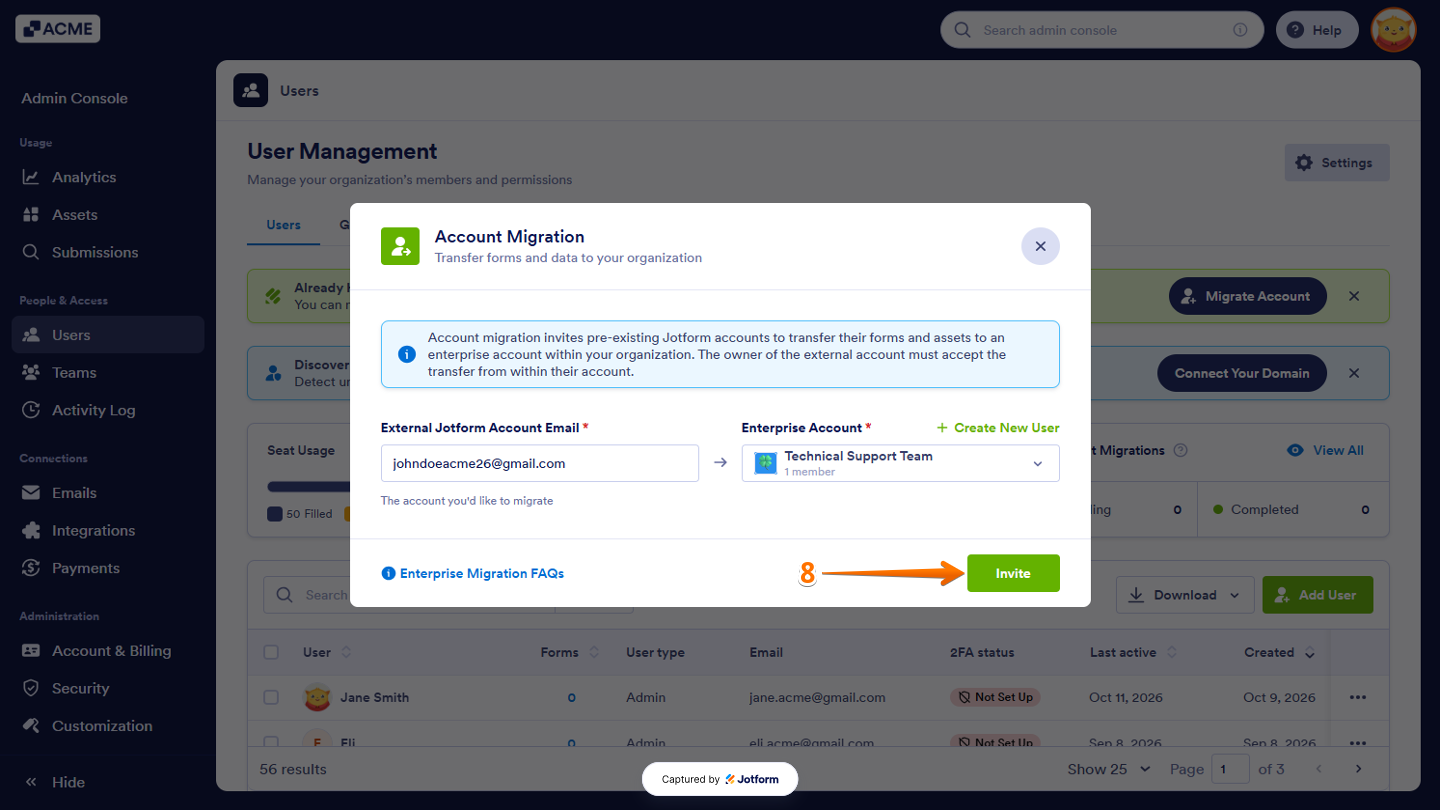
- Once you’re done, click on Invite at the bottom of the window.
Note
If the Enterprise account is HIPAA, you can request a migration once your Enterprise server is set up by submitting a ticket to our Customer Success team. For more details, check out the Enterprise Migrations FAQ.
Completing the Self Migration Flow
The Self Migration flow guides the Standard Jotform account user through reviewing the migration invitation and confirming the details. They can also schedule the migration or start it right away.
Notes
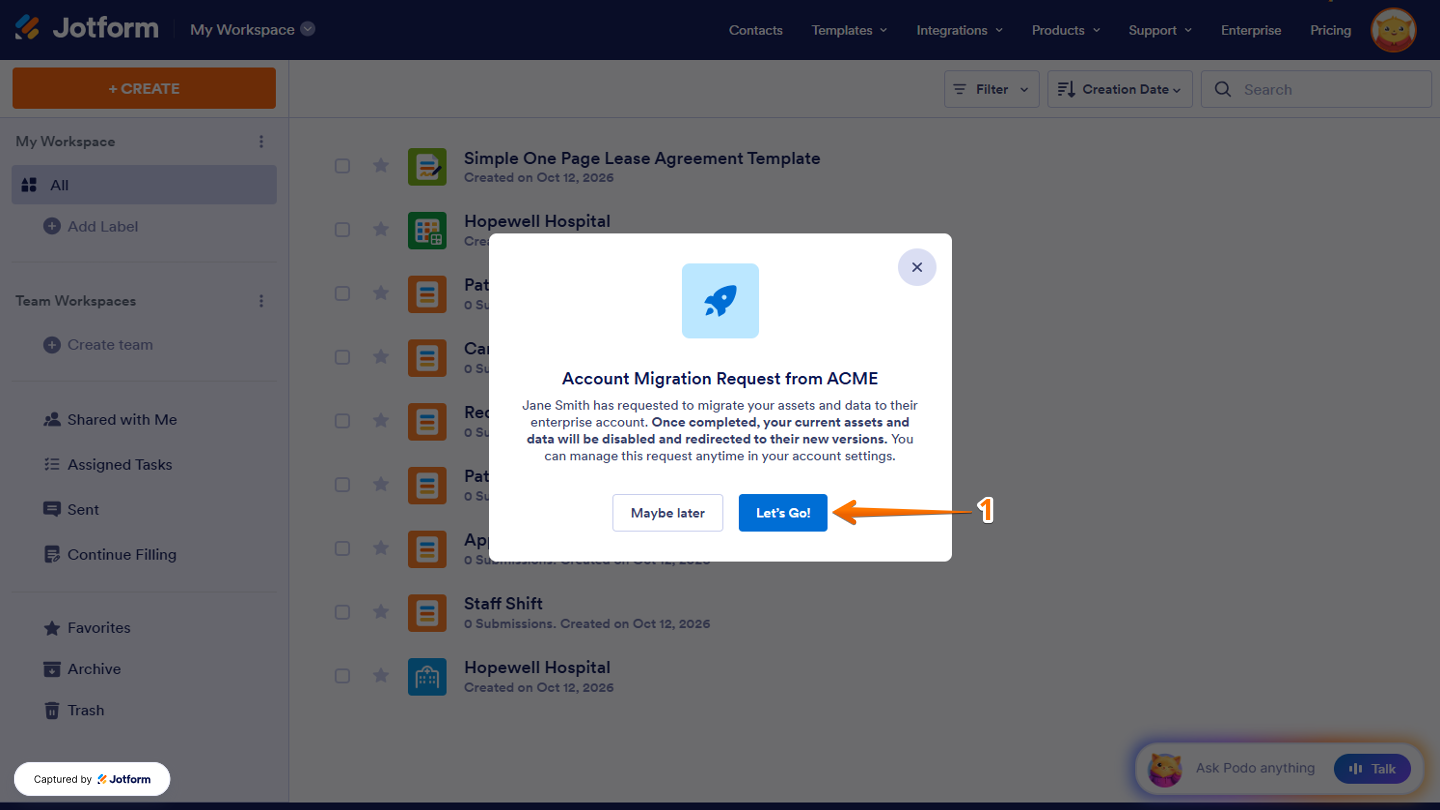
- After the Enterprise admin sends the migration request, the Standard Jotform account user will see a pop-up titled Account Migration Request from [Organization Name]. If the pop-up doesn’t appear, reload or refresh the page
- The Standard Jotform account user will also receive an email notification about the migration request.
Follow these quick steps to get started:
- At your Workspace Page, in the Account Migration Request window that opens, click on Let’s Go!.
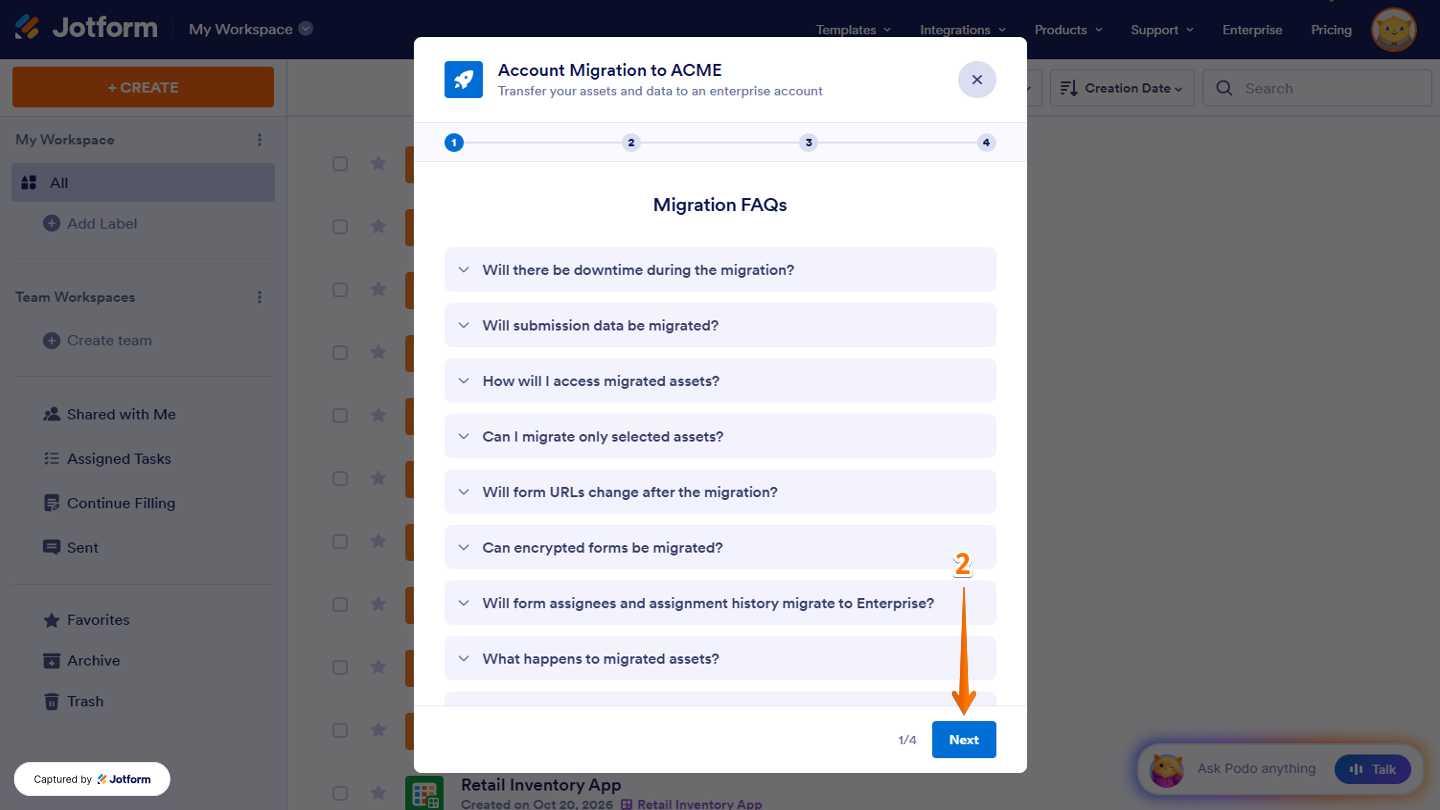
- Then, in the other Account Migration Request window that opens, read the Migration FAQs to learn more about the migration process and click on Next to proceed.
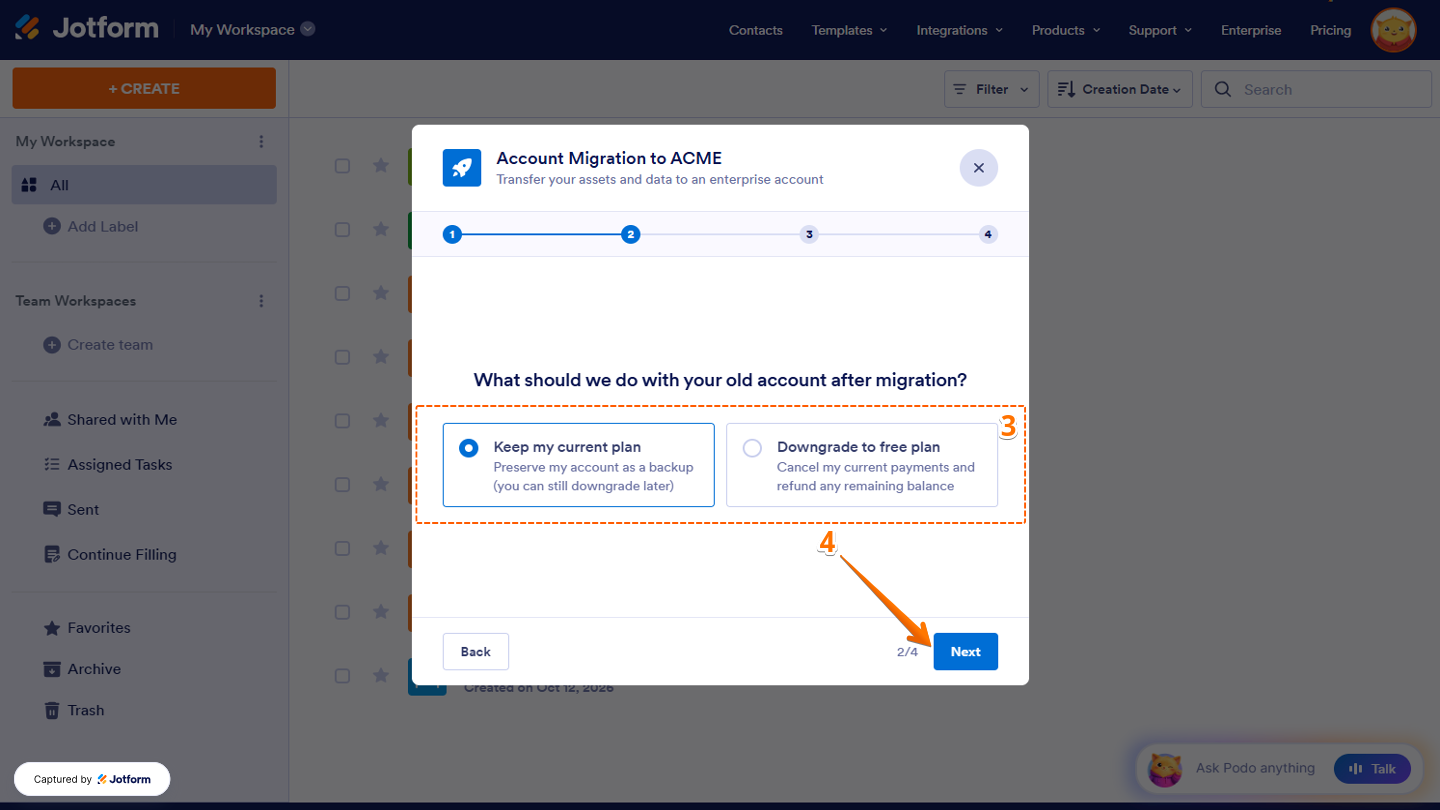
- Next, in the second step window that opens, choose whether to keep your current plan or downgrade to the Starter plan.
- Keep my current plan — Continue with your current plan as a backup. You can still downgrade later.
- Downgrade to free plan — Cancel your current payments and request a refund for any remaining balance.
- Once you’re done, click on Next to continue.
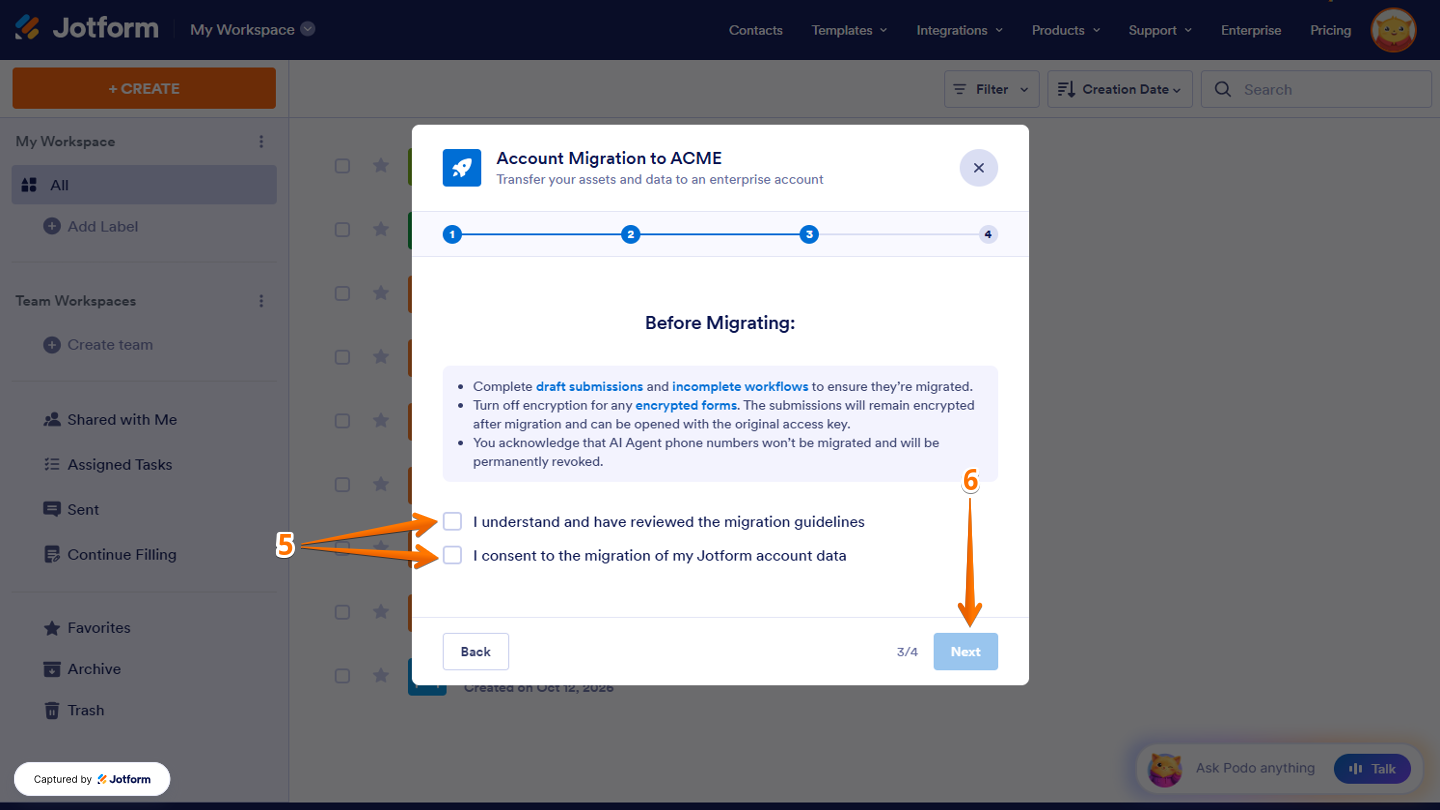
- Now, review the migration guidelines under Before Migrating to understand what you need to do before proceeding, then put a check next to both boxes to confirm that you’ve reviewed the migration guidelines and consent to migrating your Jotform account data.
- Then, click on Next to proceed.
Note
Once your account migration is complete, the refund process will begin. You’ll receive a Refund Request Submitted email confirming that your request was received. The relevant team will handle your request, and you’ll receive another email with the result.
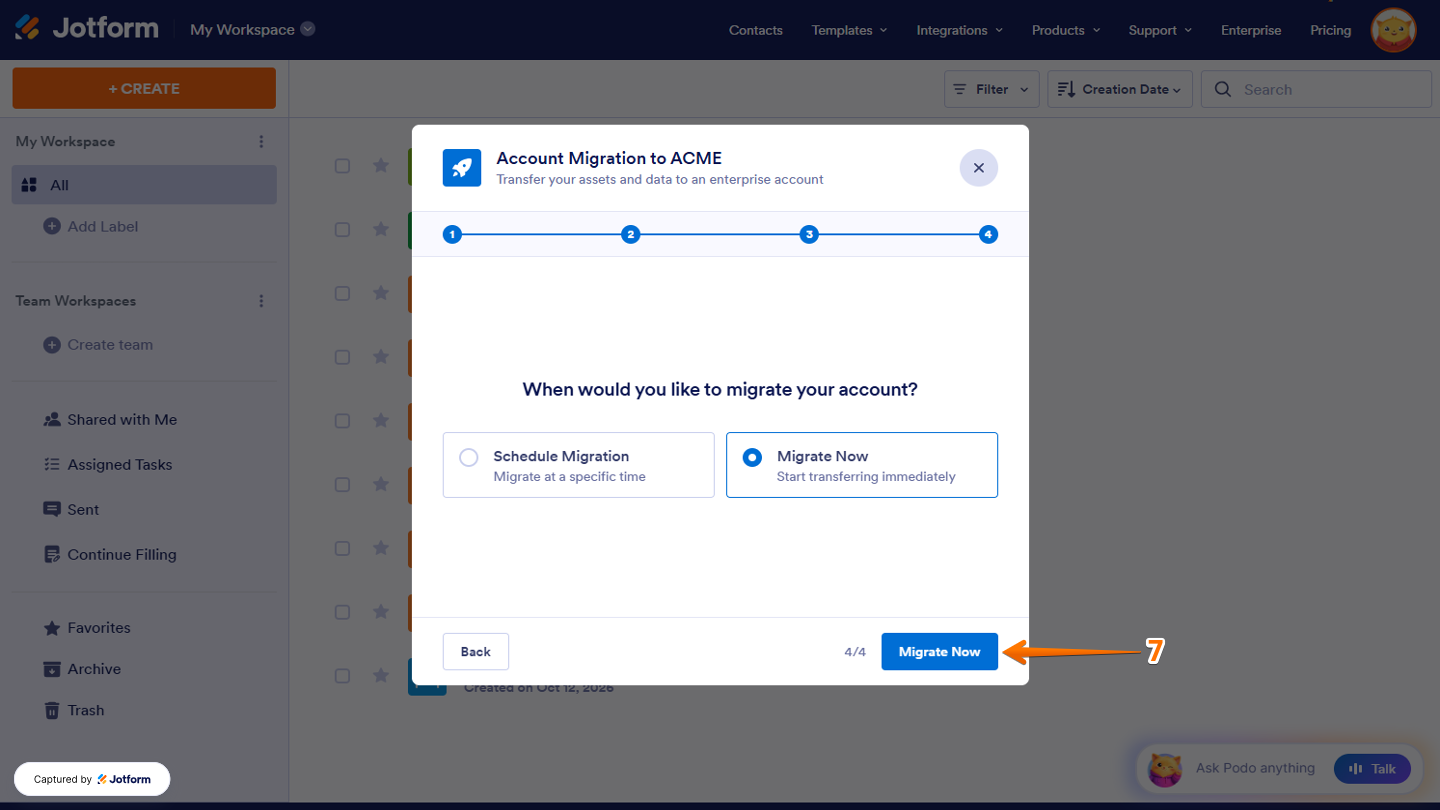
- Next, to migrate your account immediately, click on Migrate Now at the bottom of the window.
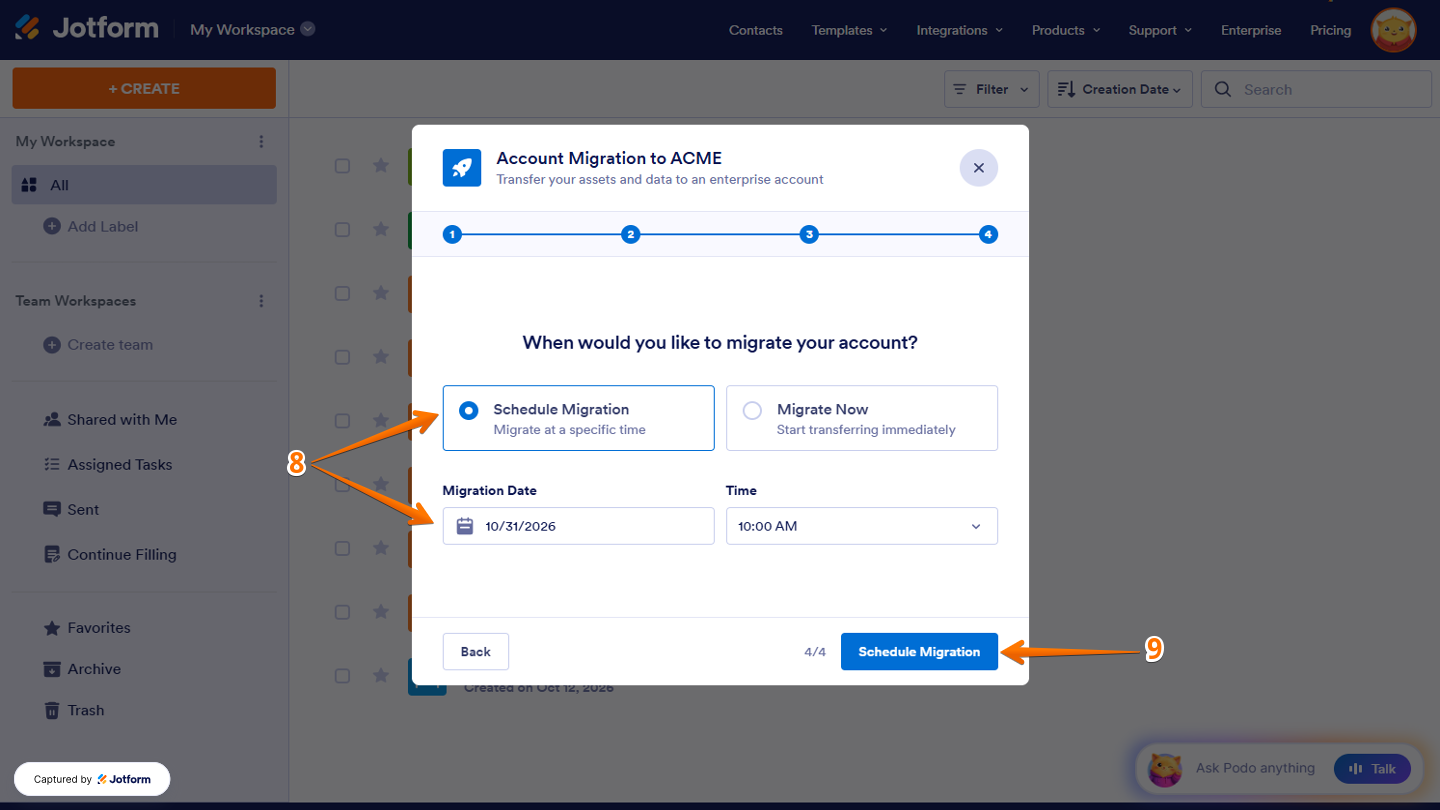
- Now, if you select Schedule Migration, the migration will begin at the scheduled time. You can set your preferred schedule in the Migration Date and Time sections.
- When everything is set, click on Schedule Migration.
If you accidentally close the migration window, you can still access the same flow from the Account Settings page. Here’s one way to do it:
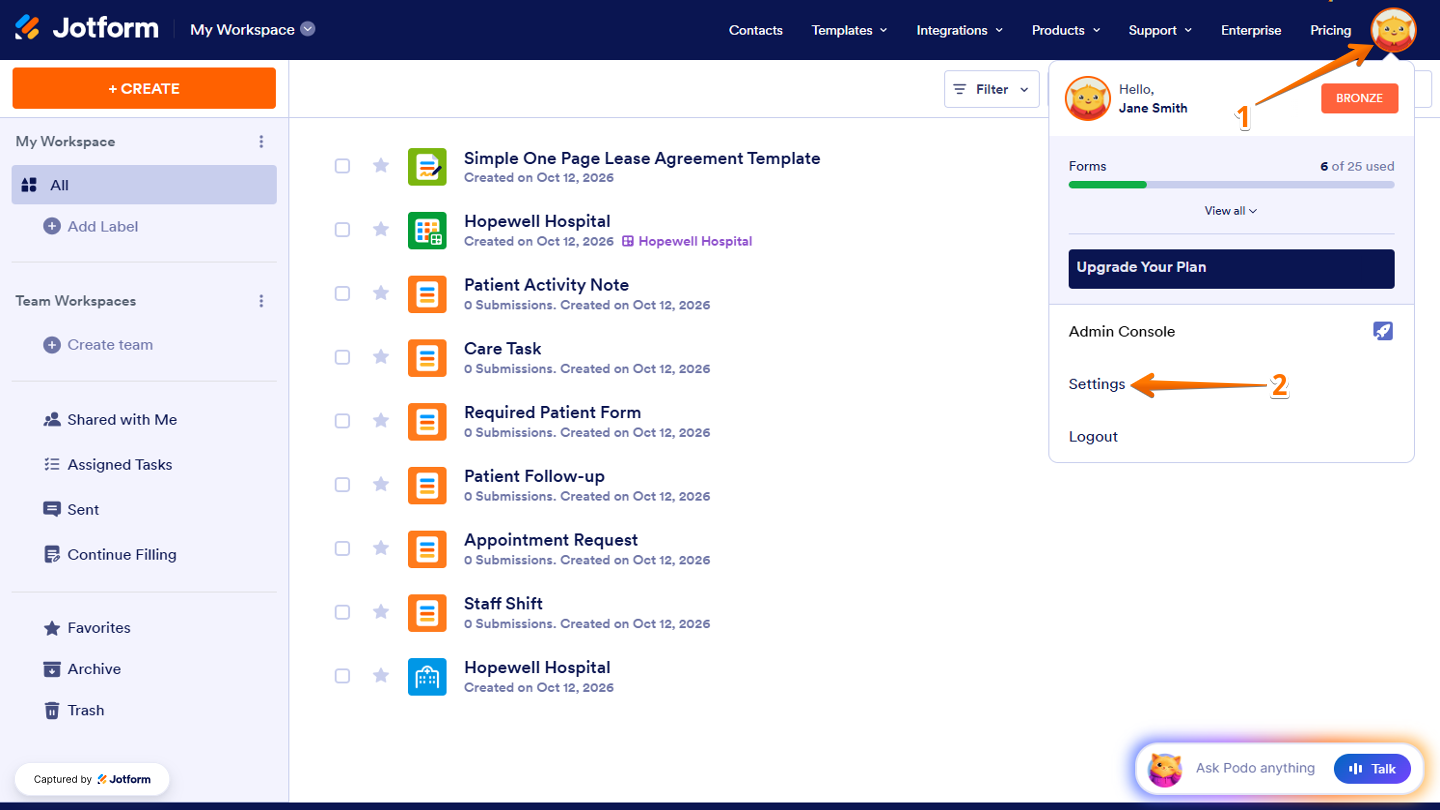
- On the top-right side of your Workspace page, click on your Avatar/Profile Image icon.
- Then, in the Dropdown menu that opens, click on Settings to open your Account Settings page in a new browser tab.
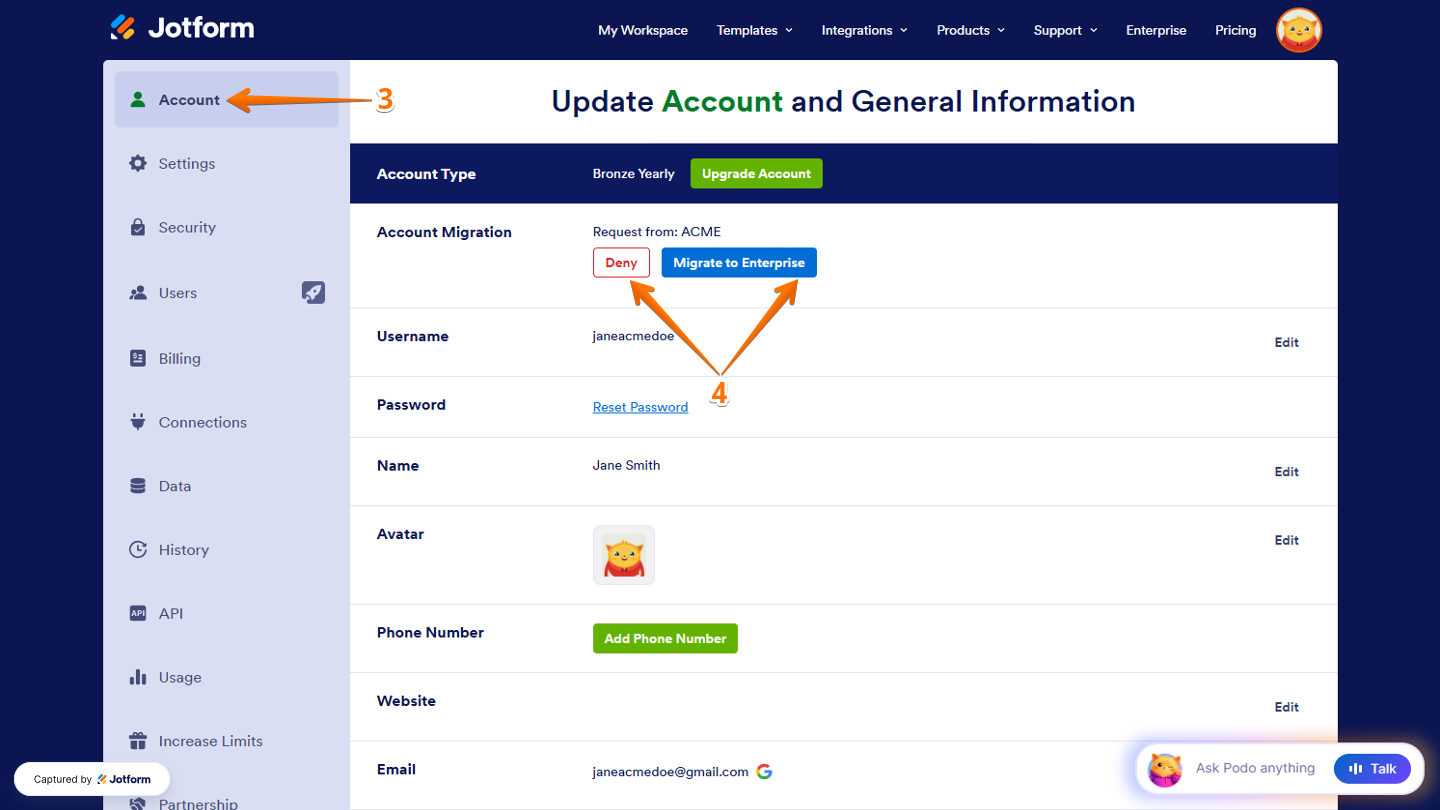
- Next, on the Account Settings page, in the menu on the left, click on the Account tab.
- Now, in the Account Migration section, click on Deny to cancel the migration or select Migrate to Enterprise to start the migration.
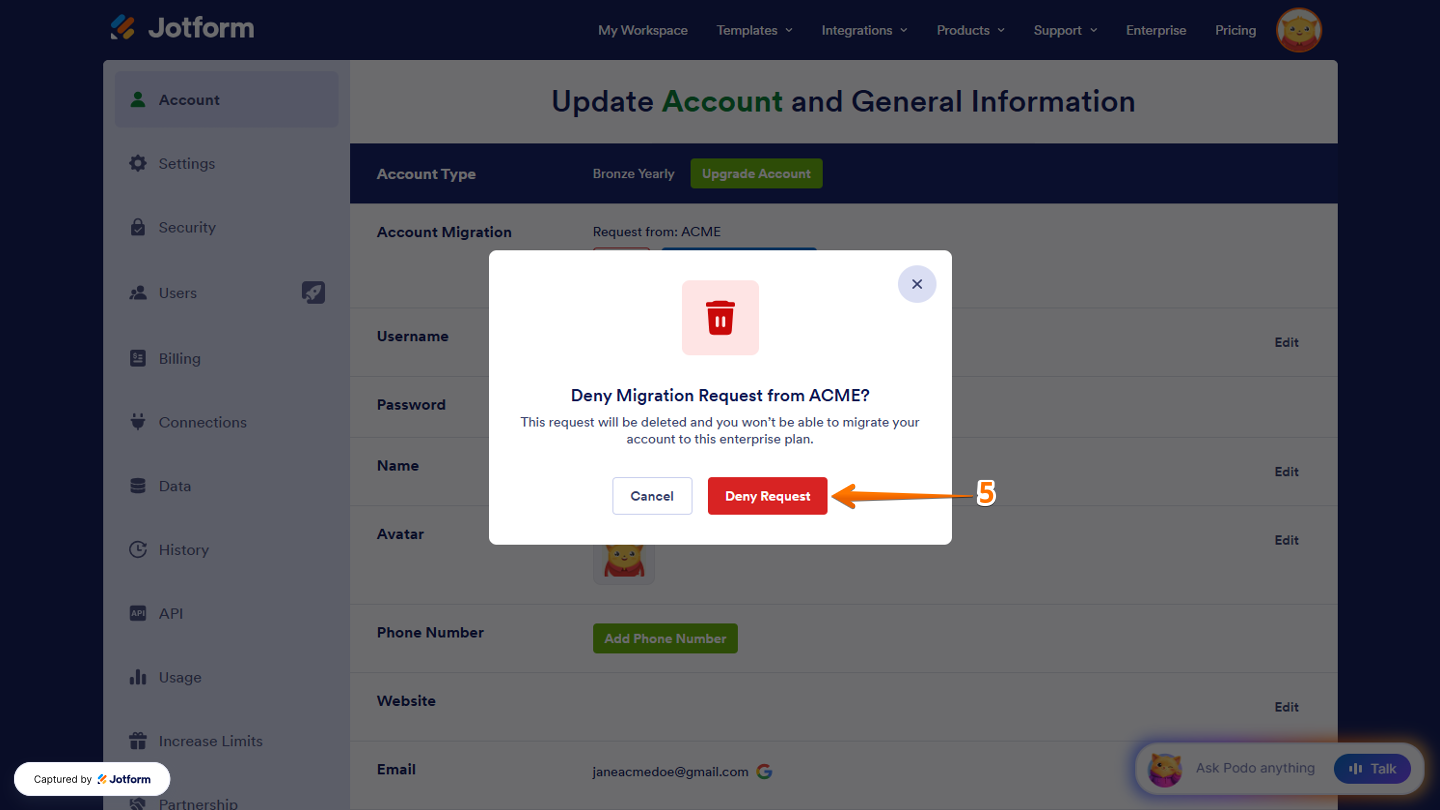
- To cancel the migration request, in the Confirmation window that opens, click on Deny Request.
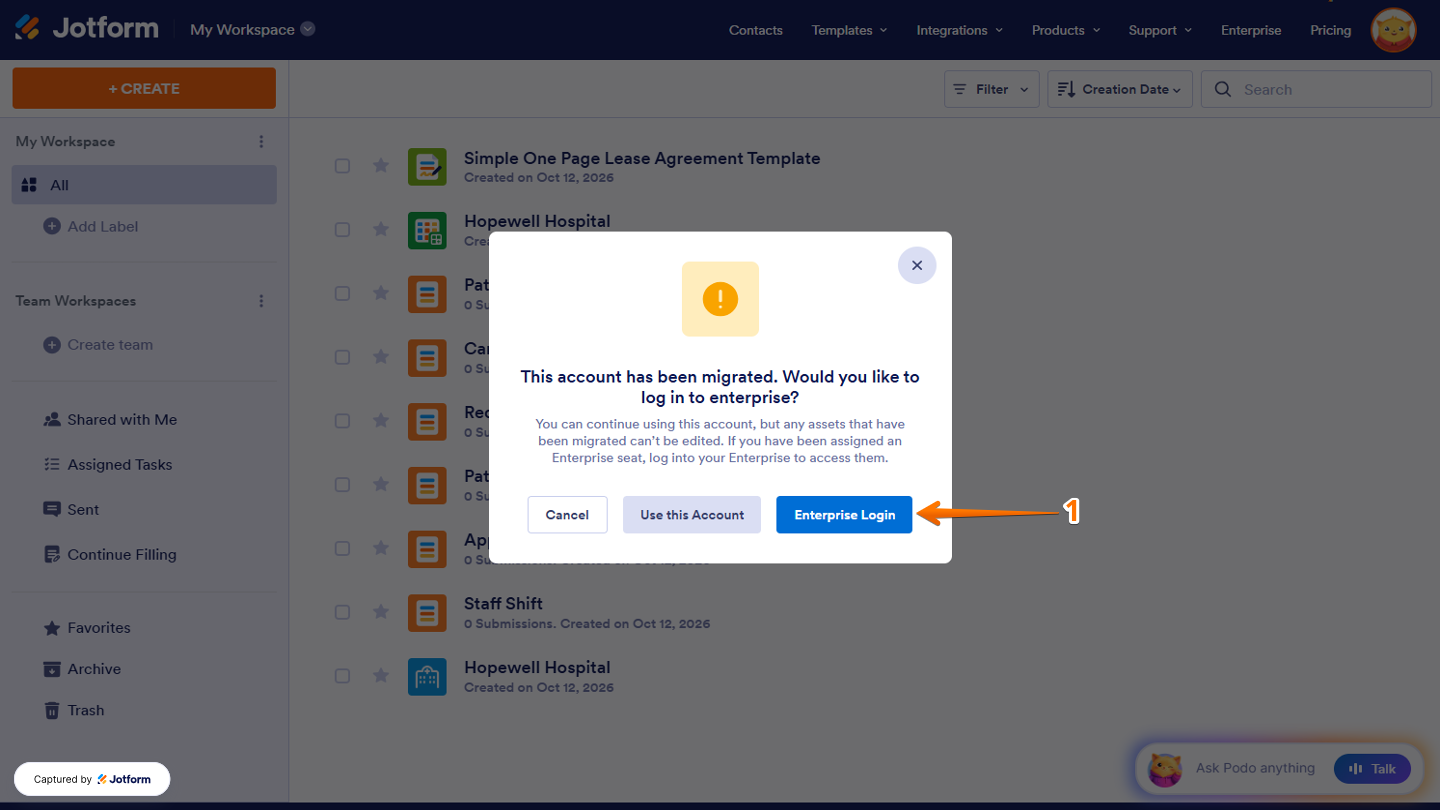
That’s it. After the migration is complete, a confirmation window will appear asking if you want to log in to your Enterprise organization. Here’s how:
- At your Workspace Page, in the Confirmation window that opens, click on Enterprise Login.
Notes
- You can continue using your current account, but any migrated assets can’t be edited. If you’ve been assigned an Enterprise seat, log in to your Enterprise account to access those assets.
- After a successful migration, all migrated assets in the Standard Jotform account’s workspace will appear as disabled. You can only view or clone these assets

Send Comment: