Jotform Boards lets you customize your workspace to match the way you organize and manage your tasks. You can personalize your board’s appearance, adjust task cards, organize groups, and customize task fields to fit your workflow.
Whether you’re updating your board’s theme, organizing tasks into groups, or deciding which information appears on each task card, these customization options help you create a workspace that works best for you.
Applying a Theme to Your Jotform Board
You can personalize your Jotform Board by changing its background color or adding a custom background image. You can do it in just a few steps:
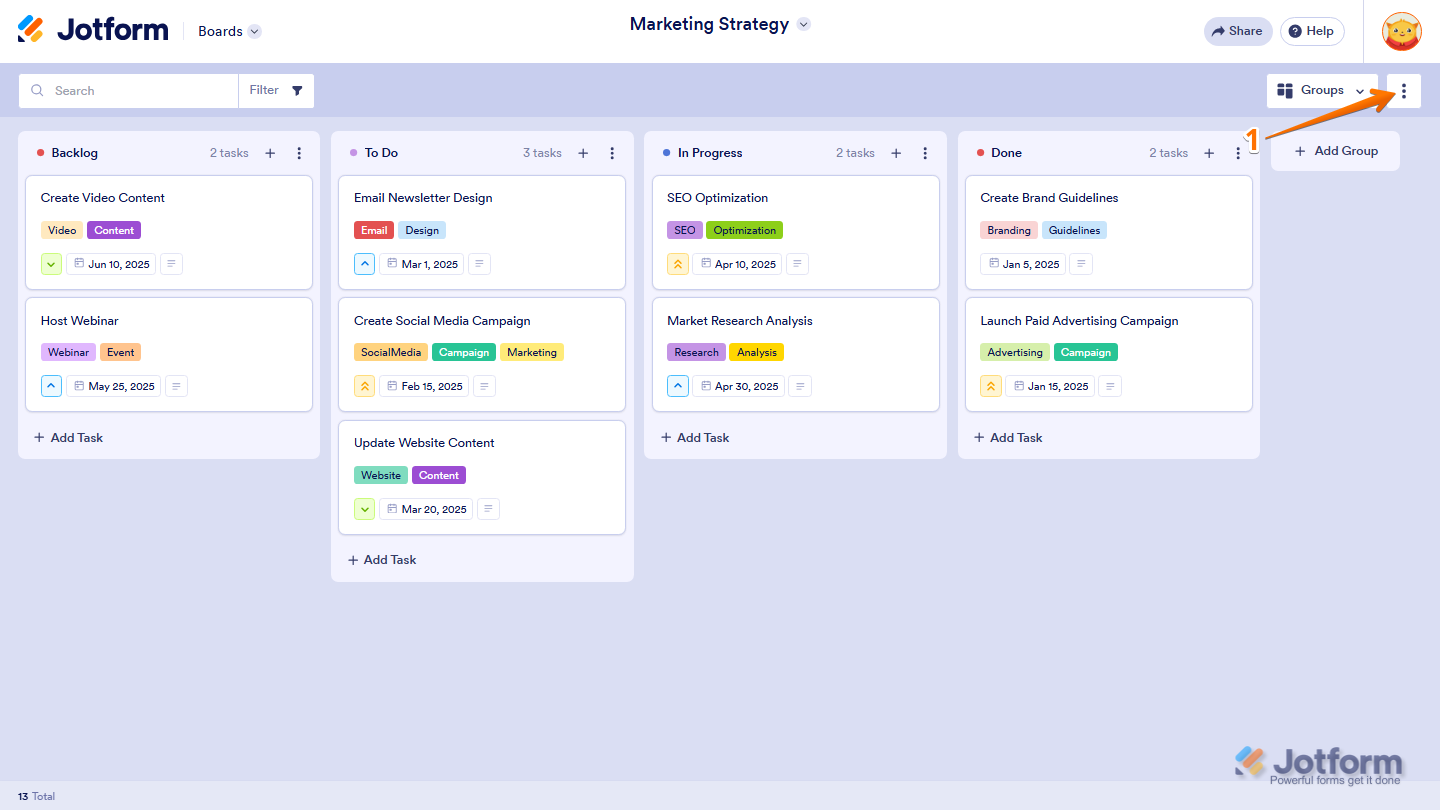
- In the upper-right corner of your Boards, click on the Three Dots icon.
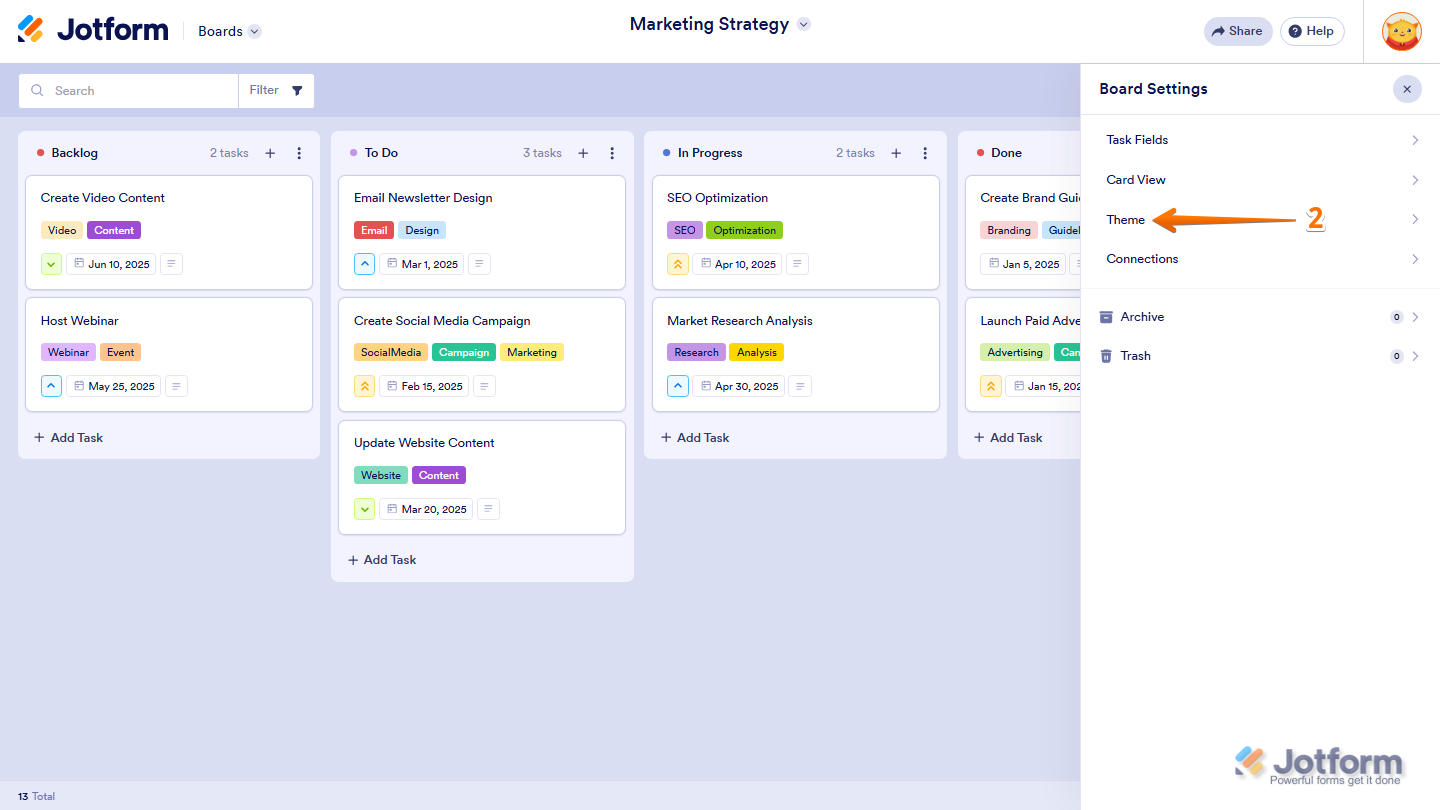
- Then, in the Board Settings menu that opens, select Theme.
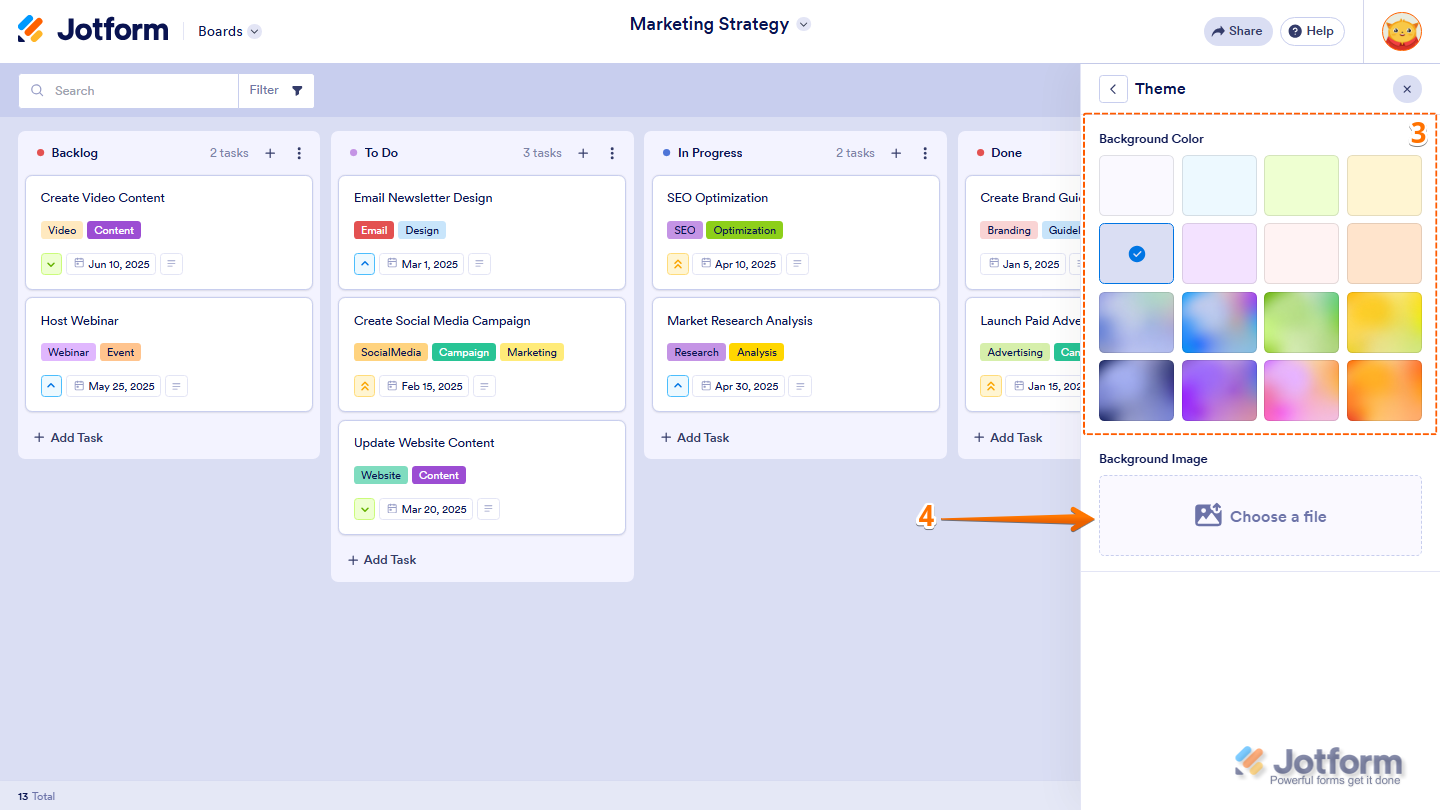
- Now, under the Background Color section, choose a preset background color.
- Or, under the Background Image section, click on Choose a File to upload your own background image, and you’re all set.
That’s it! Your Jotform Board will now use the background color or image you selected.
Editing the Card Layout
You can customize which fields appear on your task cards through Card View or Connection Assets.
Editing Card Layout Using Card View
Card View lets you choose which fields appear on your task cards. Here’s what to do:
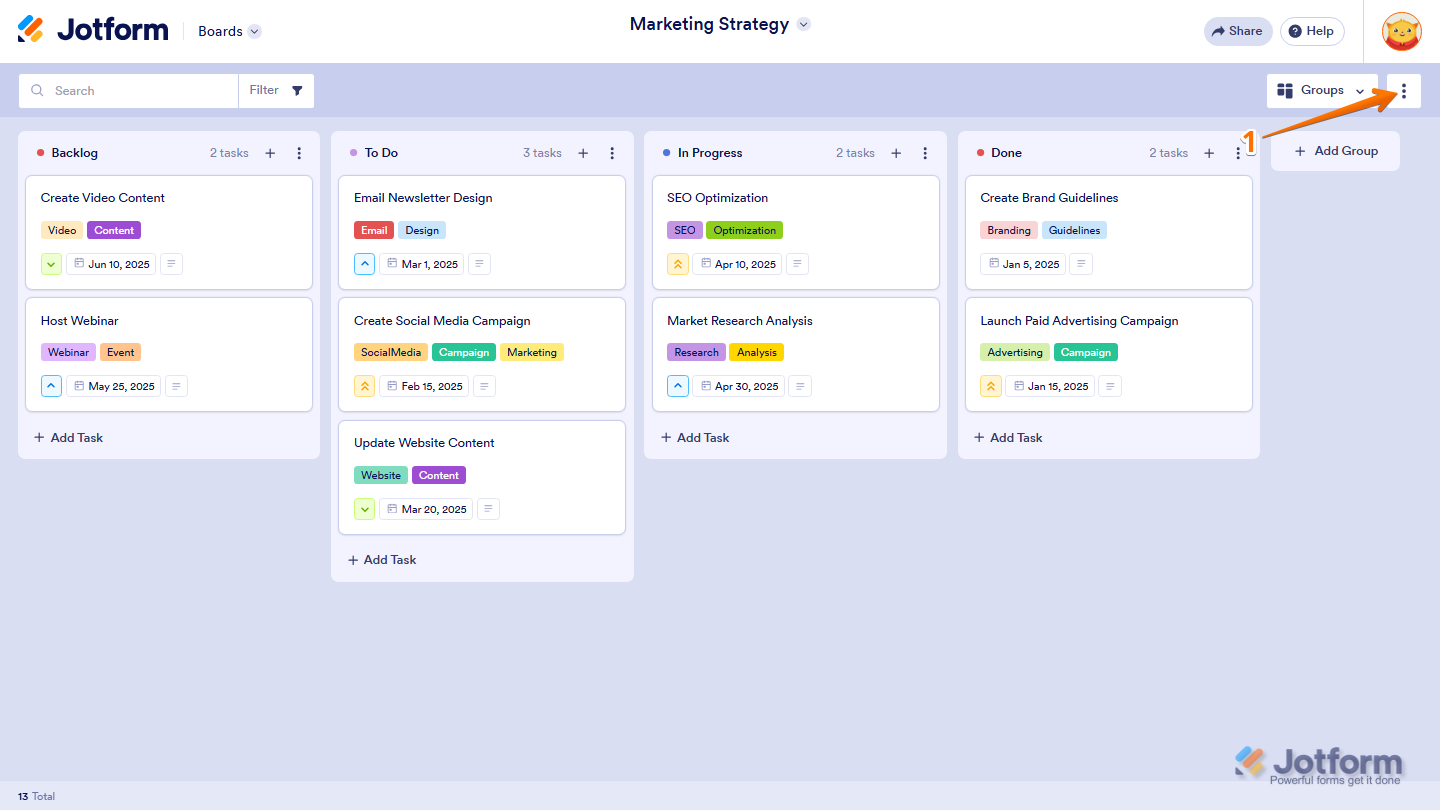
- In the upper-right corner of your Board, click on the Three Dots icon.
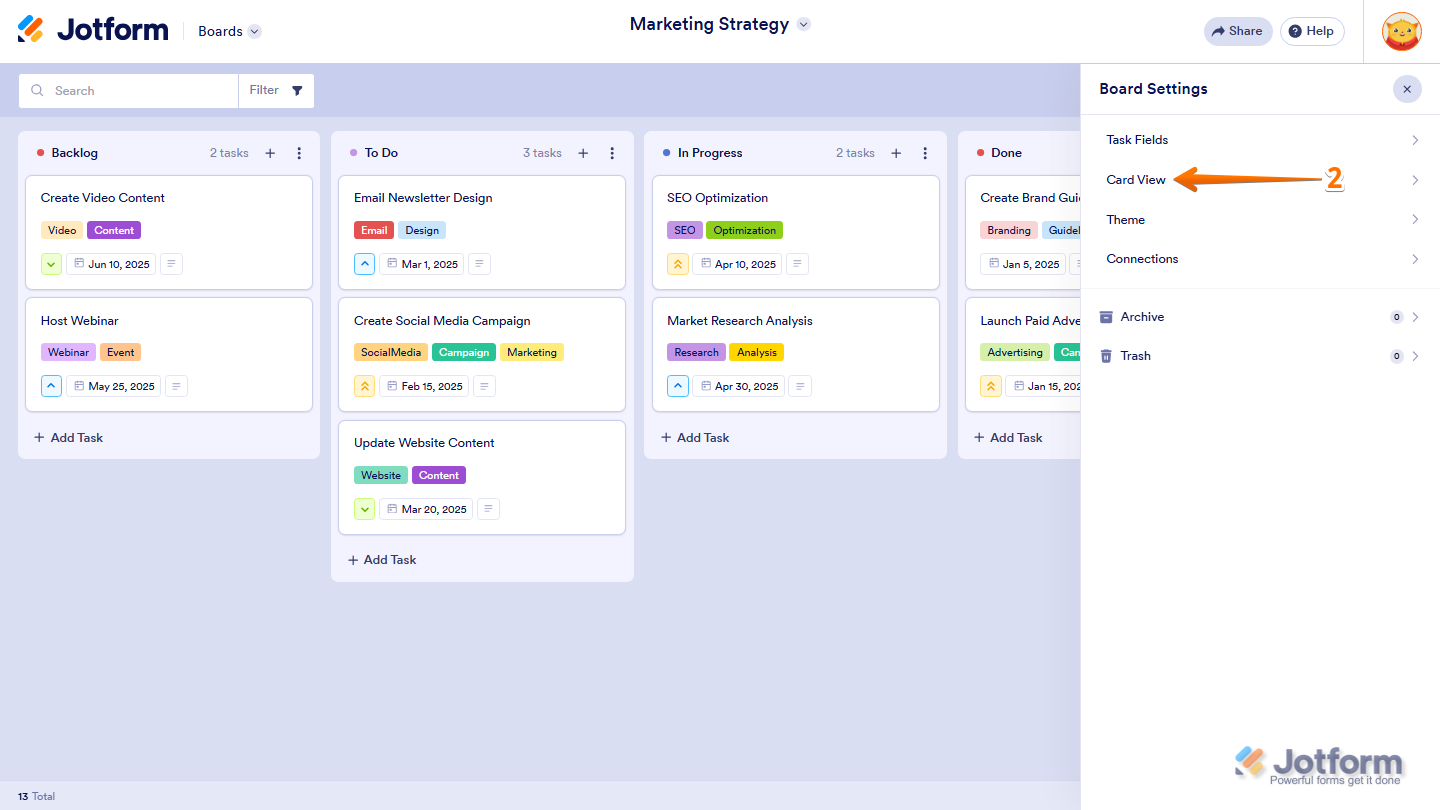
- Then, in the Board Settings menu that opens, select Card View.
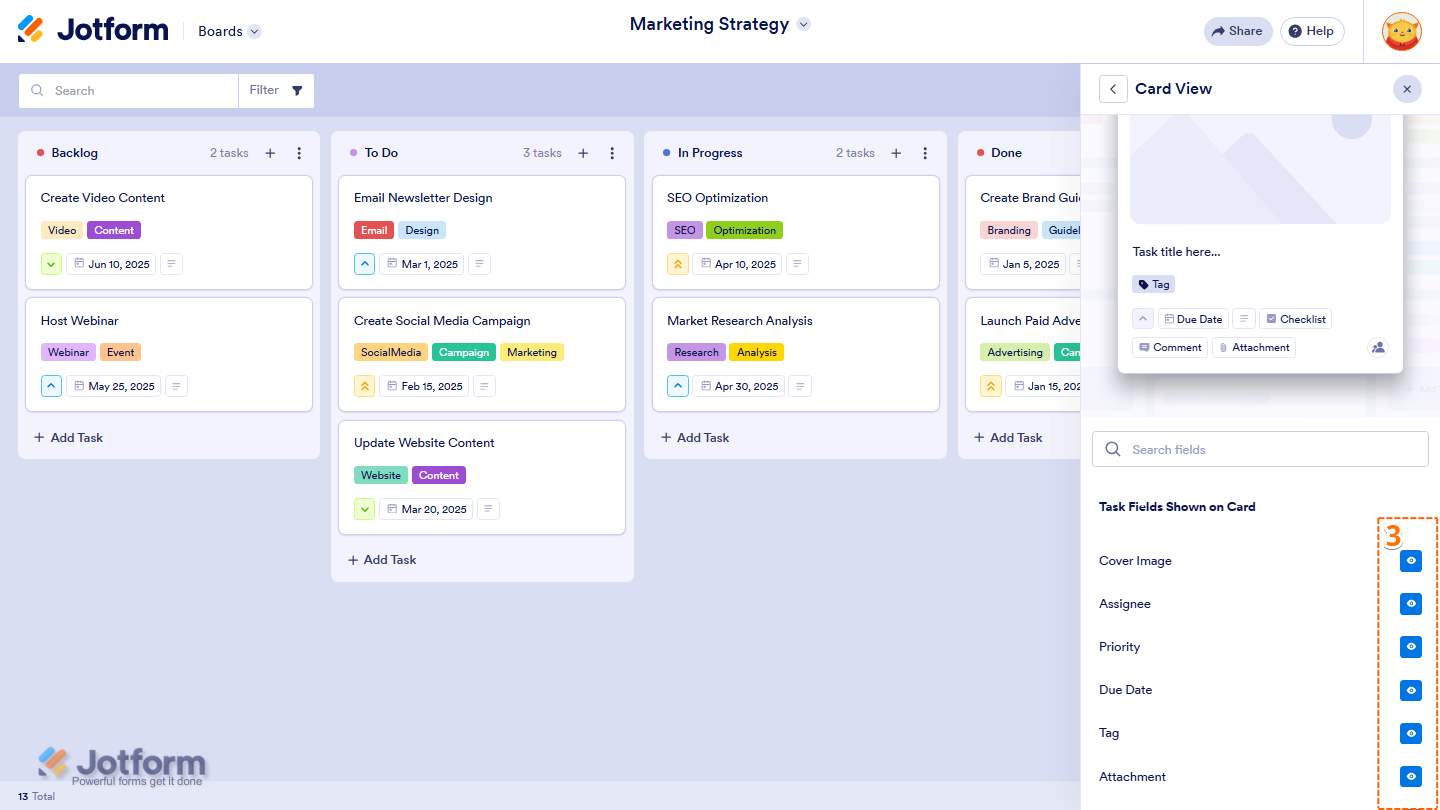
- Now, in the Card View menu that opens, scroll down to the Task Fields Shown on Card section, then click on the Eye icon next to the field you want to show or hide on your task cards.
Pro Tip
The Card Preview section updates automatically to reflect the changes you make.
Editing Card Layout Using Connections
If your board is connected to a form, you can also choose which form fields appear on your task cards through Connections. Here’s how:
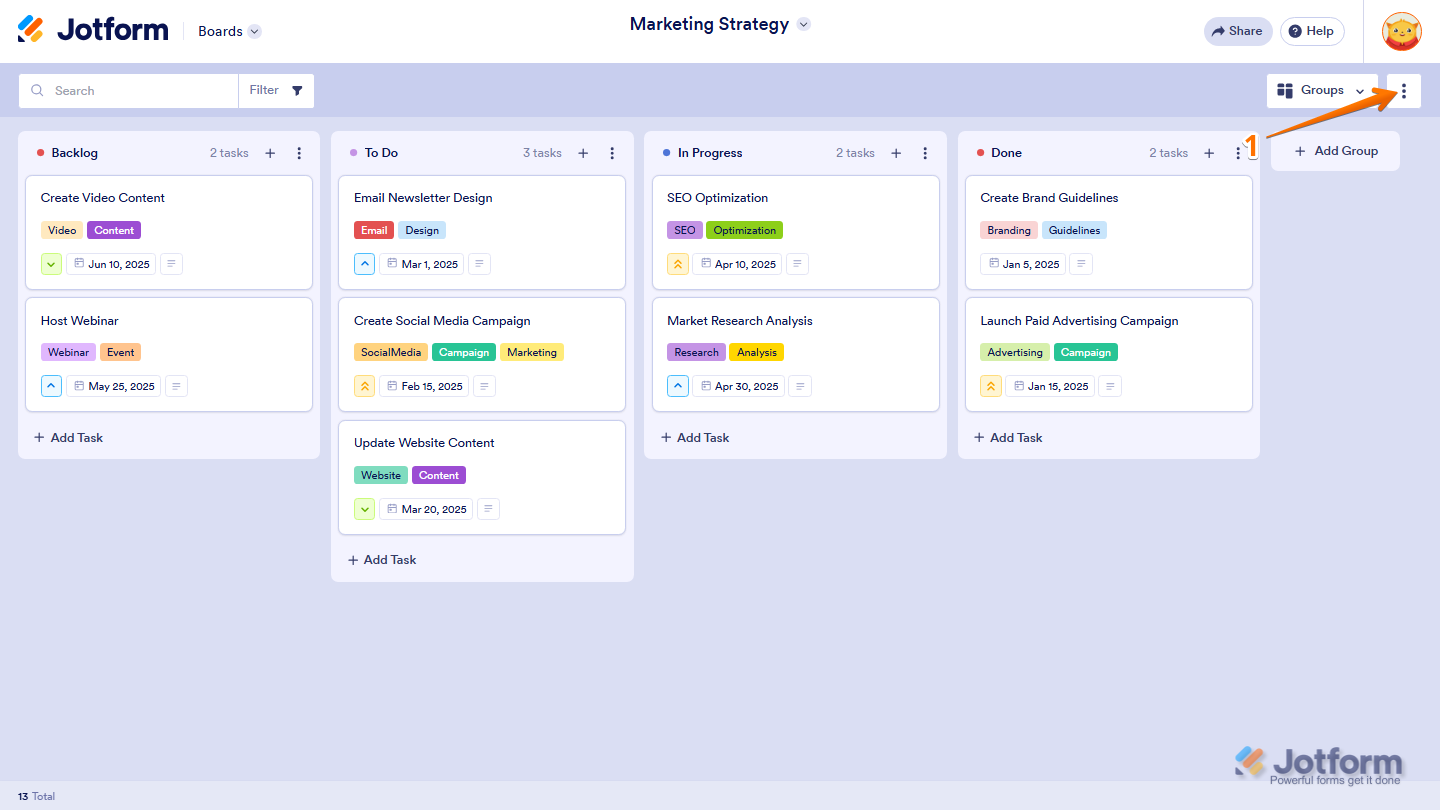
- In the upper-right corner of your Board, click on the Three Dots icon.
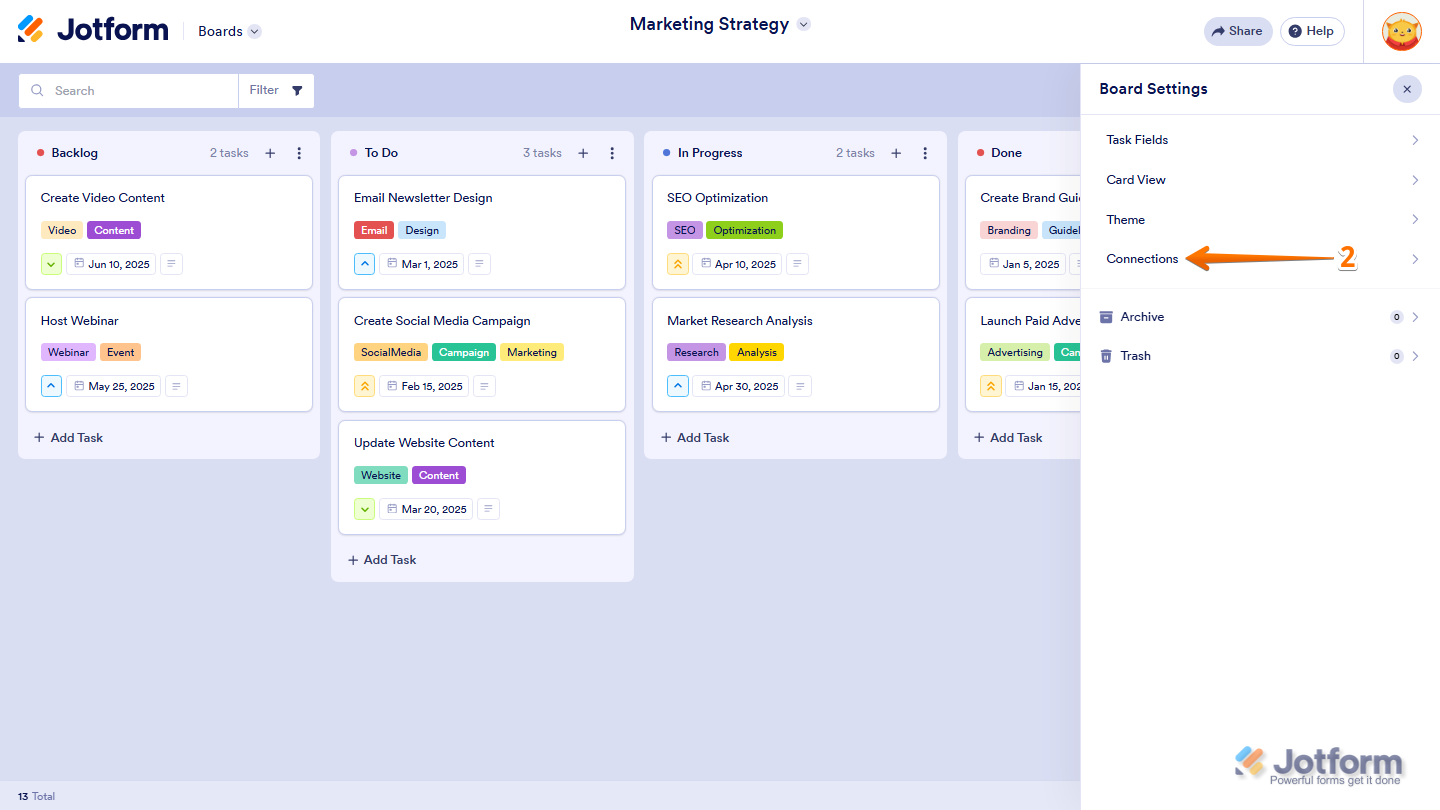
- Then, in the Board Settings menu that opens, click on Connections.
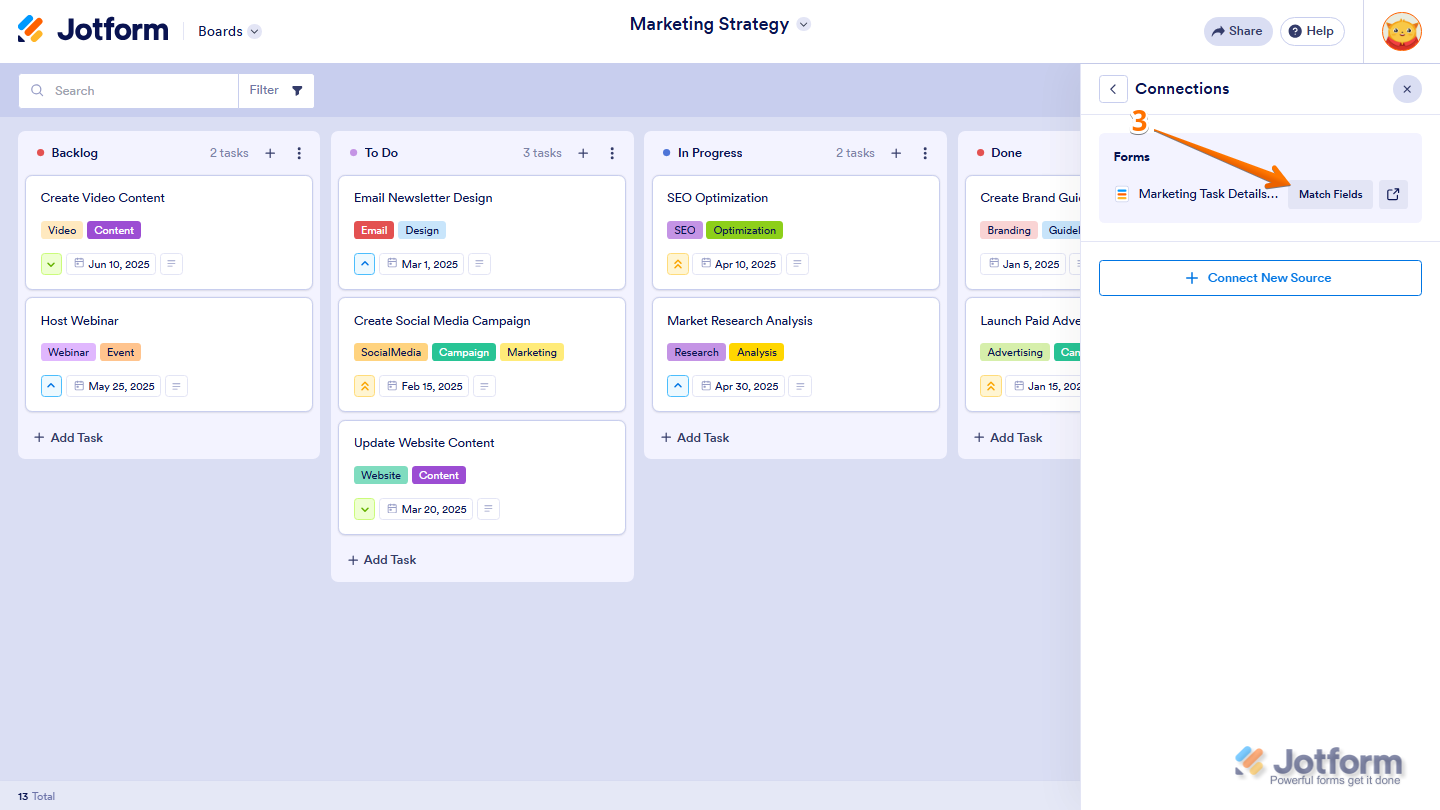
- Now, in the Connections menu that opens, under Forms, click on Match Fields next to the connected form.
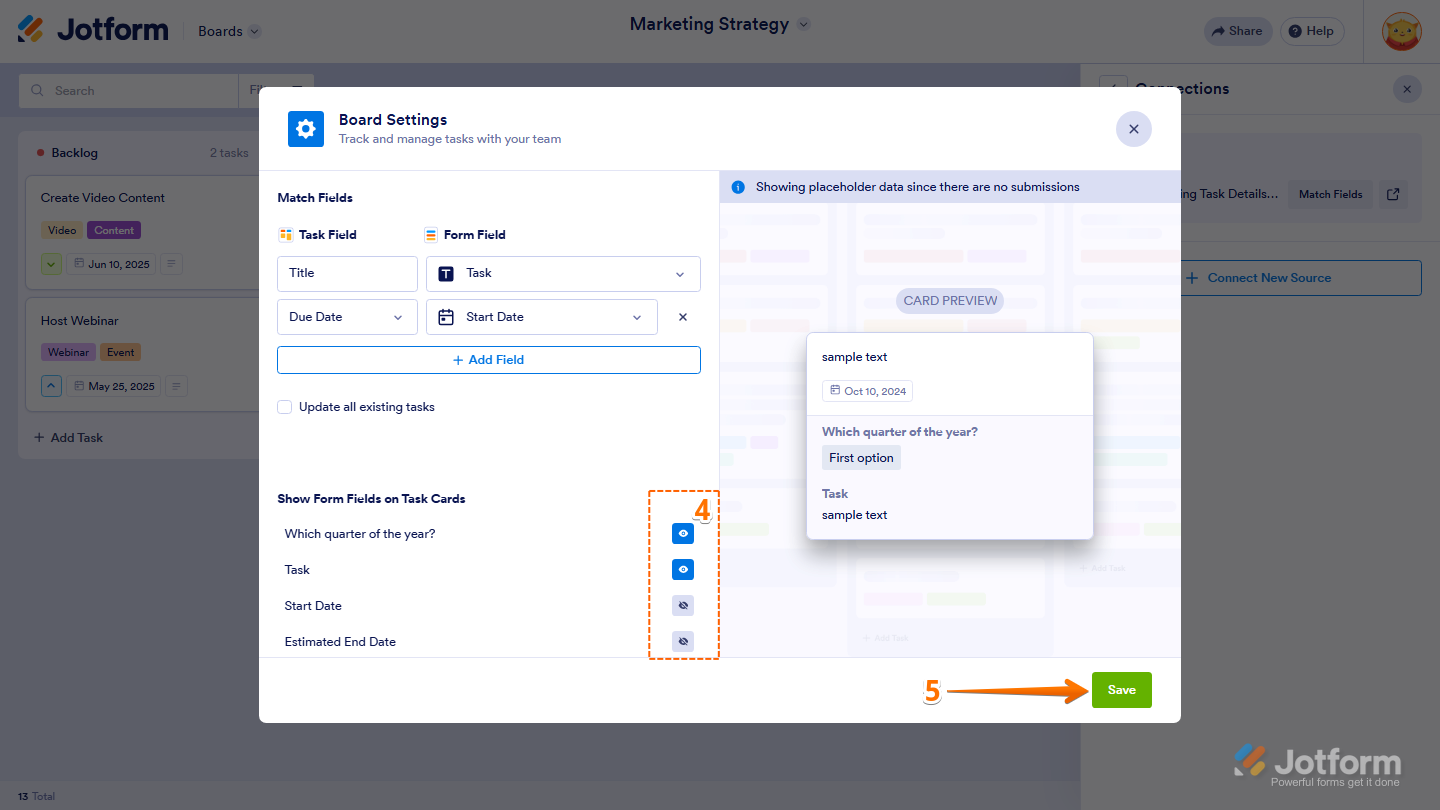
- Next, in the Board Settings window that comes up, in the Show Form Fields on Task Cards section, click on the Eye icon next to each form field to show or hide it on your task cards.
- Once everything’s set, click on Save.
Note
If you want to map additional form fields to your board, click on Add Field, then select the task field and the corresponding form field before saving your changes.
Managing Groups in Jotform Boards
Jotform Boards lets you organize your workflow by creating groups for different stages or categories of tasks. You can add, rename, or delete groups anytime to keep your board organized.
Adding a Group
You can add groups to organize your tasks into different stages or categories. Here are the different ways to add a group:
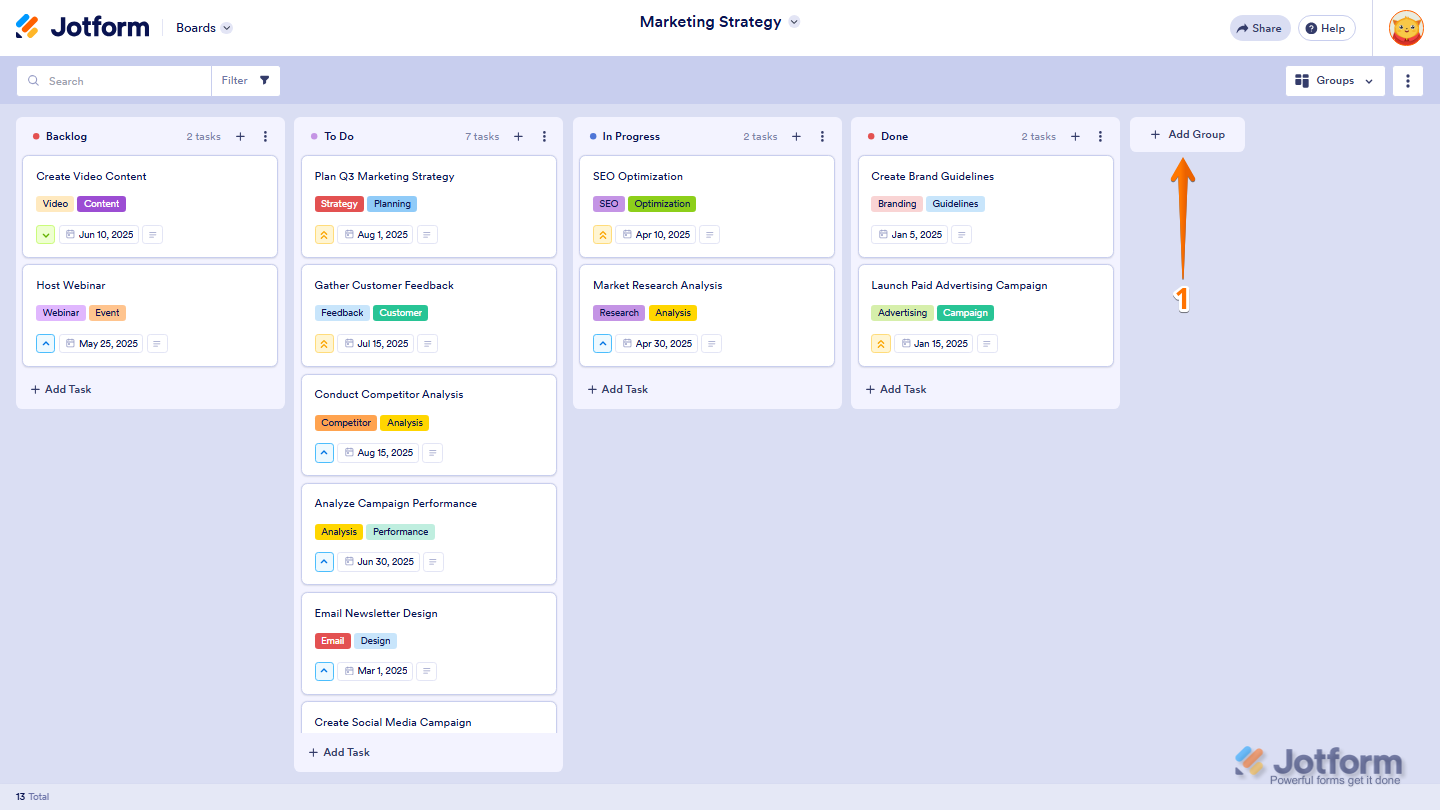
- On the right side of your Board, click on Add Group.
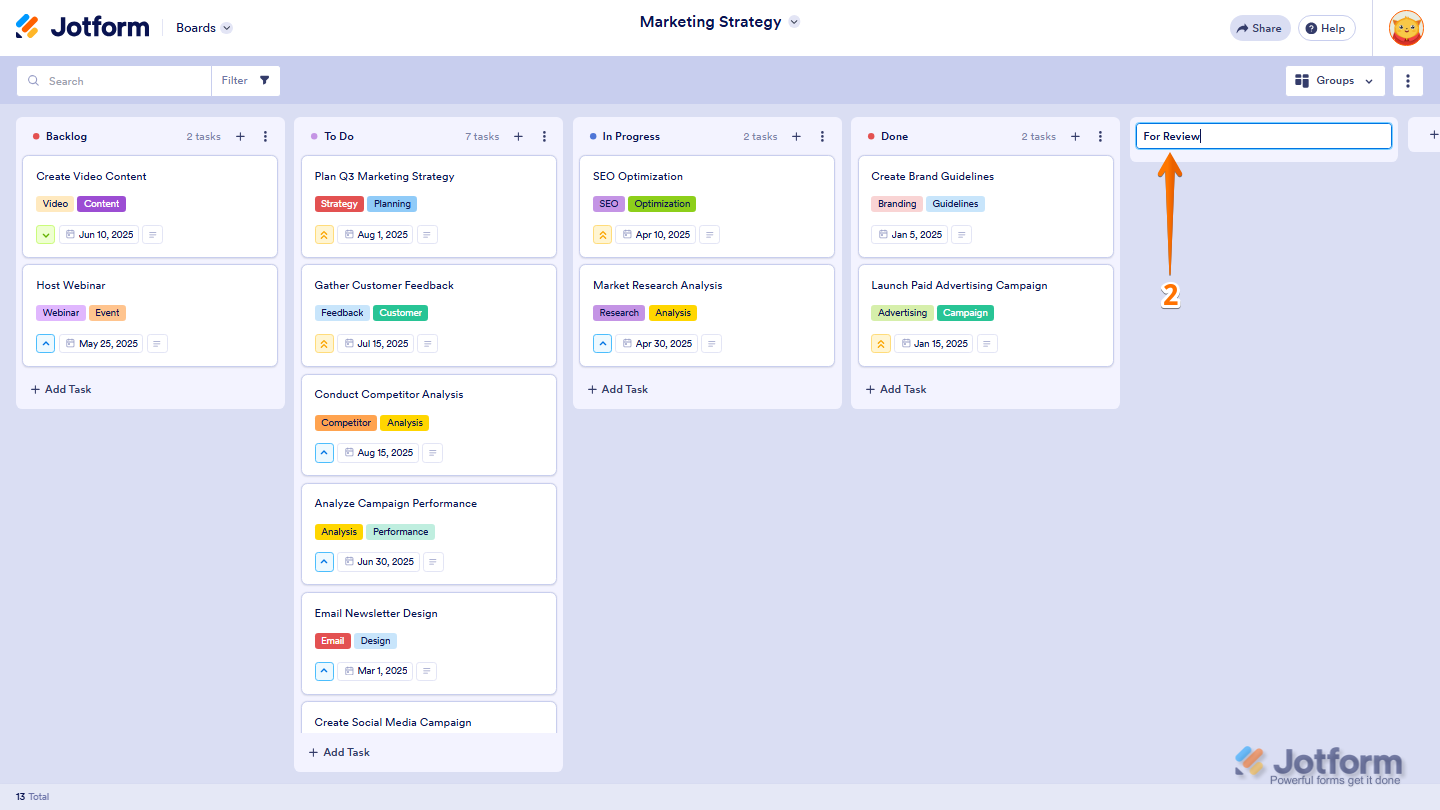
- Then, in the Enter a Title field that appears, enter a title for your group and press Enter on your keyboard.
And you can also do it this way:
- In the upper-right corner of the group, beside where you want to add the new group, click on the Three Dots icon.
- Then, in the menu that opens, click on Add New Group to Left or Add New Group to Right, depending on where you want to place the new group.
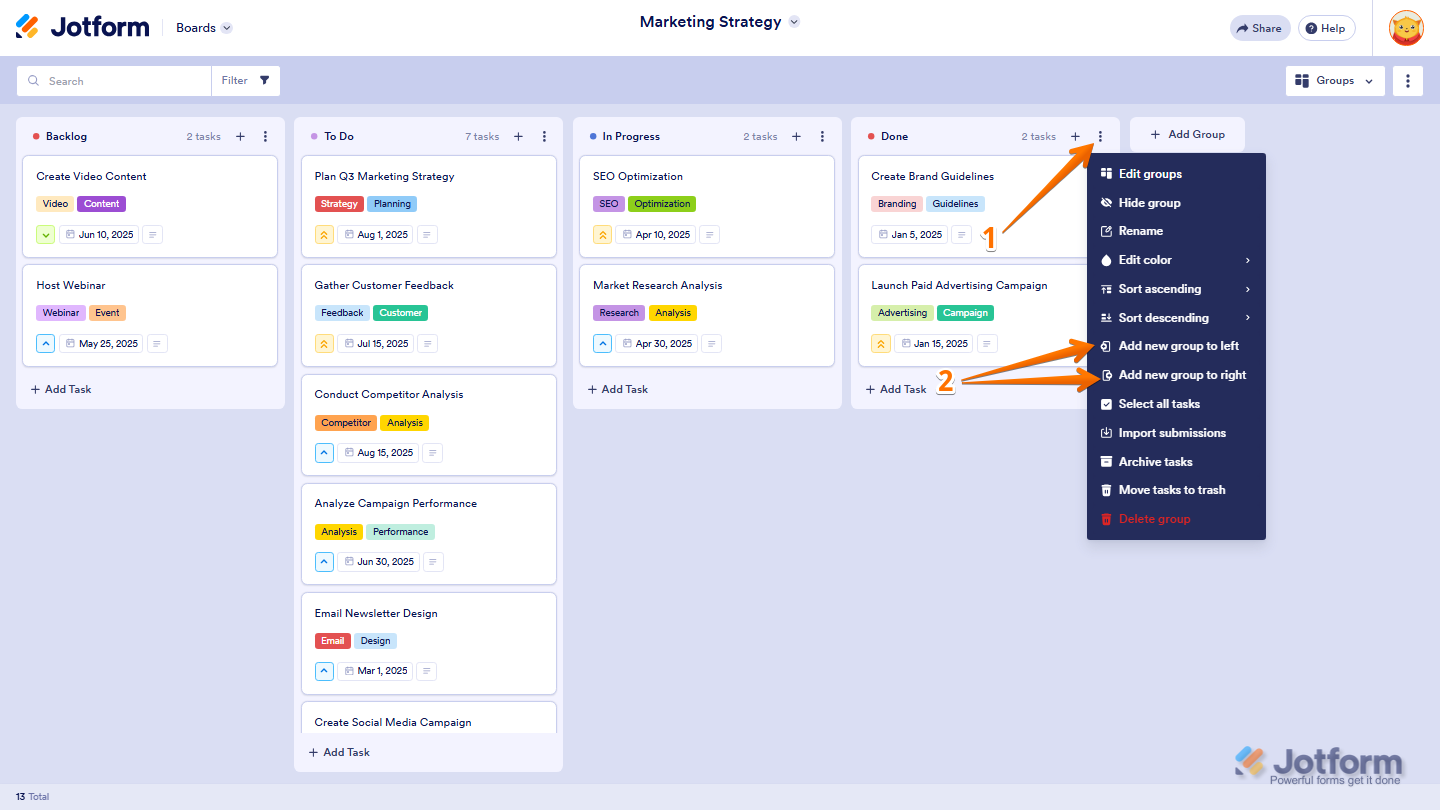
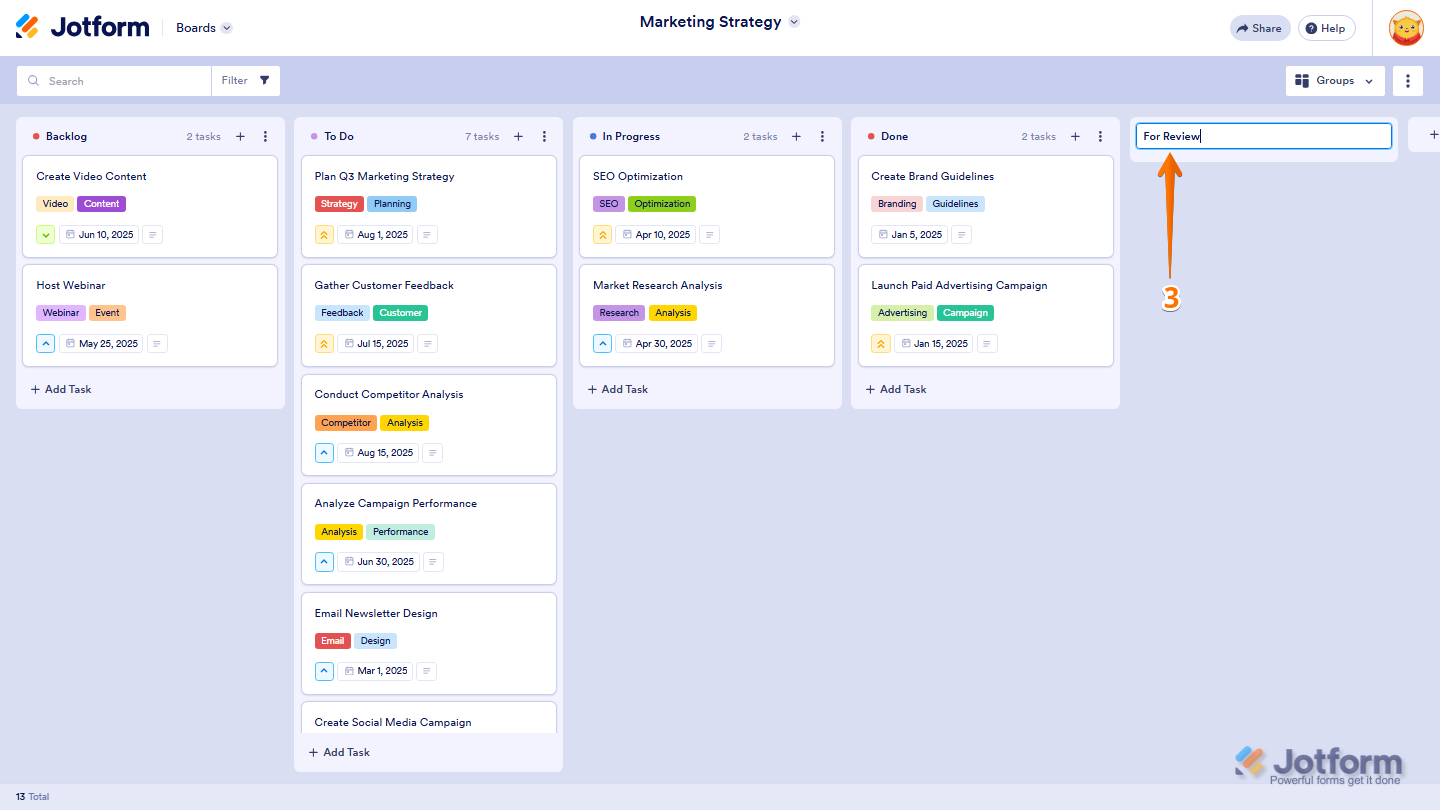
- Next, in the Enter a Title field that appears, enter a title for your group and press Enter on your keyboard, and you’re done.
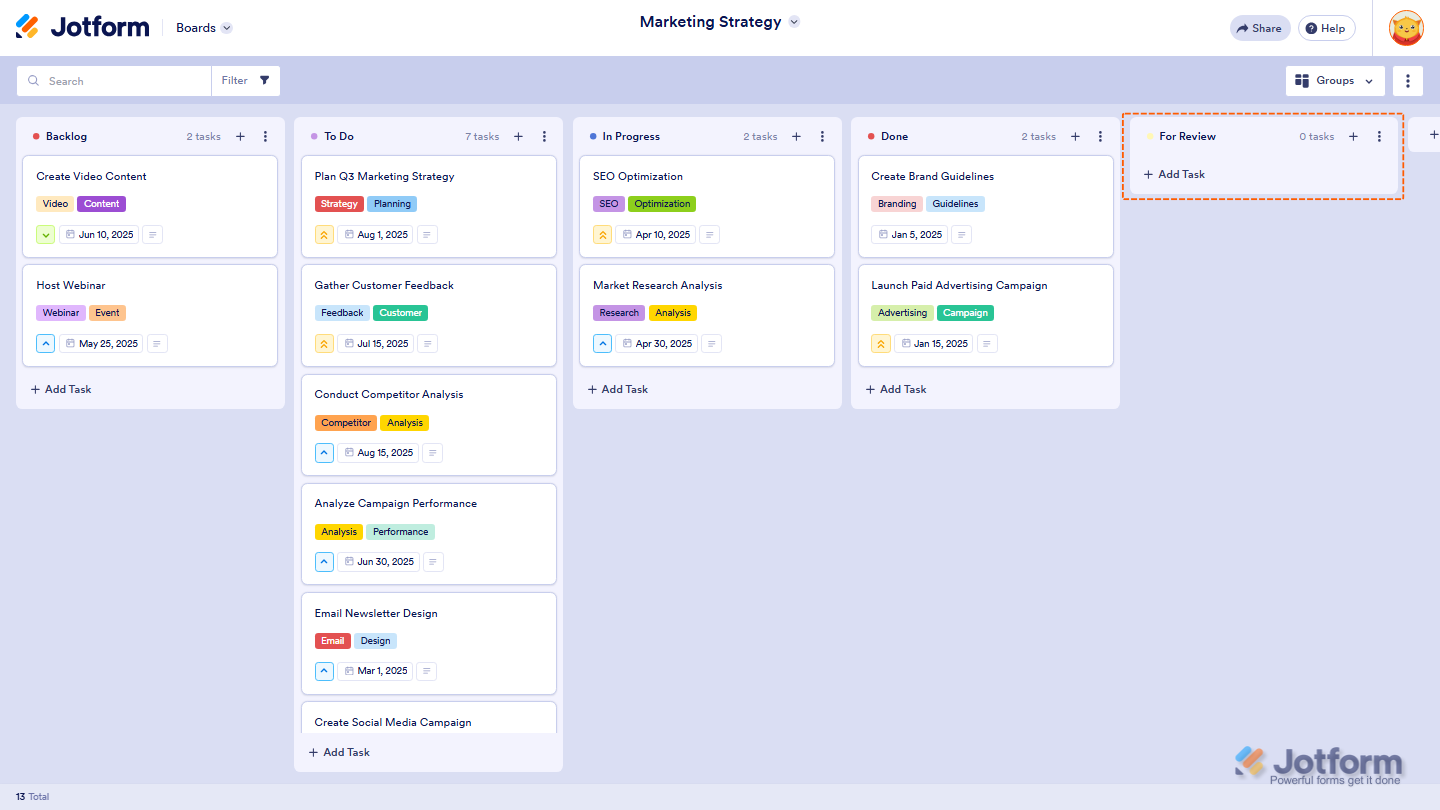
Your new group has been added successfully. You can now start organizing your tasks within it.
Renaming a Group
You can rename a group anytime to better match your workflow. This is how it’s done:
- In the upper-right corner of the group you want to rename, click on the Three Dots icon.
- Then, in the menu that opens, click on Rename.
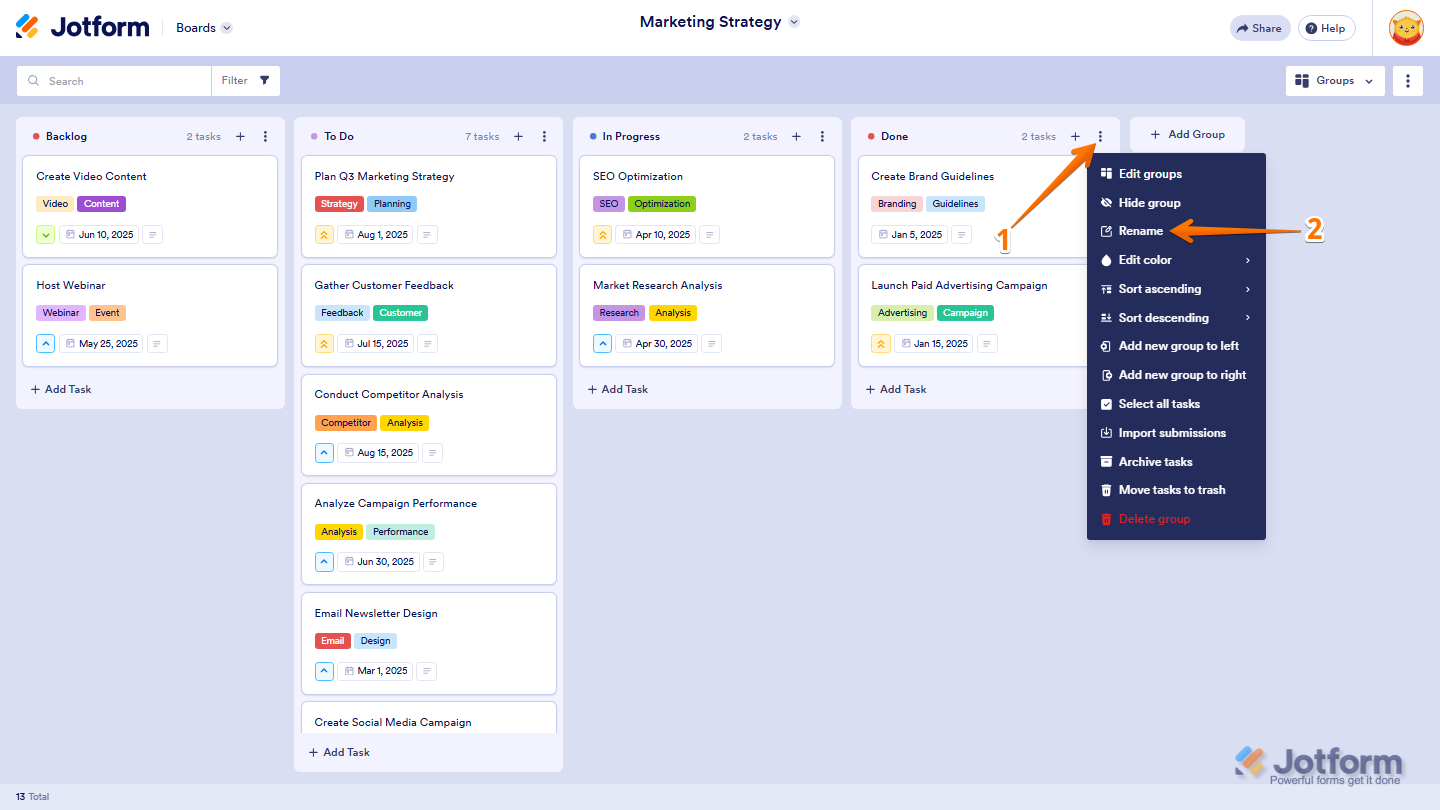
- Next, enter a new name for your group in the Enter a Title field, and press Enter on your keyboard.
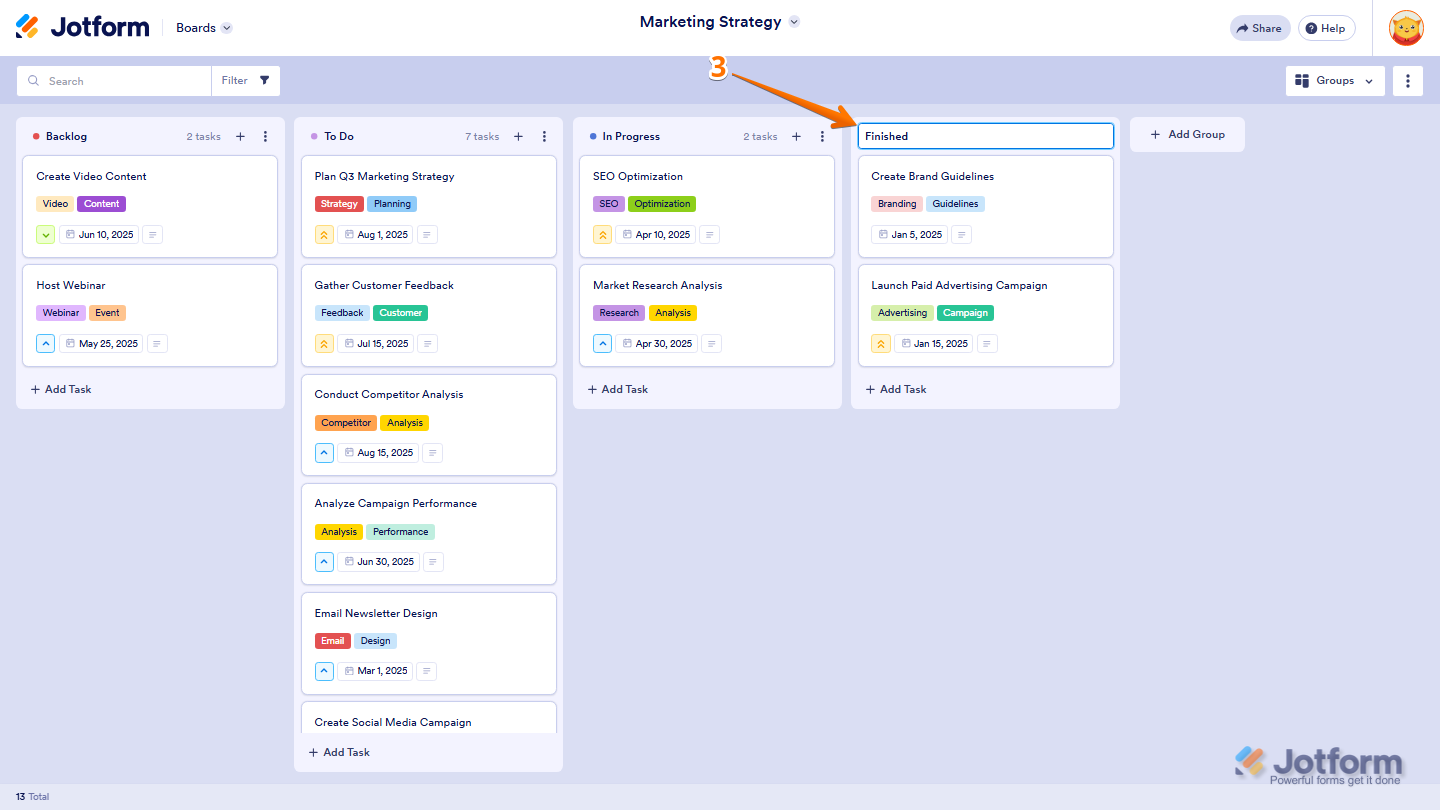
Deleting a Group
If you no longer need a group, you can remove it from your board in just a few clicks. Here’s a quick how-to:
- In the upper-right corner of the group you want to rename, click on the Three Dots icon.
- Then, in the menu that opens, click on Delete Group.
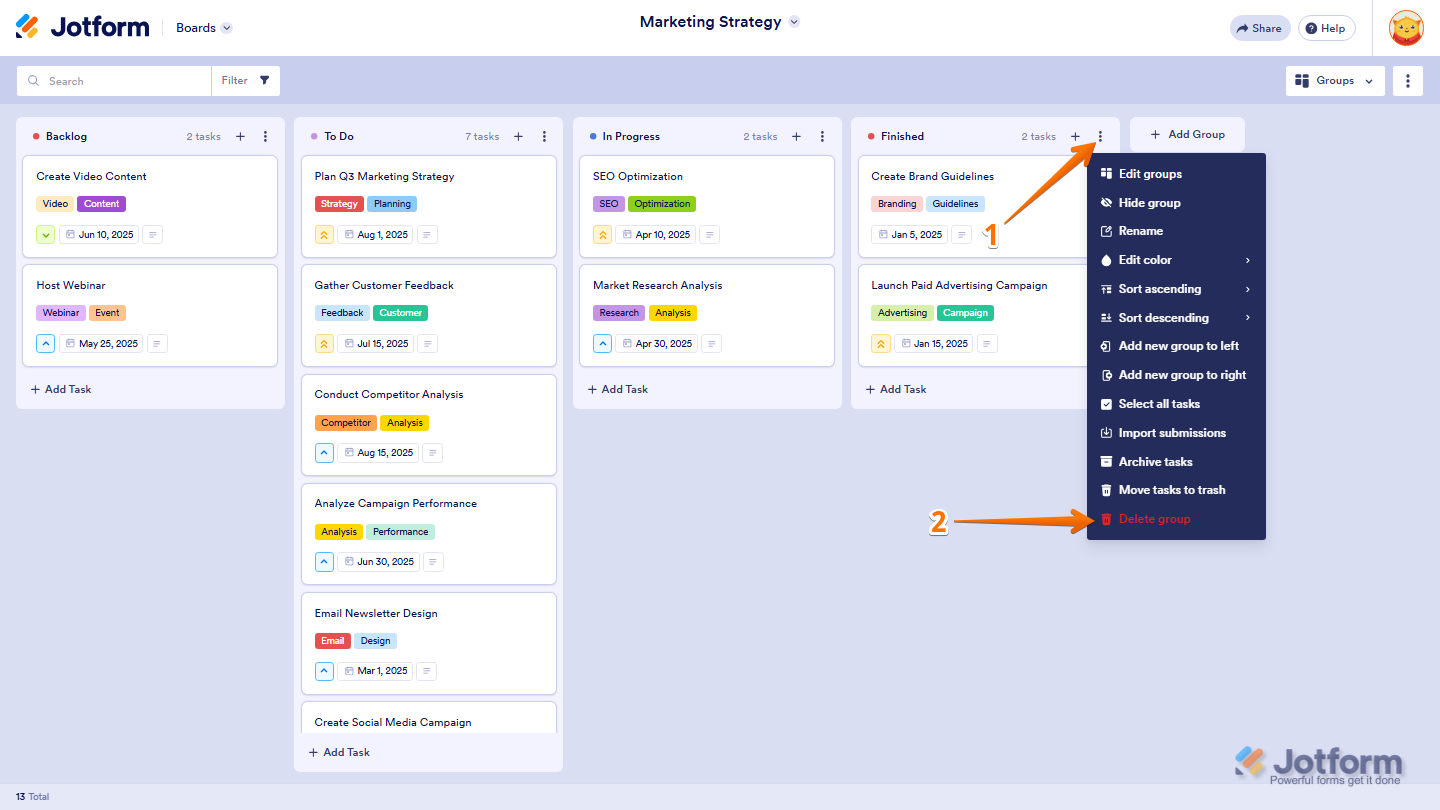
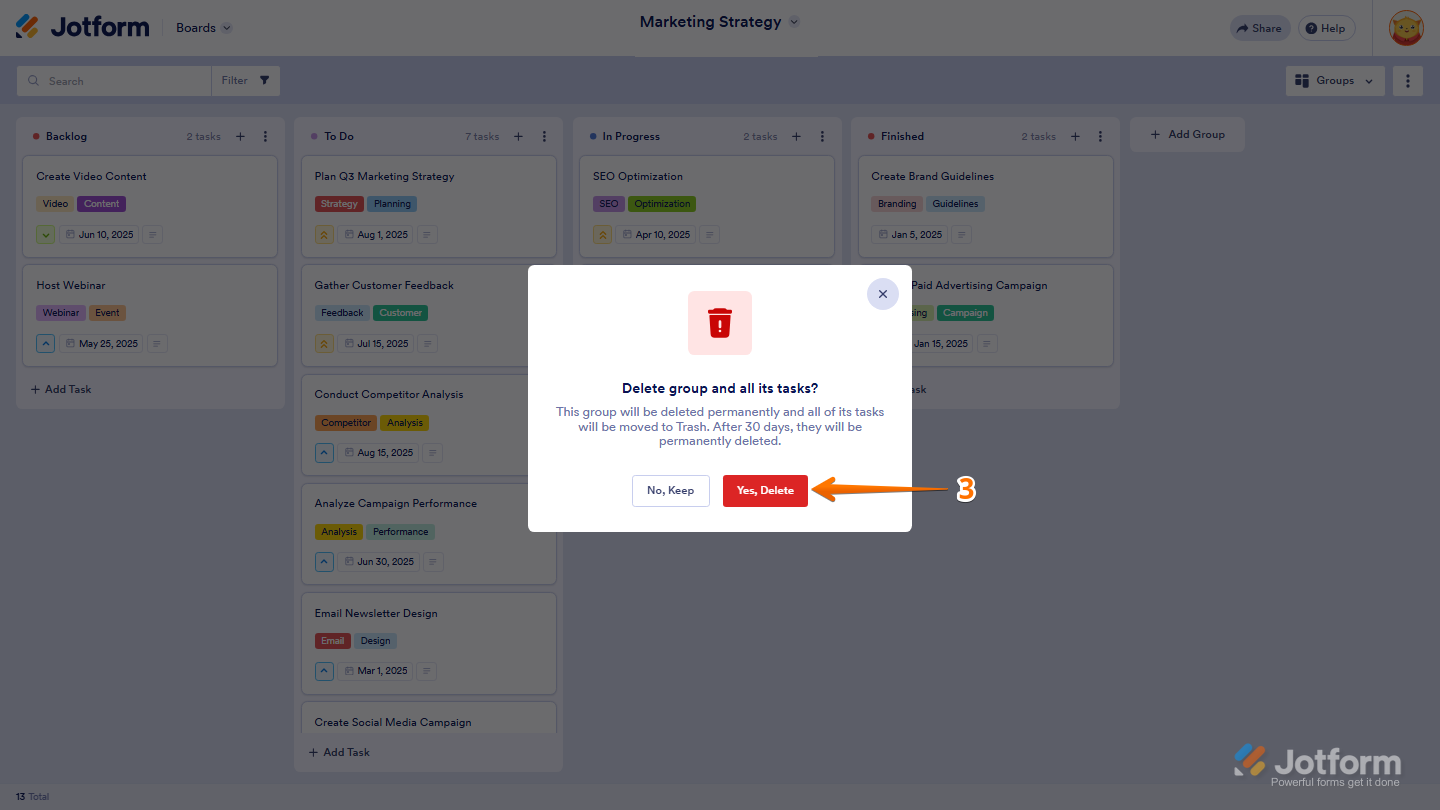
- Now, in the Confirmation window that comes up, click on Yes, Delete, and you’re done.
Managing Task Fields on Jotform Boards
Task fields let you store and organize additional information for every task on your board. You can add new custom fields or edit existing ones to better match your workflow.
Adding New Task Fields
You can add custom task fields to track additional information across all tasks on your board. It’s easier than you think:
- In the upper-right corner of your Board, click on the Three Dots icon.
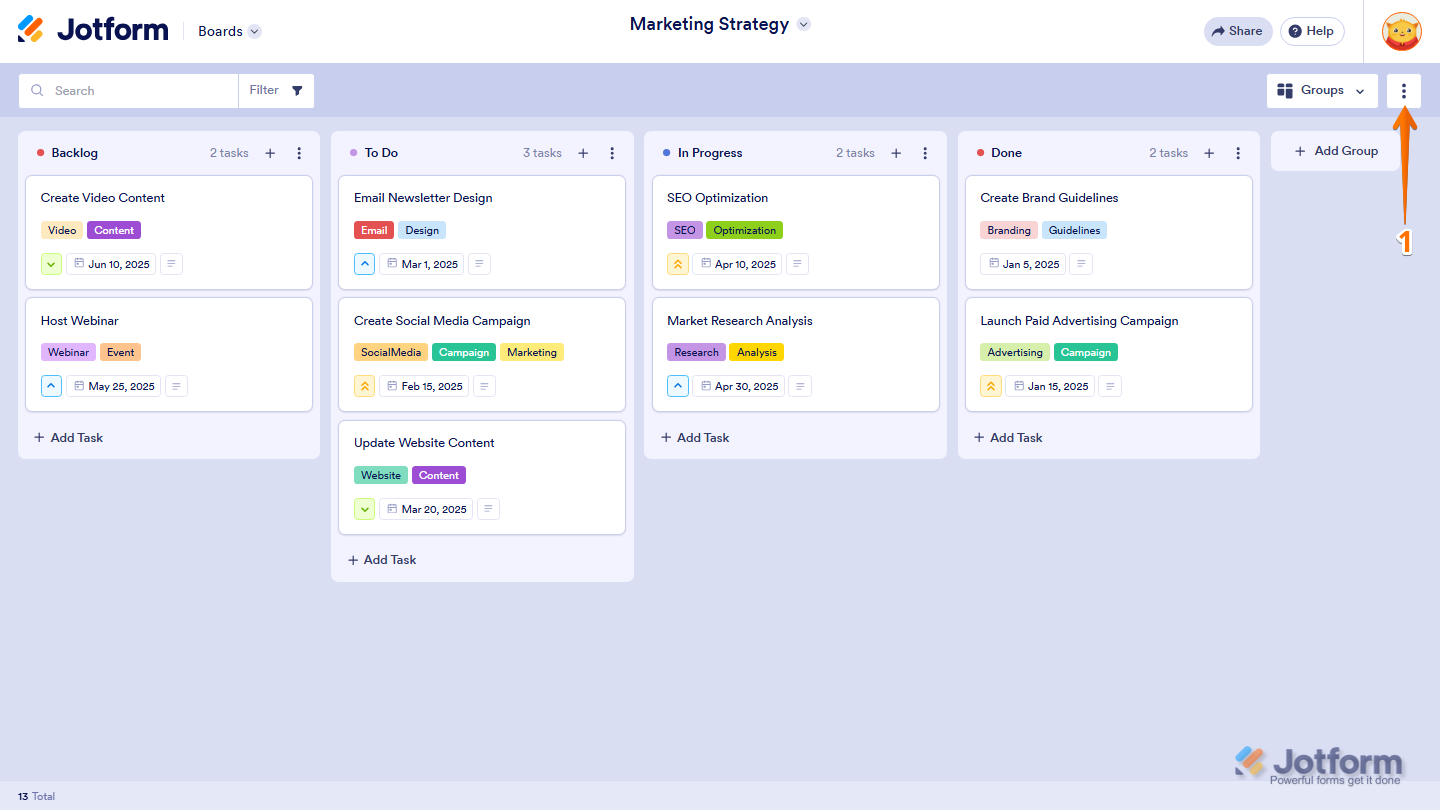
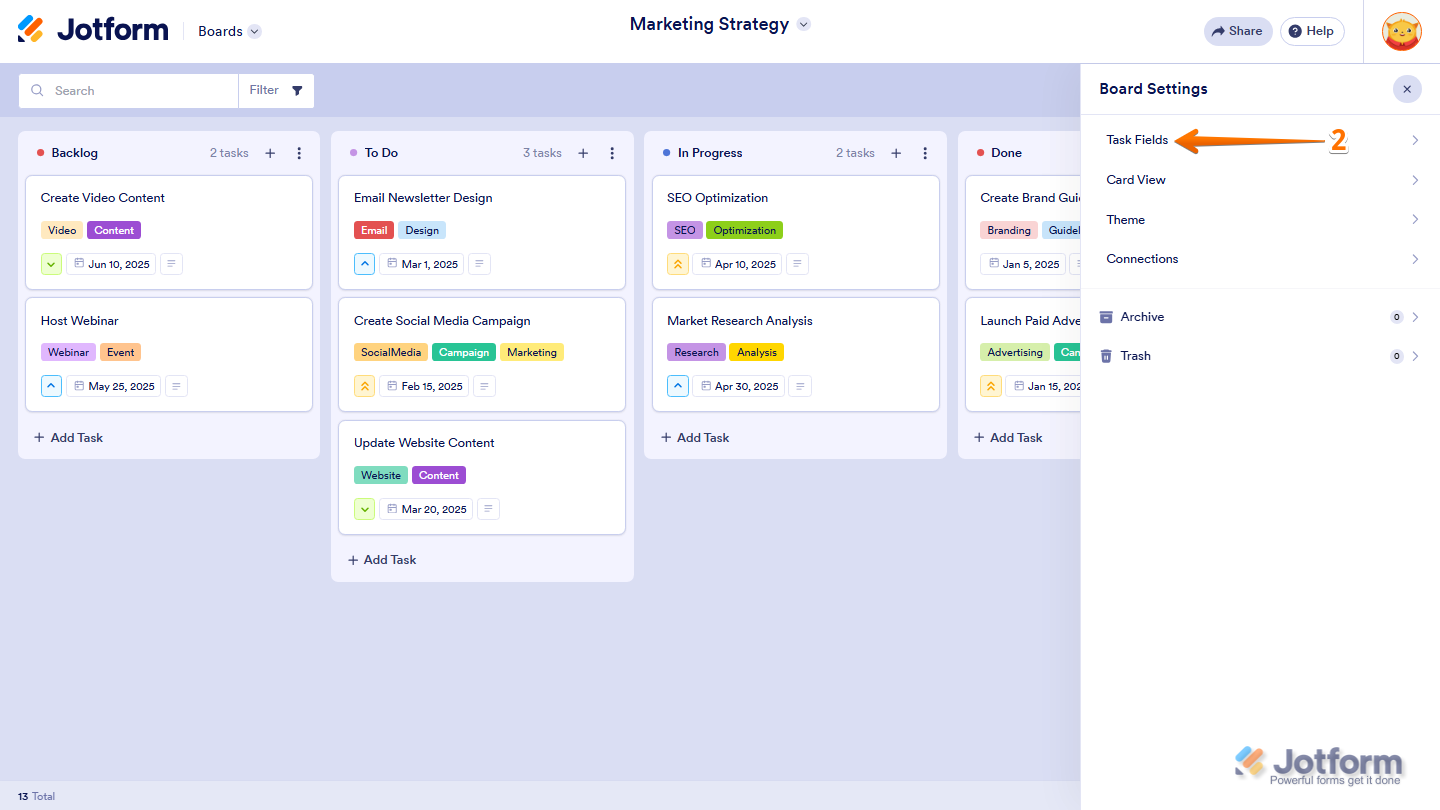
- Then, in the Board Settings menu that opens, select Task Fields.
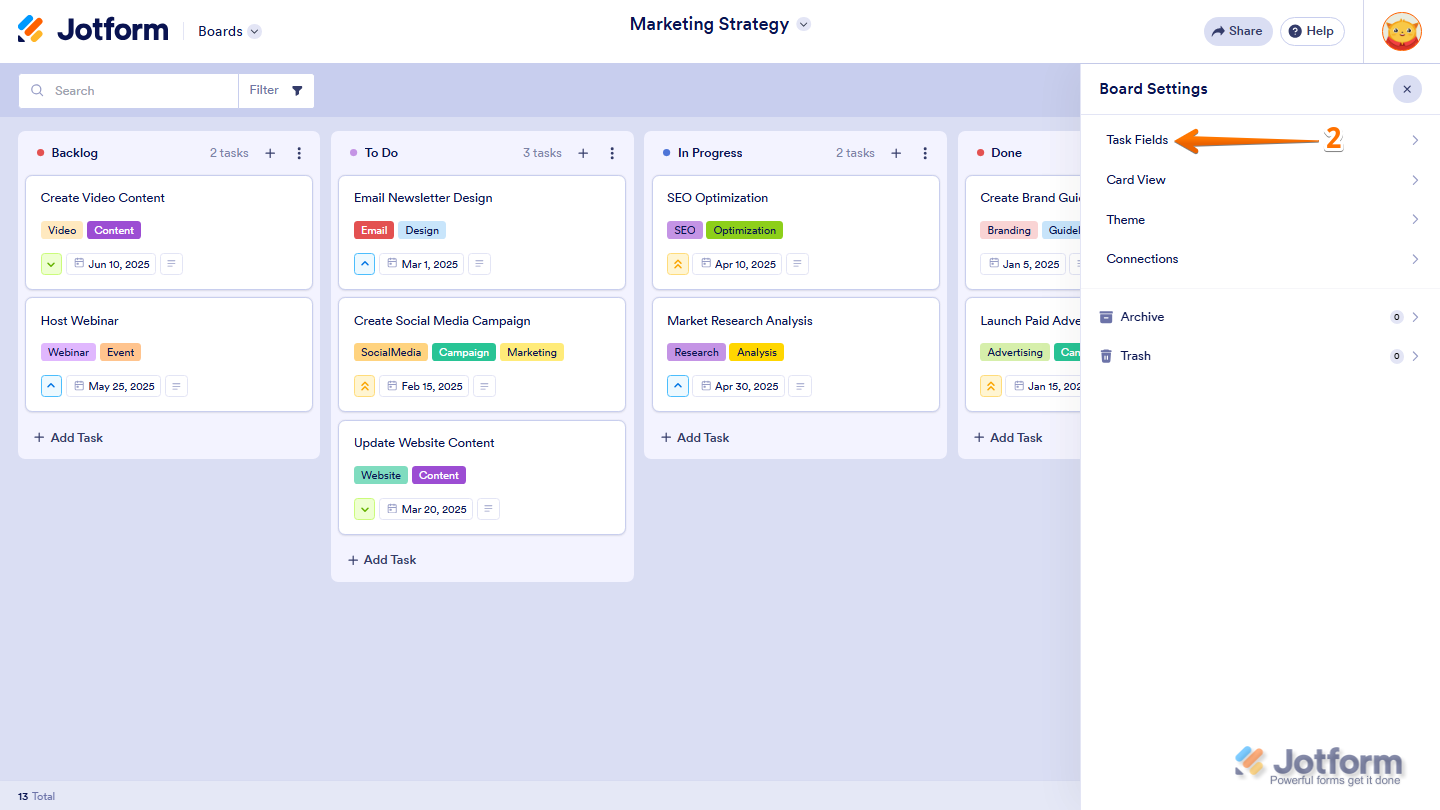
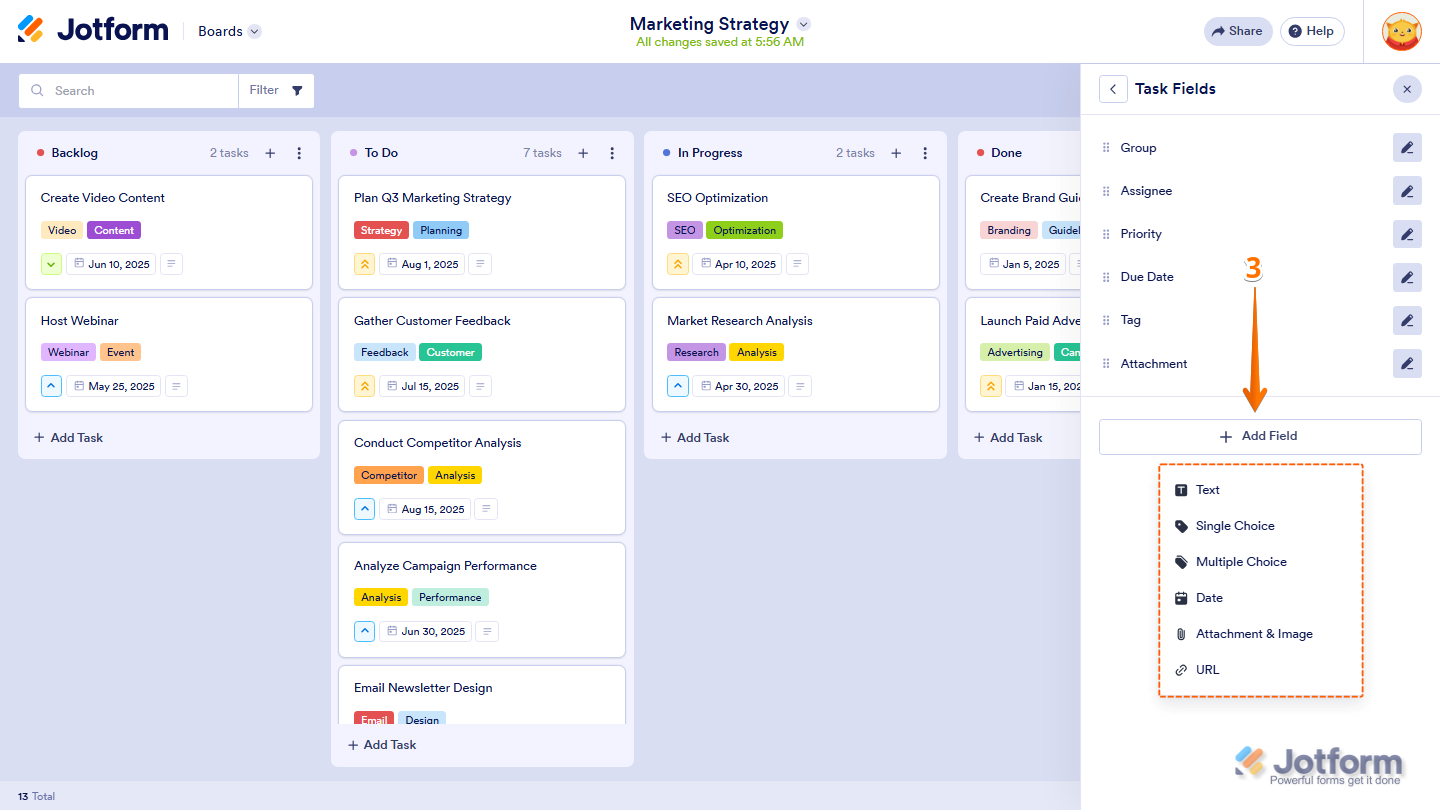
- Now, in the Task Fields menu that opens, click on Add Field, and then select the type of field you want to add:
- Text — Displays a text field.
- Single Choice — Displays a field with one selectable option.
- Multiple Choice — Displays a field with multiple selectable options.
- Date — Displays a date field.
- Attachment & Image — Displays a field for file and image attachments.
- URL — Displays a field for website links.
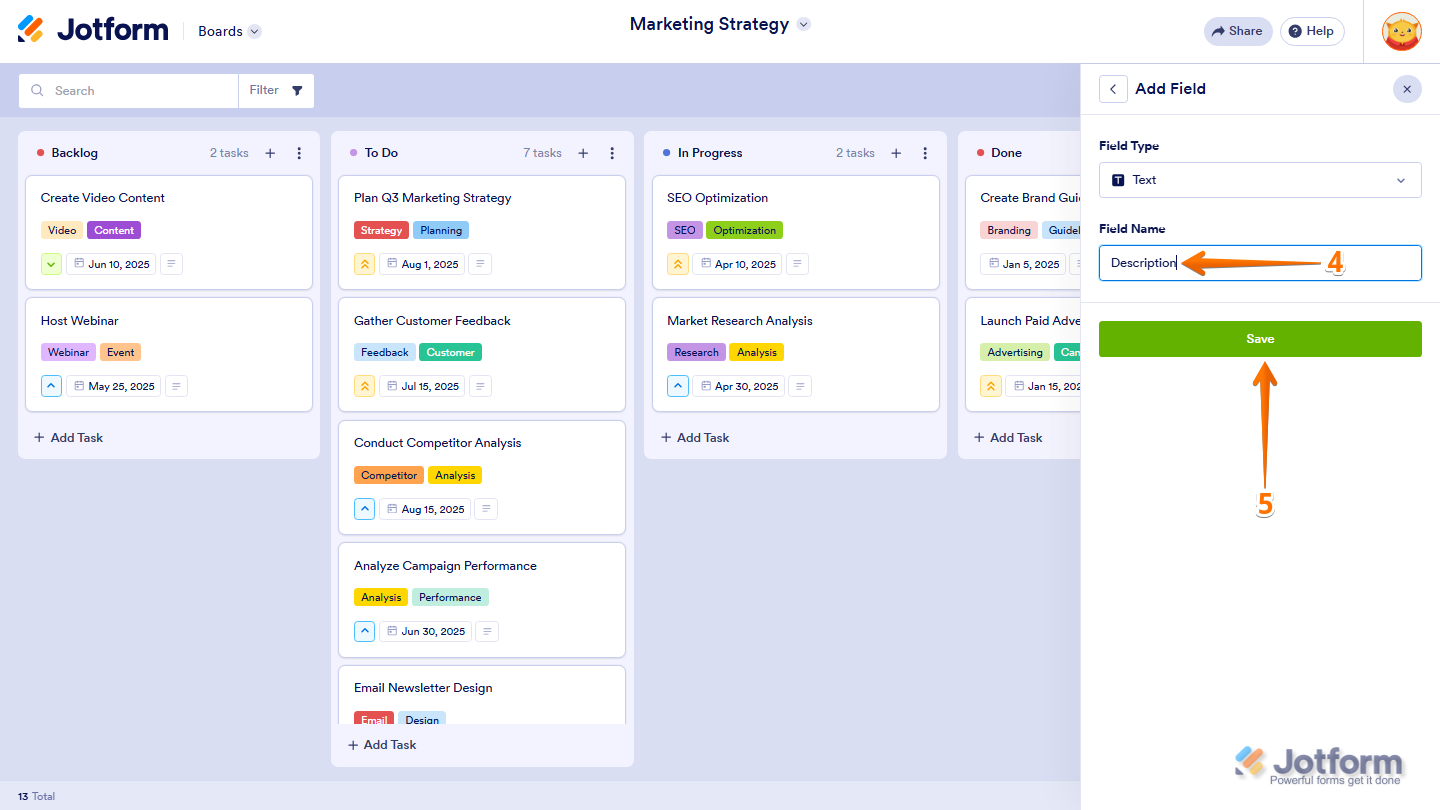
- Next, in the Add Field menu that opens, enter a name for your field in the Field Name Input box.
- Finally, click on Save, and you’re good to go.
Note
- You can only add 5 custom fields on your board.
- All the added fields will appear in all the tasks on the board.
Editing Task Fields
If you want to rename or update one of your custom task fields, you can edit it anytime. Here’s how to get going:
- In the upper-right corner of your Board, click on the Three Dots icon.
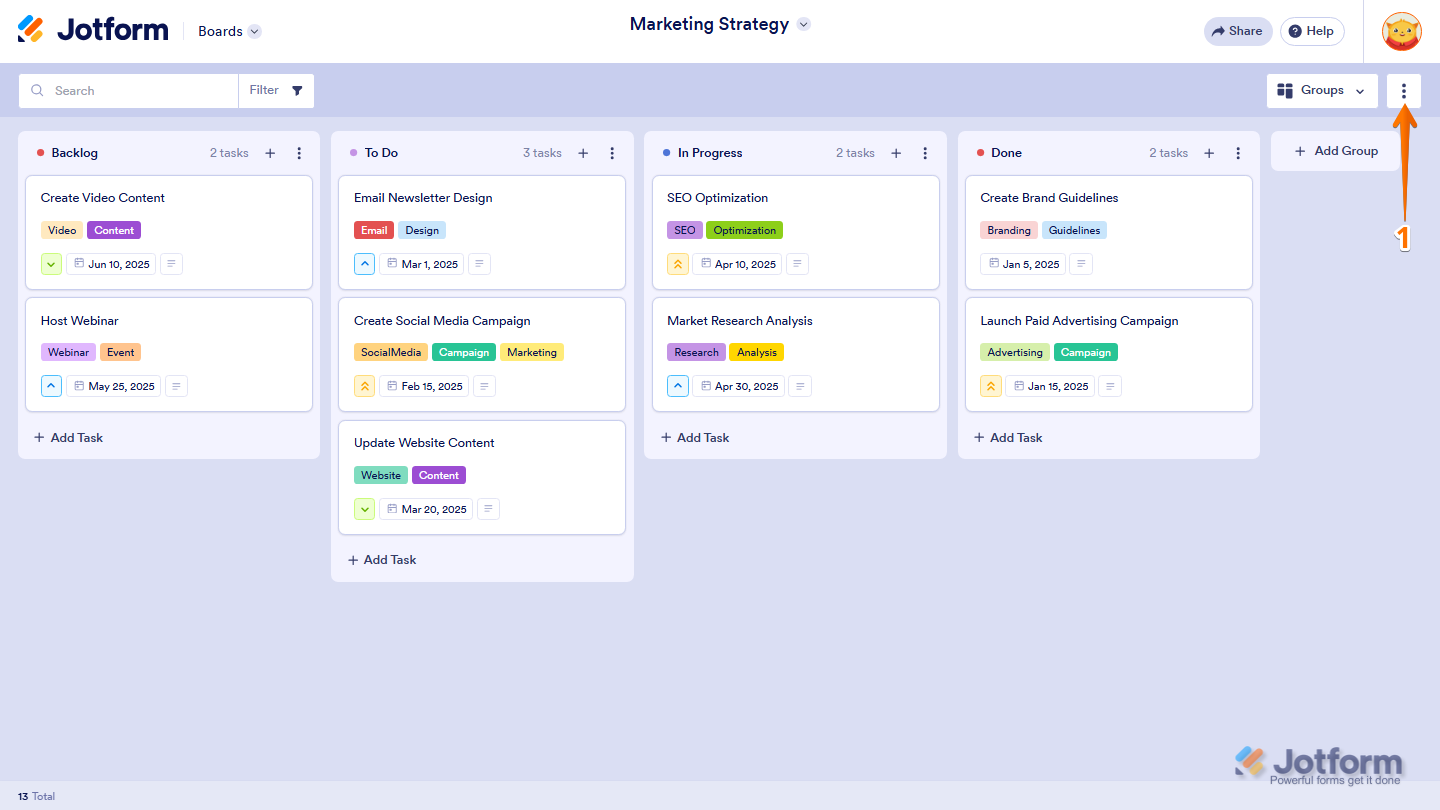
- Then, in the Board Settings menu that opens, select Task Fields.
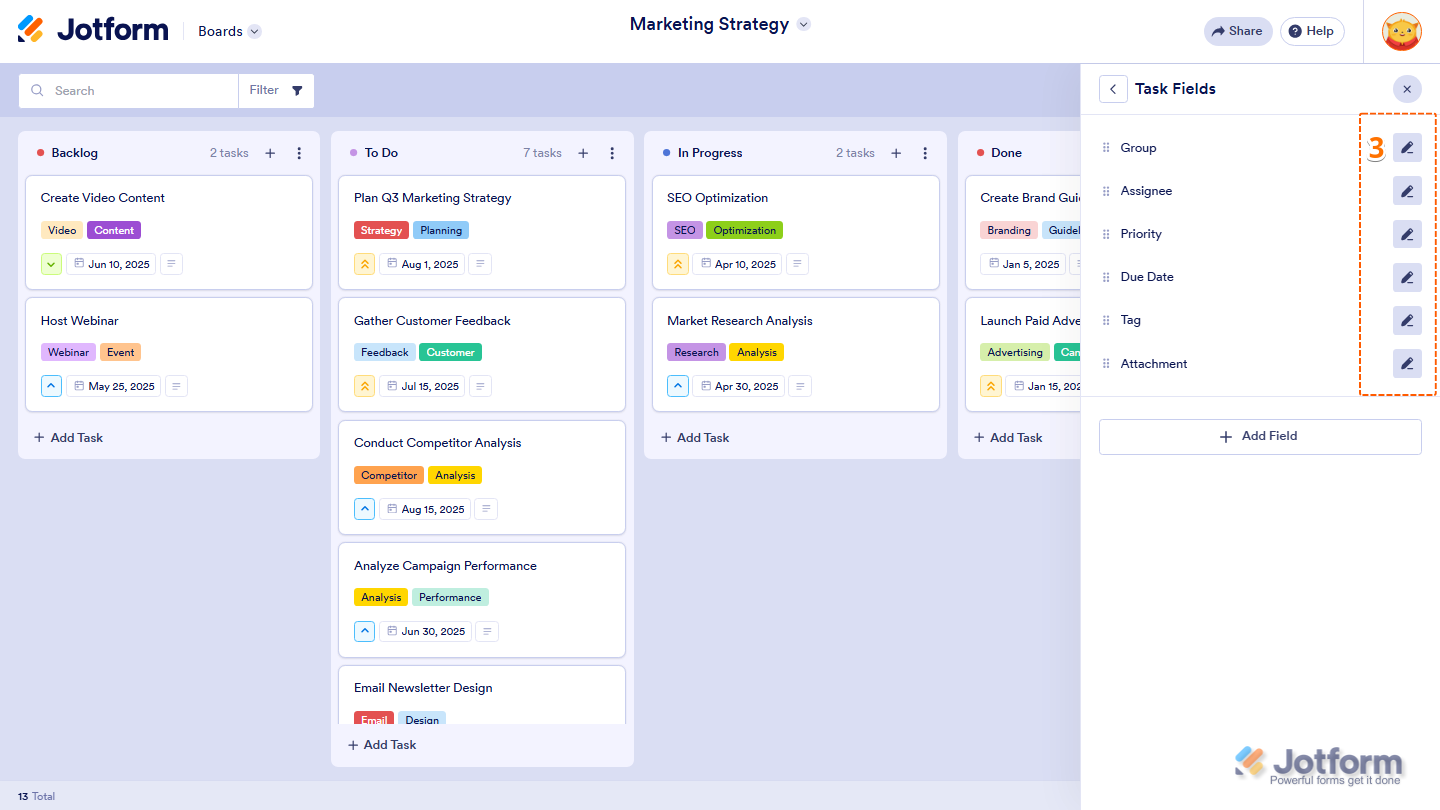
- Then, in the Task Fields menu that opens, click on the Pencil icon next to the field you want to edit.

Send Comment: