In Tables, the search bar is your primary tool for retrieving and filtering user data. It is useful when managing a large number of submissions from your users. It is convenient as it displays results as soon as you type them.
Here are some examples of how you can use the search bar:
- You’re looking for submissions sent by someone named John Doe.
- You want to find submissions that were sent on a specific date.
- You want to display submissions from people who answered Yes to a survey question.
How can you do this? It’s simple. Open Tables, and type your search query into the search bar or use the filter to filter submissions based on a date or a particular answer.
Search for a Specific Submission
For example, if you’re using the Full Name element in your form, you can search for the submitter’s full name, as shown below.
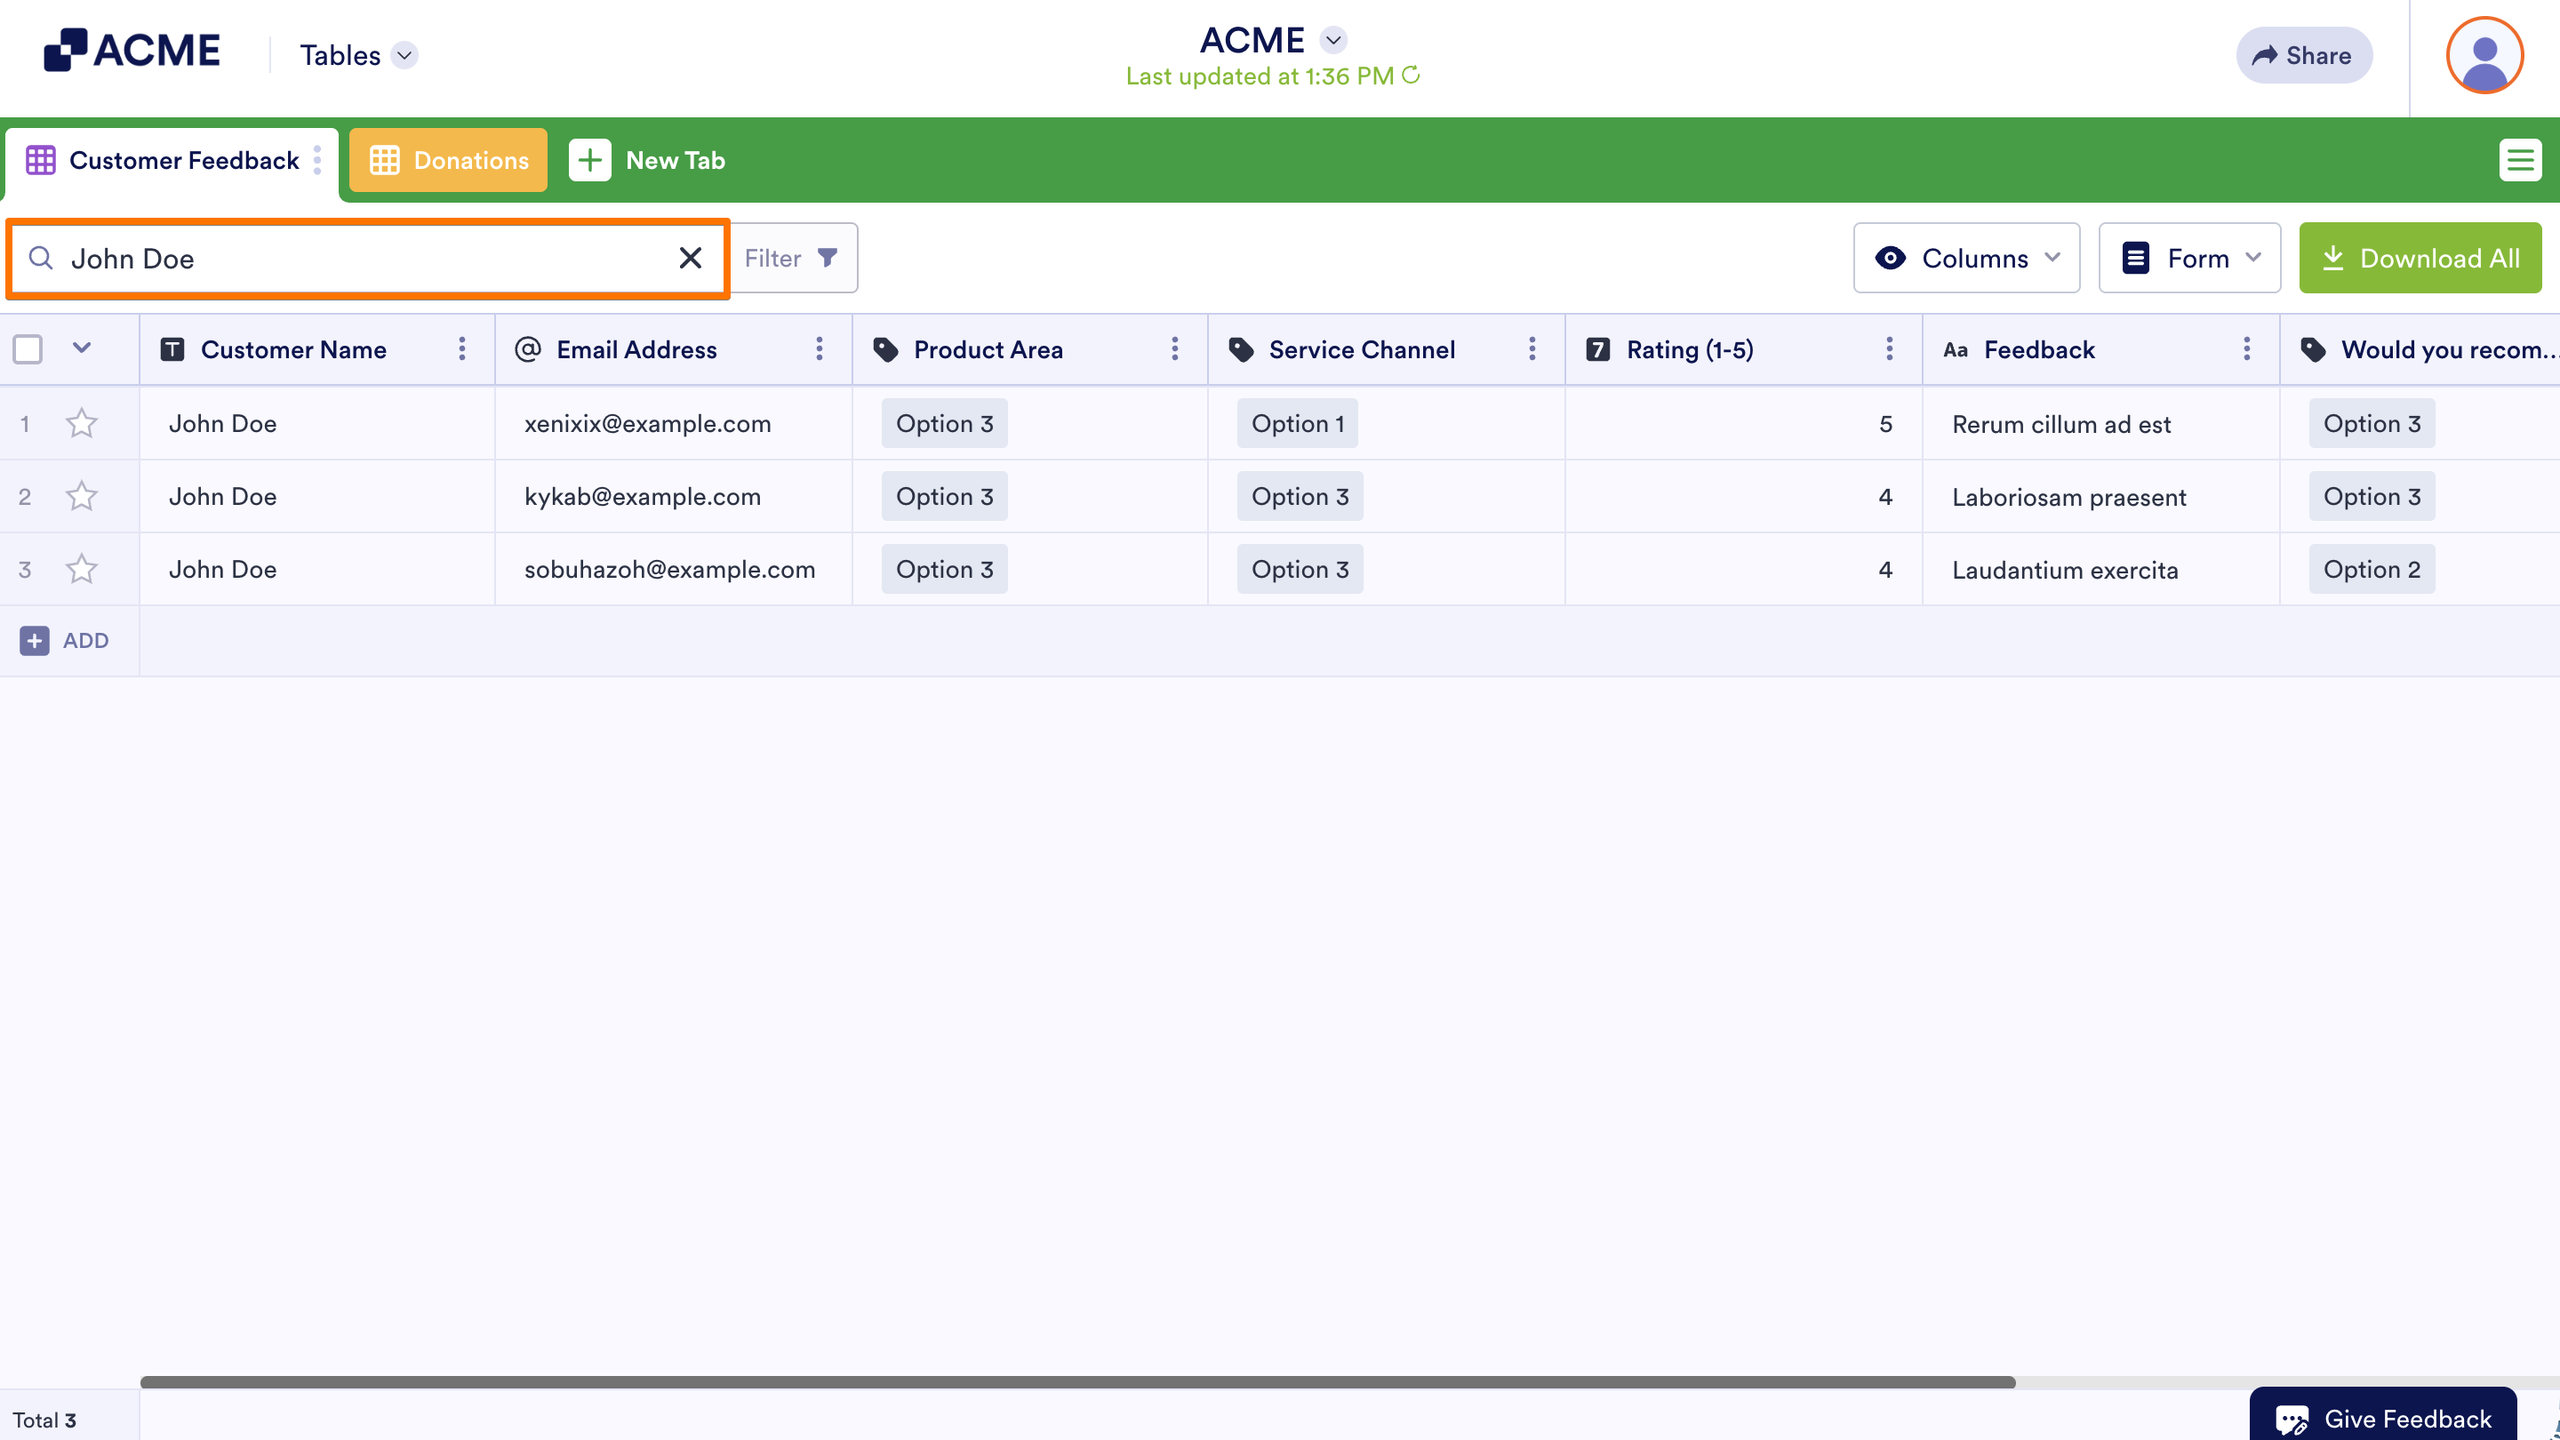
You should automatically see the results after typing your query into the search bar. You don’t need to press the enter key on your keyboard.
Filter Submissions Based on a Specific Date
You can also filter your form submissions based on a specific date. For example, filter the entries for the day. Below are the steps to do that:
- In Tables, click the Filter button.
- Click the All Time dropdown.
- Select the dates from the calendar or click the specific option on the right side of the calendar.
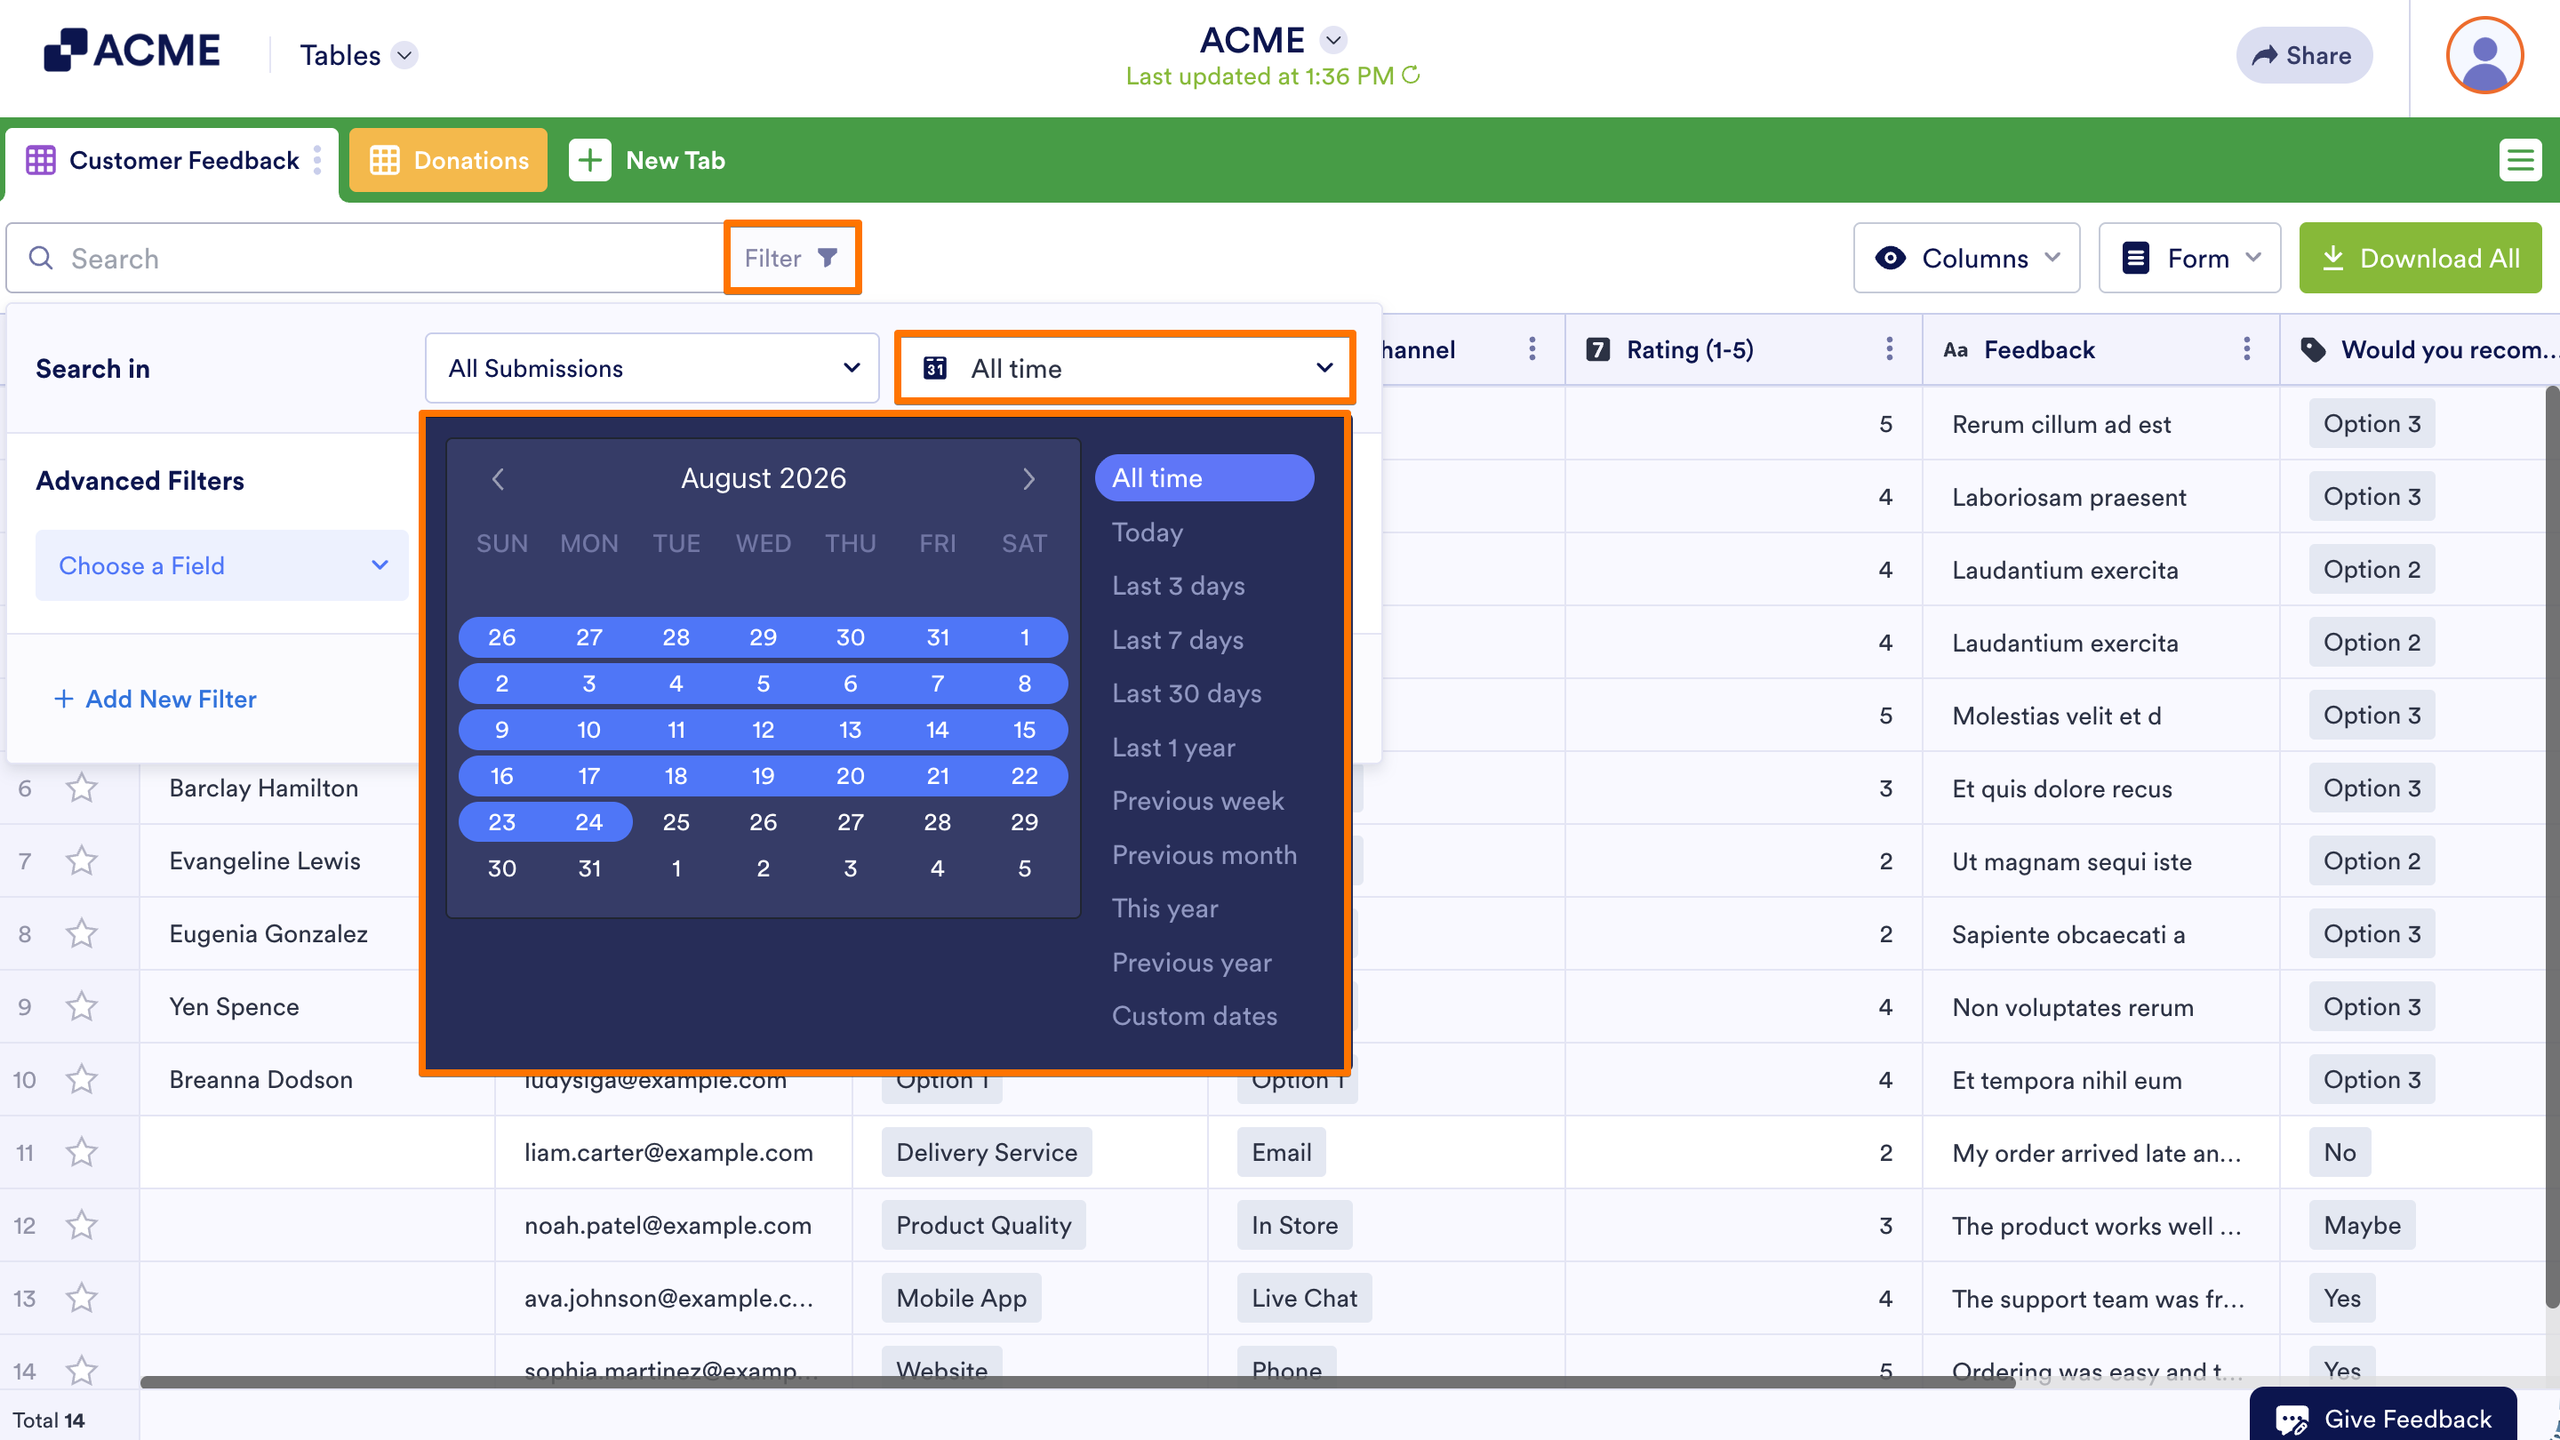
- Click outside of the filter box to save your selection.
- Finally, click the Apply Filter button. You should automatically see the filtered submissions.
Filter Submissions Based on an Answer from a Specific Field
In Tables, you can filter the submissions based on an answer from a specific element of your form — a single-choice element, for example.
- Click the Filter button.
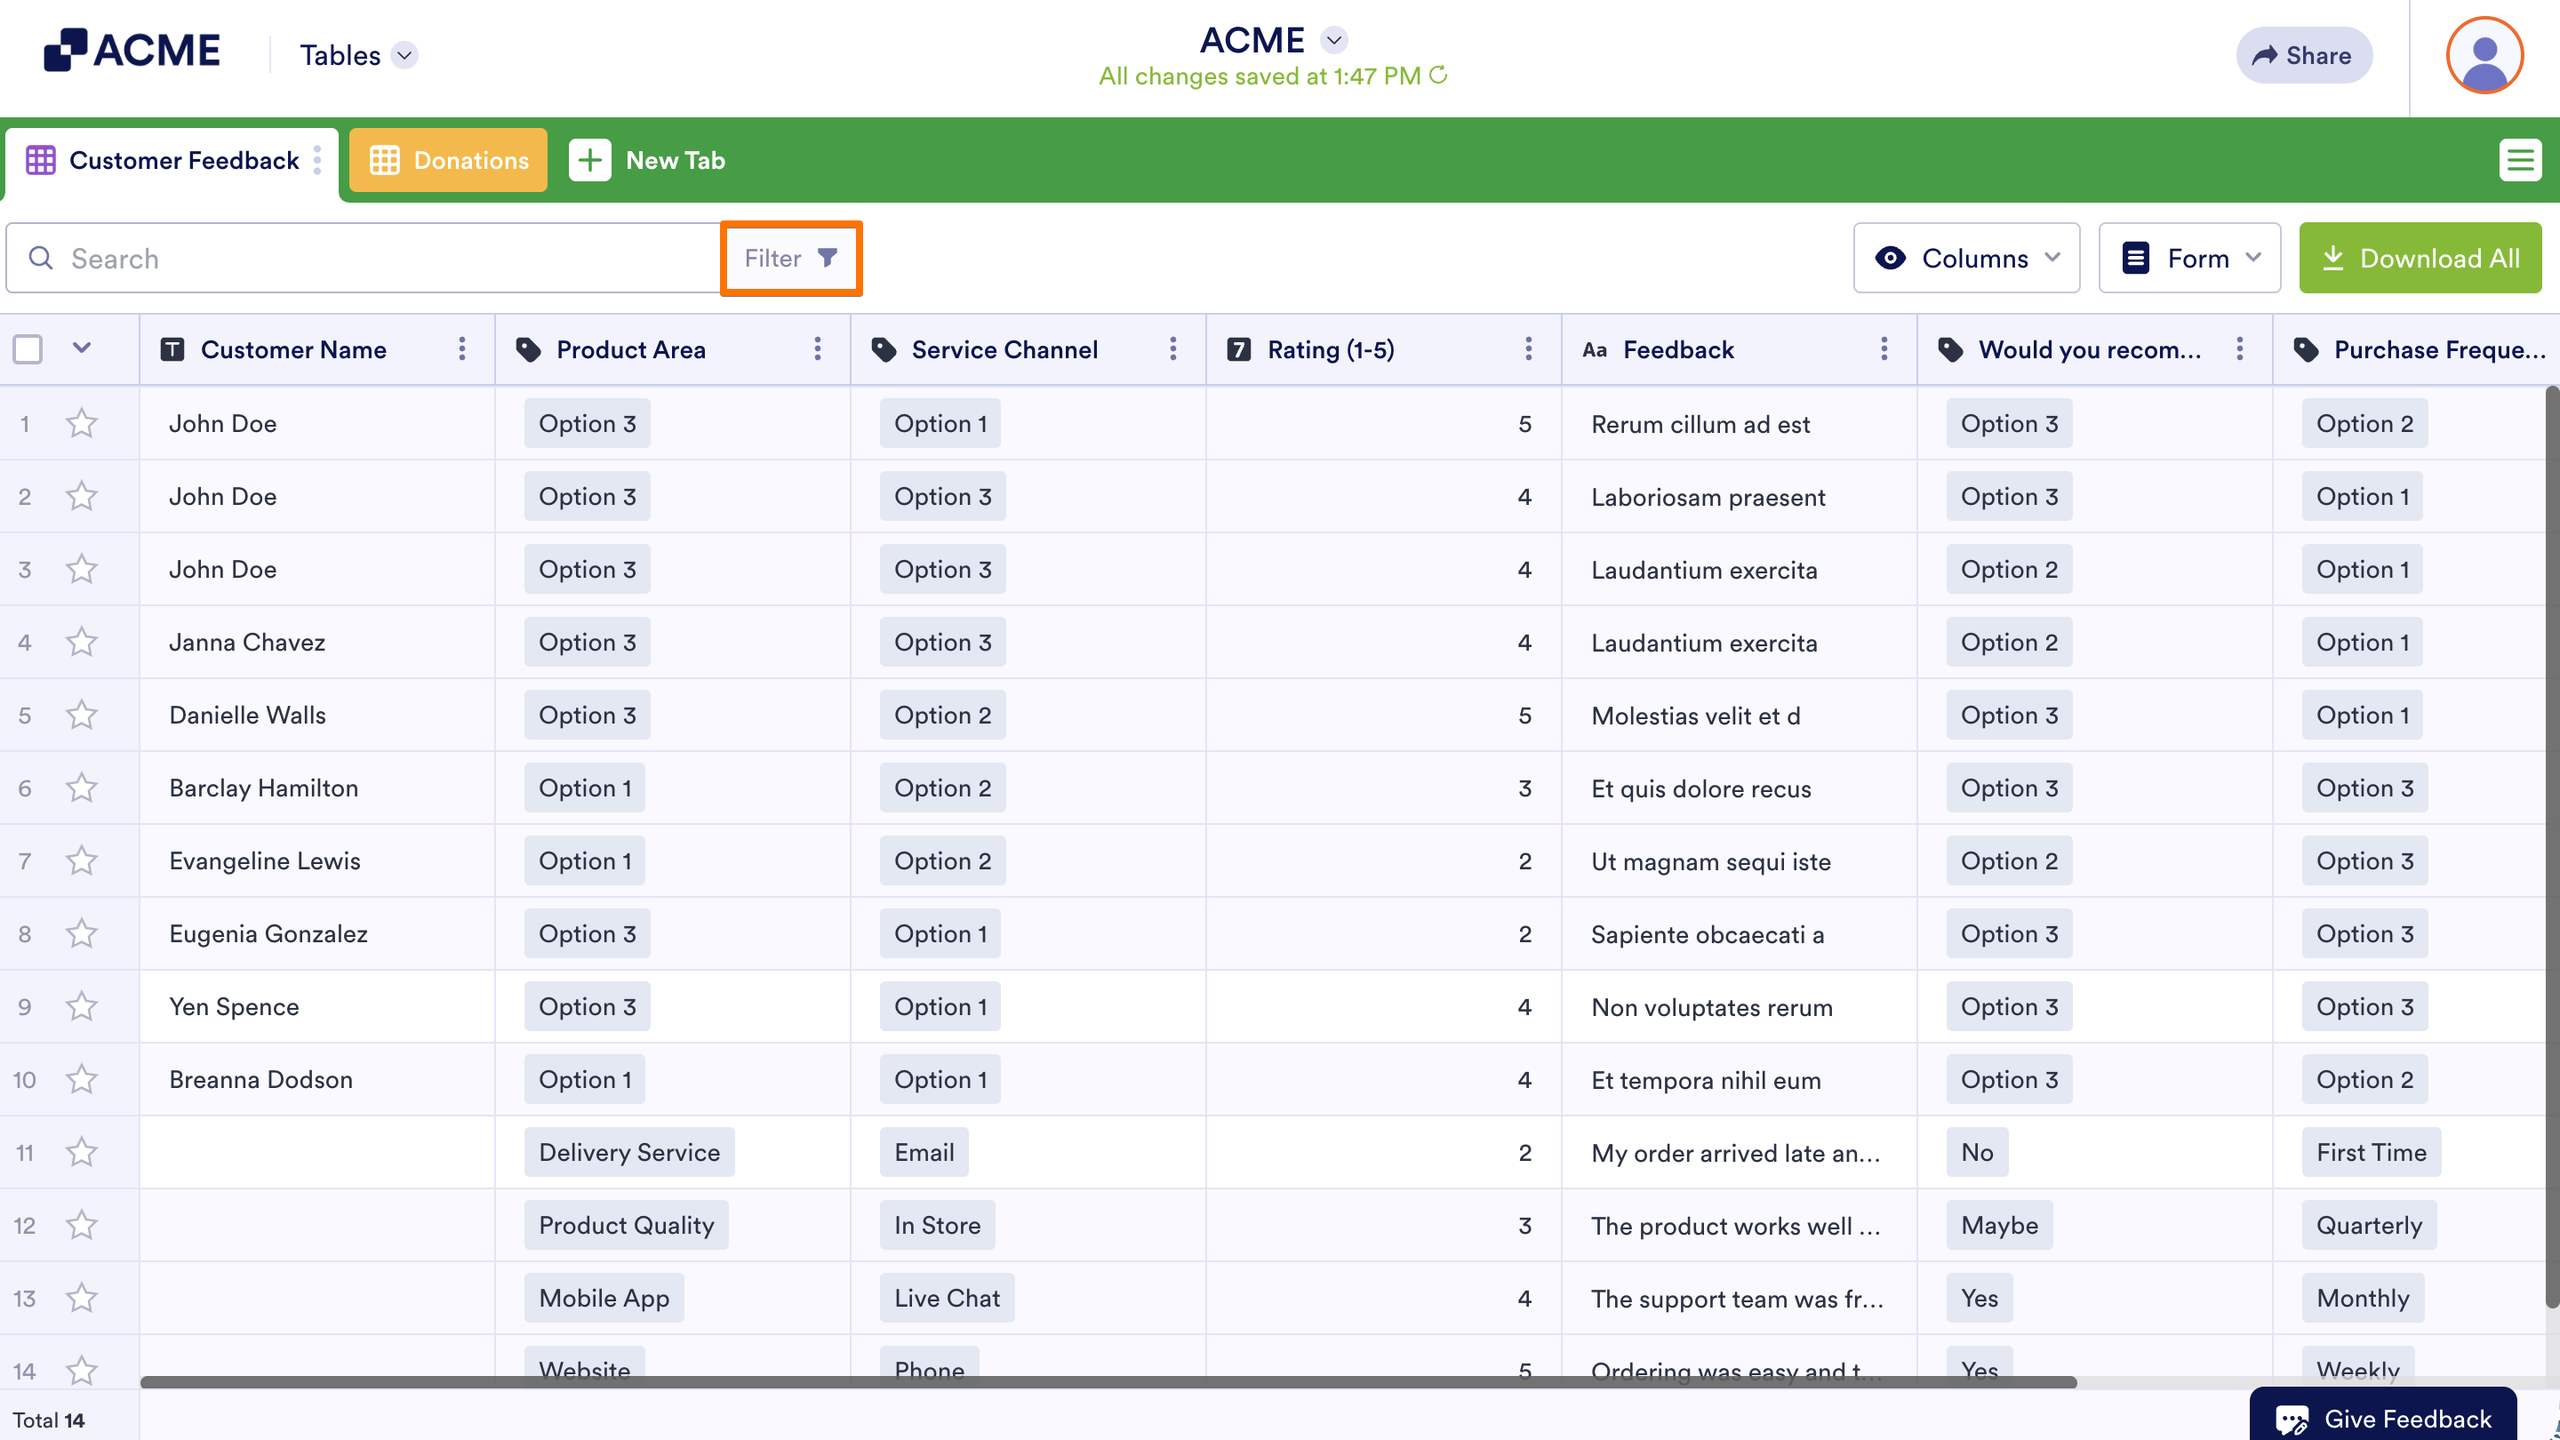
- Select the field from the Advanced Filters dropdown.
- Choose the type of operator you want to use for your research.
- Enter the value you are searching for.
- Click the Apply Filter button to apply your criteria.
Note
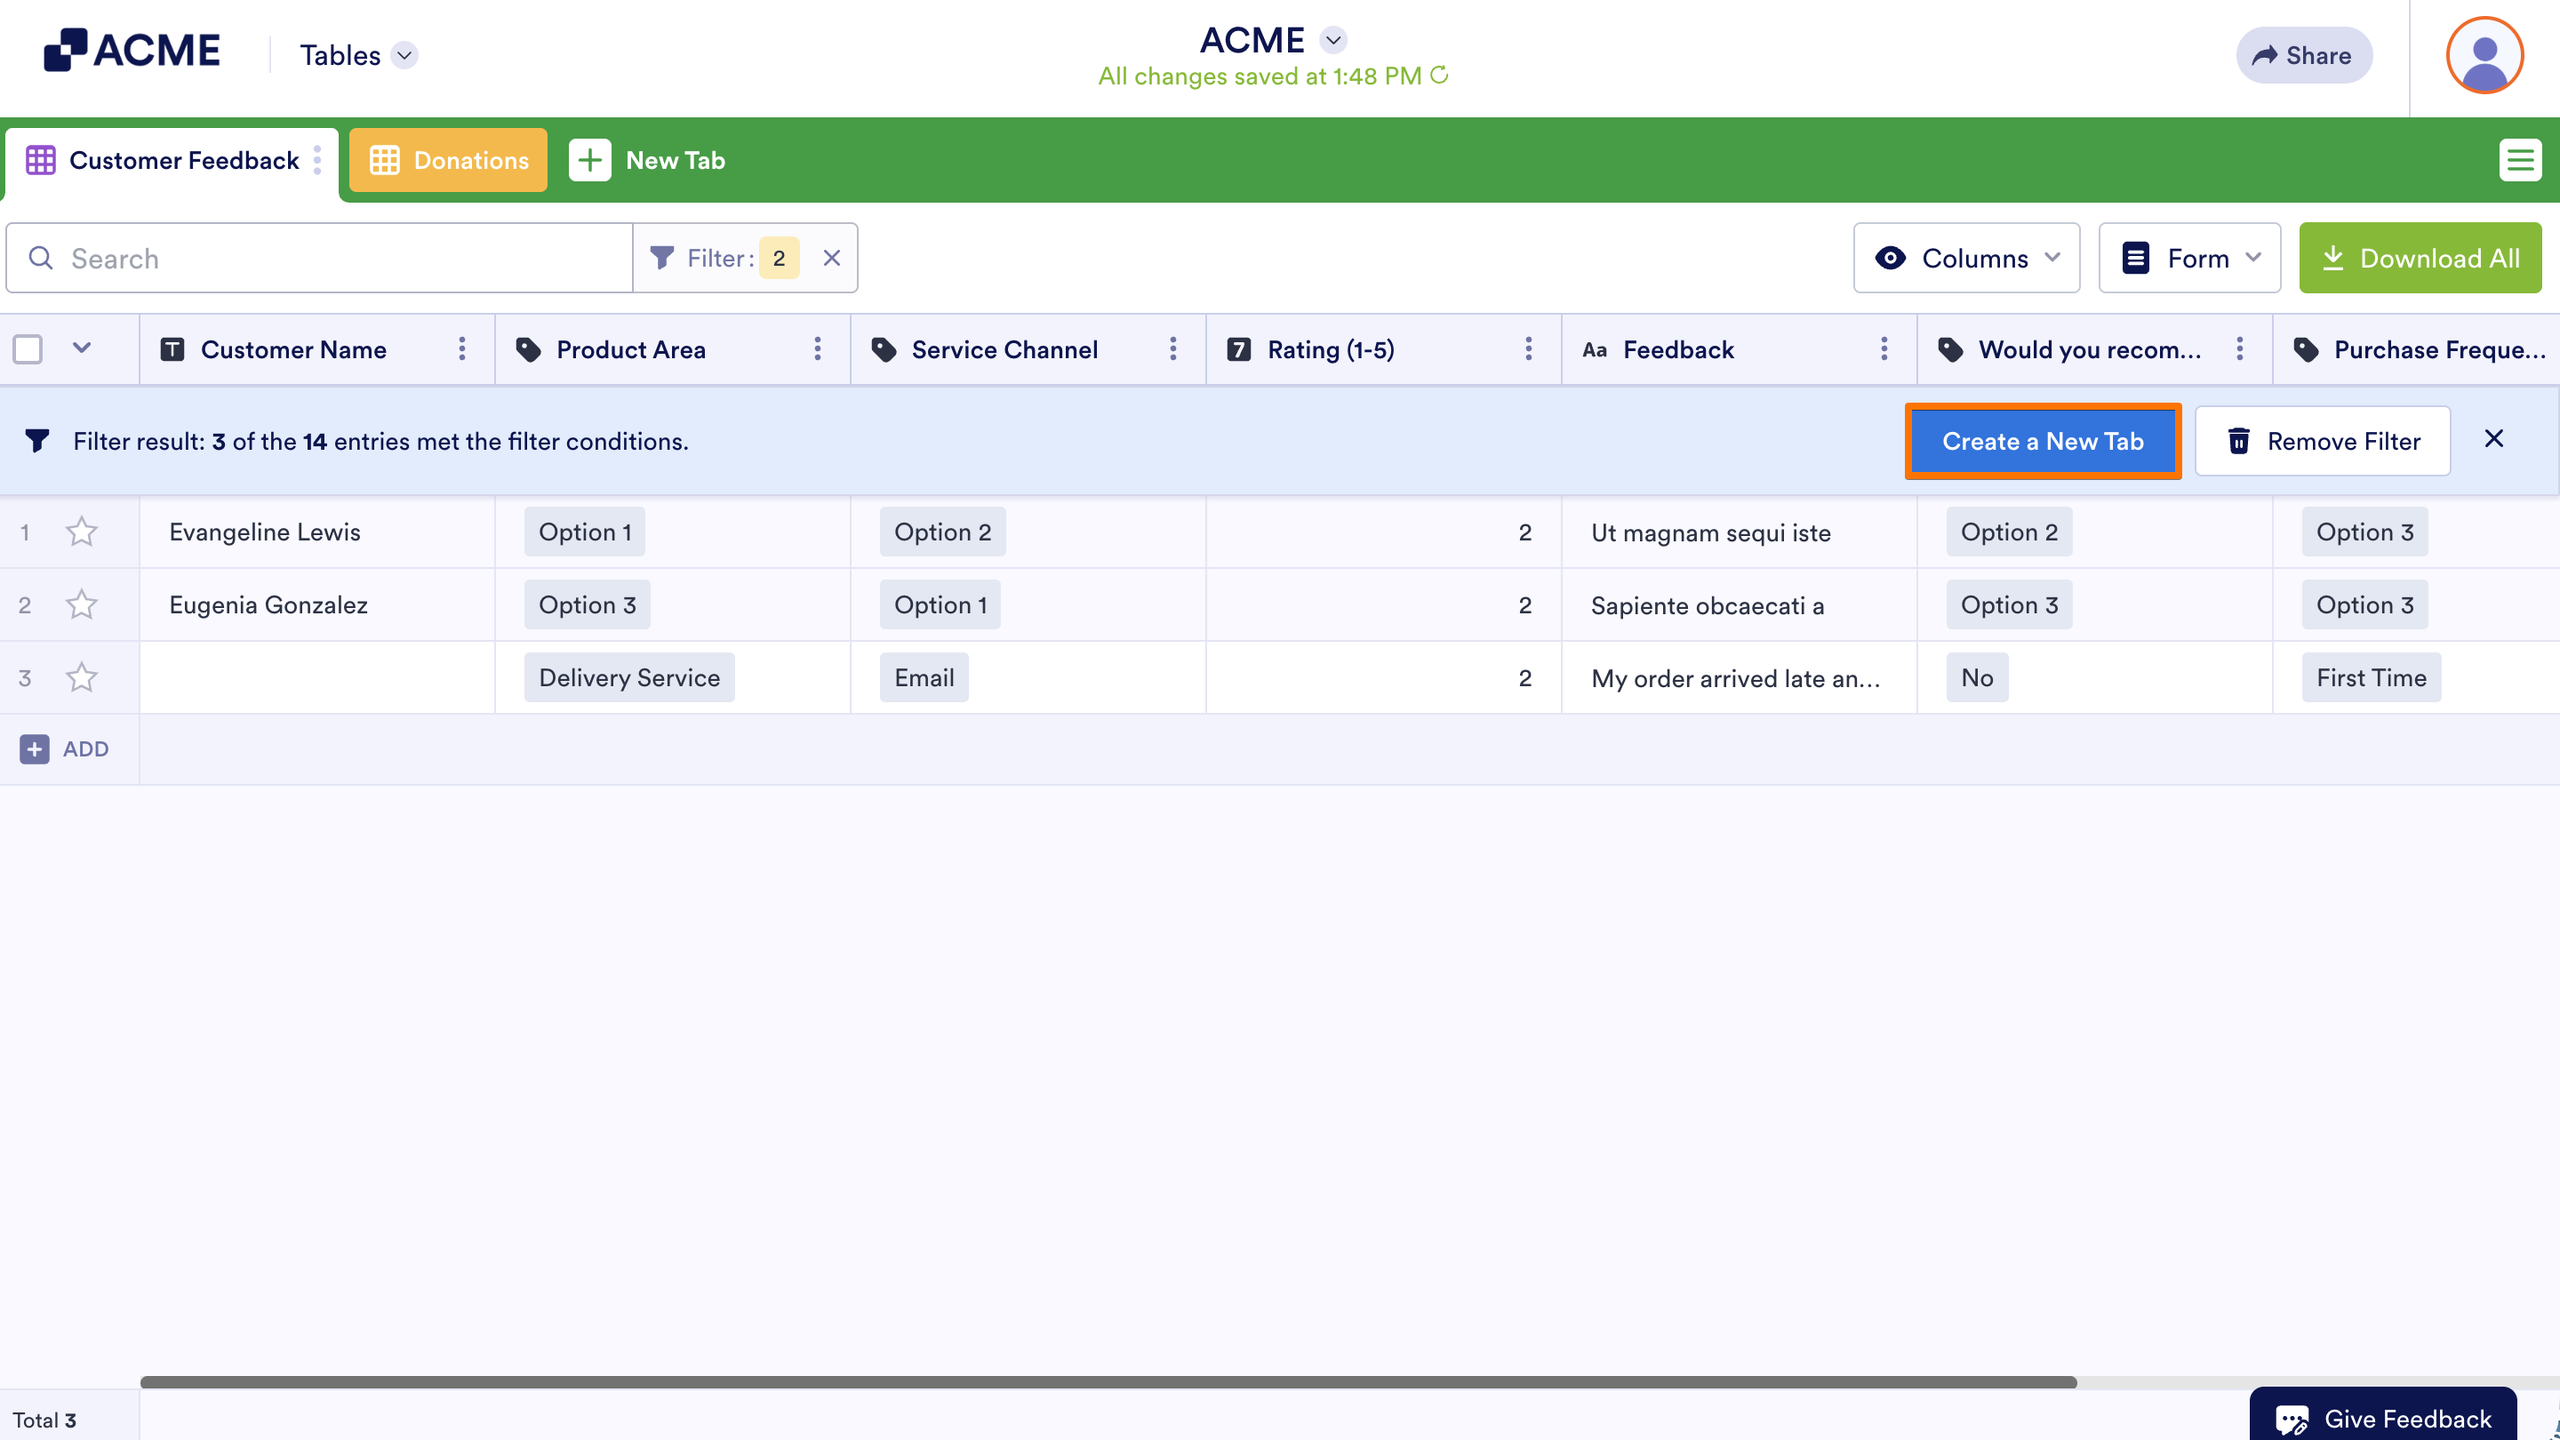
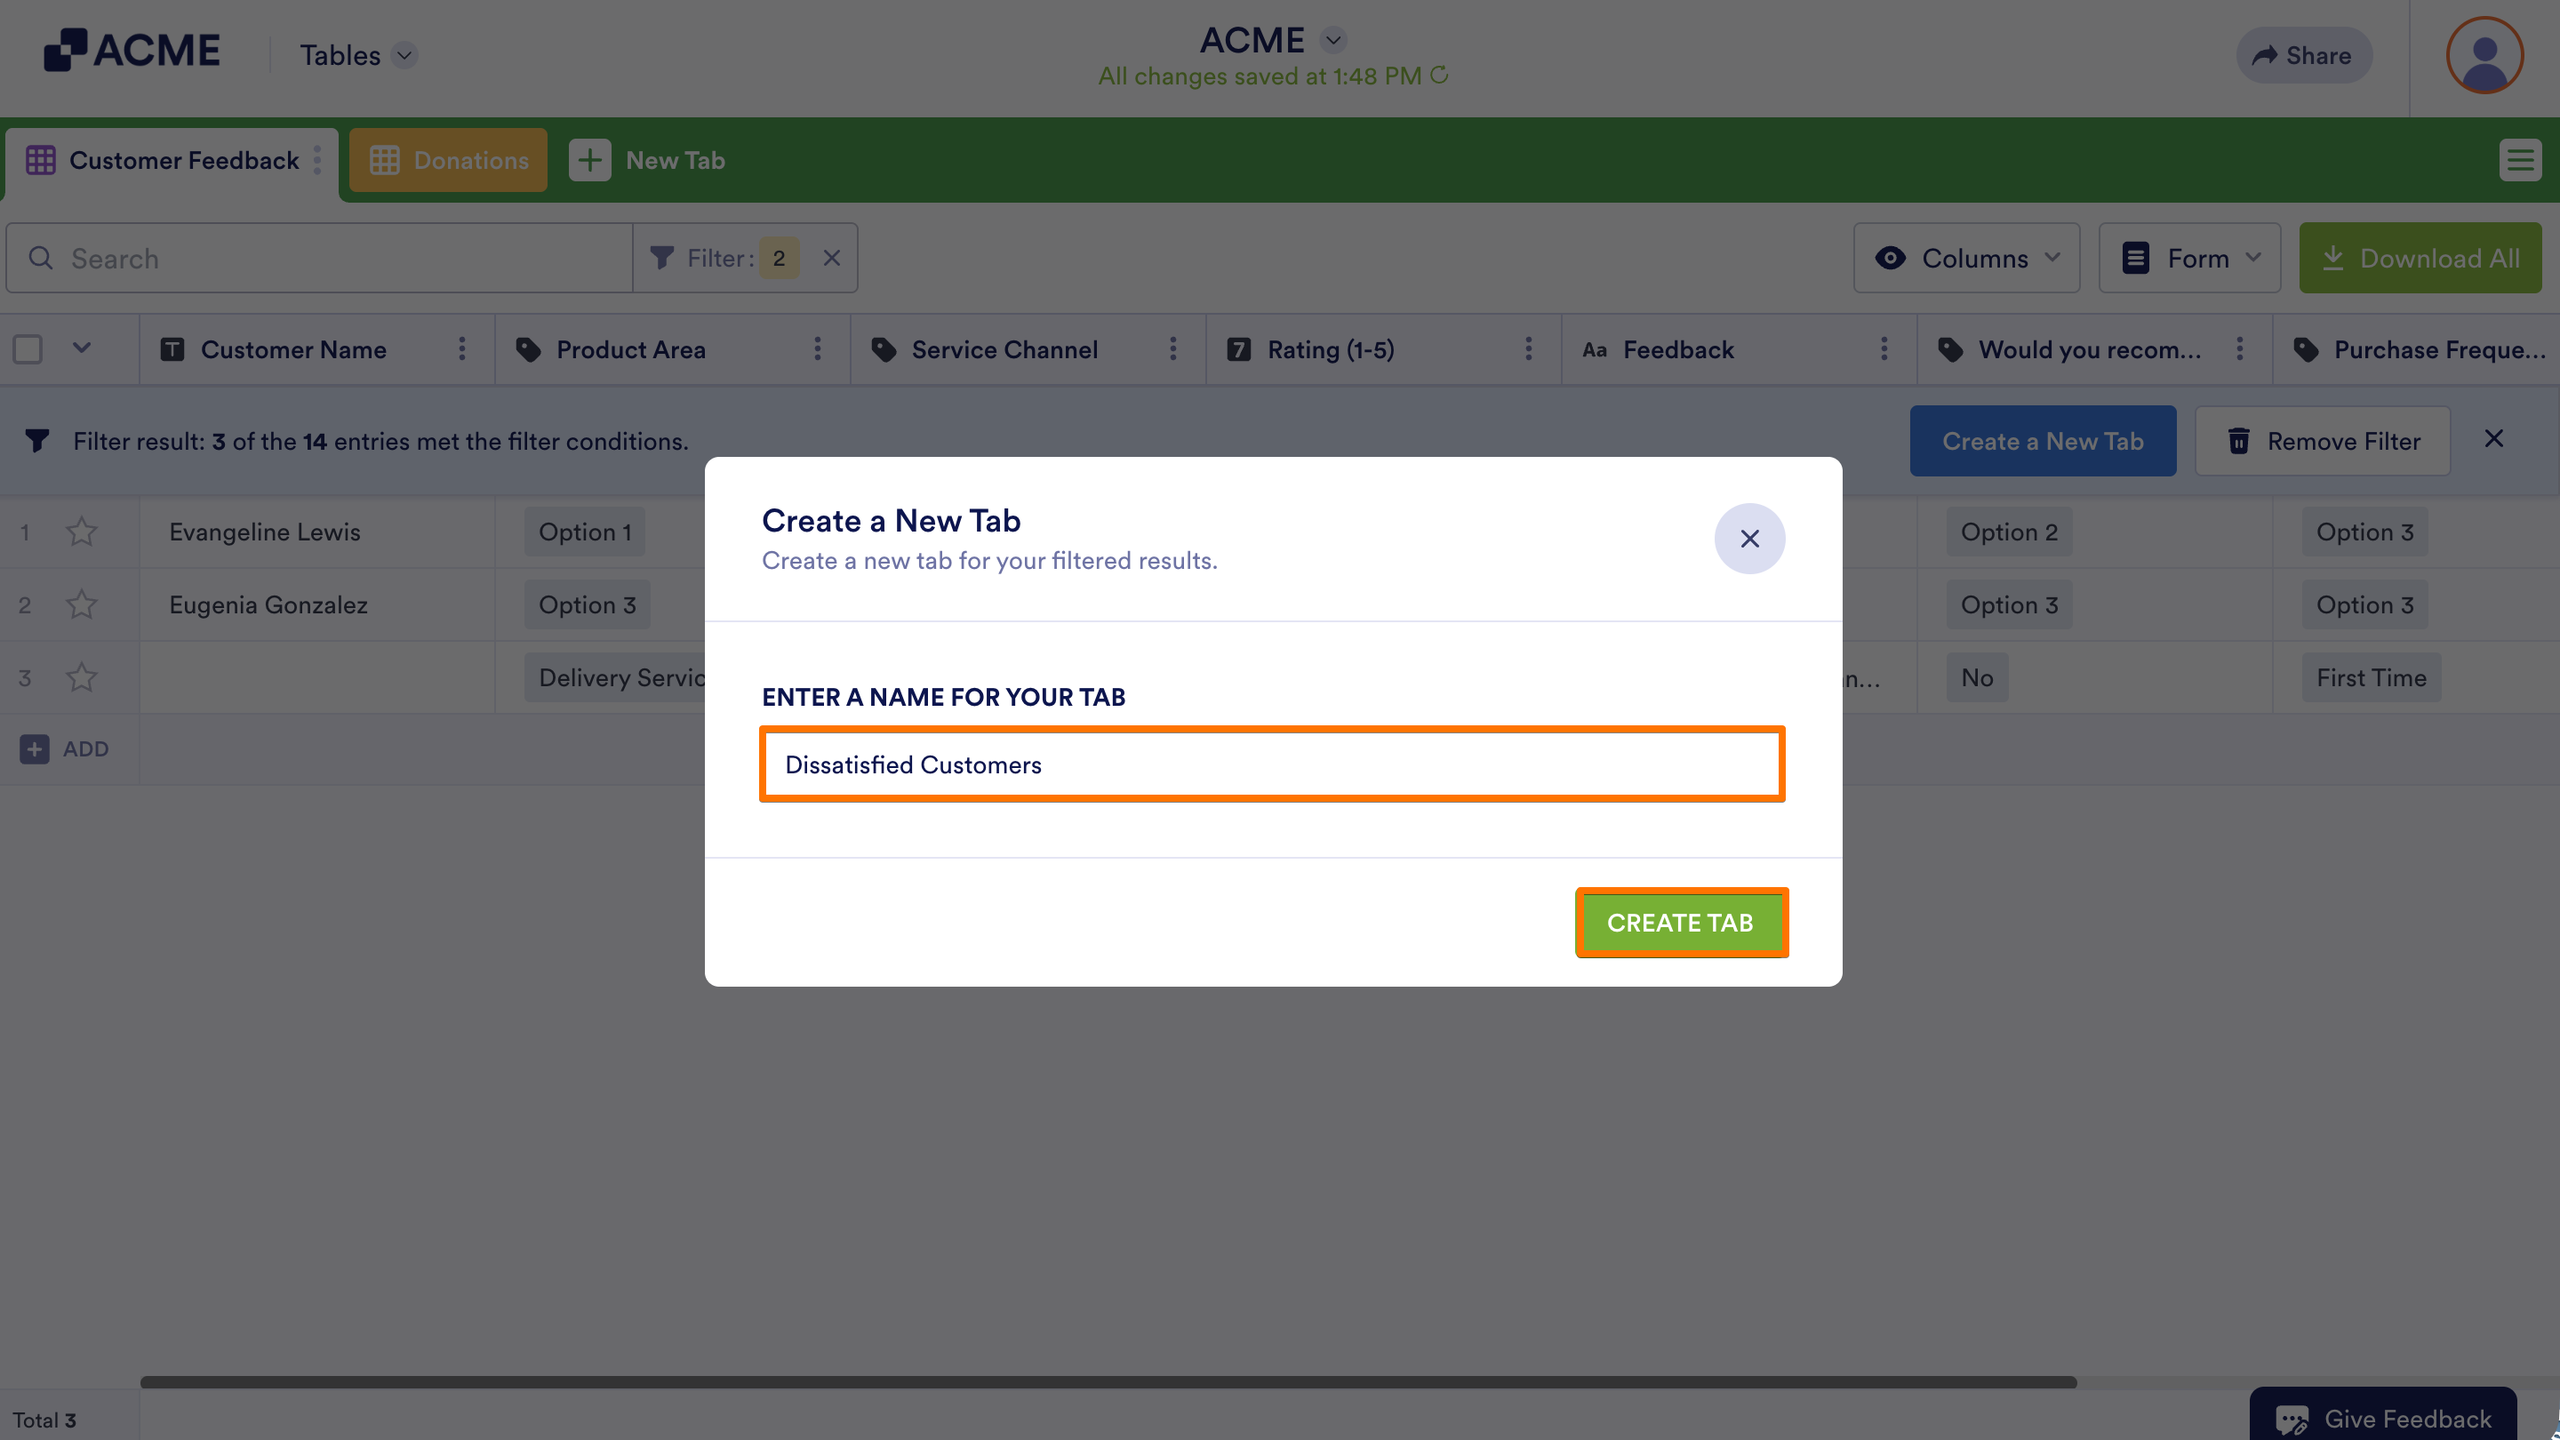
Did you know you can create a new tab from your filtered submissions with Tables? Please see the steps below. If you wish to keep the filter present all the time in Tables, you can create a new tab for that filtered data. You can create a new tab this way:
- Assuming the filter is saved, click the Create a New Tab button.
- Enter a name for the new tab.
- Click the Create Tab button in the popup window.
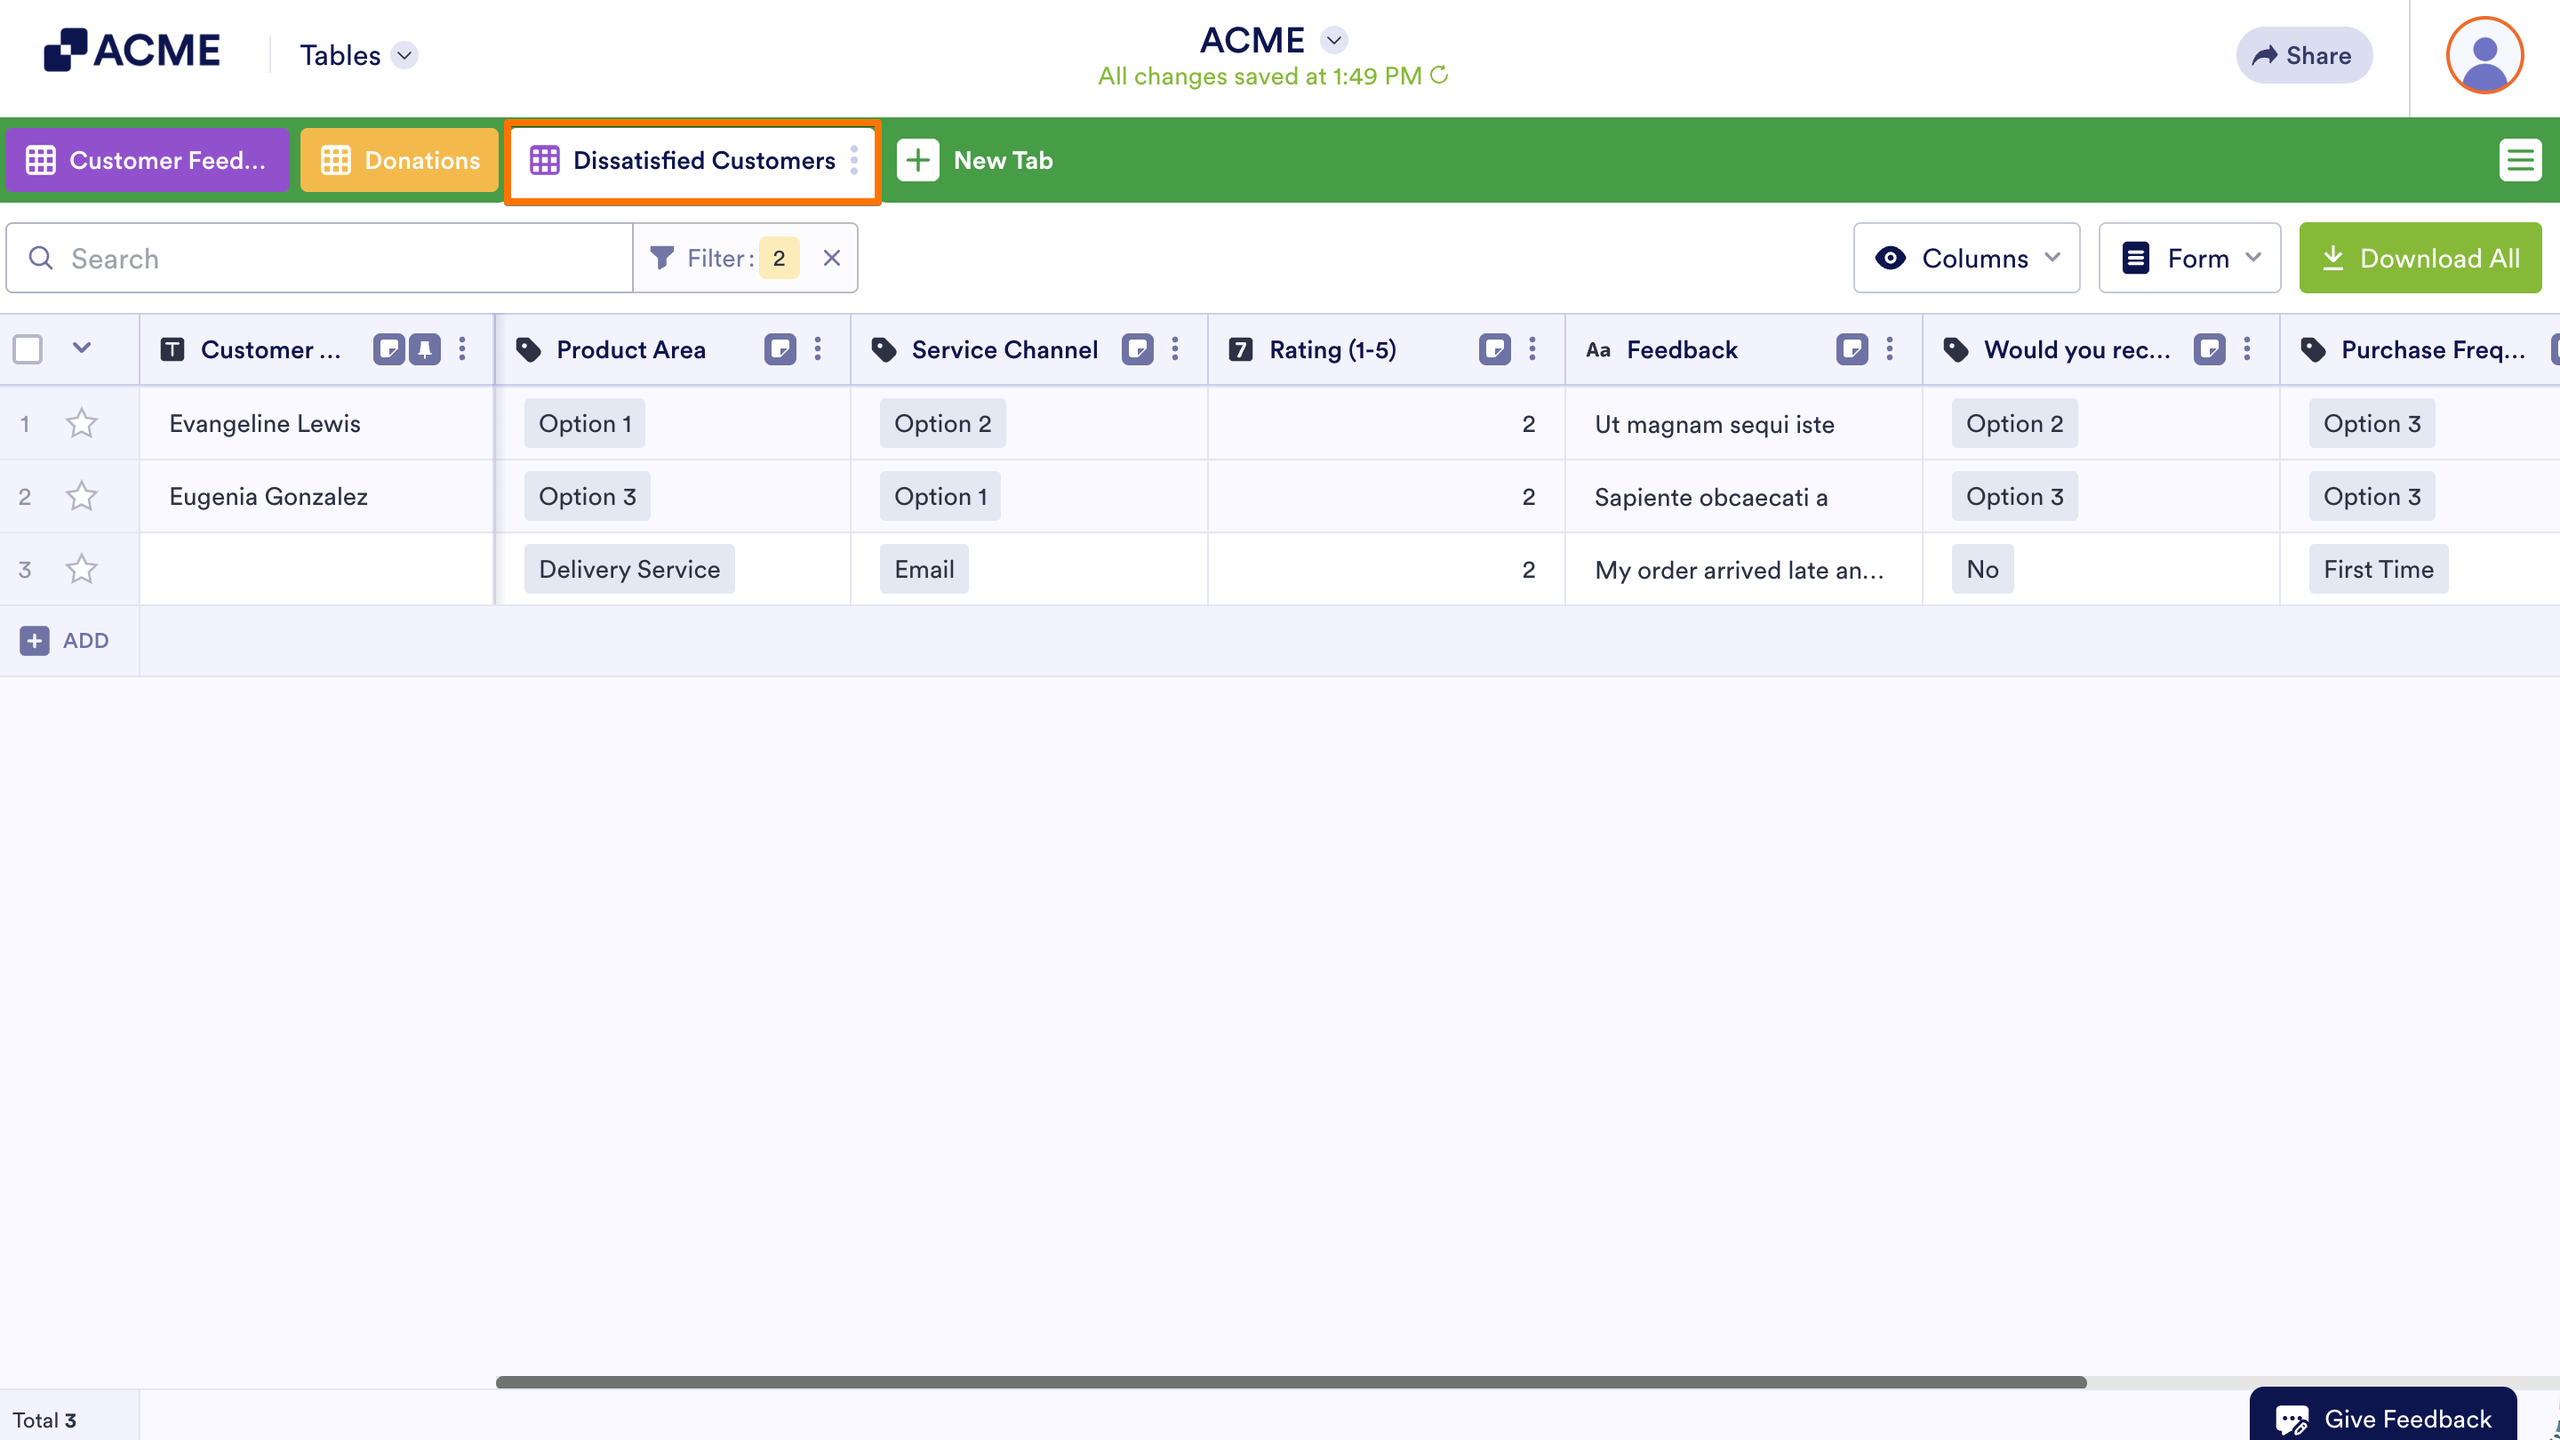
- The new tab now includes your filter with the filter set in the settings. Do not delete it. Otherwise, you’ll see the entire submission again without the filter.

Send Comment: