With Table’s Action Buttons, you can manually send your form data to other apps. It’s helpful when your form data go through a series of reviews before they are sent to a 3rd party app. With just a click of a button, your form data is sent to the other app in no time.
Setting Up to Send Data to Other Apps
To Set up and Send Data to other Apps:
- In Tables, add a new column by clicking the +Add button at the end of your table.
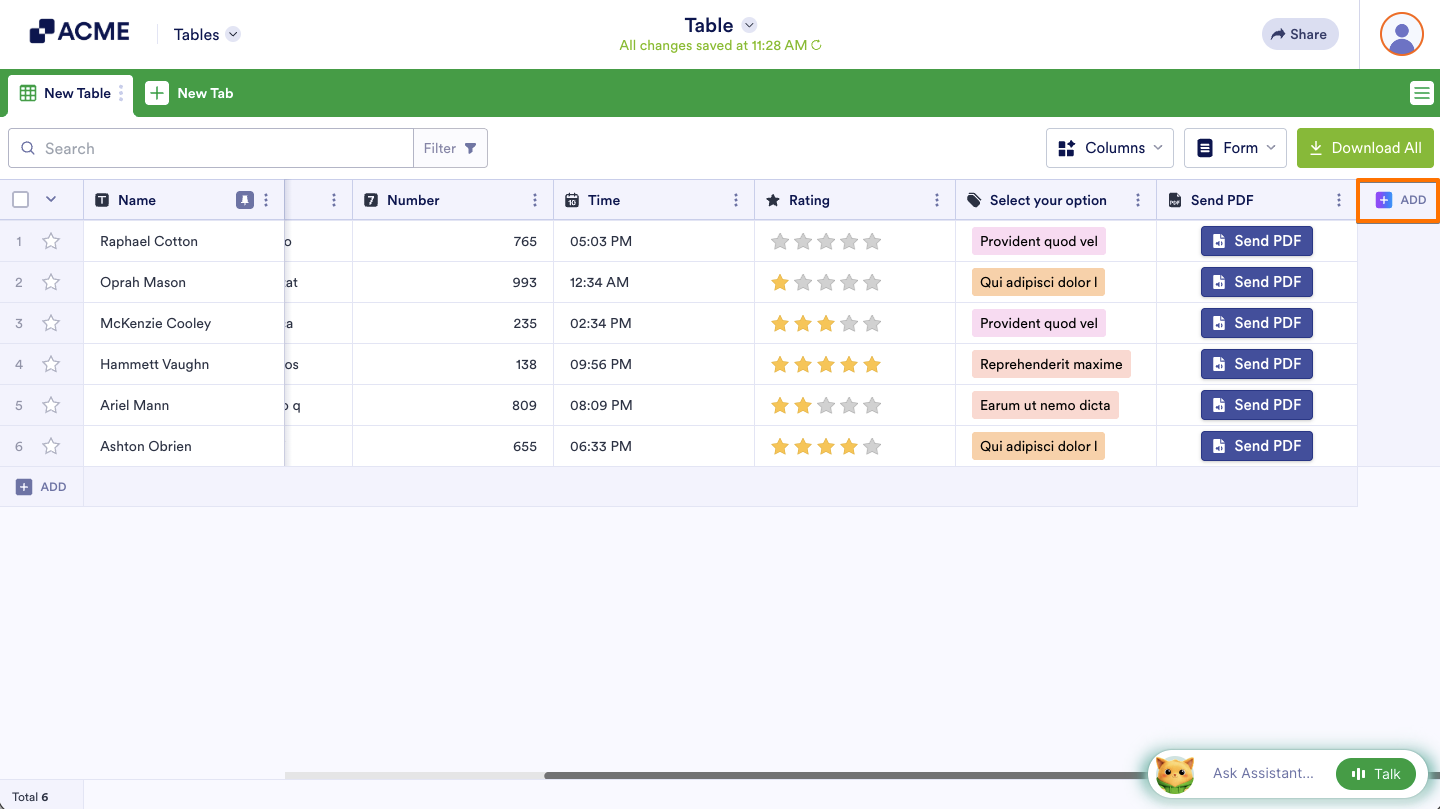
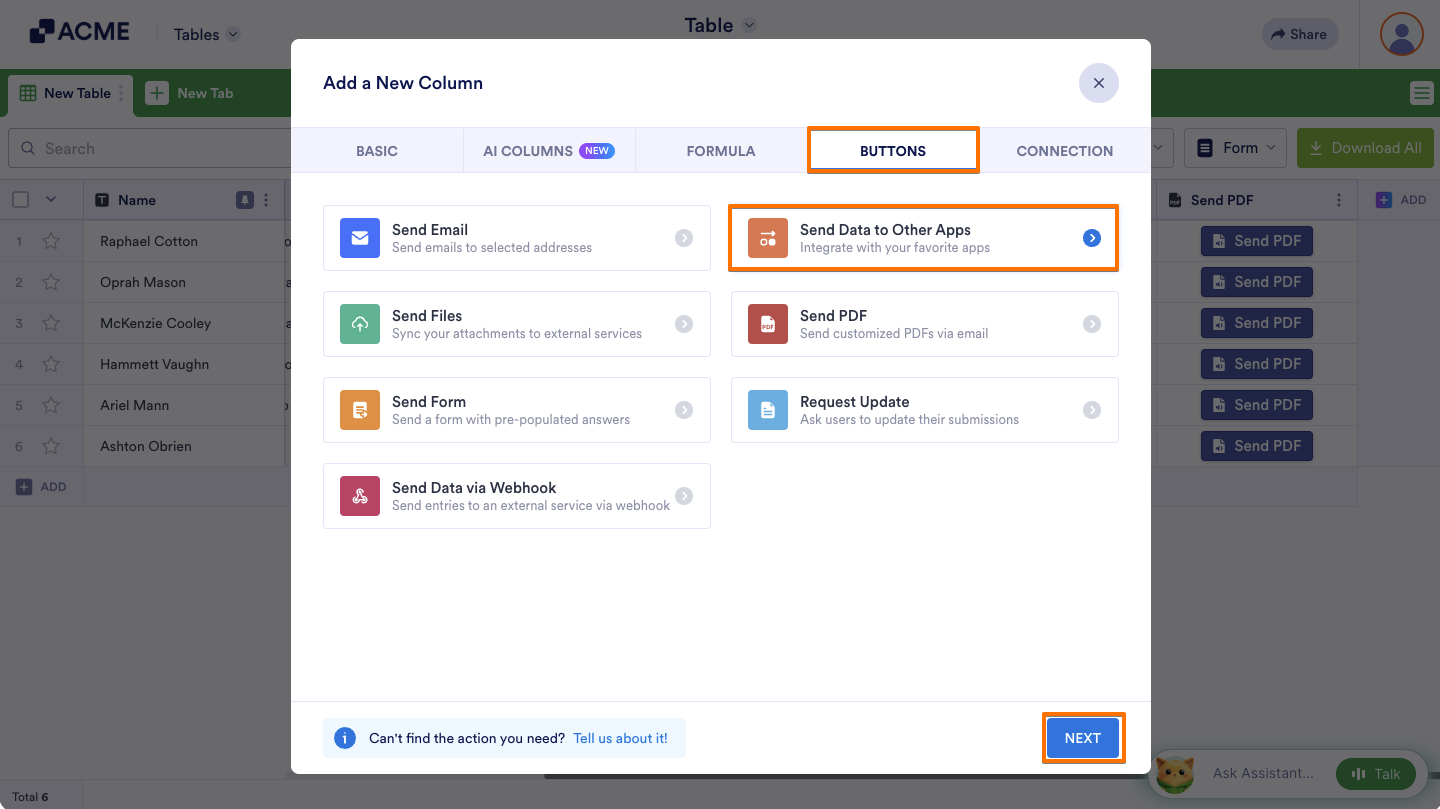
- Under the Buttons tab, select Send Data to Other Apps.
- Click the Next button to proceed.
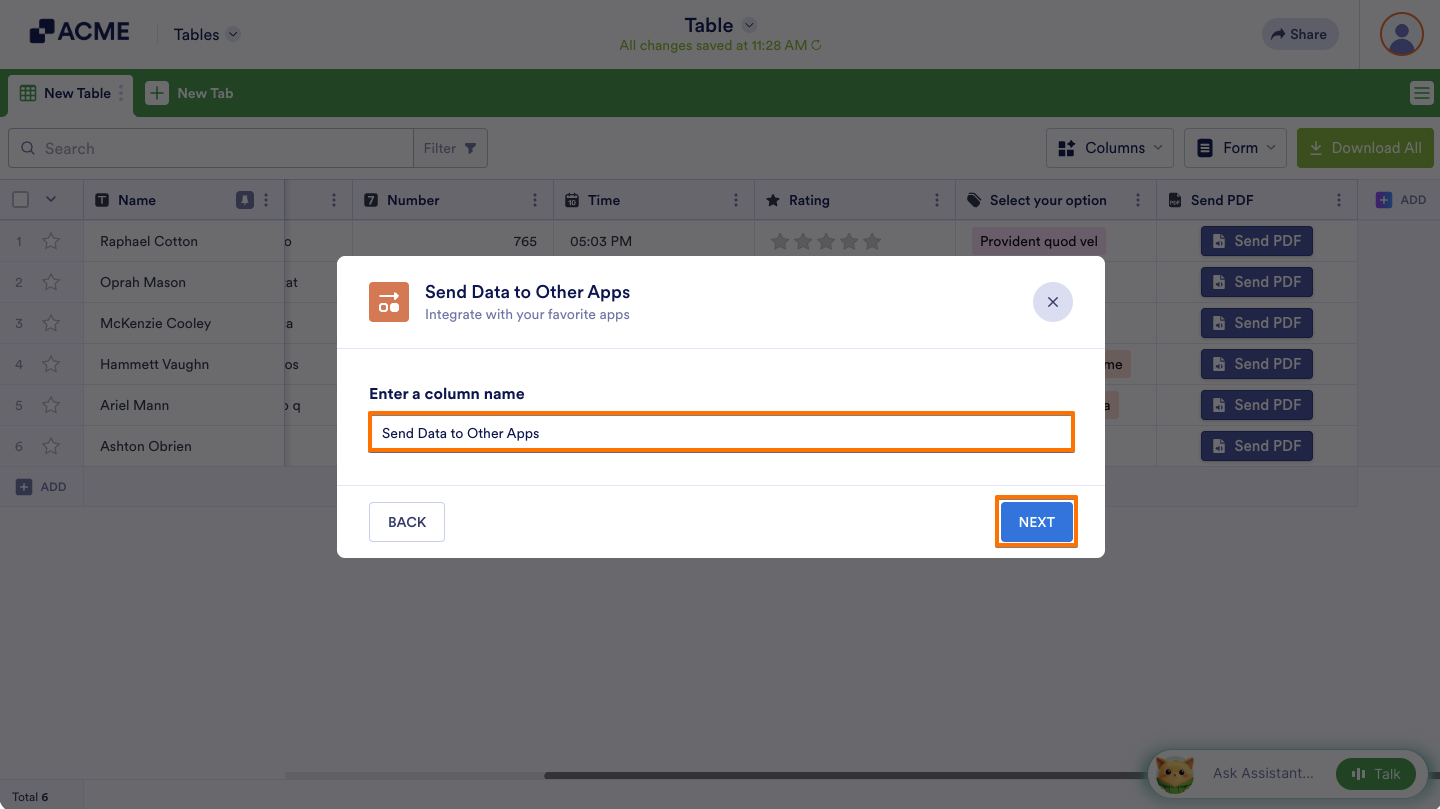
- Enter a column name, and click the Next button.
- Select from the list of integrations. Let’s take Google Drive as an example.
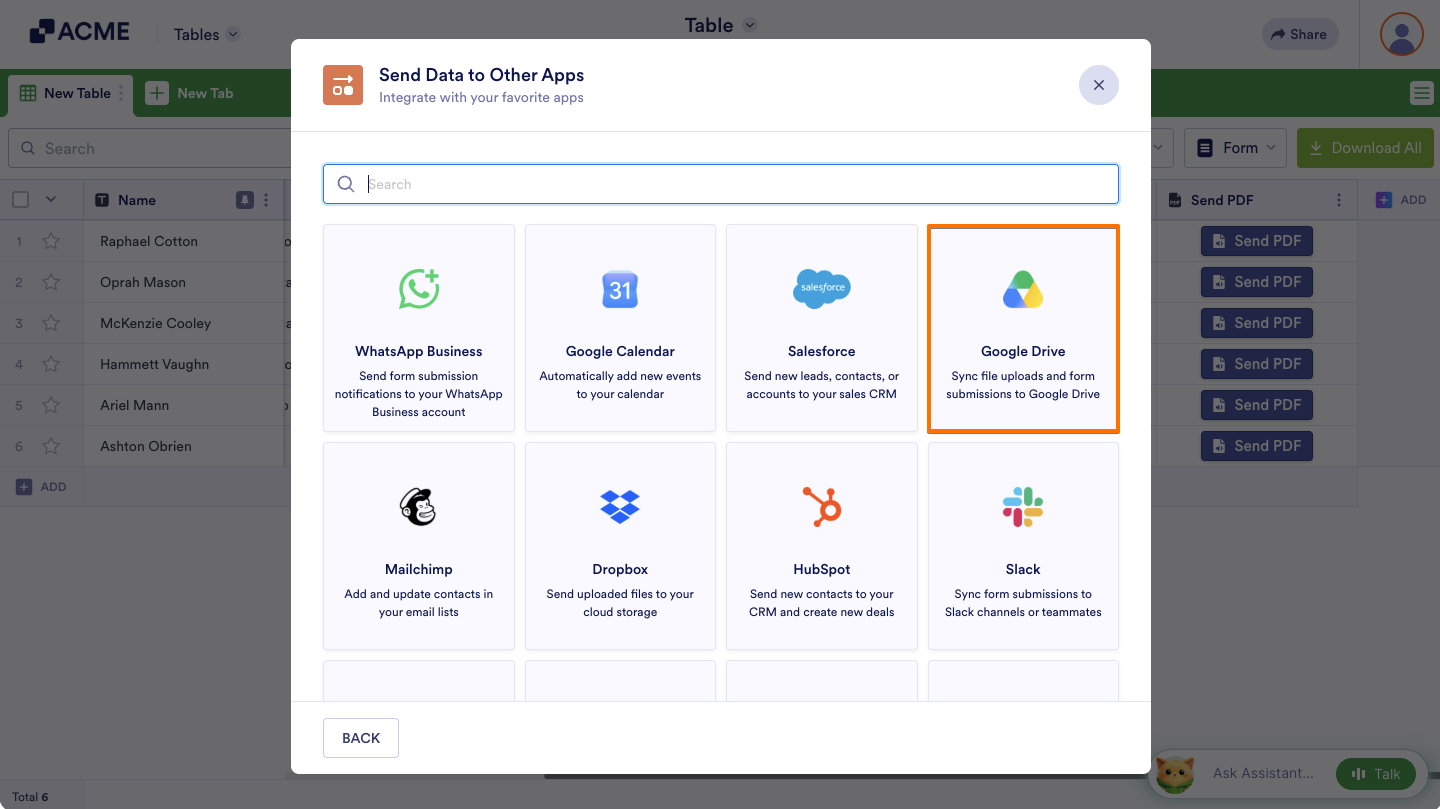
With this feature, you can select the following 3rd party apps and services:
- Microsoft Teams
- Salesforce
- Google Drive
- Dropbox
- Mailchimp
- Google Calendar
- Slack
- Hubspot
- OneDrive
- Egnyte
- Trello
- monday.com
- Asana
- Box
- Constant Contact
- ClickUp
- MailerLite
- Zendesk
- FTP
- Quickbooks
- Webhooks
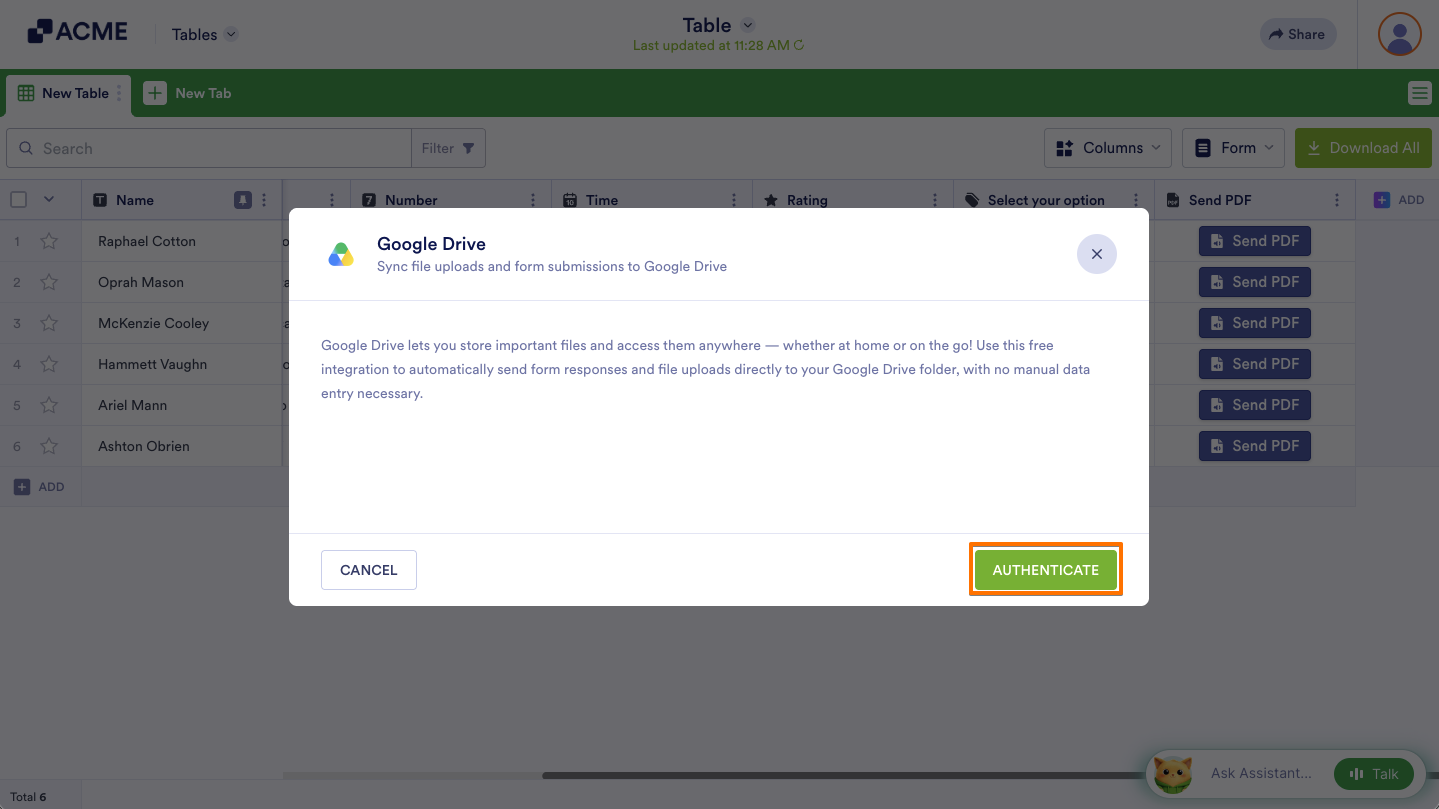
- Click the Authenticate button if you haven’t connected your Google Drive account yet.
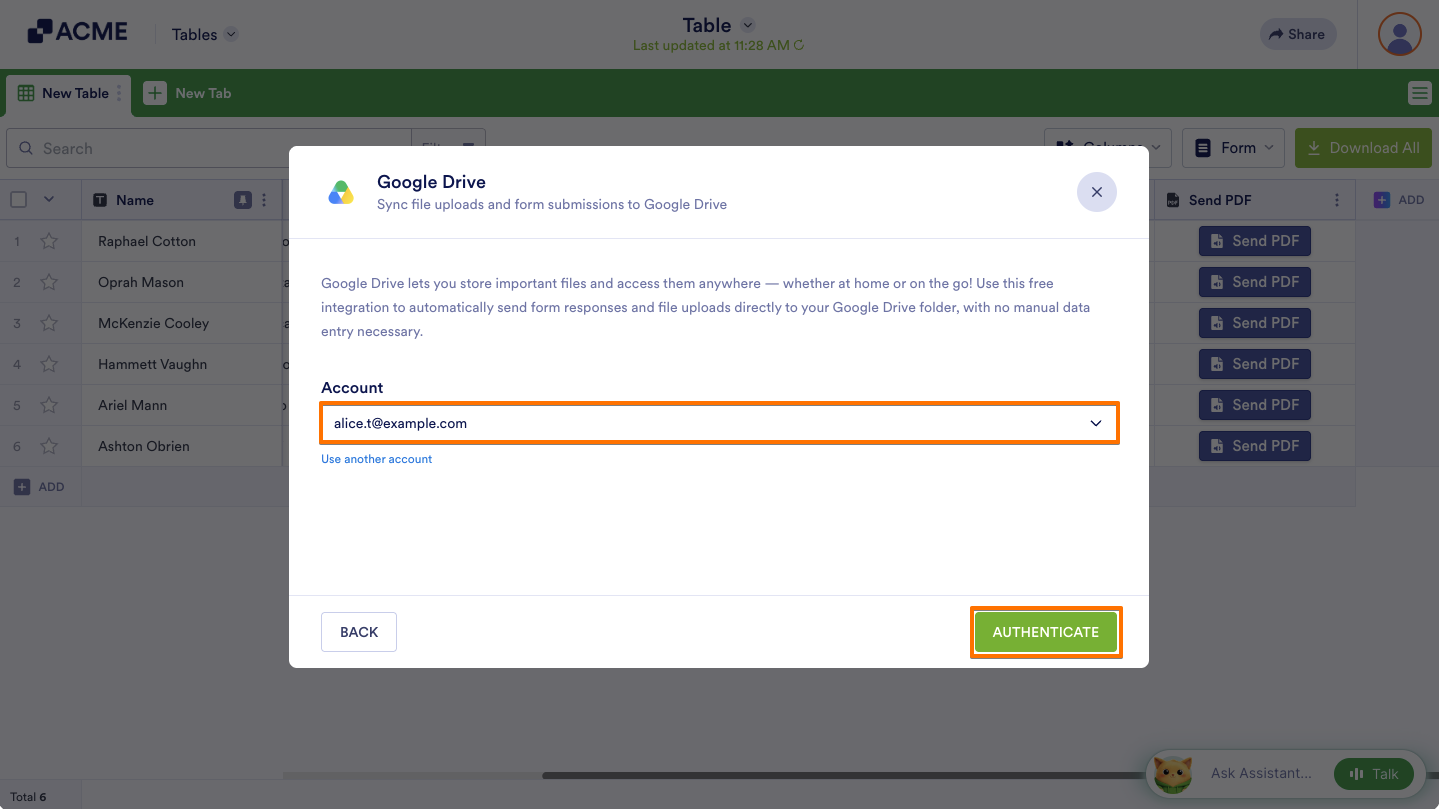
If you’ve already connected your Google Drive account, select it from the account selector and click the Add Action button.
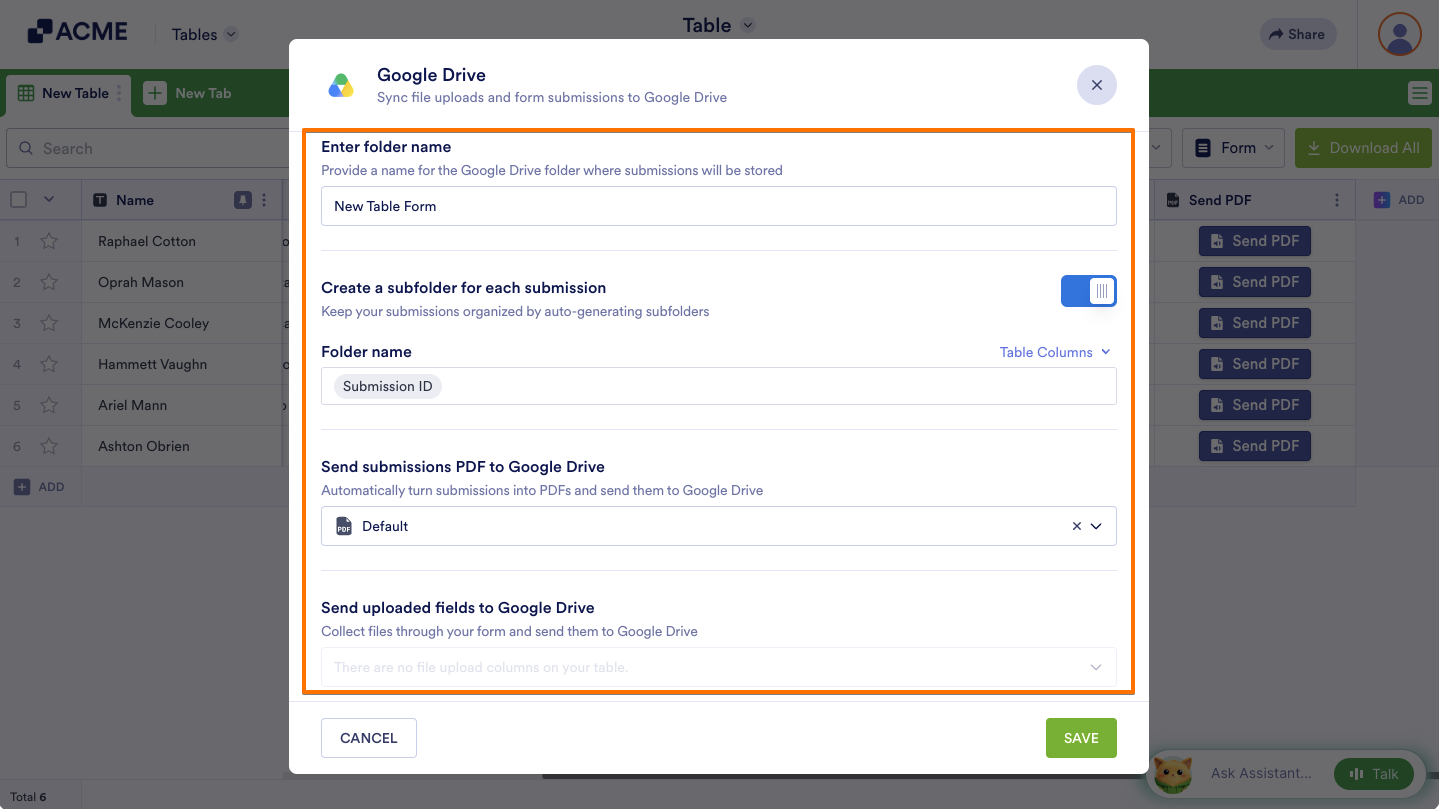
- Set up your Google Drive folders accordingly:
- Folder Name — Specify the name of the folder where your files will be saved.
- Create Subfolders for Submissions — Enable this option to automatically create a subfolder for each submission.
- Send Submission PDFs to Google Drive — Choose the PDF document to upload and send it directly to your Google Drive folder.
- Send Uploaded Files to Google Drive — Turn this on to transfer uploaded files from your form to your Google Drive.
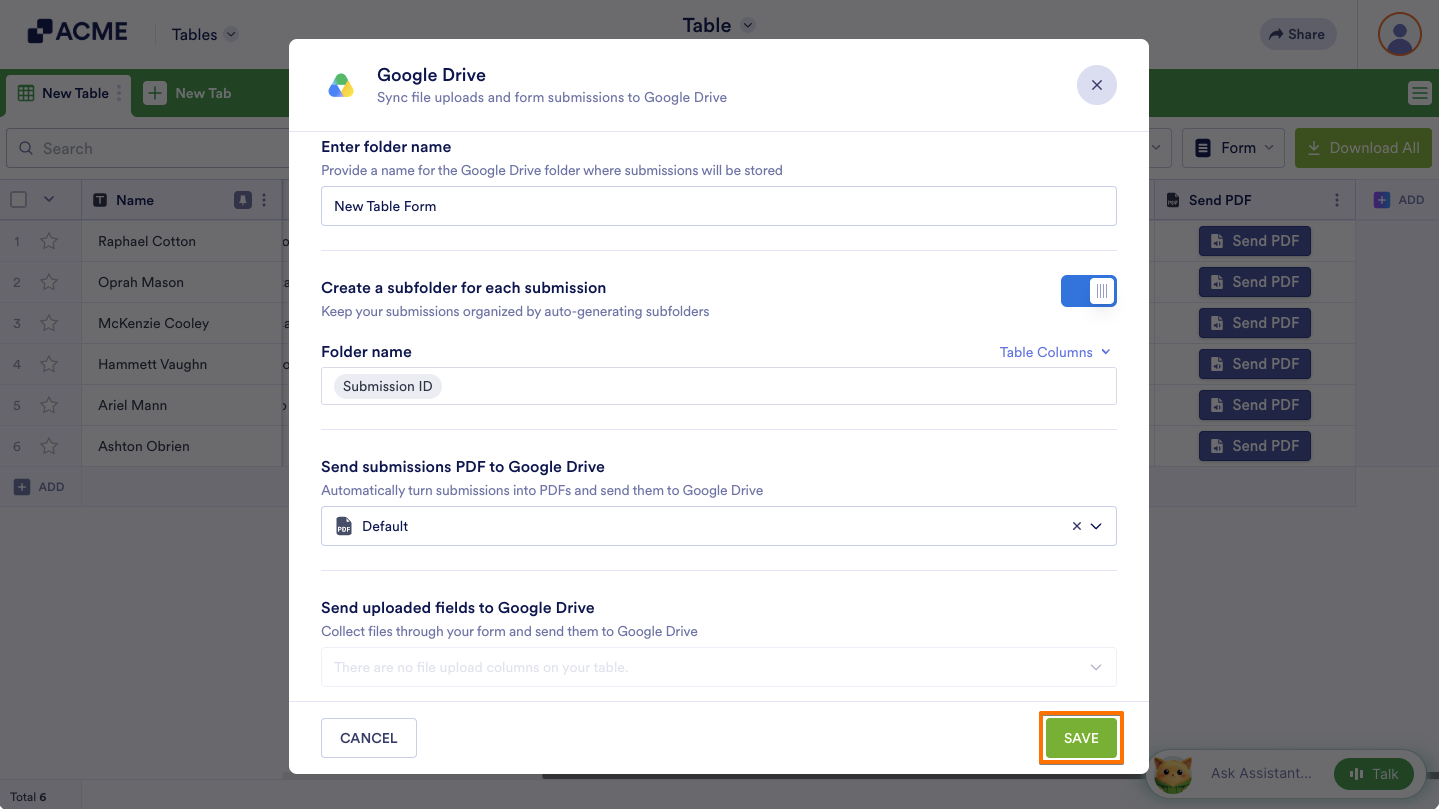
- Click the Save button to finish the setup.
Note
- Configuration steps, features, and options could vary depending on the app’s integration capabilities and limitations.
- When the Create Subfolders for Submissions option is enabled, you can also set your subfolder name for each submission.
- You can rename your PDF by following the guide on How to Assign a Custom File Name to Your PDF Report.
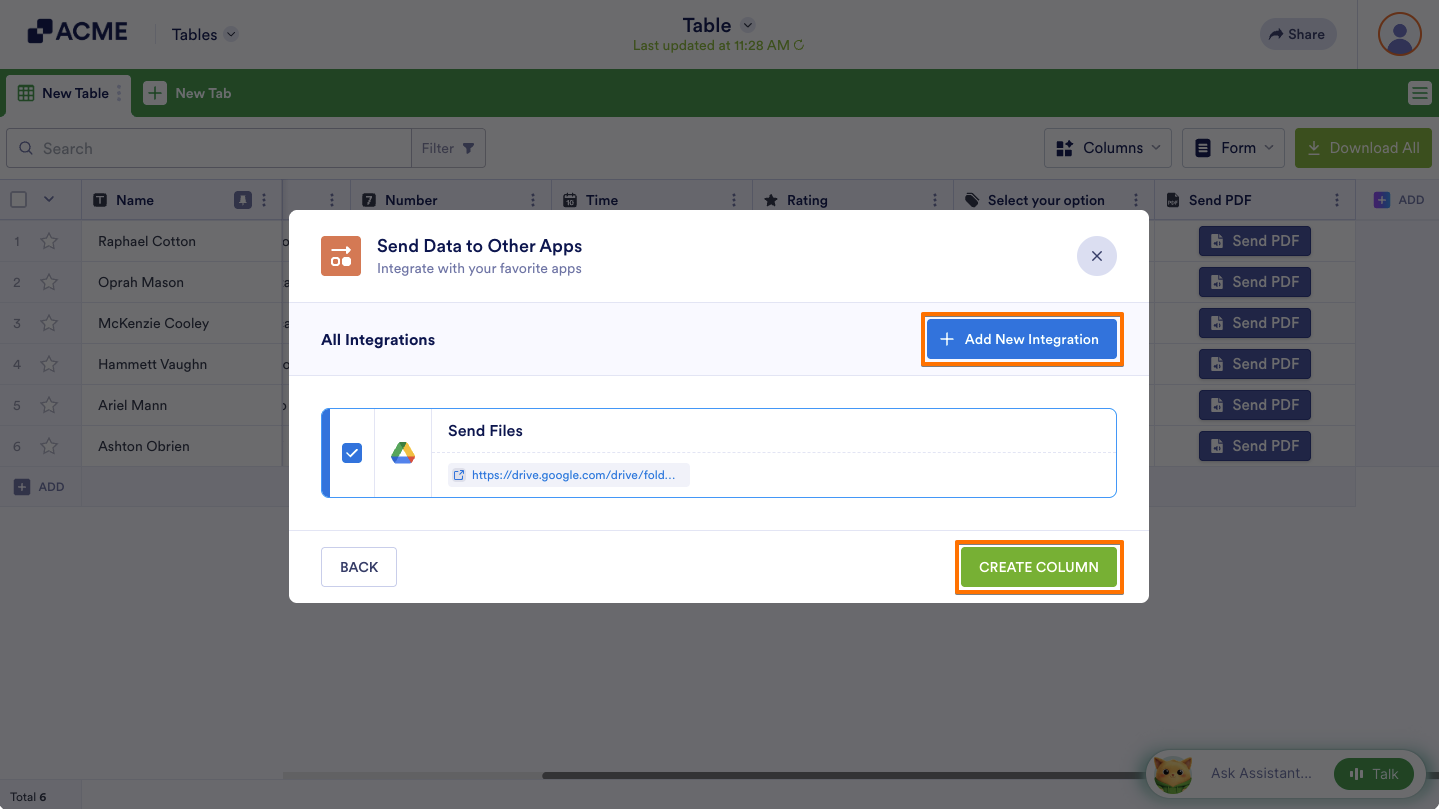
- At this step, you can finally add the Action Button by clicking the Create Column button. Click the Add New Integration button if you want to connect more apps.
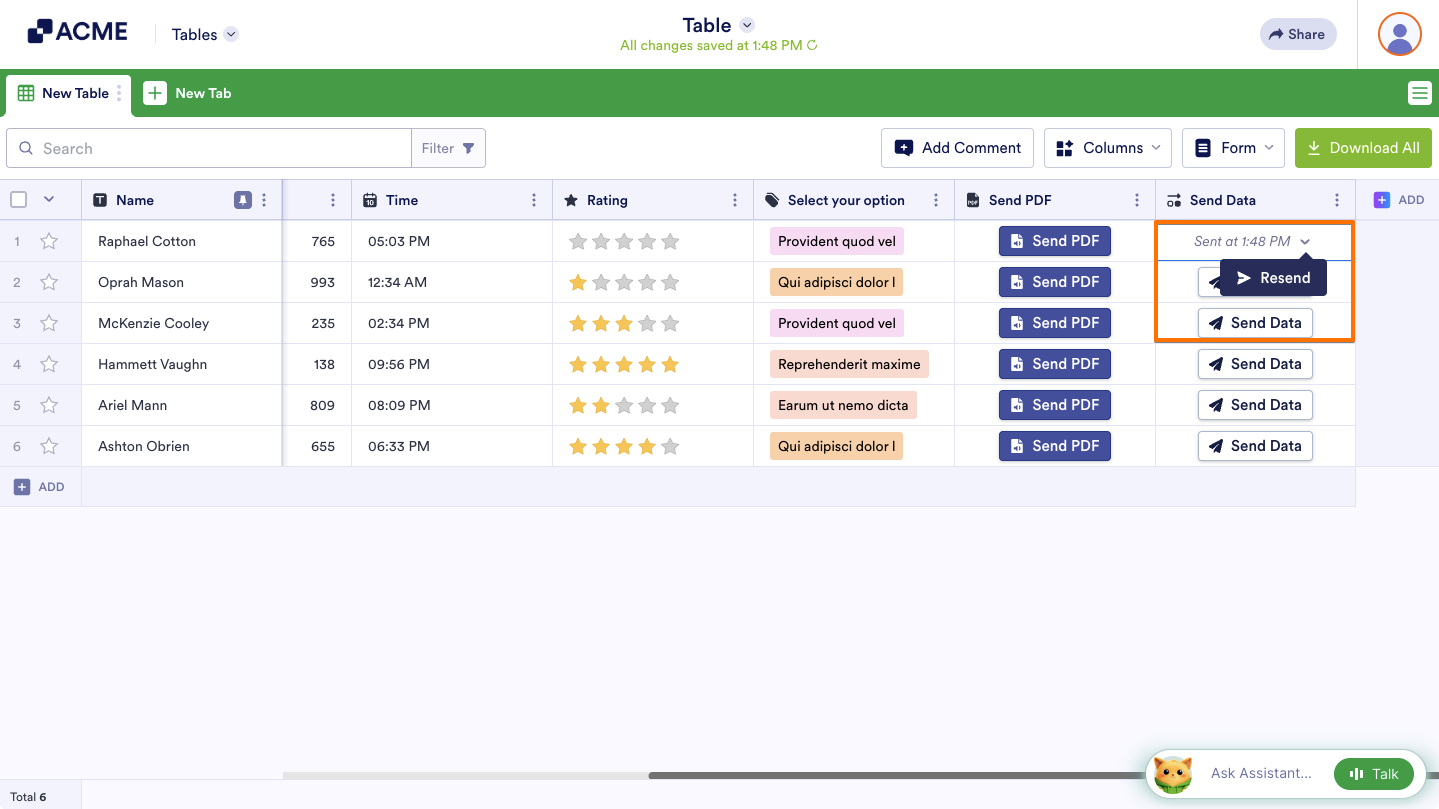
After the successful integration, you will see the newly created column with the buttons. The column will contain the following properties:
- Send Data —The main feature of the Action Button. Click this to send the data to the 3rd party app/service.
- Timestamp — The time and date you initiated the action.
- Resend — If there are changes to the data, you can sync it by resending.
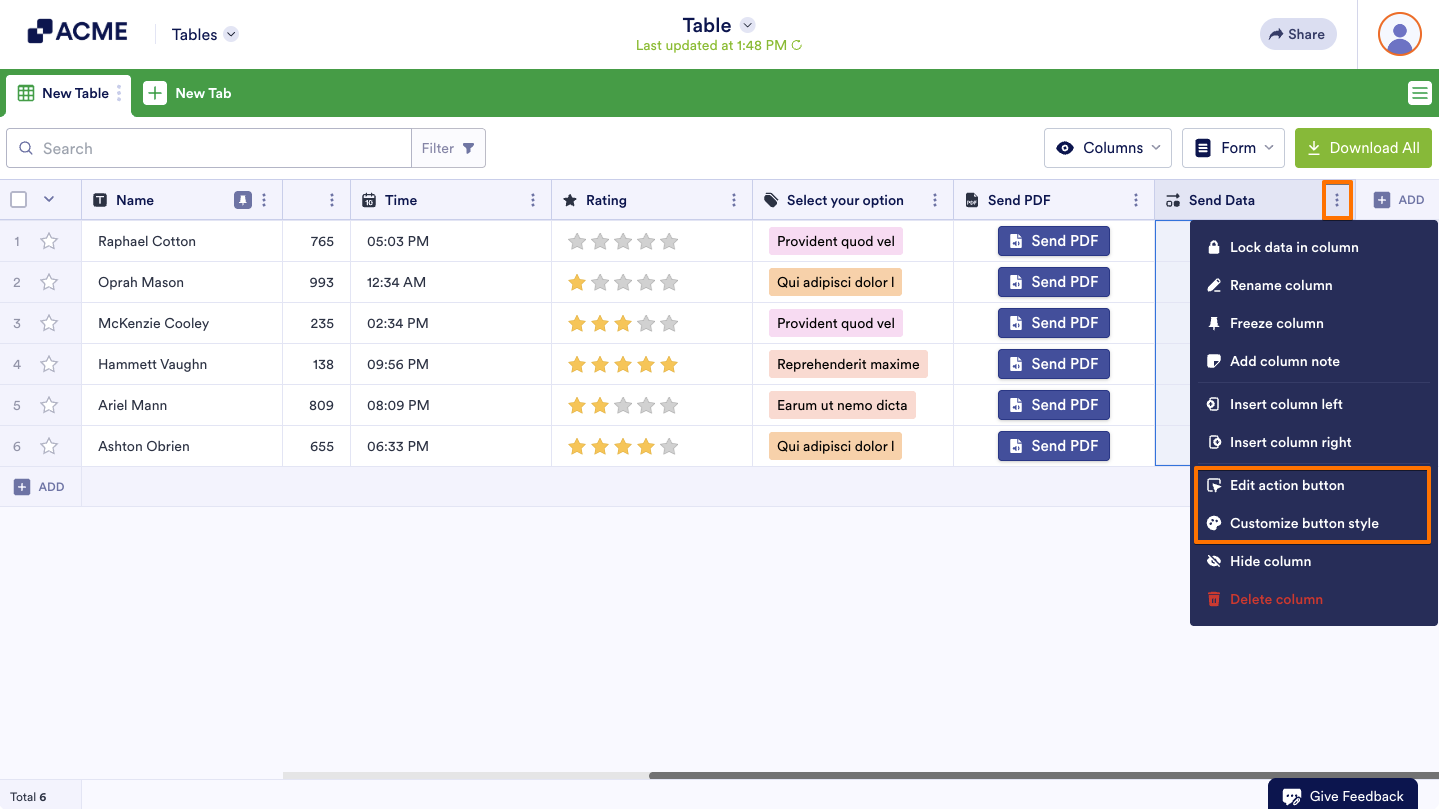
Under the column options, you’ll find both the Edit Action Button and Customize Button Style. Click on the Three Dots icon beside the column to view these options:

Send Comment: