How to Use Jotform with Shopify Flow

November 3, 2026

With Jotform Form Builder for Shopify, you can trigger a Shopify Flow workflow whenever someone submits your form. Shopify Flow is a free app that helps you automate tasks in your store. You can also set conditions based on submission data to decide what happens next. Here are the three main steps to build workflows:

  • Triggers — Events that start a workflow.
  • Conditions — Rules that decide whether a workflow should continue.
  • Actions — Tasks a workflow performs, such as updating your store or sending a notification.

It only takes a minute to set up—here’s how:

  1. On your Shopify Admin page, in the menu on the left, click on Apps 
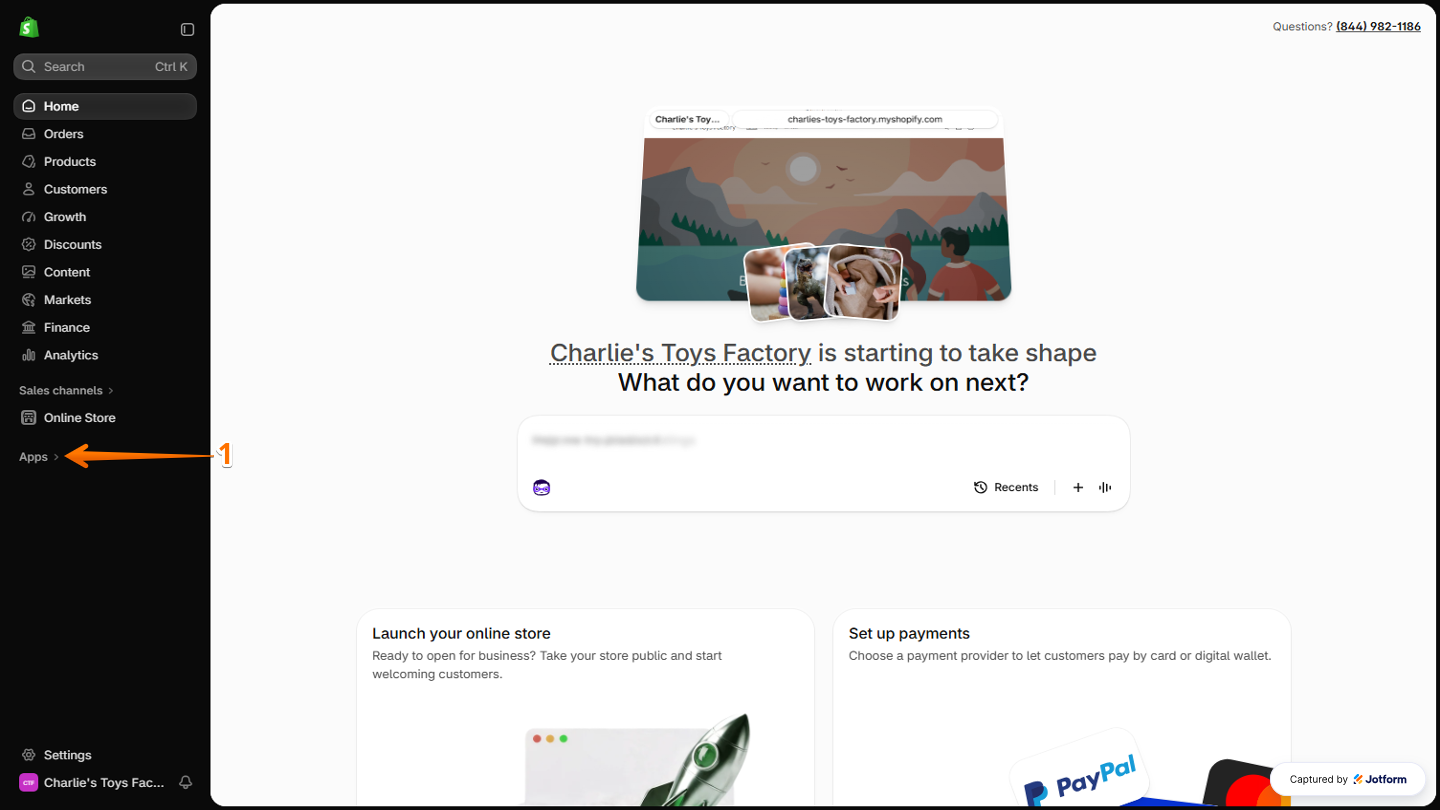
Shopify Admin page showing the Apps option in the left-side menu, ready to be selected to view and manage installed apps
  1. Then, in the window that opens, enter Flow in the Search Bar and click on it.
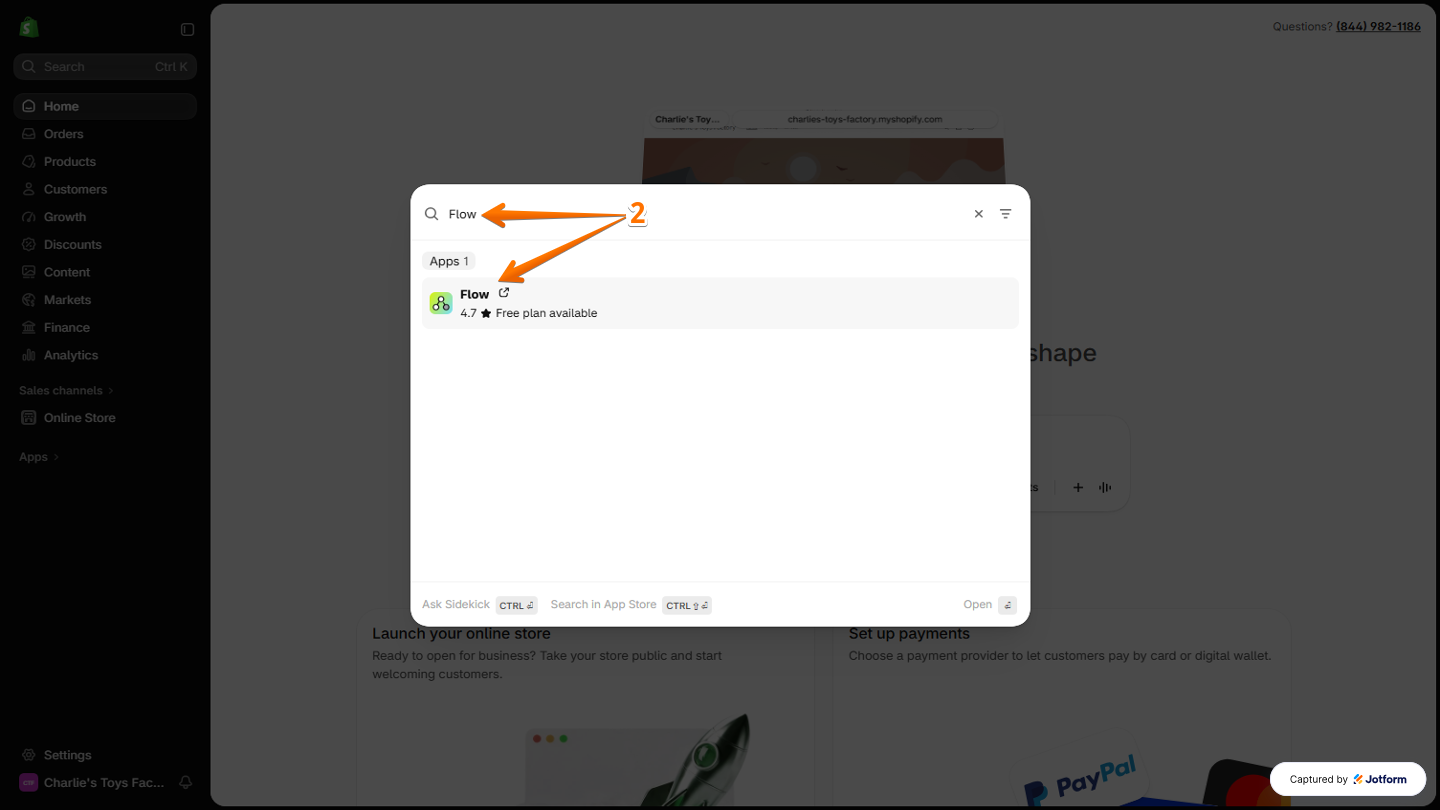
Shopify Apps window showing the Search Bar with “Flow” entered and the Flow app in the search results, ready to be selected
  1. Next, in the new tab that opens, click on Install.
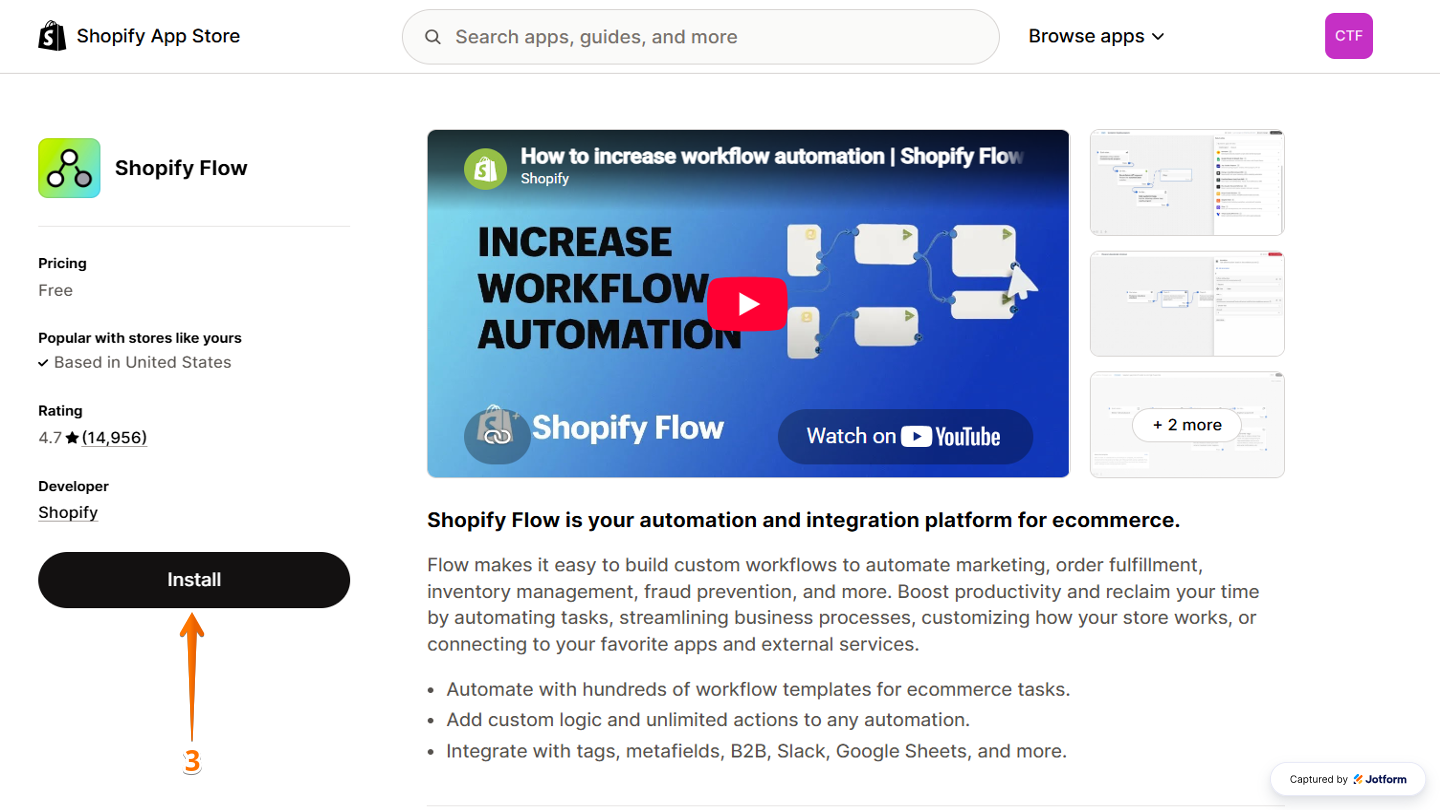
Shopify Flow app page showing the Install button, ready to be clicked to install the app in the Shopify store
  1. Now, in the Workflow section, click on Create Workflow in the middle of the page.
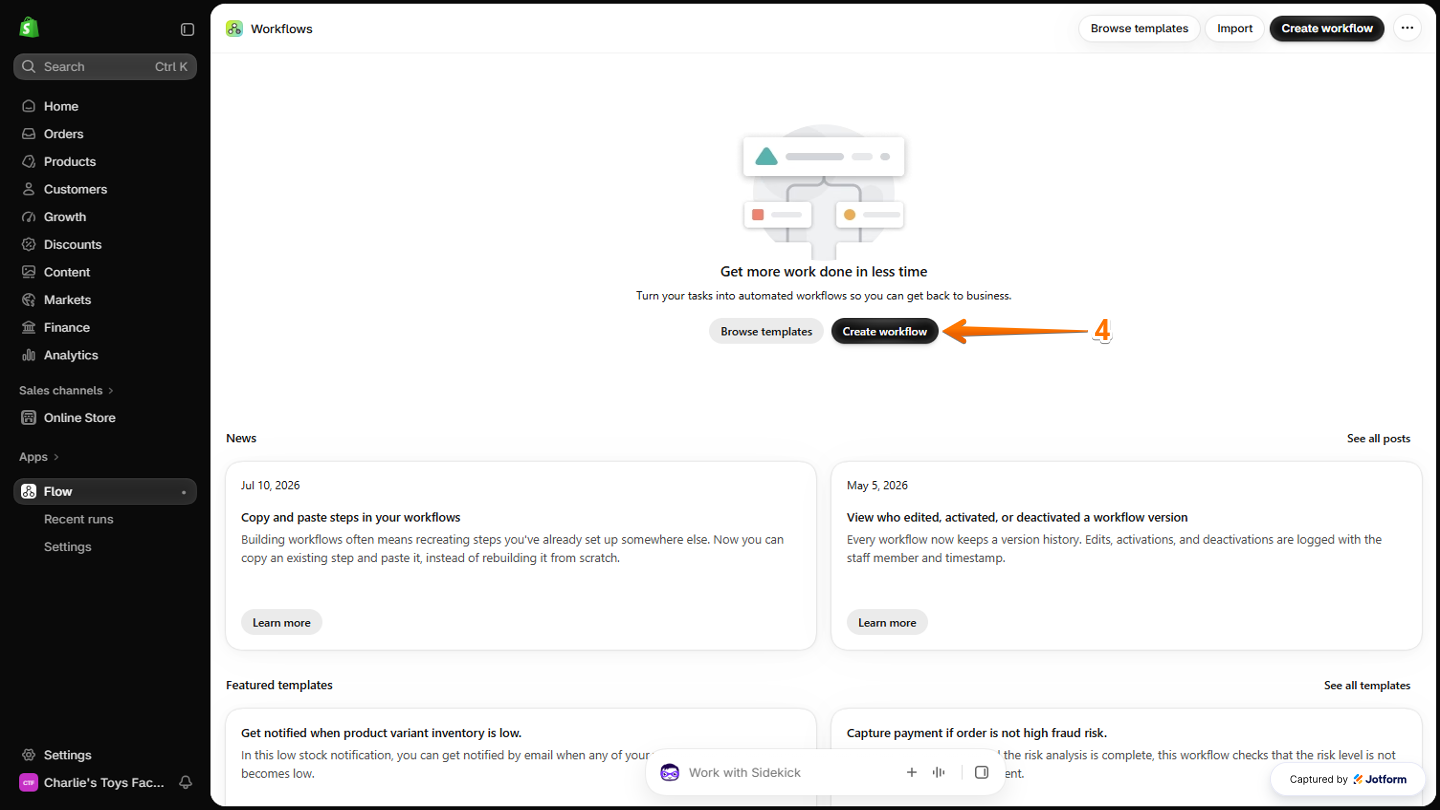
Shopify Flow Workflow section showing the Create Workflow button in the middle of the page, ready to be clicked to start creating a new workflow
  1. Then, in the Flow window that opens, click on Select a trigger.
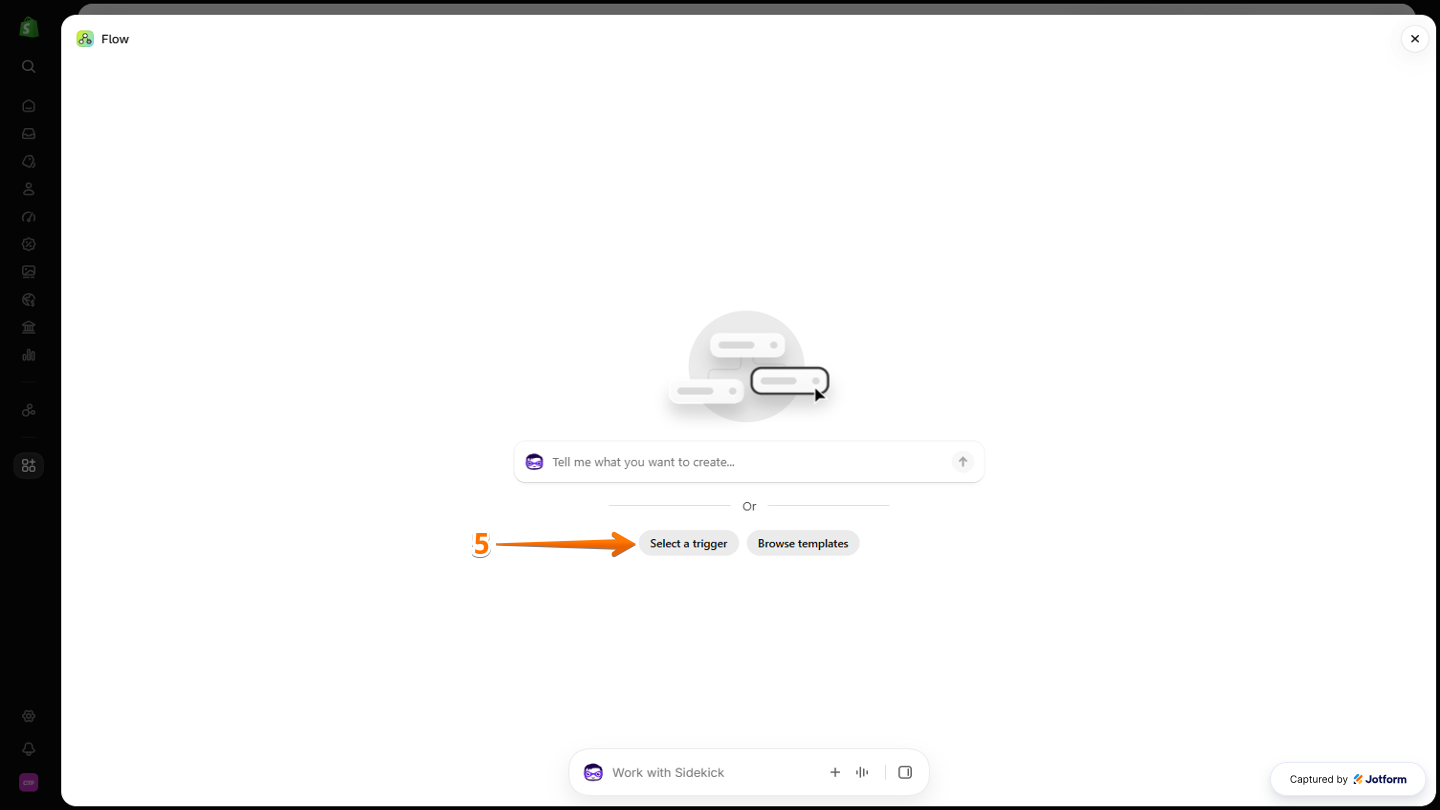
Shopify Flow workflow editor showing the Select a trigger option in the Flow window, ready to be clicked to choose the event that starts the workflow
  1. Next, in the Select Trigger window that opens on the left side of the page, click on Jotform – Form Builder.
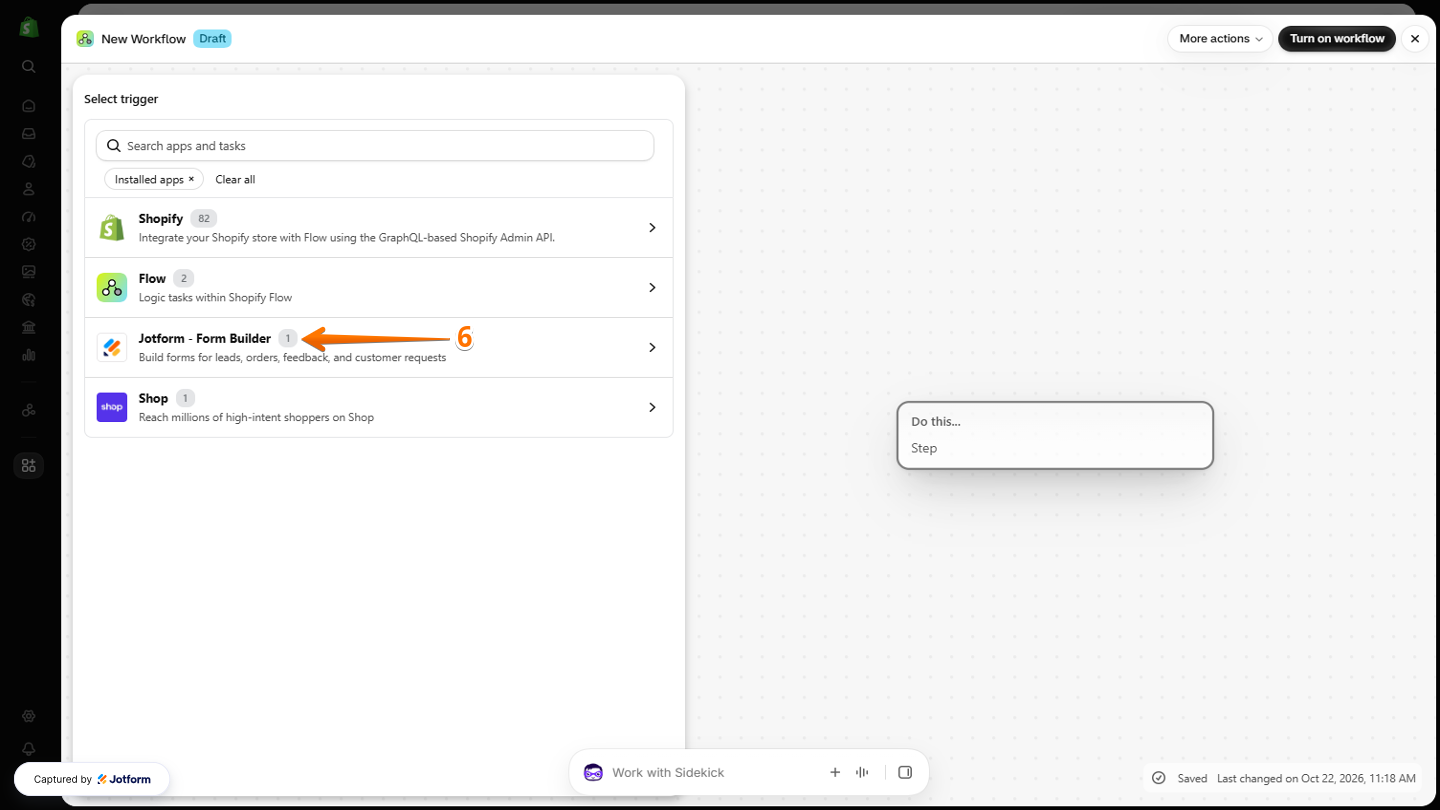
Shopify Flow Select Trigger window showing Jotform - Form Builder in the list of available trigger apps, ready to be selected to set up a workflow triggered by a Jotform event
  1. Now, click on Form is Submitted at the bottom of the Search Bar.
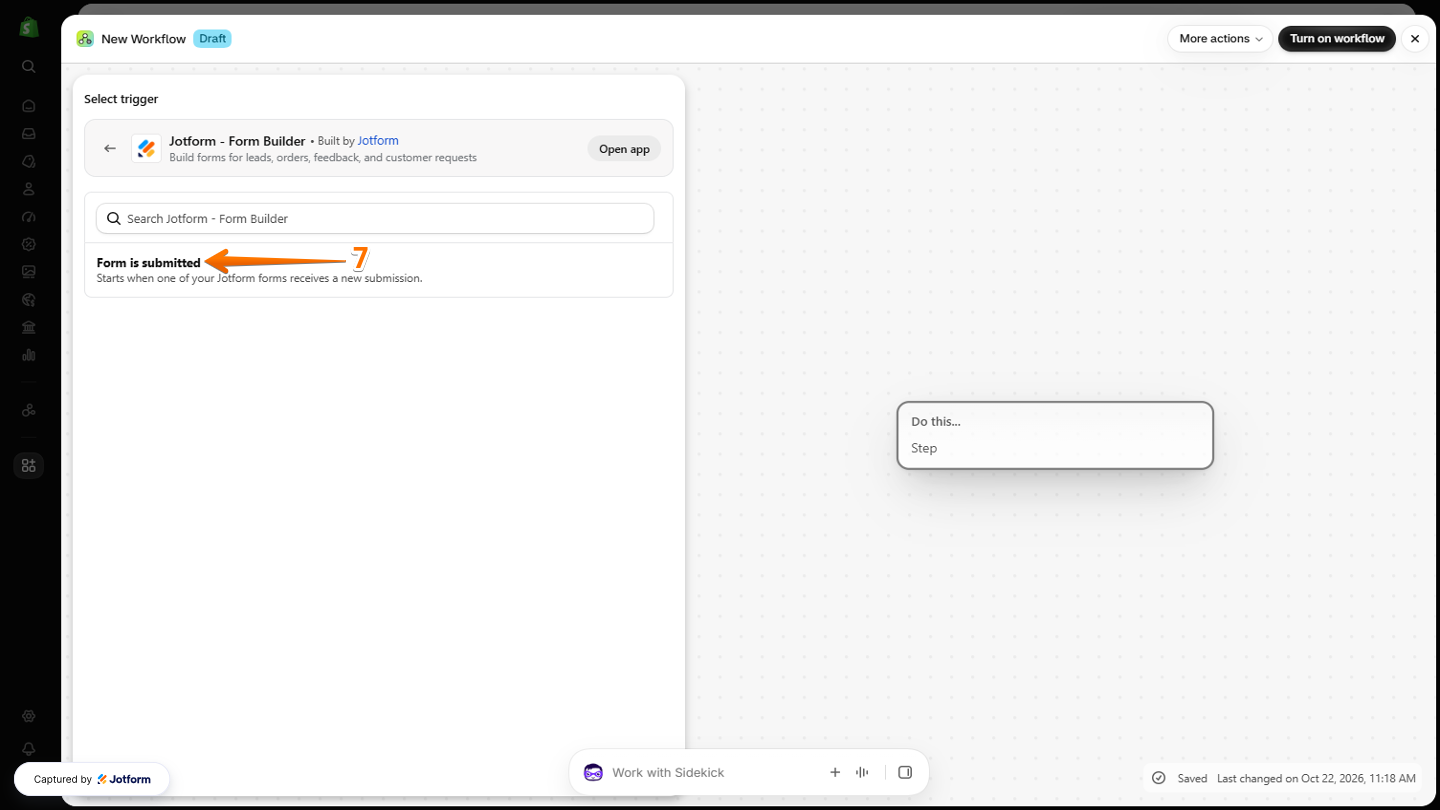
Shopify Flow Jotform - Form Builder trigger options showing Form is Submitted below the Search Bar, ready to be selected as the event that triggers the workflow when a form is submitted
  1. After that, hover your mouse over the Form is Submitted trigger and click on the Plus icon.
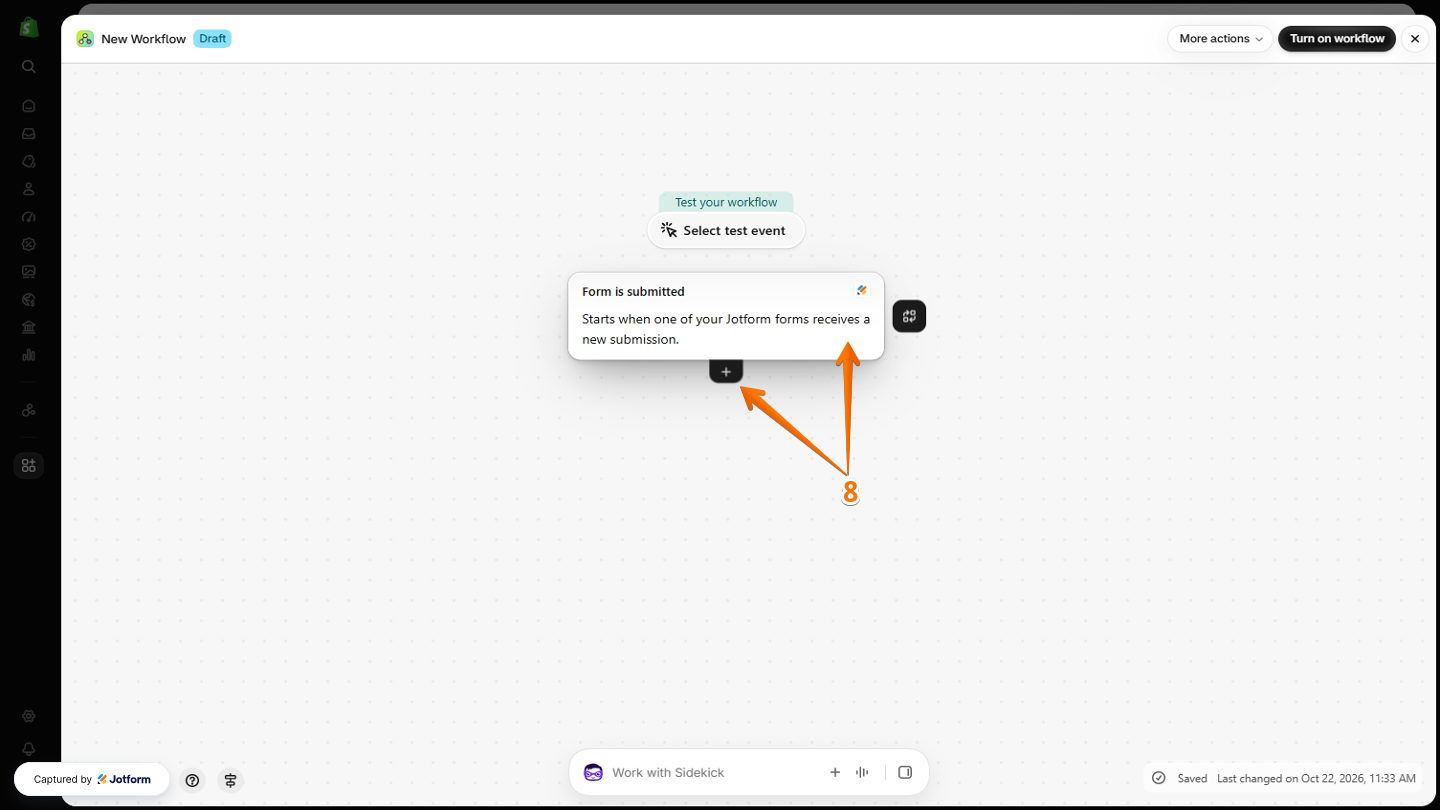
Shopify Flow workflow editor showing the Form is Submitted trigger with the Plus icon visible on hover, ready to be clicked to add the next step to the workflow
  1. Then, click on Condition to add it to your workflow.
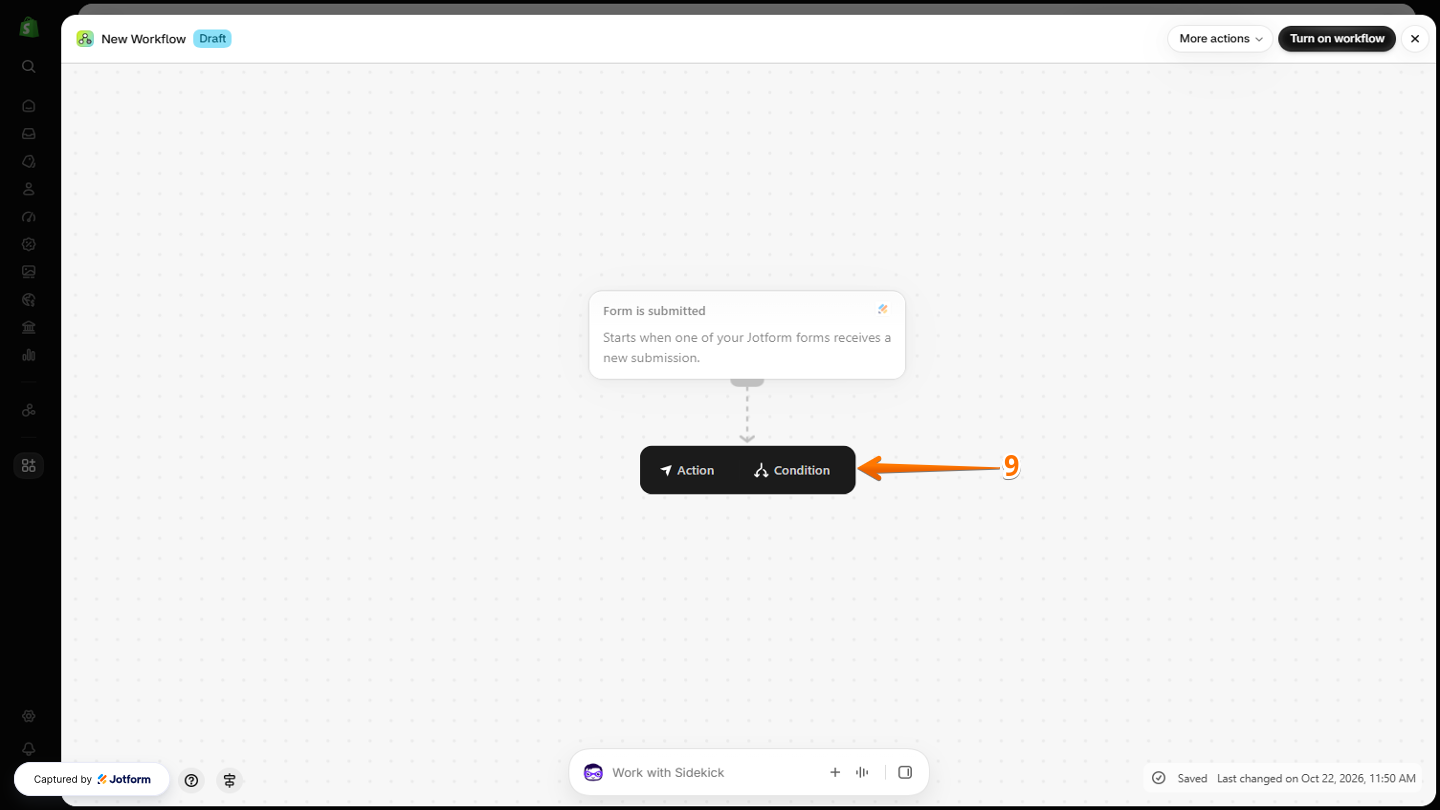
Shopify Flow workflow editor showing the Condition option in the action menu, ready to be selected to add a condition to the workflow
  1. Next, in the Condition window that opens on the left side of the page, click on Add a Variable.
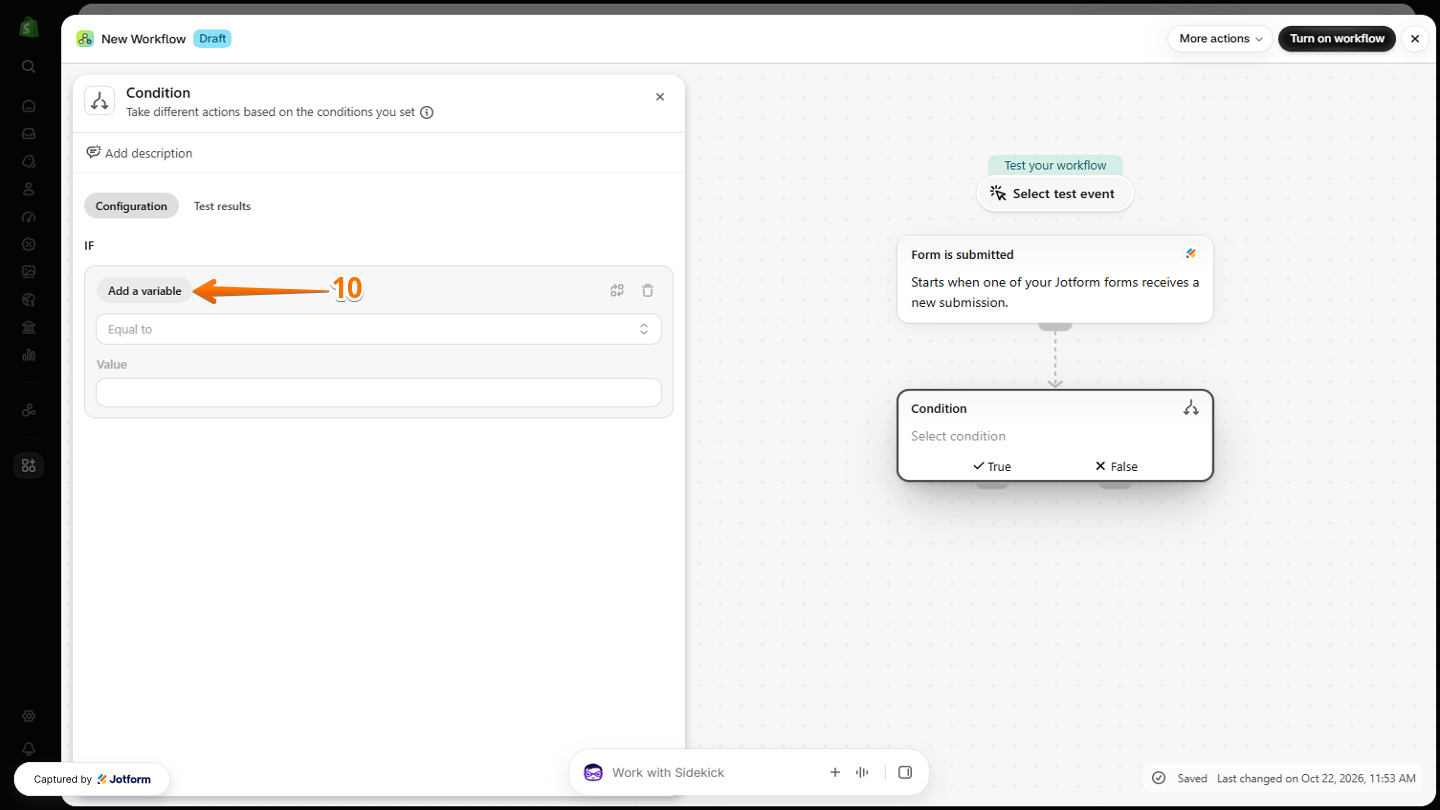
Shopify Flow Condition window on the left side of the workflow editor showing the Add a Variable option, ready to be clicked to select a variable for setting up the condition
  1. Now, in the Add a Variable window that opens, choose the Variable Name or Description, like the formId or Email field.
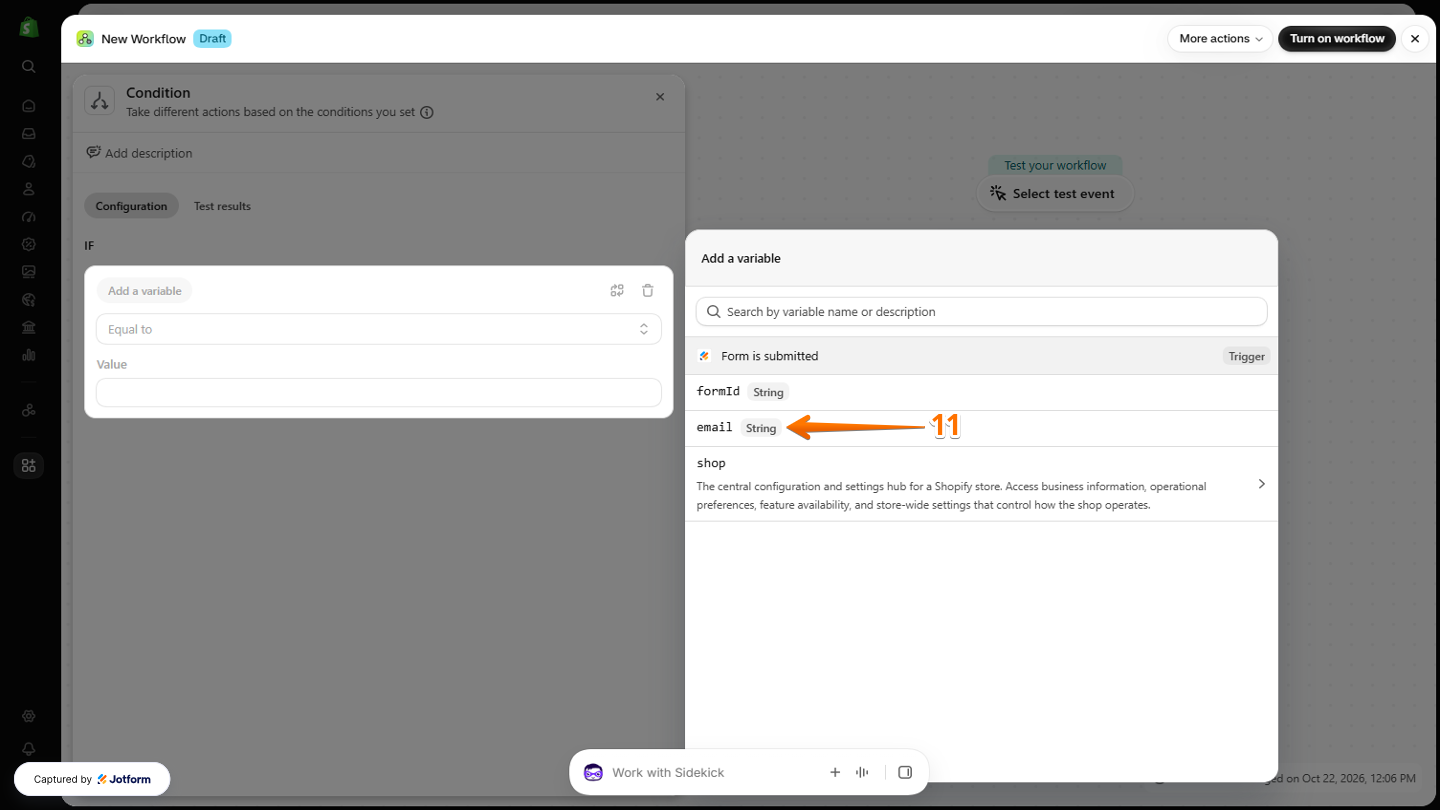
Shopify Flow Add a Variable window showing the available Variable Name or Description options, such as formId and the Email field, ready to be selected for the workflow condition

Note

The Email option only works if your form has an Email field.

  1. Then, under the IF section, enter the email address in the Email field to set your condition.
  2. Next, click on Add Criteria if you want to add another condition.
  3. Now, in the Dropdown menu that opens, select And if you want all conditions to match, or Or if at least one condition must be met.
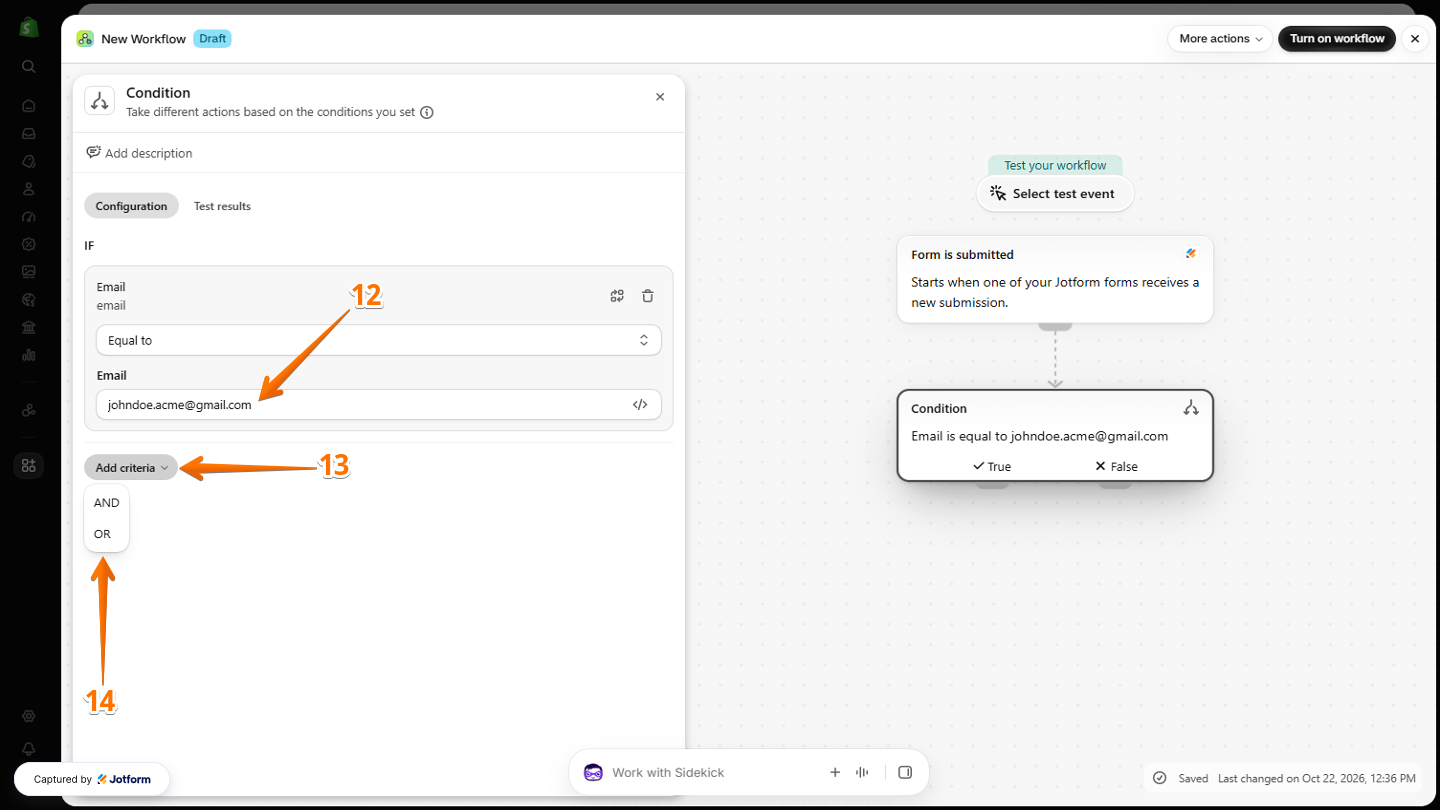
Shopify Flow Condition window showing the IF section with the Email field for entering an email address, the Add Criteria option for adding another condition, and the Dropdown menu with And and Or options for determining how multiple conditions are evaluated
  1. Then, in the Add a Variable window that opens, select another Variable Name or Description.
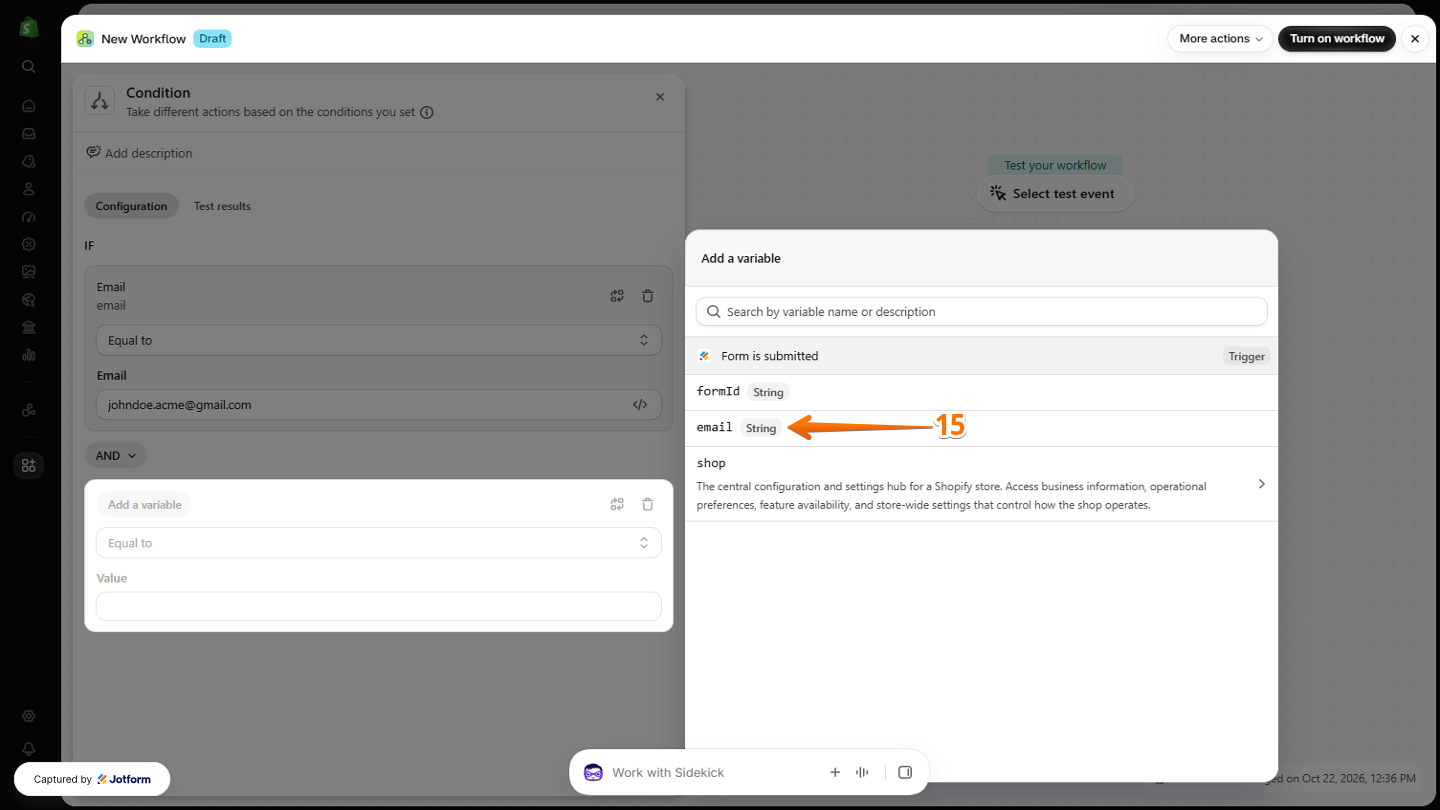
Shopify Flow Add a Variable window showing the available Variable Name or Description options, ready to be selected to add another variable to the workflow condition
  1. Next, under the OR section, enter the email address in the Email field. 
  2. After that, click on the X icon at the top-right of the Condition window.
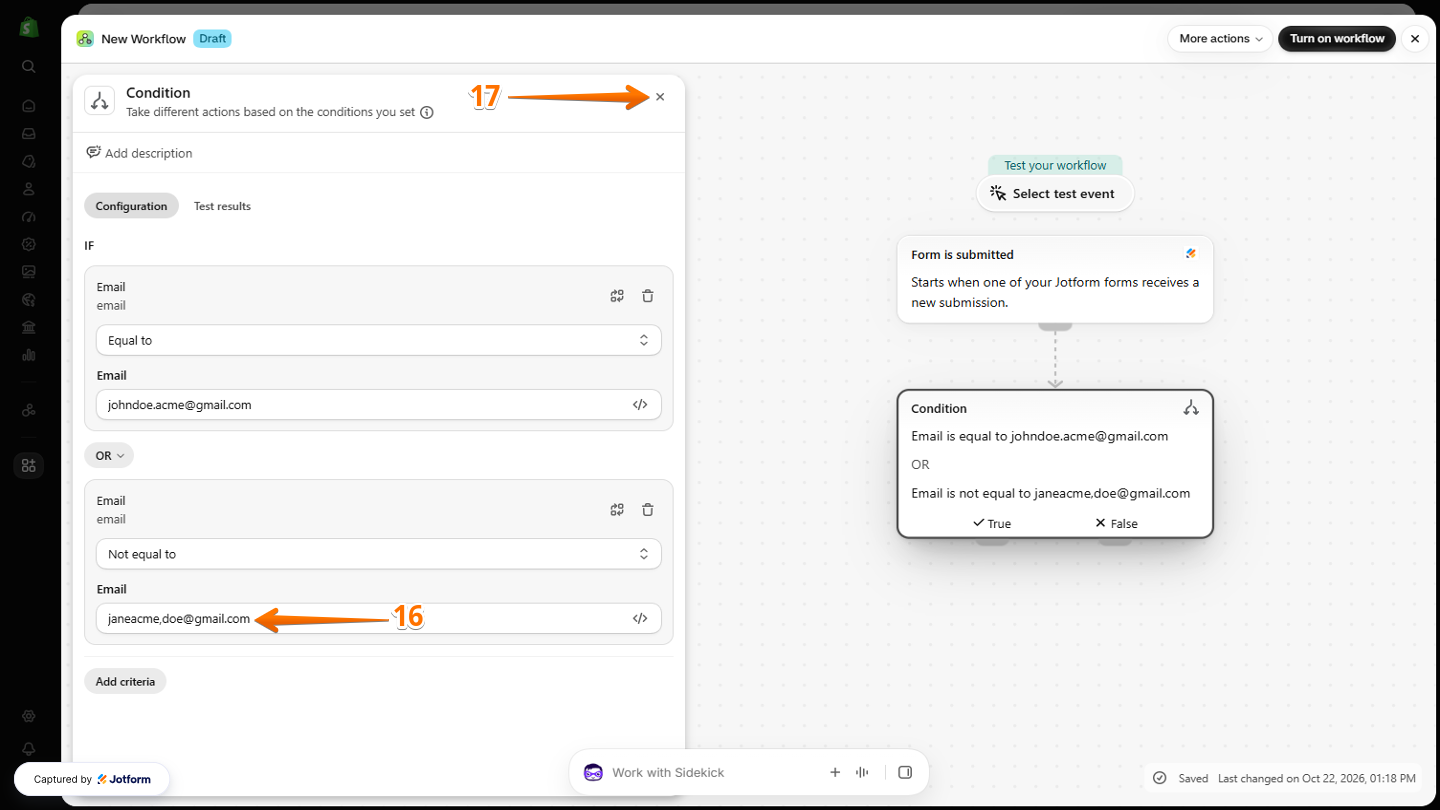
Shopify Flow Condition window showing the OR section with the Email field for entering an email address, and the X icon in the top-right corner to close the window after configuring the condition
  1. Once everything is set, click on Turn on Workflow at the top-right side of the page.
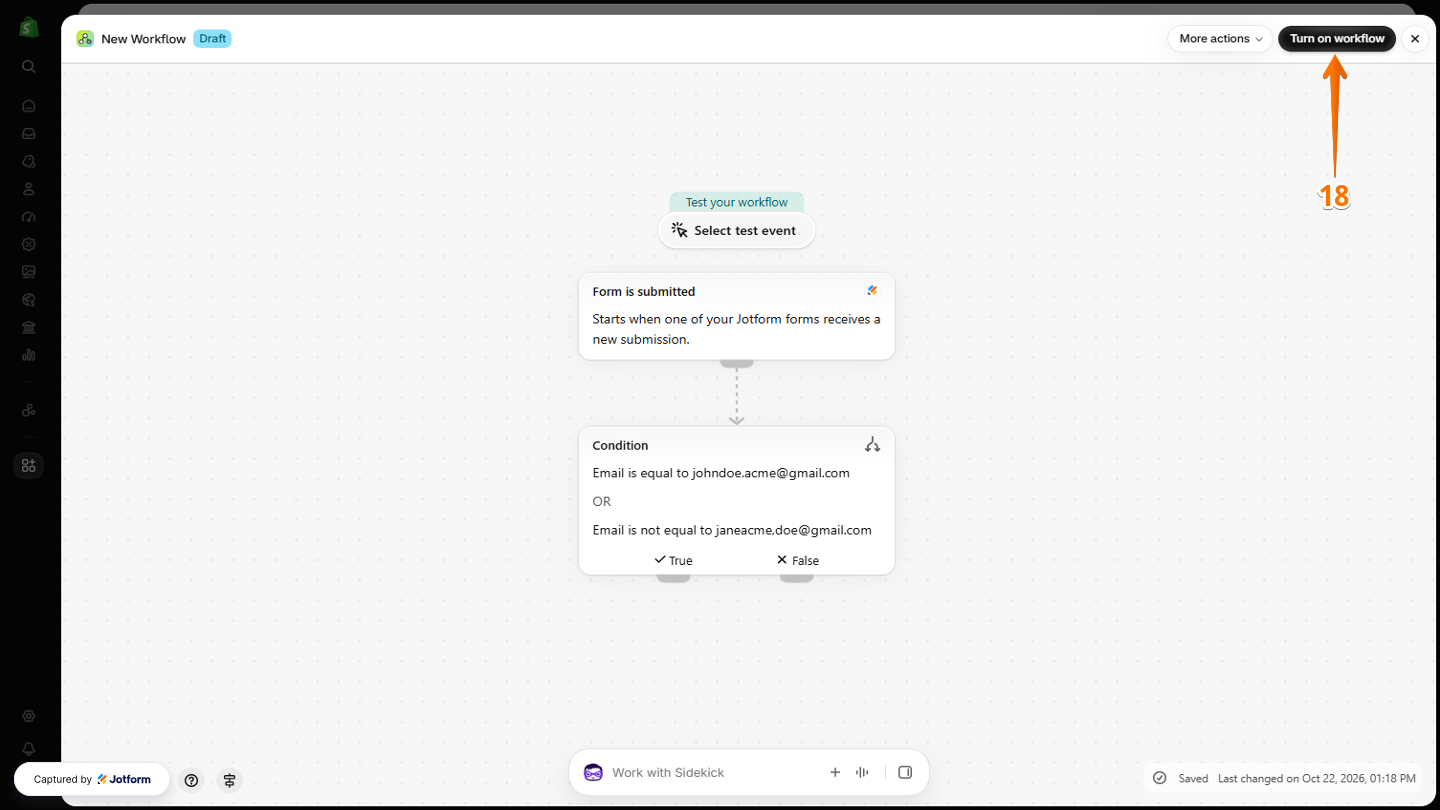
Shopify Flow workflow editor showing the Turn on Workflow button in the top-right corner, ready to be clicked to activate the configured workflow
  1. Now, in the Confirmation window that opens, click on Turn on.
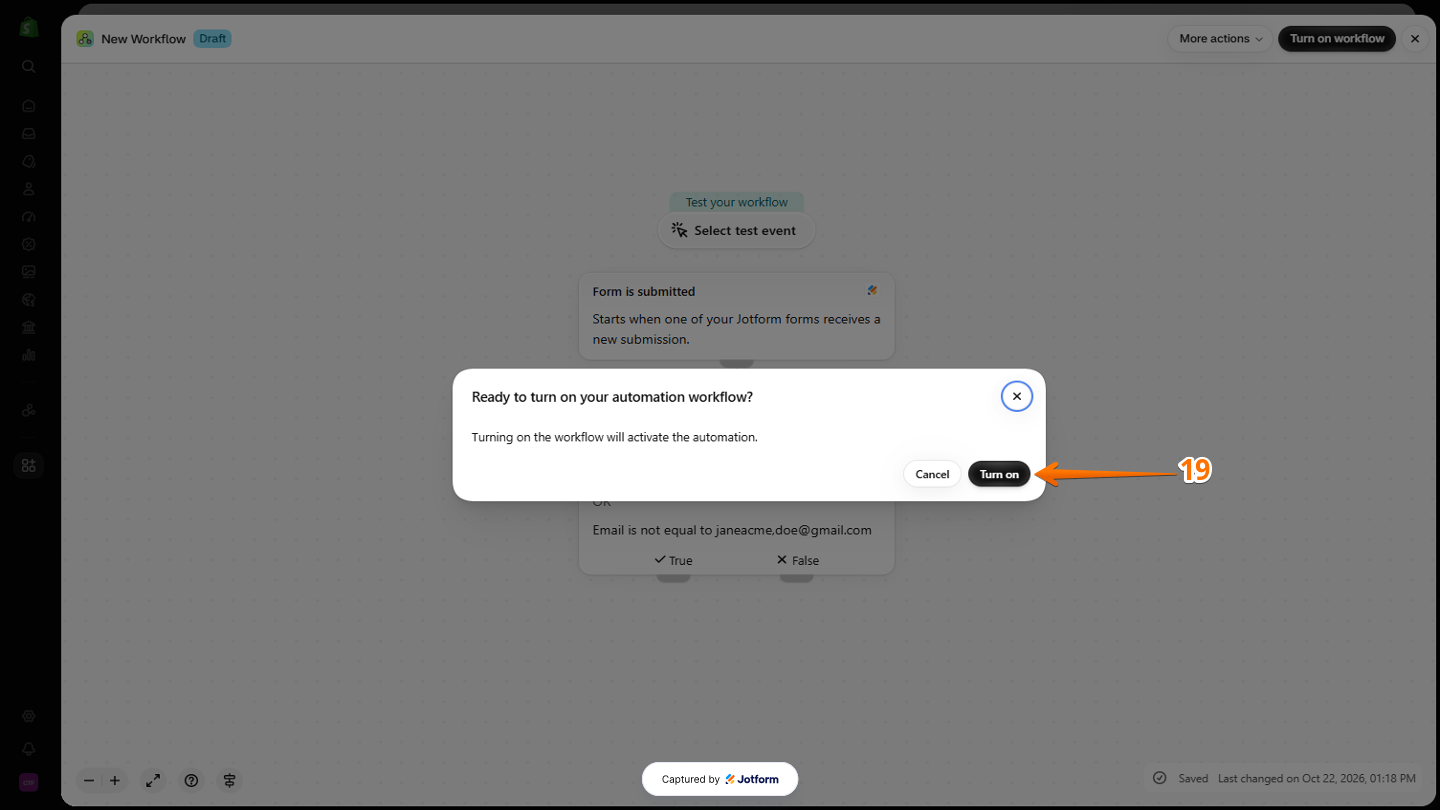
Shopify Flow Confirmation window showing the Turn on button, ready to be clicked to confirm and activate the workflow

That’s it! Your workflow is ready to run whenever someone submits your form and meets the conditions you set. For more details, check out Shopify’s guide on Getting Started with Shopify Flow.

Send Comment:

Jotform Avatar
This site is protected by reCAPTCHA and the Google Privacy Policy and Terms of Service apply.

Podo Comment Be the first to comment.
Still have unanswered questions?

We’re here for you 24/7, anytime you need us day or night. Have a question or need a hand with something? Our team is always ready to help out.