Jotform makes it easy to collect payments as part of your workflow using the Request Payment element. You can add a payment request to a workflow and let users review the amount due and complete their payment as part of the process.
Whether you’re collecting payments for an approval request, an invoice, a service, or another workflow, the Request Payment element helps you add payment collection directly to your workflow.
Whether you’re setting up a brand-new workflow or adjusting an existing one, adding a Request Payment element is a great way to collect payments as part of your workflow. Here’s how to set it up:
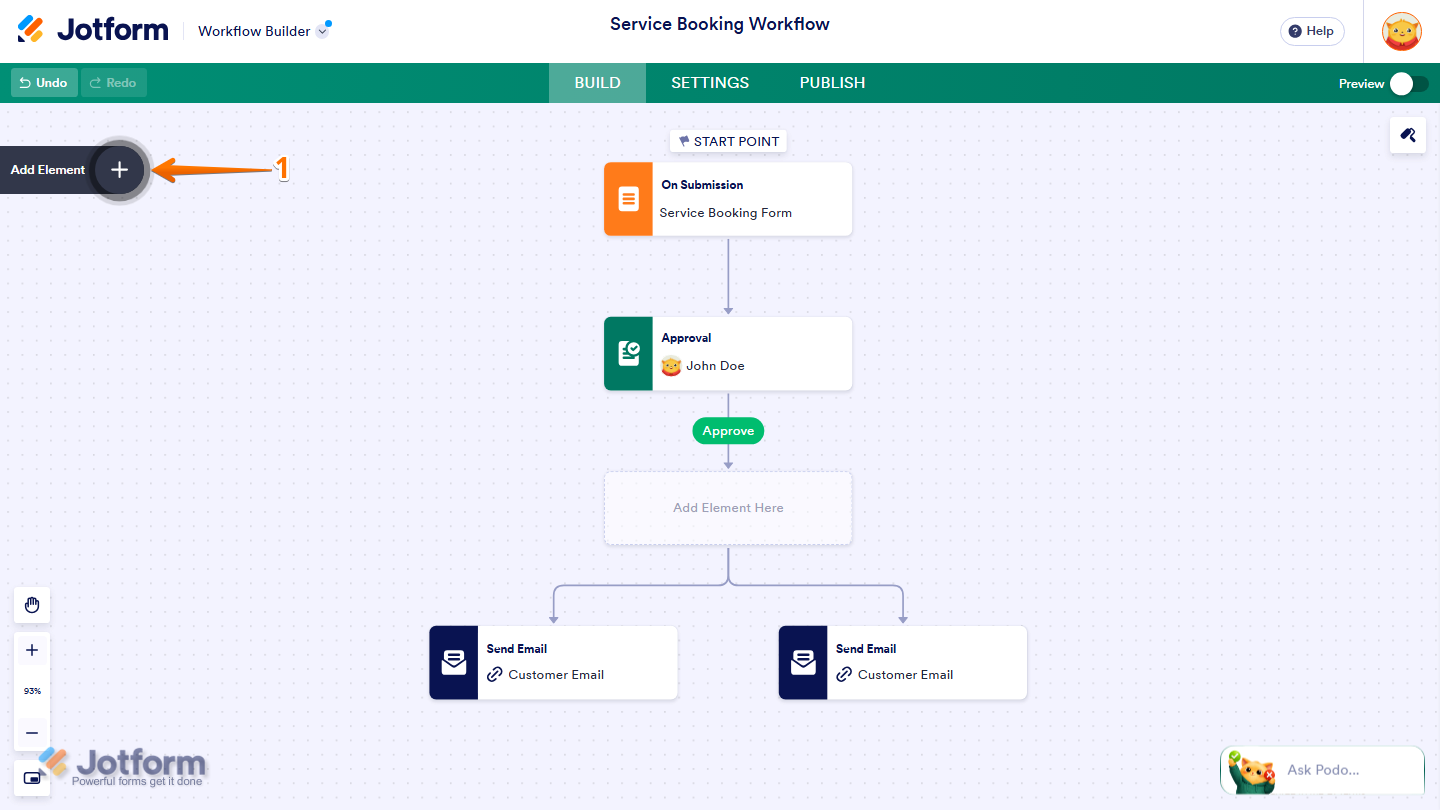
- In Workflow Builder, click on Add Element on the left side of the page.
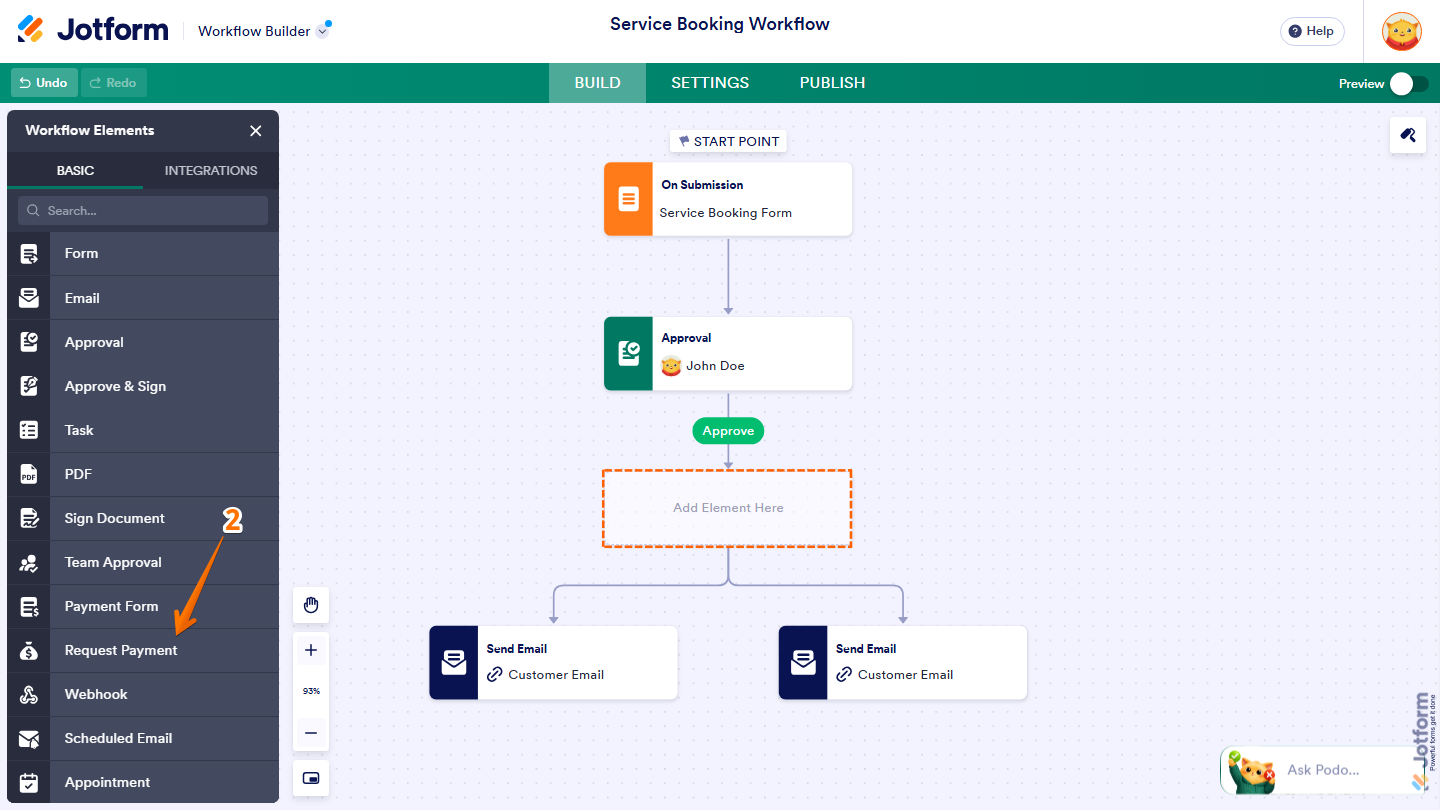
- Now, in the Workflow Elements menu, under the Basic tab, drag and drop the Request Payment element to the Add Element Here placeholder in your workflow.
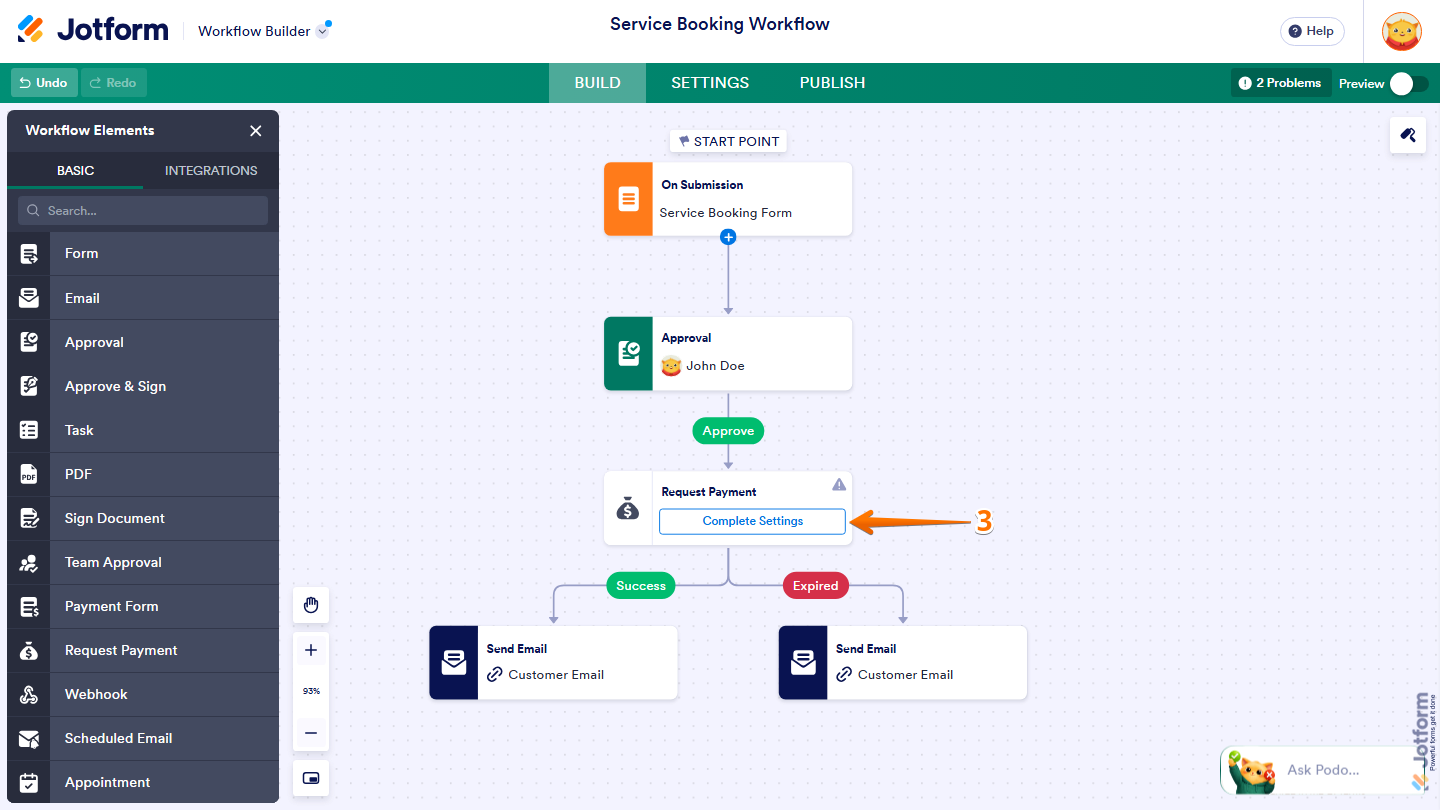
- Next, in the Request Payment Element, click on Complete Settings.
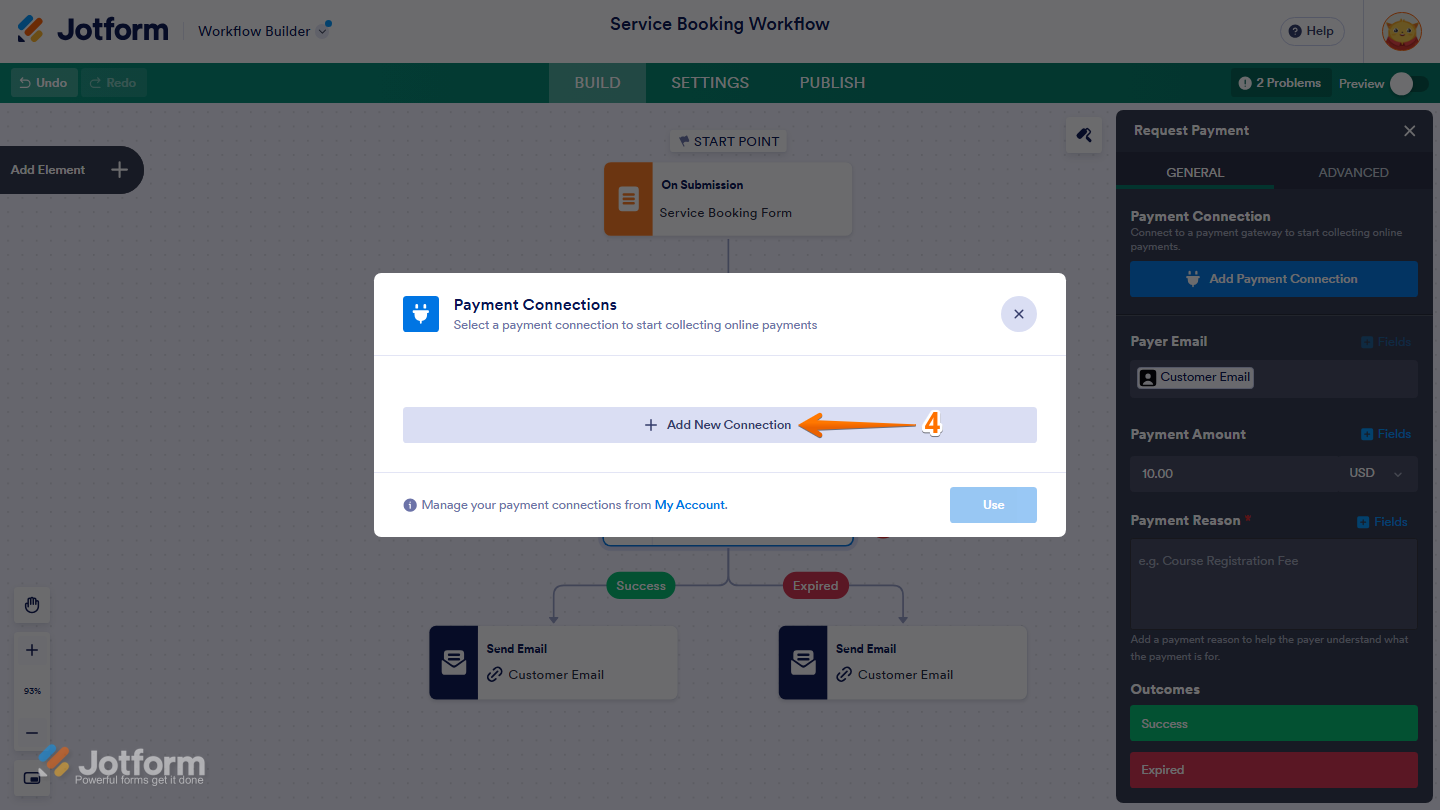
- Then, in the Payment Connections window, click on Add New Connection.
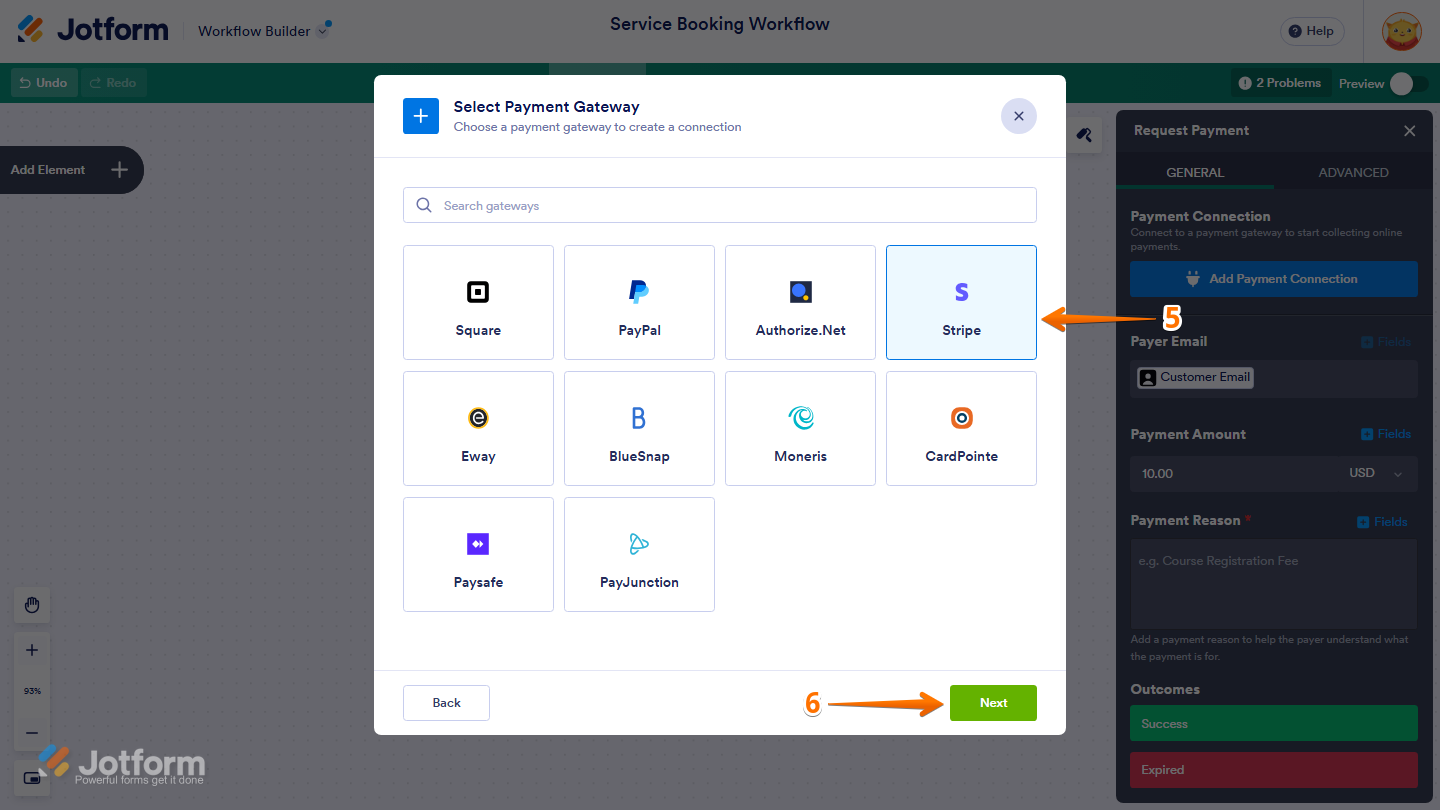
- Next, in the Select Payment Gateway window that opens, select the payment gateway you want to use for collecting payments. For example, Stripe.
- Then, click on Next.
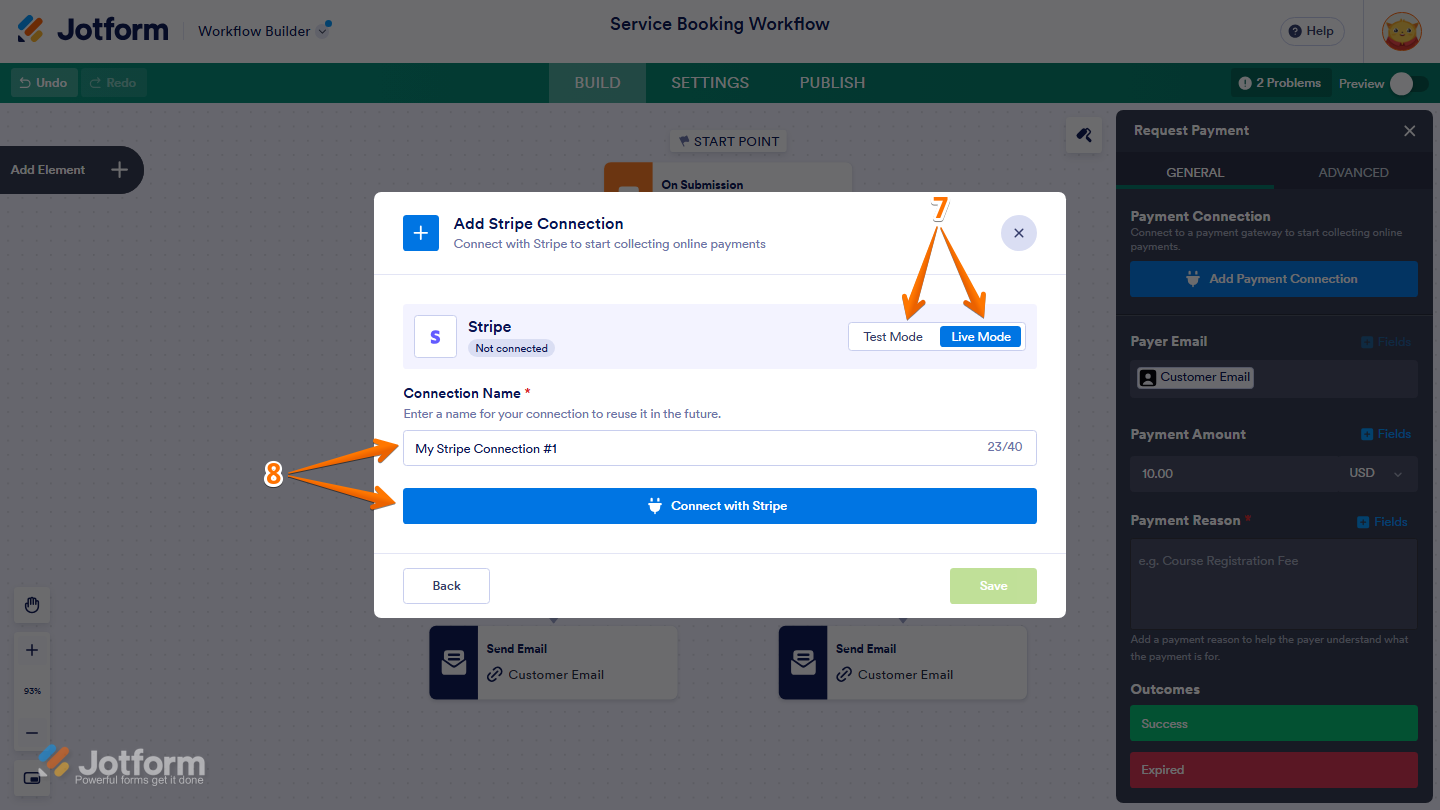
- Now, in the Add Stripe Connection window, click on Test Mode or Live Mode at the top to select which environment you’re adding a payment connection for.
- Then, enter a name in the Connection Name field, and then click on Connect with Stripe and log in to your Stripe Account.
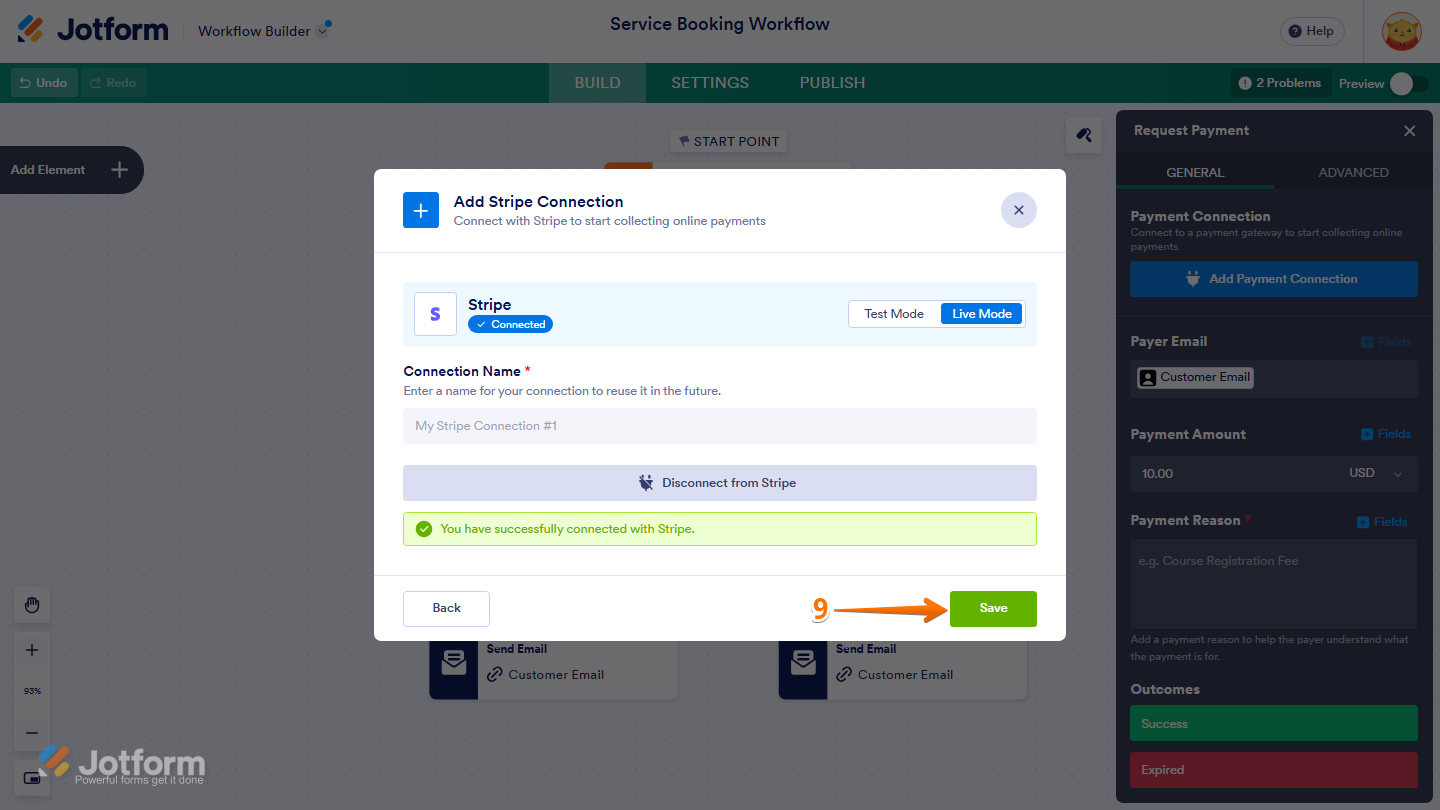
- Once it’s connected successfully, click on Save at the bottom.
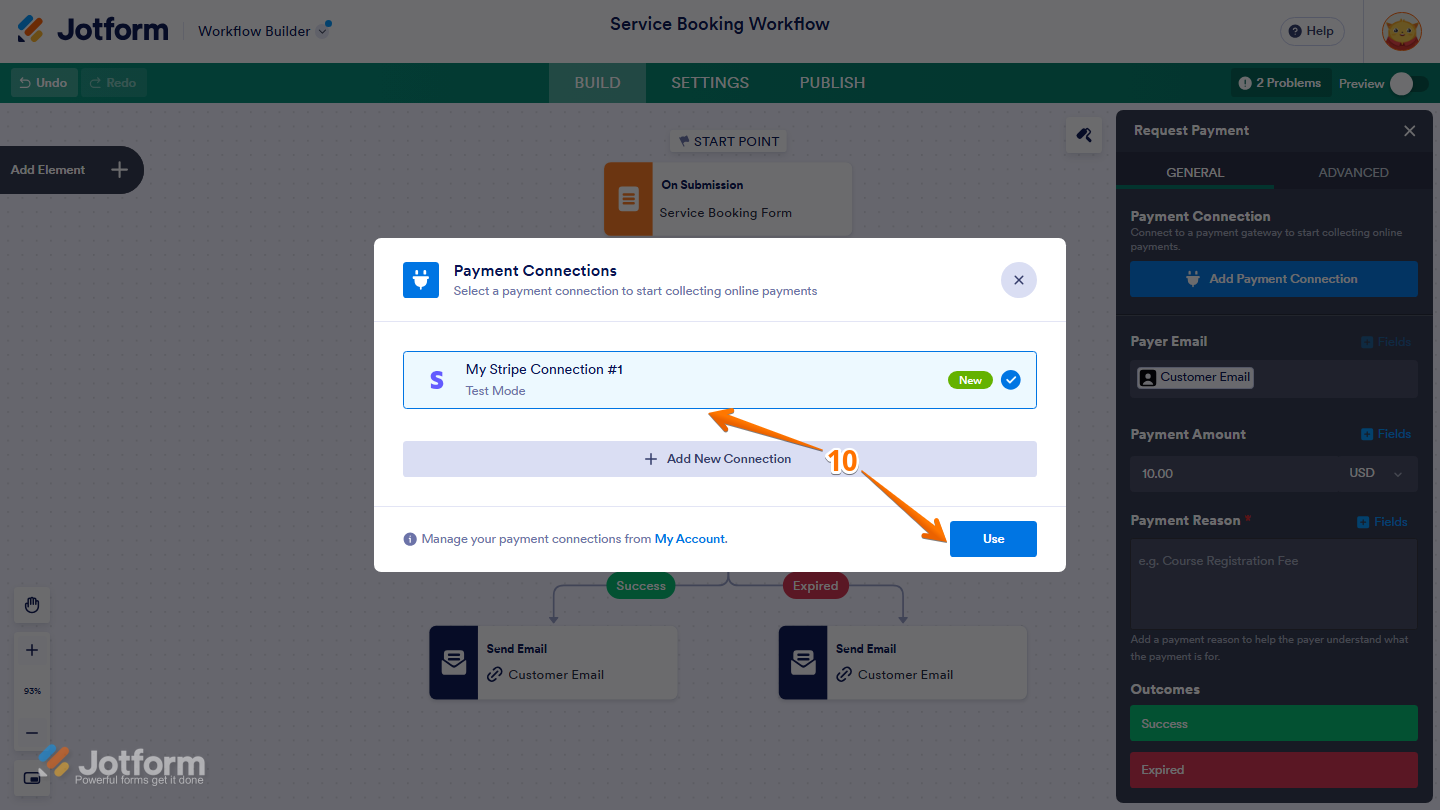
- Next, in the Payment Connections window, click on the Stripe payment connection you’ve just added to select it, and then click on Use at the bottom.
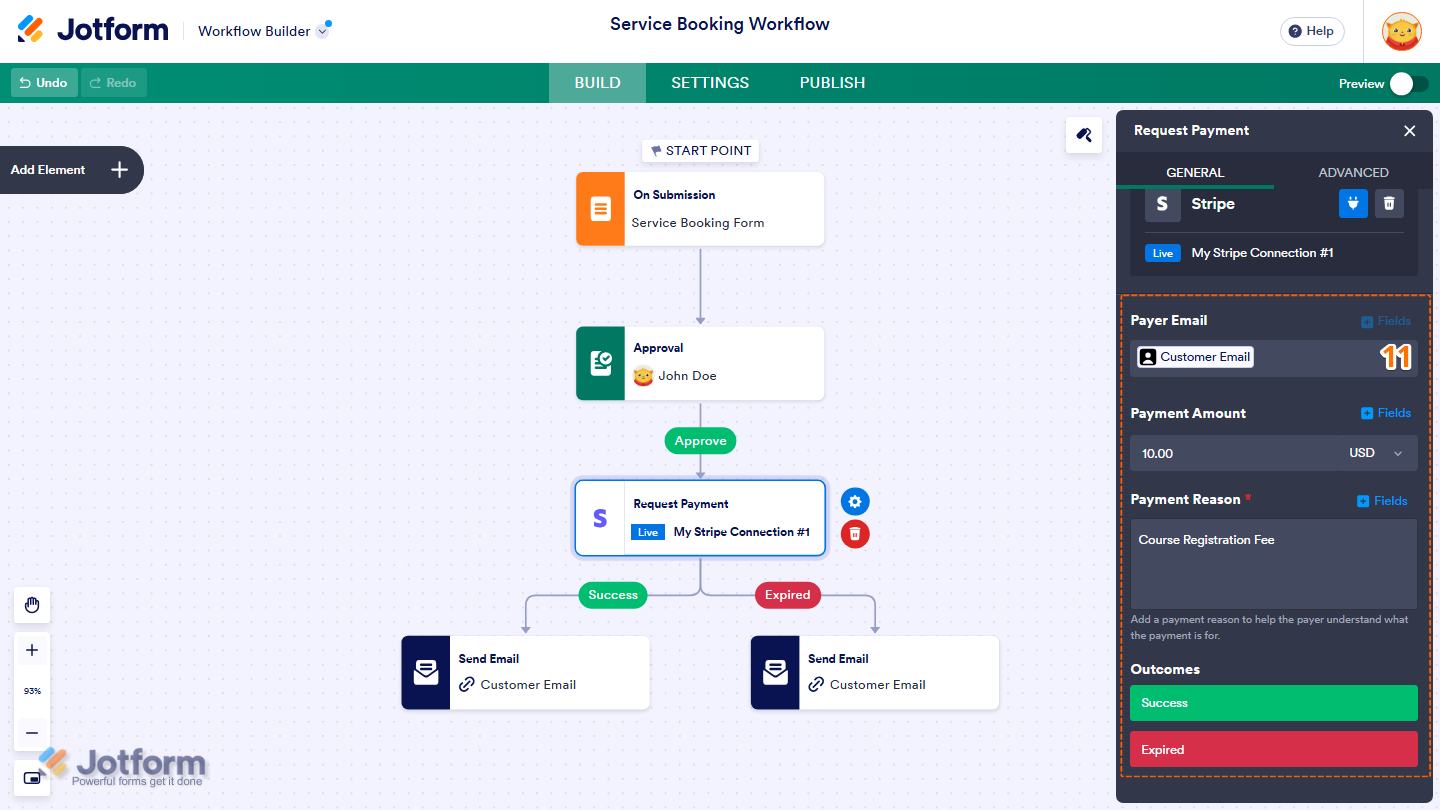
- Now, set up these things:
- Payer Email — Enter the payer’s email address, or click on Fields to use a field value for the payer’s email.
- Payment Amount — Enter the payment amount and select the currency, or click on Fields to use a field value for the payment amount.
- Payment Reason — Enter a reason to help the payer understand what the payment is for, or click Fields to use a field value for the payment reason.
- Outcomes — Select the outcome that determines how the workflow continues after the payment request is processed:
- Success — Select this outcome to continue the workflow when the payment is successfully completed.
- Expired — Select this outcome to continue the workflow when the payment request expires before it is completed.
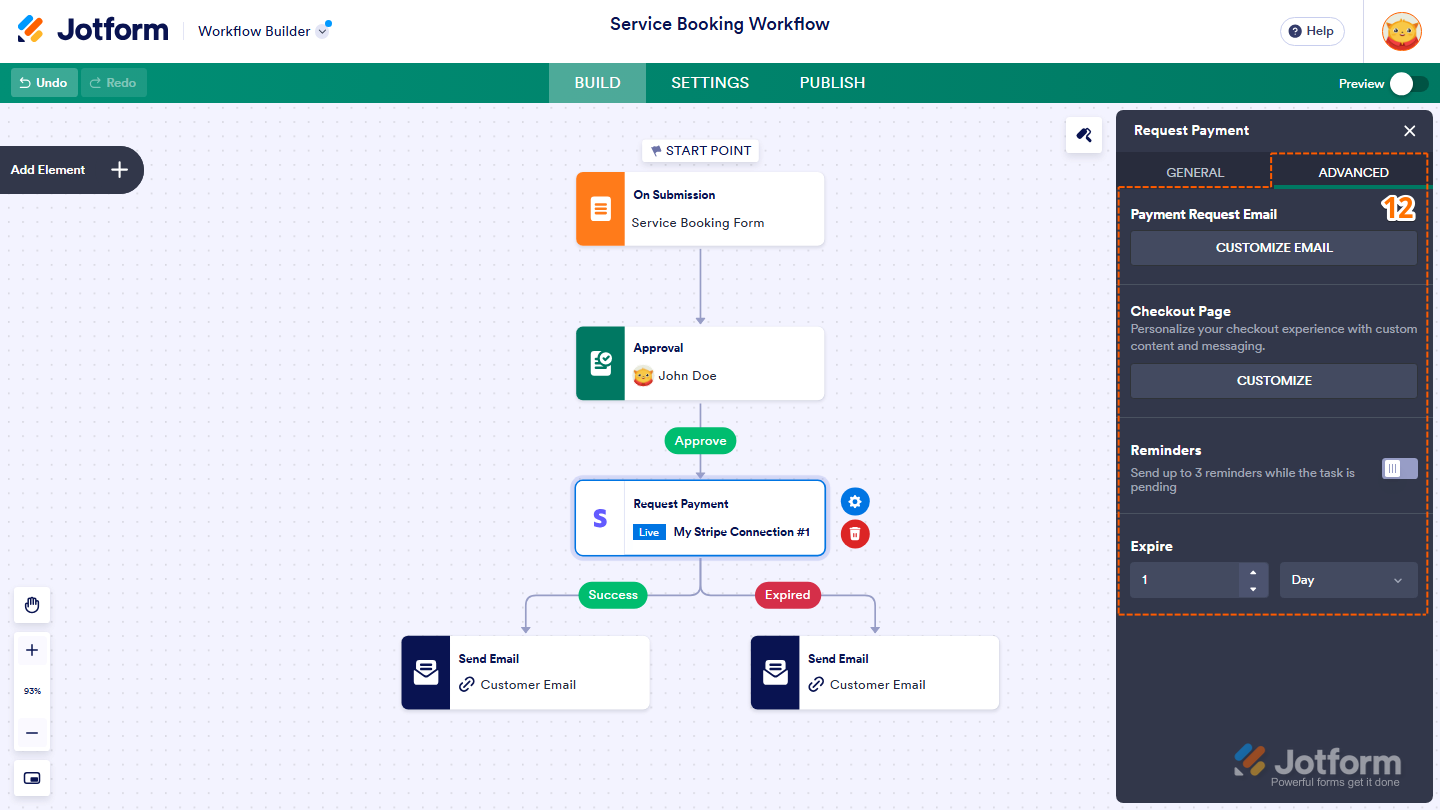
- Then, click on the Advanced tab, and configure these things:
- Payment Request Email — Click on Customize Email to customize the email sent with the payment request.
- Checkout Page — Click Customize to customize the checkout page with your own content and messaging.
- Reminders — Toggle this on to send up to three reminders while the payment request is pending.
- Expire — Enter the number and select the time unit to set when the payment request expires.
That’s it! Your Request Payment element is now configured and ready to collect payments as part of your workflow.

Send Comment: