E-commerce platform Shopify has completely changed the landscape for online selling.
Shopify was founded in 2006 by Tobias Lütke and Scott Lake, two entrepreneurs who wanted to set up an online snowboard store but struggled with the web platforms available. None had the functionality and features they wanted, so they decided to create their ideal solution — and Shopify was born.
Over the years, the platform created to solve a personal problem became a multibillion dollar global business, and for good reason.
Shopify is an easy-to-use and intuitive solution that doesn’t require any coding knowledge, making it simple for business owners to set up stores and start making sales. Plus, with a massive ecosystem of third-party apps, there’s no limit to the functionality store owners can incorporate to improve the customer experience.
So if you’re here because you’re wondering how to sell on Shopify like millions of other businesses, you’re in the right place.
Take a look at the chapter summaries below for a quick overview of each section, and then get into the details to learn how you can set up your own Shopify store and make it a resounding success.
Pro Tip
Enable 24/7 customer chat with Shopify AI Agents so customers can get support even when your team is offline. Plus, learn how Shopify AI Agents automate complex tasks like customer support, order tracking, and shipping updates.
Chapter synopsis
- Introduction
- The benefits of Shopify. Why choose this e-commerce platform over the many others available? Read about the advantages of Shopify, including its vast ecosystem of apps, fee structure, no-code setup, and 24-7 customer support.
- How to start selling on Shopify. If you’re convinced this is the platform for you, this chapter includes step-by-step instructions for setting up your account, from creating a login to selling your products.
- How to find customers on Shopify. Once your store is set up, you need to bring customers to your site. Here we cover how to create a customer persona and use it to attract new customers and keep them.
- How to integrate Shopify with Jotform. Running an online store naturally requires you to collect information from customers. An easy way to do that is with Jotform. This chapter shows you how to integrate the two solutions with ease.
- Use Shopify web forms to improve your operations. Not only can you capture data with web forms, but you can also streamline your business processes. Learn how to incorporate forms to make gathering data more effective.
- Shopify FAQ. Wondering how much Shopify costs or how to do drop-shipping with the platform? You’ll find the answers to those questions and more in this FAQ. No need for a Google search when we’ve gathered all the answers for you.
Ready to learn why Shopify is the leading e-commerce platform in the world and why you should consider it for your online business? Head to the next chapter.
The benefits of Shopify
There are many e-commerce platforms that small and medium-sized businesses can use to set up their online stores — so why go with Shopify? Several benefits make Shopify a leader in the industry. When selecting which e-commerce platform to go with, consider these advantages of Shopify.
No coding required
If you’re new to web development, creating an online store can seem daunting. This is an area where Shopify shines. You can create an online store without any coding background. You don’t need to know how to create a website or have any prior experience, as Shopify is intuitive and user-friendly. Setup is easy, and the administrative user interface is straightforward.
If you have any questions about online store coding, you can always refer to Shopify’s detailed documentation and video guides. “Shopify is quick and easy to set up and use. It’s mobile-friendly, and it has powerful SEO tools,” says Melanie Bedwell, e-commerce manager for OLIPOP. “If you have a product to sell, Shopify makes it intuitive to do so.”
Customizable themes
Web themes make it easy to create the site you want, including the layout, graphics, colors, fonts, images, and background. On the Shopify Theme Store, you can choose from over 100 free and premium web themes categorized by industry and collection.
If you want more options, hundreds of third-party themes are available from other sites. With some coding knowledge, you can customize any theme to make it work for your business.
No selling fees
Shopify’s pricing structure includes a monthly subscription fee, but you don’t need to pay any special fees to sell your products — no matter what or how much you sell. If you use Shopify Payments, you won’t have to pay any transaction fees. However, there are payment processing fees if you go with a third-party payment gateway.
App ecosystem
If you want to add functionality to your Shopify store beyond what’s included with the platform, there is a massive app ecosystem.
“Shopify provides turnkey access to an extensive collection of tools that help businesses reach customers and maximize sales,” says Kurt Ellis, president of GLF E-Commerce Fulfillment. “This includes a robust library of built-in features, like customer analytics, SEO tools, and easy integrations with third-party sales and marketing apps.”
In the Shopify App Store, you’ll find apps for everything from landing page builders and loyalty programs to analytics and product review integrations. No matter what you want to do, there’s an app for it. Some apps are completely free to use, while there’s a charge for others.
“As a Shopify App Developer, I’m pretty confident saying that 99 percent of the merchants’ needs have been satisfied with what is available on the Shopify App Store,” says Dan Doughty, founder of Dripshipper, a private-label coffee drop-shipping business.
💡 Need a custom app for your store? Learn what affects Shopify app development cost before you get started.
Fraud analysis
When dealing with online sales, there’s a high potential for fraud. For example, a customer may order with a fraudulent credit card. Shopify has a Fraud Analysis feature to protect your business and help avoid such issues.
Depending on the Shopify plan you have, you can get support for identifying fraud indicators, support from third-party fraud apps, and recommendations on avoiding fraud. These features can help businesses prevent debilitating chargeback costs.
Multichannel sales
While Shopify is primarily an e-commerce platform, that doesn’t mean merchants are limited to online sales. “If you have retail, online, and wholesale sales channels, Shopify can handle all of those,” says Doughty.
“This is important because it can tie all your sales together and help streamline your business. You can add in-person POS, marketplace channels like Amazon and Walmart, wholesale customers with special pricing, and your online store. All of this is under one platform, so you can easily manage it.”
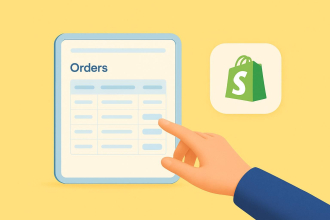
To keep your records complete across those channels, you’ll also want to know how to import orders into Shopify from outside sources.
24-7 customer support
Being a business owner doesn’t mean you have to do everything alone. Shopify offers 24-7 customer support, so you can get a helping hand whenever you have an issue.
You’ll receive near-instant replies to your most pressing questions via phone, web chat, or email. Plus, if you like to figure things out for yourself, you can also rely on the Shopify Help Center or Shopify Guides, where you can find commonly asked questions and answers.
Now that you know why using Shopify is so advantageous for business owners, it’s time to look at how you can start selling on Shopify.
How to start selling on Shopify
Convinced Shopify is the place to start your online business? If you have a great product or service and want to turn it into a business on Shopify, follow these steps to start selling.
1. Sign up for an account
Go to the Shopify website and click on the Start free trial button. You don’t need to enter your credit card details for the free trial, so there’s no financial risk involved with this step.
Dip your toe into the Shopify waters to try it out. Just remember that if you want to continue using Shopify after the free 14-day trial, you need to submit your payment information and select a plan. Once you sign up, you’ll answer a few basic questions about your business.
2. Enter a domain name
Your domain name is the equivalent of the street address of your physical store. It’s how people will find you on the internet, so it’s important to pick one that’s easy to remember and easy to spell.
The default setting in Shopify will be examplestorename.myshopify.com. You can choose a different root domain name, which you can purchase from a third-party provider.
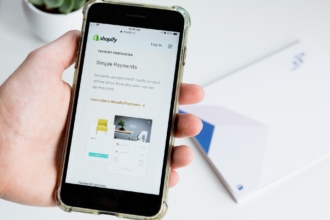
3. Establish your payment method
Give your customers a couple of payment method choices. This will make it easier for them to purchase from you and may lead to a higher conversion rate.
Options include Shopify Payments (including different credit cards and debit cards), PayPal, Amazon Pay, and more. You’ll also need to submit your social security number, bank account number, bank routing number, and your employer identification number as part of this process.
For a closer look at specific payment methods, including Shopify’s support for Cash App, you can learn how Cash App payments work with Shopify in this blog post.
4. Set up shipping and delivery settings
Getting your products to your customers in a safe and timely manner is vital, so you need a solid shipping and delivery plan. What will your strategy be? For example, will you charge for shipping separately, or will you build the shipping cost into the price of your products? Which countries will you ship to, and which service provider will you use for shipping?
Be sure to think about order fulfillment early. “Providing a hassle-free shopping experience is only half of the battle,” says Ellis. “Issues with order fulfillment, such as unexpected delays or incorrect shipments, can kill an otherwise perfectly built online shop. Make sure you have a rock-solid order fulfillment process integrated into your online storefront before you process your first order.”
5. Select a Shopify theme and design your store
Here comes the creative work. Once you’ve figured out the logistics, it’s time to focus on how your online store will look.
The theme determines the layout and design of your e-commerce store. This will be a critical aspect of your business because a clunky or unintuitive online store may turn off customers.
In Shopify, you can choose from predesigned themes or create your own. When selecting and customizing your theme, remember to check it on different devices, such as mobile phones and tablets, to make sure it’s fully responsive.
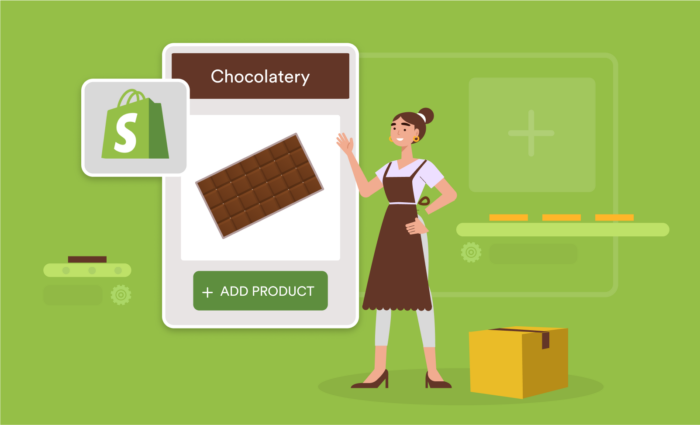
6. Add your products
There are a couple of options for adding products to Shopify. You can manually add each product through the Shopify admin panel, but this will take time and attention to detail. A quicker, more streamlined option is to upload a CSV file with your product details, including pricing. This is a good option if you have an extensive product selection.
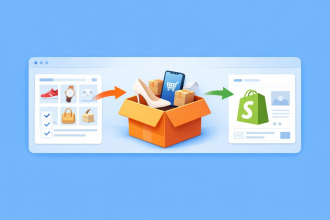
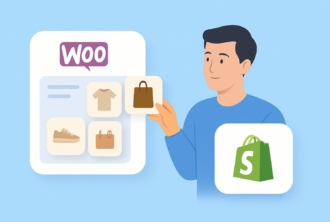
If you’re migrating from another platform, you can also import products directly. Learn how to import products from WooCommerce to Shopify.
Some business owners want to take a different route that doesn’t involve their own products. Are you one of those wondering how to sell on Shopify without inventory? Take the drop-shipping route, so you don’t need to worry about product inventory levels, shipping, and packaging.
If you want to change the pricing for your products, or any other fields, go to Products and filter for the one you’re looking for. Edit the field you want to change, and click Save when it appears.
Many merchants like to showcase sale prices for their products to entice consumers. “If you’re using the app, tap Products and then select the product you want to sell,” says Bedwell. “From there, go to Variants and tap the variant you want to sell. From the variant’s details screen, set the compare at price to the product’s original price. Then set the price of the product to your new sale price. Hit save, and you’re done. It’s that simple.”
7. Expand your business with Shopify apps
In the Shopify App Store, you can find thousands of apps to expand the functionality of your online shop. You can find the best Shopify apps to boost sales, apps for creating loyalty programs, and Shopify inventory management apps. It’s vital to keep a close eye on your online inventory management to ensure you have adequate stock available and that you reorder at the right time.
Check out this article to learn how to build a Shopify app.
8. Market your online store
You need a marketing strategy to drive traffic to your business and encourage those website visitors to convert. Use the best email marketing for Shopify tools to build your list and nurture prospects, showcase your products and company on social media, and optimize your product pages for conversion.
Remember that marketing isn’t a one-time activity but an ongoing effort that you need to focus on for the life of your business.
9. Sell your products
Your store is now ready to welcome your customers. Keep a close eye on your analytics to determine which products sell well, which aren’t as popular as you thought, and what your customers prefer.
Also determine whether the layout of your online store is intuitive, making it easy for your customers to find what they’re looking for and check out. If you need some inspiration, check out these popular Shopify stores to see what they are doing well and how you can incorporate their strategies into your business.
“It may seem like a lot, but some of these steps are very fast,” says Doughty. “Signing up, setting up your payment gateway, configuring your shipping settings, and connecting a domain take about five minutes each. It’s very quick.”
There are, however, a couple of time-intensive areas. “The bulk of your time will be spent designing your store with a Shopify theme and adding your products,” adds Doughty.
“The themes do a great job of making the structure of the site super easy and fast. Adding the images of your products takes the most time but makes the site look great. Adding products can also take some time because you need to add prices and descriptions to the images. If you already have that information, adding the products to your store will be faster.”
With your Shopify store set up and ready to go, it’s time to find your customers.
How to find customers on Shopify
One of the biggest challenges online store owners face is finding customers. There’s a lot of “noise” online, and it can be difficult to make your store stand out among the hundreds or thousands of competitors.
It’s important to have an acquisition strategy to attract new customers and a retention strategy to keep old customers coming back. However, before you can do any of that, you have to know who your customers are.
Creating a detailed customer persona
No customer acquisition or retention effort can work without a detailed buyer persona. You need a clear understanding of who you’re marketing to, and this begins by researching some vital information about your target audience.
With these details, you can target your marketing efforts more effectively. Your customer persona should include
- Demographics. The age range, gender, location, job title, annual income, and other basic facts about your customers will help you figure out what challenges your customers face so that you can be the solution to their problems.
- Psychographics. Your customers’ values, interests, and hobbies will help you determine what they hold dear and how they think.
- Behaviors. Are your customers loyal, and how ready are they to make a purchase? This kind of information helps you figure out how your target audience thinks and behaves when it comes to spending their money.
Generating leads for your Shopify store
To increase awareness for your Shopify store, it’s important to take a multichannel approach. Depending on your industry, products, and buyer persona, specific marketing channels may be more successful at attracting new customers than others.
Regardless of your lead generation strategy, Bedwell recommends having a clear goal and using content that appeals to your target audience. “Ensure your content is personalized. When consumers feel like you know their wants and needs, they’re more likely to respond to your company and brand,” says Bedwell.
Your Shopify lead generation tactics may include
- Search engine optimization. Find the keywords your target audience uses in online searches related to your business, and ensure those words appear in the content of your online store in key areas like page titles and headings. This will help your store show up in Google search results.
- Social media. Create social media pages for your business on various platforms, such as Facebook, Instagram, and LinkedIn. Build your following by first adding people you know and asking them to recommend others follow your page. Curate your posts carefully to showcase the value of your business and use hashtags within each post to make your page easier to find. Link all posts back to your Shopify store.
- Influencer marketing. If there are social media influencers in your industry, build a partnership with them to promote your Shopify store. They may have a wider reach into your target audience to get more eyes on your business.
- Blog. Depending on your industry, a blog can be a great way to showcase your expertise and make your website easier to find online. Write about topics that include important high-ranking keywords while also providing helpful information.
In addition to using marketing channels, you can also get leads through logistics. Ellis suggests offering international shipping. “International customers give your business more consistent income throughout the year. For example, if you sell swimsuits, you can avoid seasonal lulls by shipping anywhere in the world.”
Building a loyal customer base
Once you’ve attracted new customers, it’s important to have a plan to keep them coming back. You’ll need to consistently nurture your customers to remind them why they purchased in the first place, how you helped them solve their problems, and how much you value their business.
Shopify customer retention methods can include
- Loyalty programs. Incentivize existing customers to return to your store by giving them discount codes, special offers, free shipping, and VIP access.
- Referral programs. One of the most effective ways of marketing is through word of mouth. Encourage customers to recommend your store to a friend in return for a coupon or discount code.
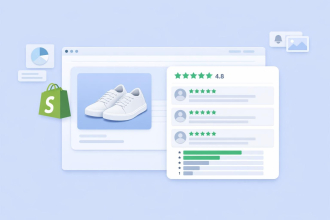
- Review programs. Get current customers to leave reviews of your products and services online. This helps build brand loyalty and encourages new customers to try your products.
You can share your retention efforts with existing customers through email marketing, SMS campaigns, social media marketing, and other methods. Keep in mind that your level of service to your customers plays a big role in getting them to come back.
“It is possible to avoid the most common online shopping customer complaints, which include out-of-stock items, late delivery, and a frustrating returns process,” says Ellis. This requires detailed inventory management, well thought-out shipping strategies, and transparent return policies.
Many processes within your Shopify store will require customers to fill out forms, so let’s look at how to integrate Jotform into your store.
How to integrate Shopify with Jotform
Forms are an effective way to capture information from customers. With Jotform, Shopify business owners can integrate easy-to-use and intuitive forms into their stores without advanced coding knowledge. Jotform is incredibly user-friendly — just like Shopify — so putting the two platforms together is a breeze.
How to integrate Jotform forms with your Shopify checkout process
One of the most common areas on the Shopify website to use forms is on checkout pages. This is where customers input their contact information, payment details, shipping address, and potentially even product customization details.
With a Jotform form in place, it’s easy to get this information and use the data to fulfill customers’ orders. Here’s how to complete a Jotform Shopify integration for checkout:
1. Add a special tag to custom products. You need to add a special tag for any products that require you to capture additional information through a custom form. Go to the tag section in the product detail page and type in the new tag name you want to use or choose from an existing tag name. For example, you can label the tag “custom.” Once complete, click Update.
2. Create a new snippet. We recommend that you back up your theme by downloading it to your Assets before completing this step. Once that’s done, go to Assets and click on the Theme Editor link. Click Add a new snippet on the Themes page. Type in “custom” as the name for the snippet, and click Create.
3. Get the Jotform embed code. In the Jotform Form Builder, open the form you’d like to embed in the Shopify checkout process, go to the Publish tab, and click Embed. Copy the embed code. (Be sure to include a form field in the Jotform form for the customer name or email address to associate the custom data collected on the form with the Shopify order.)
4. Paste the Jotform embed code into Shopify. Go to the Themes page in Shopify. Paste the Jotform embed code into the Liquid snippet. Click Save.
5. Edit the cart.liquid template. You must ensure that when any item in the cart has a custom tag, the site shows the custom Jotform form instead of the checkout button. You need to enter specific code into the theme editor to do this. You can find the lines of code here. Now your Jotform form is ready to go on the checkout page.
How to add a Jotform form to any Shopify page
In addition to the checkout process, you may want to embed a Jotform form on other Shopify pages. This is a great way to collect information about your target audience. Follow these steps to add a form to a Shopify page:
1. Get the embed code for the Jotform form. Once you’ve built the form you want to use in the Jotform Form Builder, go to the Publish tab and click Platforms. Search for and click Shopify. Click the Copy code button.
2. Add the code to Shopify. In the Shopify dashboard, click Pages in the Online Store section. Click on the page where you want to add the form. This will open the editor. Next, click the Show HTML icon on the far right. Paste the Jotform embed code in the HTML box. Click Save. Now your Jotform form will appear on the Shopify page you selected.
Now that you’ve seen two ways to incorporate Jotform forms into Shopify, it’s time to learn about other uses for Jotform within the e-commerce platform. In the next chapter, we cover several different Jotform forms that can improve the Shopify experience for the customer.
Use Shopify web forms to improve your operations
One benefit of using Jotform on Shopify is that it comes with thousands of form templates. There are templates for every business process a Shopify store owner will need, saving them time and energy.
There’s no need to create forms from scratch — just start with a Jotform template and customize the fields you want to use. Then easily add the forms to your Shopify site. If you need a refresher, go back to the previous chapter.
Using forms to capture data for business processes — such as registrations, returns, and sales — improves operations because it standardizes the data being gathered. Instead of getting these details over email or the phone, where someone may forget to ask a question or write down the wrong info, forms ensure that customers provide the exact information a business needs to complete the process.
Let’s explore how you can incorporate Jotform forms in your Shopify site to streamline operations.
Shopify contact form
The contact form, typically used on the Contact page of a Shopify store, provides an easy way for prospects and customers to get in touch with the store. They don’t need to make a phone call or send an email — they can simply fill out the form with their contact information and question so that the business can get back to them.
Using a form for this process also makes it easy for the store to organize customer contact information in a table format. Plus, many Shopify businesses use the contact form to collect signups for their newsletter or email list. This way, the business can further nurture the customer with frequent content about its offerings.
Shopify customer registration form
Another way to incorporate forms into your Shopify site is to collect customer data through a Shopify customer registration form. This is great if you run events — whether digital or in person — as customers can register and make payments easily and seamlessly. Registration forms are also good for workshops, tutorials, and other events.
Shopify returns form
When it comes to retail — whether online or in person — businesses are bound to have returns. Sometimes the customer doesn’t like the product after buying it or ends up with the wrong size or color. Regardless of the reason, it’s important to use a Shopify returns form on the site to make it easy for customers to initiate the returns process.
Shopify wholesale order form
Shopify businesses that sell to wholesale customers may need to capture additional details, such as quantities, customization details, and special delivery instructions. A Shopify wholesale order form can capture this information and more.
Shopify developer form
While Shopify is easy and intuitive to use for most business owners, some may want to work with professional Shopify developers to set up their store. In this case, you can provide info to Shopify developers about the site you want to build.
Shopify intake forms for building a website will ask you questions about product details, refund processes, and website themes — all essential information for building the Shopify site you want.
Shopify designer and content forms
In addition to developing the website, Shopify business owners may want to work with professional Shopify designers and copywriters to help them attract customers and close sales. Shopify questionnaires for this purpose capture data such as brand slogans, product descriptions, and special widgets for your store.
Now that you’ve seen some of the different ways Shopify stores can incorporate forms to improve business operations, it’s time to explore some common questions you may have about Shopify — and get the answers, of course.
Shopify FAQ
You’ve got Shopify questions? We’ve got Shopify answers! If you’re thinking about starting a Shopify business, review these commonly asked questions to ensure you’re prepared and avoid pitfalls.
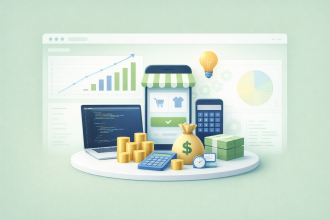
How much does Shopify cost?
Shopify has four pricing plans: Basic, Shopify, Advanced and Plus. Each subsequent tier offers additional features, so make sure you get the functionality you need within your price range. The Basic plan is $29 per month, the Shopify plan is $79 per month, the Advanced plan is $299 per month and the Plus plan is $2,300 per month, all on yearly billing. Learn more about the different pricing plans in this article.
How can I cancel Shopify?
We get it — committing is hard. That’s why it’s important to know how to cancel Shopify if you ever need to. You can easily deactivate your Shopify store anytime you want by going to Settings and then Plan in the Shopify admin. Remember that you can also pause your account or sell your business to another merchant, so canceling isn’t your only option. Learn more about how to cancel Shopify in this article.
How can I remove Powered by Shopify?
If you want a clean-looking footer that features only your company’s branding, you can remove the Powered by Shopify tagline from your online store. Go to the theme you’re using, click Actions, and then click Edit Languages. Search for Powered by Shopify and delete it from the areas where it shows up. You can leave the areas blank or add your tagline. Learn more about how to remove Powered by Shopify in this article.
How can I connect my existing domain to Shopify?
If you purchased a domain from a third-party provider like GoDaddy or Google Domains and want to connect it with your Shopify store, go to Settings and then Domains in the Shopify admin area. Click Connect Existing Domain and enter the URL into the text field. Follow the prompts and log into your domain provider’s website to complete the connection. Learn more about connecting to an existing domain in this video.
How can I drop-ship on Shopify?
Drop-shipping is a great option if you don’t want to deal with the manufacturing, storing, shipping, and delivery of products. You’ll work with a partner, such as AliExpress or Worldwide Brands, to connect with suppliers. You will act as the middleman and facilitate selling their products through your website while they handle the inventory and shipping management logistics. Learn more about how to drop-ship on Shopify in this article.
Conclusion
Ready to get started with Shopify? There are many advantages to choosing this e-commerce platform for your online business. With its no-code interface and access to many third-party apps that increase store functionality, you can lead your business to success.
Be sure to integrate Jotform with your Shopify store so you can easily embed forms on your website to capture essential data from customers, such as during checkout or registration.
Meet your Shopify guides
Dan Doughty
Dan Doughty is the founder of Dripshipper, a private label coffee drop-shipping business with roasters in the U.S. and U.K. He’s worked with tens of thousands of e-commerce merchants over the years. Over the last five years, Doughty has successfully built multiple drop-shipping supplier companies on the Shopify platform and spends most of his time helping merchants launch and scale their coffee product lines.
Kurt Ellis
Kurt Ellis has worked in the fulfillment industry for 31 years, gaining experience in fulfillment efficiencies, customer relations, and fulfillment integrity. As the President of GLF, an e-commerce fulfillment provider with locations in Dallas and Maine, he’s passionate about helping small and medium-sized e-commerce businesses grow through personalized fulfillment services.
Melanie Bedwell
Melanie Bedwell is the e-commerce manager for OLIPOP. She has over a decade of experience working with brands such as TOMS and Apple. Bedwell is skilled in content and project management as well as email, affiliate, and referral marketing.


Send Comment: