If you have an appointment form, an event registration form, an RSVP form, or a booking form, the Calendar View in Tables will come in handy.
The Calendar view provides you with a visual calendar display that includes the appointments booked through your form. Each appointment will be listed on the appropriate date and time and will be labeled with the name of the form respondent.
The information updates in real-time, so you’re always working with the latest data. The calendar view is easy to navigate and gives you a dynamic way to add new appointments.
Let’s start! This guide covers the following:
- Creating a New Calendar View Tab
- Setting Up Event Date and Time
- Switching Between Calendar View Types
- Managing Calendar View Settings
- Viewing and Scheduling Appointments
- Drag & Drop and Expand Action on the Calendar
Creating a New Calendar View Tab
You can add a new tab in Tables that let’s you turn your form submissions to events and view them in a calendar. The steps below will show you how to do that:
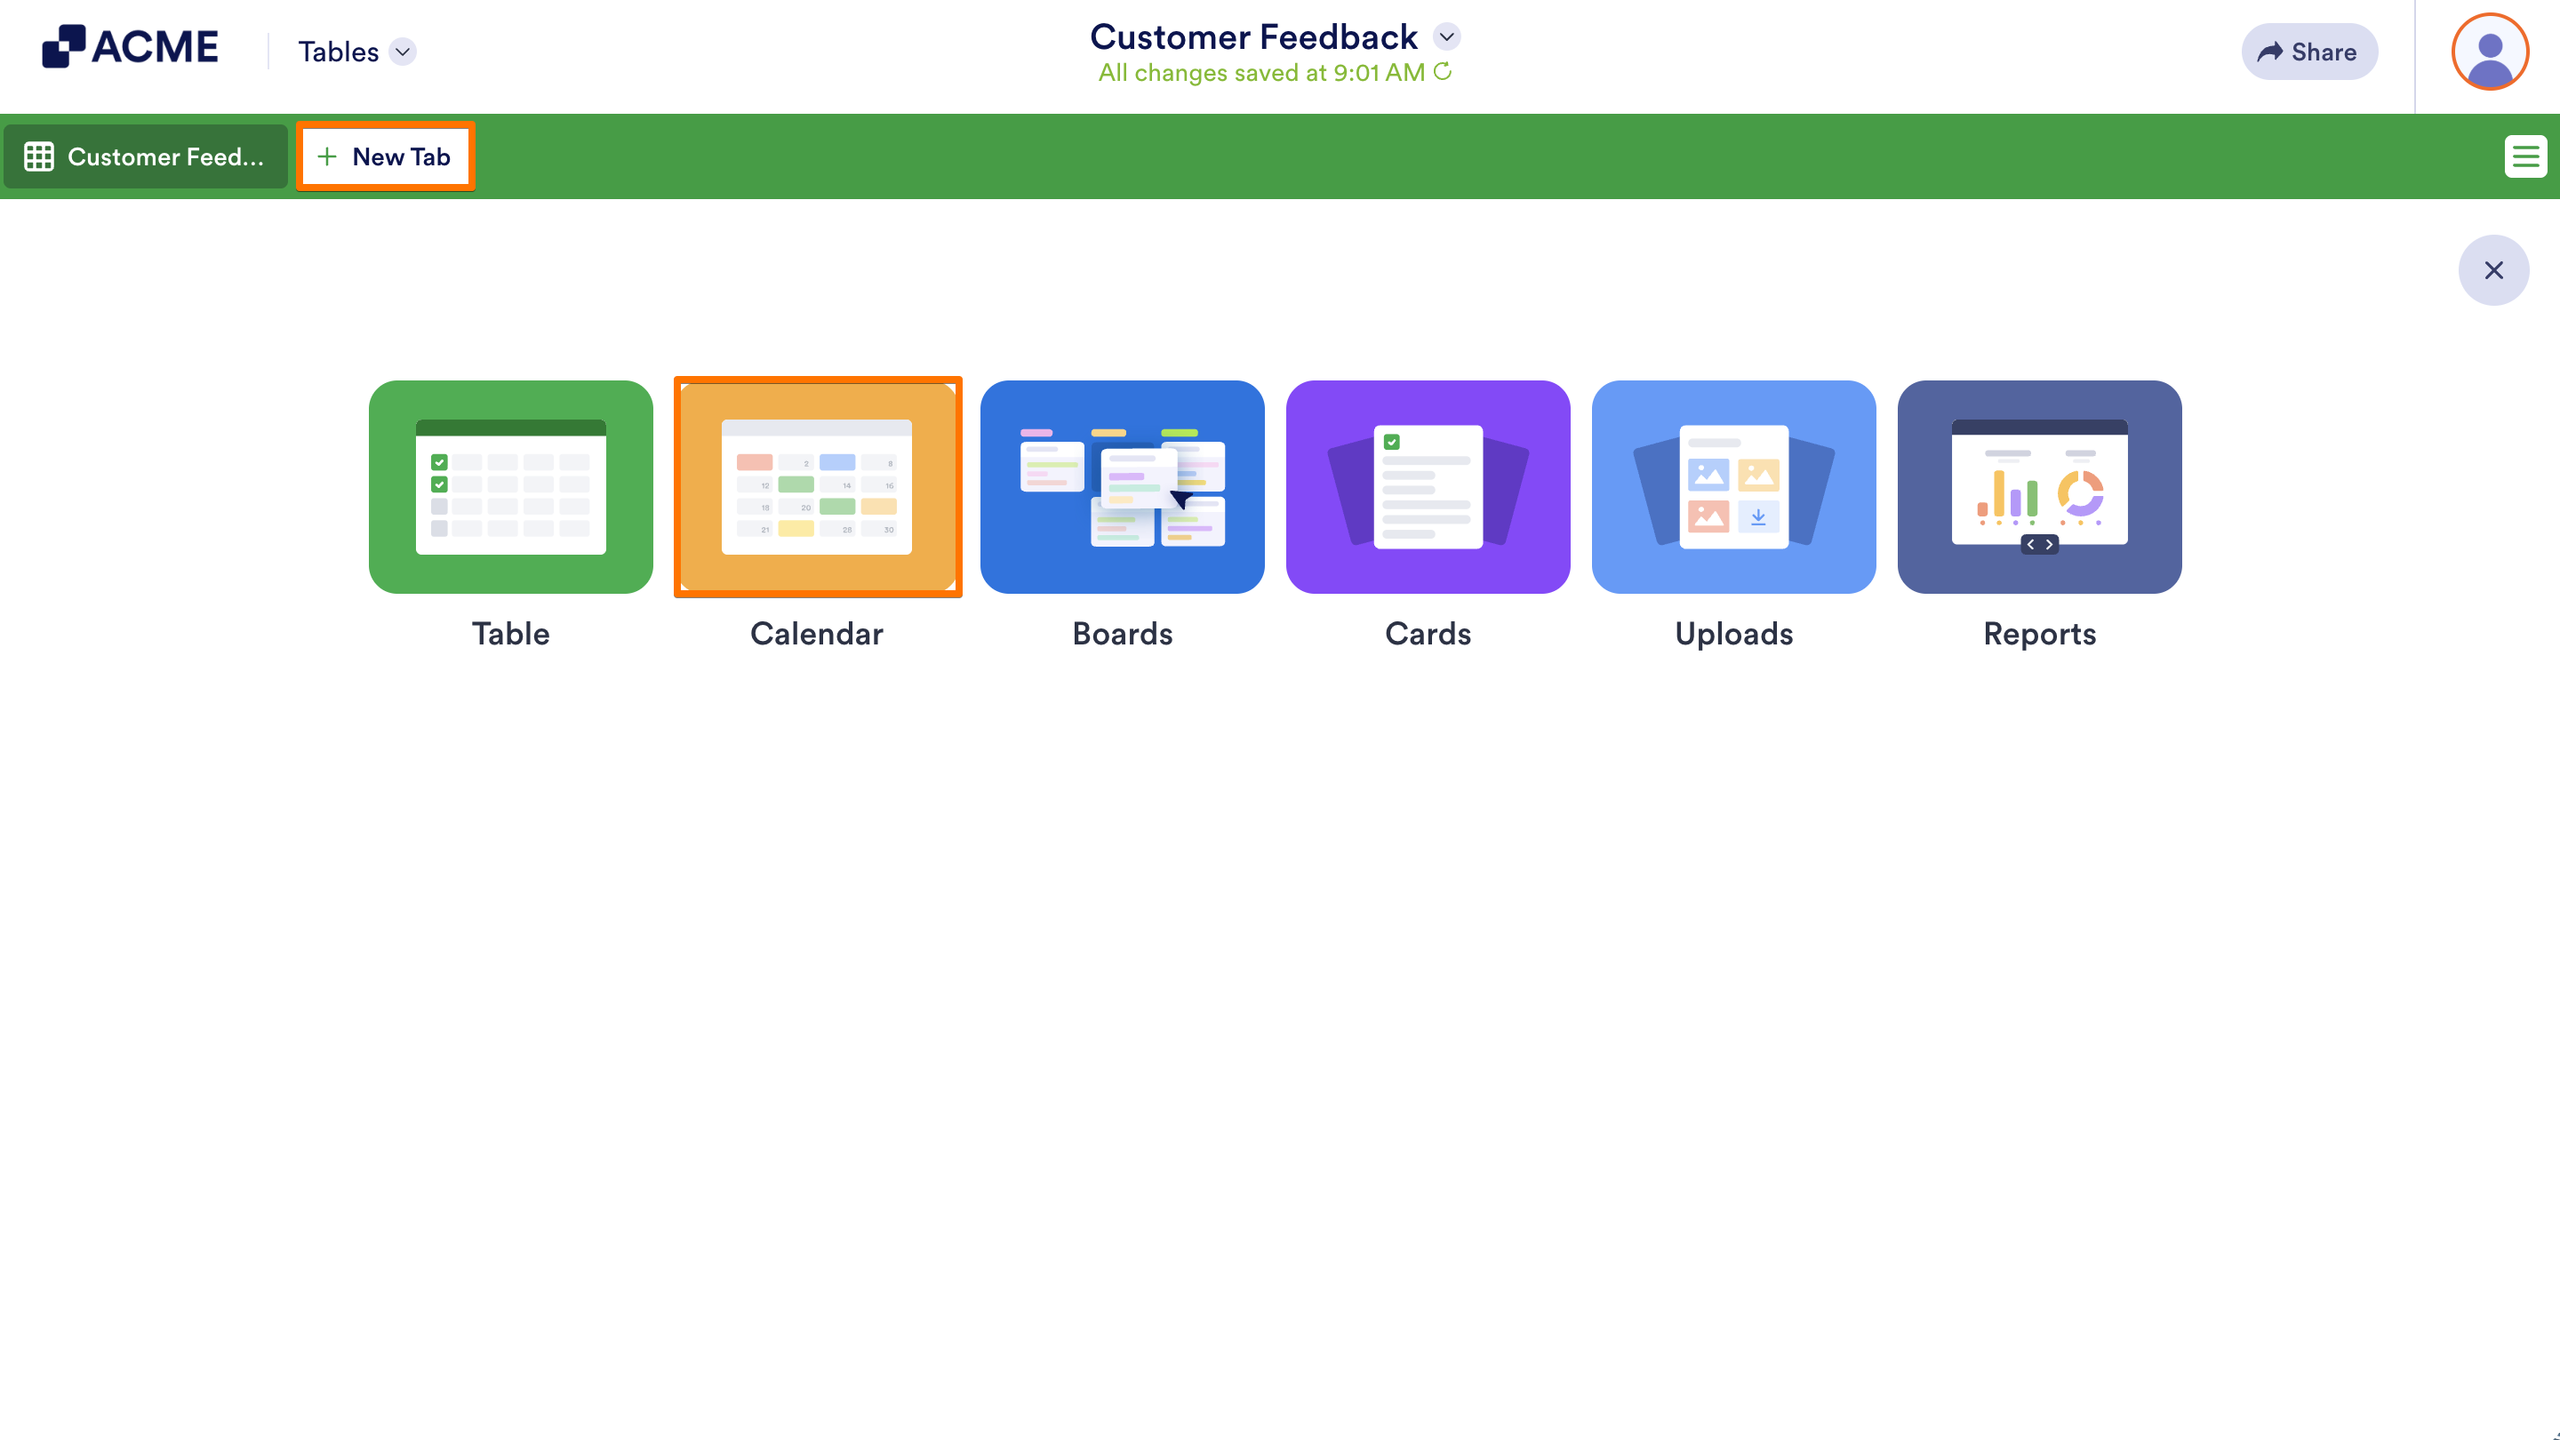
- In Tables, click the New Tab button.
- Next, choose Calendar option in the Create a New Tab window.
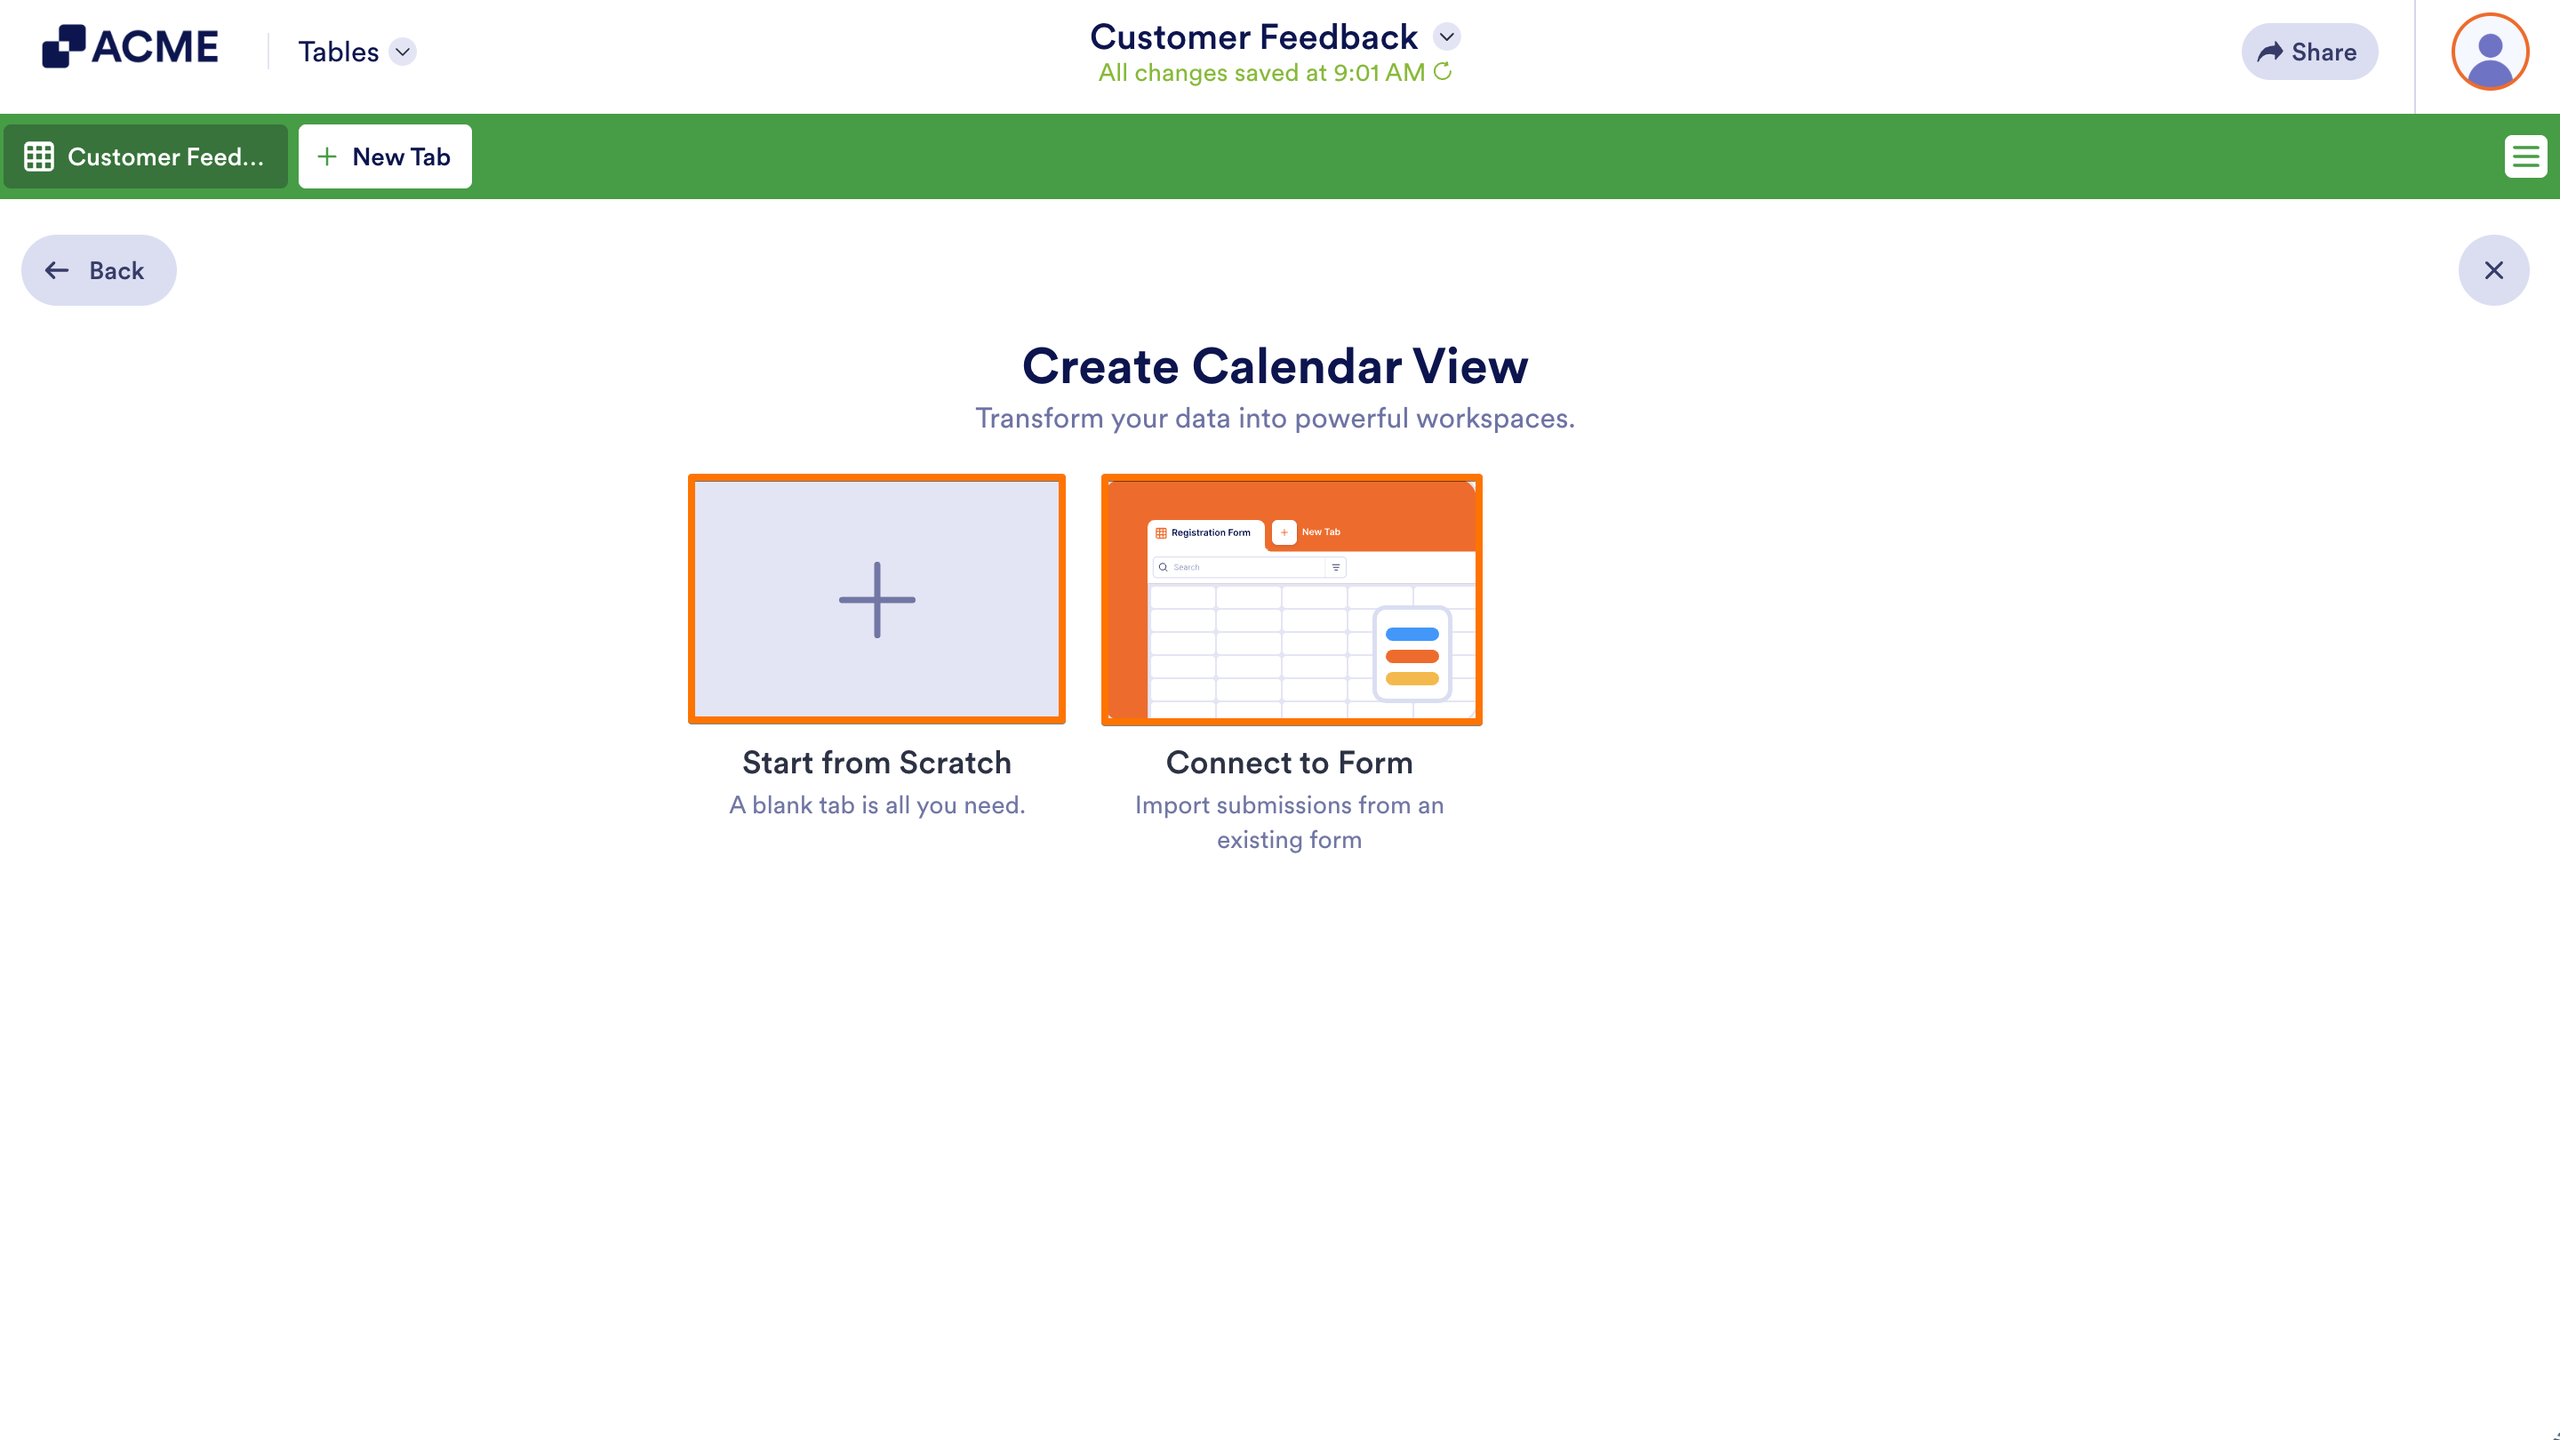
- In the Create Calendar View window, choose between the Start from Scratch option to create a blank calendar and manually add events, or the Connect to Form option to import existing form submissions into your calendar.
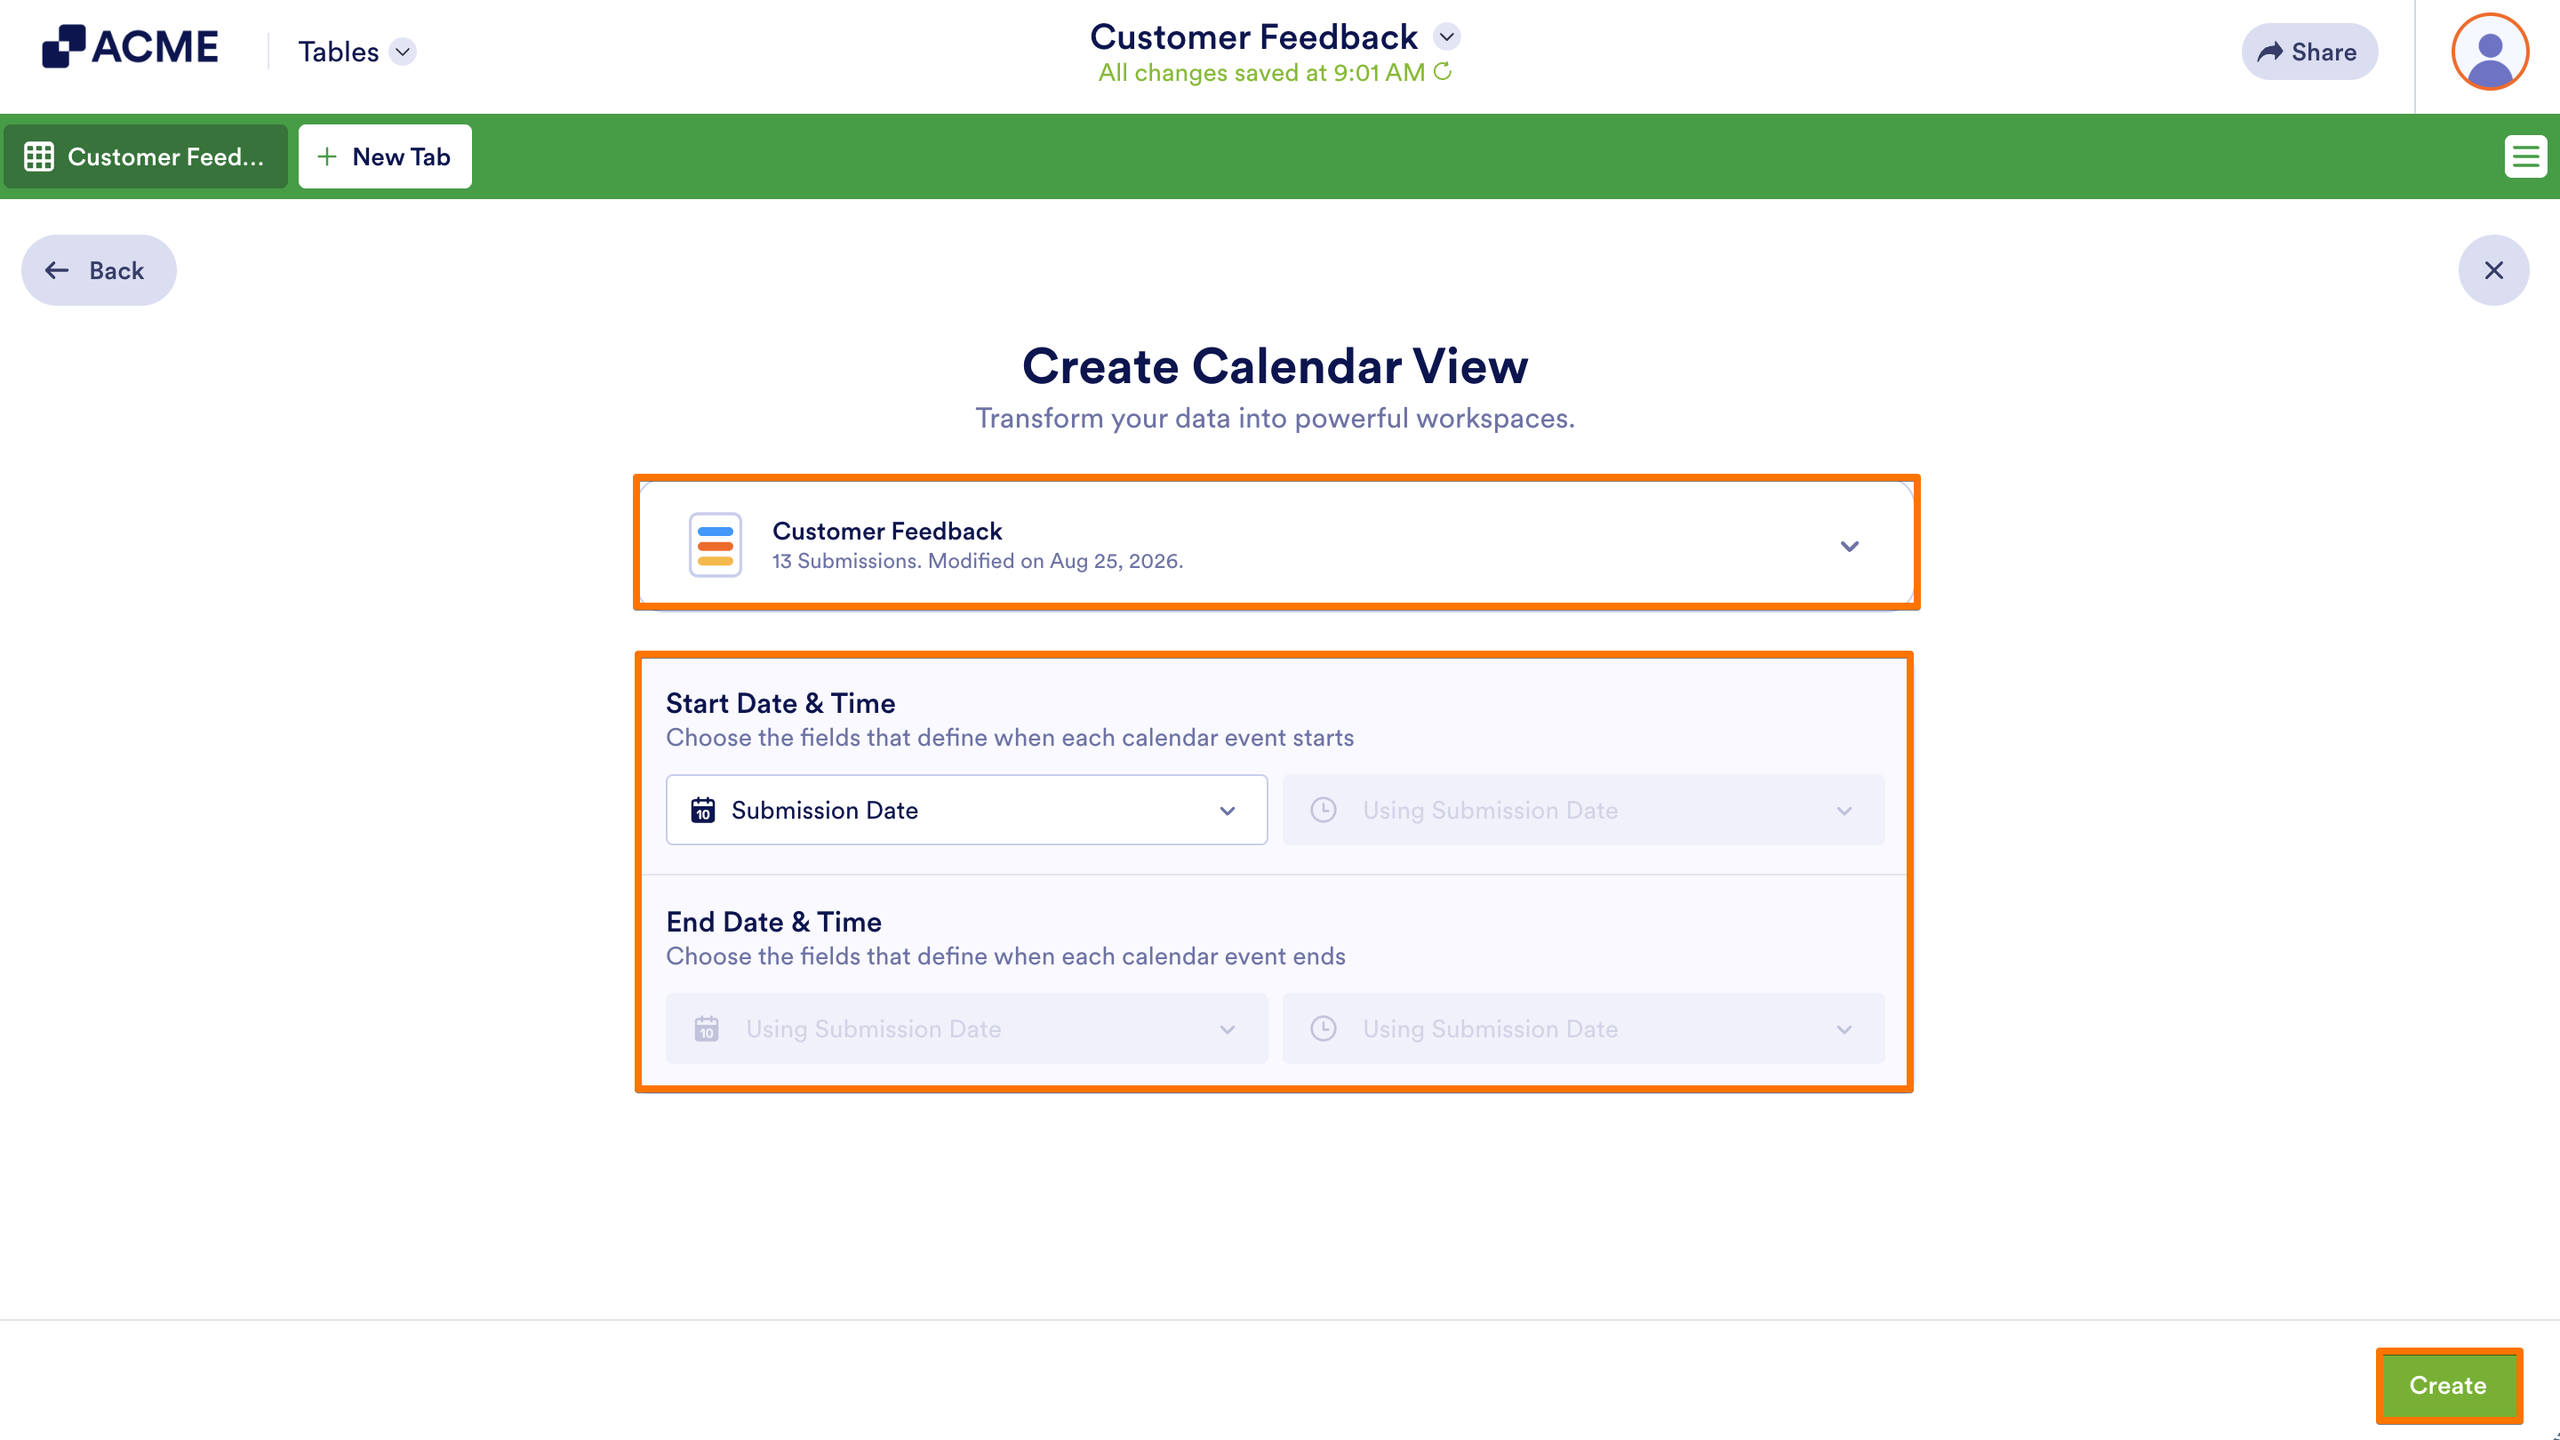
- If you selected Connect to Form, choose a form to continue with and configure the start and end dates.
- Then, click on Create.
Setting Up Event Date and Time
You can match only Basic Appointment, Date, and Time form fields, as well as Date and Time, Submission Date, and Last Update Date columns from your submission table, to the event date fields in the Create Calendar View window. The calendar will use the Start Date and Start Time to show when the event begins, and the End Date and End Time to indicate when it ends.
Matching Event Date Fields
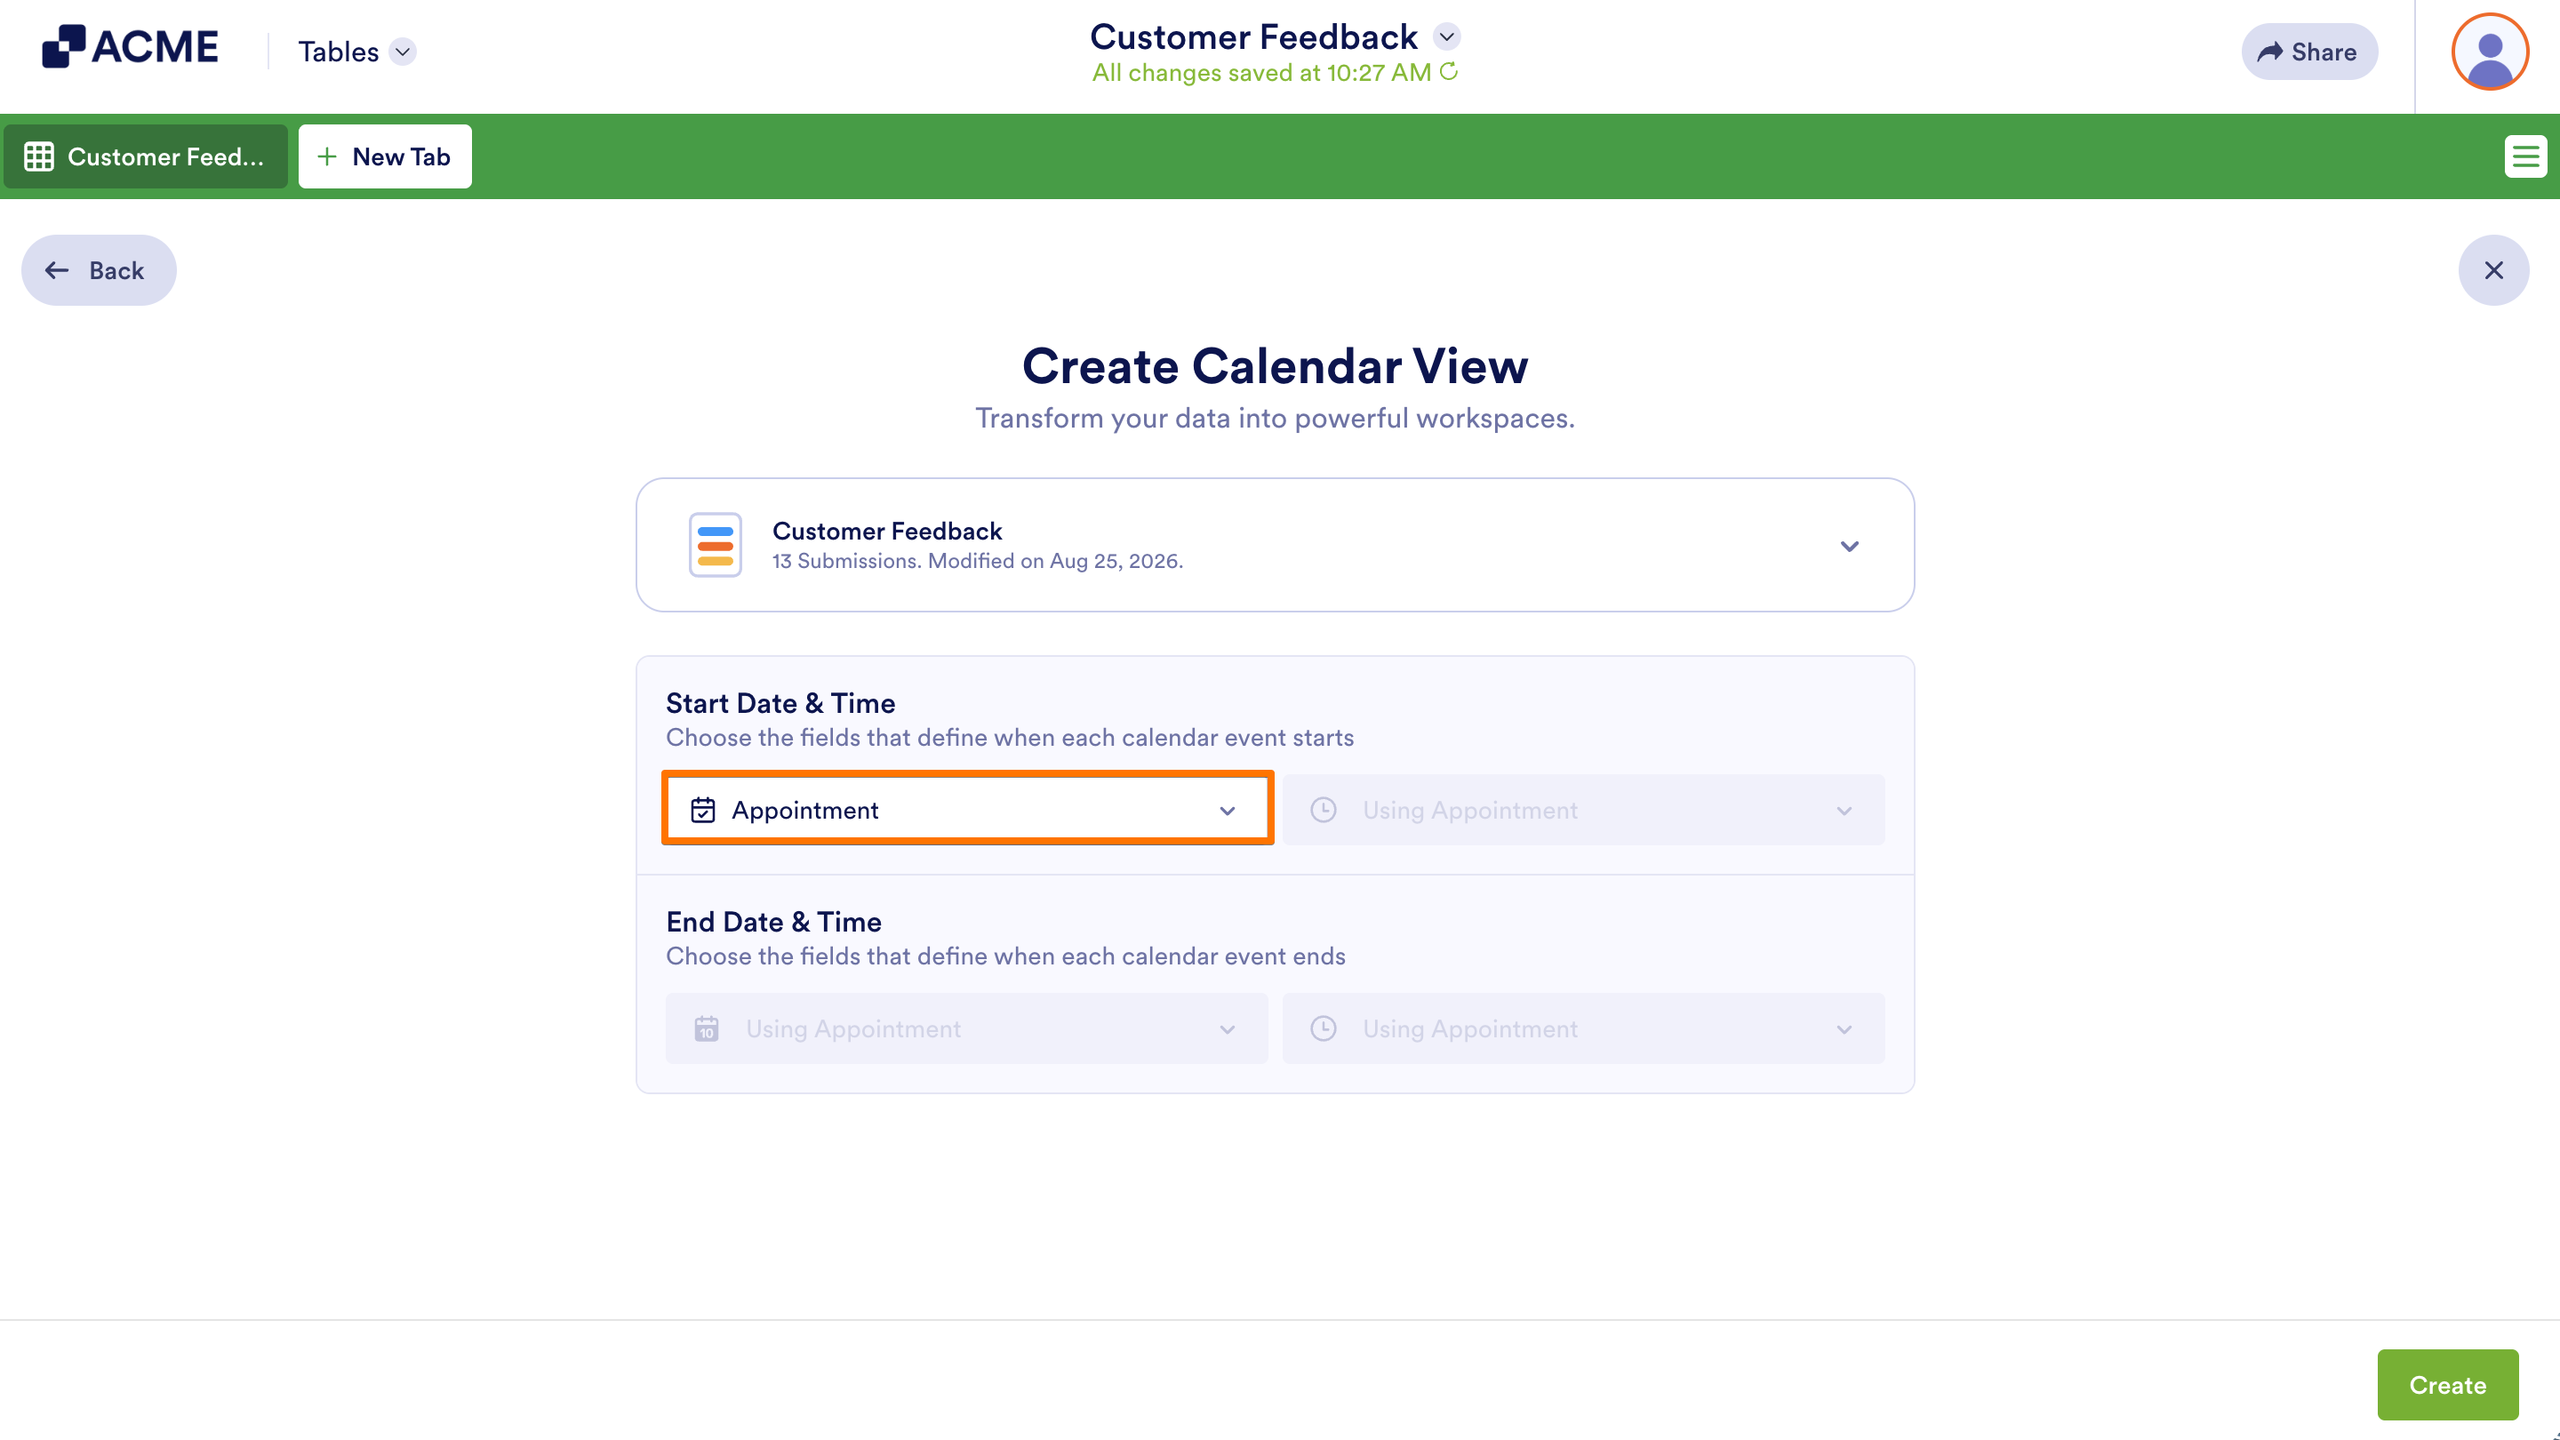
You can select an Appointment field on your form in the Start Date event field. The length of the appointment slot set in the Appointment field properties will determine the duration of the event in the calendar, which means you won’t have to match other form fields or submission table columns to the other event fields.
If your form includes basic date fields or your submission table has additional date columns, you can choose one for the event start date and another for the event end date. Only events where the end date is the same date as the start date or the start date is before the end date will be displayed on the calendar.
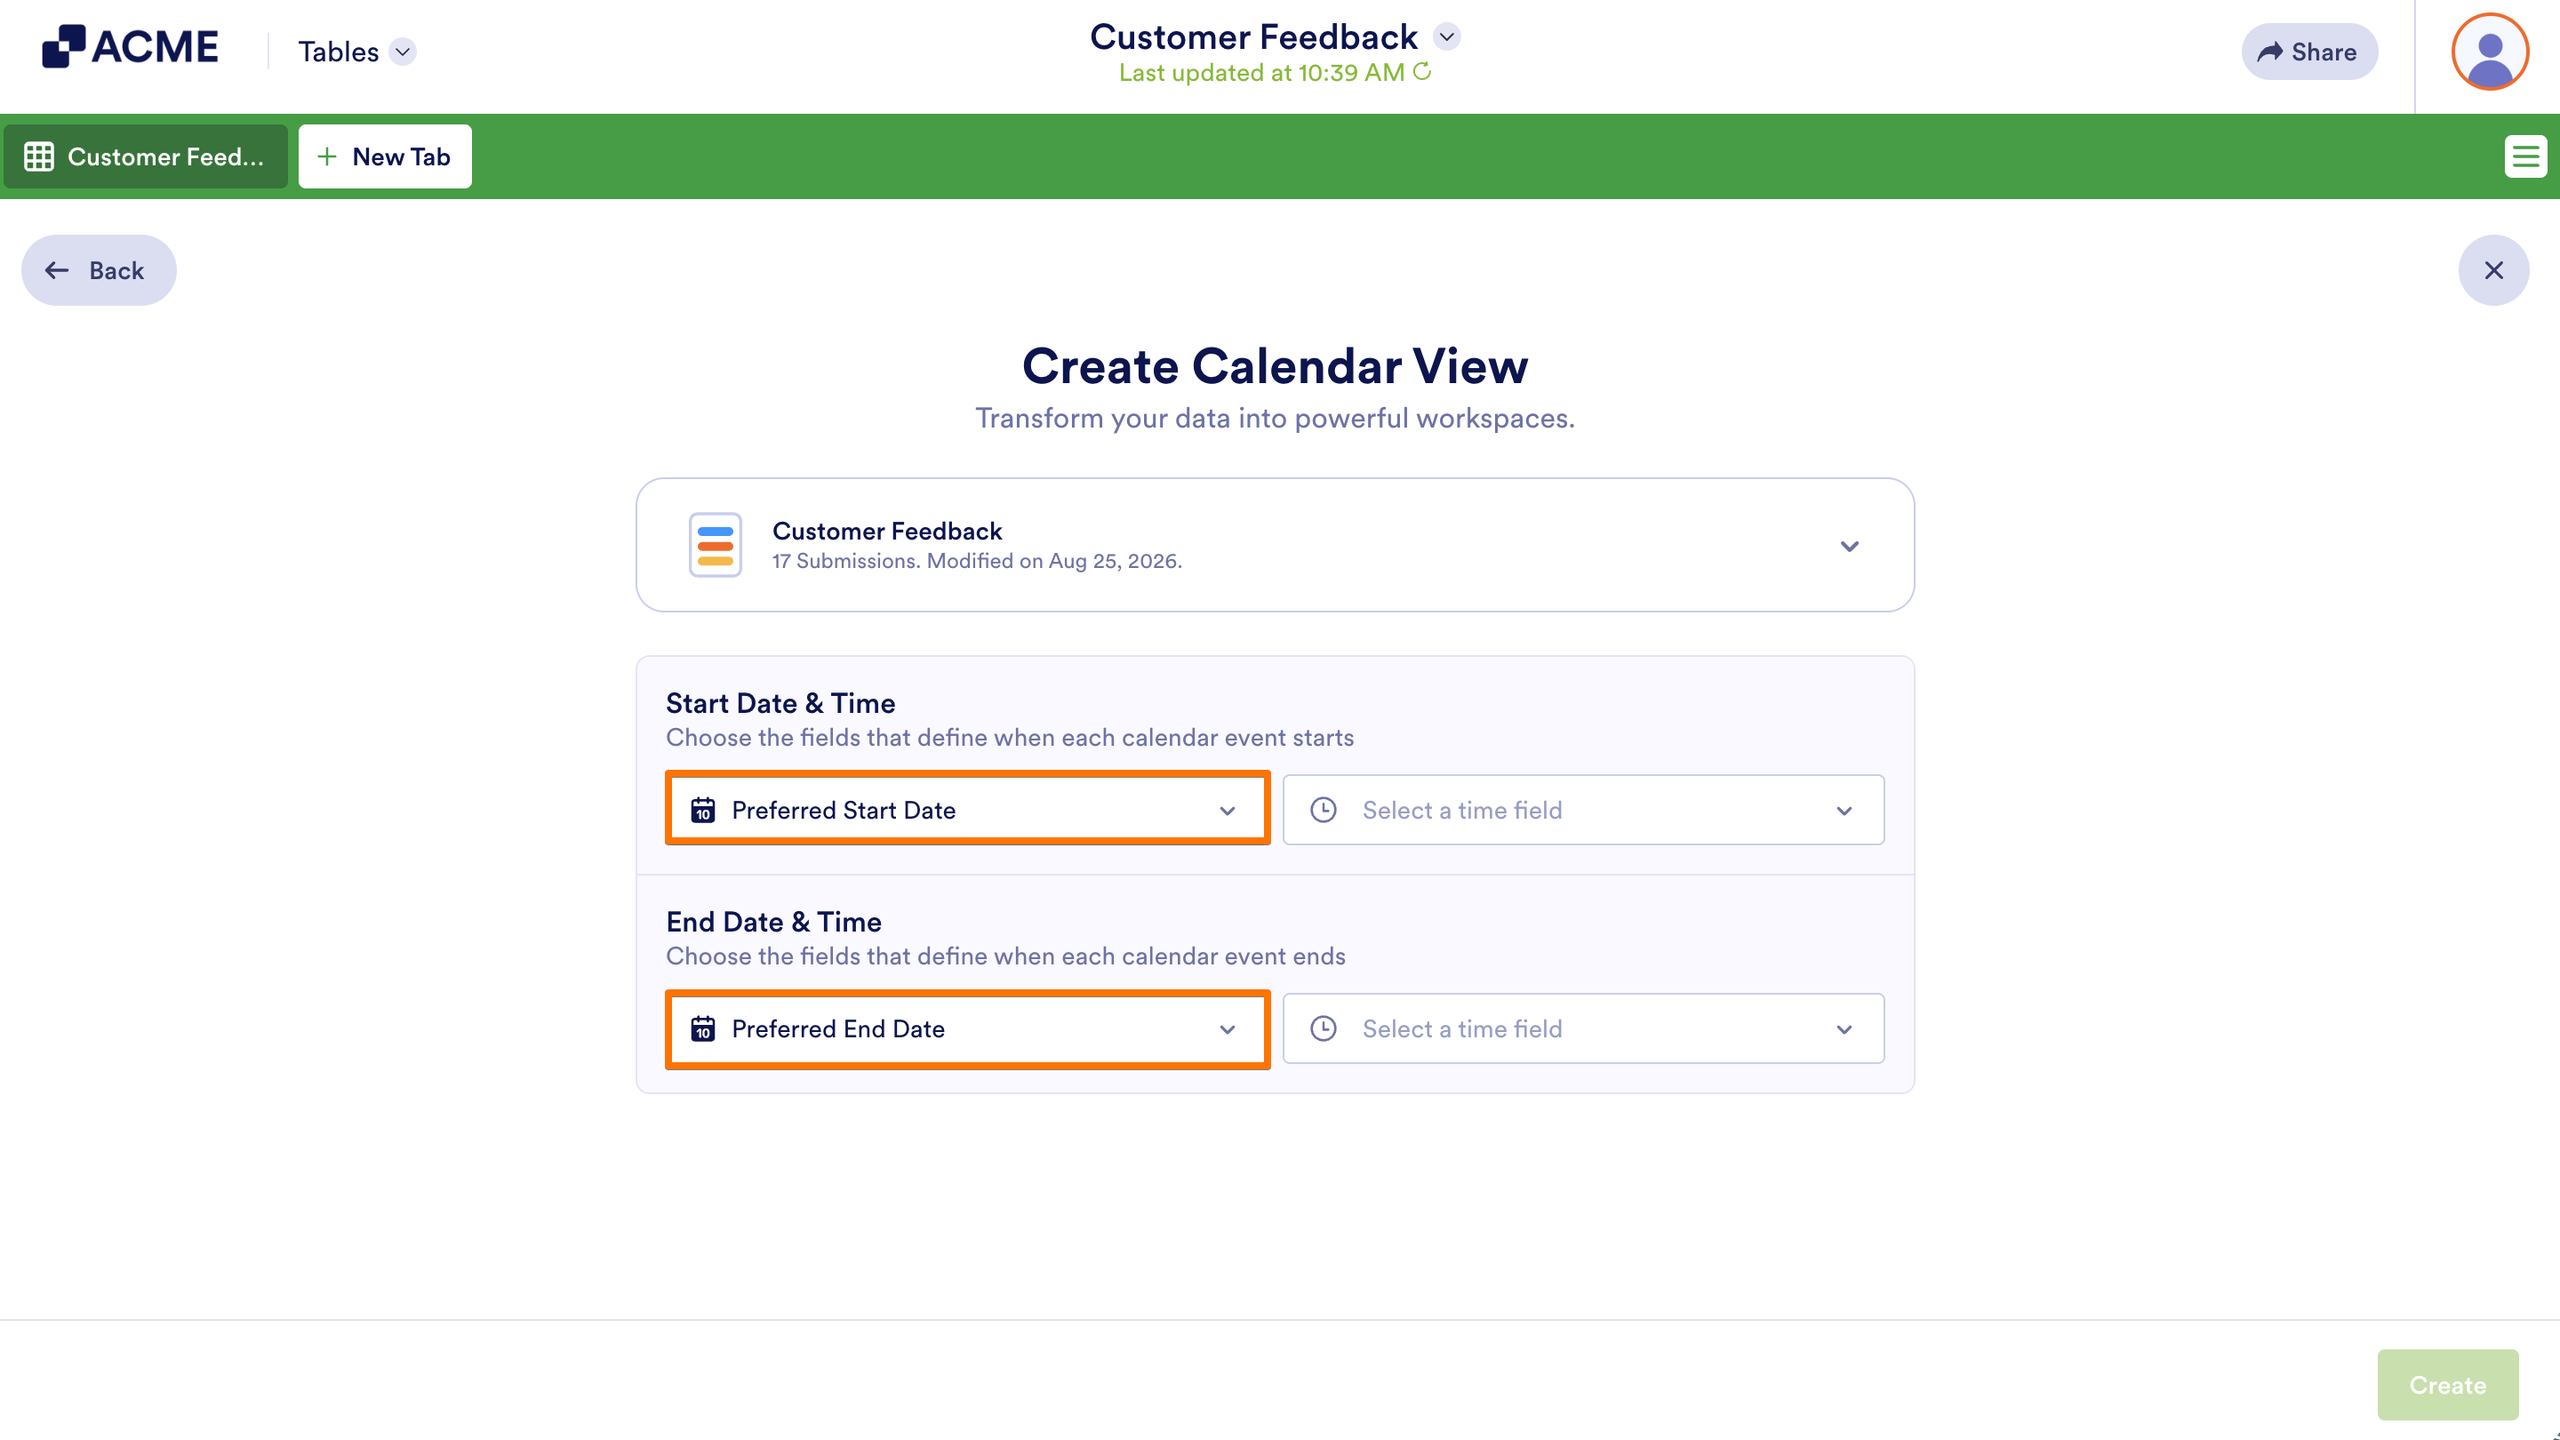
If the selected basic date field in your form or the additional date column in your submission table includes time options, they will be automatically used for the event time fields.
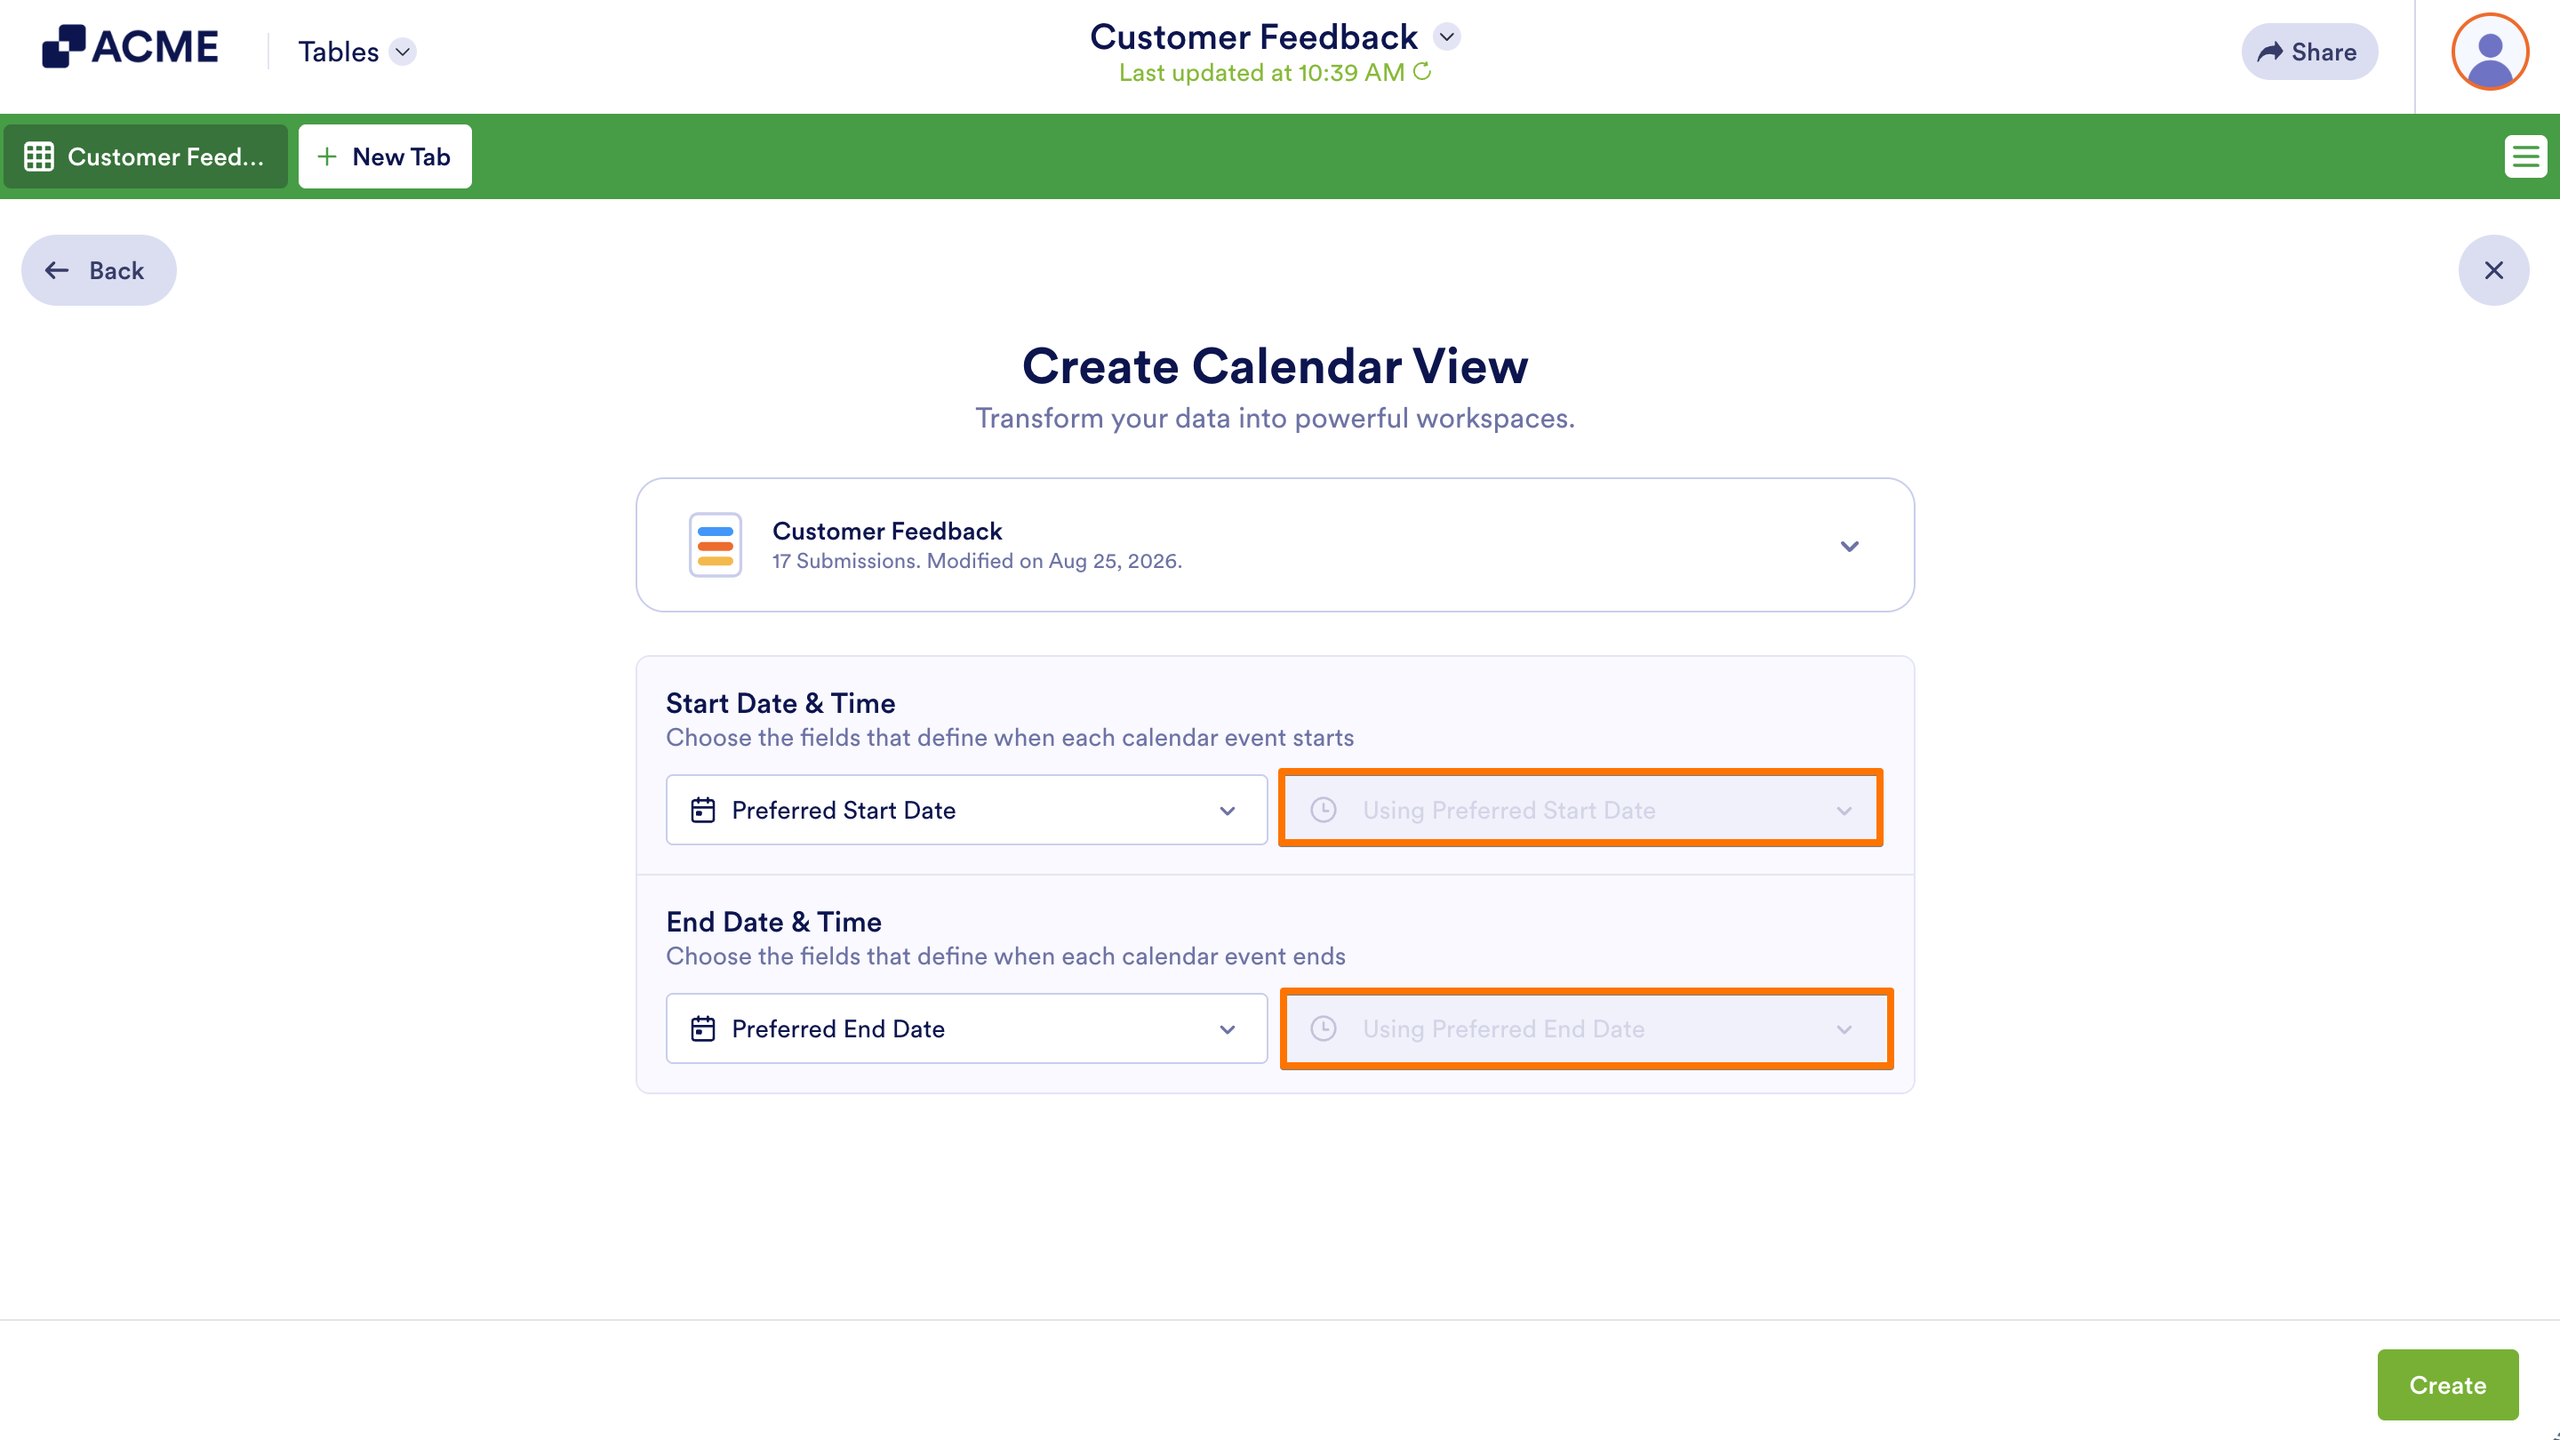
The form submission dates can also be set as the event start date. If you select Submission Date for the Start Date event field, the other event fields will already be based on that date.
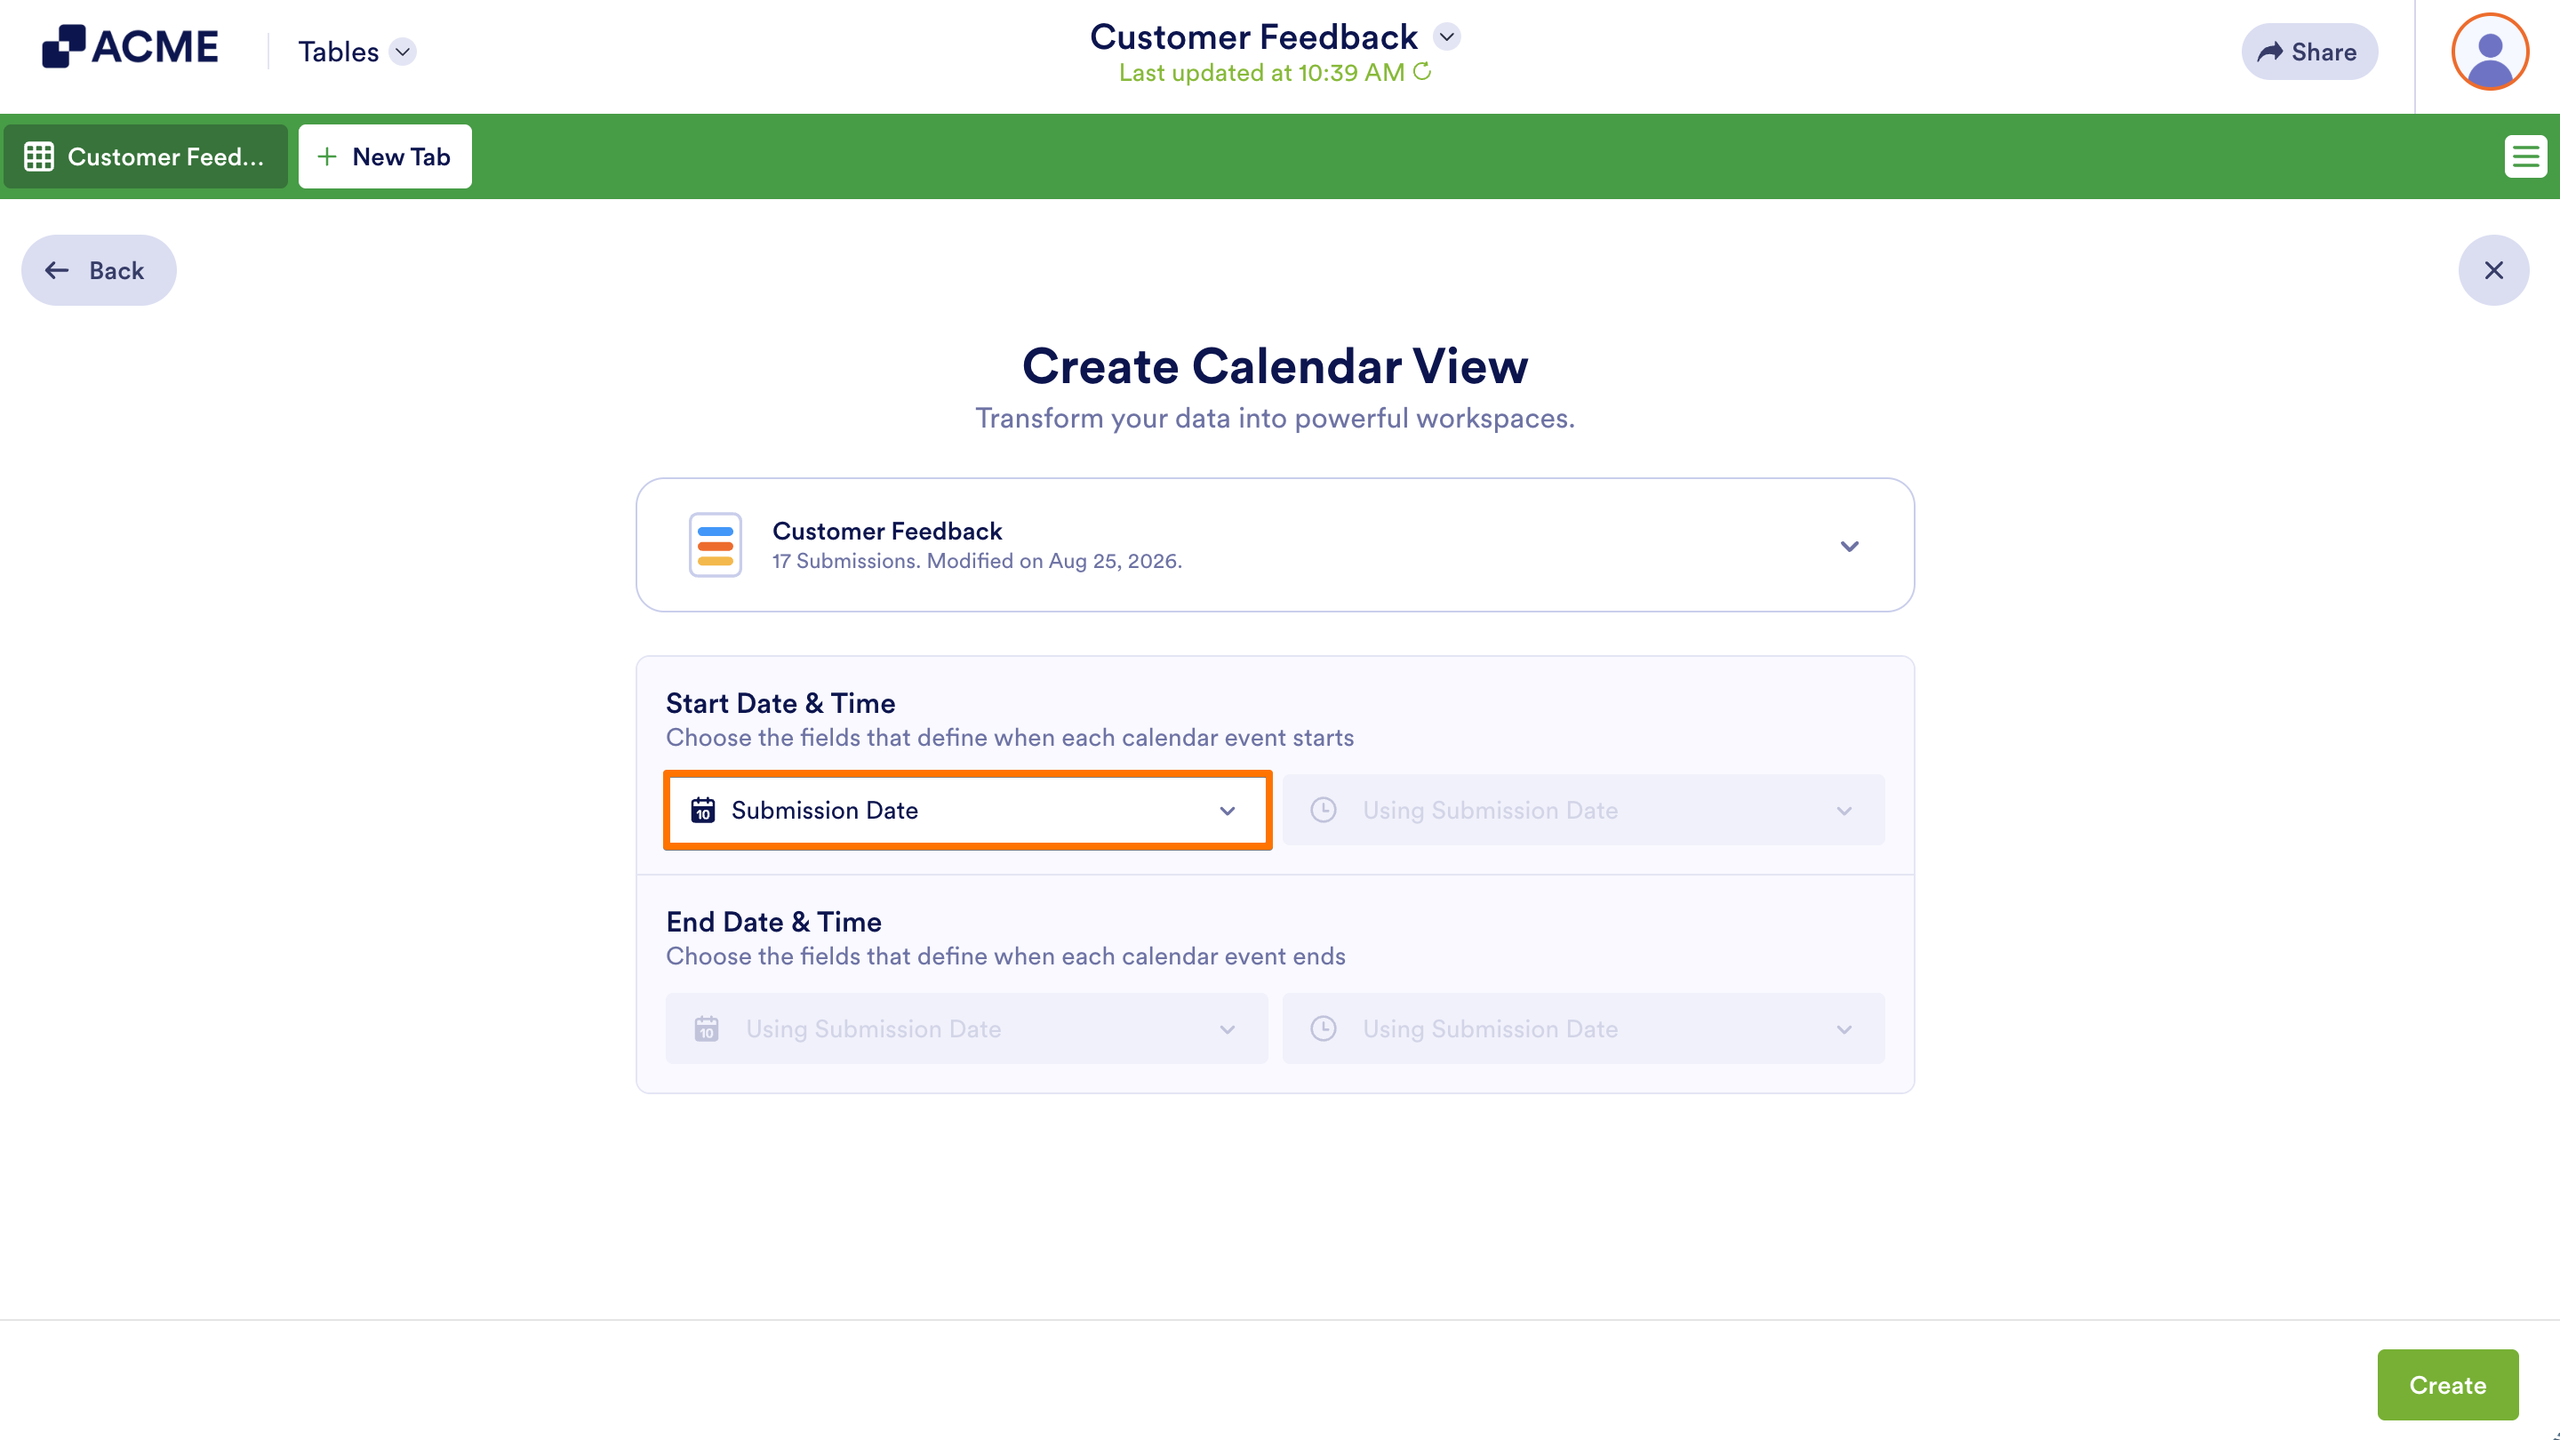
Alternatively, you can choose the Last Update Date, which is the date an entry was last updated. Similar to the Submission Date, the other event fields will align with that date as well.
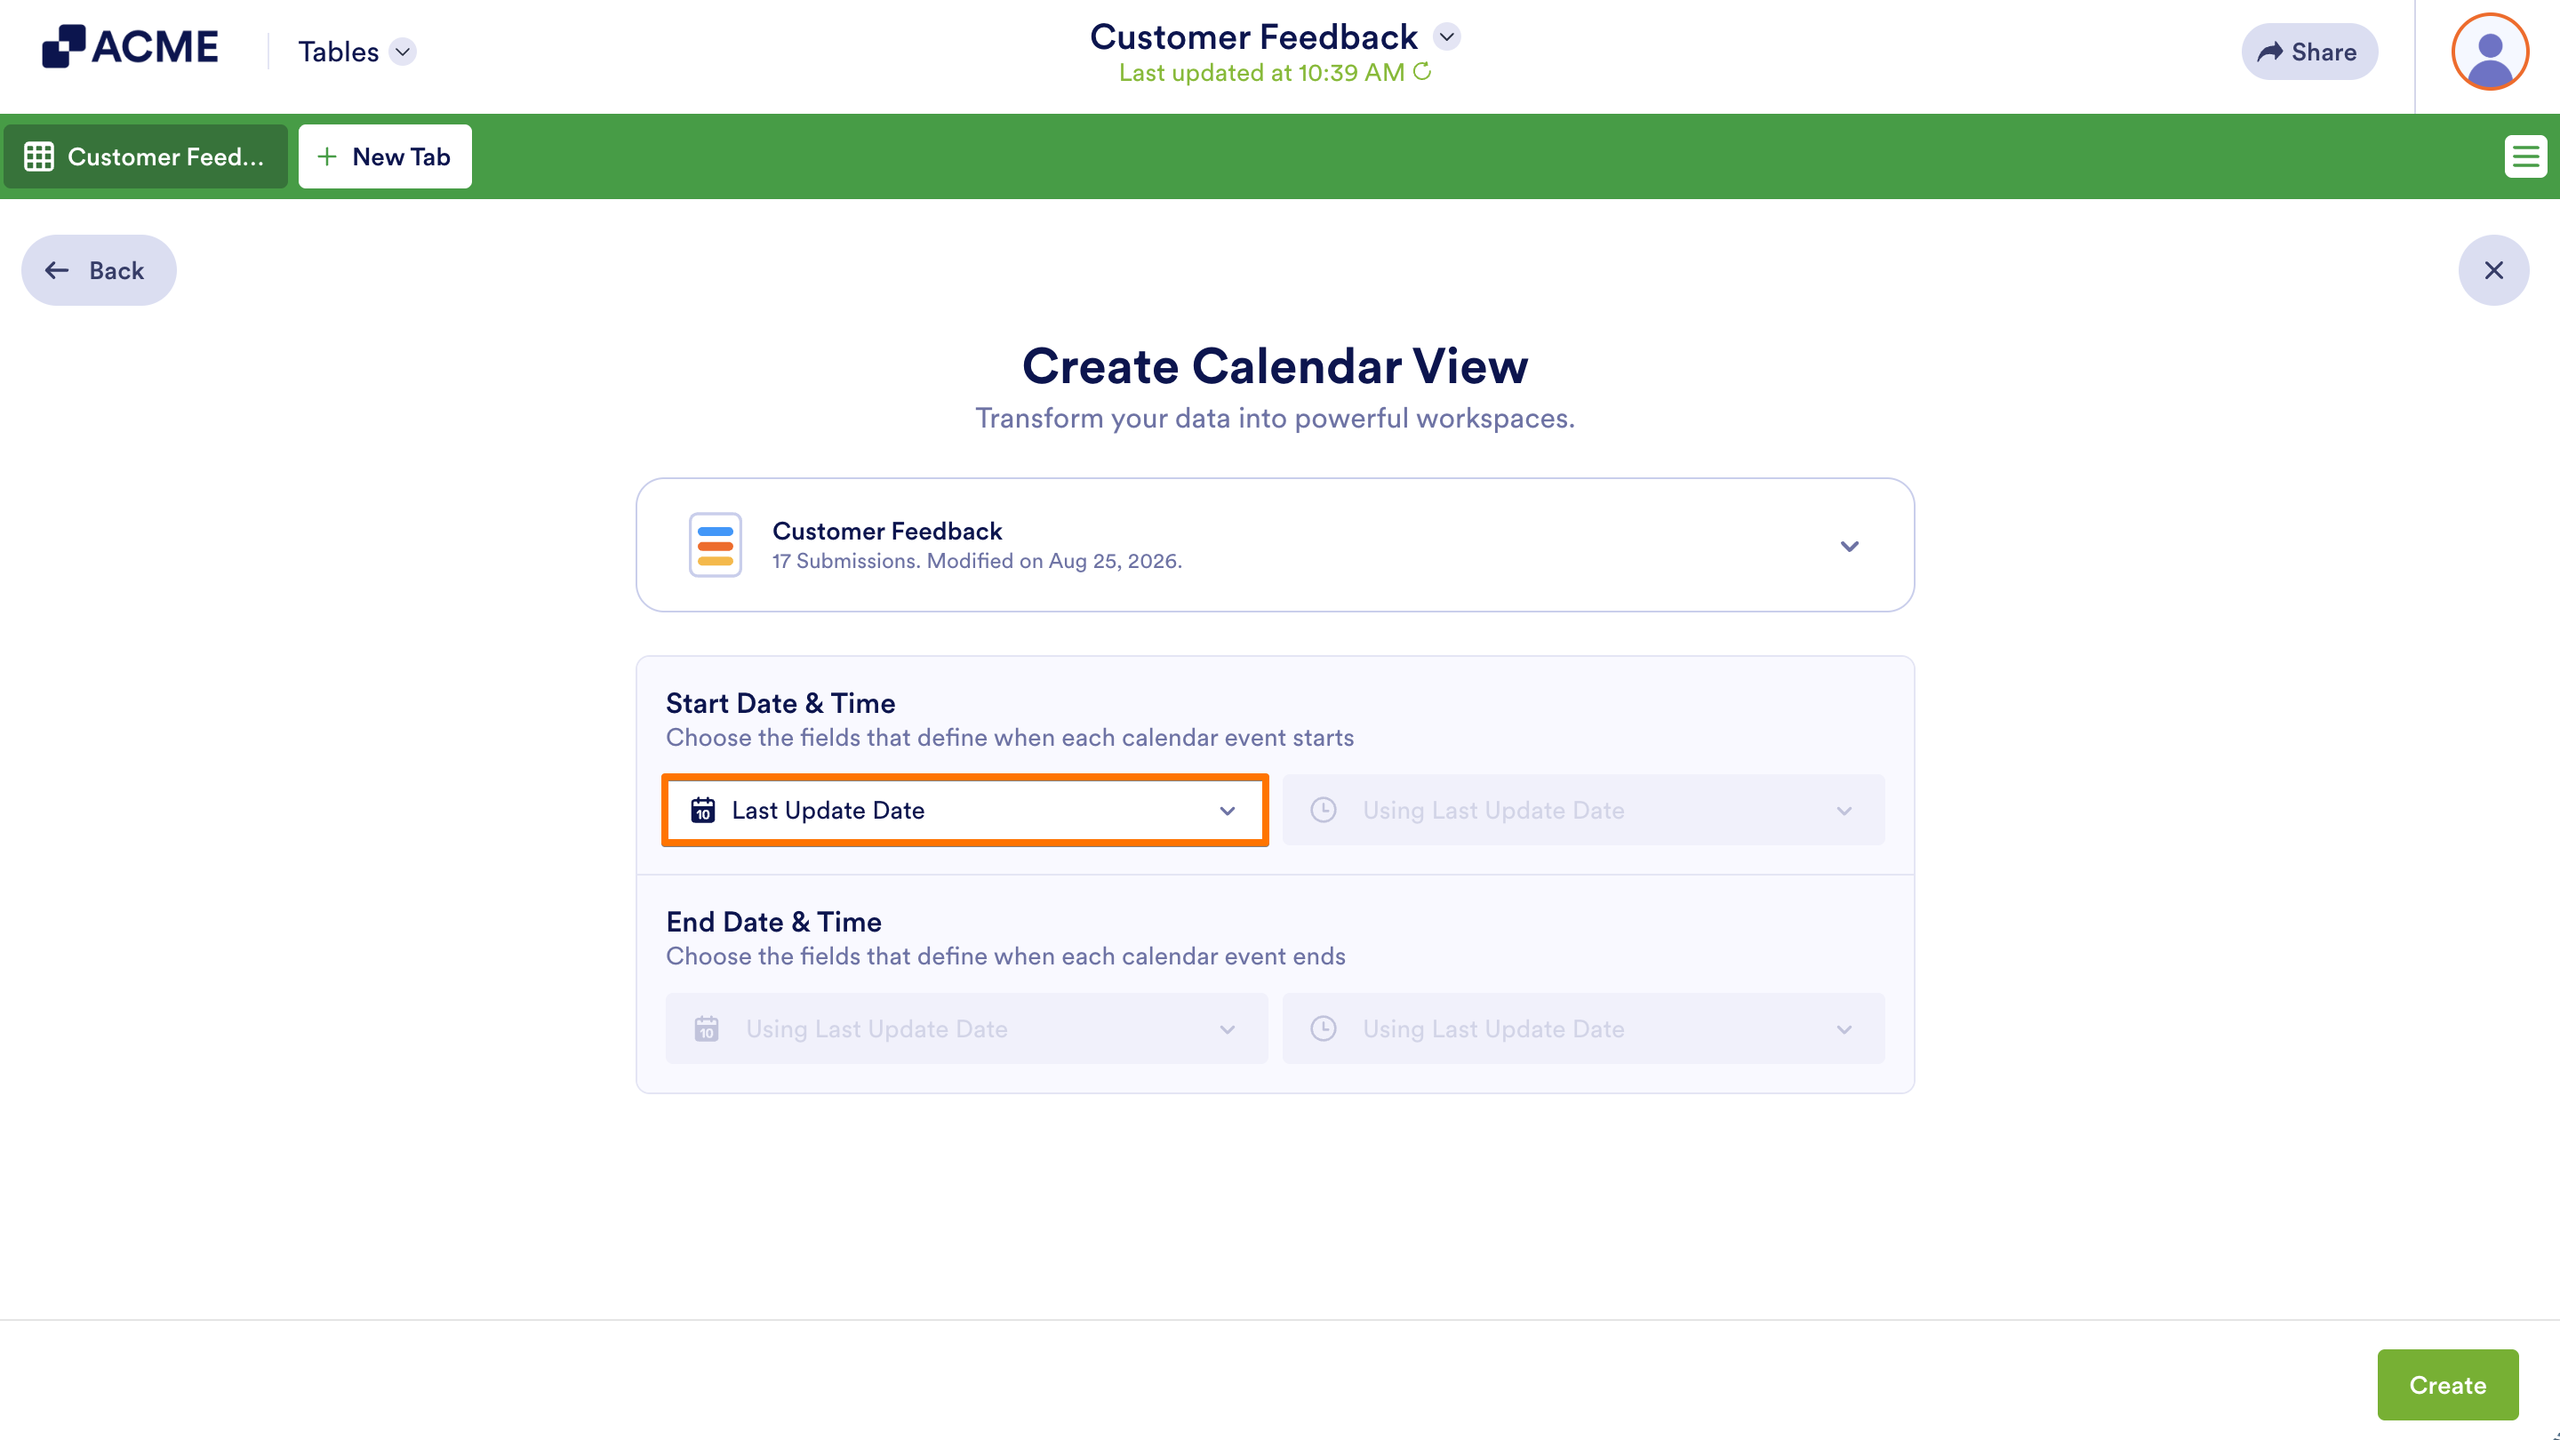
If the Submission Date or Last Update Date doesn’t fit your purpose and there are no suitable date fields in your form or date columns in your submission table to select, you can add new date fields to match with the event date fields. The new date fields created in the Create Calendar View window will include both date and time options.
Note
You can add individual date and time columns to the submission table and match them separately to the event date and time fields.
The Event Duration option in the End Date event field lets you specify a duration for the event instead. You can select from predefined minutes, choose an All Day option, or enter a custom duration in minutes.
Matching Event Time Fields
You can use the basic time fields in your form or additional time columns in your submission table for the event time field only when a date field or date column, without time options included, is selected in the event date field.
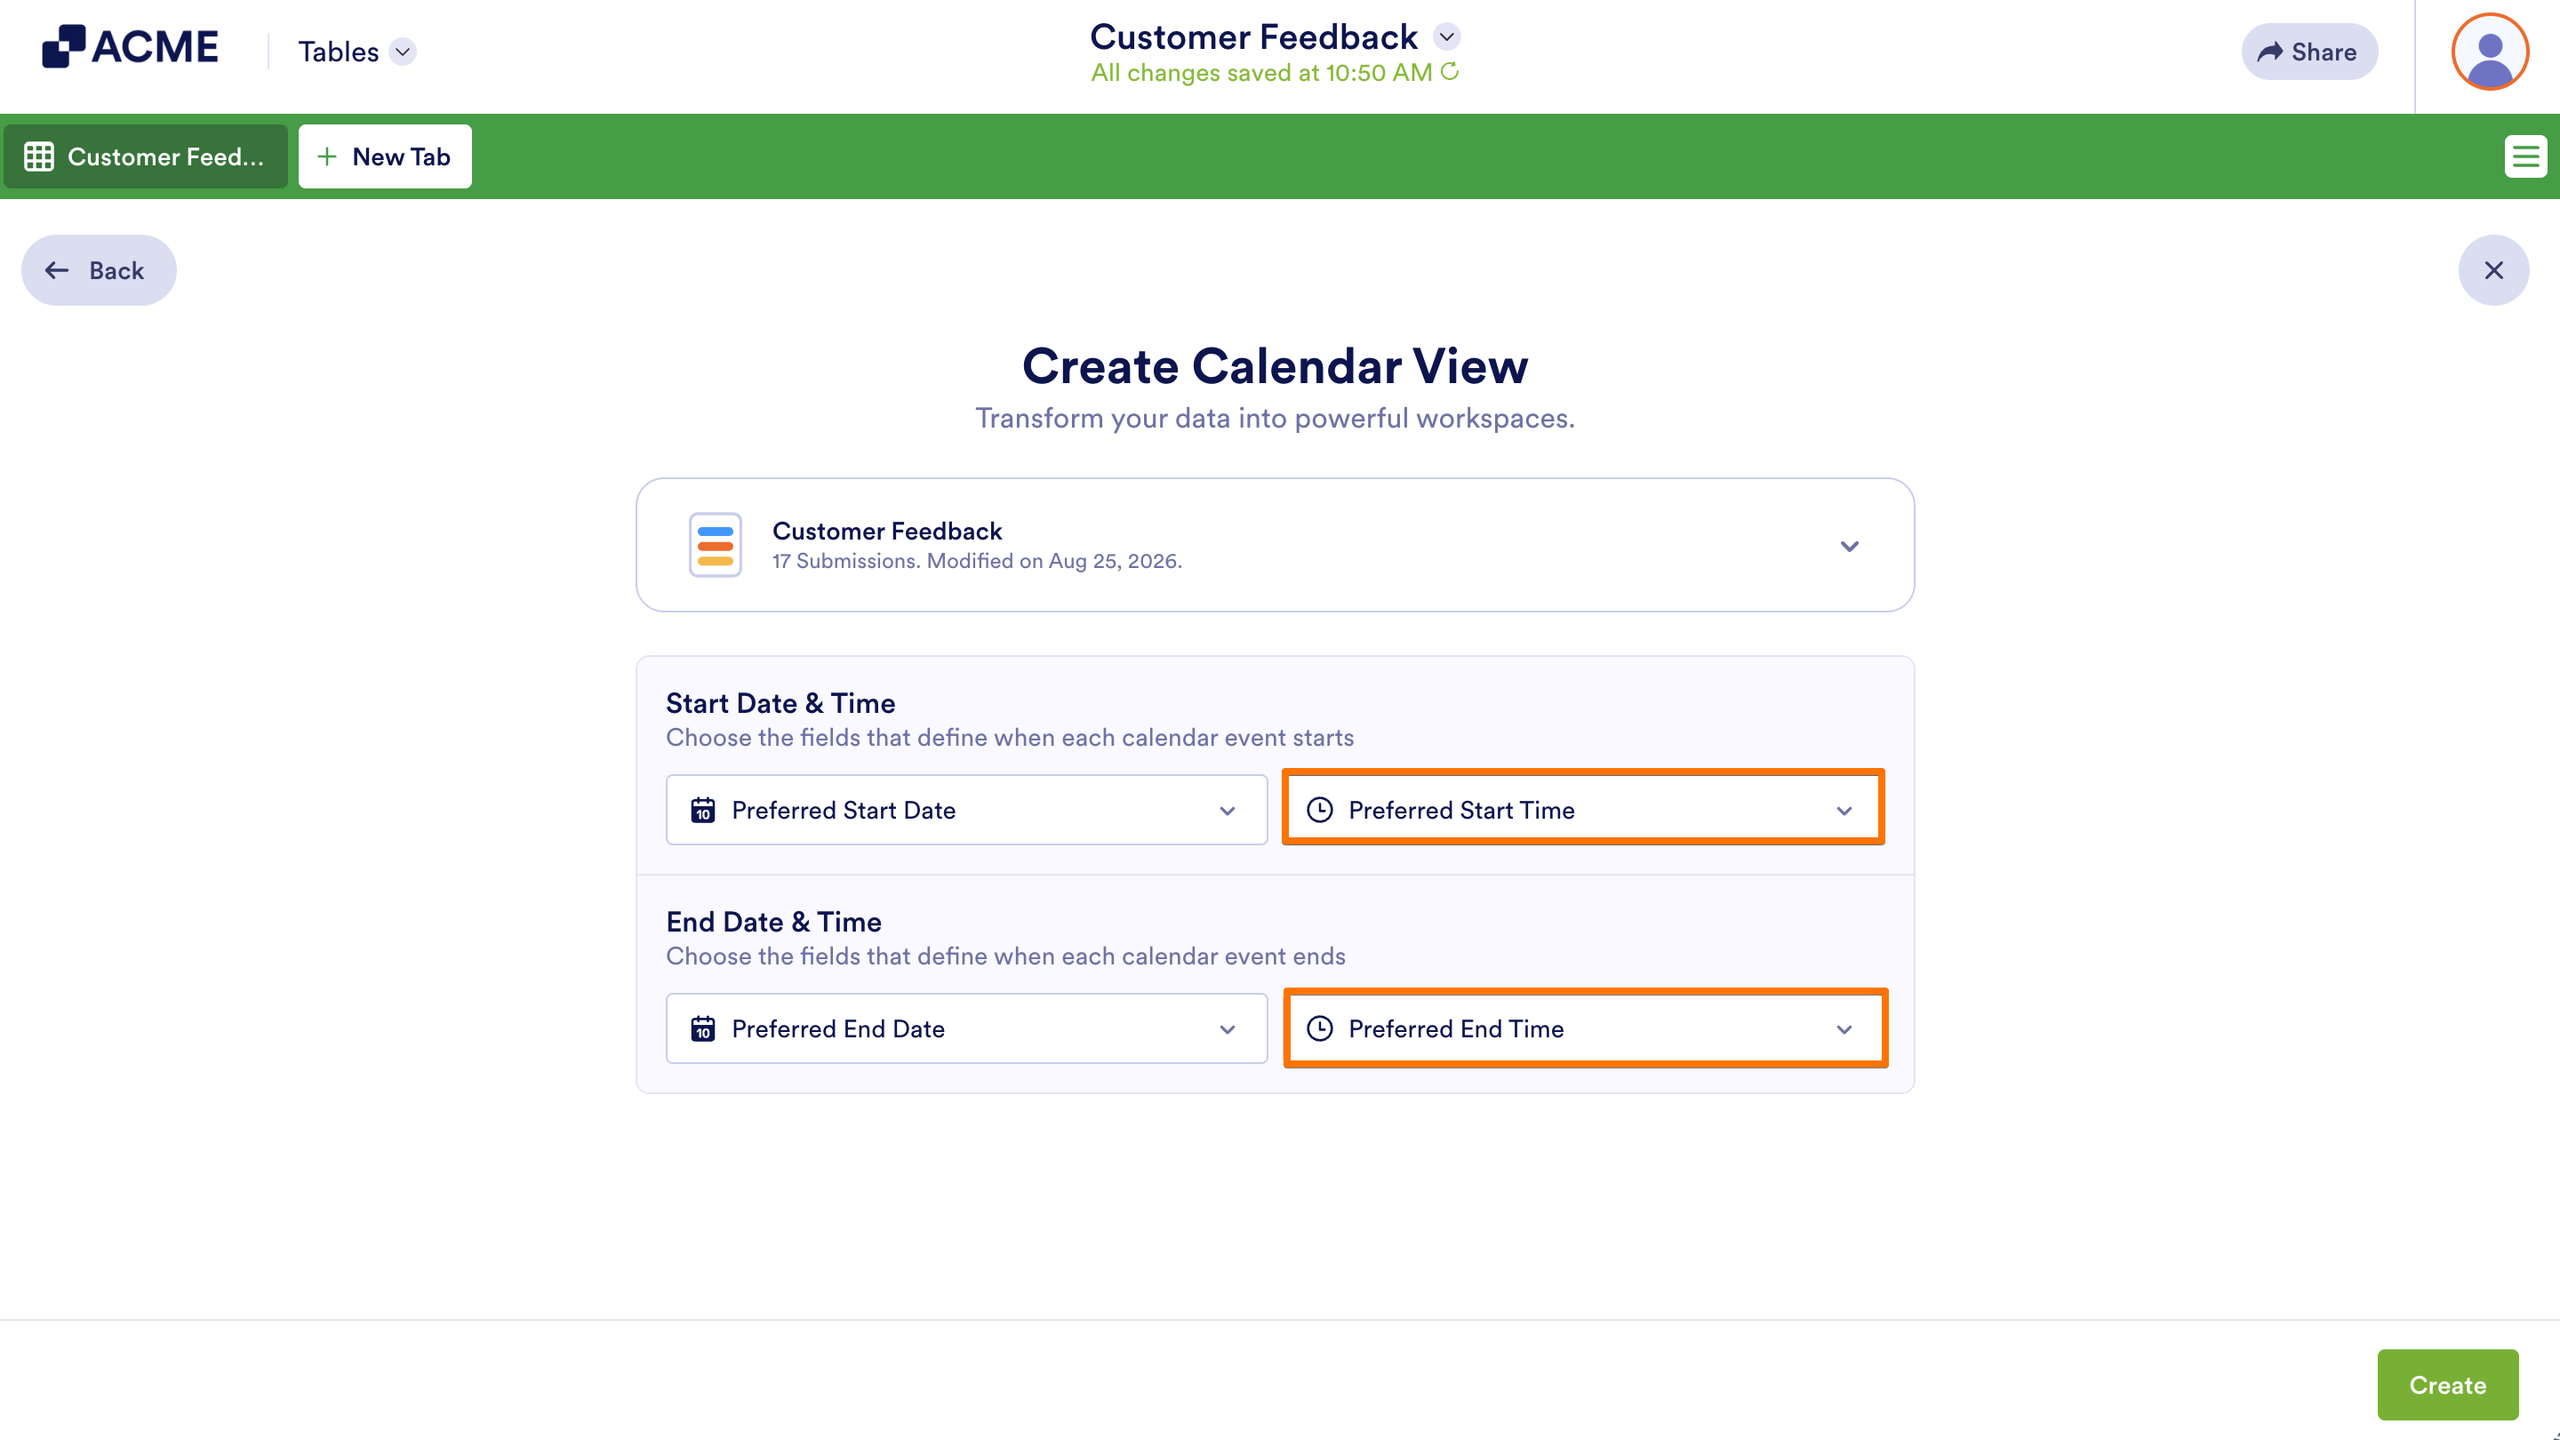
If there are no existing basic time fields in your form or additional time columns in your submission table that you can select, you can add new time fields to match with the event time fields.
Notes
The new fields you add through the Create Calendar View window will not be created on your form.
You can also show the new field columns on the submission table and fill them out manually, similar to inline editing an entry.
Switching Between Calendar View Types
Different calendar views can help you manage appointments, events, and schedules more effectively. Choose the one that makes it easier for you to stay organized.
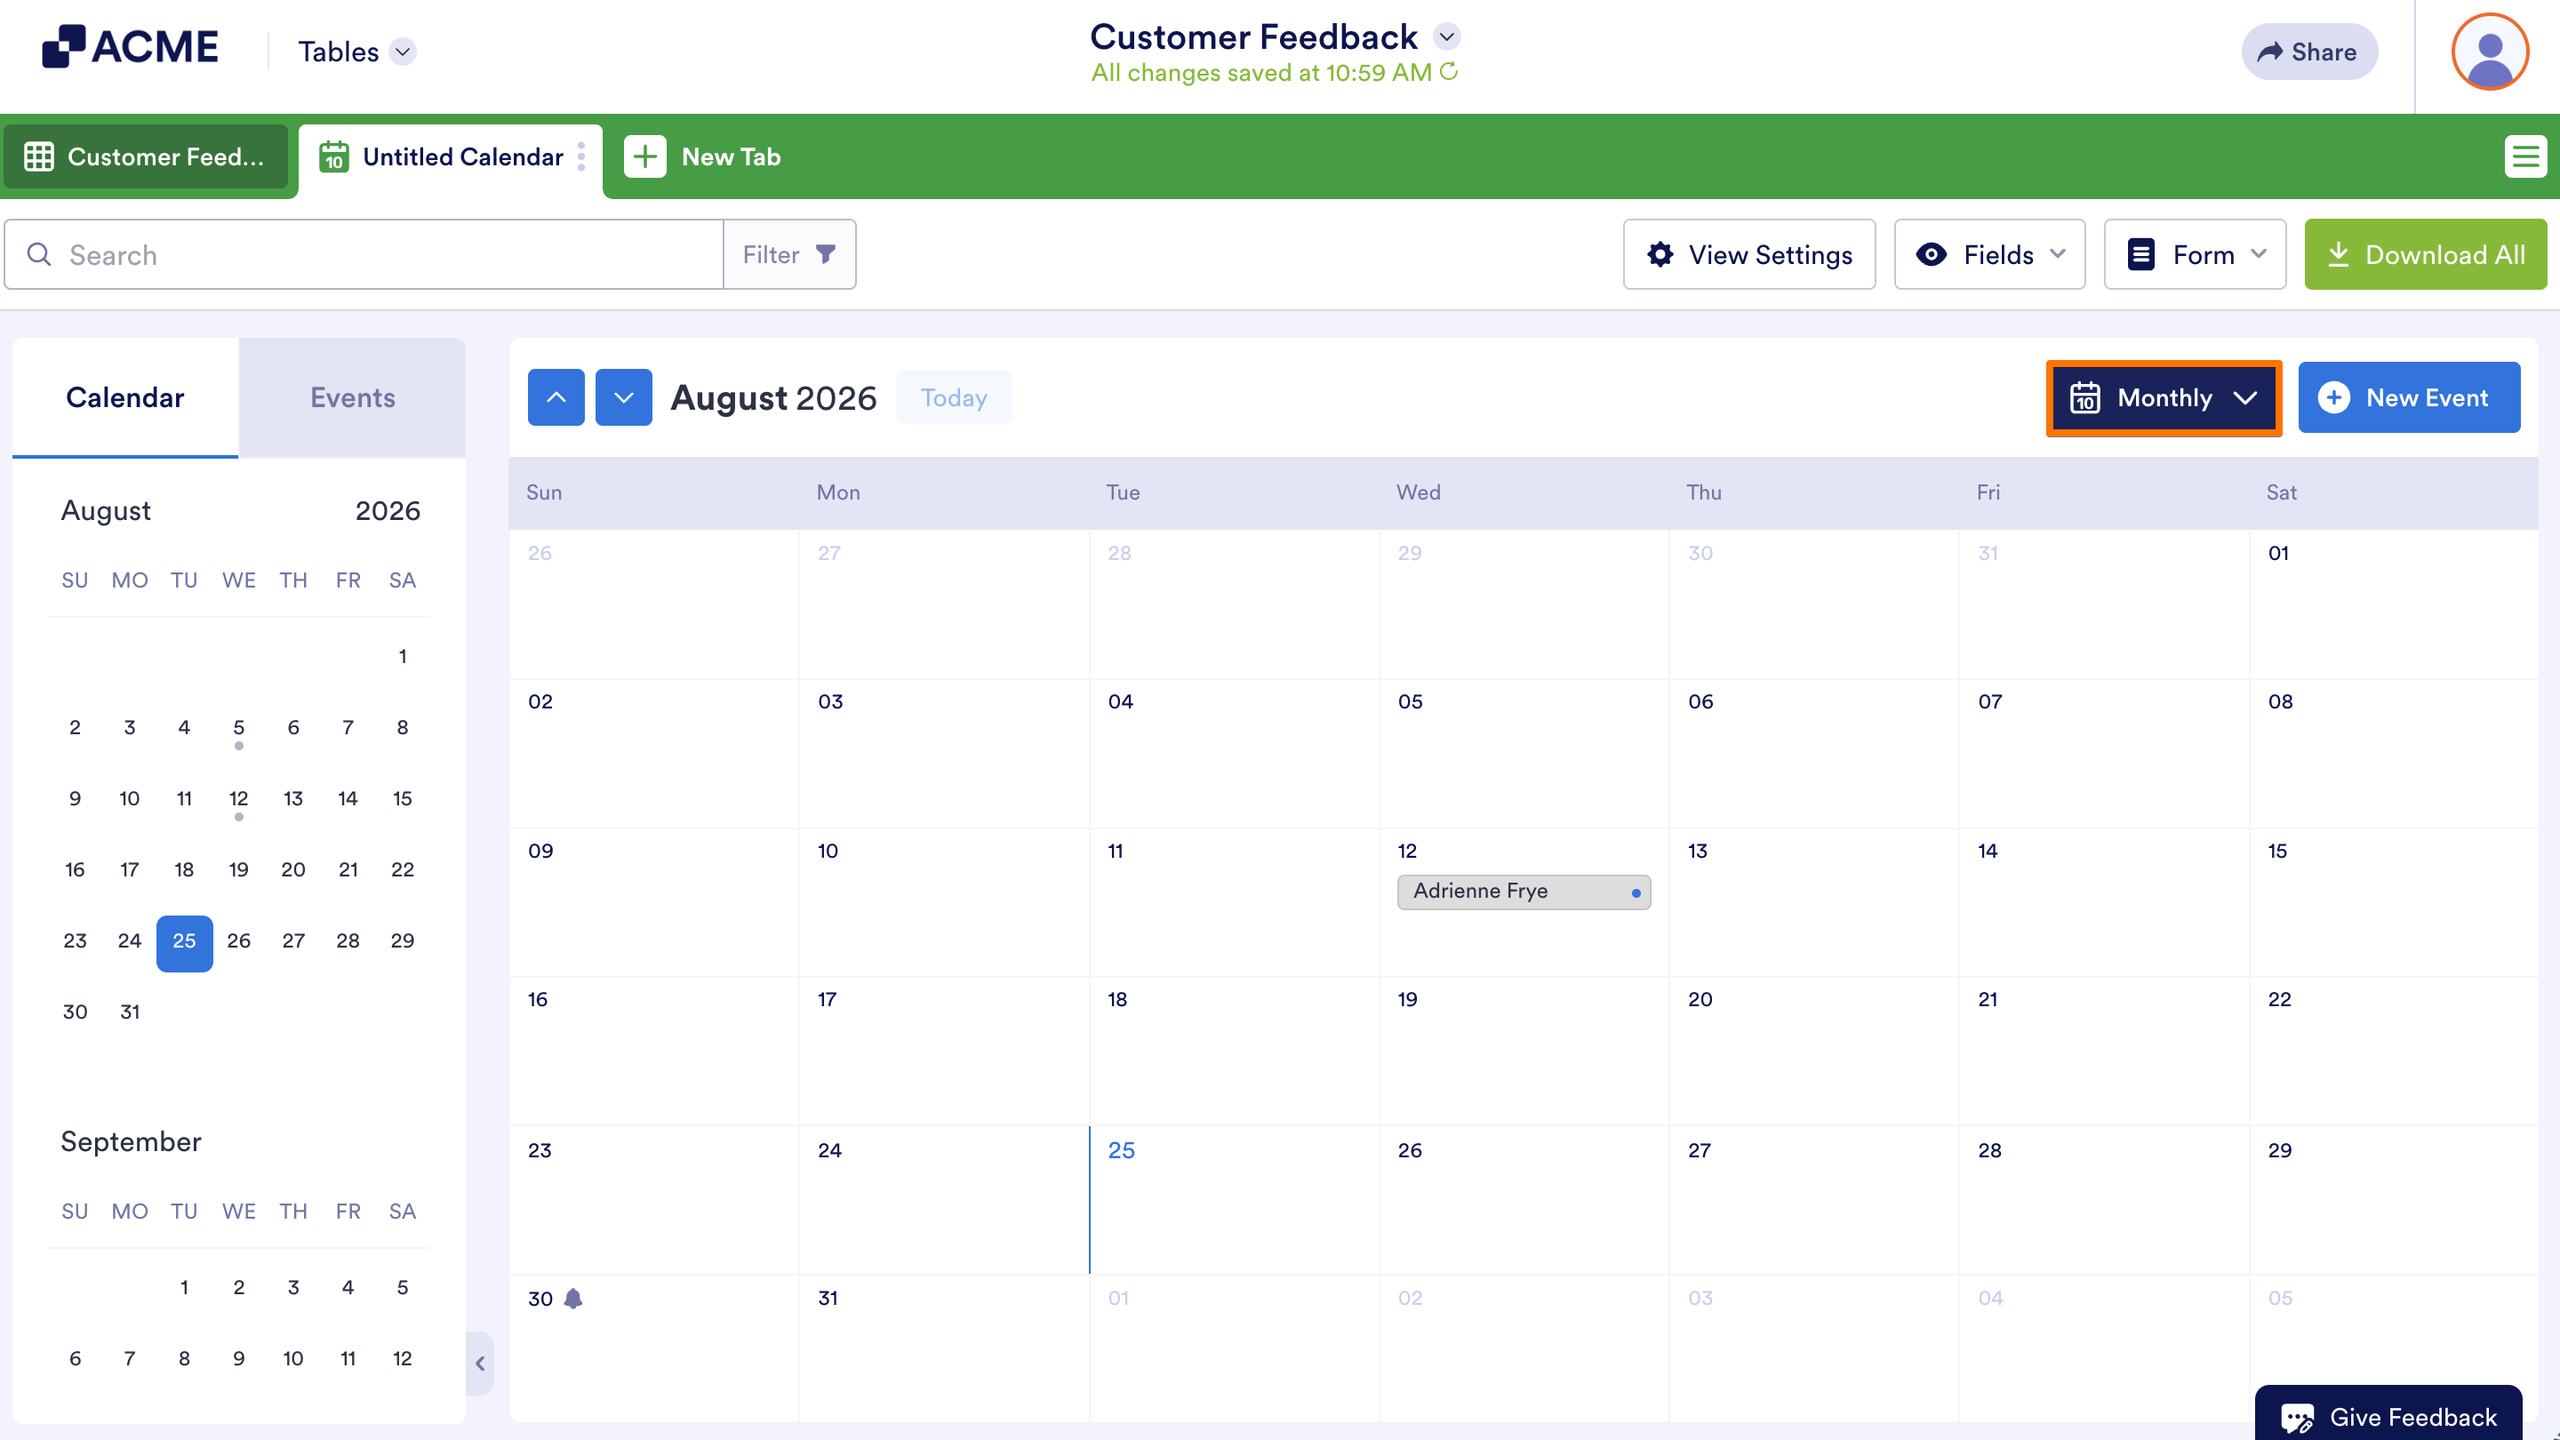
The Monthly View, selected by default when the calendar first loads, shows you the entire month at a glance. You can see all your events and appointments in one place, making it easier to spot upcoming events, plan ahead, and avoid scheduling conflicts.
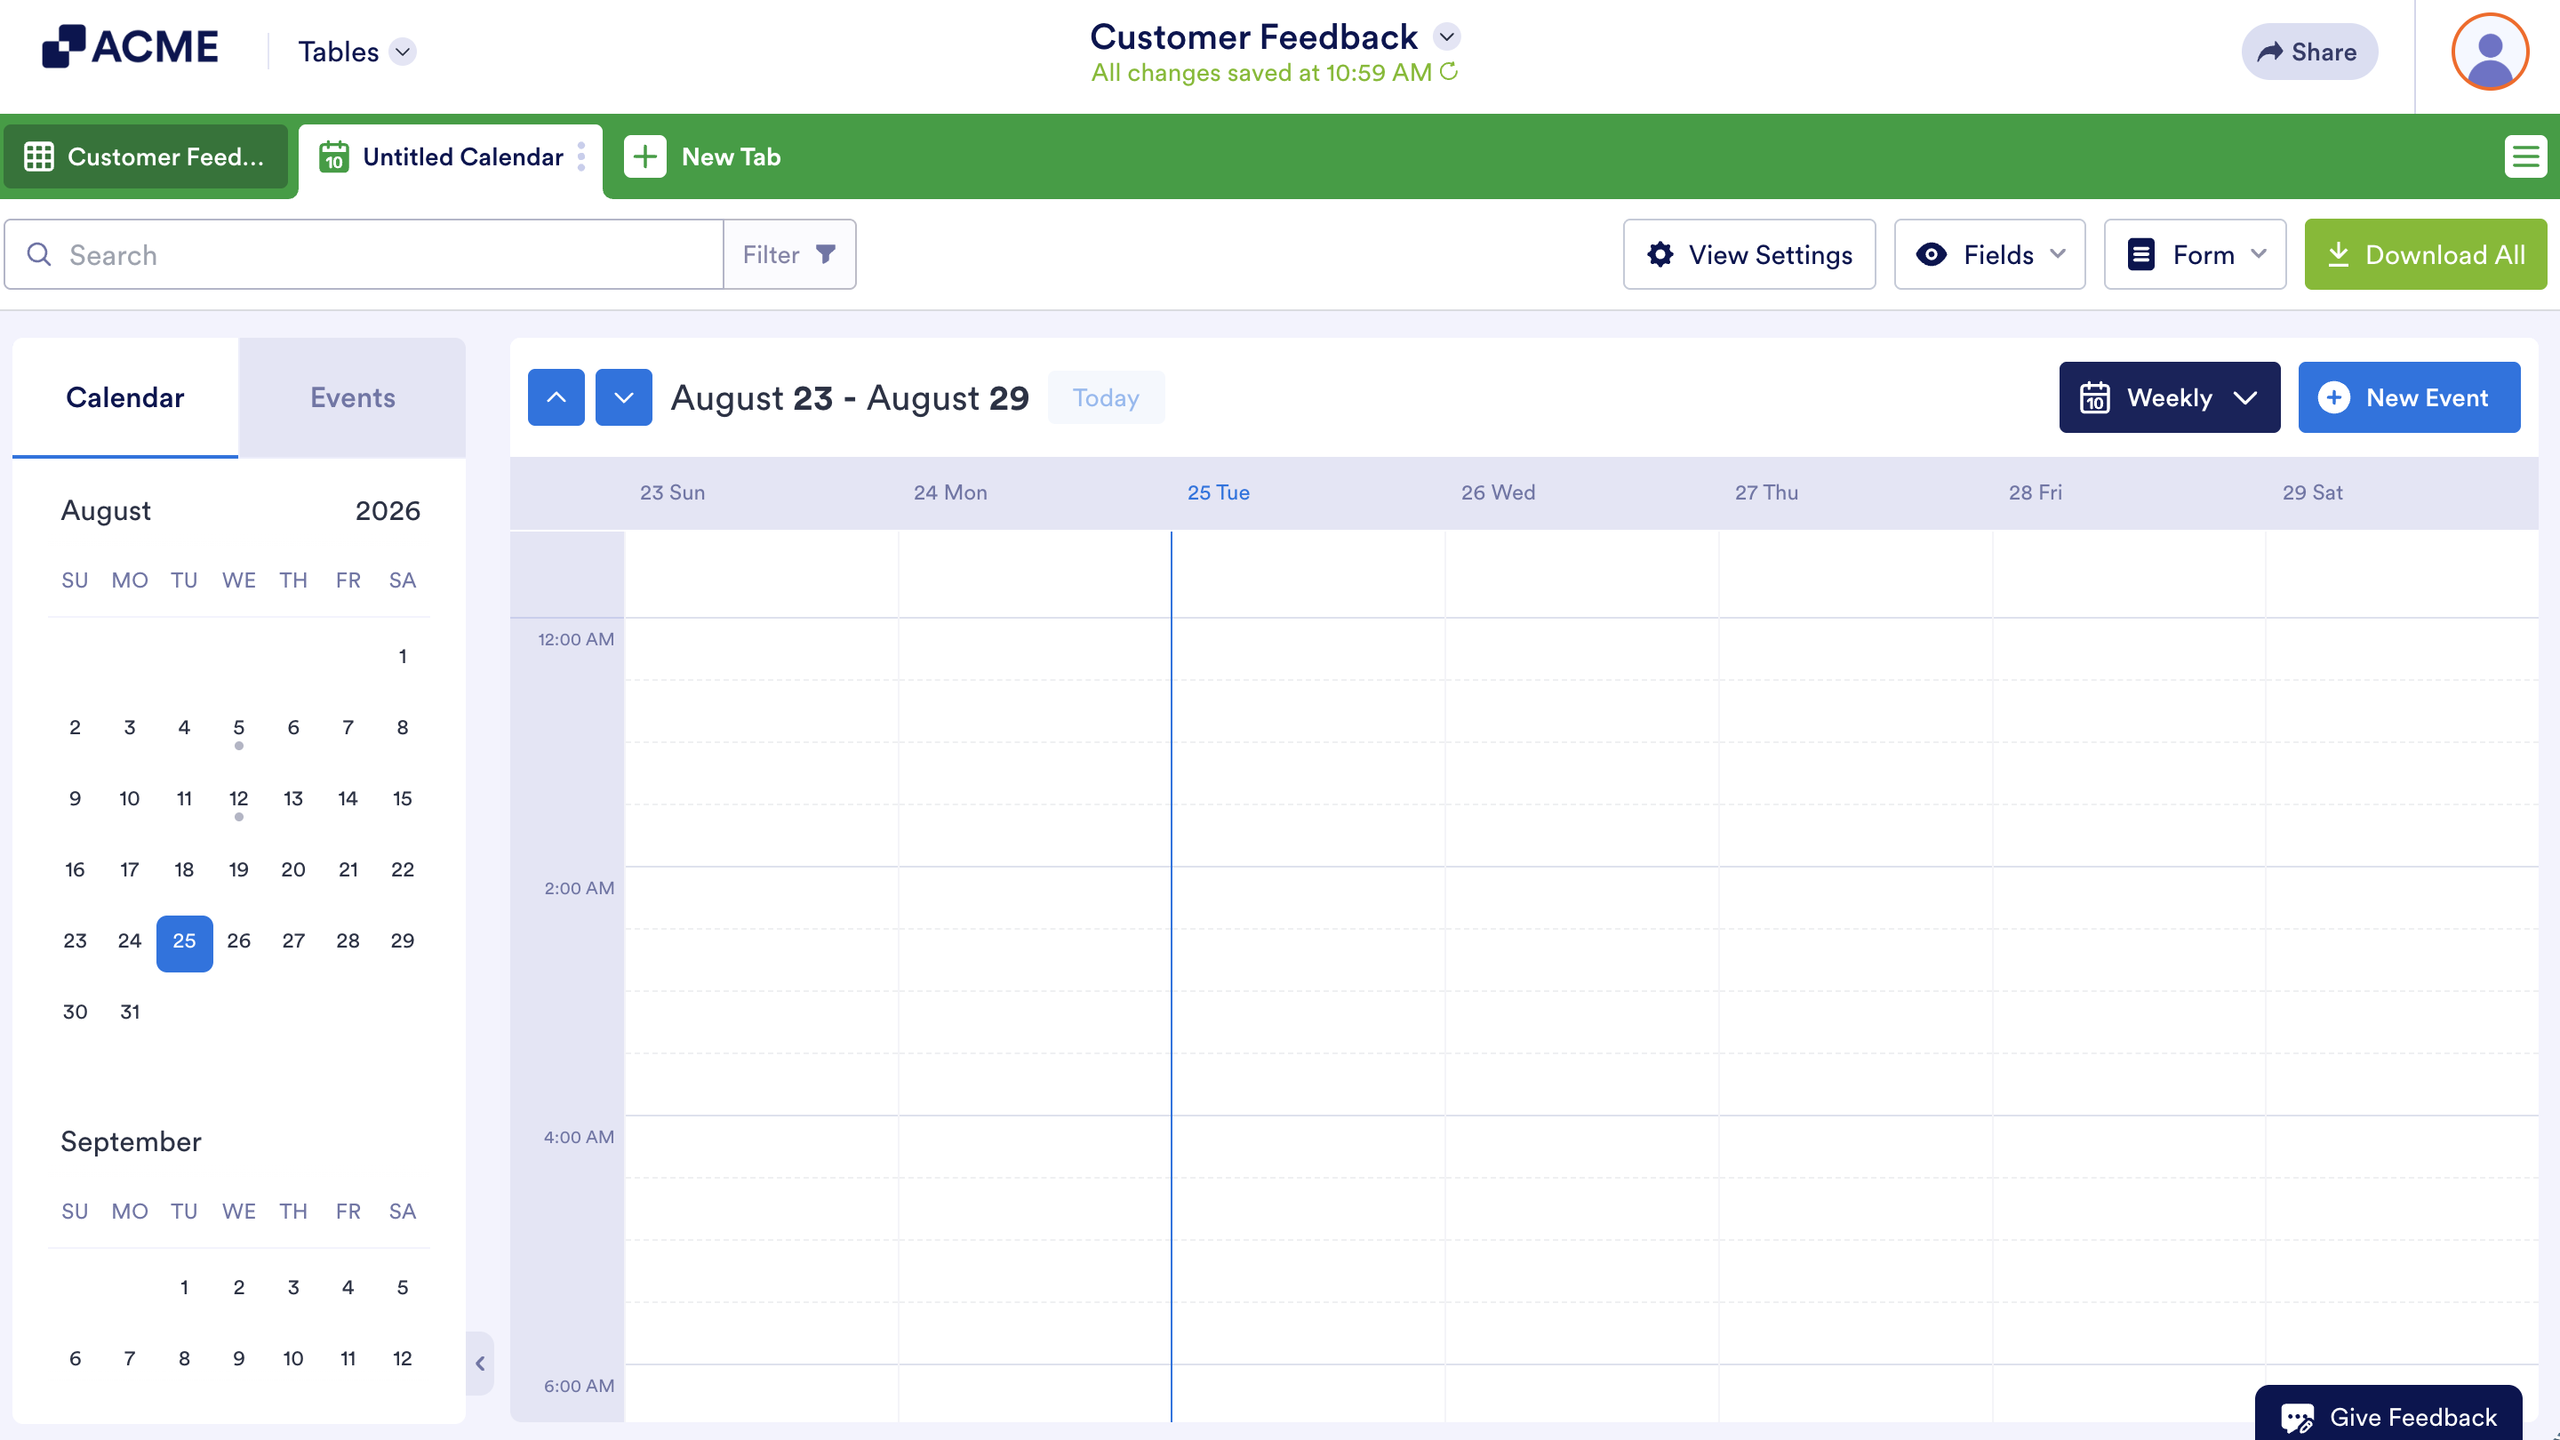
The Weekly View displays an entire week in a single screen, giving you a broader perspective on your schedule. It helps you see what’s coming up each week, plan your time effectively, and spot any overlaps or busy days.
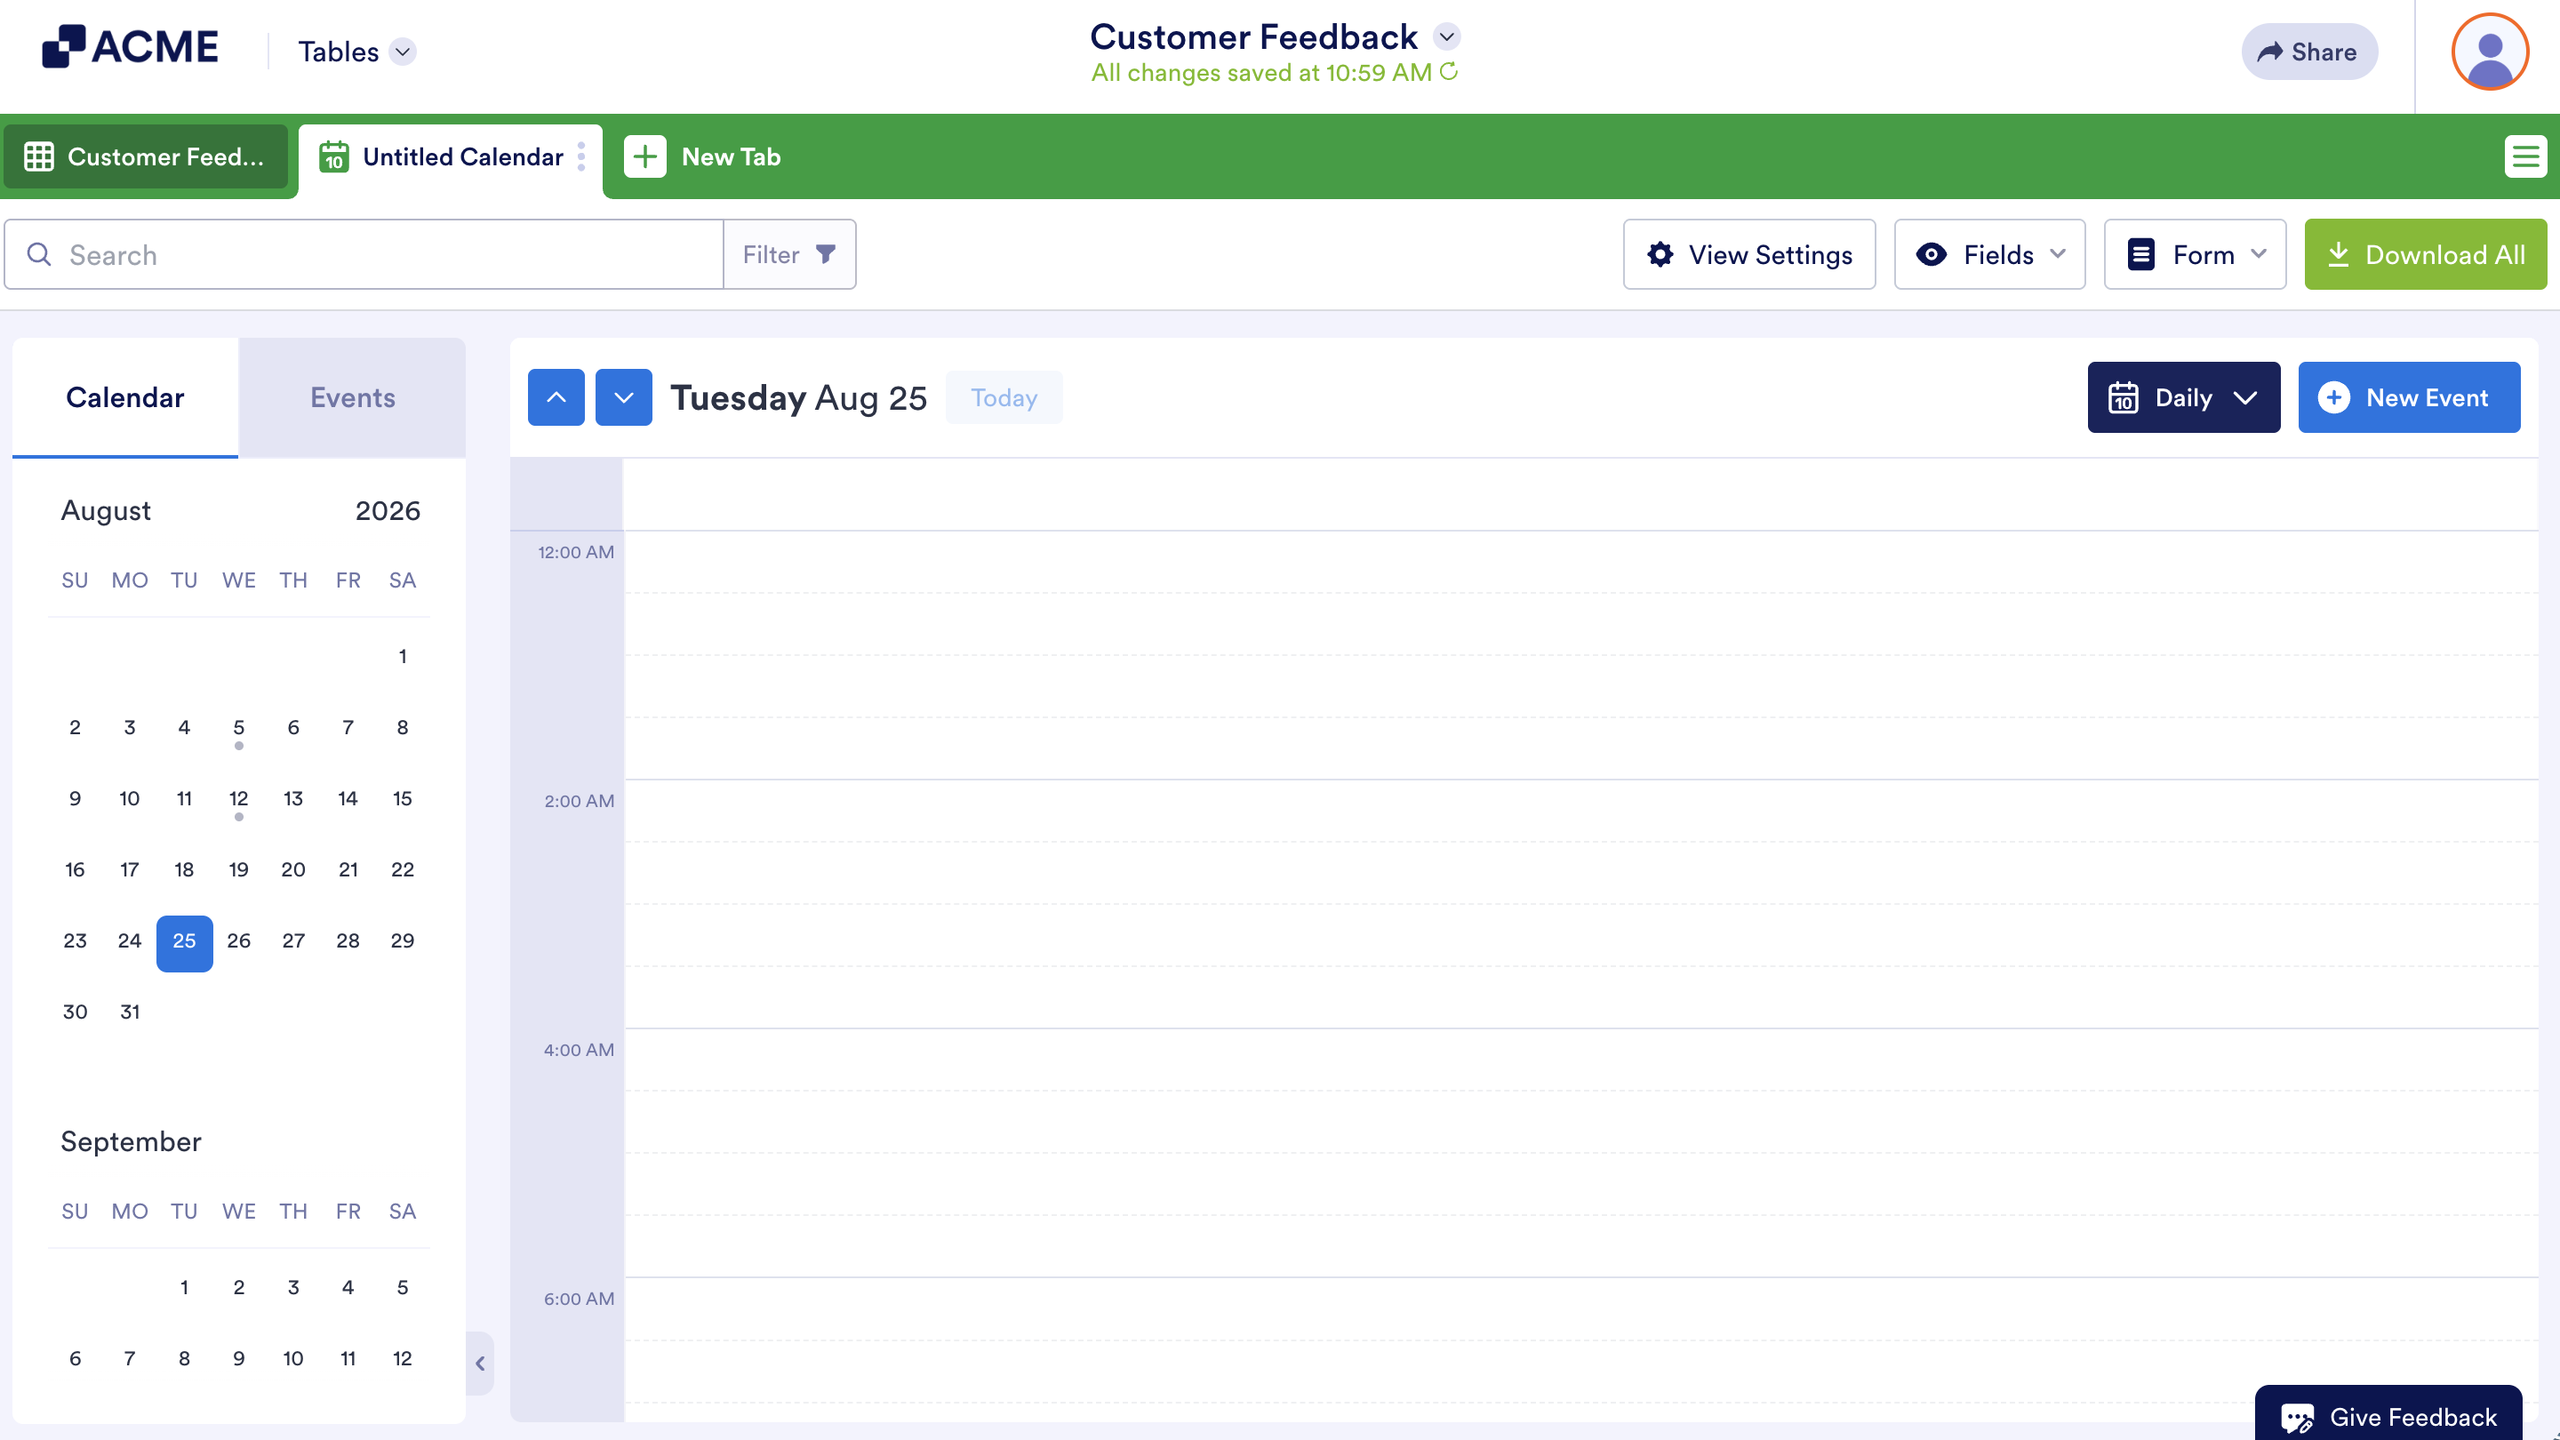
The Daily View shows you one day at a time, so you can focus on your schedule for that specific day. It helps you see detailed information about your appointments and tasks, making it easier to manage your daily activities and stay organized.
Managing Calendar View Settings
Each appointment is displayed under the name of the submitter from the appointment form. The date is also based on the first appointment/date field from the form. If you need to change any of the information, open the settings and choose the appropriate fields.
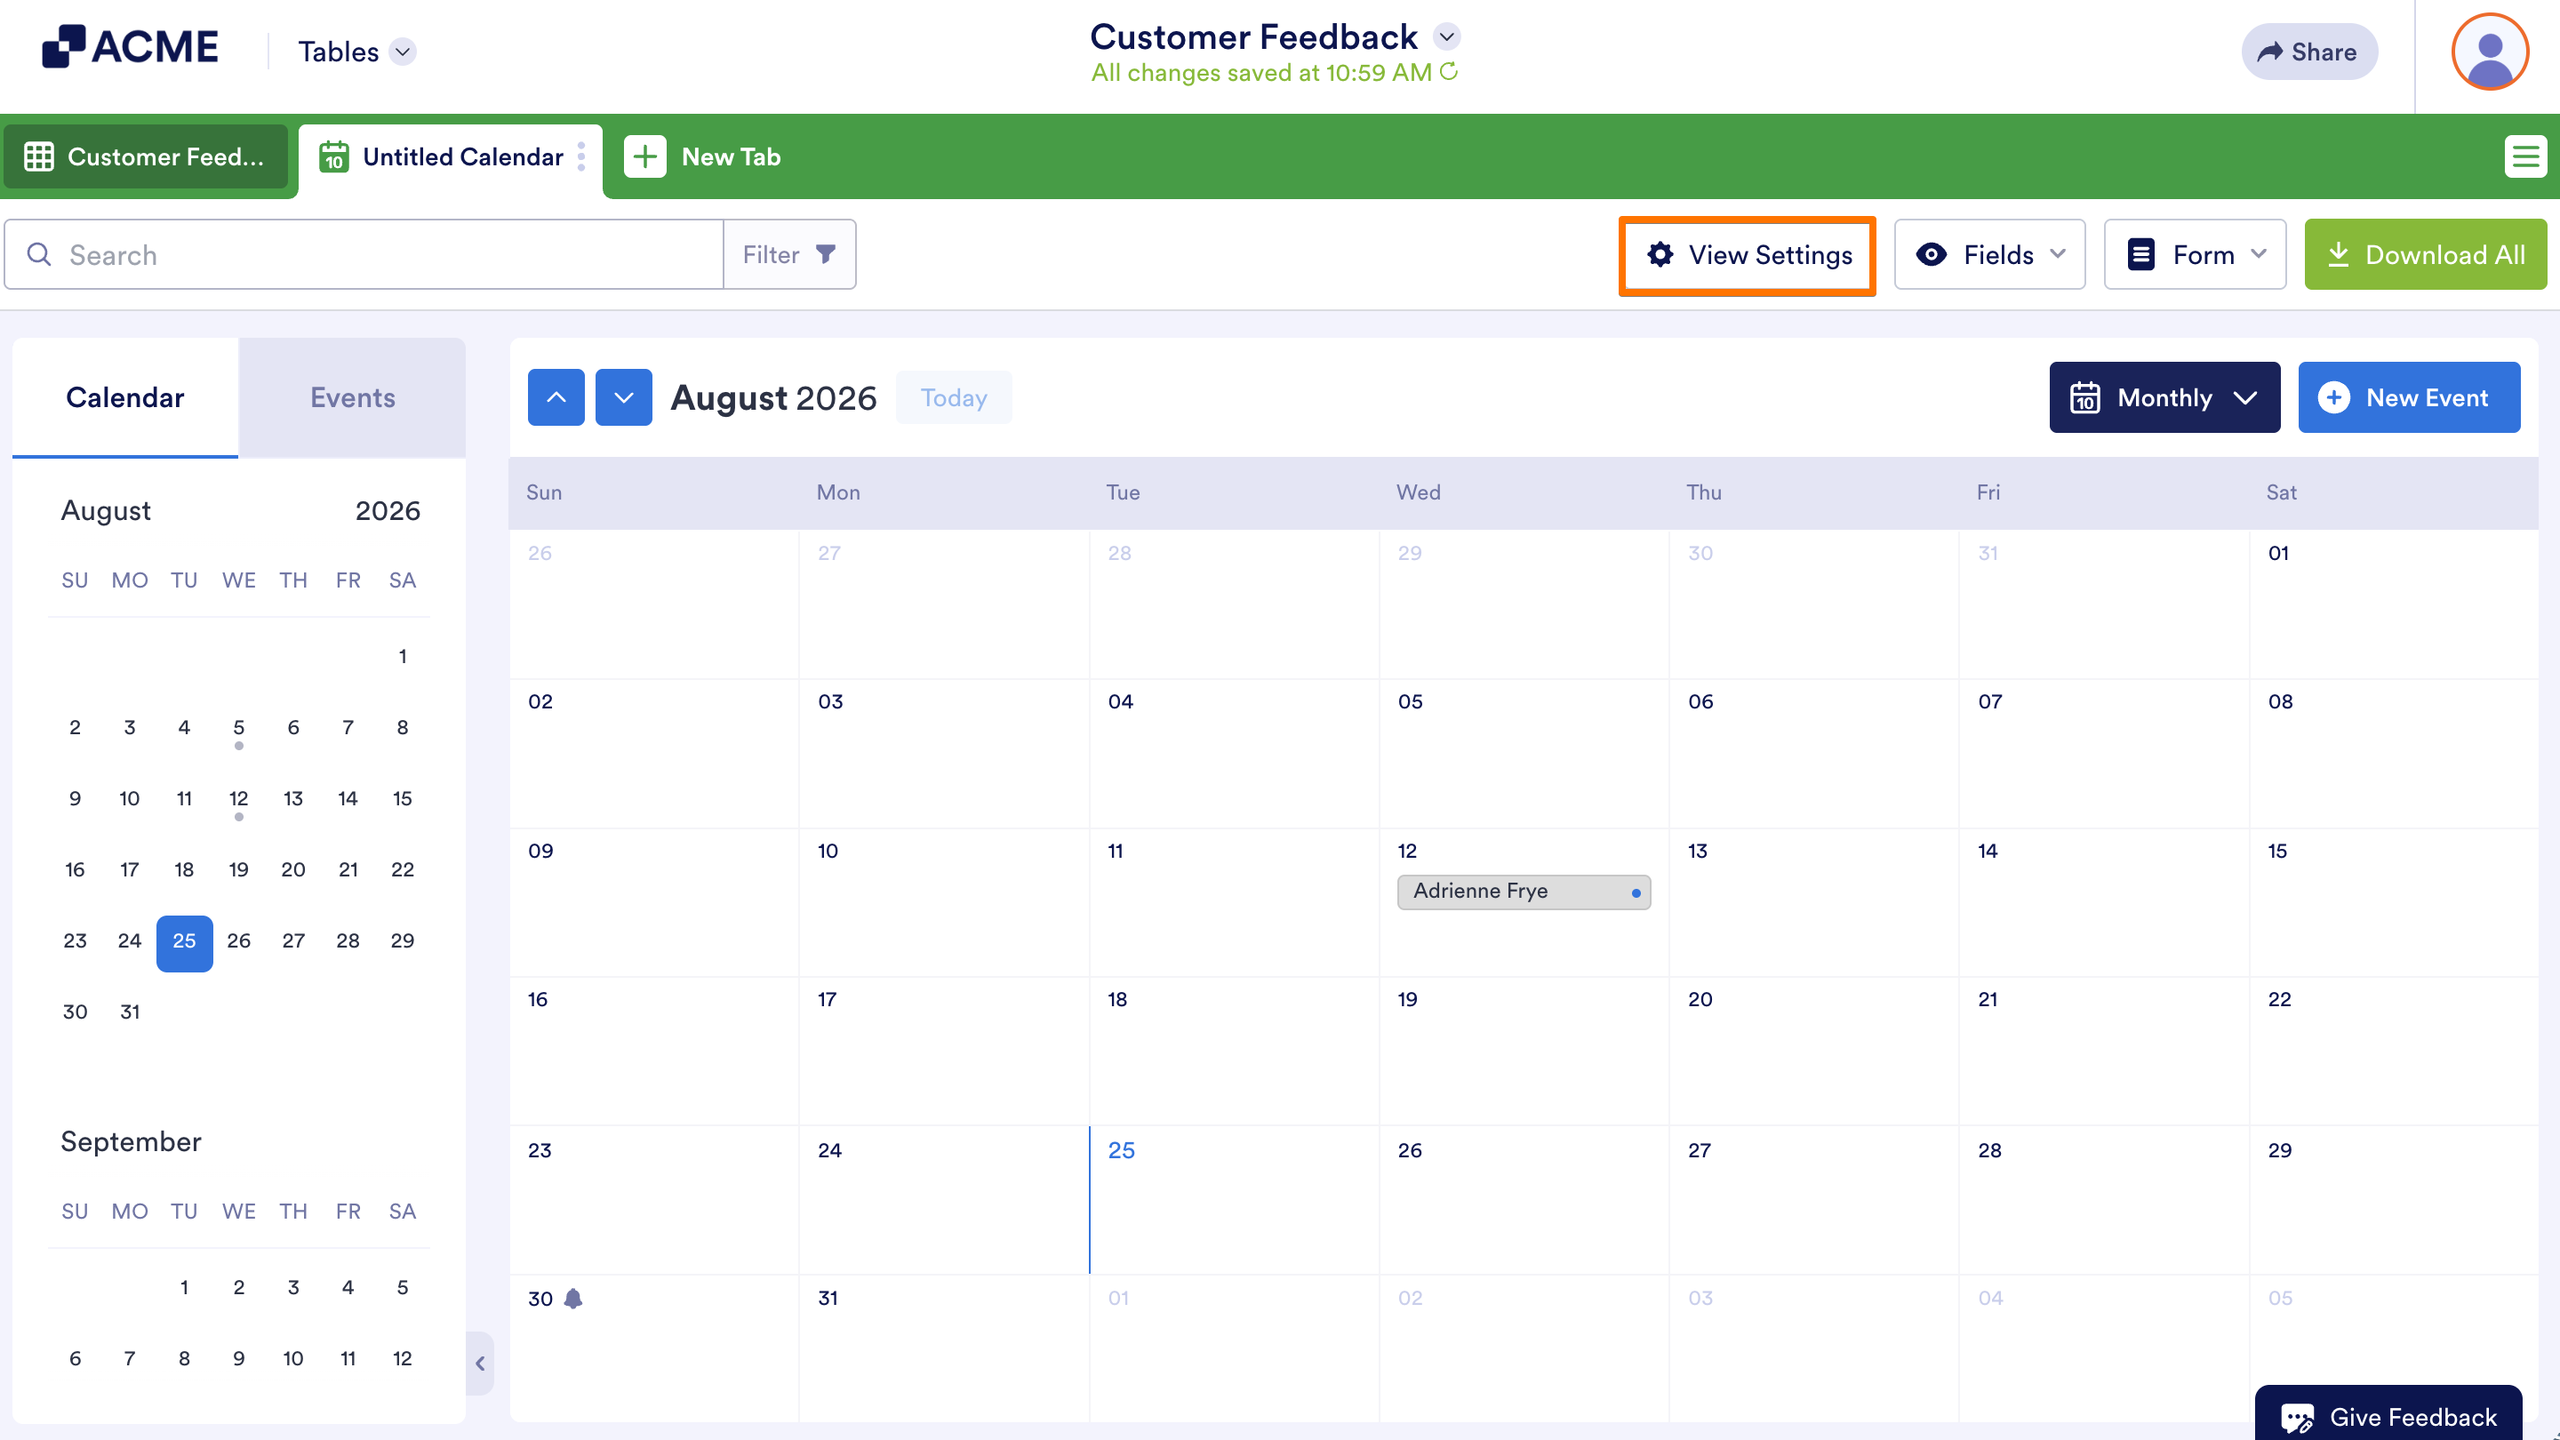
Click on the Tab Menu (Kebab or Three Vertical Dots Menu) beside the tab name, and then click on the View settings option. Alternatively, you can open the settings by clicking on the View Settings button from the list of buttons visible at the top-right side of the calendar.
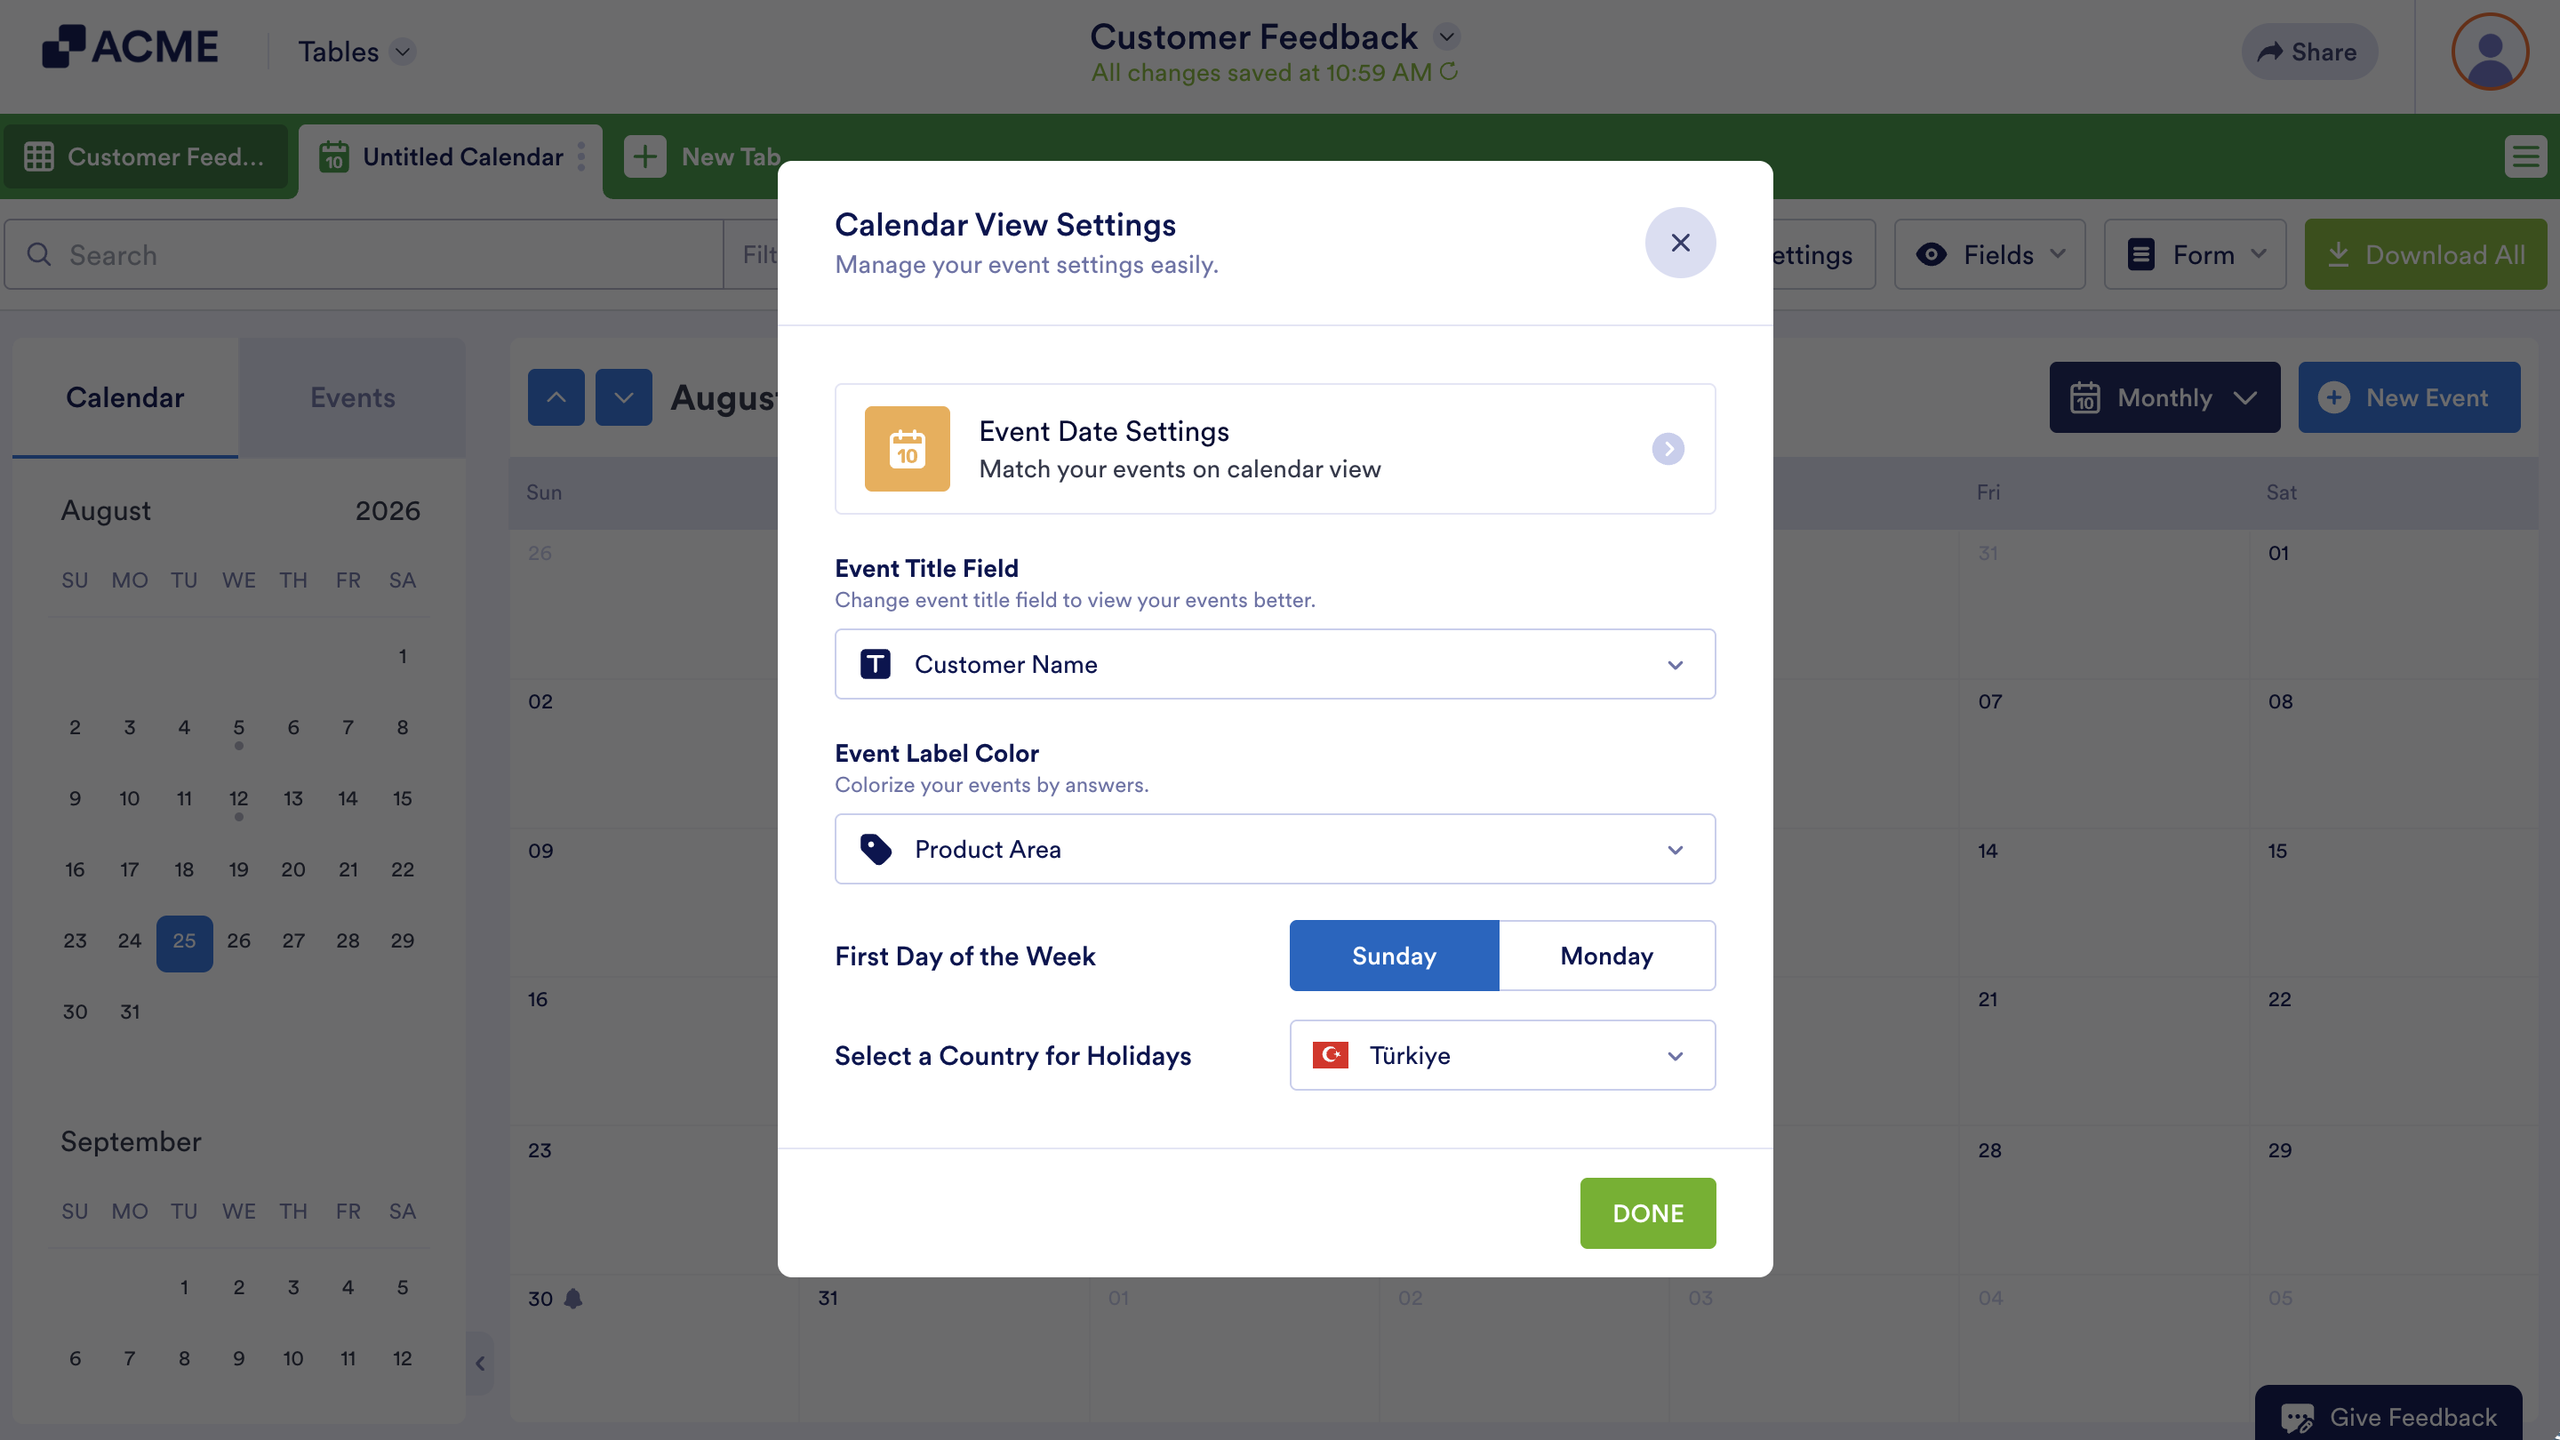
Reconfigure the Event Date Settings or select the Event Title Field, change the First Day of the Week to either Sunday or Monday, Select a Country for Holidays. Click on the Done button to save your changes.
Viewing and Scheduling Appointments
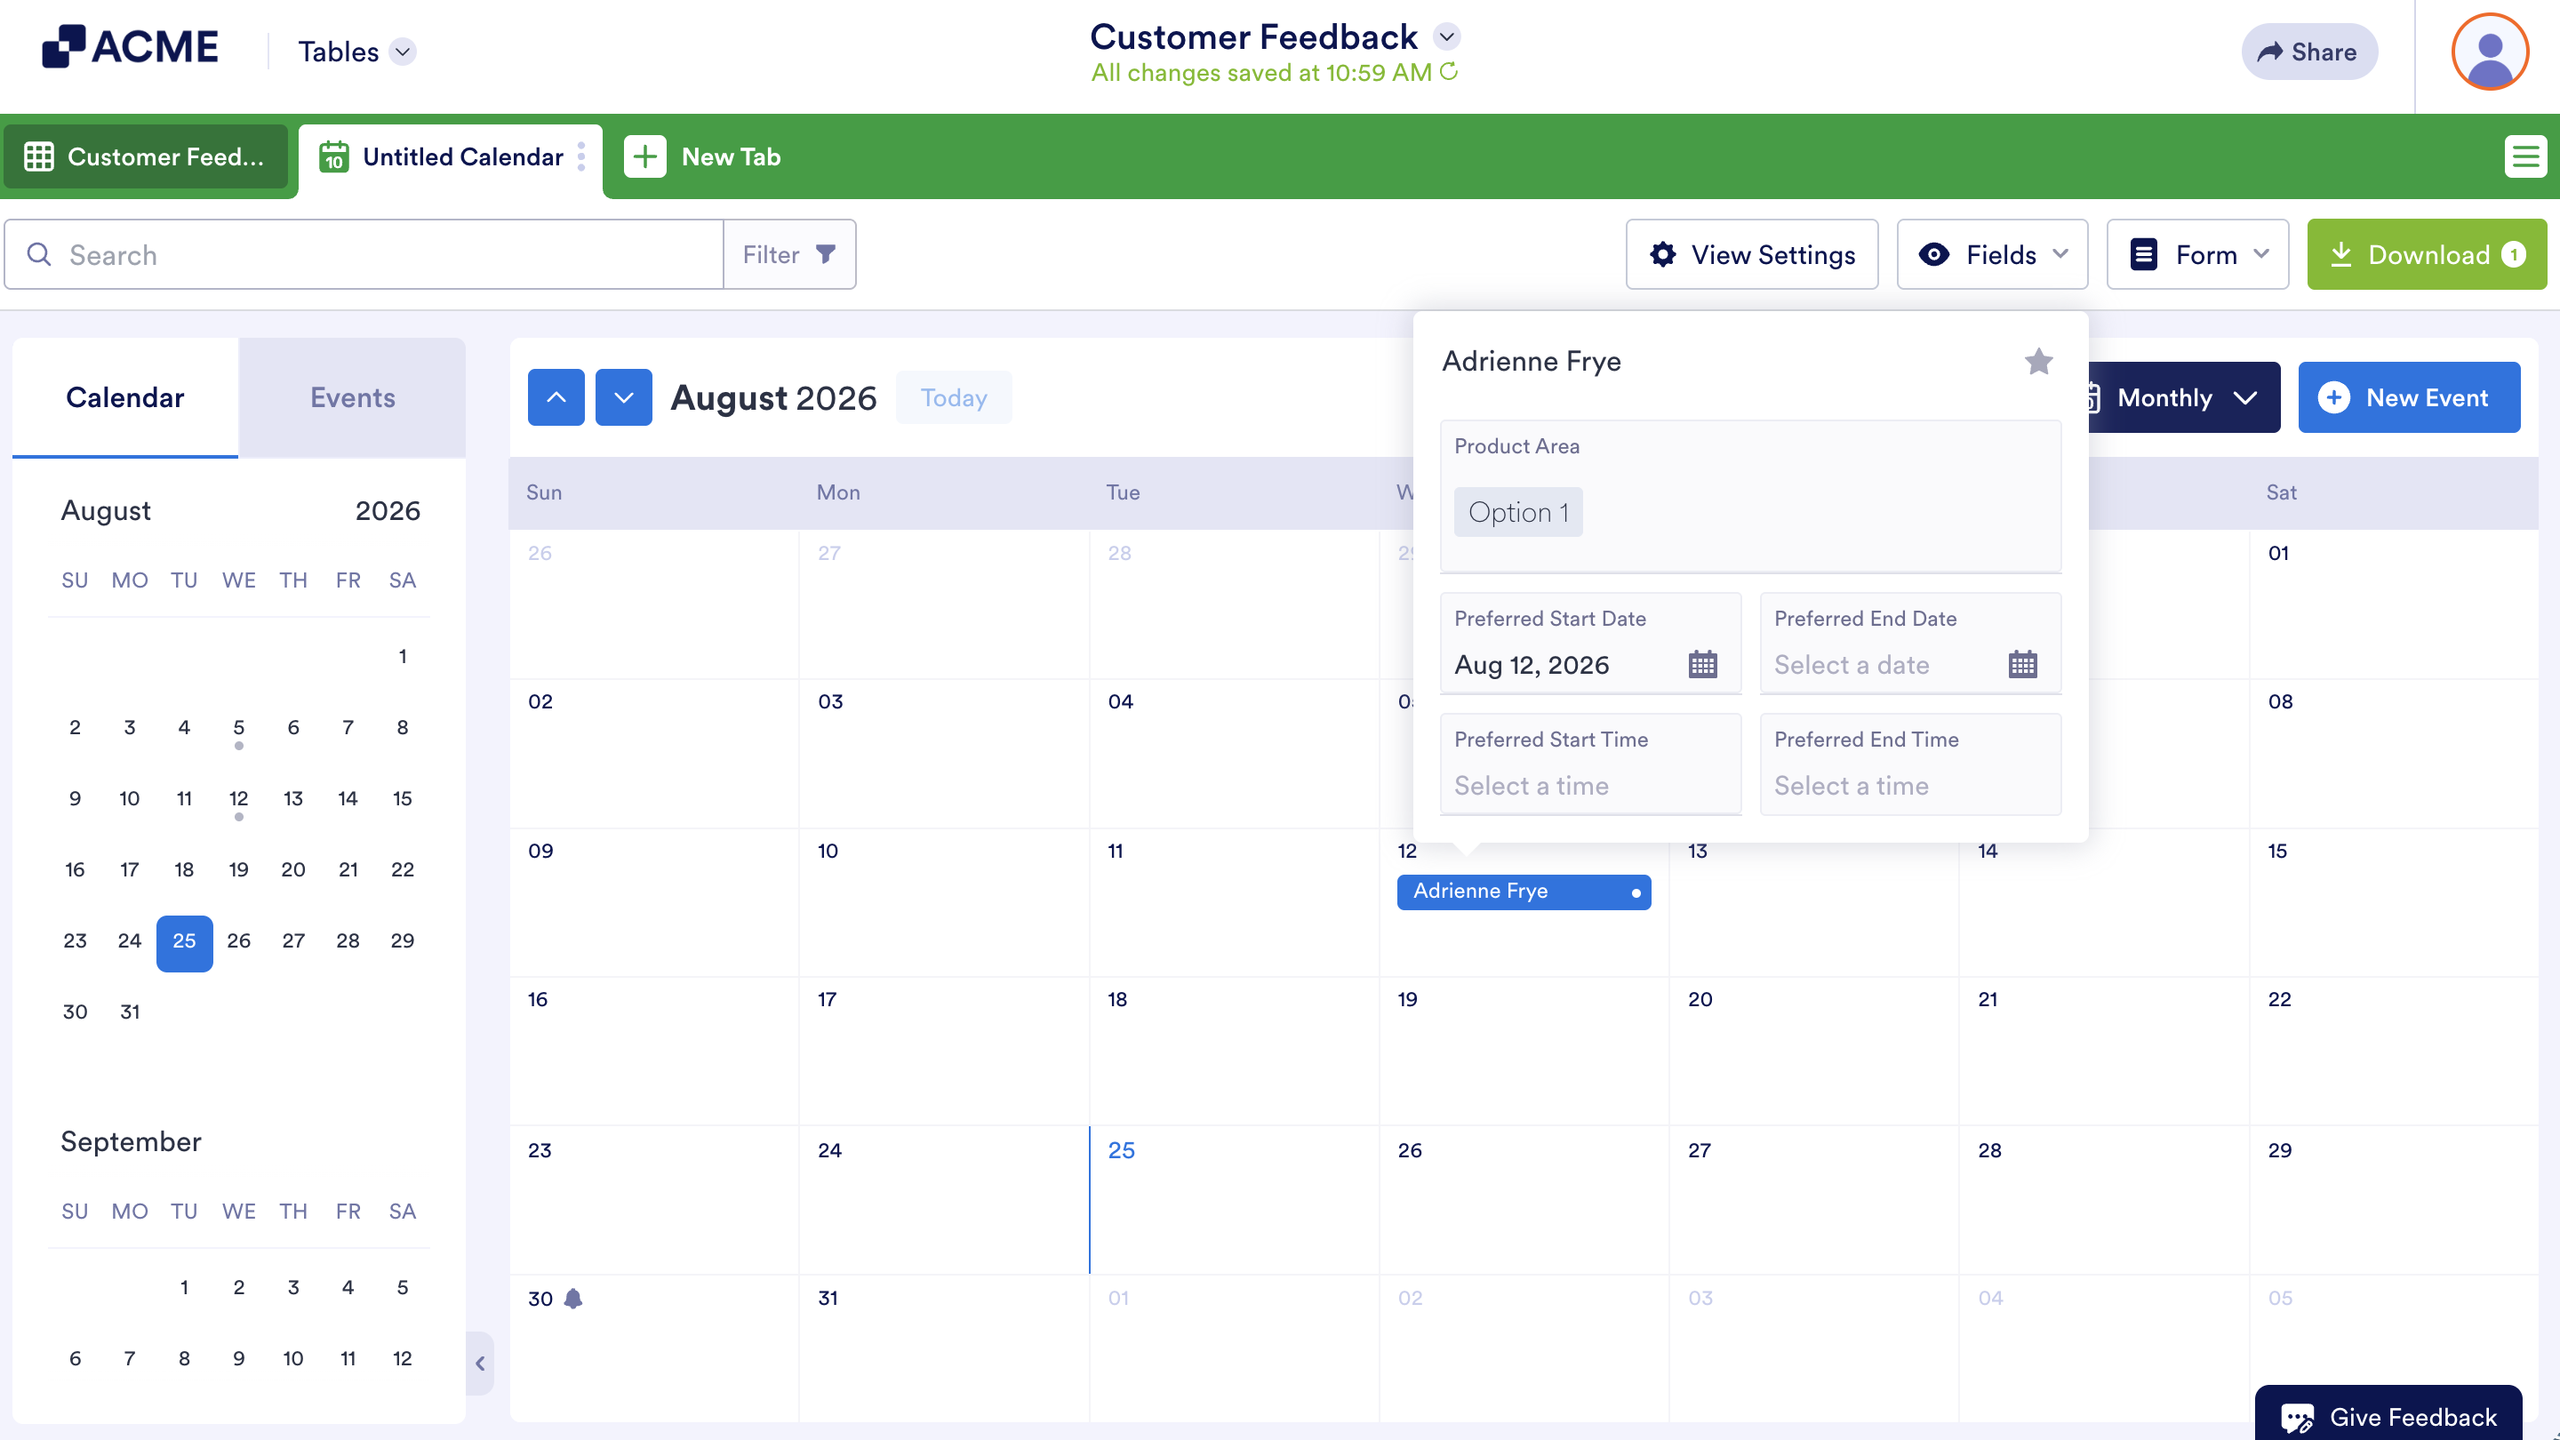
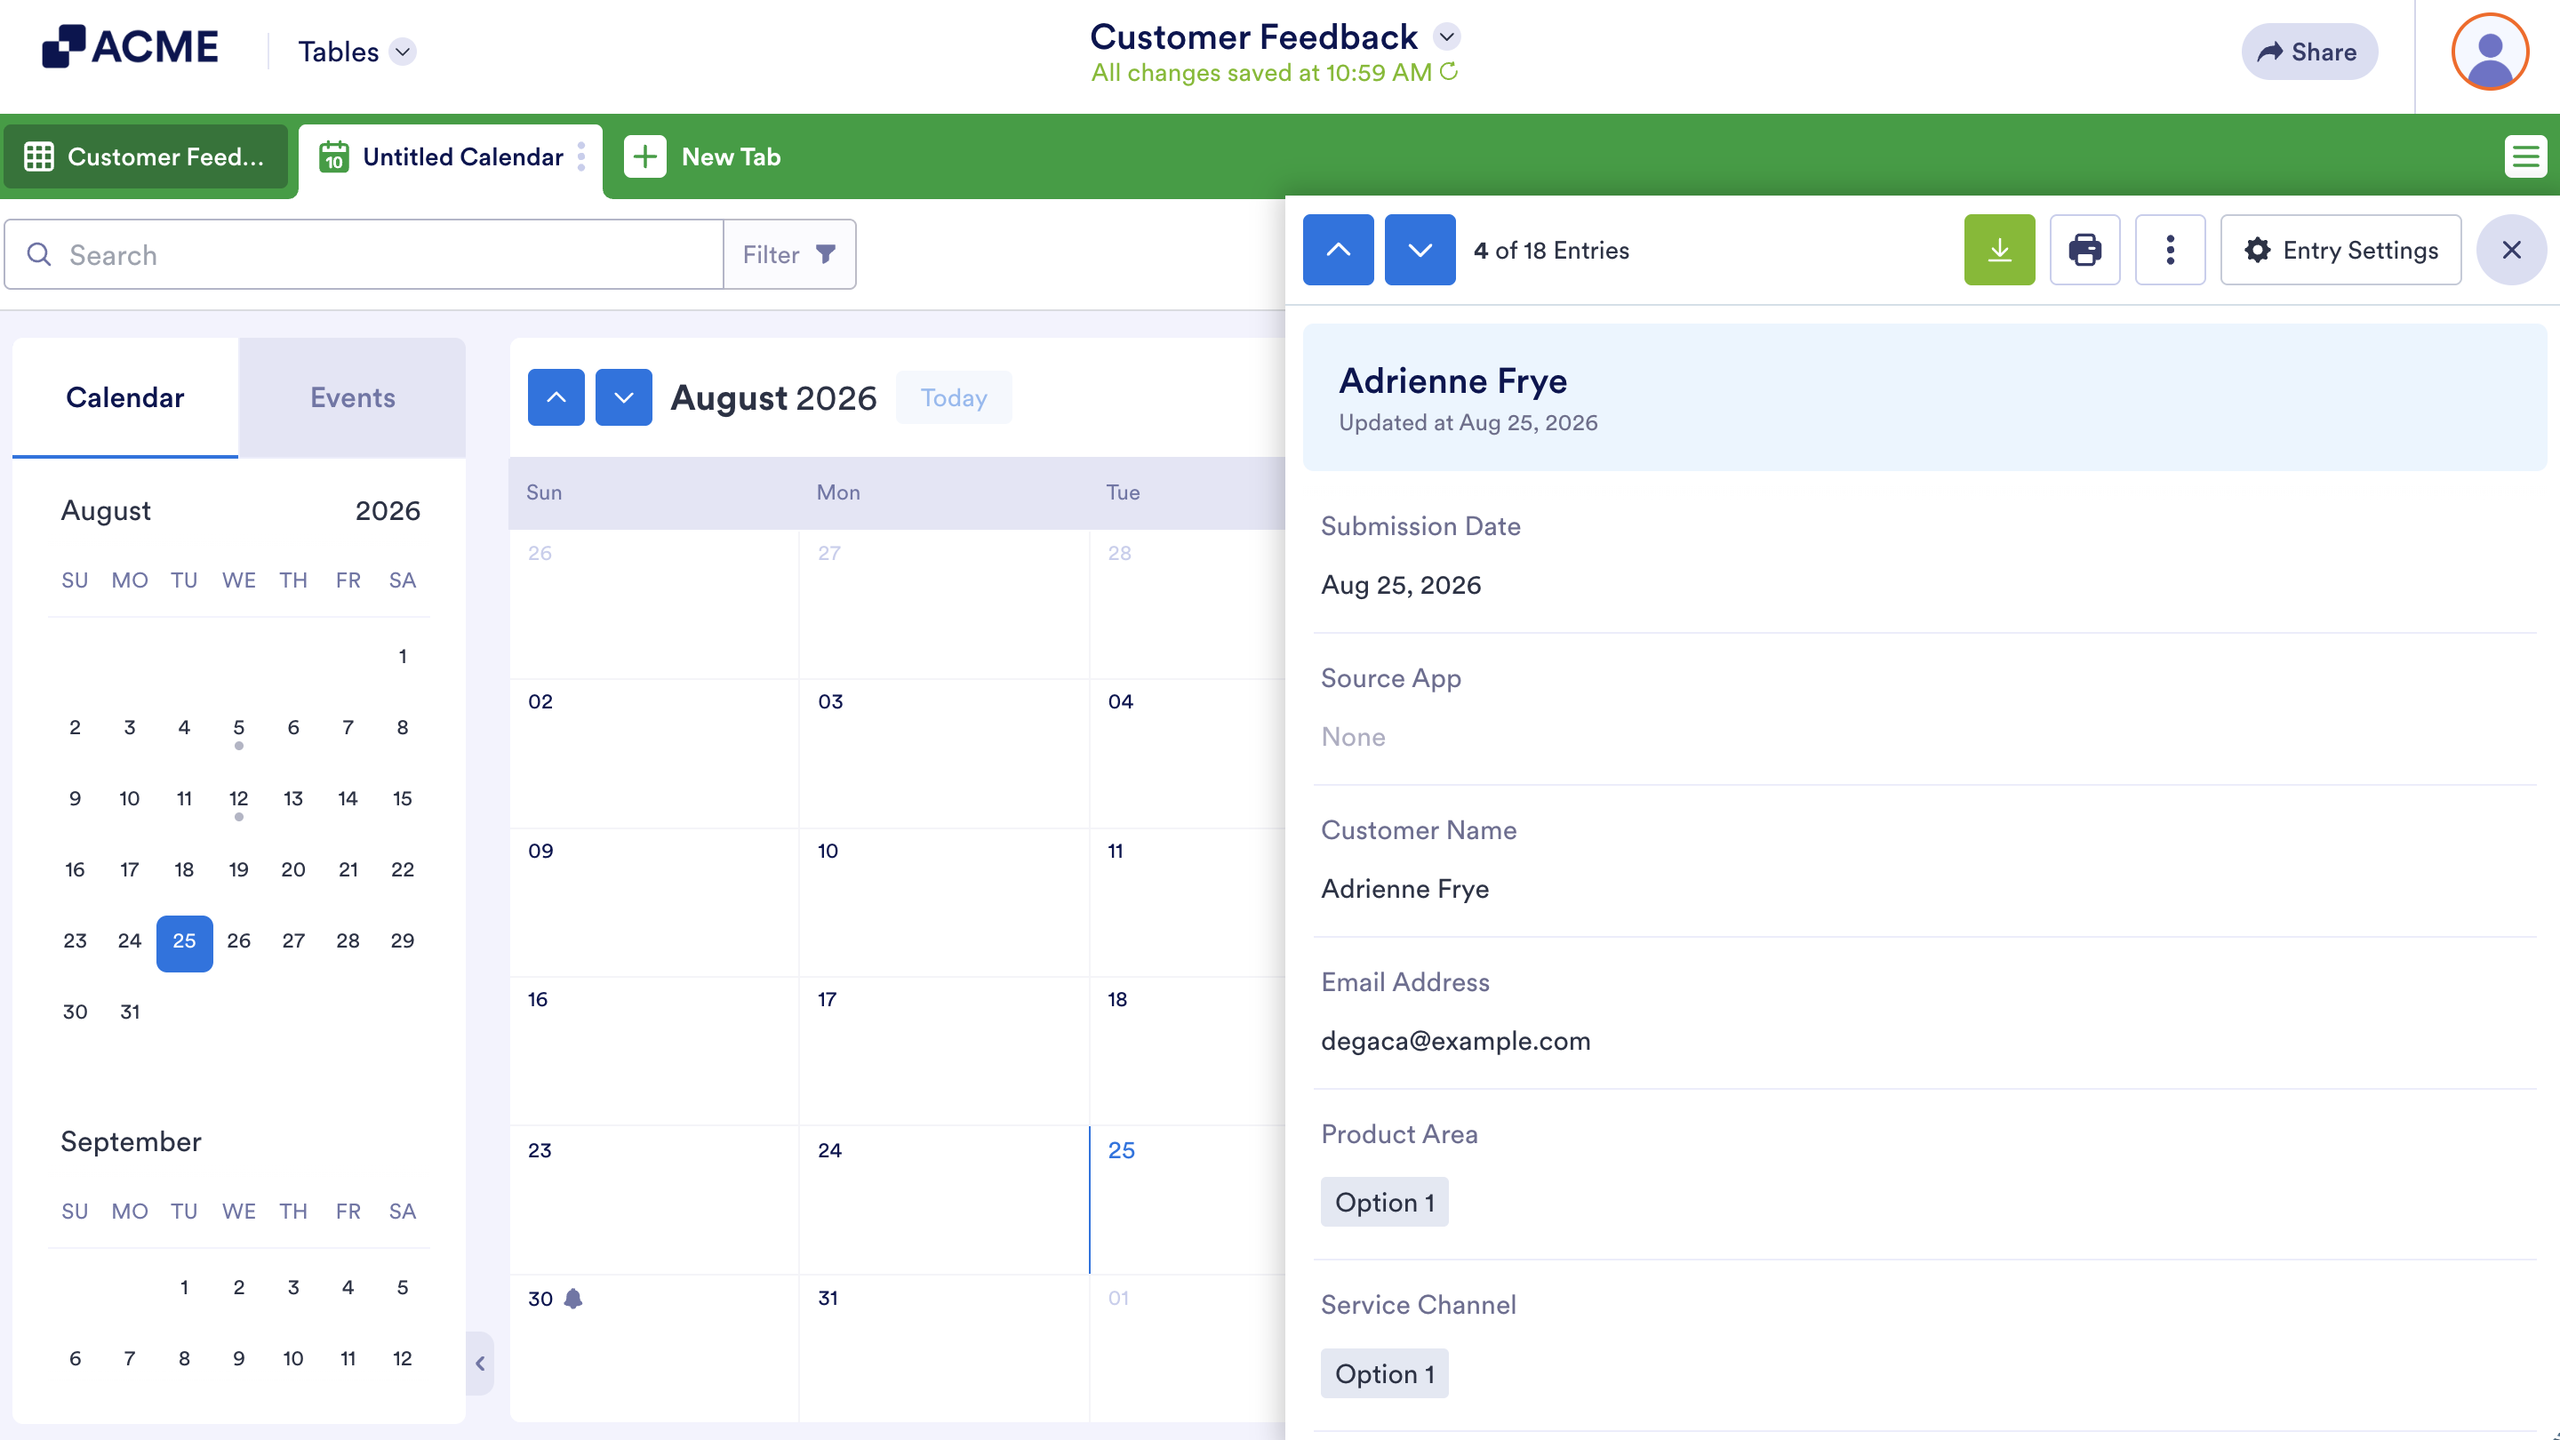
Clicking on the name of the submitter will open a quick view of the appointment. The display will show the title and date, formatted as specified in the settings. Click on the small blue arrow icon to open the full entry.
The Calendar tab allows you to quickly navigate to each month of the year and view appointments for that month by scrolling.
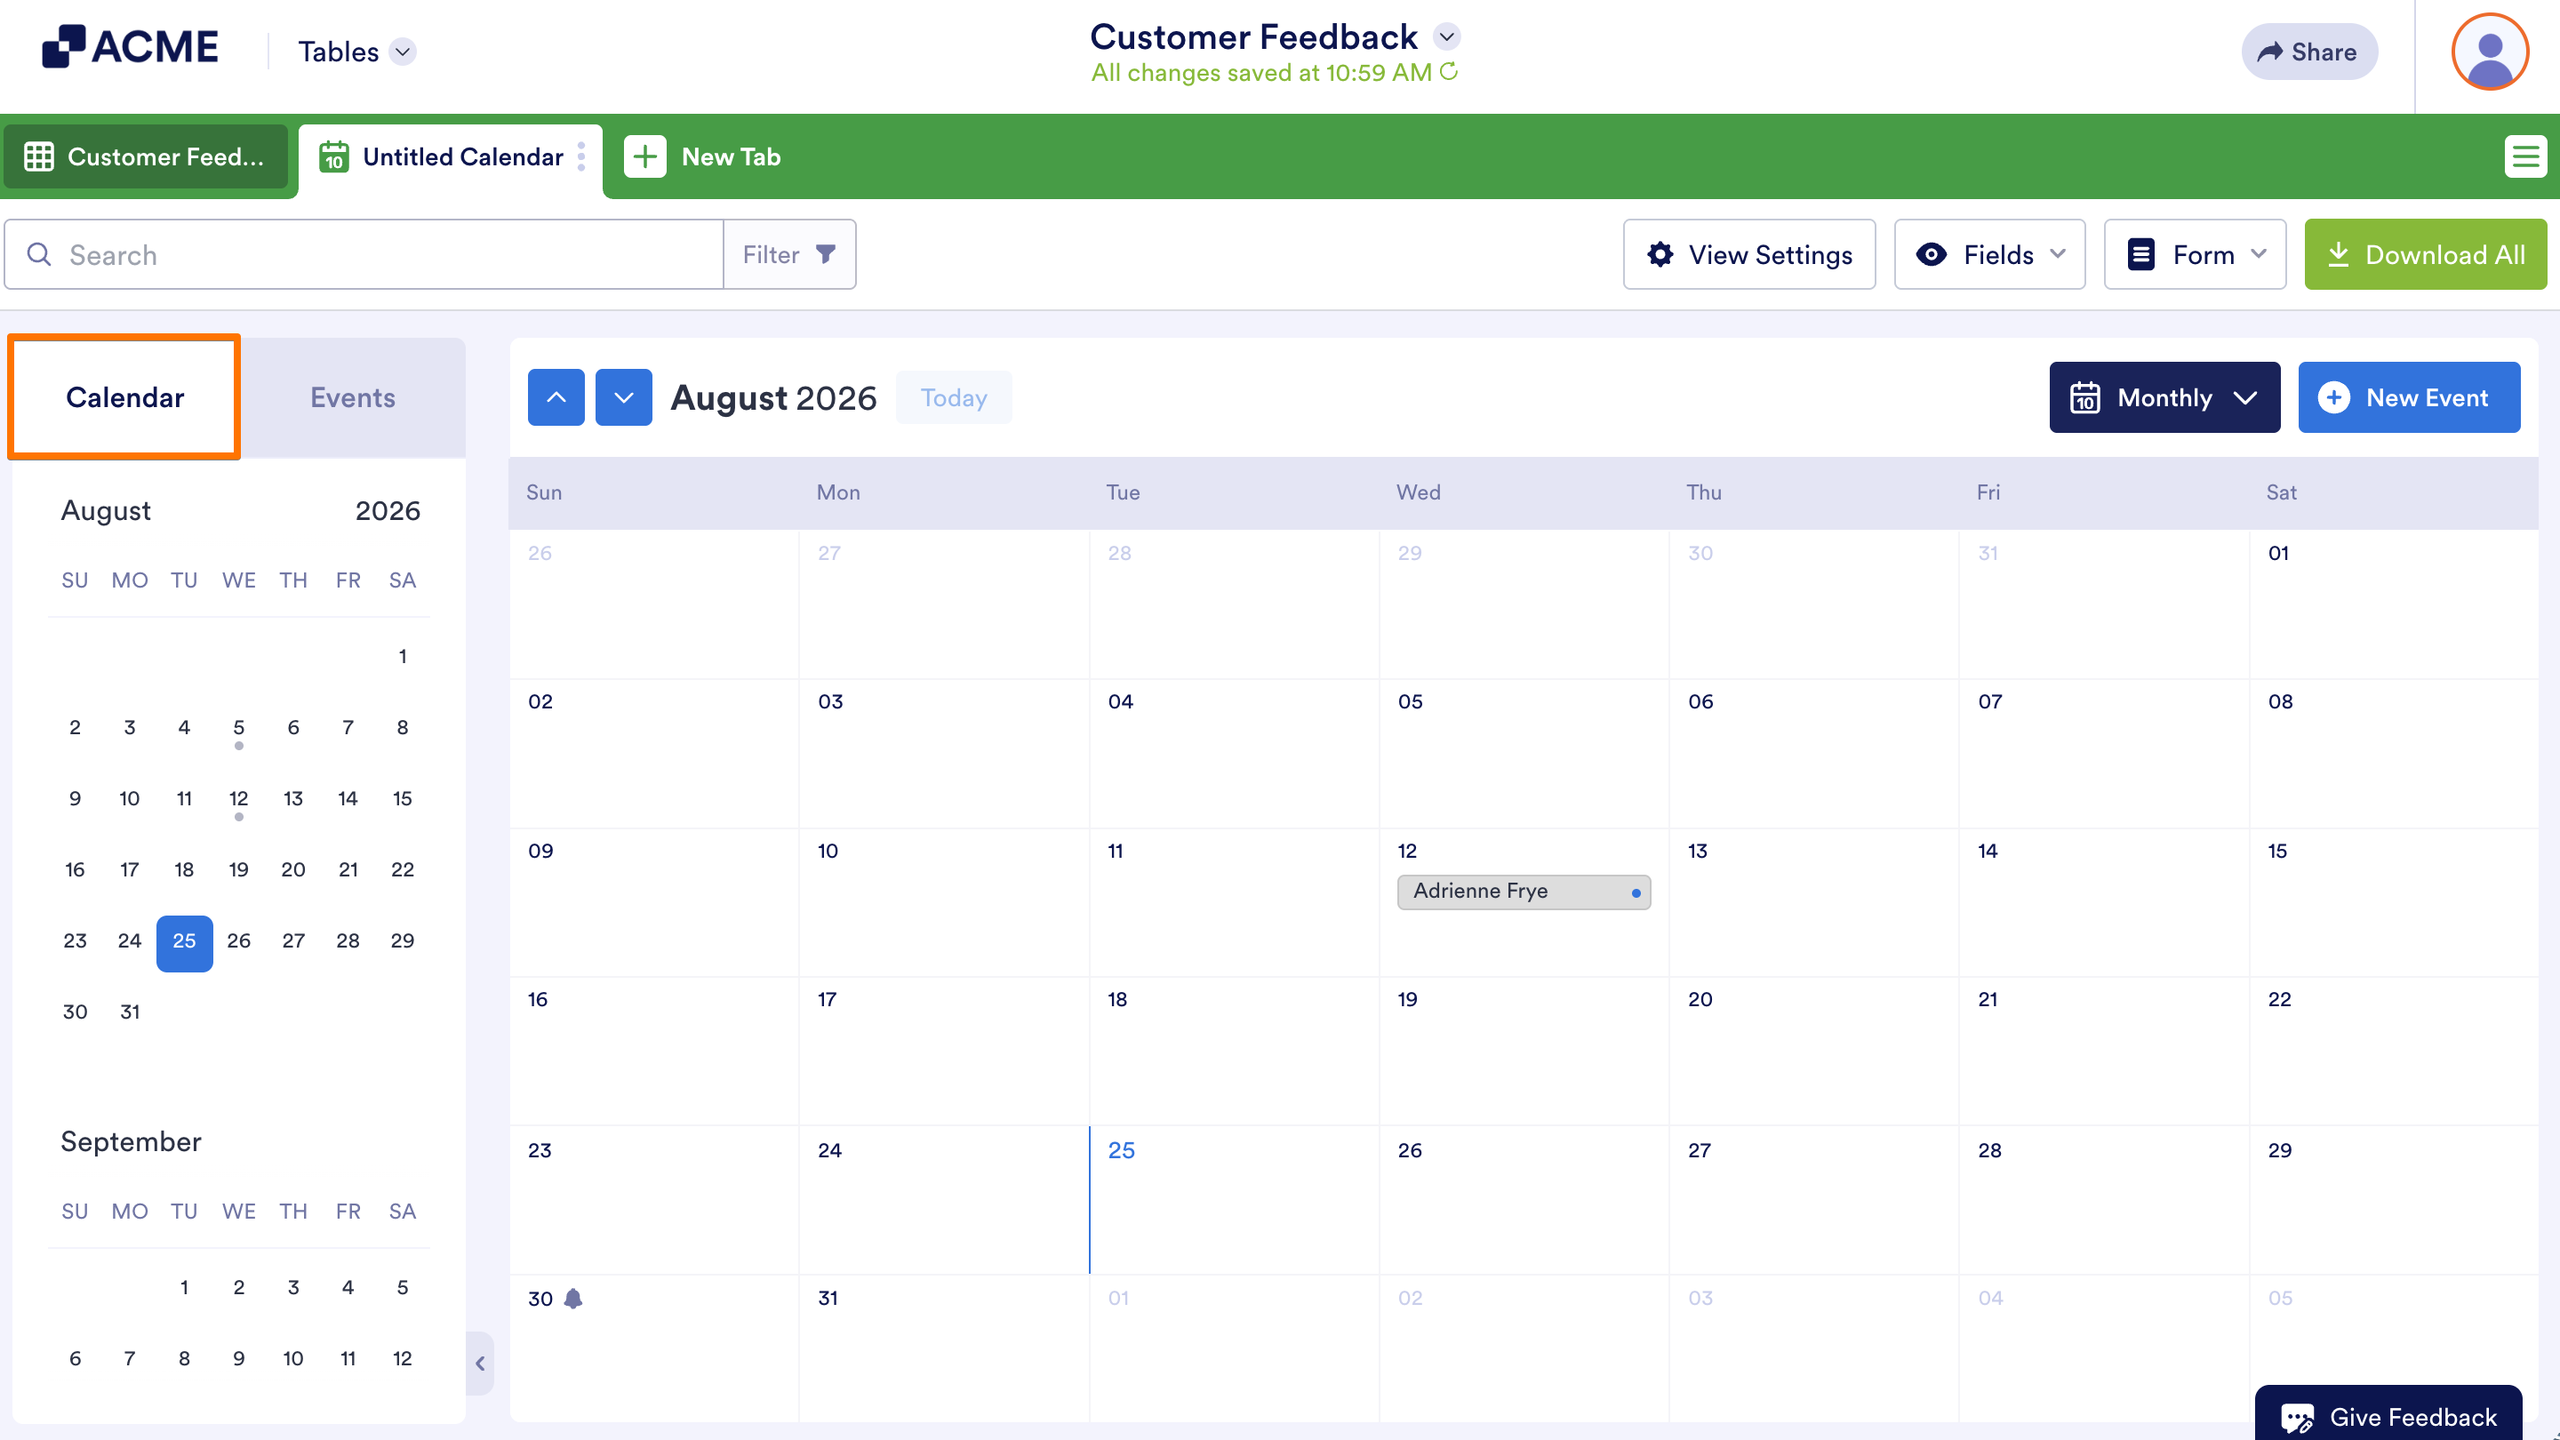
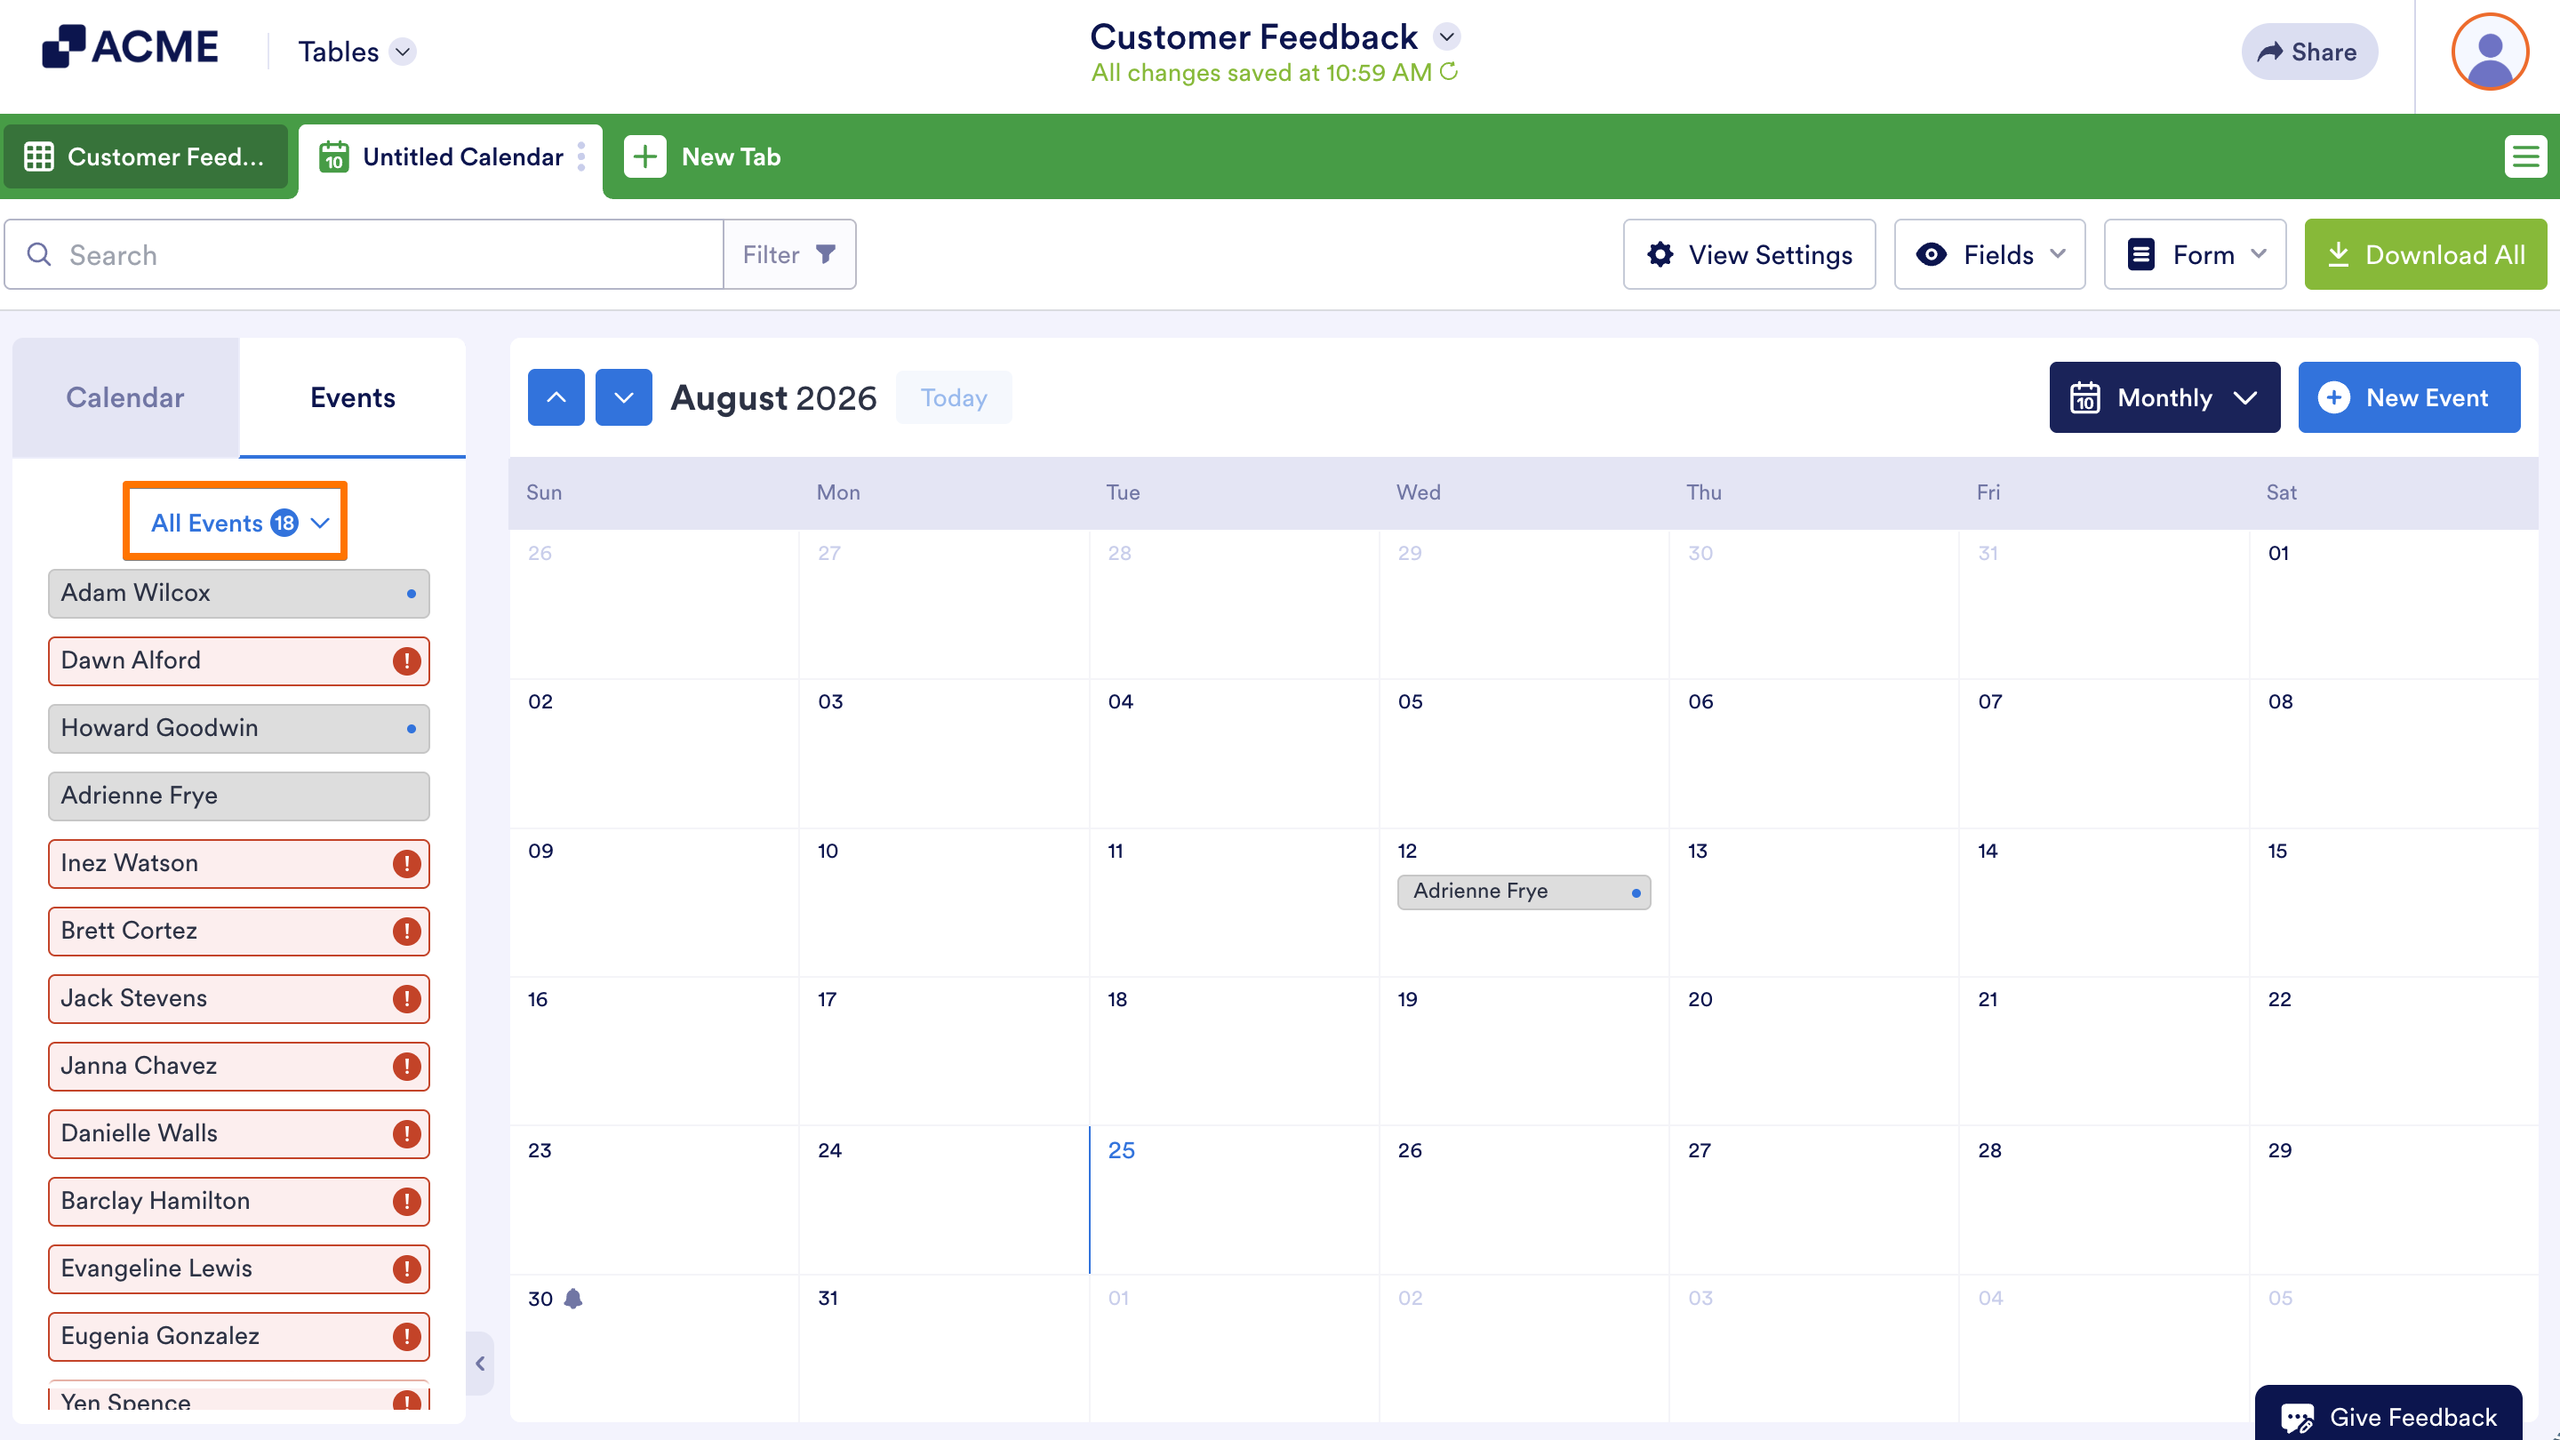
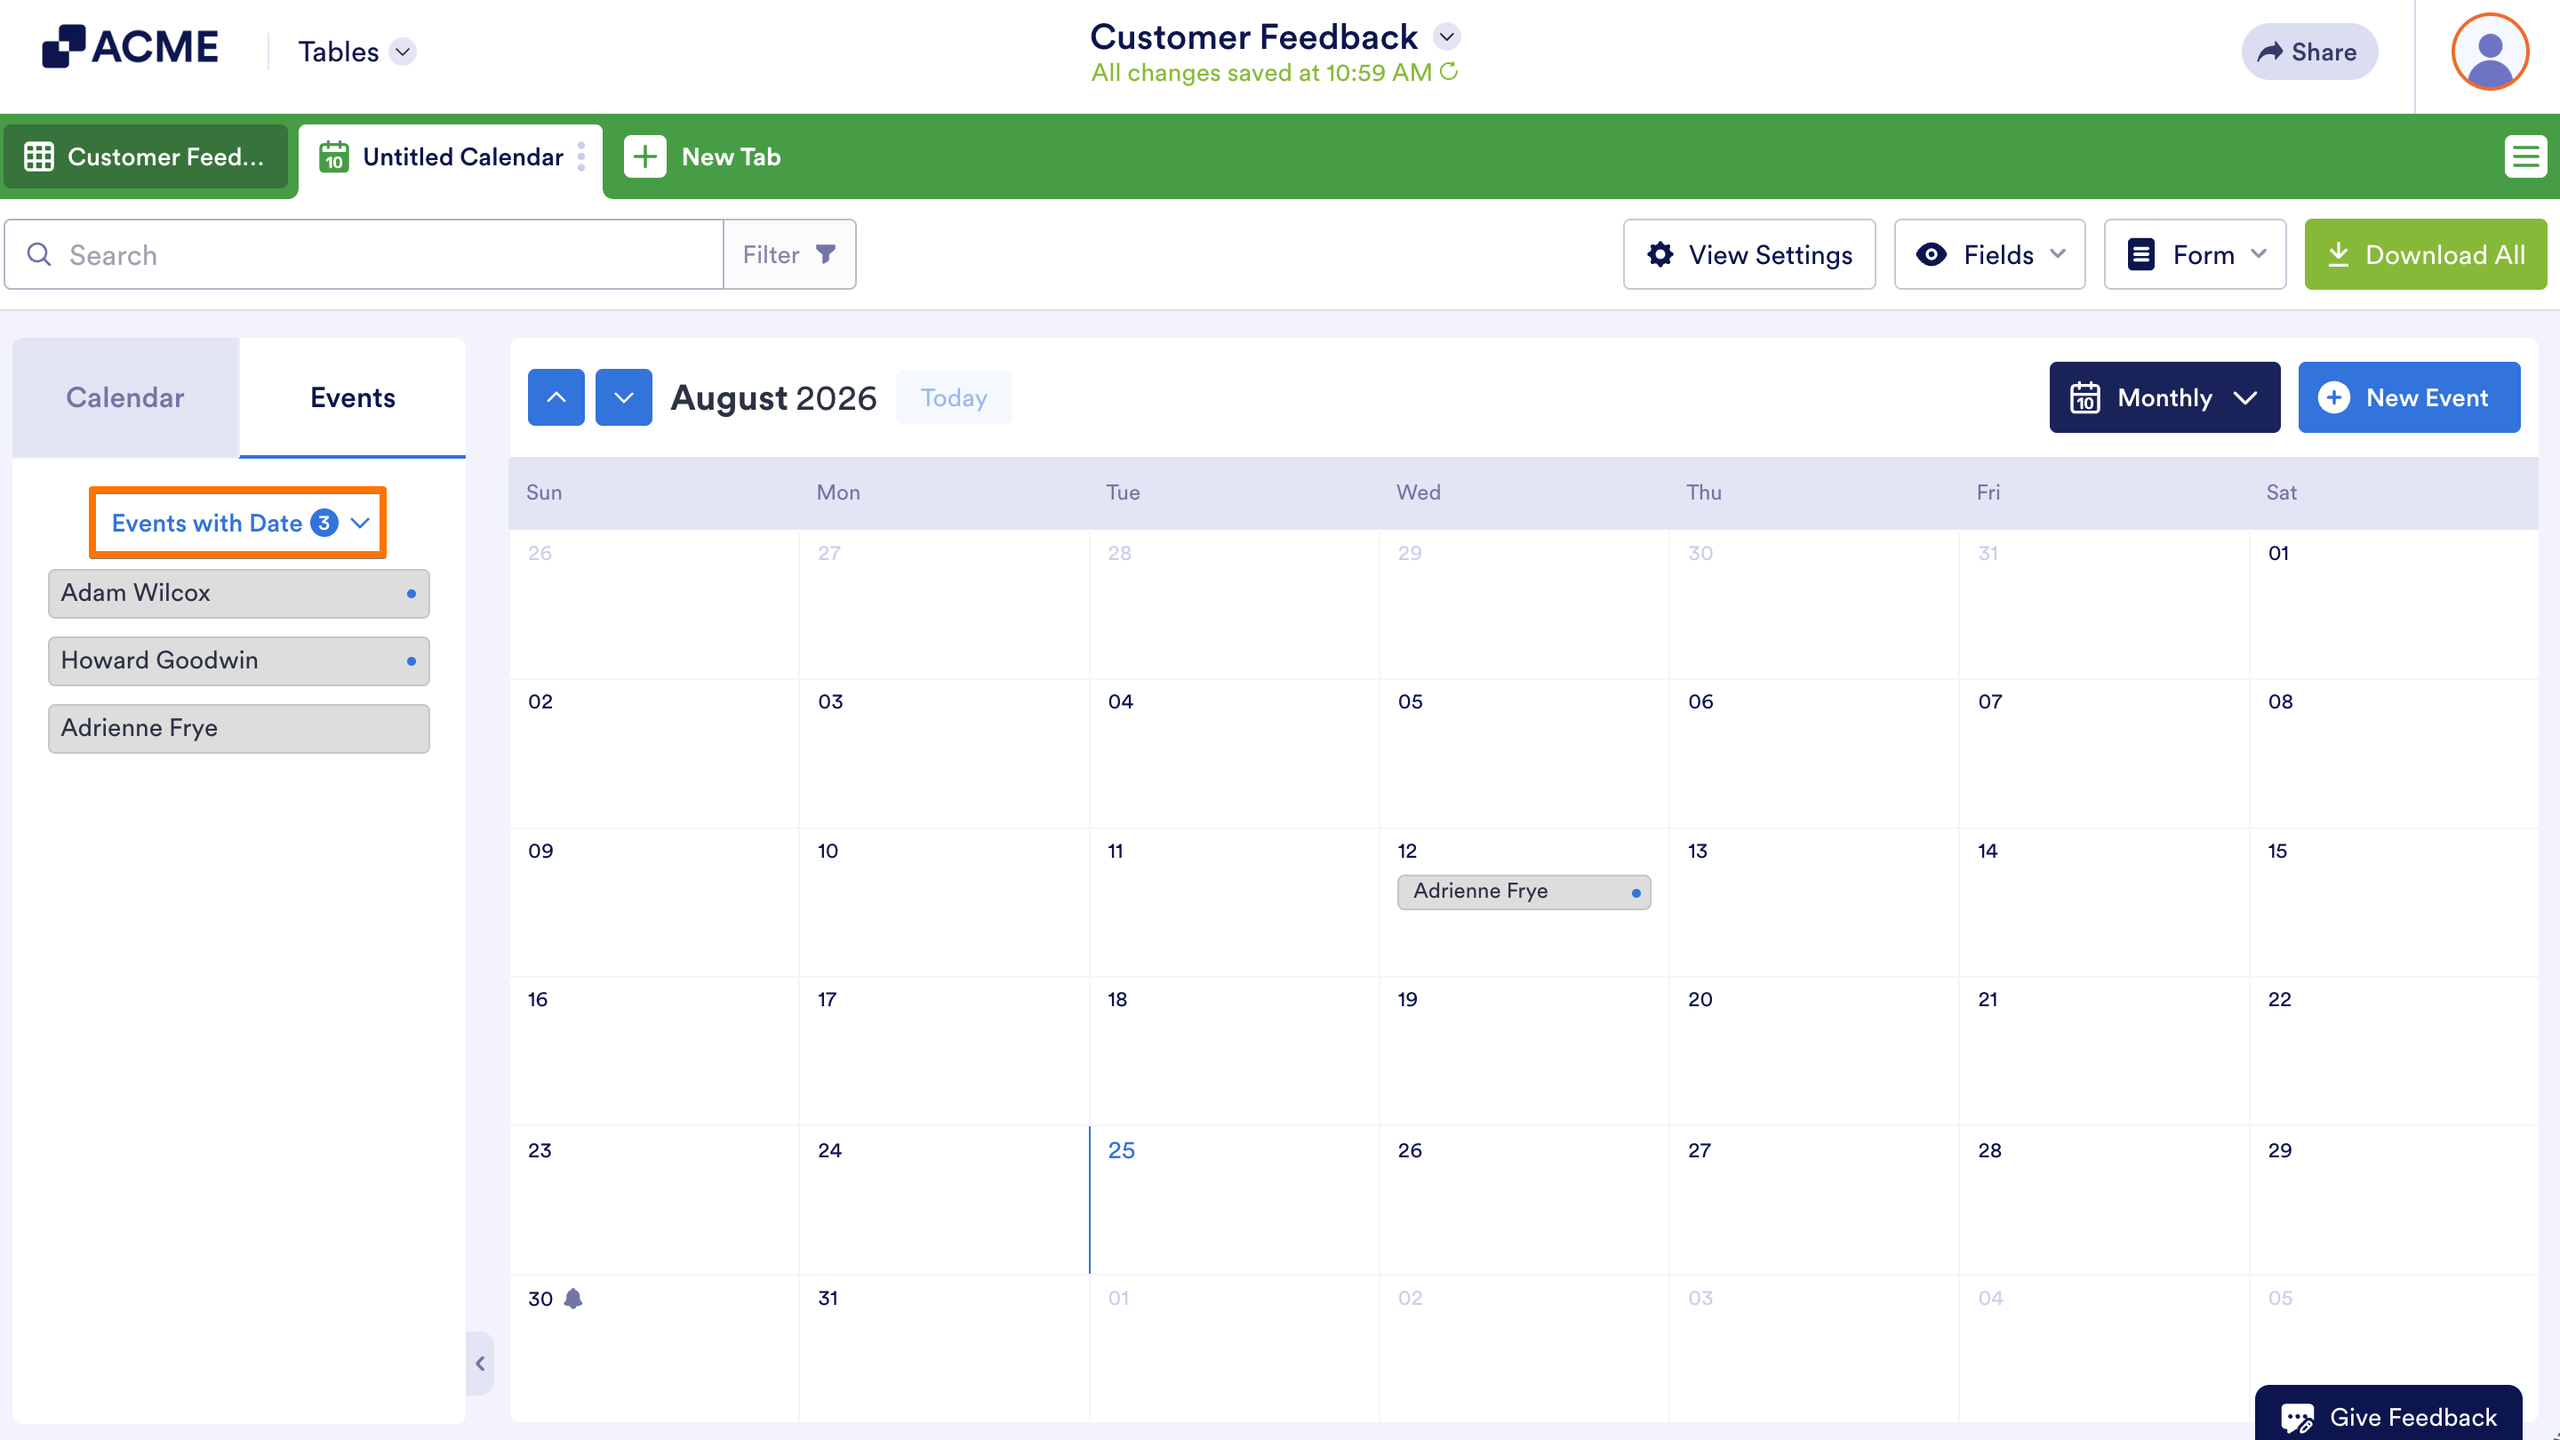
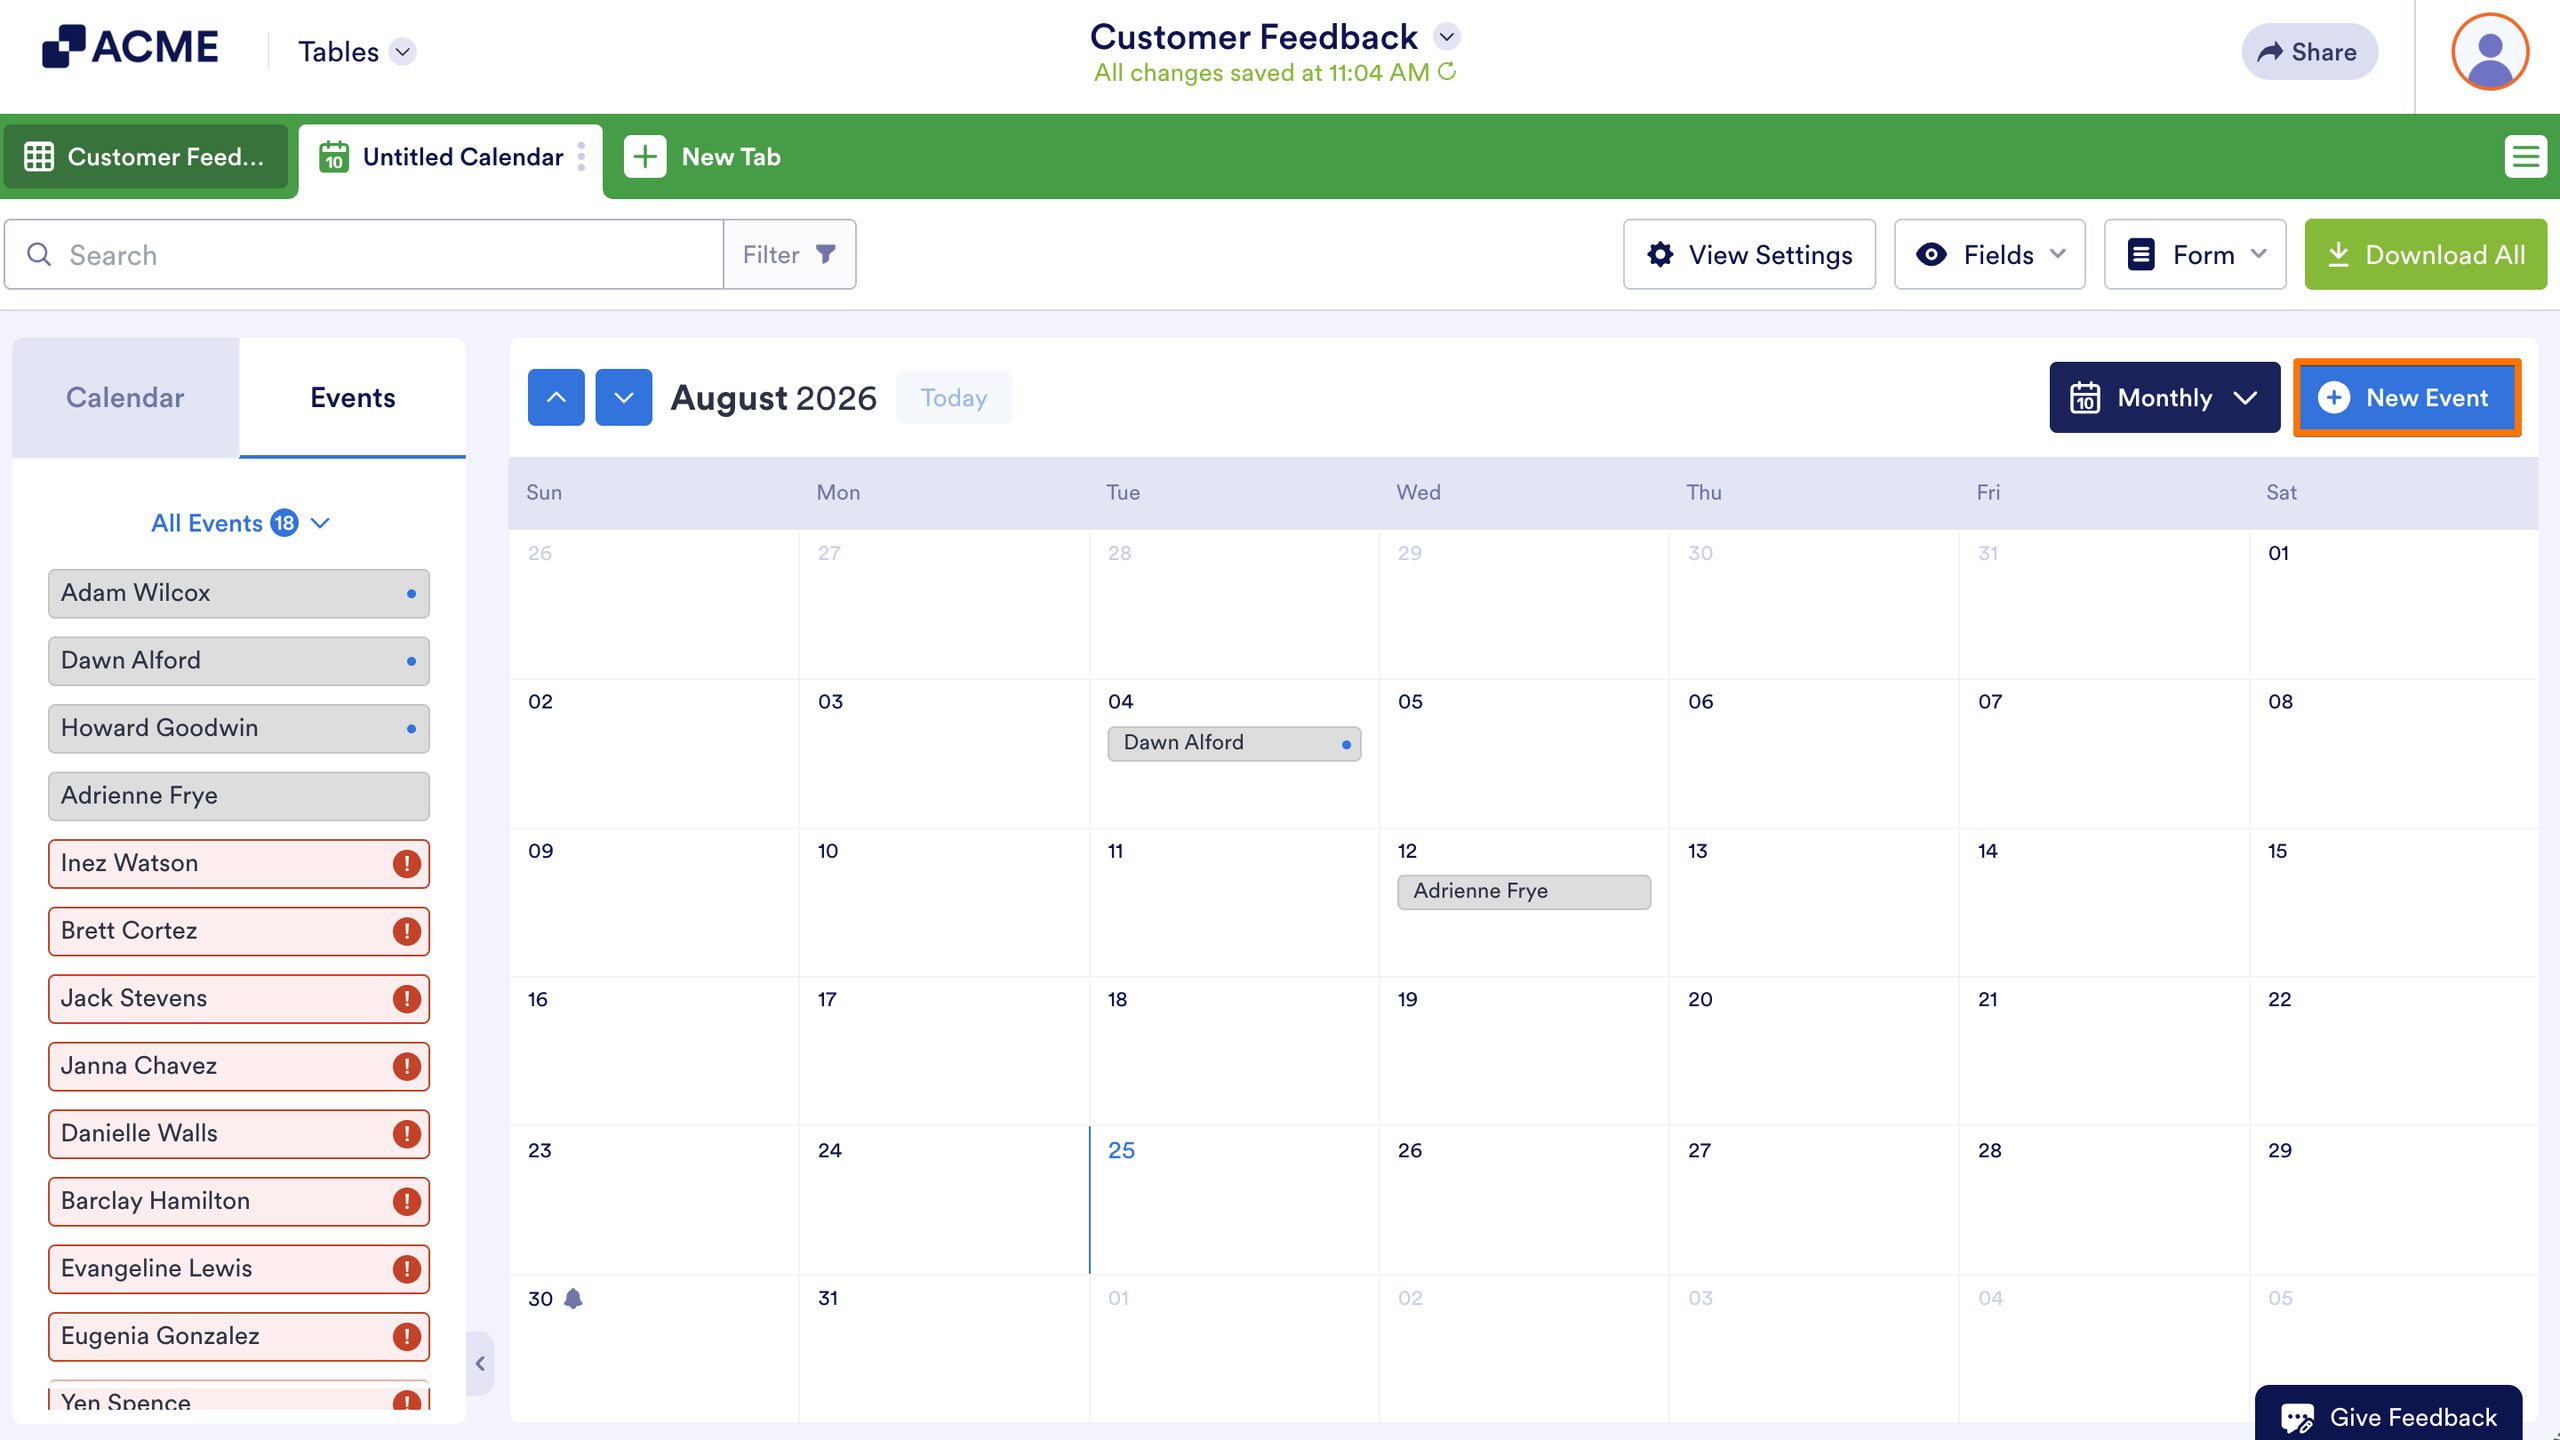
In the Events tab, you can see a list of appointments for the active month in the Calendar view. You can also filter out entries according to whether or not they include an appointment date: All Events, Events with Date, and Events without Date.
All Events displays every event, regardless of whether the submission includes a date.
Events with Date display entries that have appointment dates.
Events without Date will show submissions that don’t include a date answer selection in the appointment or date picker field. This may happen if the field is optional.
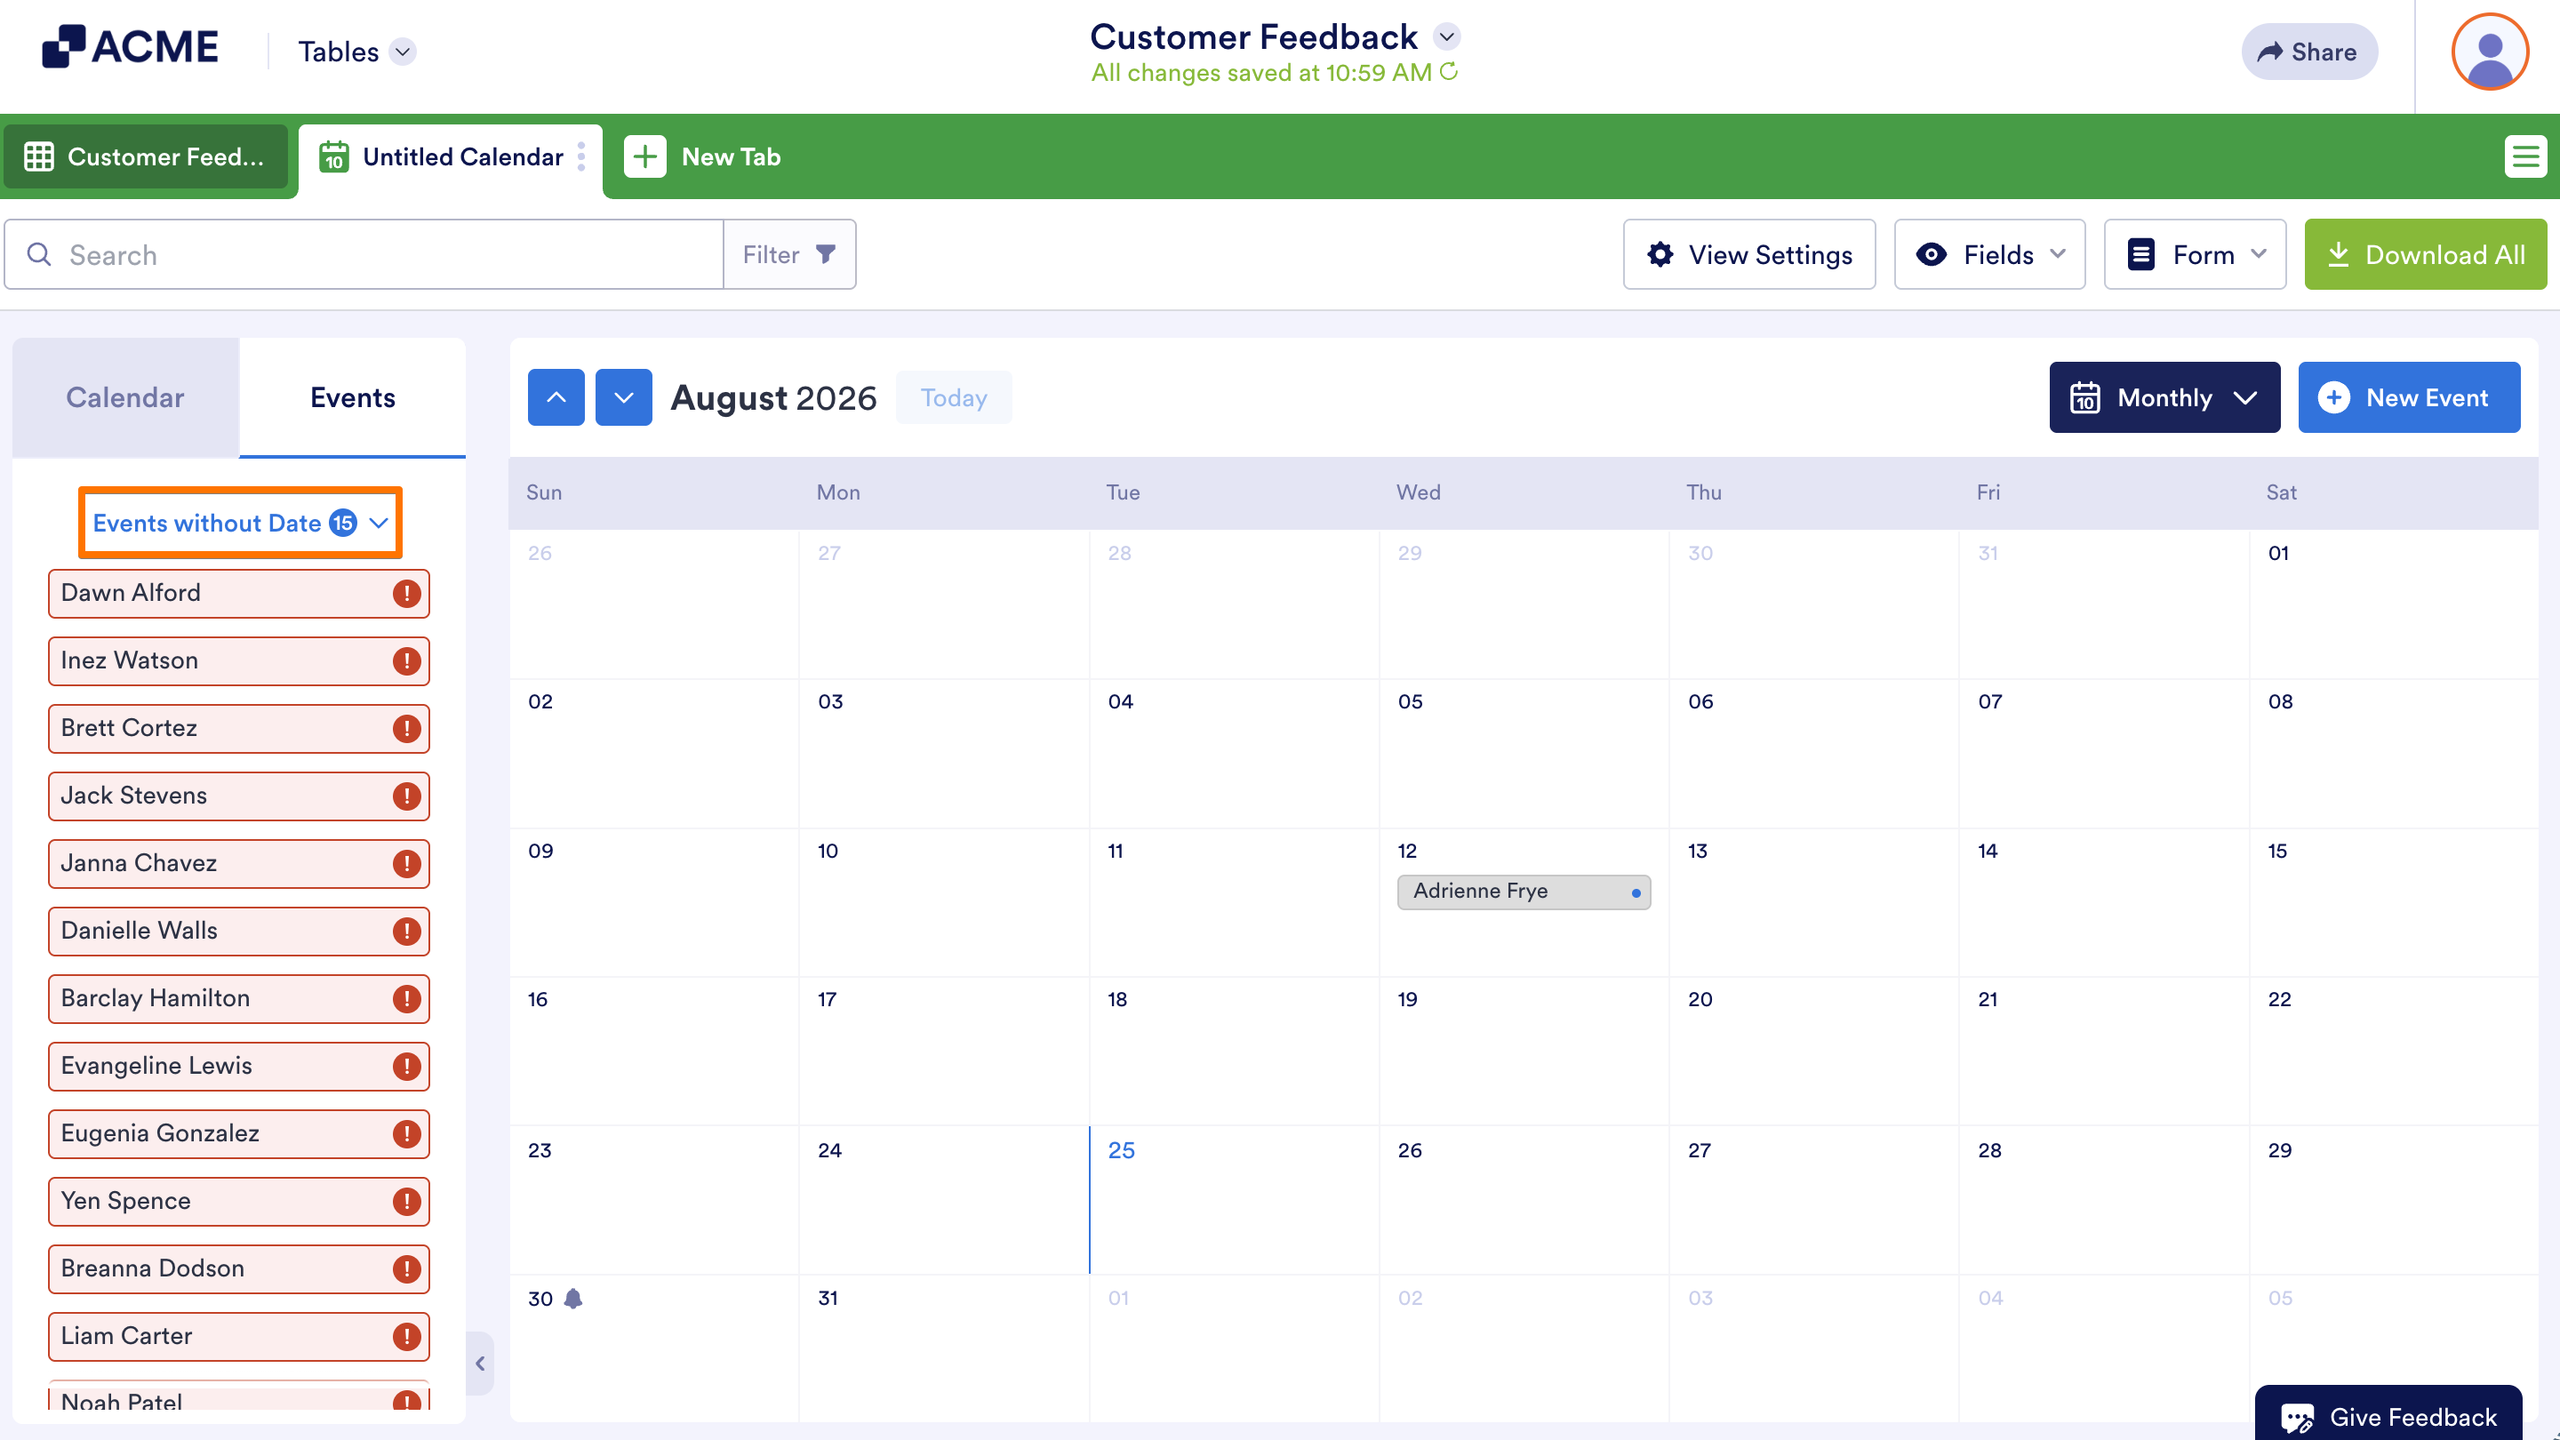
If the submitter contacts you to set their appointment date, you can drag and drop their entry to the specific date block in the calendar instead of editing their submission.
Clicking the name of the submitter under the Events tab will also open the full view of the submission. You can dynamically add appointments in the calendar without viewing and submitting your form. Just select and double-click on the date where you want to add the appointment.
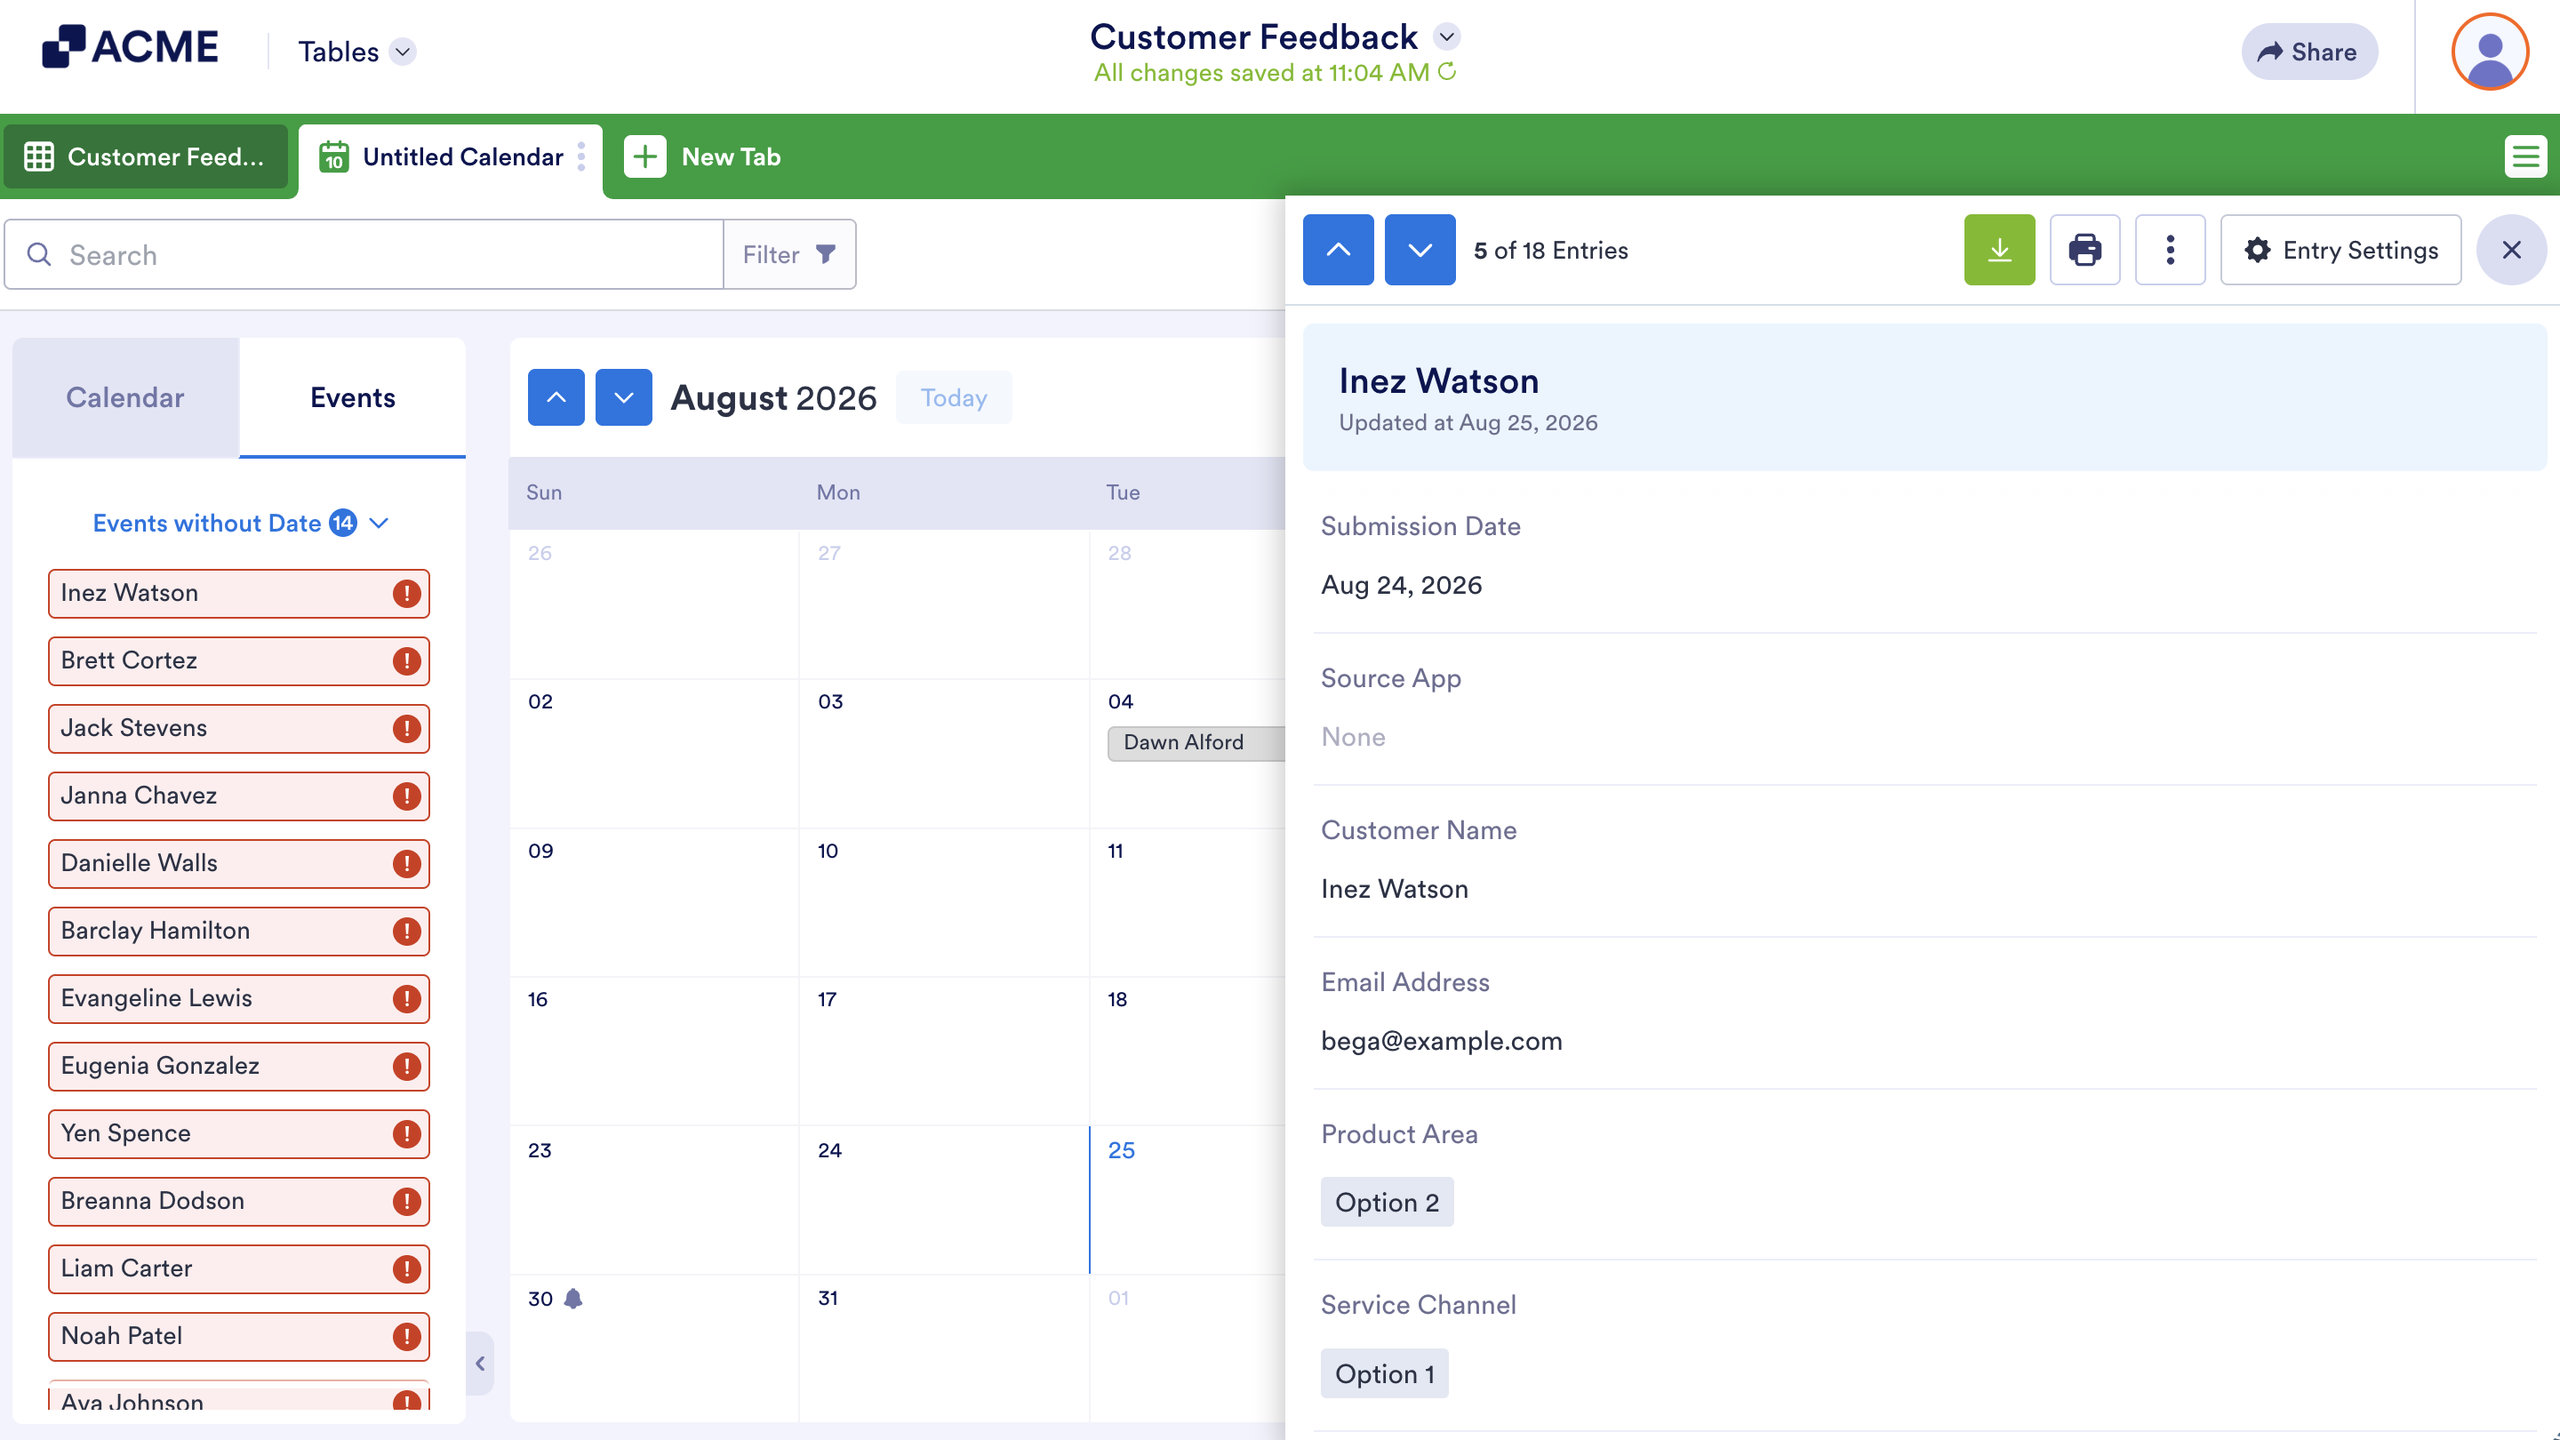
If you want to add the event on the current day, click on the New Event button.
Add the details of the appointment by double-clicking the fields. Tap the Enter key on your keyboard to save. Close the window by clicking the X button. This will also save the entry.
Drag & Drop and Expand Action on the Calendar
Yes, it’s possible to move the entries of the calendar by drag and drop. The appointment dates can also be expanded. However, there are conditions to that.
If you have chosen the Appointment field as the Start Date or have chosen the Event Duration as the End Date, the entries can be moved but cannot be expanded.
If you have chosen the combination of Date Picker with or without the time field in the Start and End Date Time or Dates and Times, the entries can be moved and can be expanded.
Lastly, you can’t move or expand events if you have selected the Submission Date or the Last Update Date as the Start Date.
That sums up everything for the Calendar view. If you have any questions or suggestions, please contact us through one of the support channels below.

Send Comment: