Jotform’s Birth Date Picker widget makes it easy and reliable for users to select their birthdate using a clean, simple dropdown. You can customize the date format to match your region, set minimum or maximum age limits, and collect neat, structured birthdate data for things like registrations, applications, or age verification. It’s a great choice when you want accurate birthdate info without the hassle of manual entry errors.
Here are a few ways to use it:
- Collect Birthdays for Registrations — Perfect for sign-ups where you need a birth date—think event registrations, class enrollments, or account creations.
- Use it for Fun Surveys or Quizzes — This widget makes it easy for users to share their birth date accurately.
- Verify Age Requirements — Hosting an event or offering a service with an age limit? The widget helps you easily confirm if someone meets the age requirement.
- Keep Your Forms Organized — Because it uses a calendar-style picker, you get dates in a consistent format—no more guessing if someone meant “03/04/24” as March 4 or April 3.
Adding and Setting Up the Birth Date Picker Widget
Adding the Birth Date Picker widget to your form is an easy way to streamline the process and make things smoother for both you and your users. Follow these quick steps to get started:
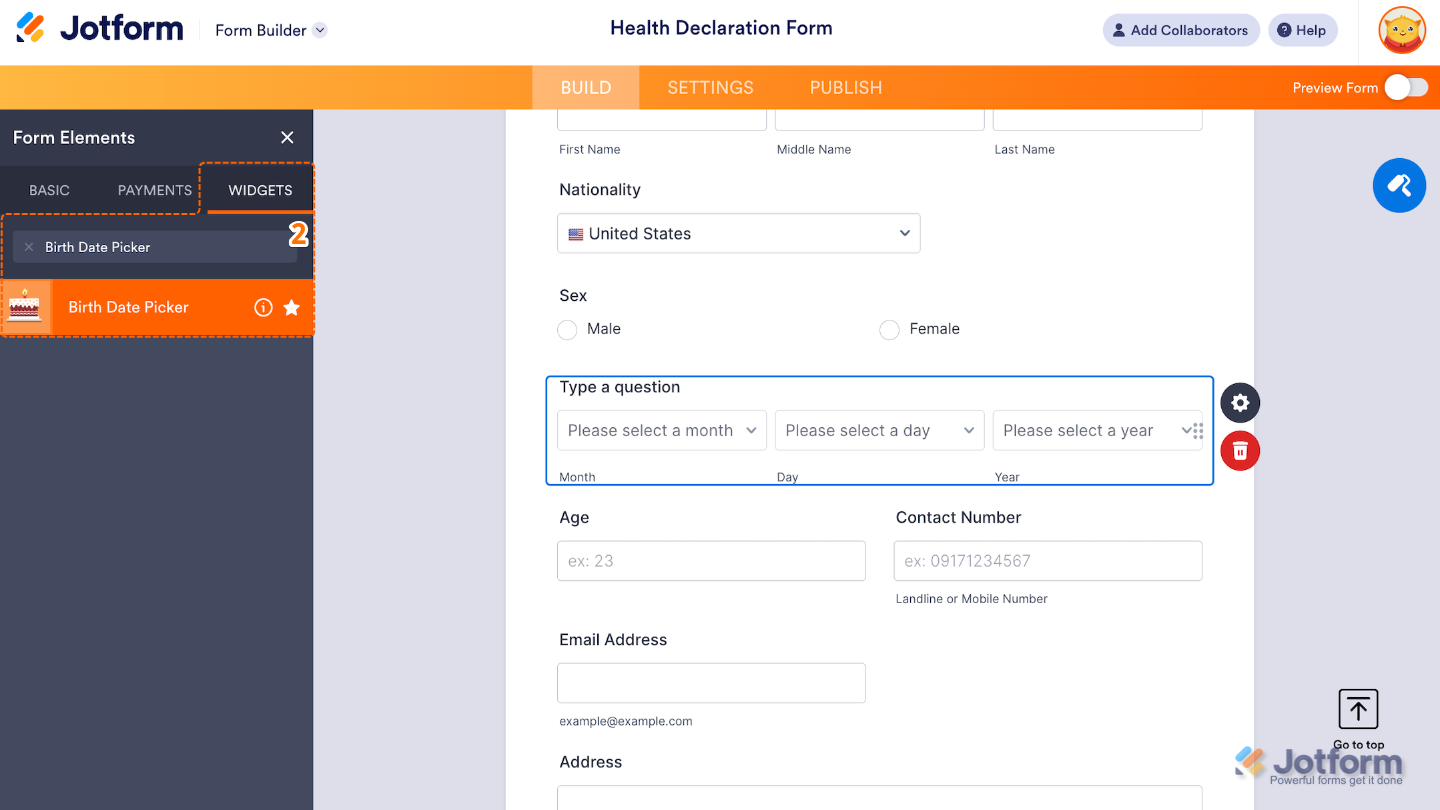
- In Form Builder, click on Add Element on the left side of the page.

- Now, in the Form Elements menu, under the Widgets tab, search for Birth Date Picker and then click on it. Or, just drag and drop it to where you want it to be on your form.
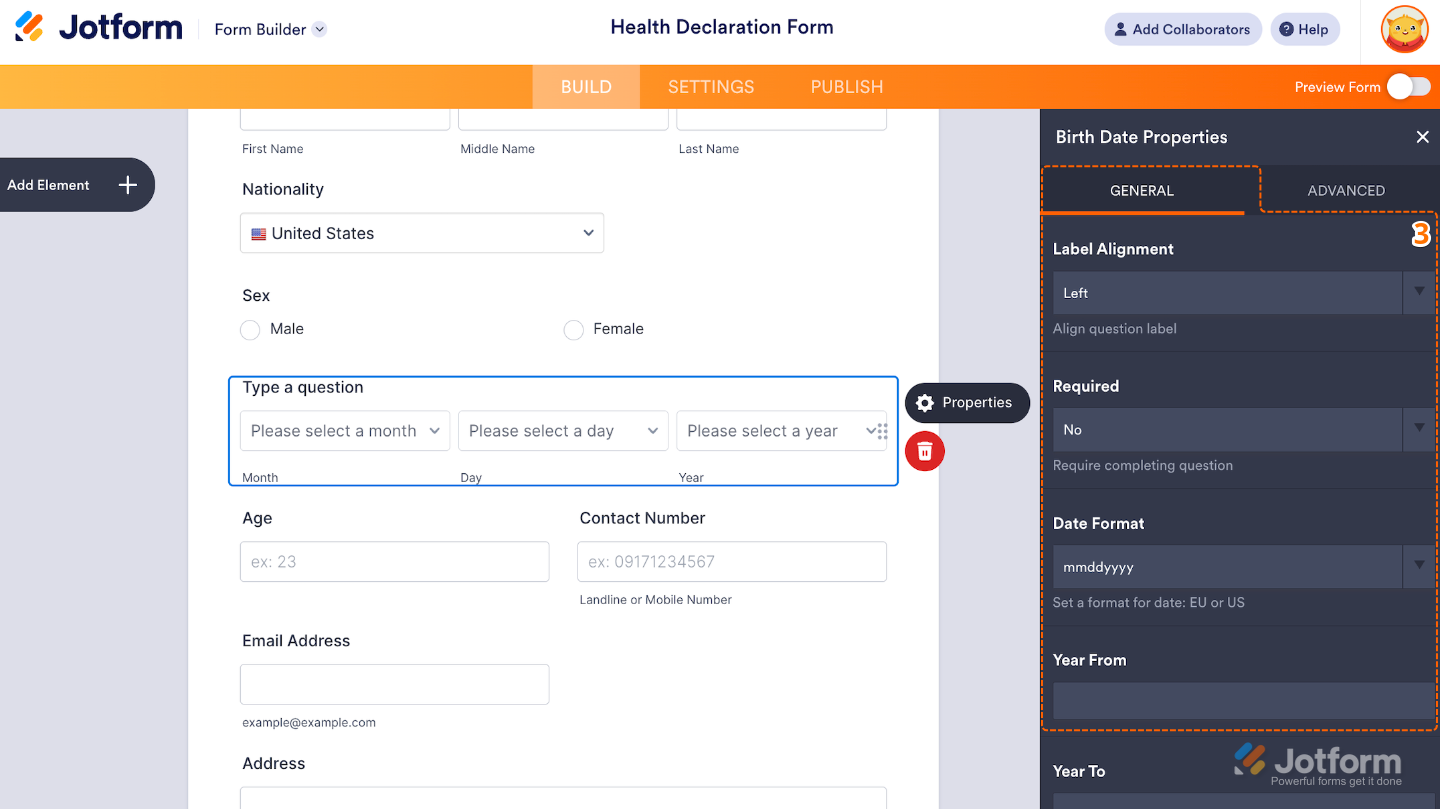
- Next, in the Birth Date Properties window that opens on the right side of the page, under the General tab, set up the following options:
- Label Alignment — Adjust this if you want to control how the field label is positioned, you can align it to the top, left, or right of the field.
- Required — When enabled, this option forces users to select or type a valid response before submitting the form.
- Date Format — Choose a format that best suits your audience or region (mmddyyyy, ddmmyyyy, yyyymmdd)
- Year From — Use this to control the age range (Earliest Year) that users can select in the year dropdown.
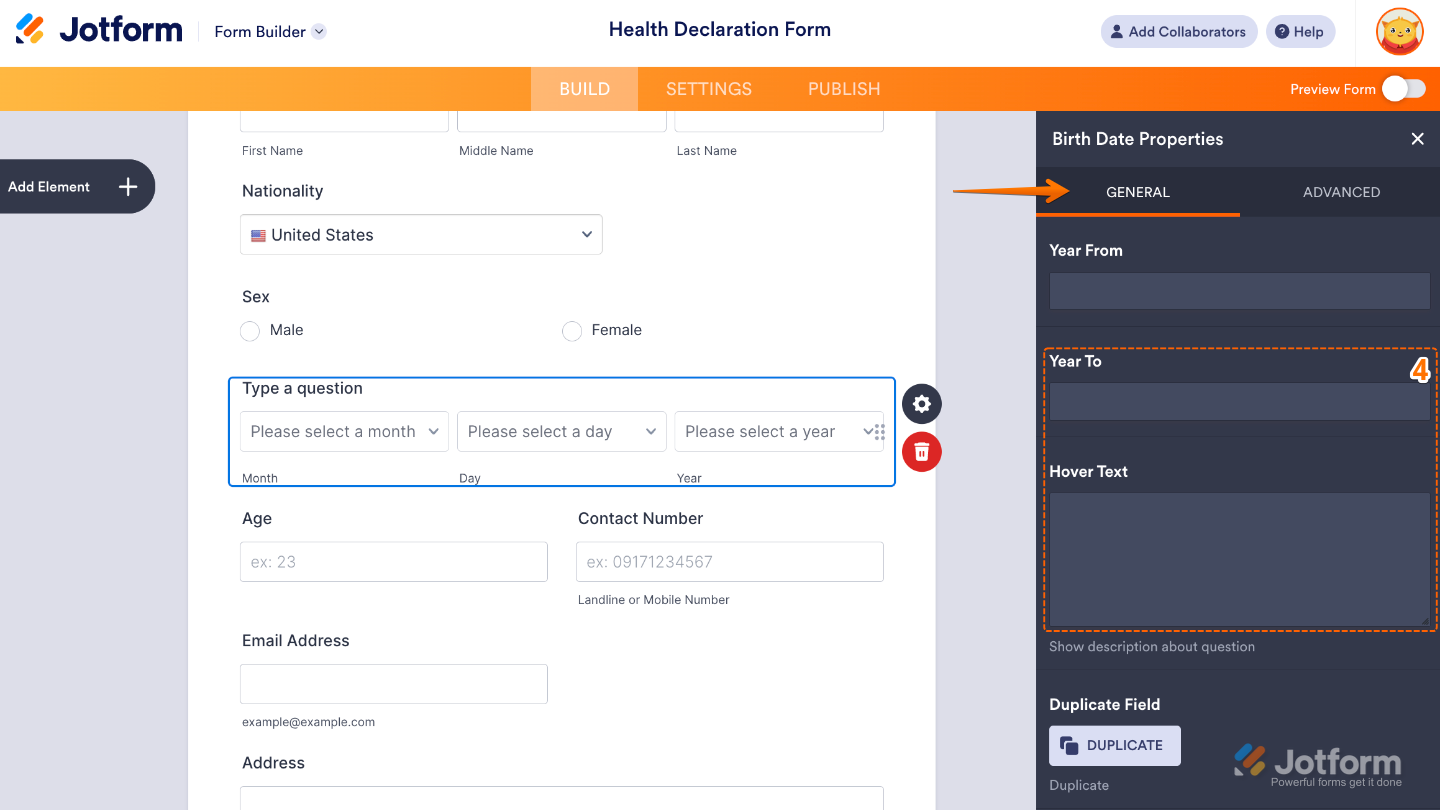
- Then, scroll down to the bottom and continue to set up these options:
- Year To — Set this up to control the age range (Latest Year) that users can select in the year dropdown.
- Hover Text — Shows a tooltip when users hover over the field, offering more info without cluttering the form.
That’s it. You’ve successfully added and set up the Birth Date Picker widget to your form. Now, you can collect user birthdates using a simple, dropdown-style input. It’s great for age verification, form personalization, or eligibility filtering based on birthdate. Wondering how it looks in action? Check out this Demo Form.
Pro Tips
- Set an age range if your form is meant for a specific group—like 18+ for adult-only services or under 13 for youth events.
- Match the date format to your users’ region to avoid confusion (for example, DD/MM/YYYY for international audiences).
- If birthdate information is important for your process or records, be sure to mark the field as required.

Send Comment:
1 Comment:
February 19, 2026
Date Format doesn't allow me to add separator, I would like separator as shown in Pro Tips: https://www.jotform.com/help/how-to-add-and-set-up-the-birth-date-picker-widget-on-your-form/