With the Jotform Sign plugin in ChatGPT, you can create and update Sign Documents using simple, conversational prompts. Just describe what you need, and the plugin can create a ready-to-use Sign Document in your Jotform account or make changes to an existing one.
This is especially useful for preparing contracts, agreements, consent forms, and other documents that need signatures without starting from scratch. You can move between ChatGPT and Jotform Sign whenever you need to refine the document, add signers, or make other changes before sending it for signatures.
Setting Up the Jotform Sign Plugin in ChatGPT
Before you can create Sign Documents through ChatGPT, you’ll first need to install the Jotform Sign plugin and connect it to your Jotform account. Here’s how to set it up:
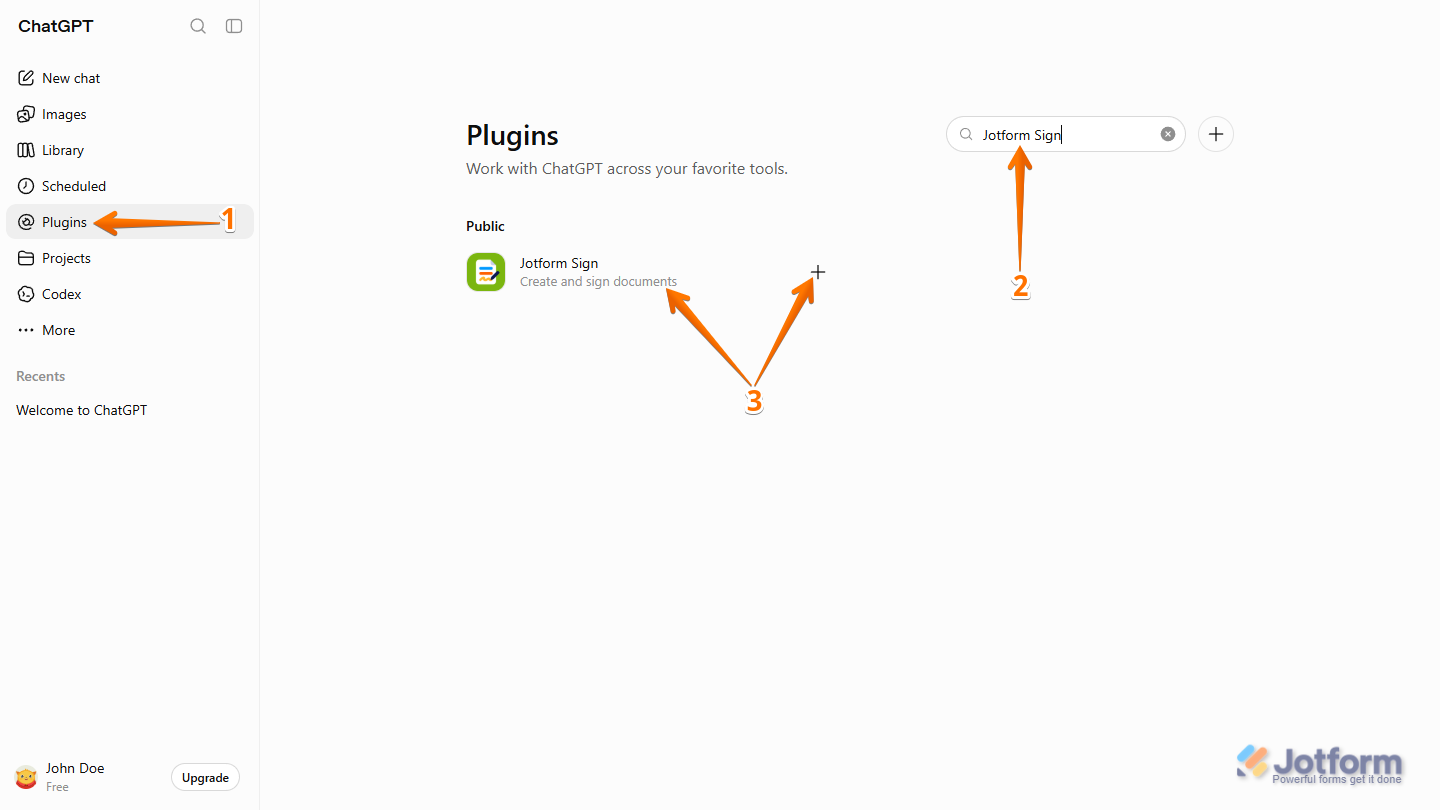
- Log in to your ChatGPT Account and, in the menu on the left side of the page, click on Plugins.
- Then, in the Search bar on the right side of the Plugins section, enter Jotform Sign.
- Next, in the search results, click on it to review the plugin details, or click on the Plus icon on its right to install it directly.
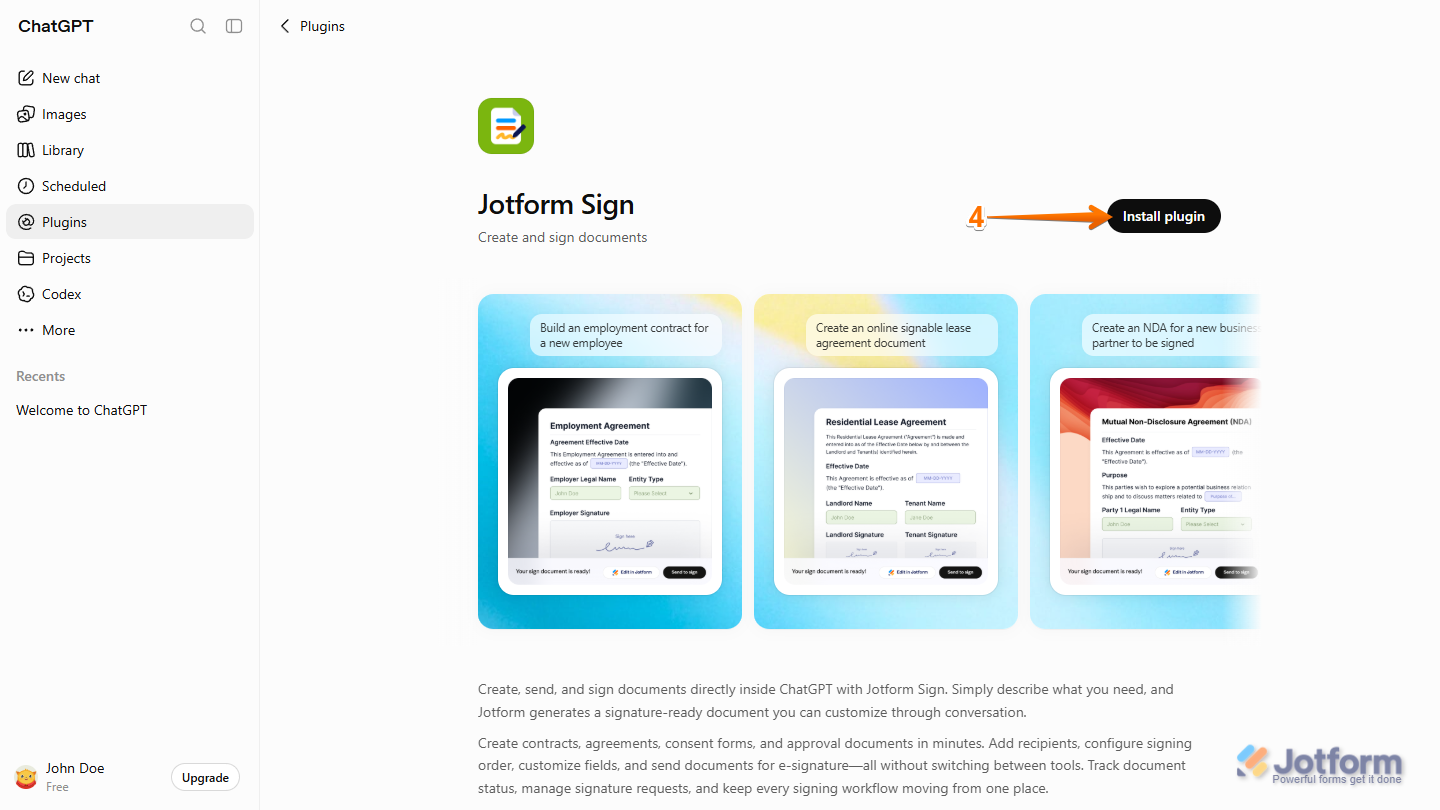
- At the top-right of the Jotform Sign plugin details, click Install Plugin.
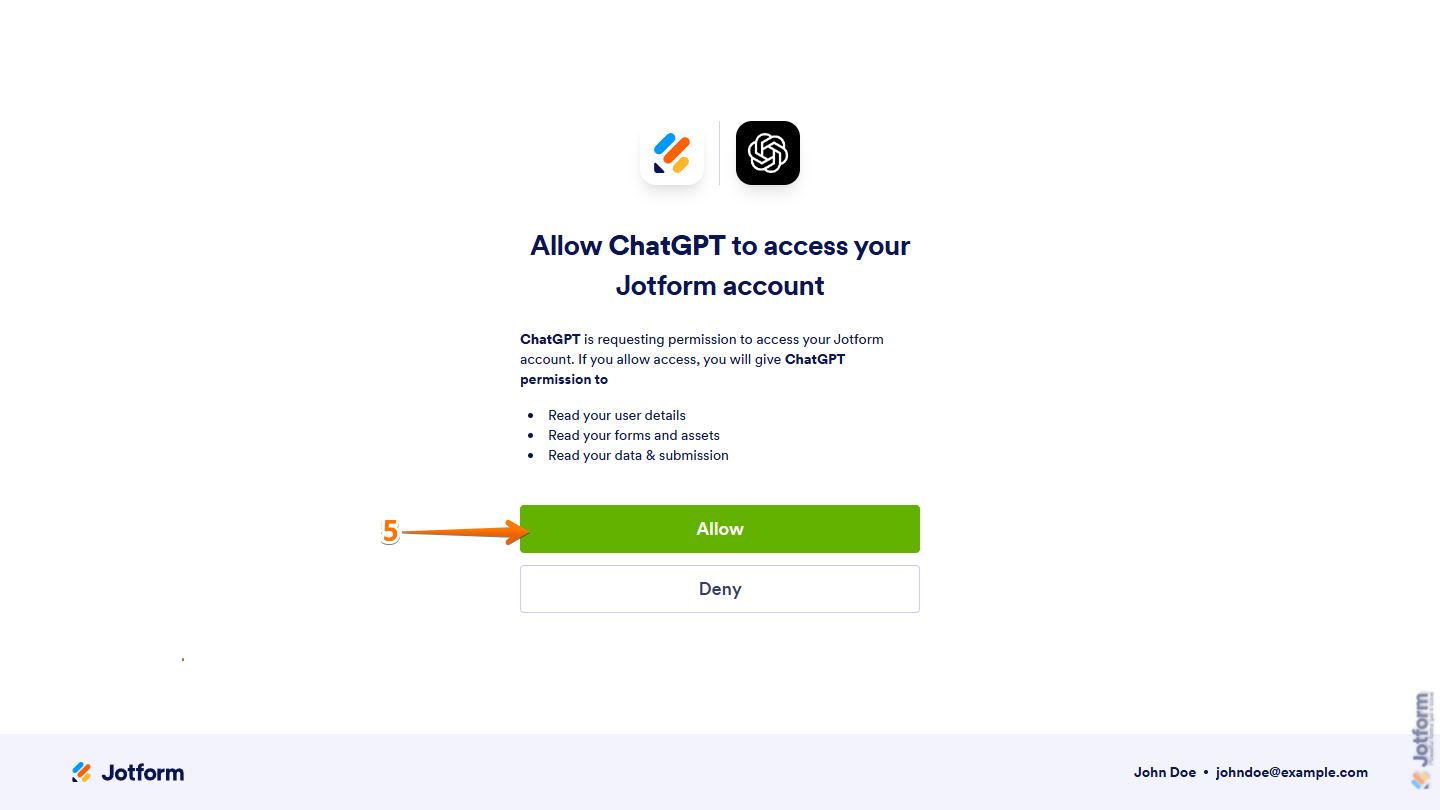
- Then, in a new browser tab that opens, log in to your Jotform account, then click on Allow to authorize ChatGPT to access it.
- To open a new chat with a sample prompt for creating a Sign Document in your connected Jotform account, click on Try in Chat at the top-right of the plugin details.
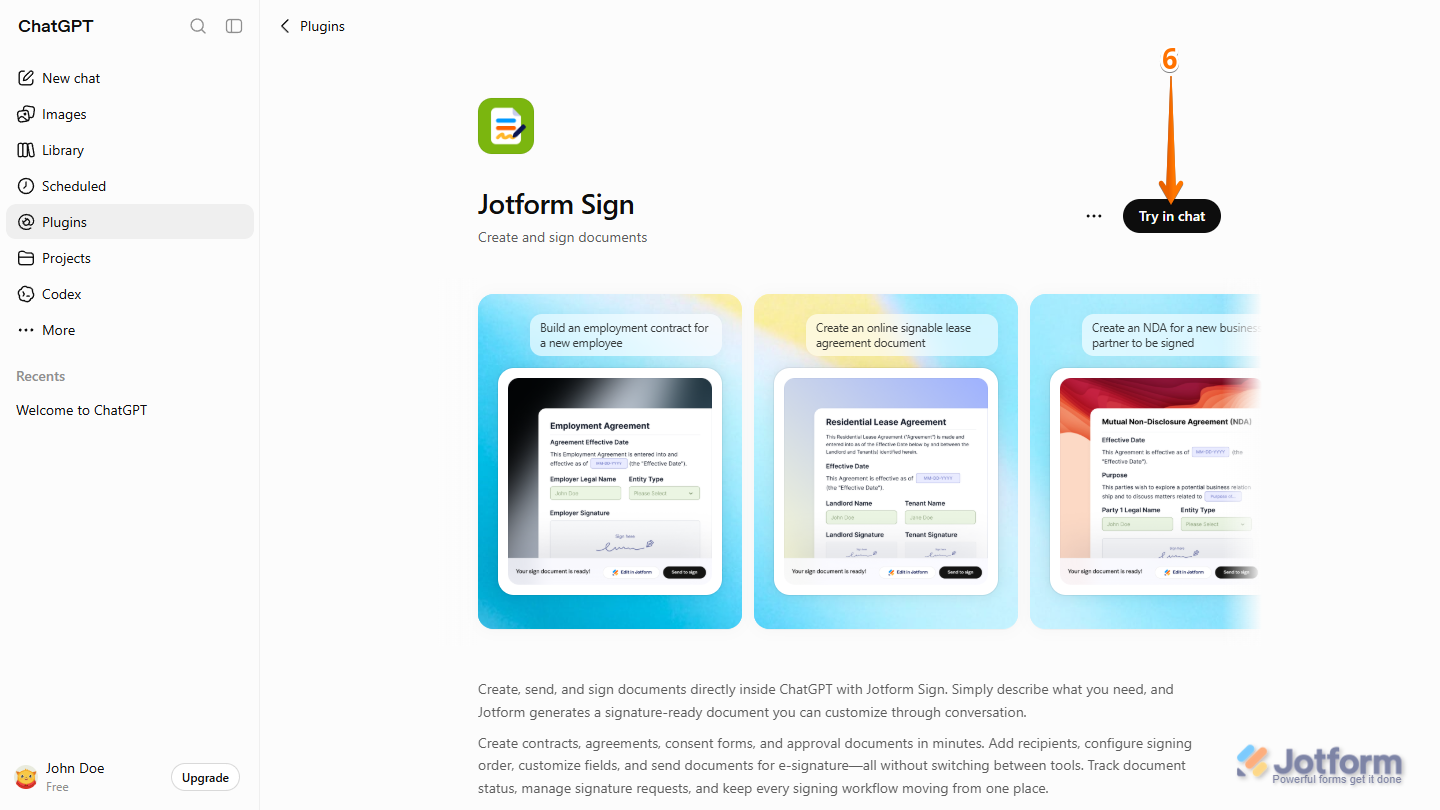
You’re all set! The Jotform Sign plugin is now ready to use whenever you need it in ChatGPT.
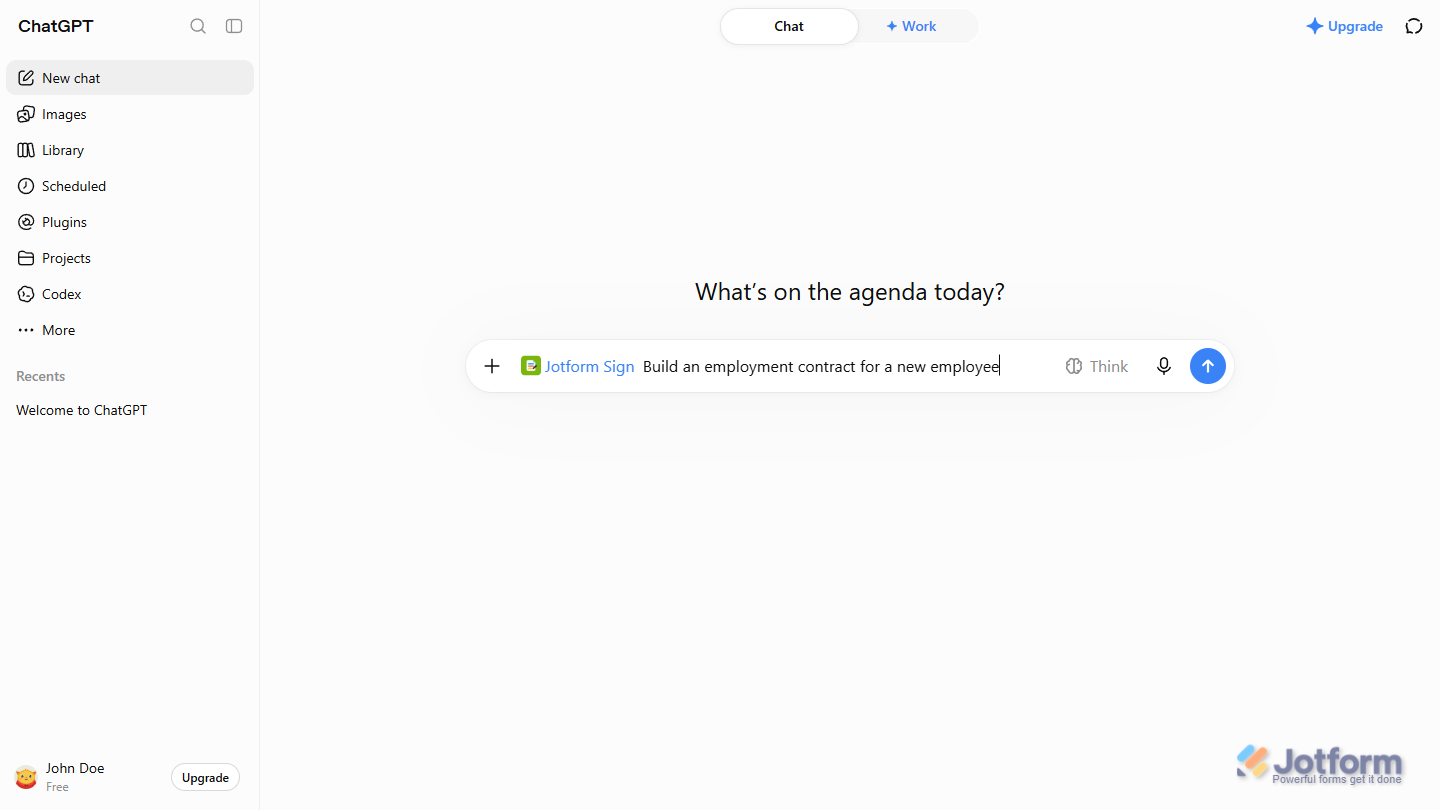
Using the Jotform Sign ChatGPT Plugin
Once you’ve set up the Jotform Sign plugin, you can start using prompts to create and update Sign Documents in your Jotform account. Whether you’re creating a new document or making changes to an existing one, you can do it right within ChatGPT. Here’s how to get started:
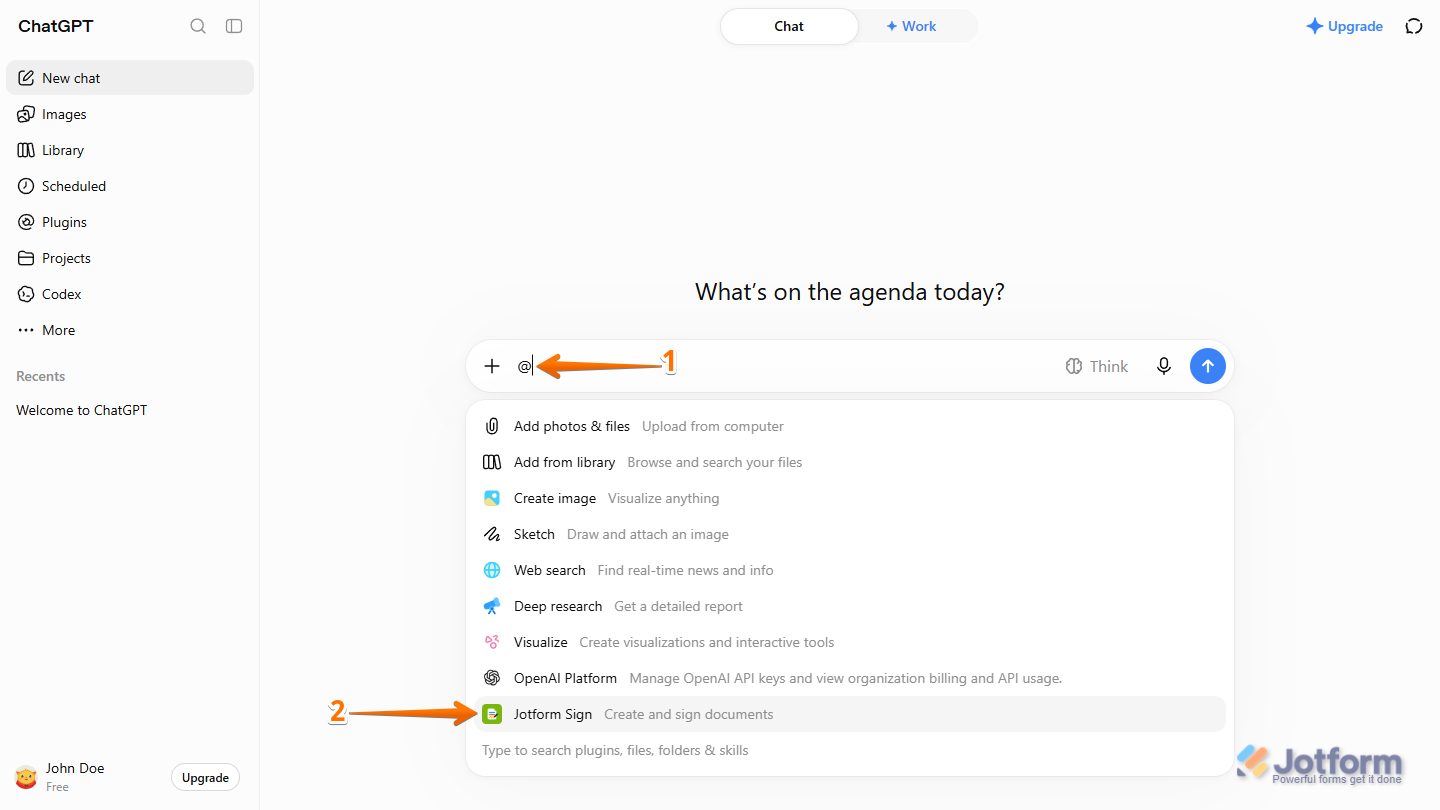
- In the ChatGPT prompt box, enter the At Sign (@).
- Then, in the menu that appears, select Jotform Sign to use the Jotform Sign plugin.
Pro Tip
You can also type @jotformsign and press the Spacebar or Tab key on your keyboard to select it more quickly.
- Then, depending on what you want to do, enter a prompt for either of the following:
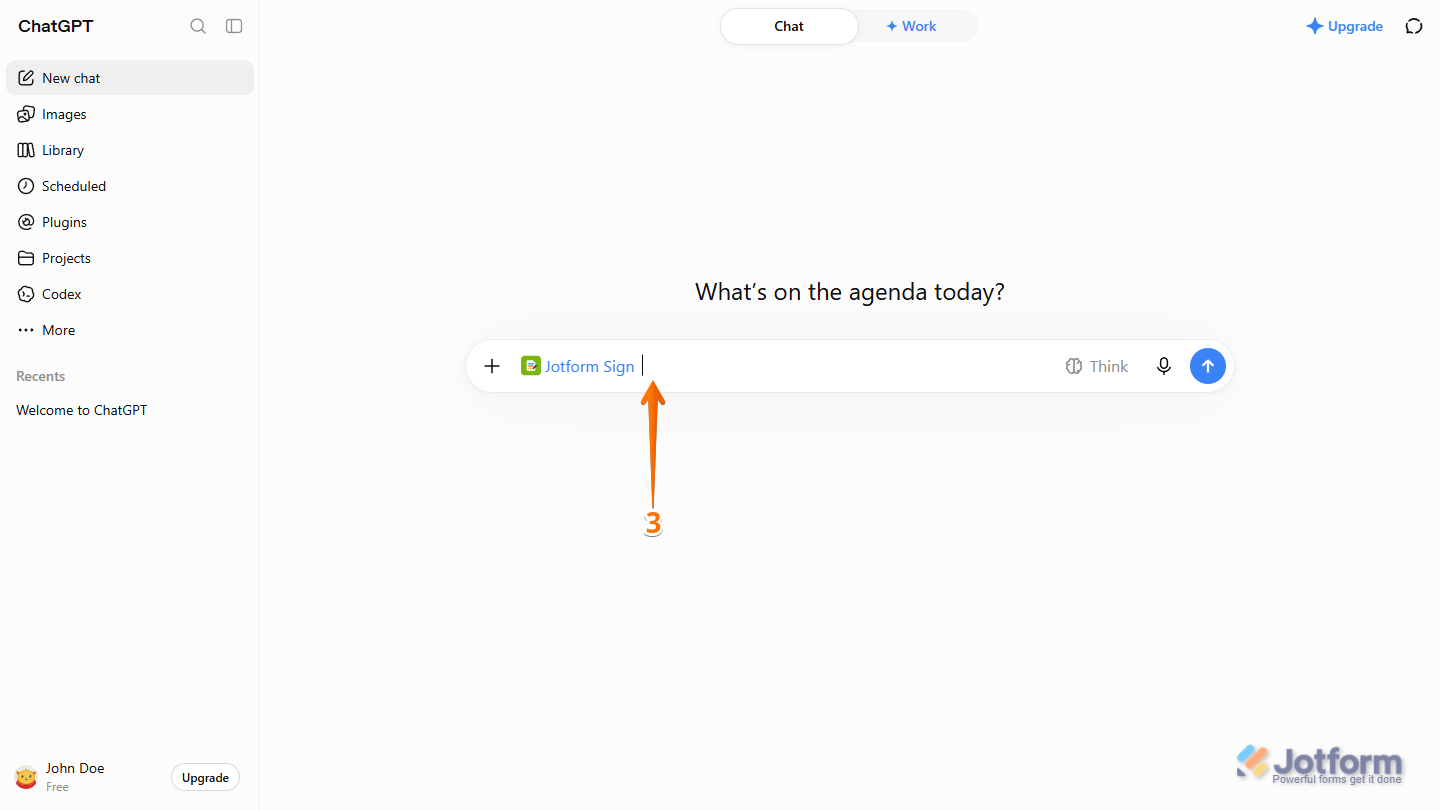
Creating a Sign Document From Scratch
While using the Jotform Sign plugin in ChatGPT, you can create a new Sign Document in your Jotform account using prompts. Here’s how it’s done:
- In the ChatGPT prompt box, enter a prompt describing the Sign Document you want to create, including its purpose, the information it should contain, and any signer fields you want to include.
- Then, press the Enter key on your keyboard or click on the Upward Arrow icon on the right side of the Prompt box.
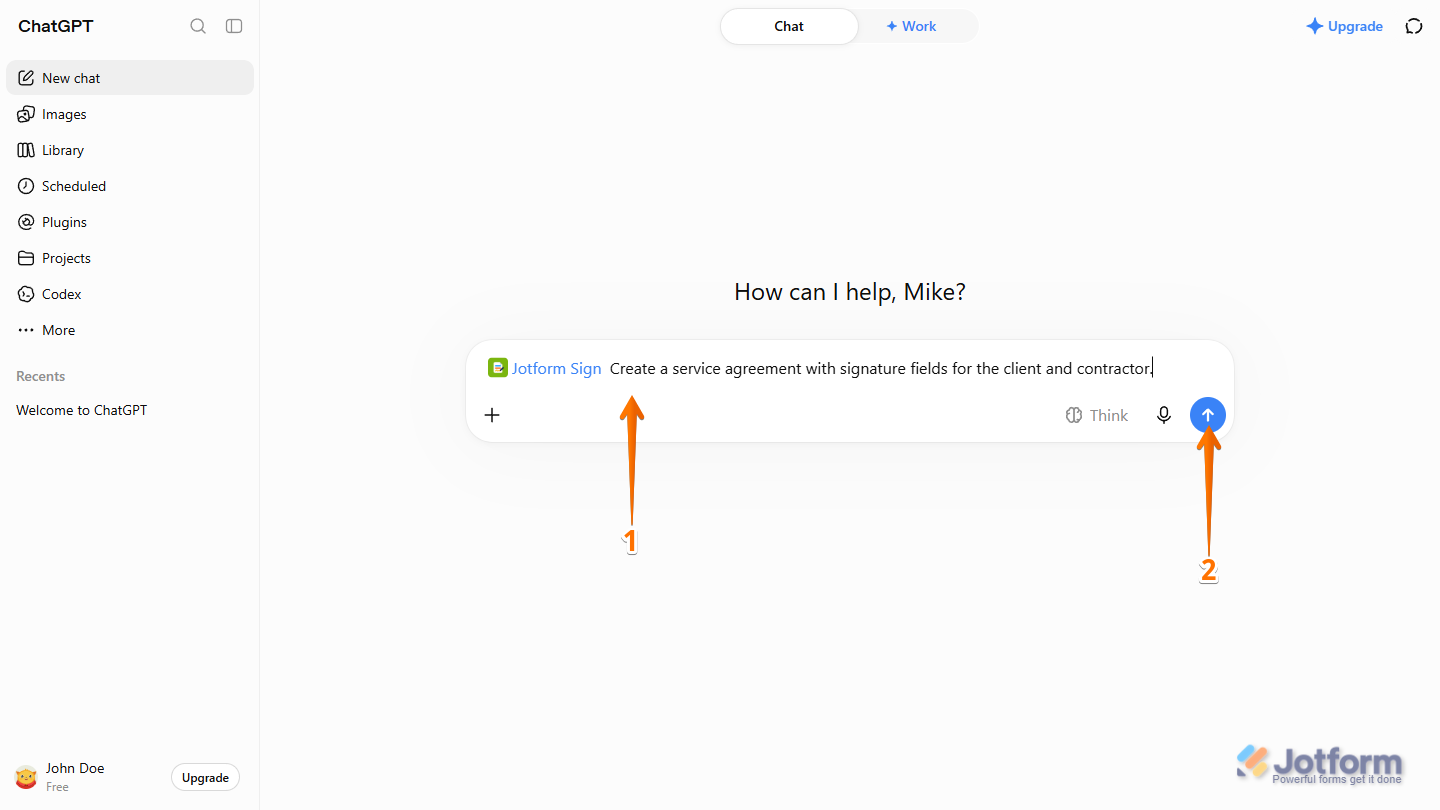
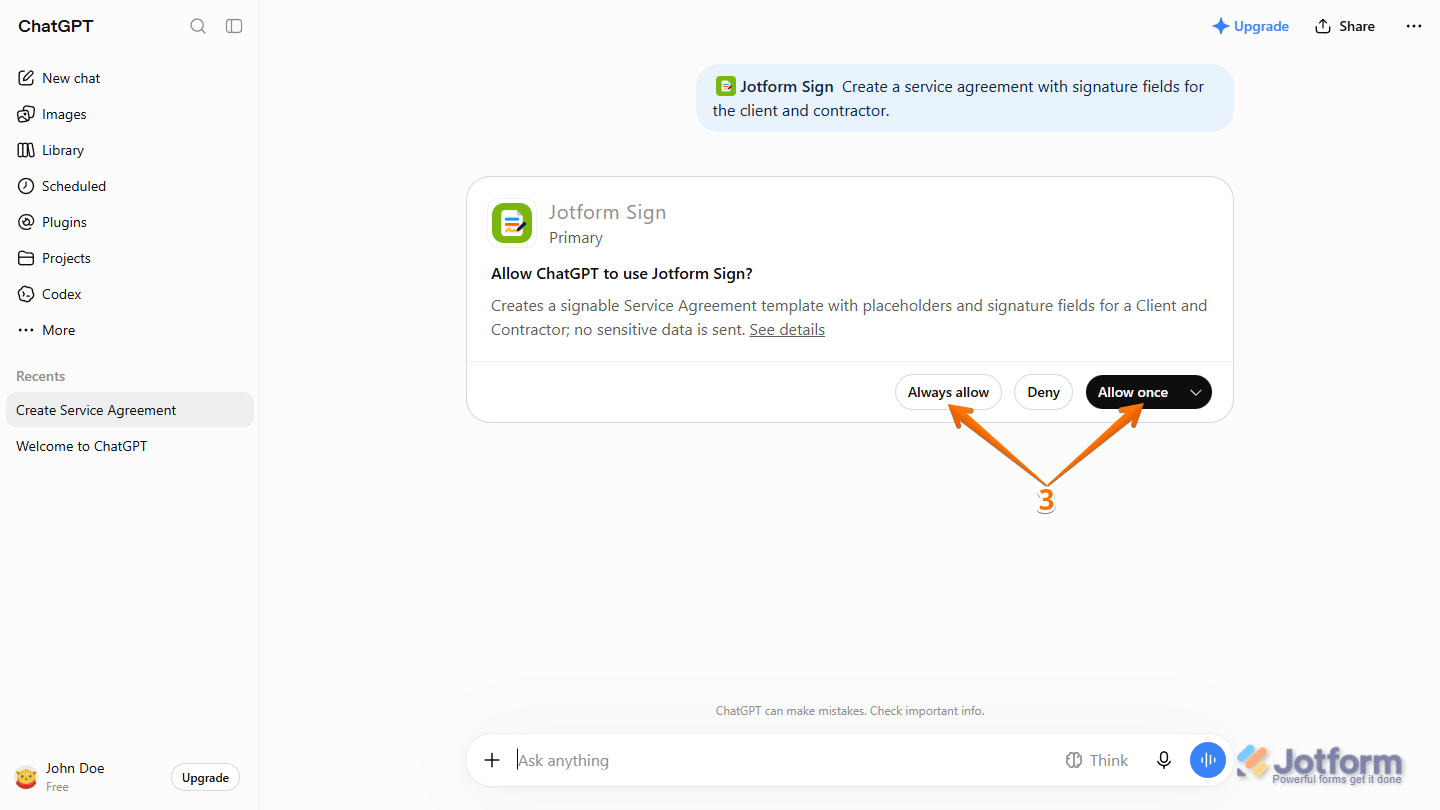
- When ChatGPT asks for permission to use Jotform Sign, click on Always Allow to give permission for future requests or Allow Once for the current request only.
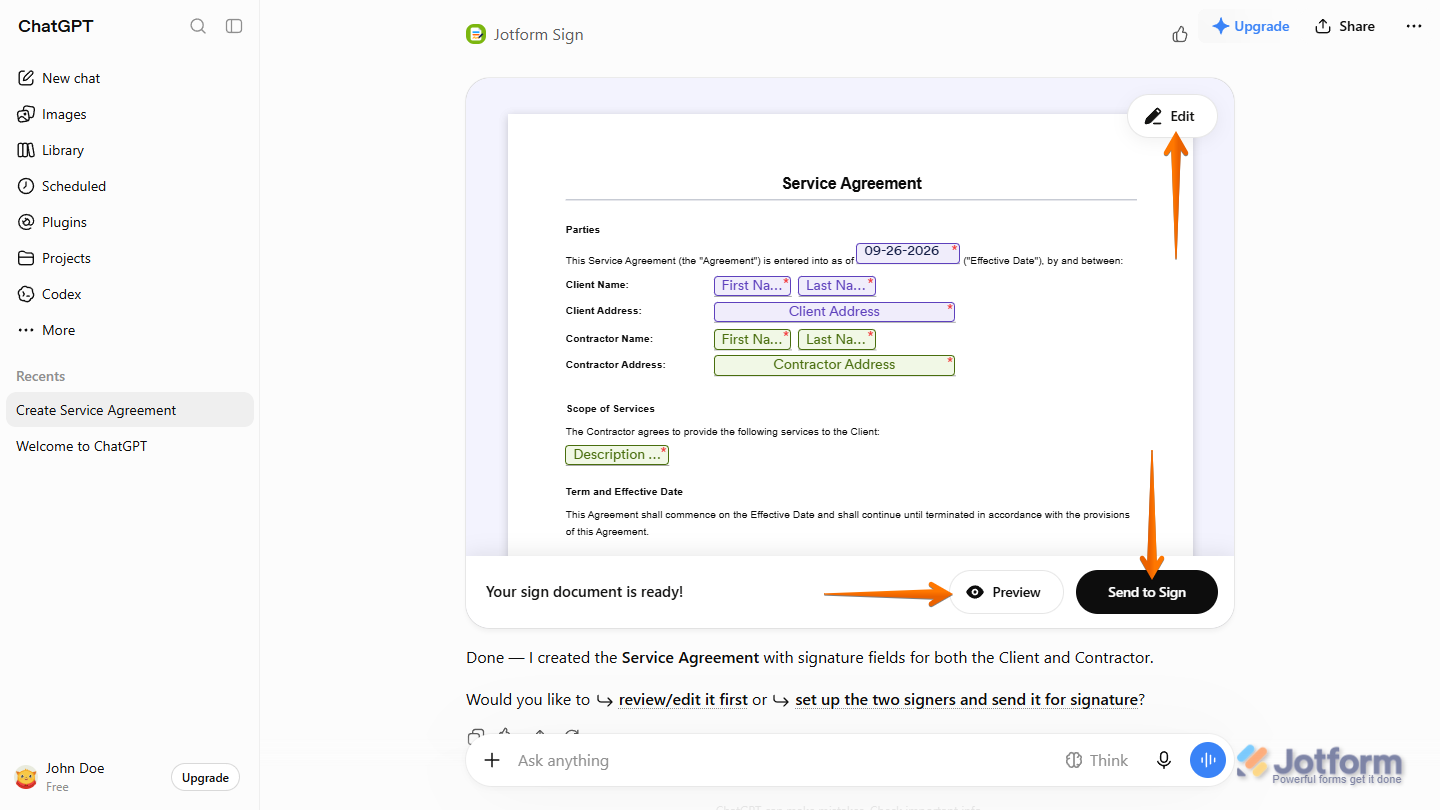
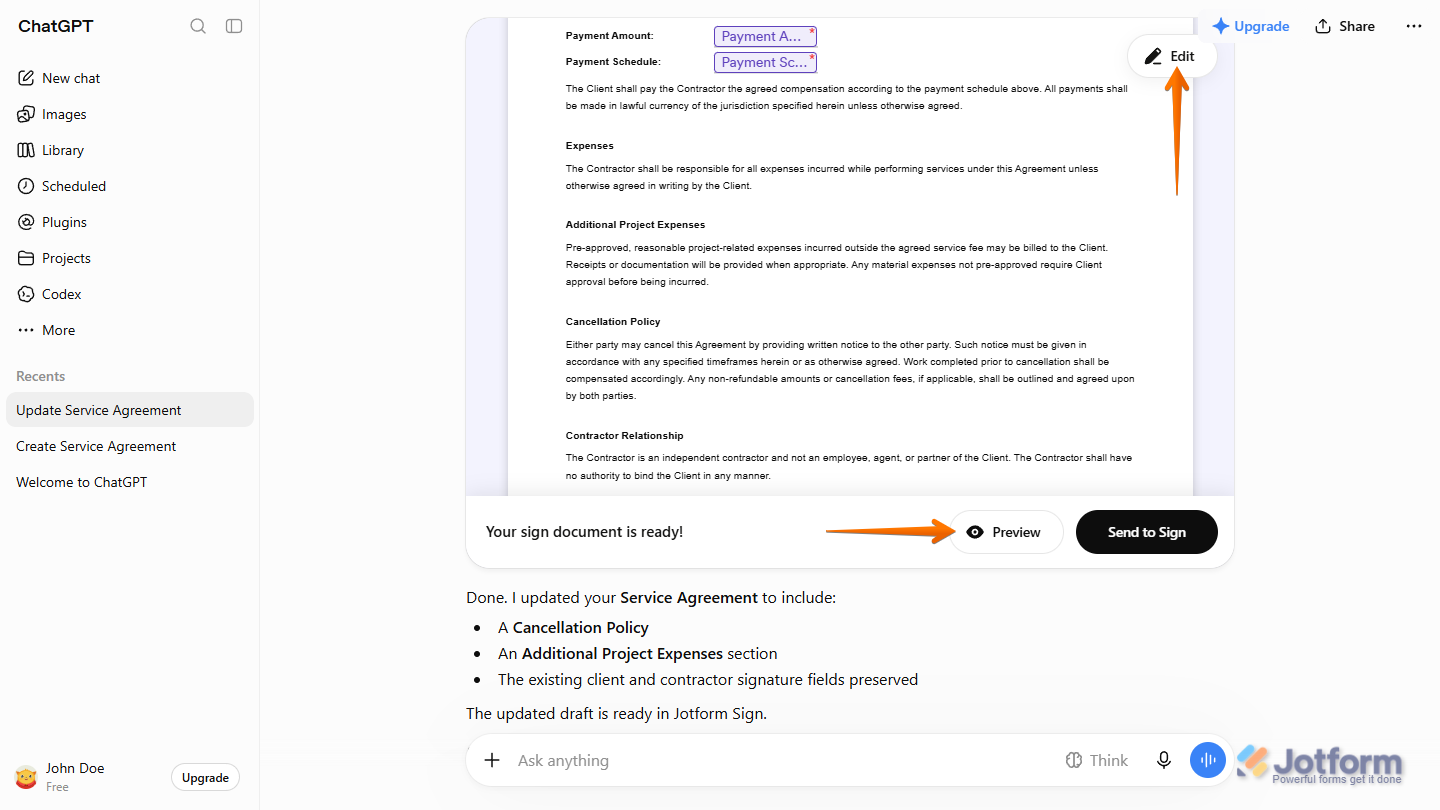
That’s it. ChatGPT will create the Sign Document in your Jotform account. In its response, you’ll see options to edit, preview, or send it for signature.
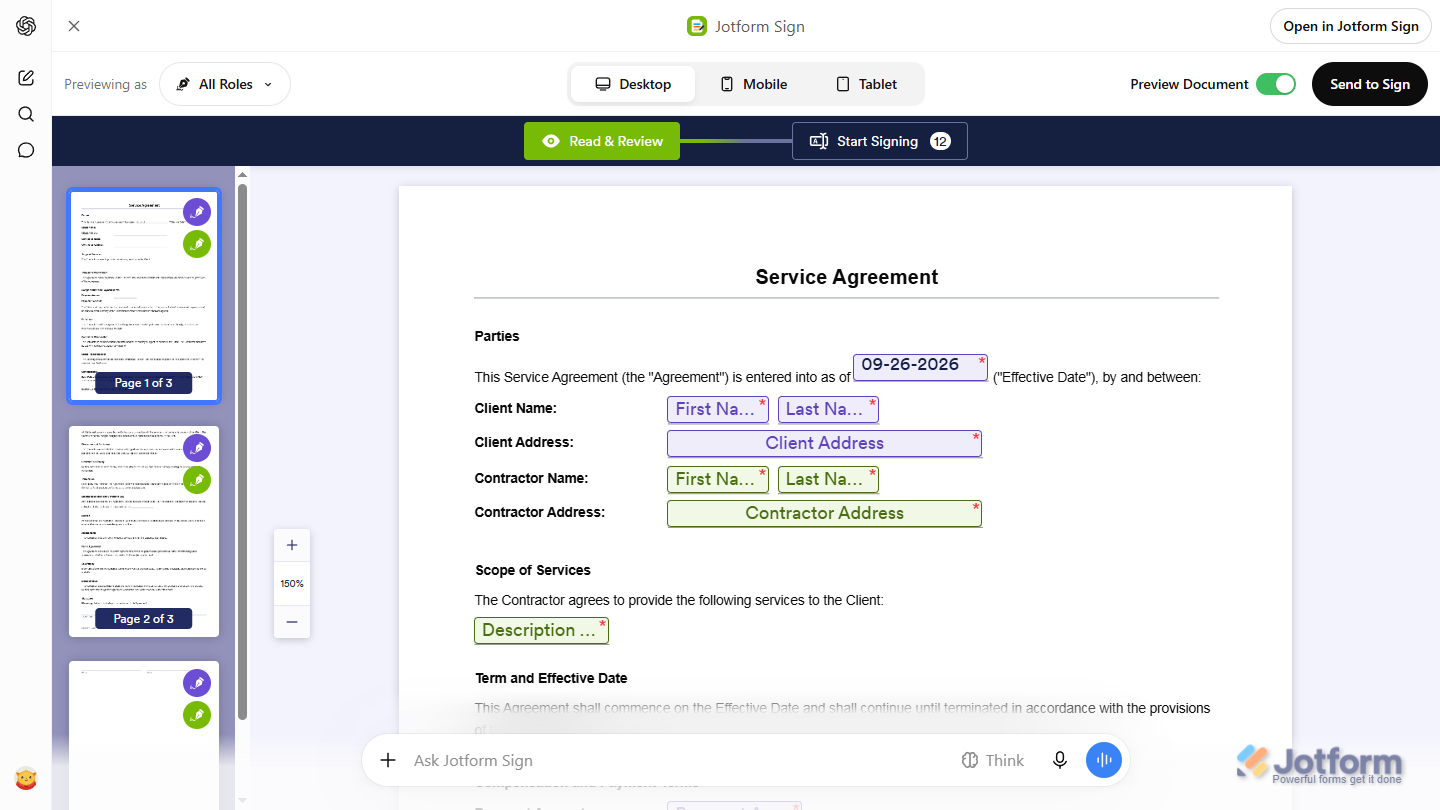
The Preview button opens a preview of the Sign Document within ChatGPT, where you can test filling it out as different signer roles to see how it will work for each signer.
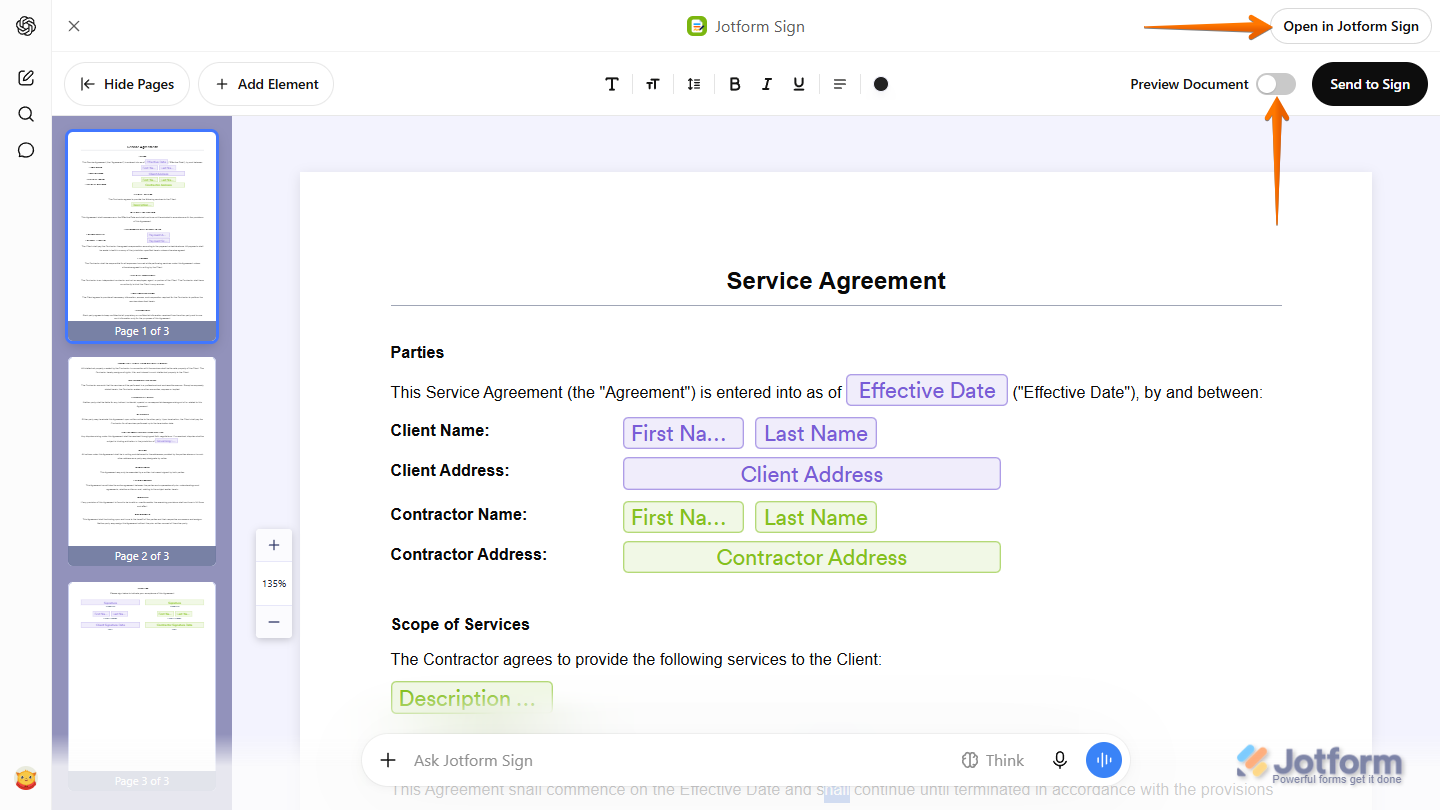
While in Preview mode, you can toggle Preview Document off to make changes within ChatGPT or use Open in Jotform Sign to edit the document in the Jotform Sign Builder.
For more details on signing or sharing the document to others, check out the Sending a Sign Document for Signature section below.
Editing an Existing Sign Document
While using the Jotform Sign plugin in ChatGPT, you can continue customizing a Sign Document or update an existing one by describing the changes you want. Here’s what to do next:
- In the ChatGPT prompt box, enter a prompt describing the changes you want to make and include the name of the Sign Document they should be applied to.
- Then, press the Enter key on your keyboard or click on the Upward Arrow icon on the right side of the Prompt box.
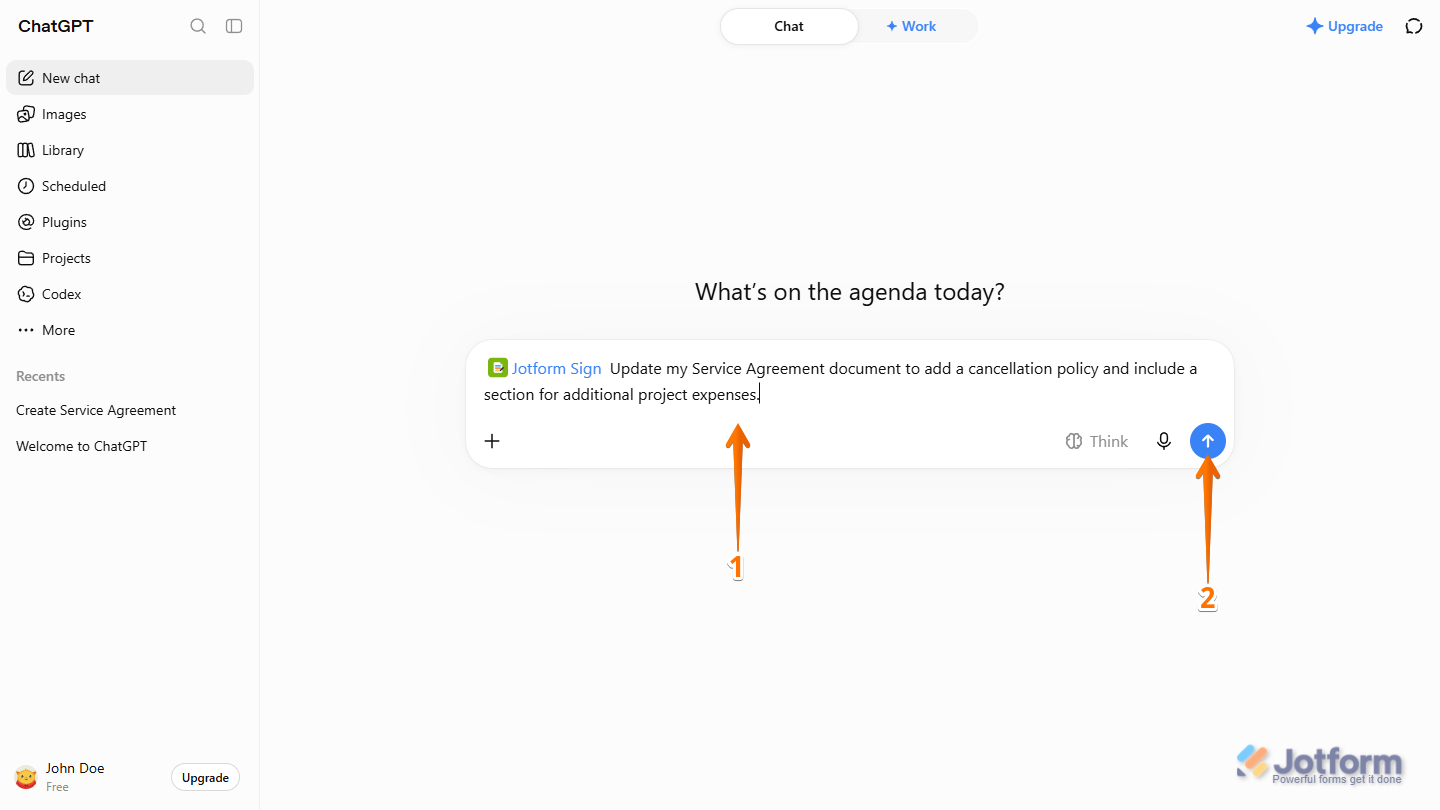
That’s it. Your Sign Document is now updated with the changes you requested, and you can also preview and edit it before sending it for signatures.
Sending a Sign Document for Signature
After creating or updating your Sign Document, you can either sign it yourself or send it to others for signature. Jotform Sign gives you a few simple ways to complete the signing process without leaving ChatGPT.
Signing Your Document
It only takes a few steps to sign your document. Here’s how to get going:
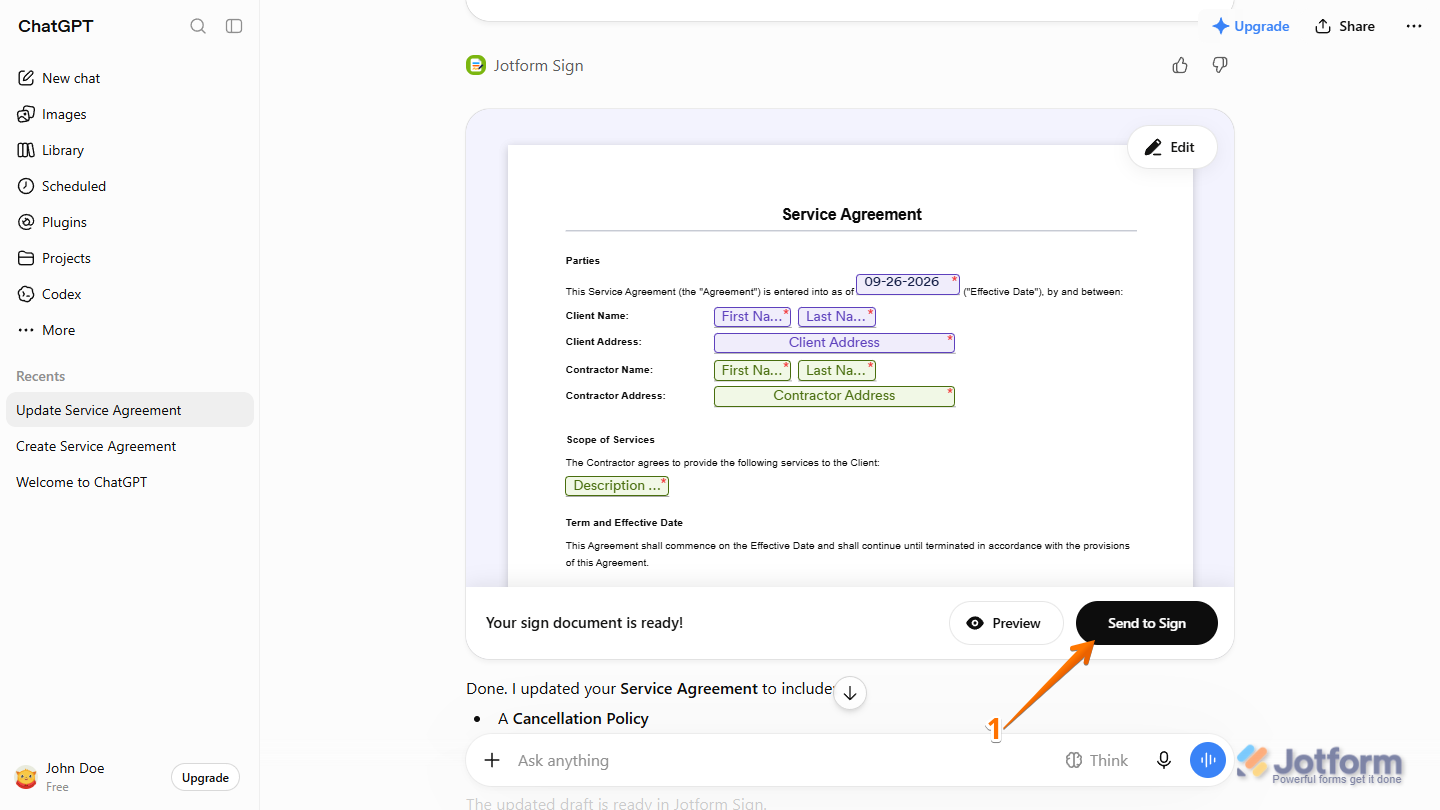
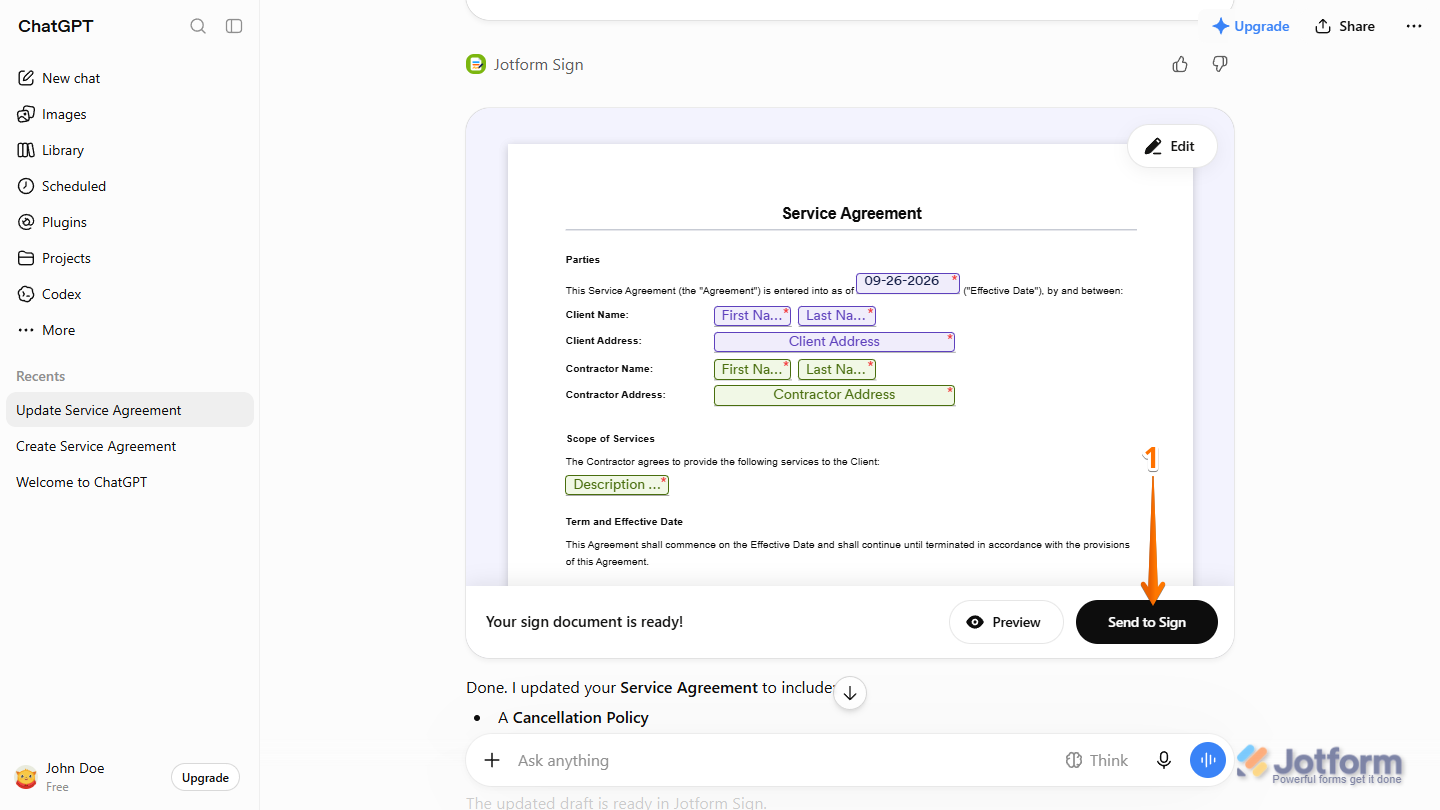
- At the bottom-right of the Jotform Sign section in ChatGPT’s response, click on Send to Sign.
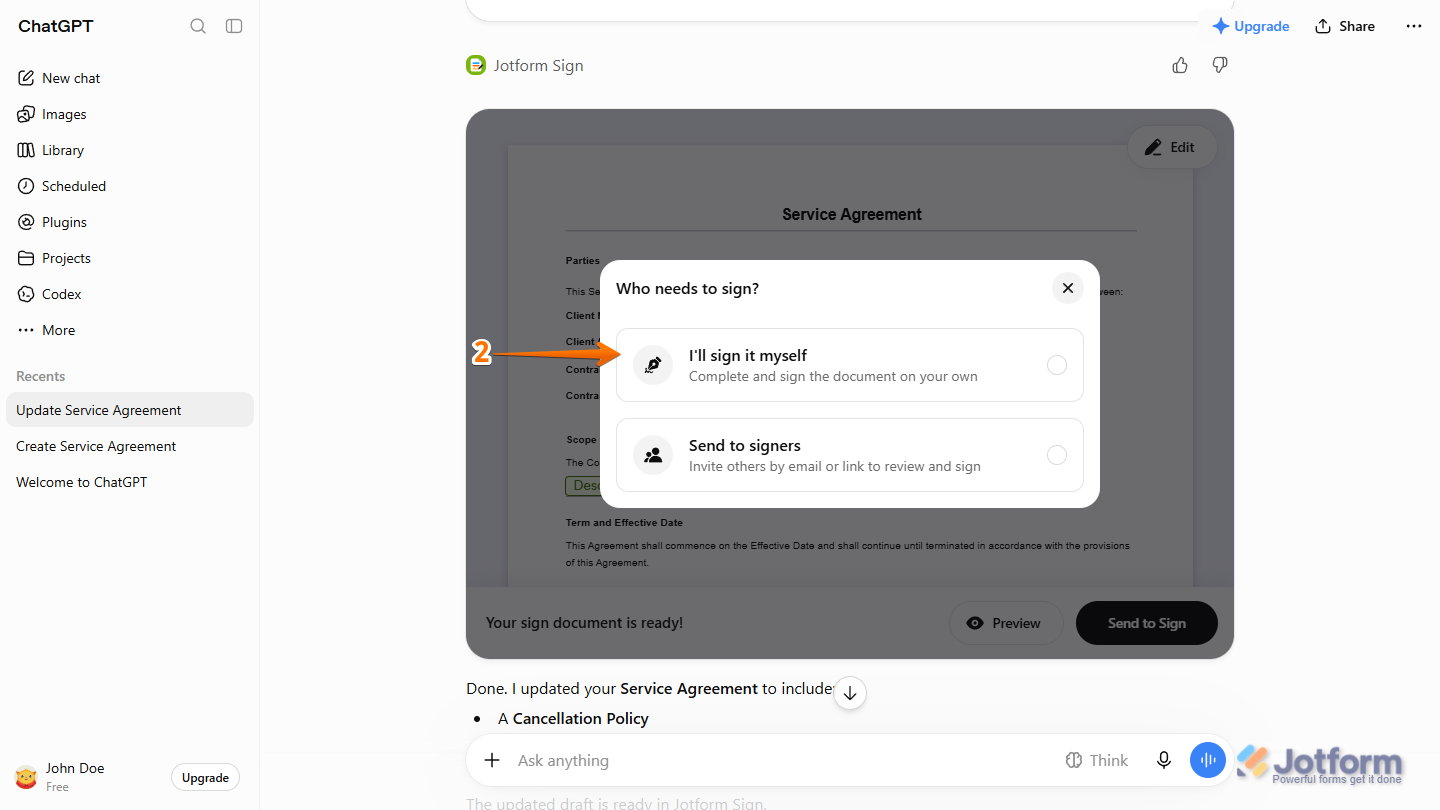
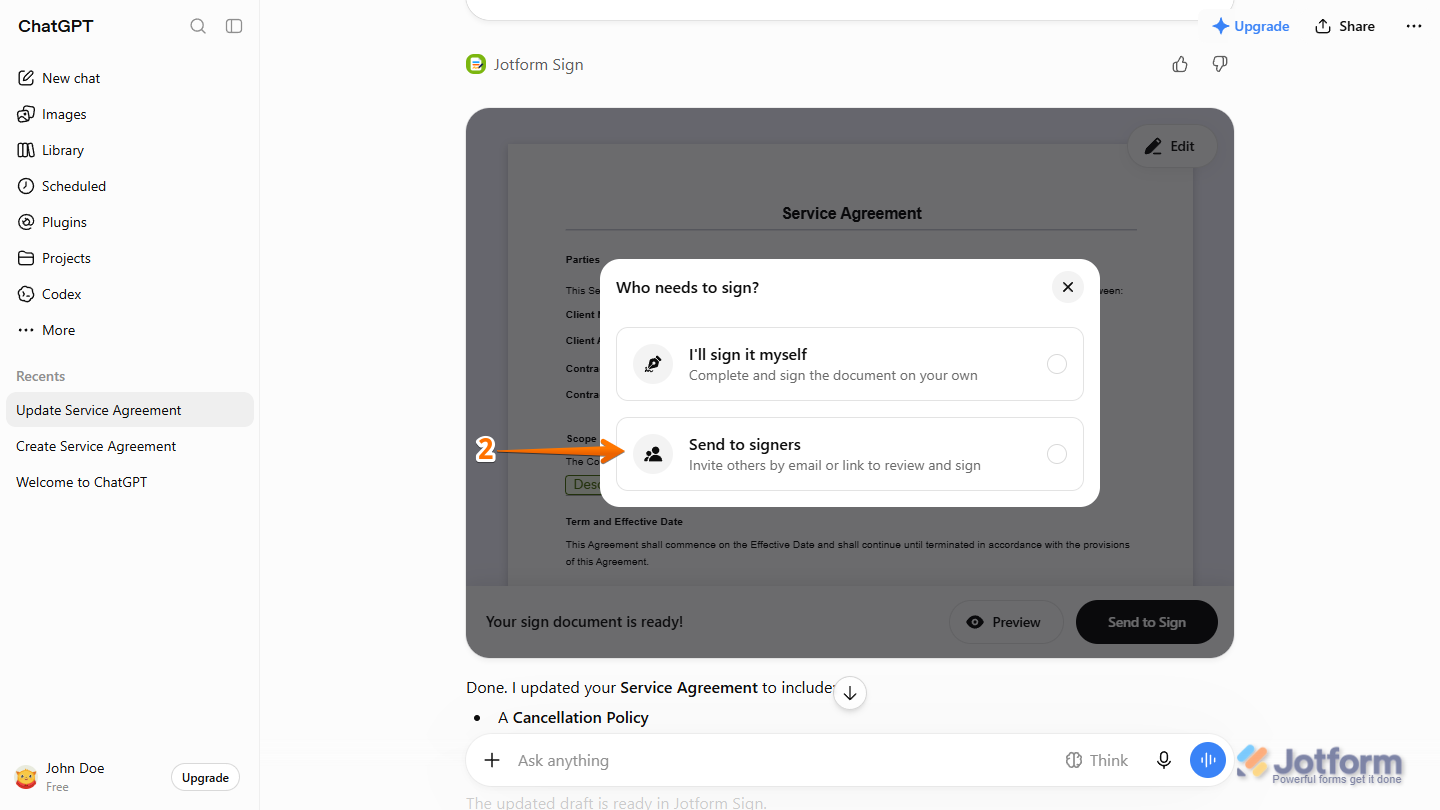
- Then, in the Who Needs to Sign? dialog, select I’ll Sign it Myself.
- In the Sign Yourself dialog, review the Full Name and Email Address associated with your connected Jotform account, then click on Review and Sign.
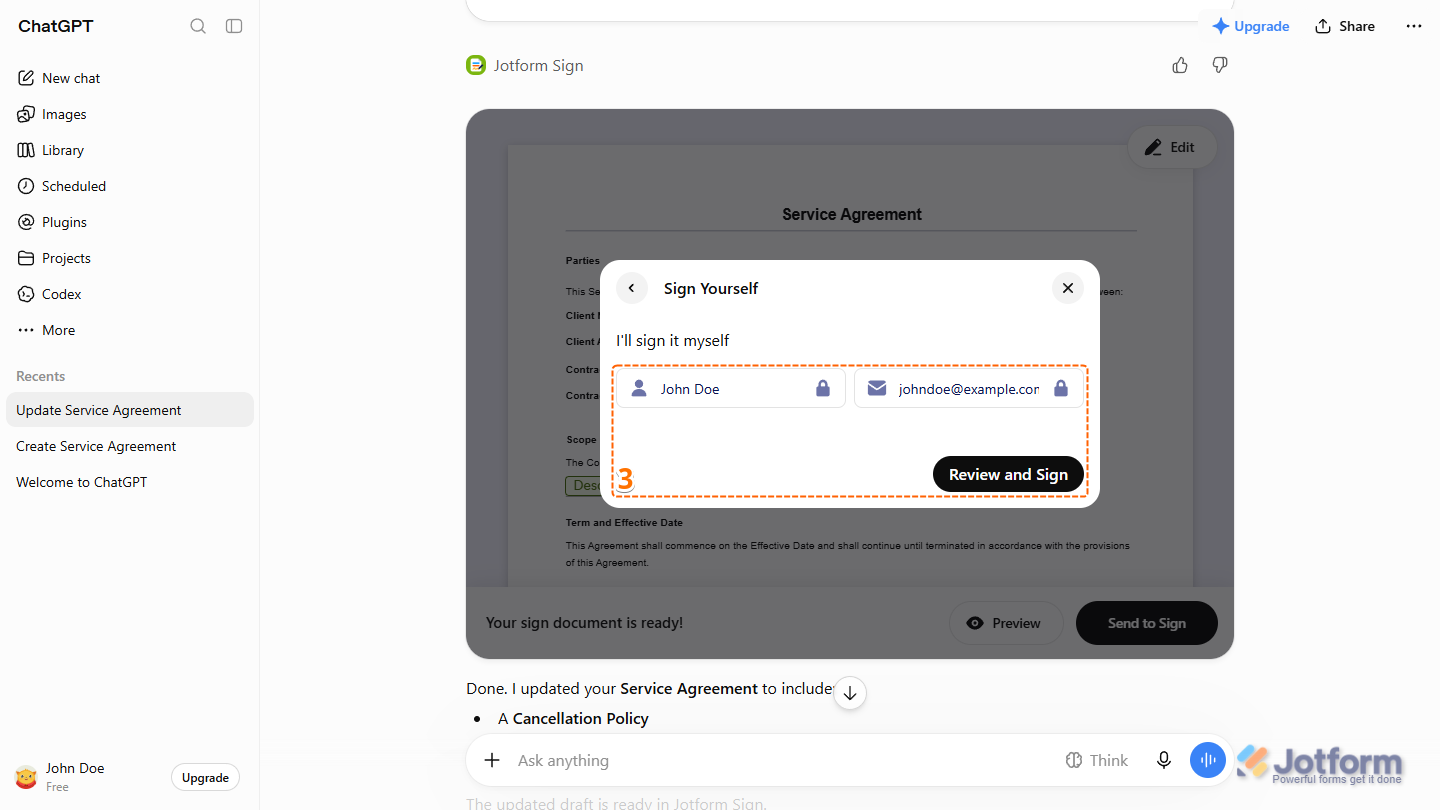
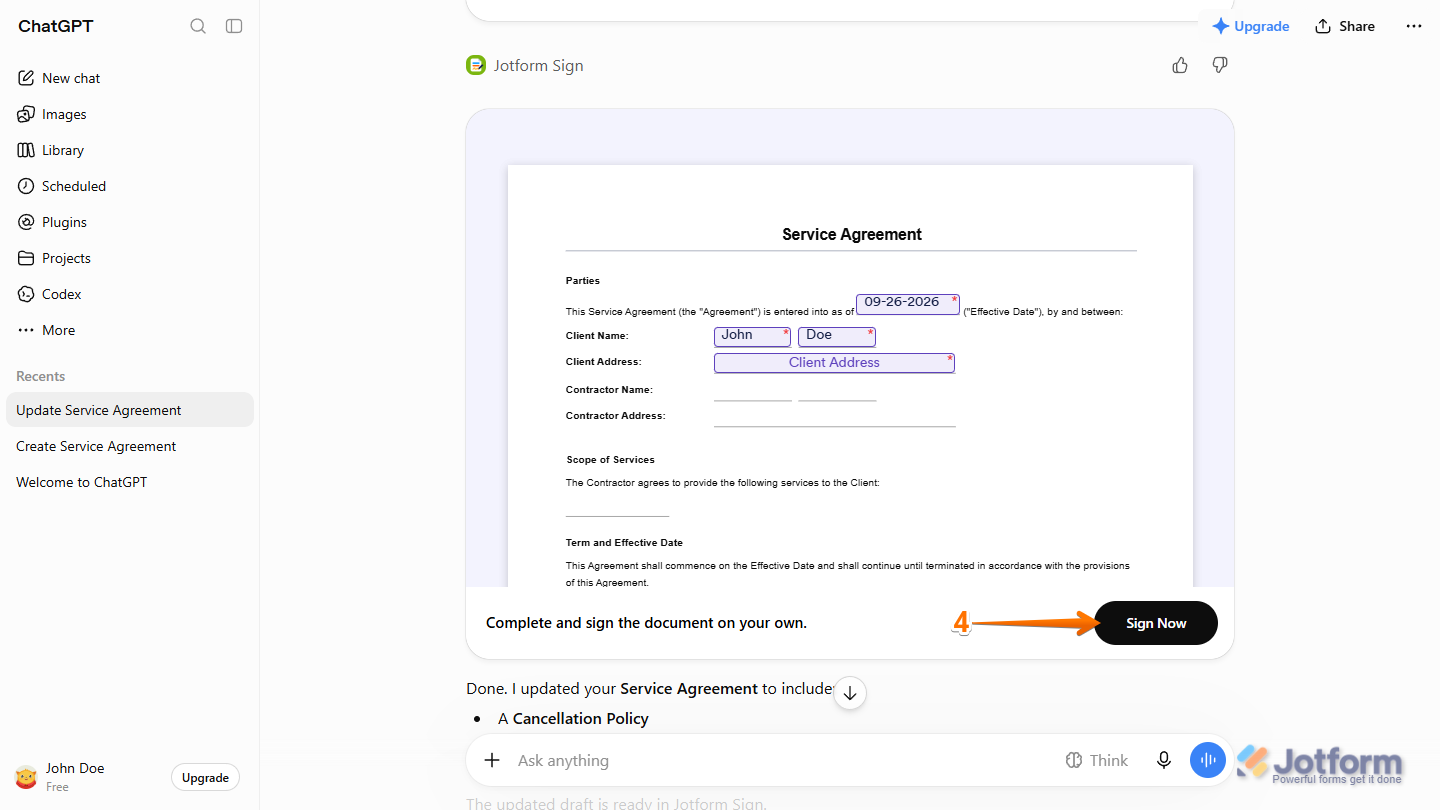
- Now, at the bottom-right of the Jotform Sign section, click on Sign Now.
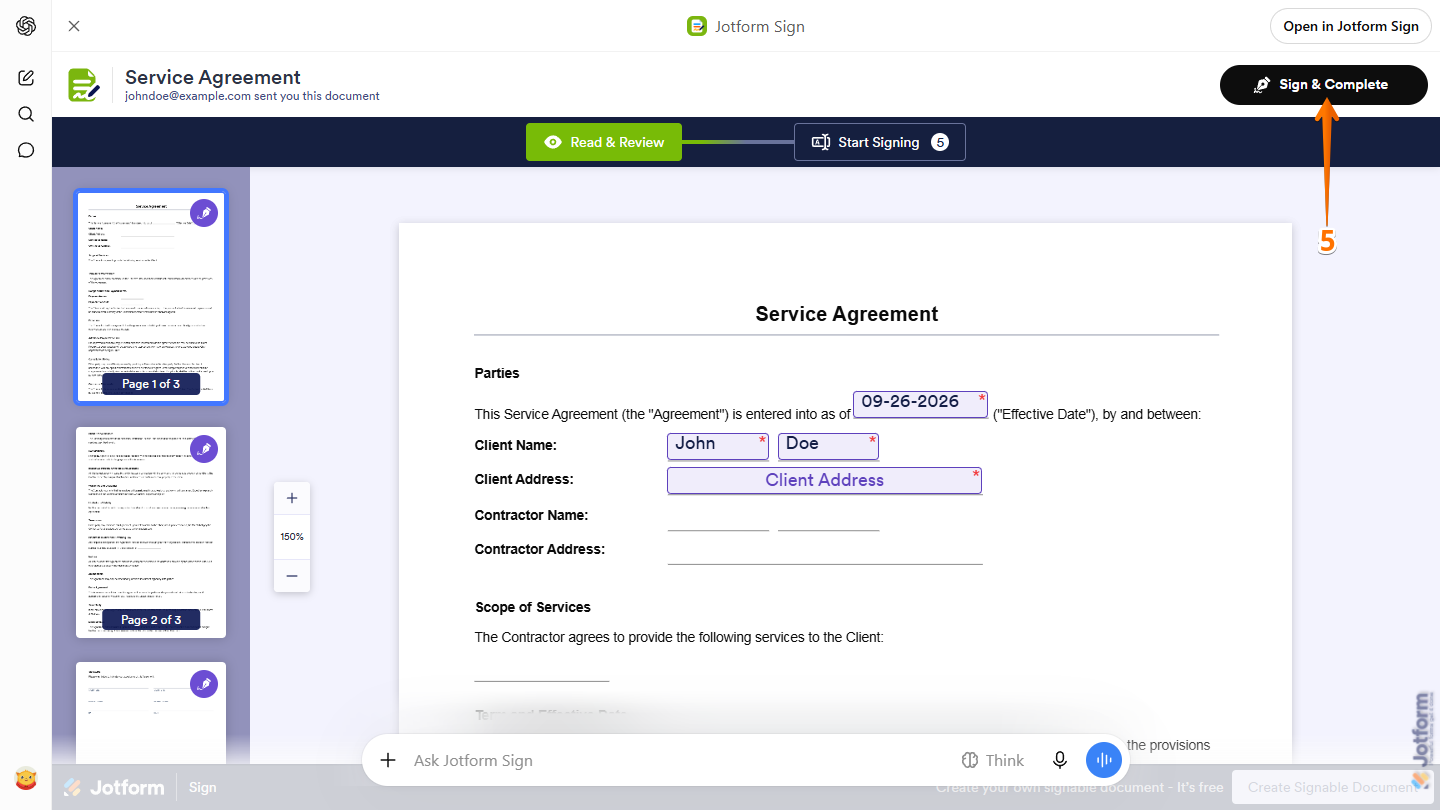
- Next, at the top-right of the Sign Document that opens within ChatGPT, click on Sign & Complete to start filling it out.
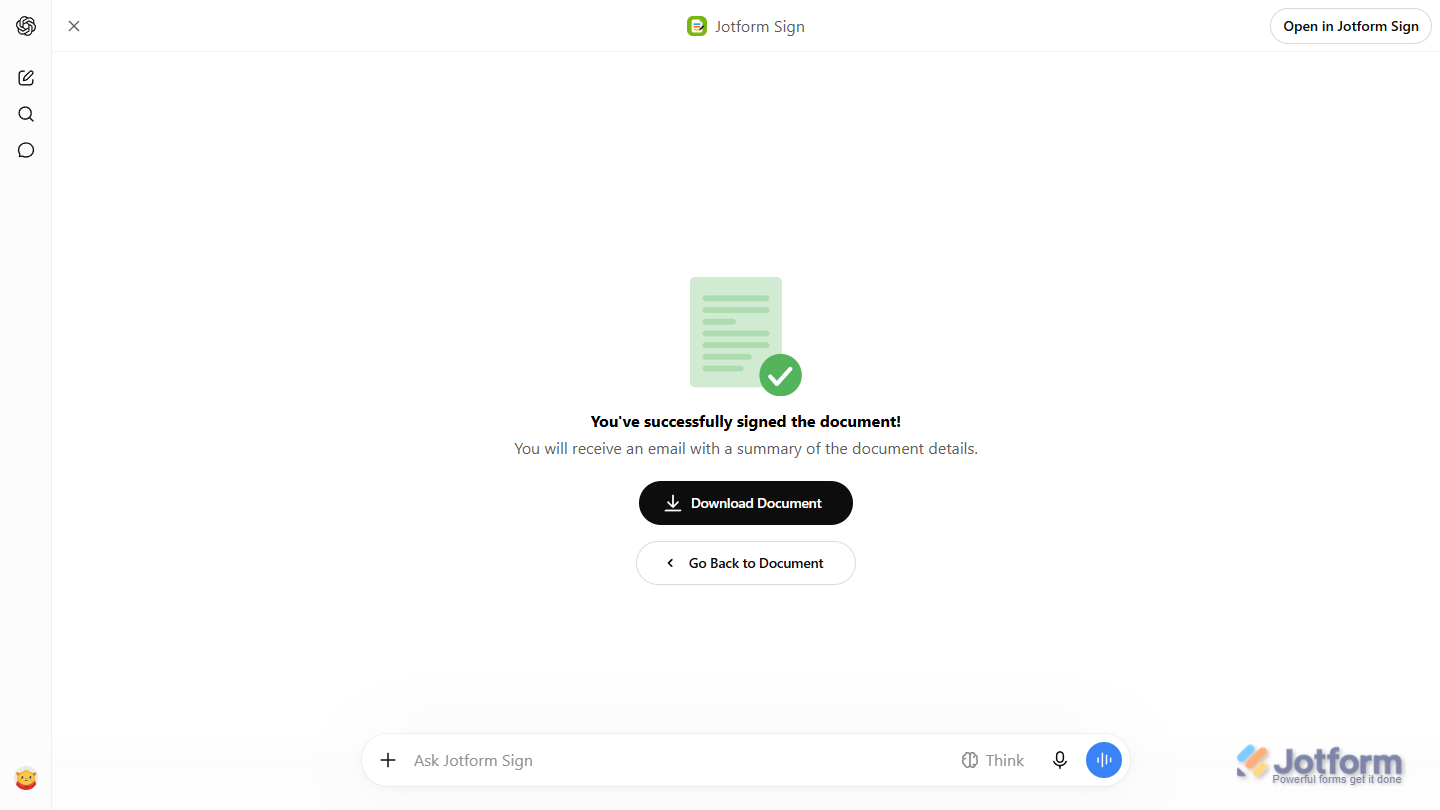
That’s it. If another signer is on your document, you’ll see a message that their signature is still needed to complete it.
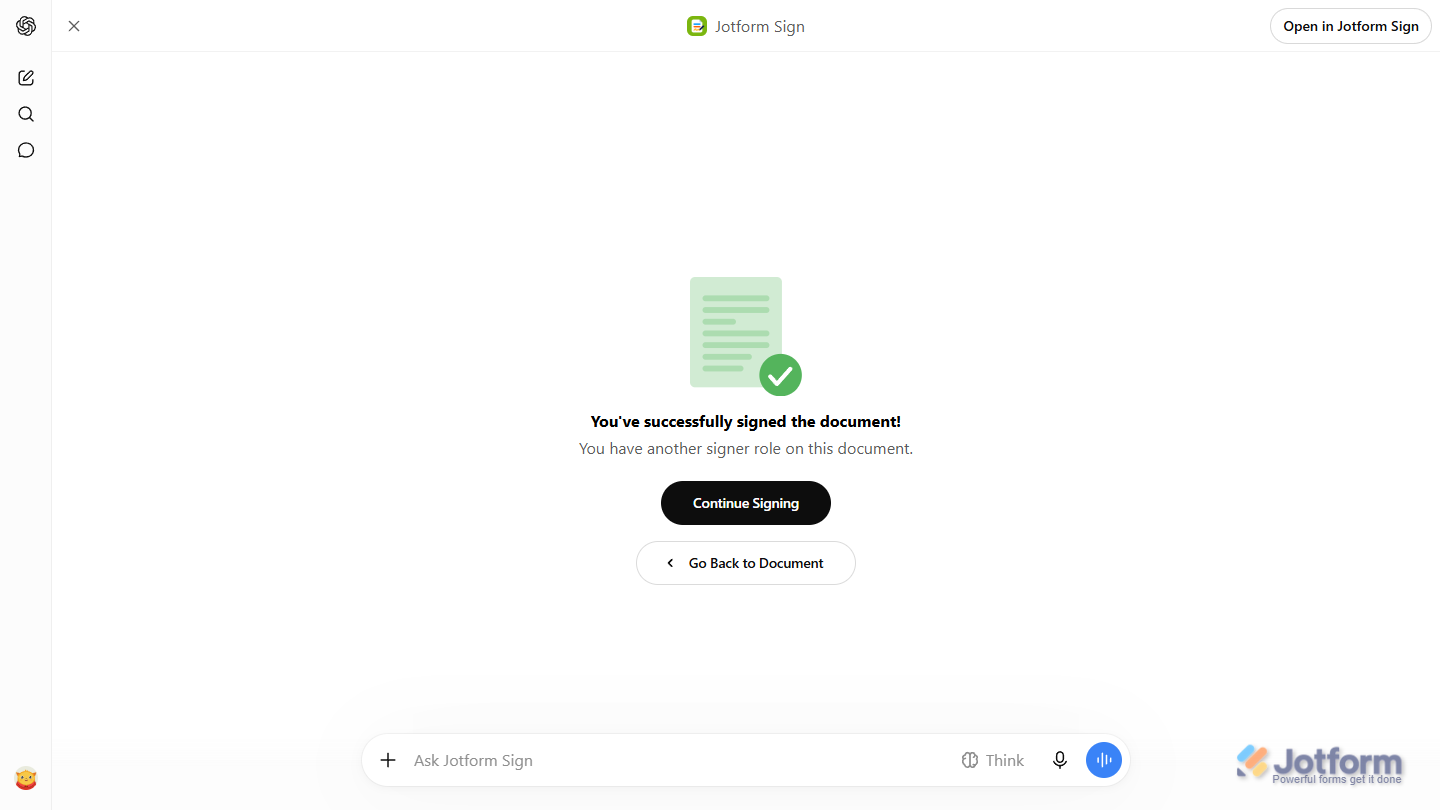
Otherwise, the document is complete. You can download it for your records, and you’ll also receive an email with a summary of the document details.
Sharing the Document by Email
If other people need to sign the document, you can send it to them by email. Follow these quick steps to get started:
- At the bottom-right of the Jotform Sign section in ChatGPT’s response, click on Send to Sign.
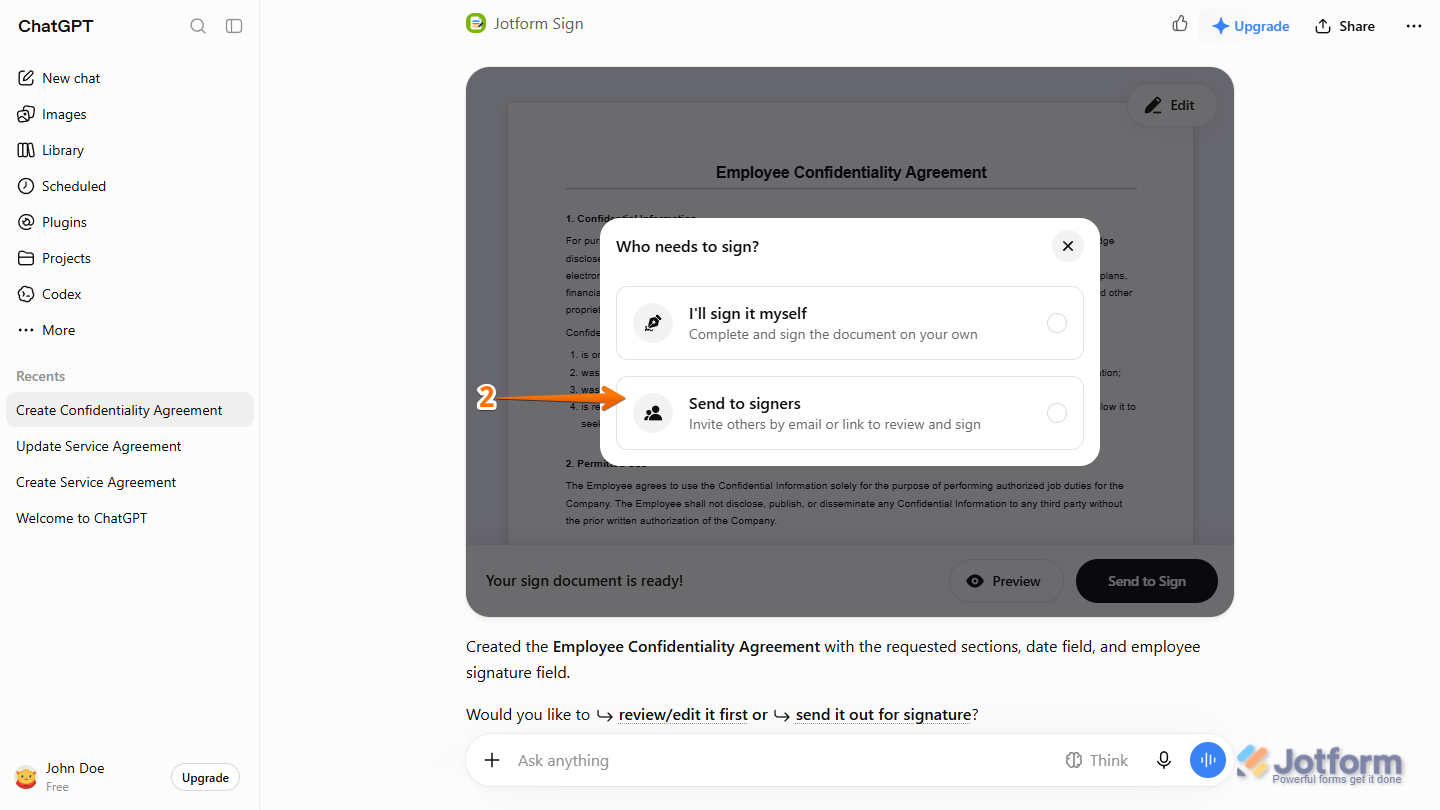
- Then, in the Who Needs to Sign? dialog, select Send to Signers.
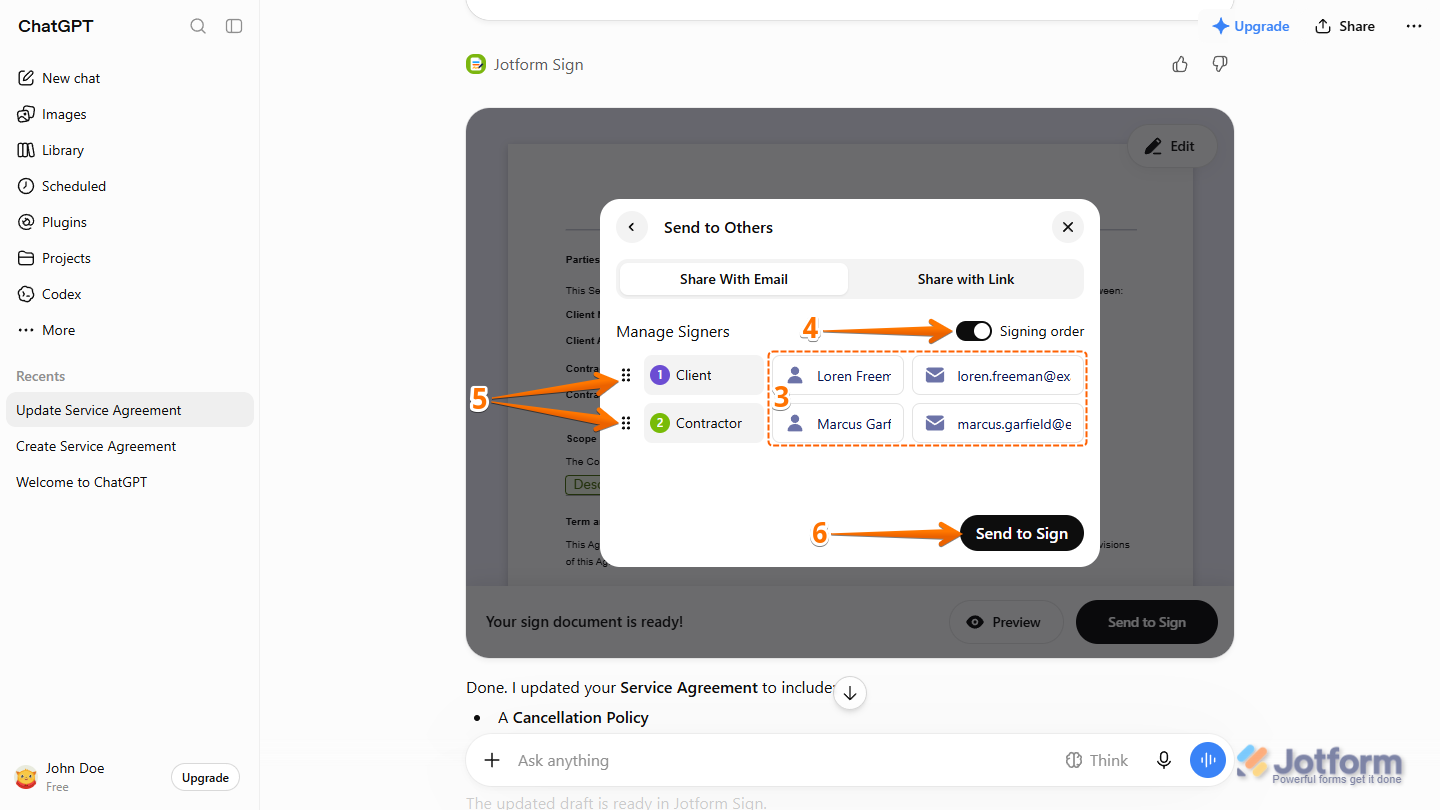
- In the Send to Others dialog, under Manage Signers, enter the Full Name and Email Address for each signer.
- To have multiple signers receive the Sign Document in the order they’re listed, enable Signing Order on the right side of the dialog.
- Then, to change the order of a signer, click on and hold the Six Dots icon on the left side of it to grab it, and then move it to where you want it.
- Once everything’s set, click on Send to Sign.
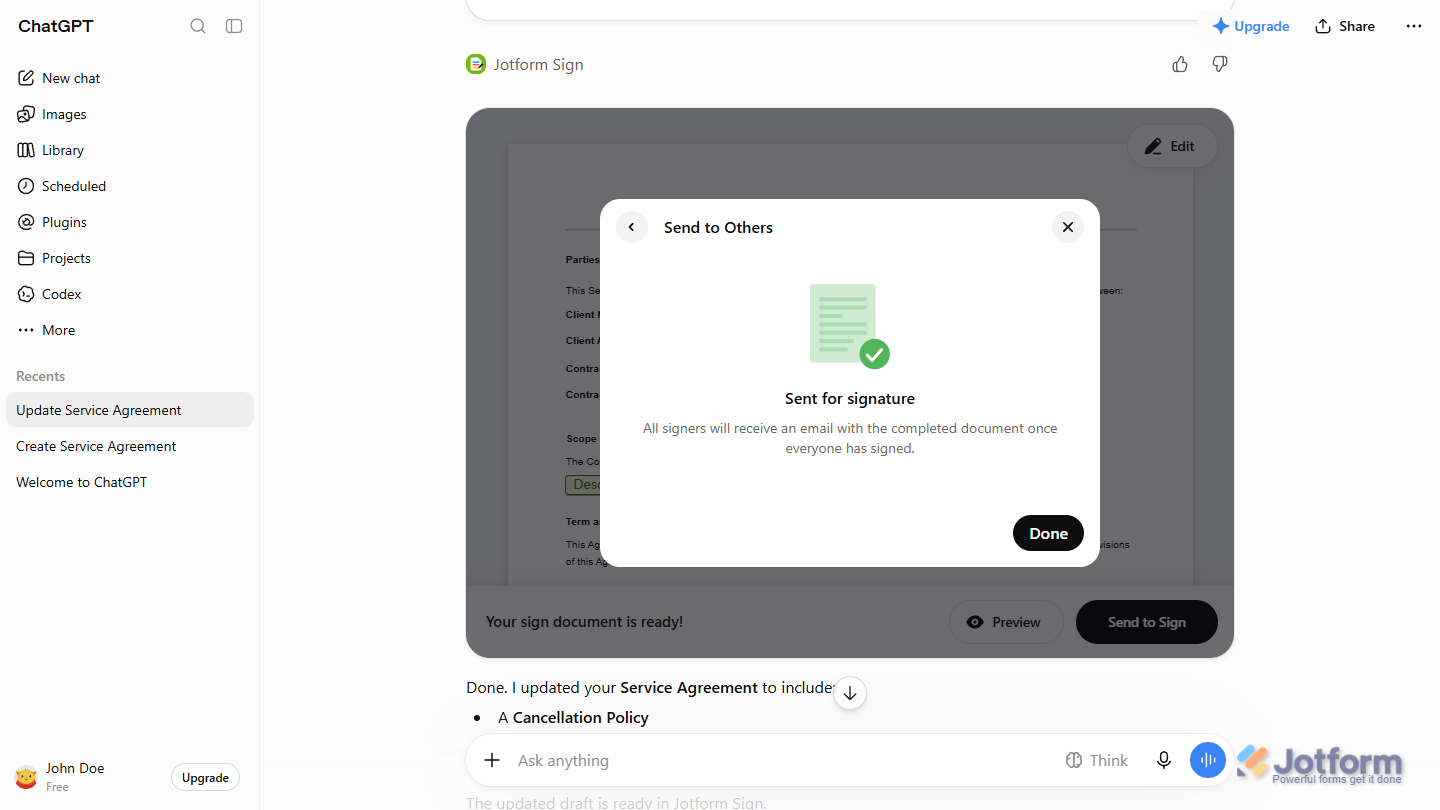
That’s it. The Sign Document has been sent for signature. Once everyone has signed, all signers will receive an email with the completed document.
Sharing the Document With a Link
You can also create a shareable link for a signer to complete the Sign Document. You can do it in a few simple steps:
- At the bottom-right of the Jotform Sign section in ChatGPT’s response, click on Send to Sign.
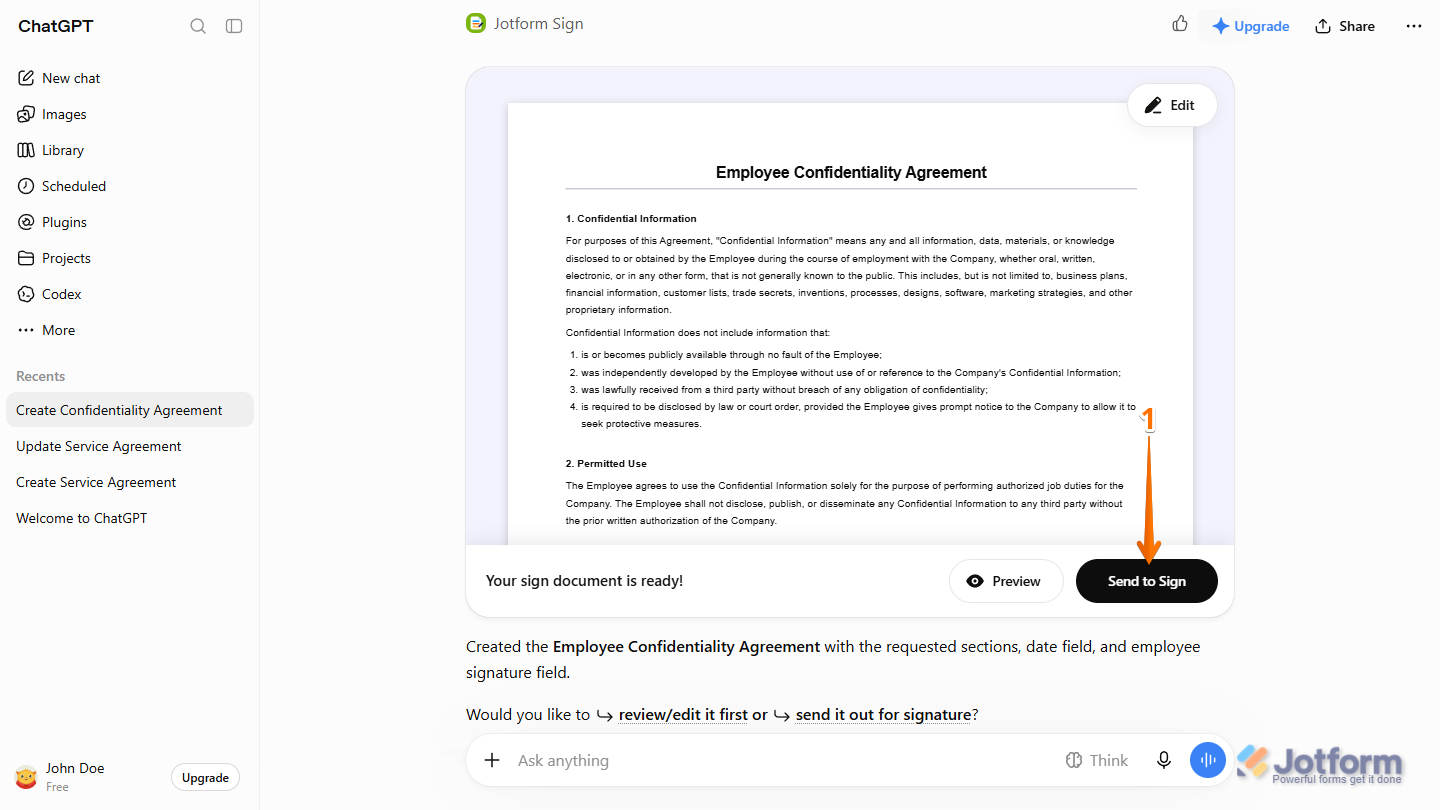
- Then, in the Who Needs to Sign? dialog, select Send to Signers.
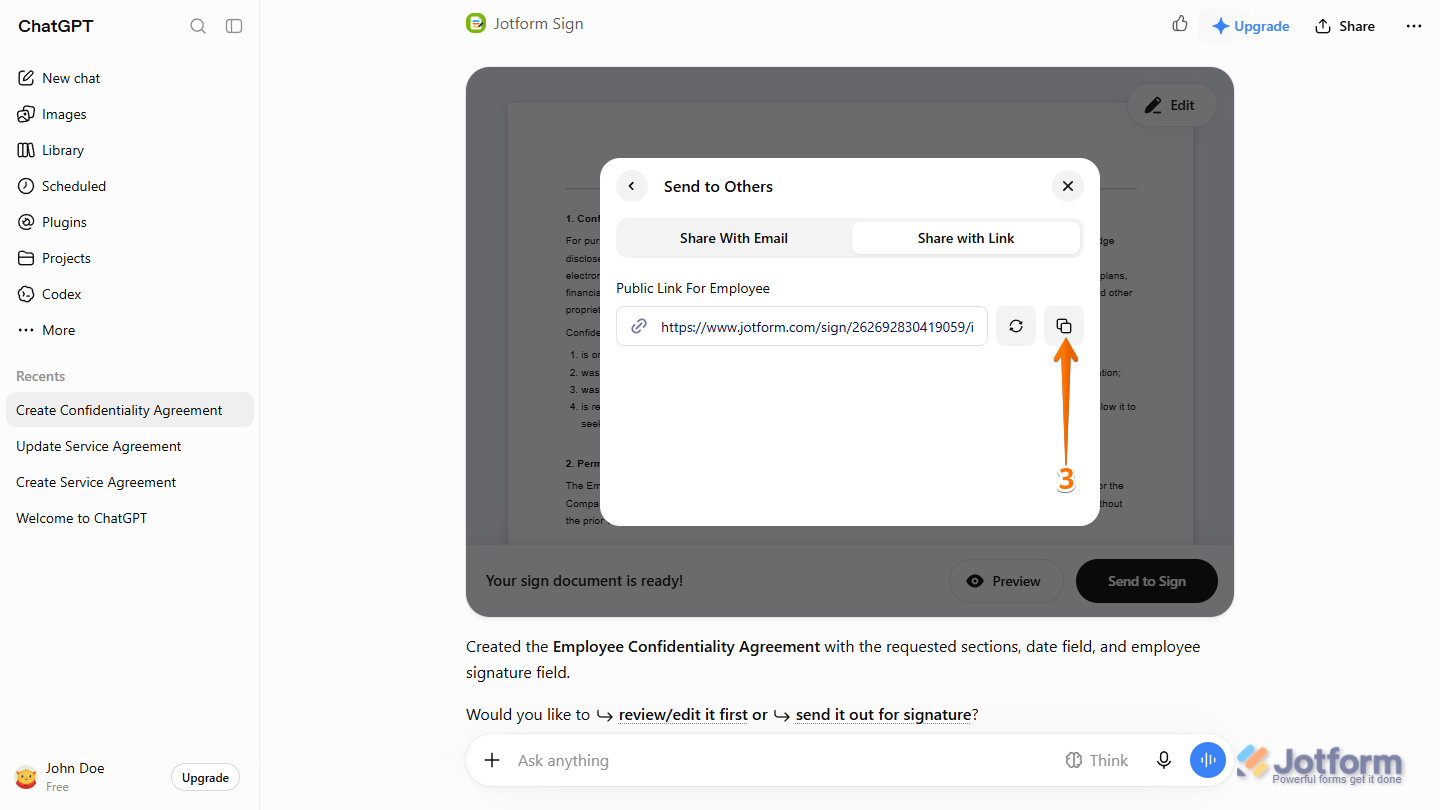
- In the Send to Others dialog, select Share with Link and, on the far-right side of the Public Link, click on the Copy icon.
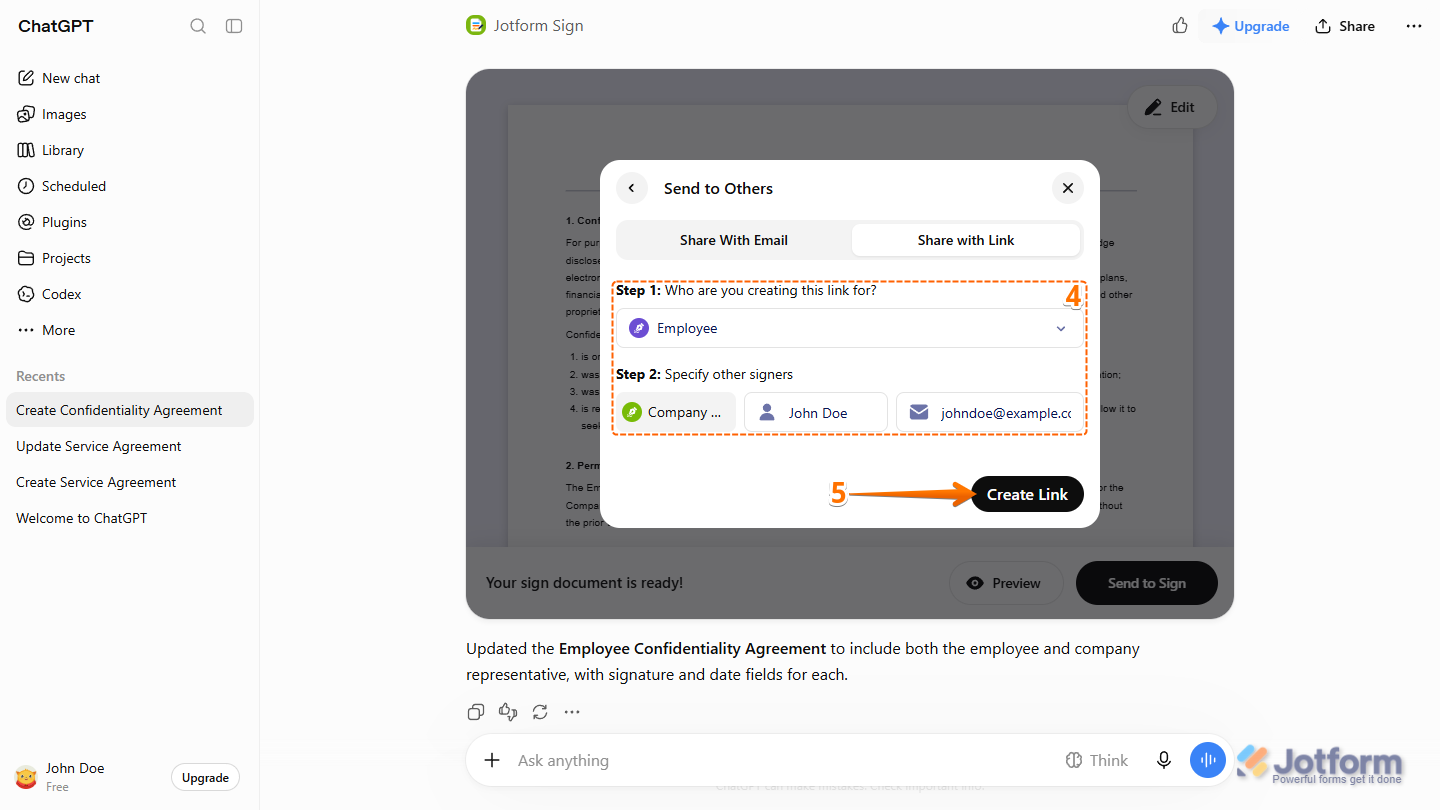
- For Sign Documents with multiple signer roles, configure the following settings to generate a link for a specific signer role:
- Step 1 — Click on the Downward Arrow icon and, in the Dropdown menu, select a signer role.
- Step 2 — Enter the Full Name and Email Address for the other signers.
- Then, click on Create Link.
- Now, on the far-right side of the generated Public Link, click on the Copy icon.
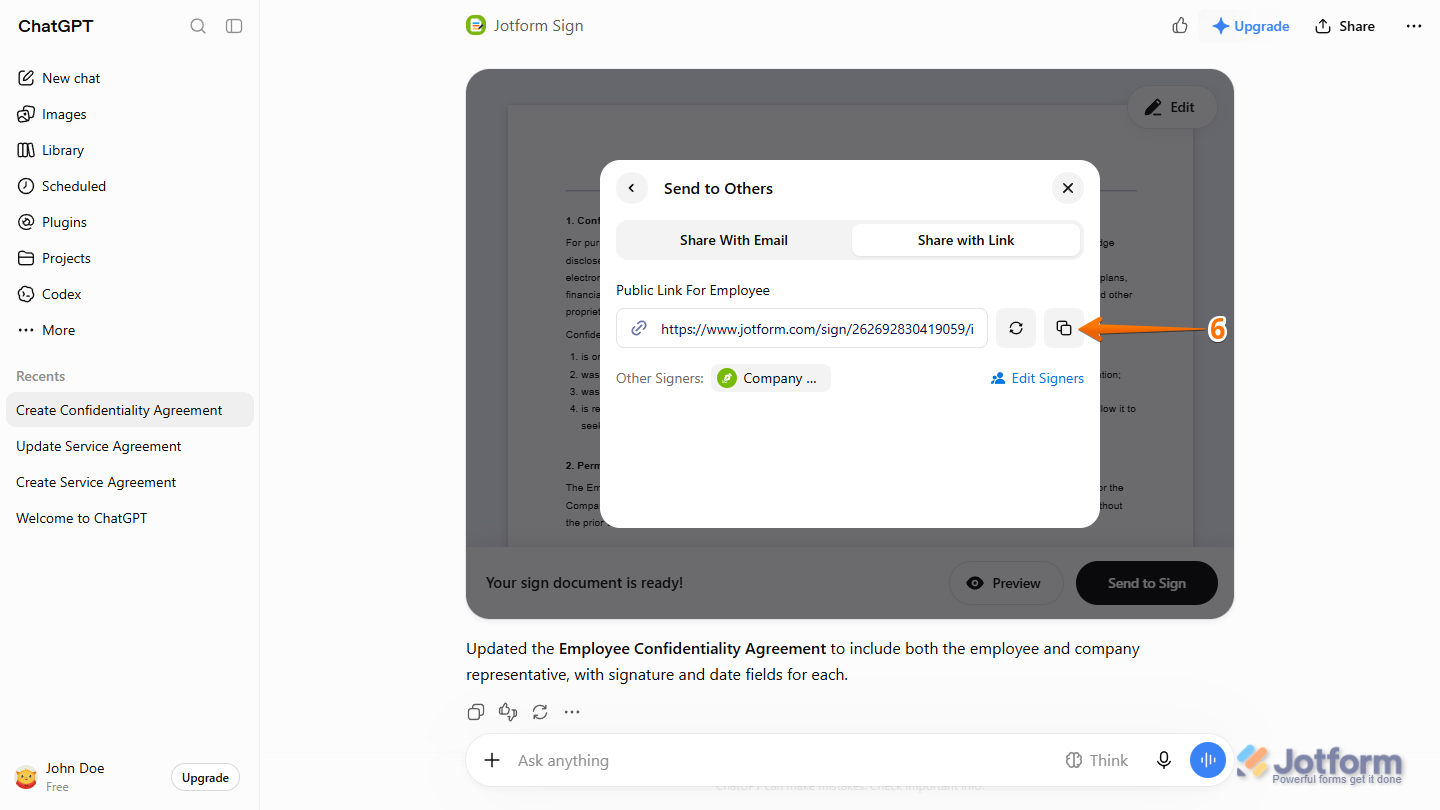
That’s it. You can now share the generated link with the intended signer.

Send Comment: