Salesforce Forms let you build lead forms that instantly sync with your Salesforce account—helping you save time and close more deals with ease. With the Configurable List Widget, you can boost your data collection efficiency and create multiple child records from a single form submission. Each row added by a user in the widget can automatically generate a separate child record in your connected Salesforce object.
This powerful Salesforce integration feature enables you to capture structured, repeatable data—such as products, attendees, services, or order items—and send each row as an individual child record linked to the same parent record.
In addition, this feature seamlessly integrates with Salesforce Prefill, automatically populating the Configurable List Widget with existing data when a form opens. This streamlines updates and allows users to easily review or modify previously stored records before resubmitting the form.
Adding and Setting Up the Configurable List Widget
First, you must add and set up the Configurable List Widget with the required fields for the integration. Adding and setting it up takes no time at all—here’s how:
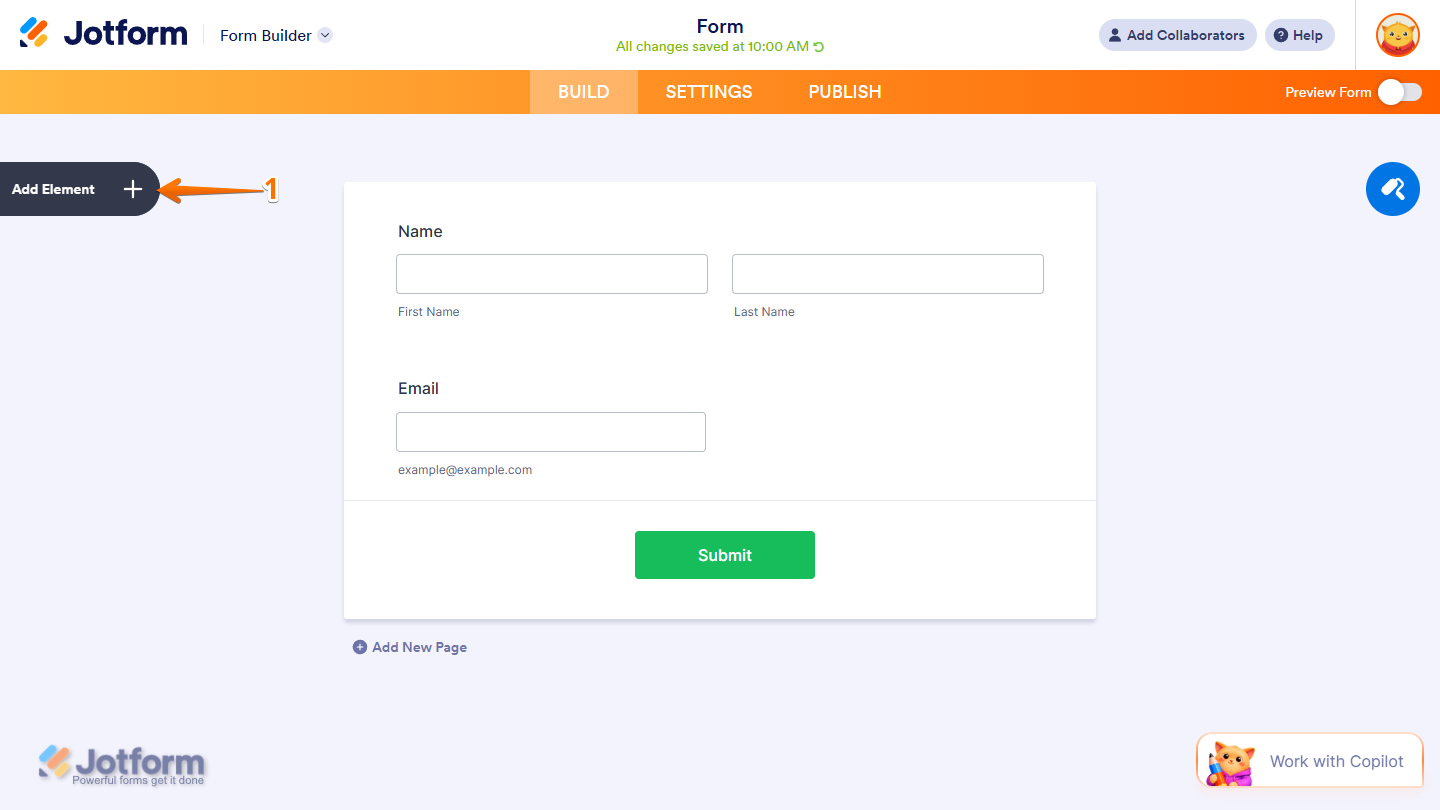
- In Form Builder, click on Add Element on the left side of the page.
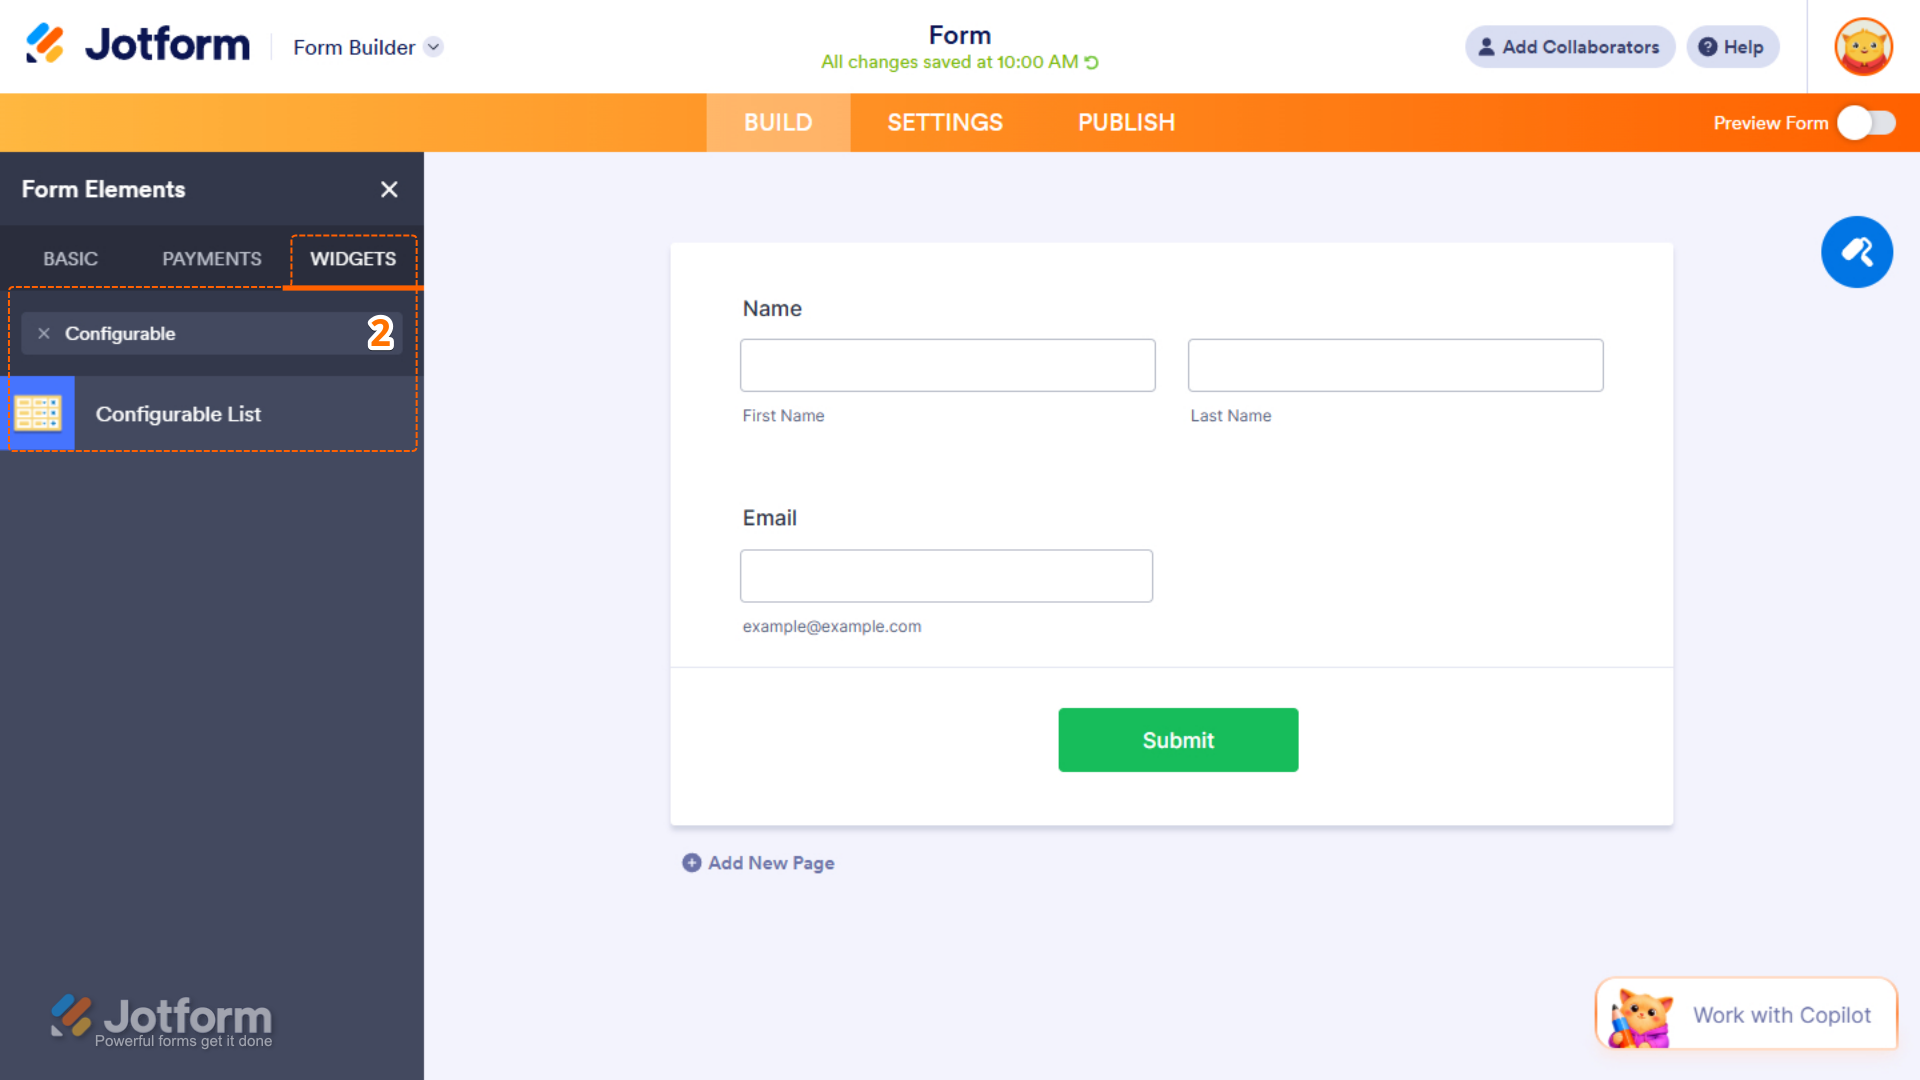
- Then, in the Form Elements menu, under the Widgets tab, search for Configurable List and click on it. Or just drag and drop it to where you want it on your form.
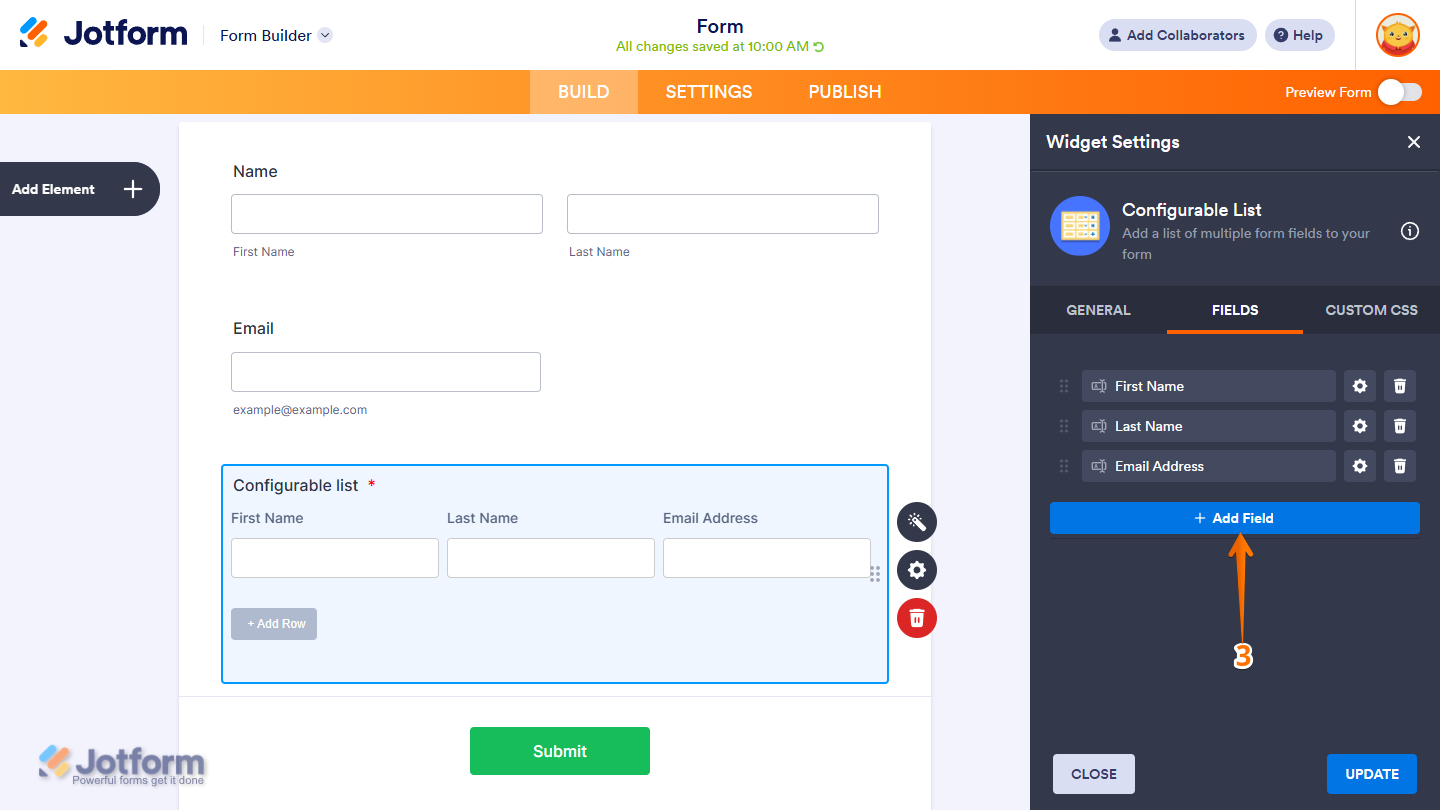
- Next, in the Configurable List Widget Settings menu that opens on the right side of the page, under the Fields tab, add all the required fields for your integration by clicking on Add Field.
Notes
- The Configurable List Widget has a default field added when you add it to your form. You can delete the fields by clicking the Trash Can icon next to them.
- In the image above, we used the Short Text field for the First Name, Last Name, and Email Address fields.
- There are other settings of the Configurable List widget that may be beneficial for your use case. For a full breakdown of how to do it, head over to our guide on How to Set Up the Configurable List Widget.
Creating an Account Record With Salesforce
Creating an account is a key step when setting up multiple child records in Salesforce. Make sure the Account Name is accurately recorded, as it serves as the primary reference that links all related child records to the correct parent account. Here’s how to set it up:
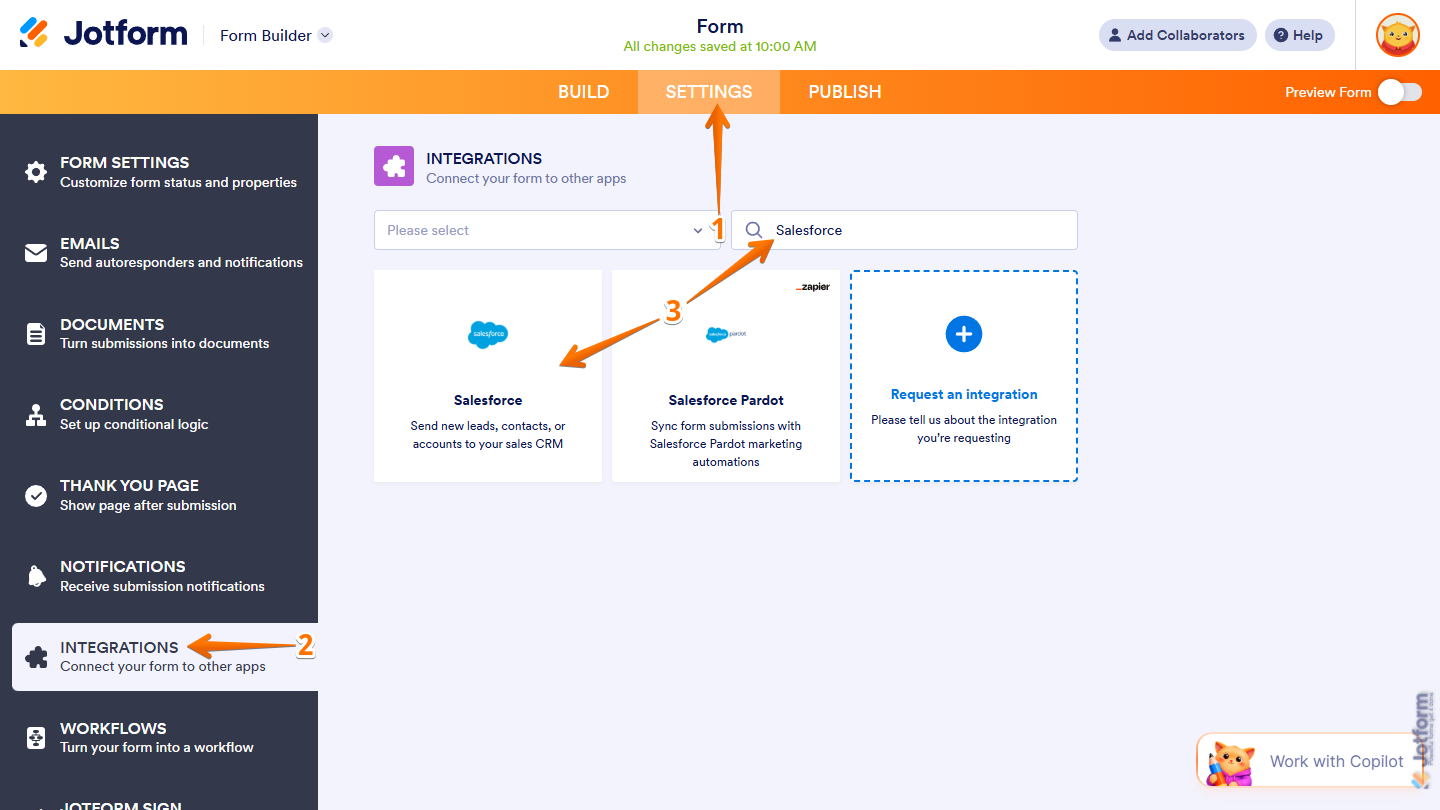
- In Form Builder, in the orange navigation bar at the top of the page, click on Settings.
- Then, in the menu on the left side of the page, click on Integrations.
- Now, in the Integrations section on the right, search for Salesforce and click on it.
- Next, select one from the following options to connect your form with Salesforce:
- Production — Connects to your live Salesforce environment.
- Sandbox — Connects to your Salesforce test environment for development and testing.
- Then, click on Continue and log in to your Salesforce account.

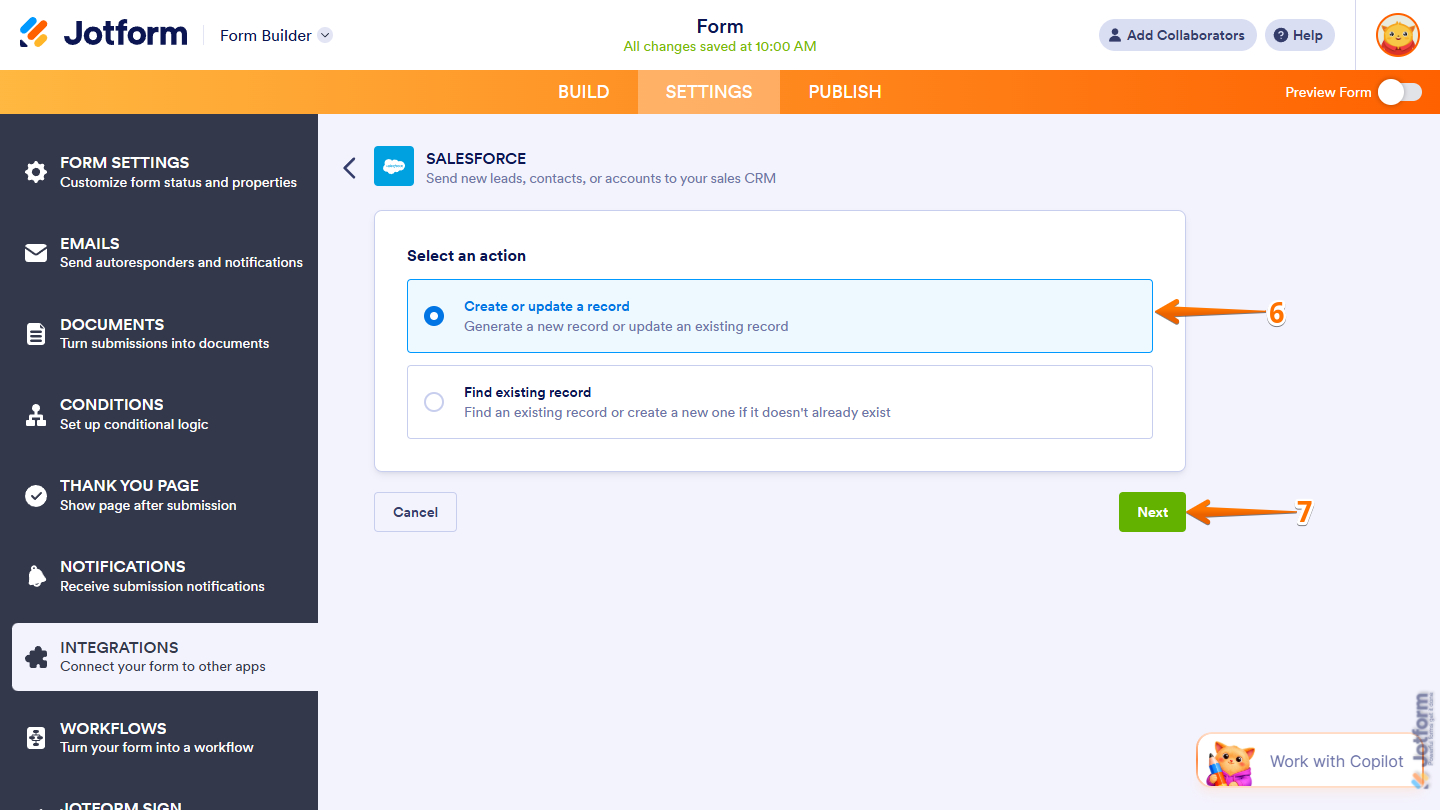
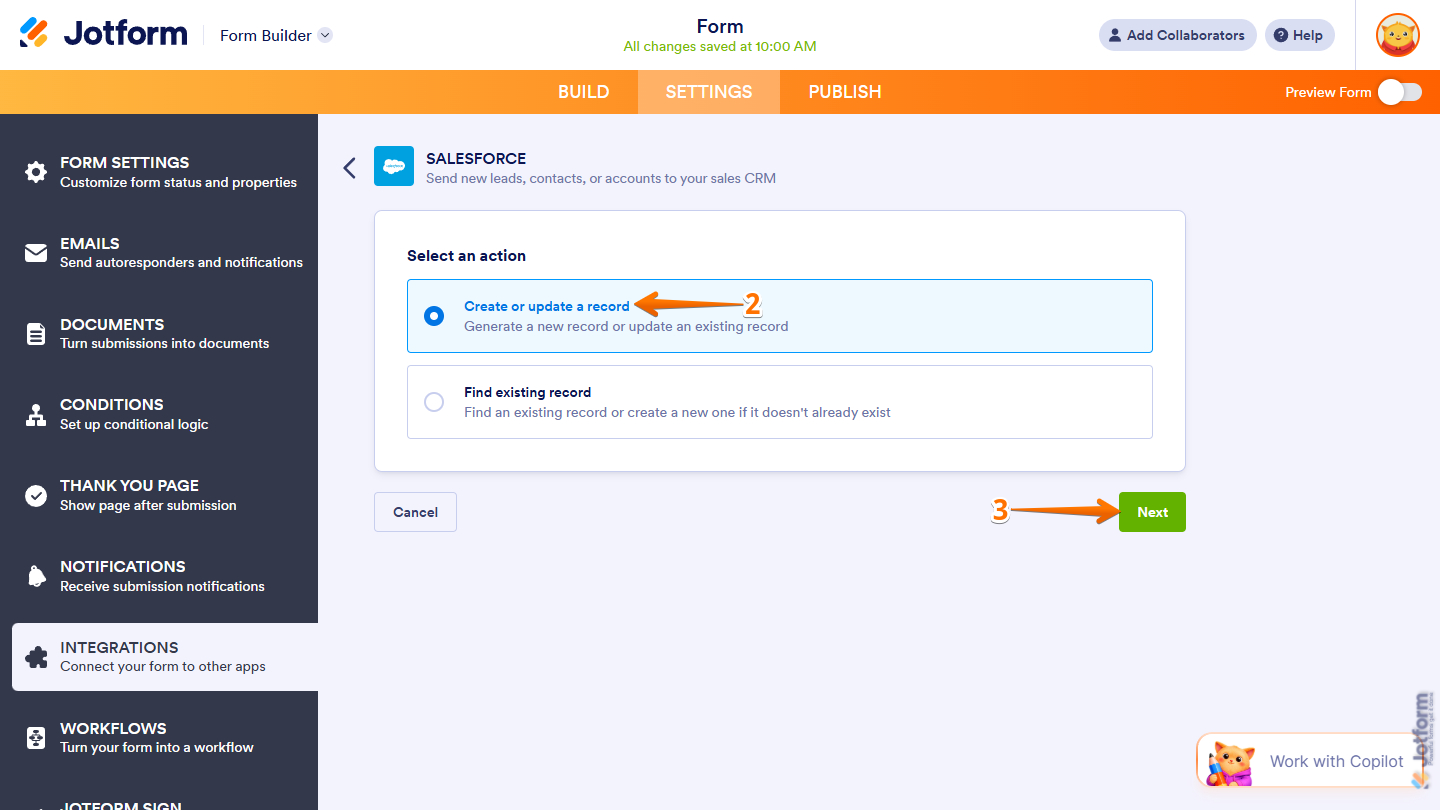
- Once connected, select Create or Update a Record from the Select an Action screen.
- Then, click on Next.
- Next, set up these things:
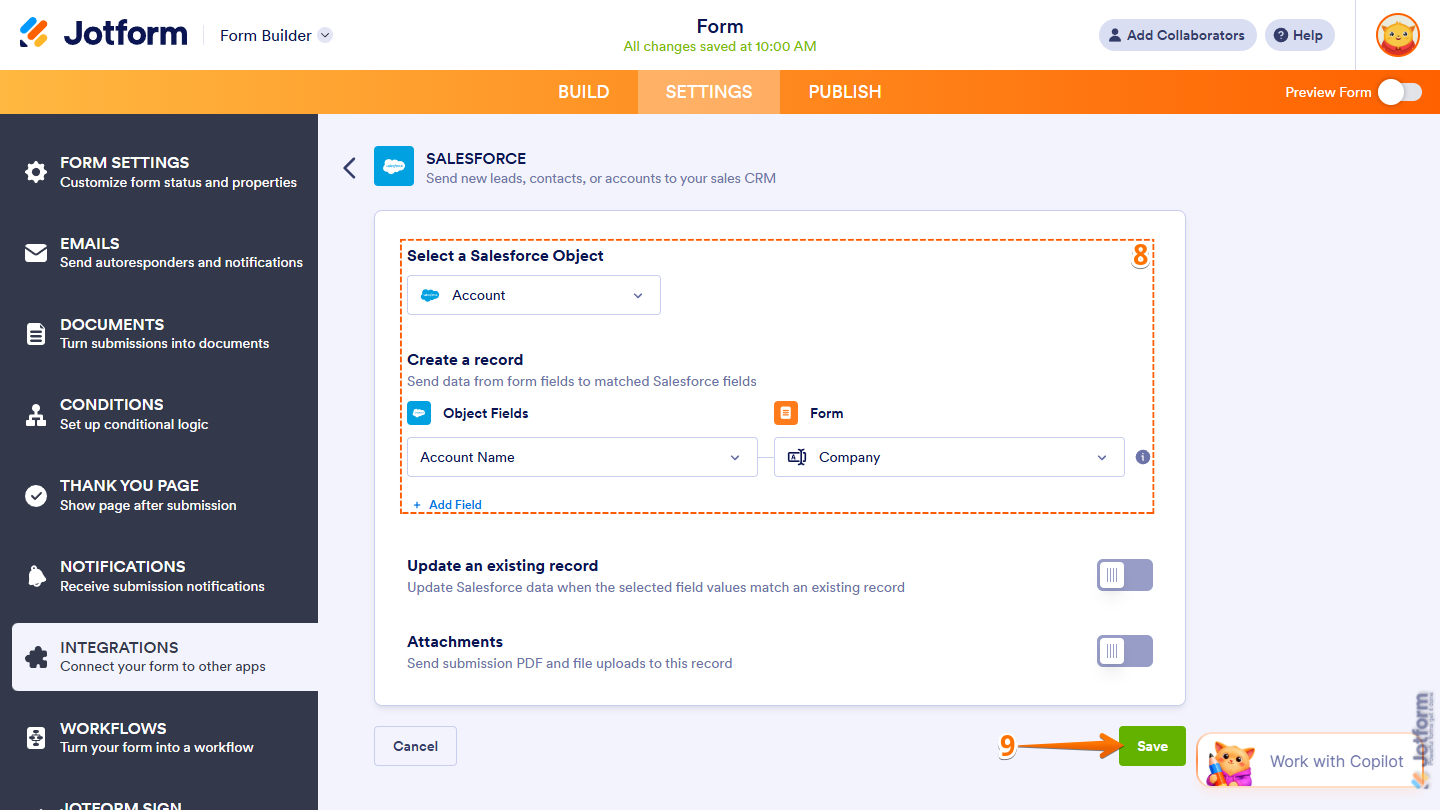
- Select a Salesforce Object — Select Account as the object.
- Create a Record — Map the Account Name from your Salesforce Object Fields to your Jotform form field. For example, the Company.
- Now, click on Save to complete this part.
Notes
- You can also map additional form fields in this step when creating an account. Just make sure that each mapped field corresponds to the same field type in Salesforce to avoid errors.
- Optionally, you can enable Update an Existing Record and map the appropriate fields to handle duplicate detection or record updates. You can also use the Attachments option to link file upload fields in your form to the account record as attachments.
Creating a Contact Record With Salesforce
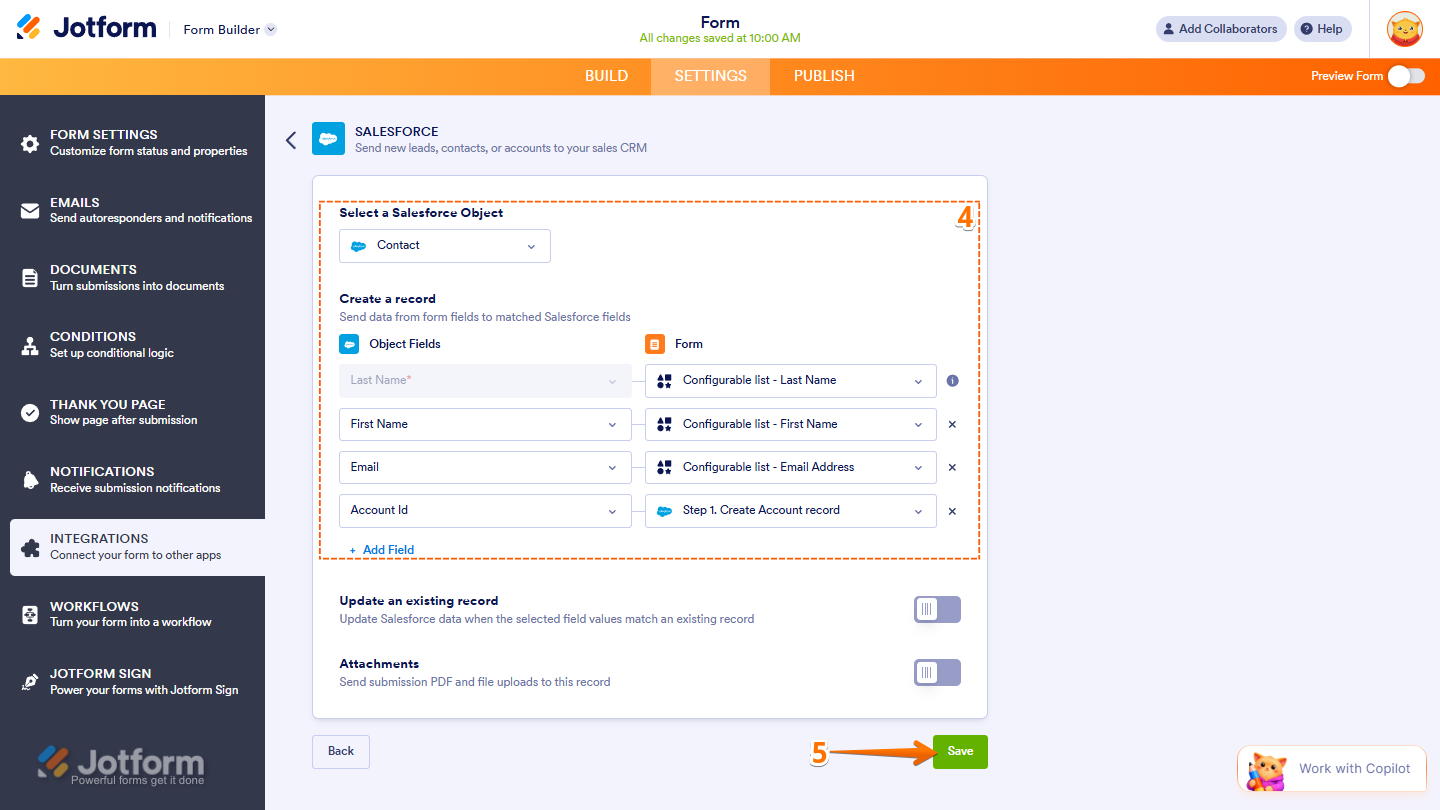
In this part, you’ll map the Configurable List fields to the corresponding Salesforce fields and ensure the Account ID is properly linked to the newly created Account record. This guarantees that all related child records are correctly associated with the right parent account. Here’s what to do next:
- In your Salesforce integration page, click on Add New Action.
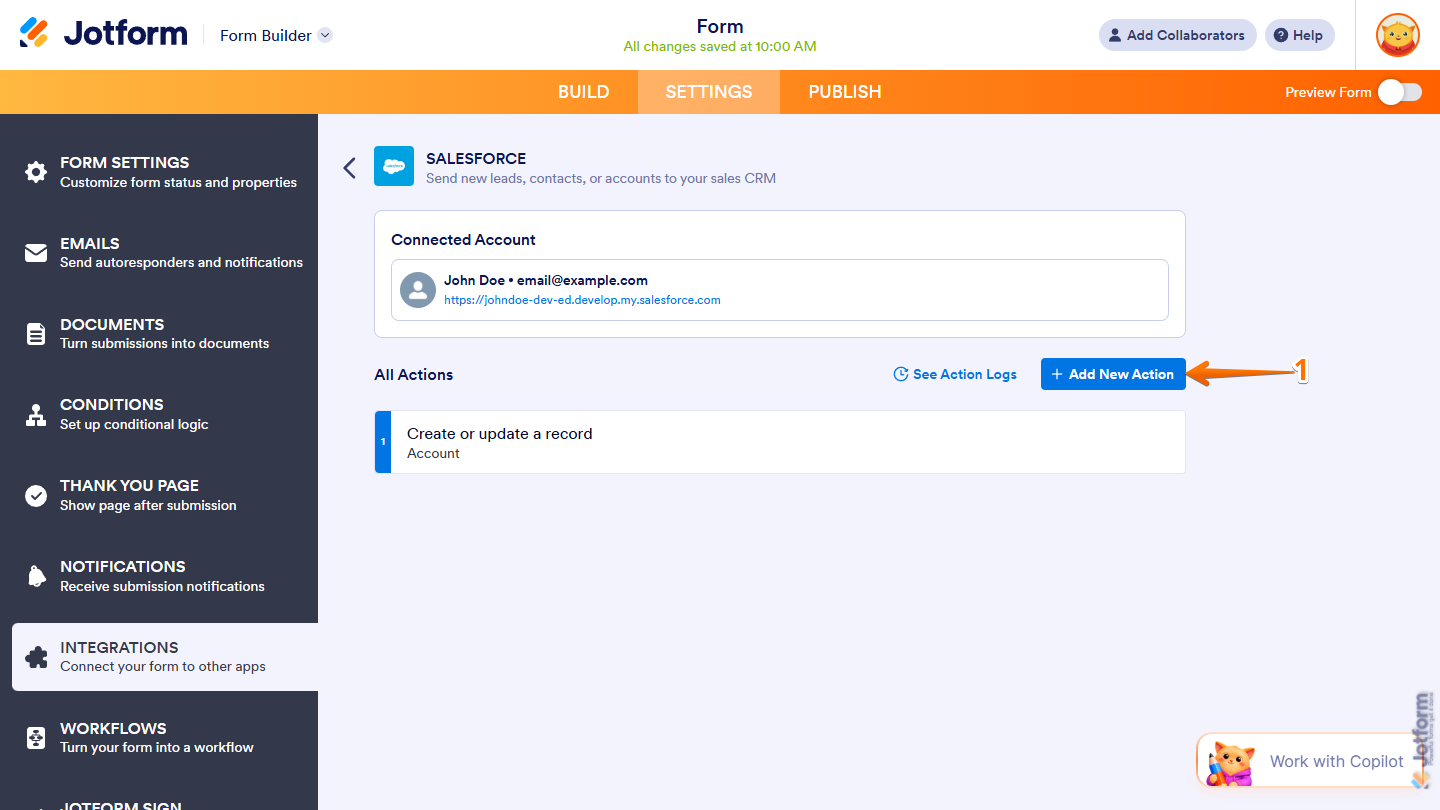
- Next, in the Select an Action page, select Create or Update a Record.
- Then, click on Next.
- Now, configure these things:
- Select a Salesforce Object — Select Contact as the object.
- Create a Record — Map your Salesforce Contact fields on the left to your Configurable List widget fields on the right. Make sure the Account ID is mapped to the Create Account Record, which is your first step.
- Once everything’s set, click on Save to complete the integration.
Pro Tip
As mentioned, the Configurable List Widget can also be used in the Salesforce Prefill. Configure your prefill with matching conditions and map the widget fields appropriately. To learn how it’s done, see our guide on How to Prefill Your Form Using Data From Salesforce.
Submitting the Form and Creating the Account and Contacts in Salesforce
Now that you have everything set up, you can submit the form and see how the account and contacts are created in Salesforce.
That’s it for creating multiple child records in Salesforce using the Configurable List Widget. Now you can efficiently capture structured, repeatable data and ensure each entry is properly linked within your Salesforce records—helping you maintain accurate, organized data and streamline your workflows.

Send Comment: