Jotform workflow offers the flexibility to slow things down when needed—because not every step has to happen instantly. Sometimes, you might want to give someone time to respond, waiting a few hours, days, months, or even years before taking the next action, or simply pause until the timing feels right.
With Jotform’s delay feature, you can easily build pauses right into your workflow so that the next step happens exactly when it should. This helps you create smoother processes, avoid overwhelming recipients with too many notifications at once, and keep everything moving at a pace that makes sense for your team and your users.
Adding and Setting Up the Pause Element
Whether you’re setting up a brand-new workflow or adjusting an existing one, adding a delay is a great way to control the timing of each step. Here’s how to set it up:
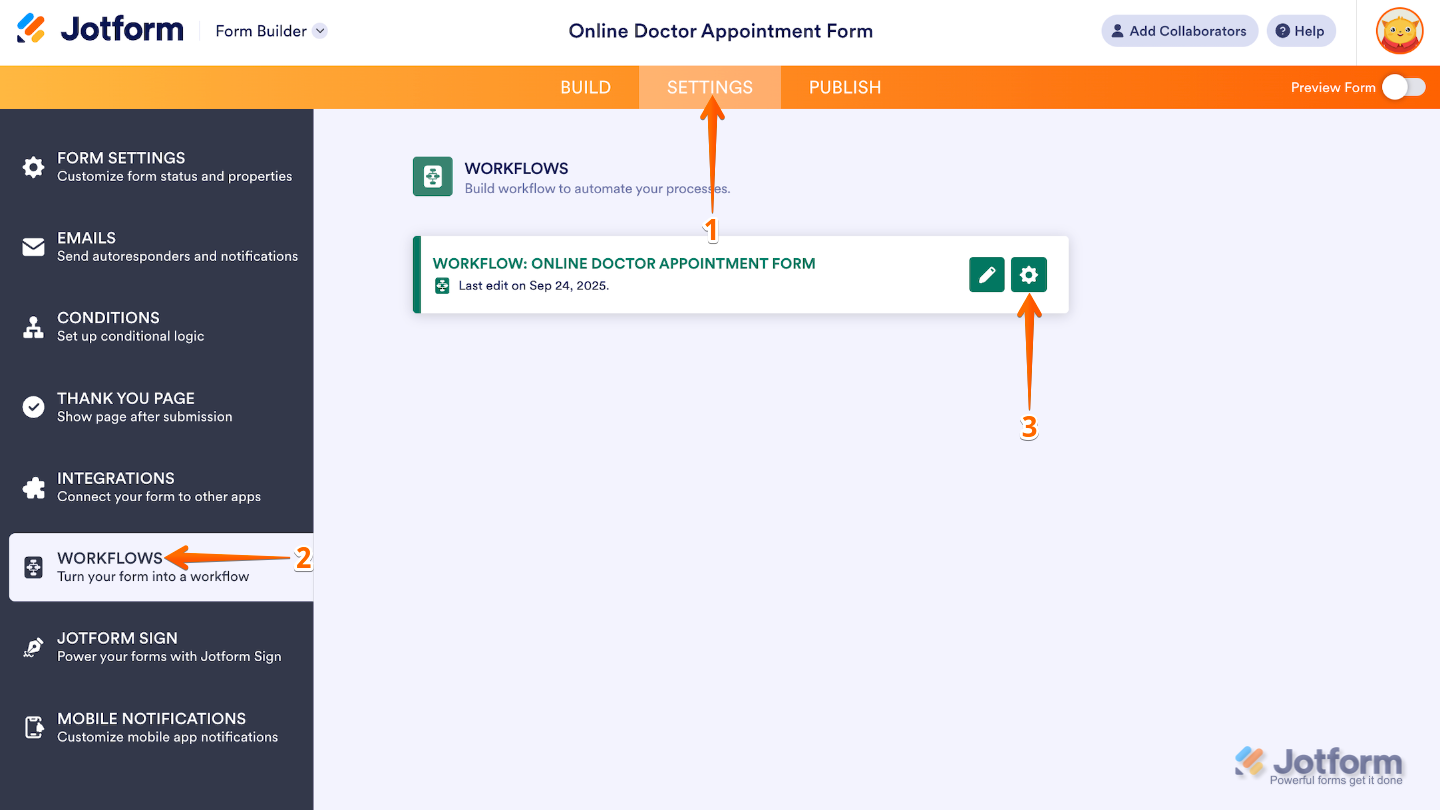
- In Form Builder, in the orange navigation bar at the top of the page, click on Settings.
- Then, click on Workflows in the menu on the left.
- Hover your mouse over the Workflow on the right and click on the Pencil icon to edit it.
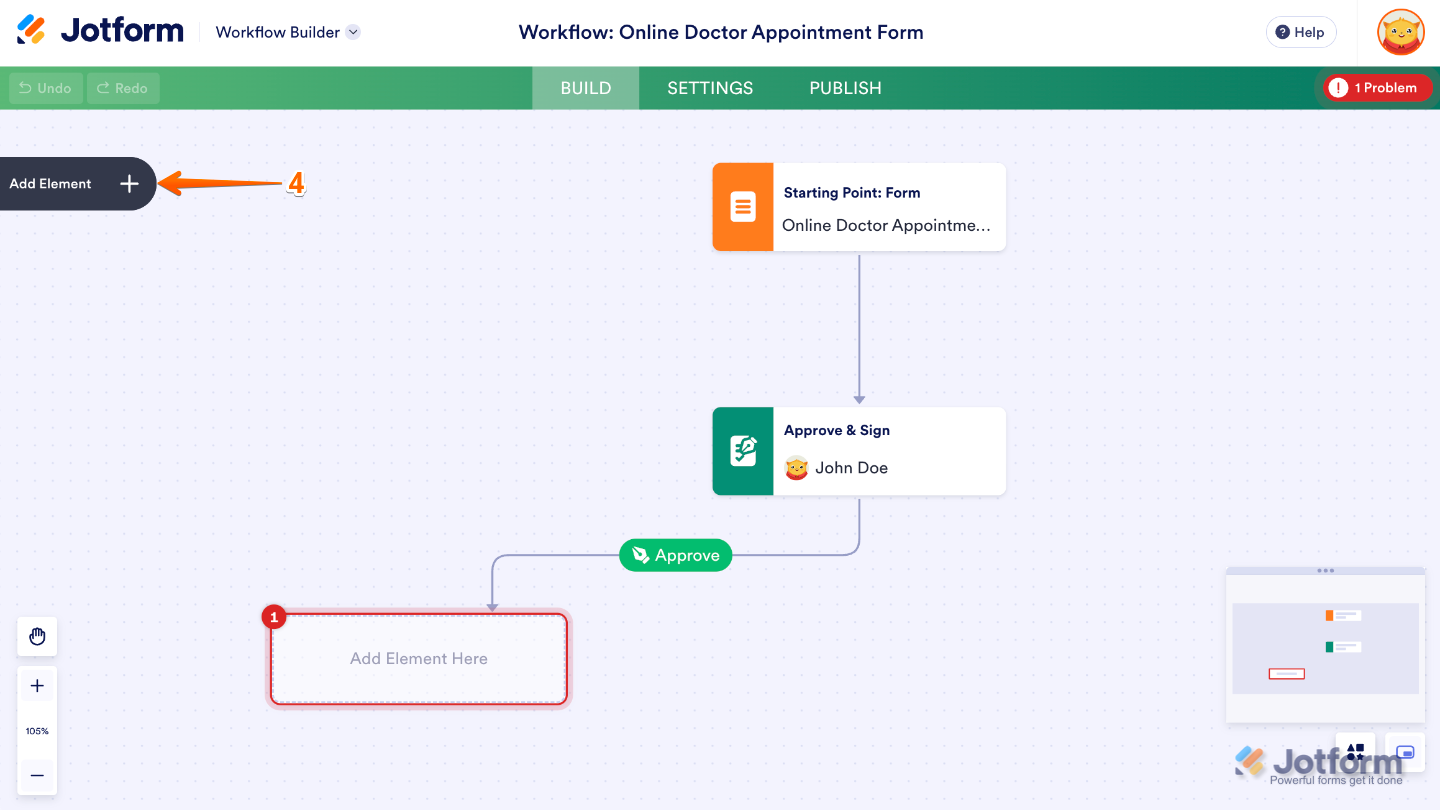
- Next, in the Workflow Builder, click on Add Element on the left side of the page.
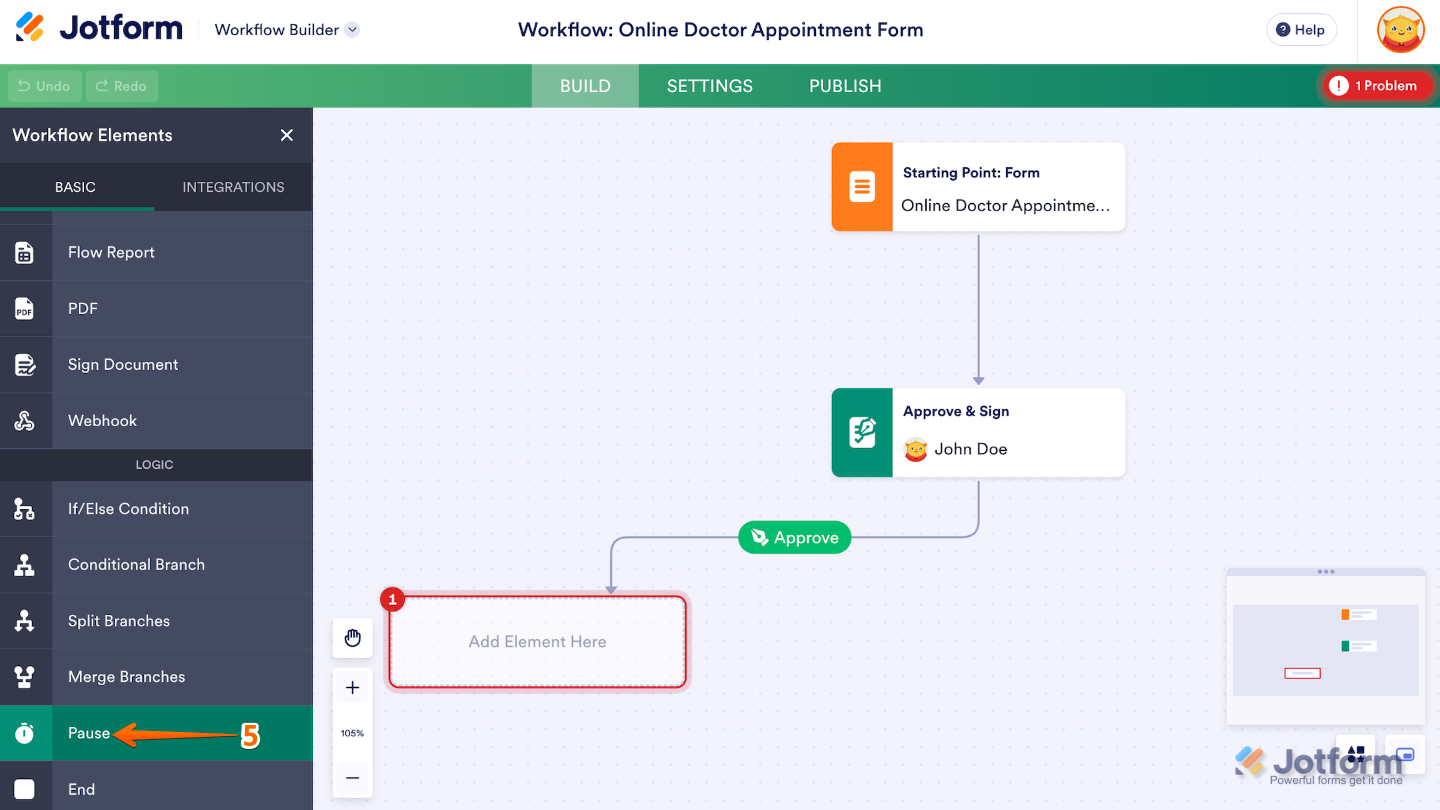
- Now, in the Workflow Elements menu, under the Basic tab, scroll down to see the Pause element and click on it. Or, just drag and drop it to where you want it to be in your workflow.
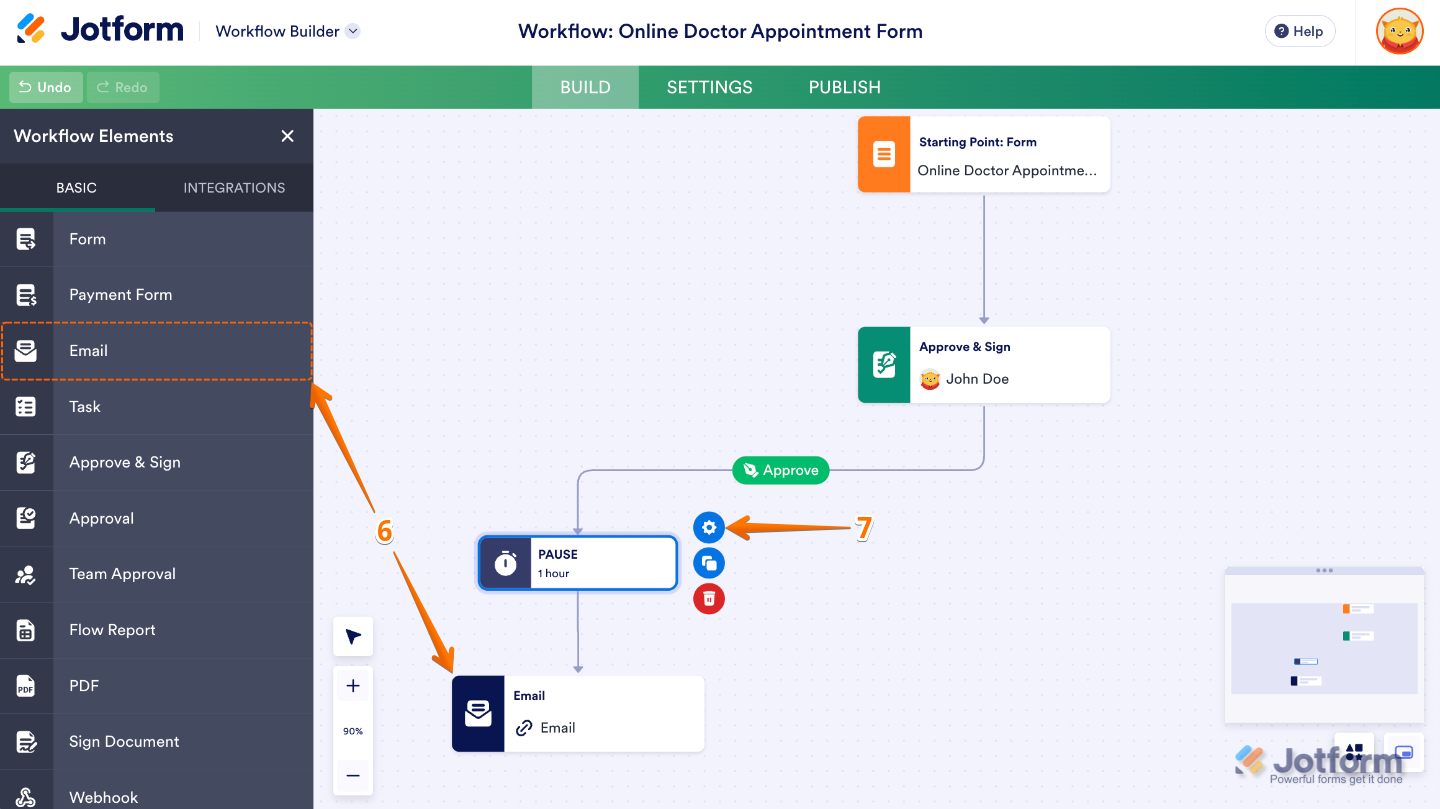
- After that, add an Email element next to it.
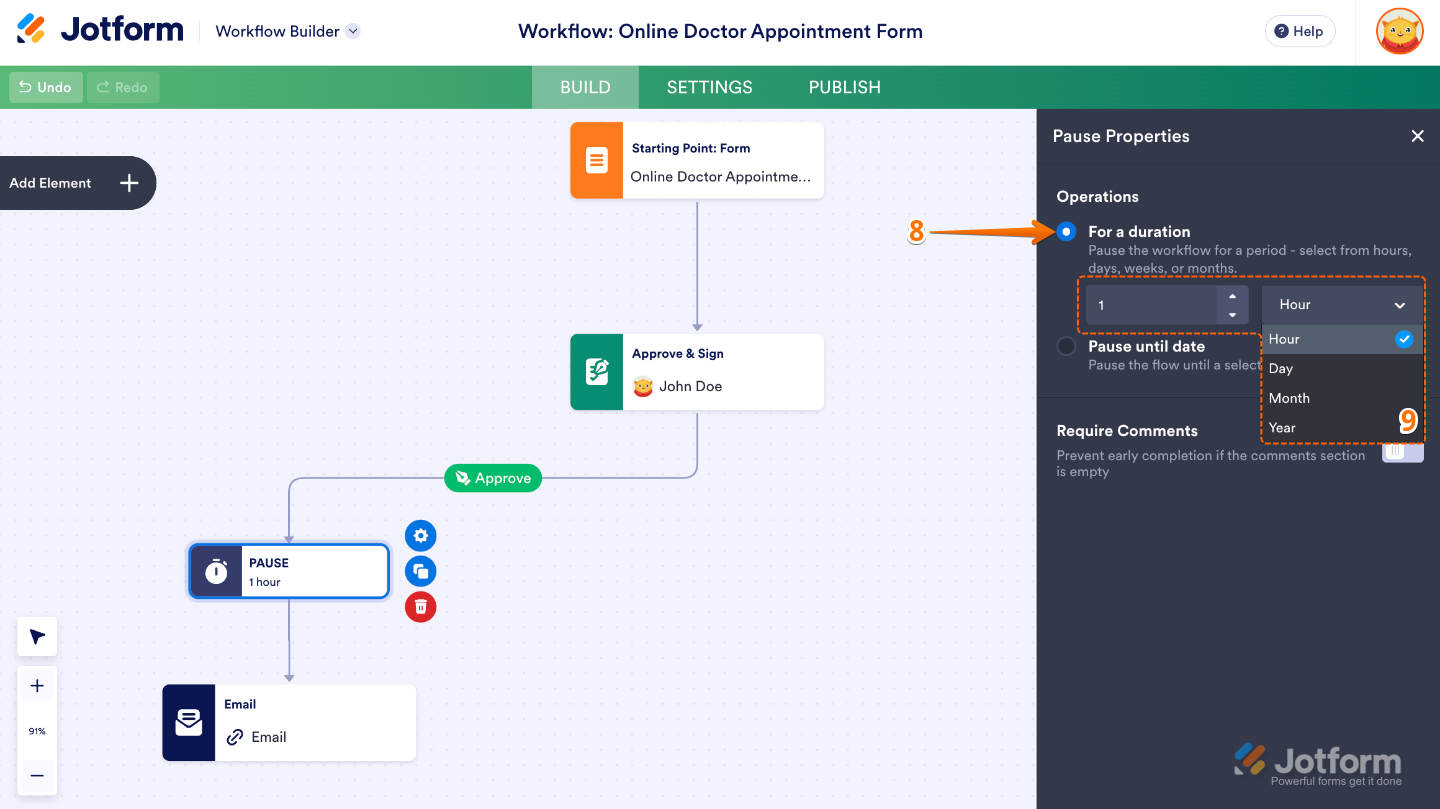
- Once done, click on the added Pause field, and then click on the Gear icon.
- In the Pause Properties panel on the right, under Operations, select the For a Duration option.
- Click on the Downward Arrow icon to set a number of hours, days, months, or years before the email is sent.
That’s it. Your workflow will now pause and pick back up right when you’ve scheduled it to. You can relax knowing Jotform will handle the timing for you—no extra steps required.
Manually Ending the Pause to Resume the Workflow Early
You don’t always have to wait for the full pause to run its course. If things are ready to move forward sooner, you can manually end the pause and pick the workflow back up right away. It’s a handy way to save time and keep everything flowing smoothly when the next step doesn’t need to wait. Here’s a quick how-to:
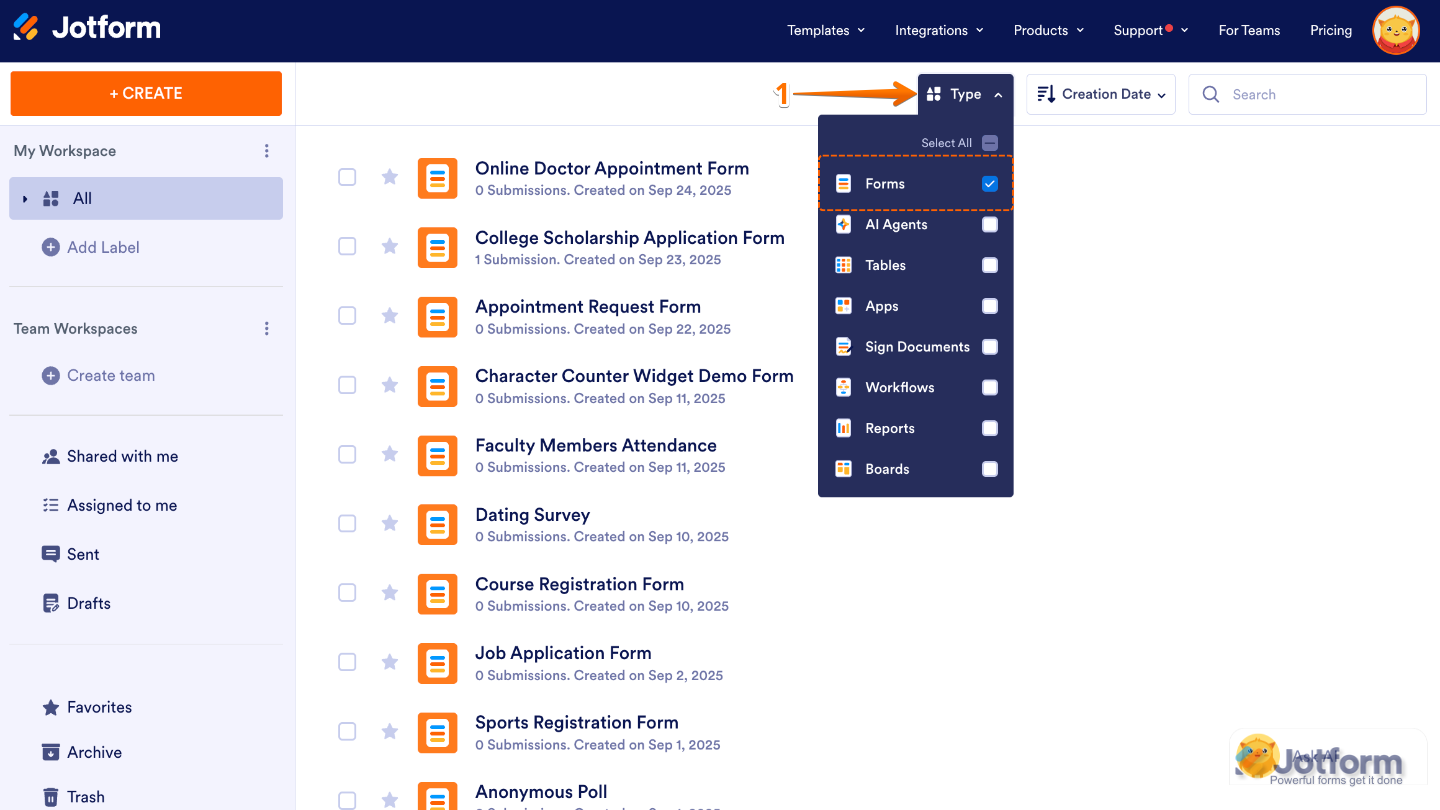
- On your My Workspace page, click on Type at the top, and in the Dropdown menu that opens, uncheck the boxes next to all the assets except Forms, so only they’ll be shown on the page.
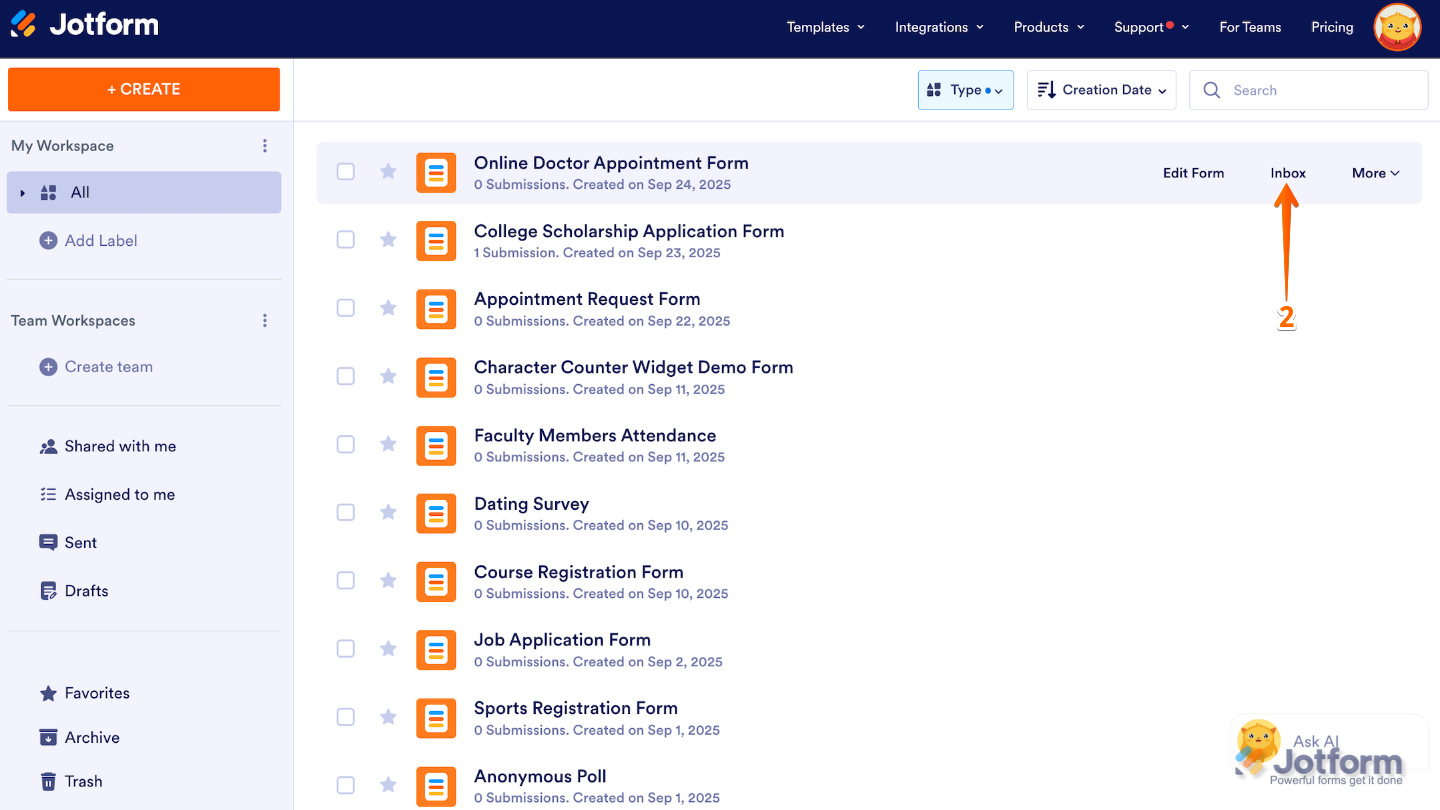
- Then, hover your mouse over the form you want to archive submissions for, and click on Inbox on the right side of the page. For example, we selected the Online Doctor Appointment Form.
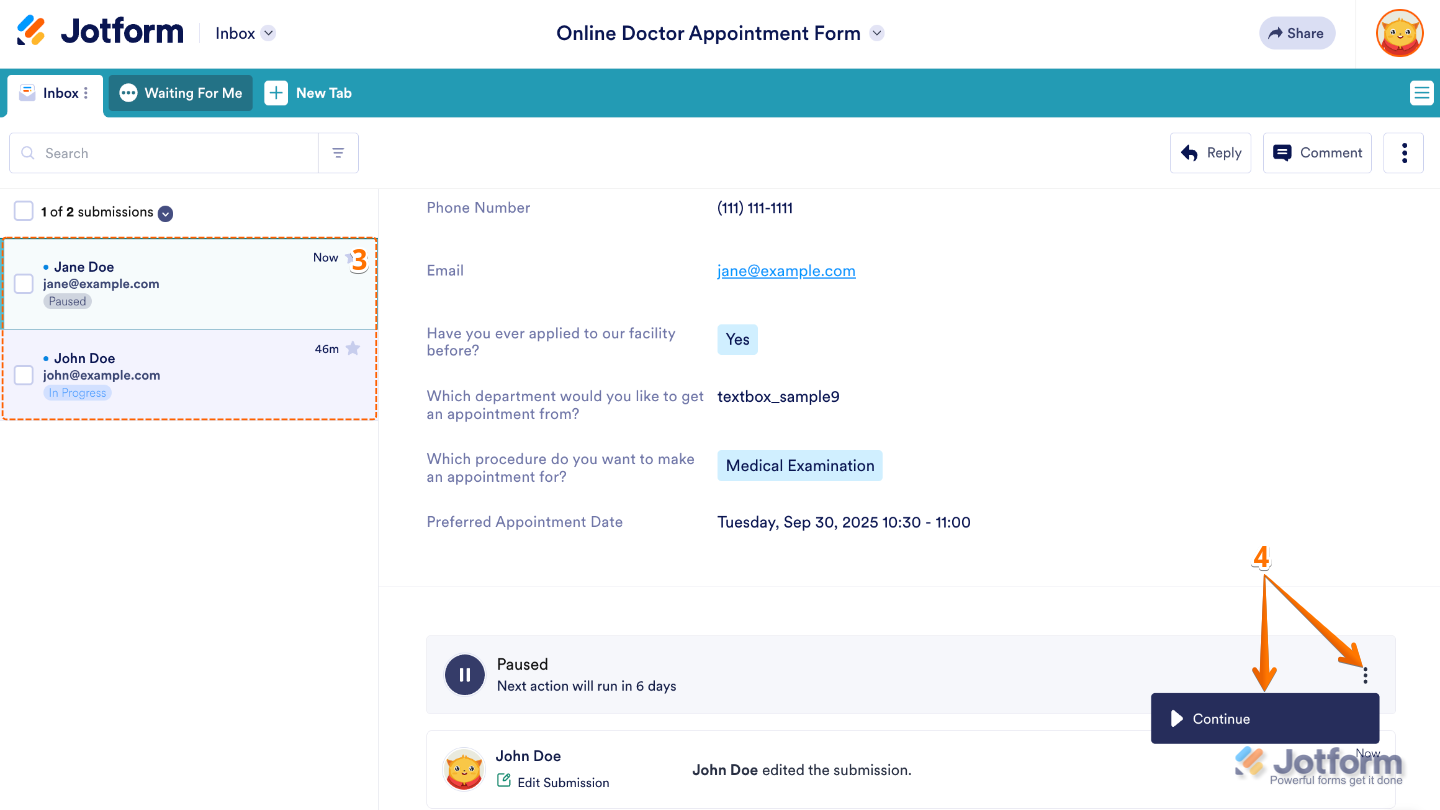
- Now, in Jotform Inbox, select the submission where you want to end the pause.
- Scroll down to the Paused section, click on the Three Dotsicon, and then select Continue.
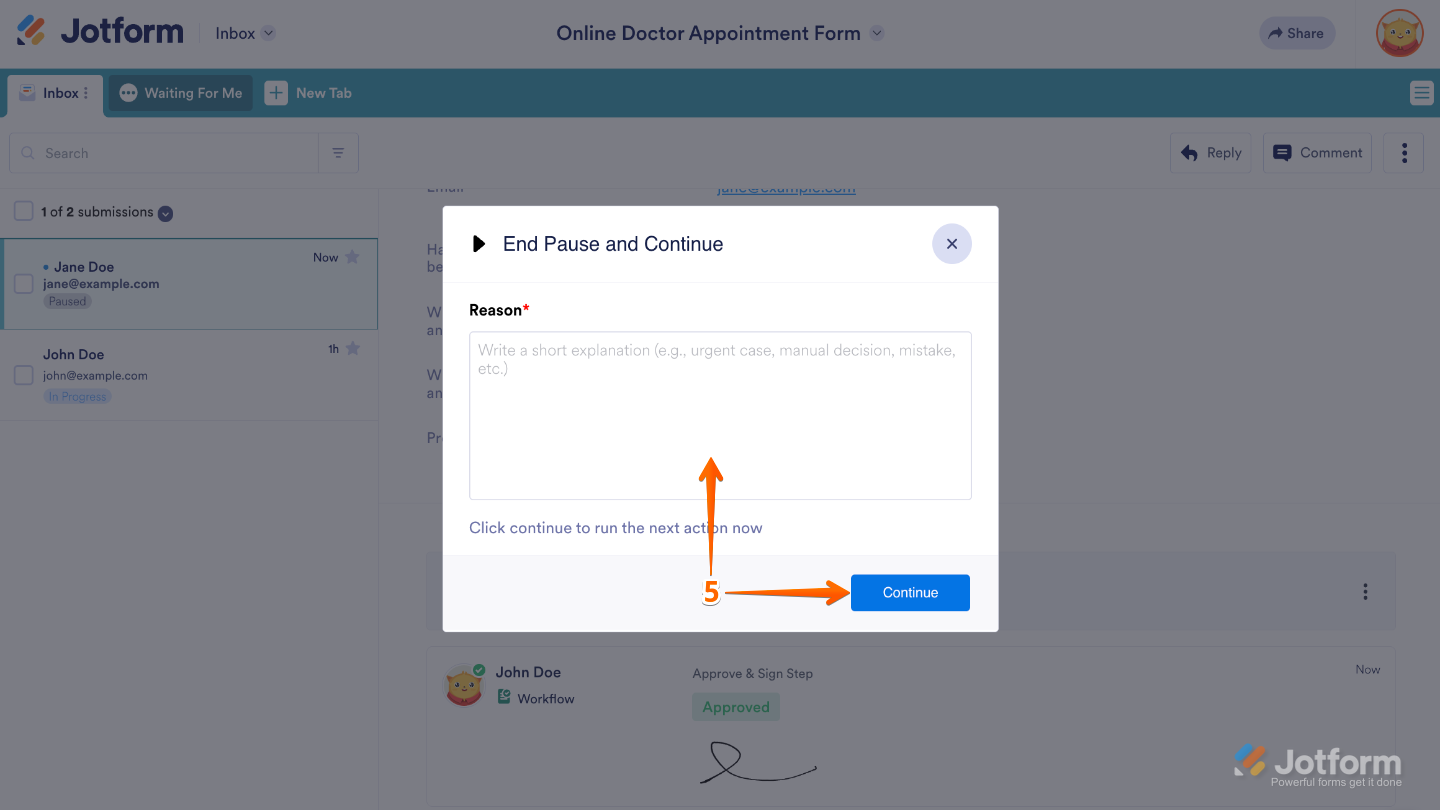
- If you turned on the Require Comment option in your Pause properties from your workflow, in the End Pause and Continue window, add a quick reason for ending the pause and click on Continue.
That’s it. Your workflow picks up instantly, so you can skip the wait and keep everything moving without missing a beat.

Send Comment: