You can easily delete submission data right from your Tables. After downloading your submissions, you might want to remove old or test entries and keep only the recent ones. Whether you’re managing outdated responses, clearing test entries, or staying compliant with data privacy regulations, knowing how to safely delete submissions is essential.
Note
- Deleted entries are moved to the Trash and kept there for a set amount of time.
Accessing the Form Submission Table
To view and manage the responses you’ve collected, you’ll need to open your form’s Submission Table. Here’s how to do it:
- In Workspace, click on Filter on the toolbar.
- In the Dropdown menu that opens, hover over the Forms, and click on Only.
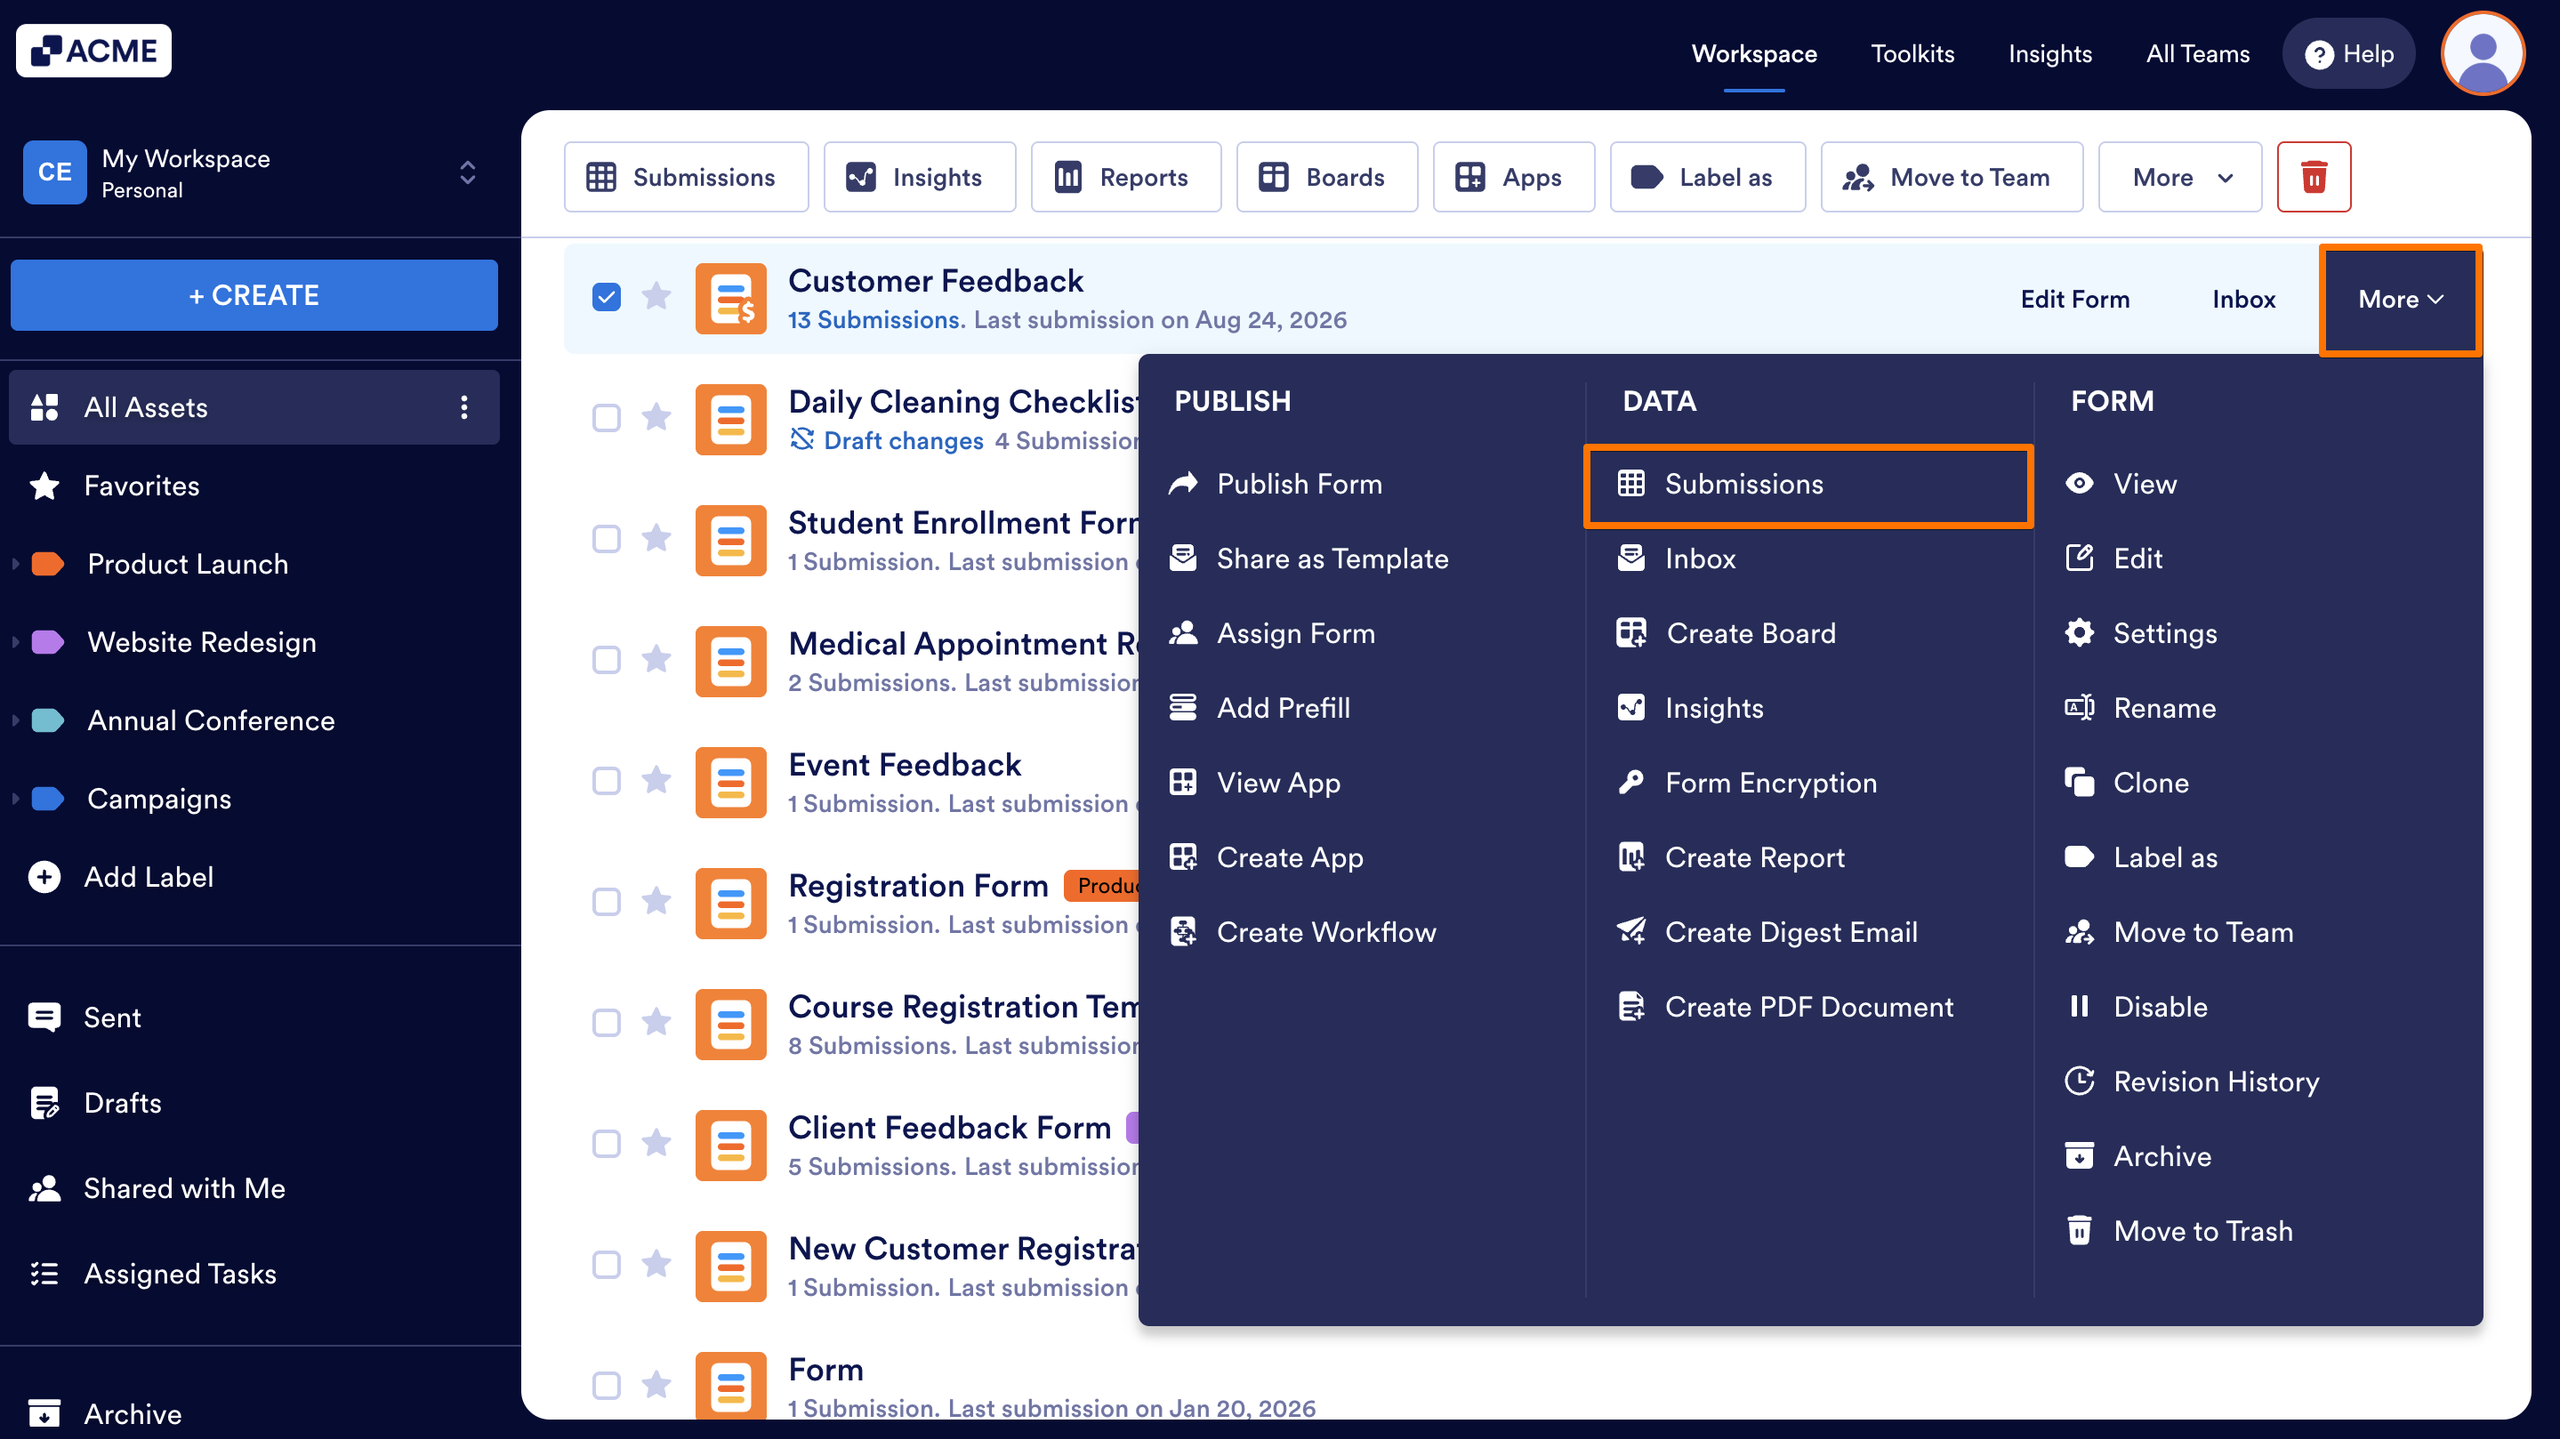
- Now, hover your mouse over the form you want to manage, and click on More on the right side of the page.
- Next, in the Dropdown menu, under the Data column, click on Submissions.
Deleting a Specific Entry
You can delete individual submissions directly from the Submission Table to free up space or remove unwanted entries. Here’s how to do it:
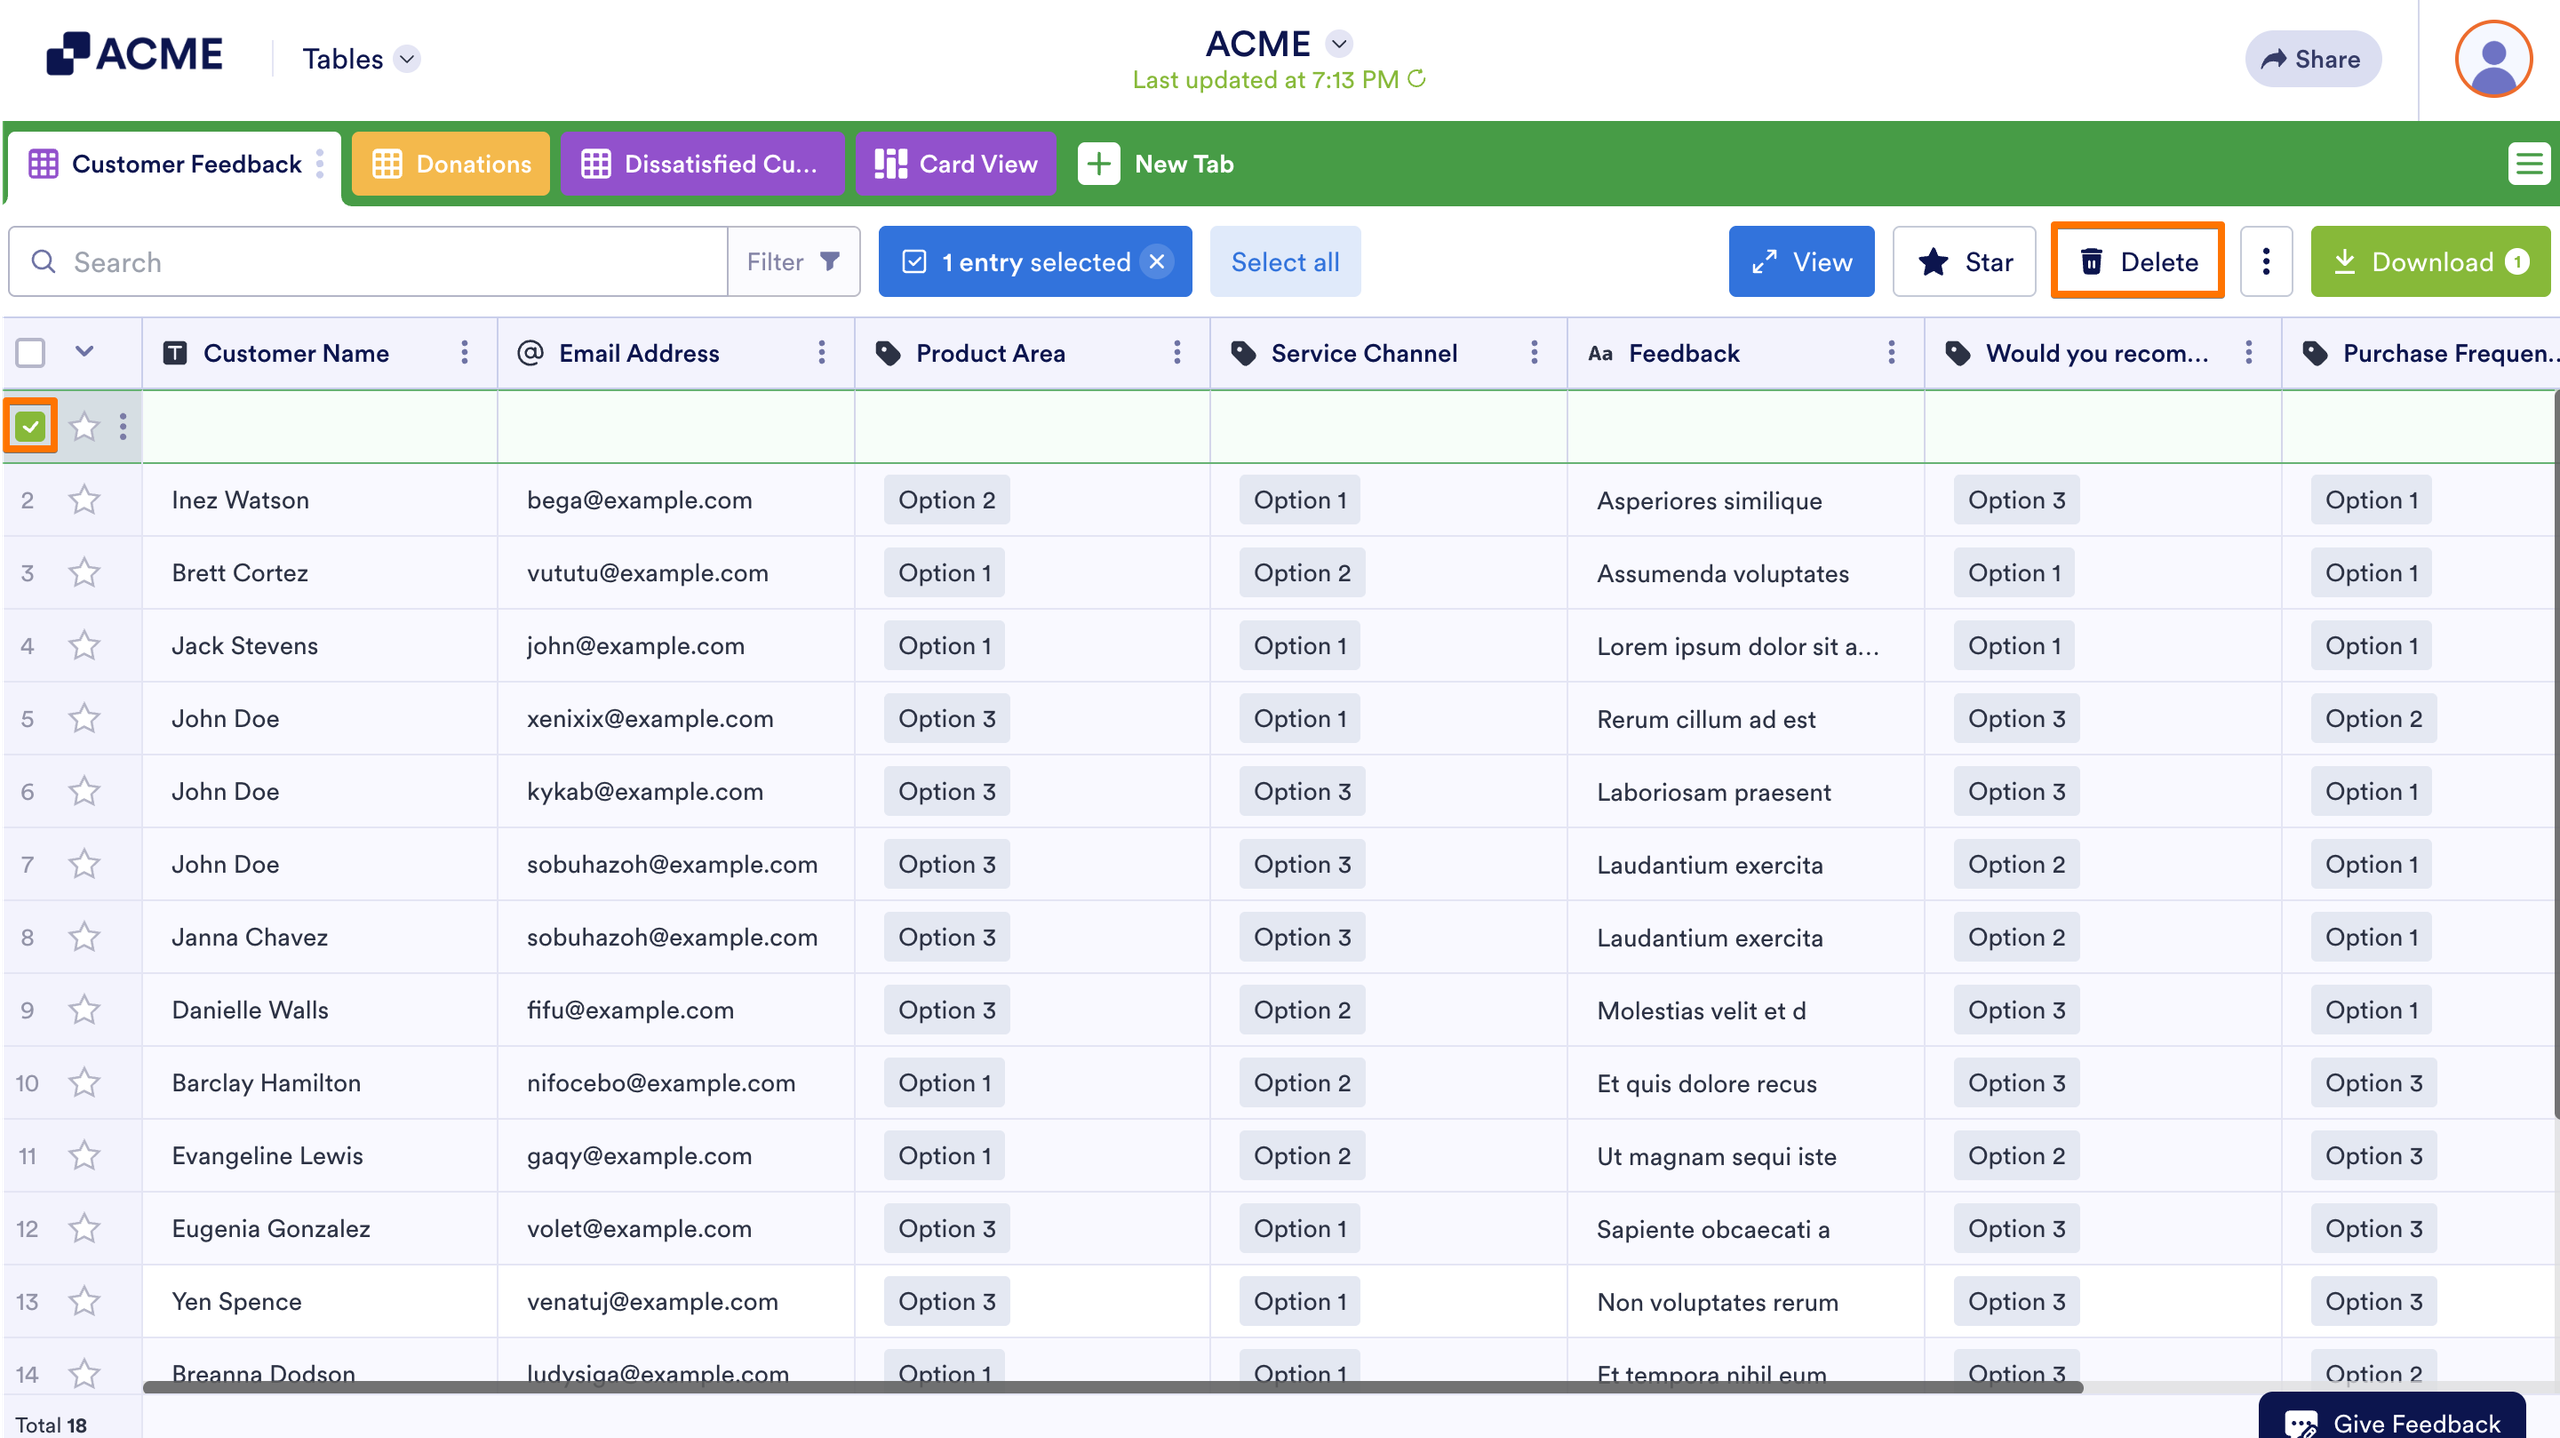
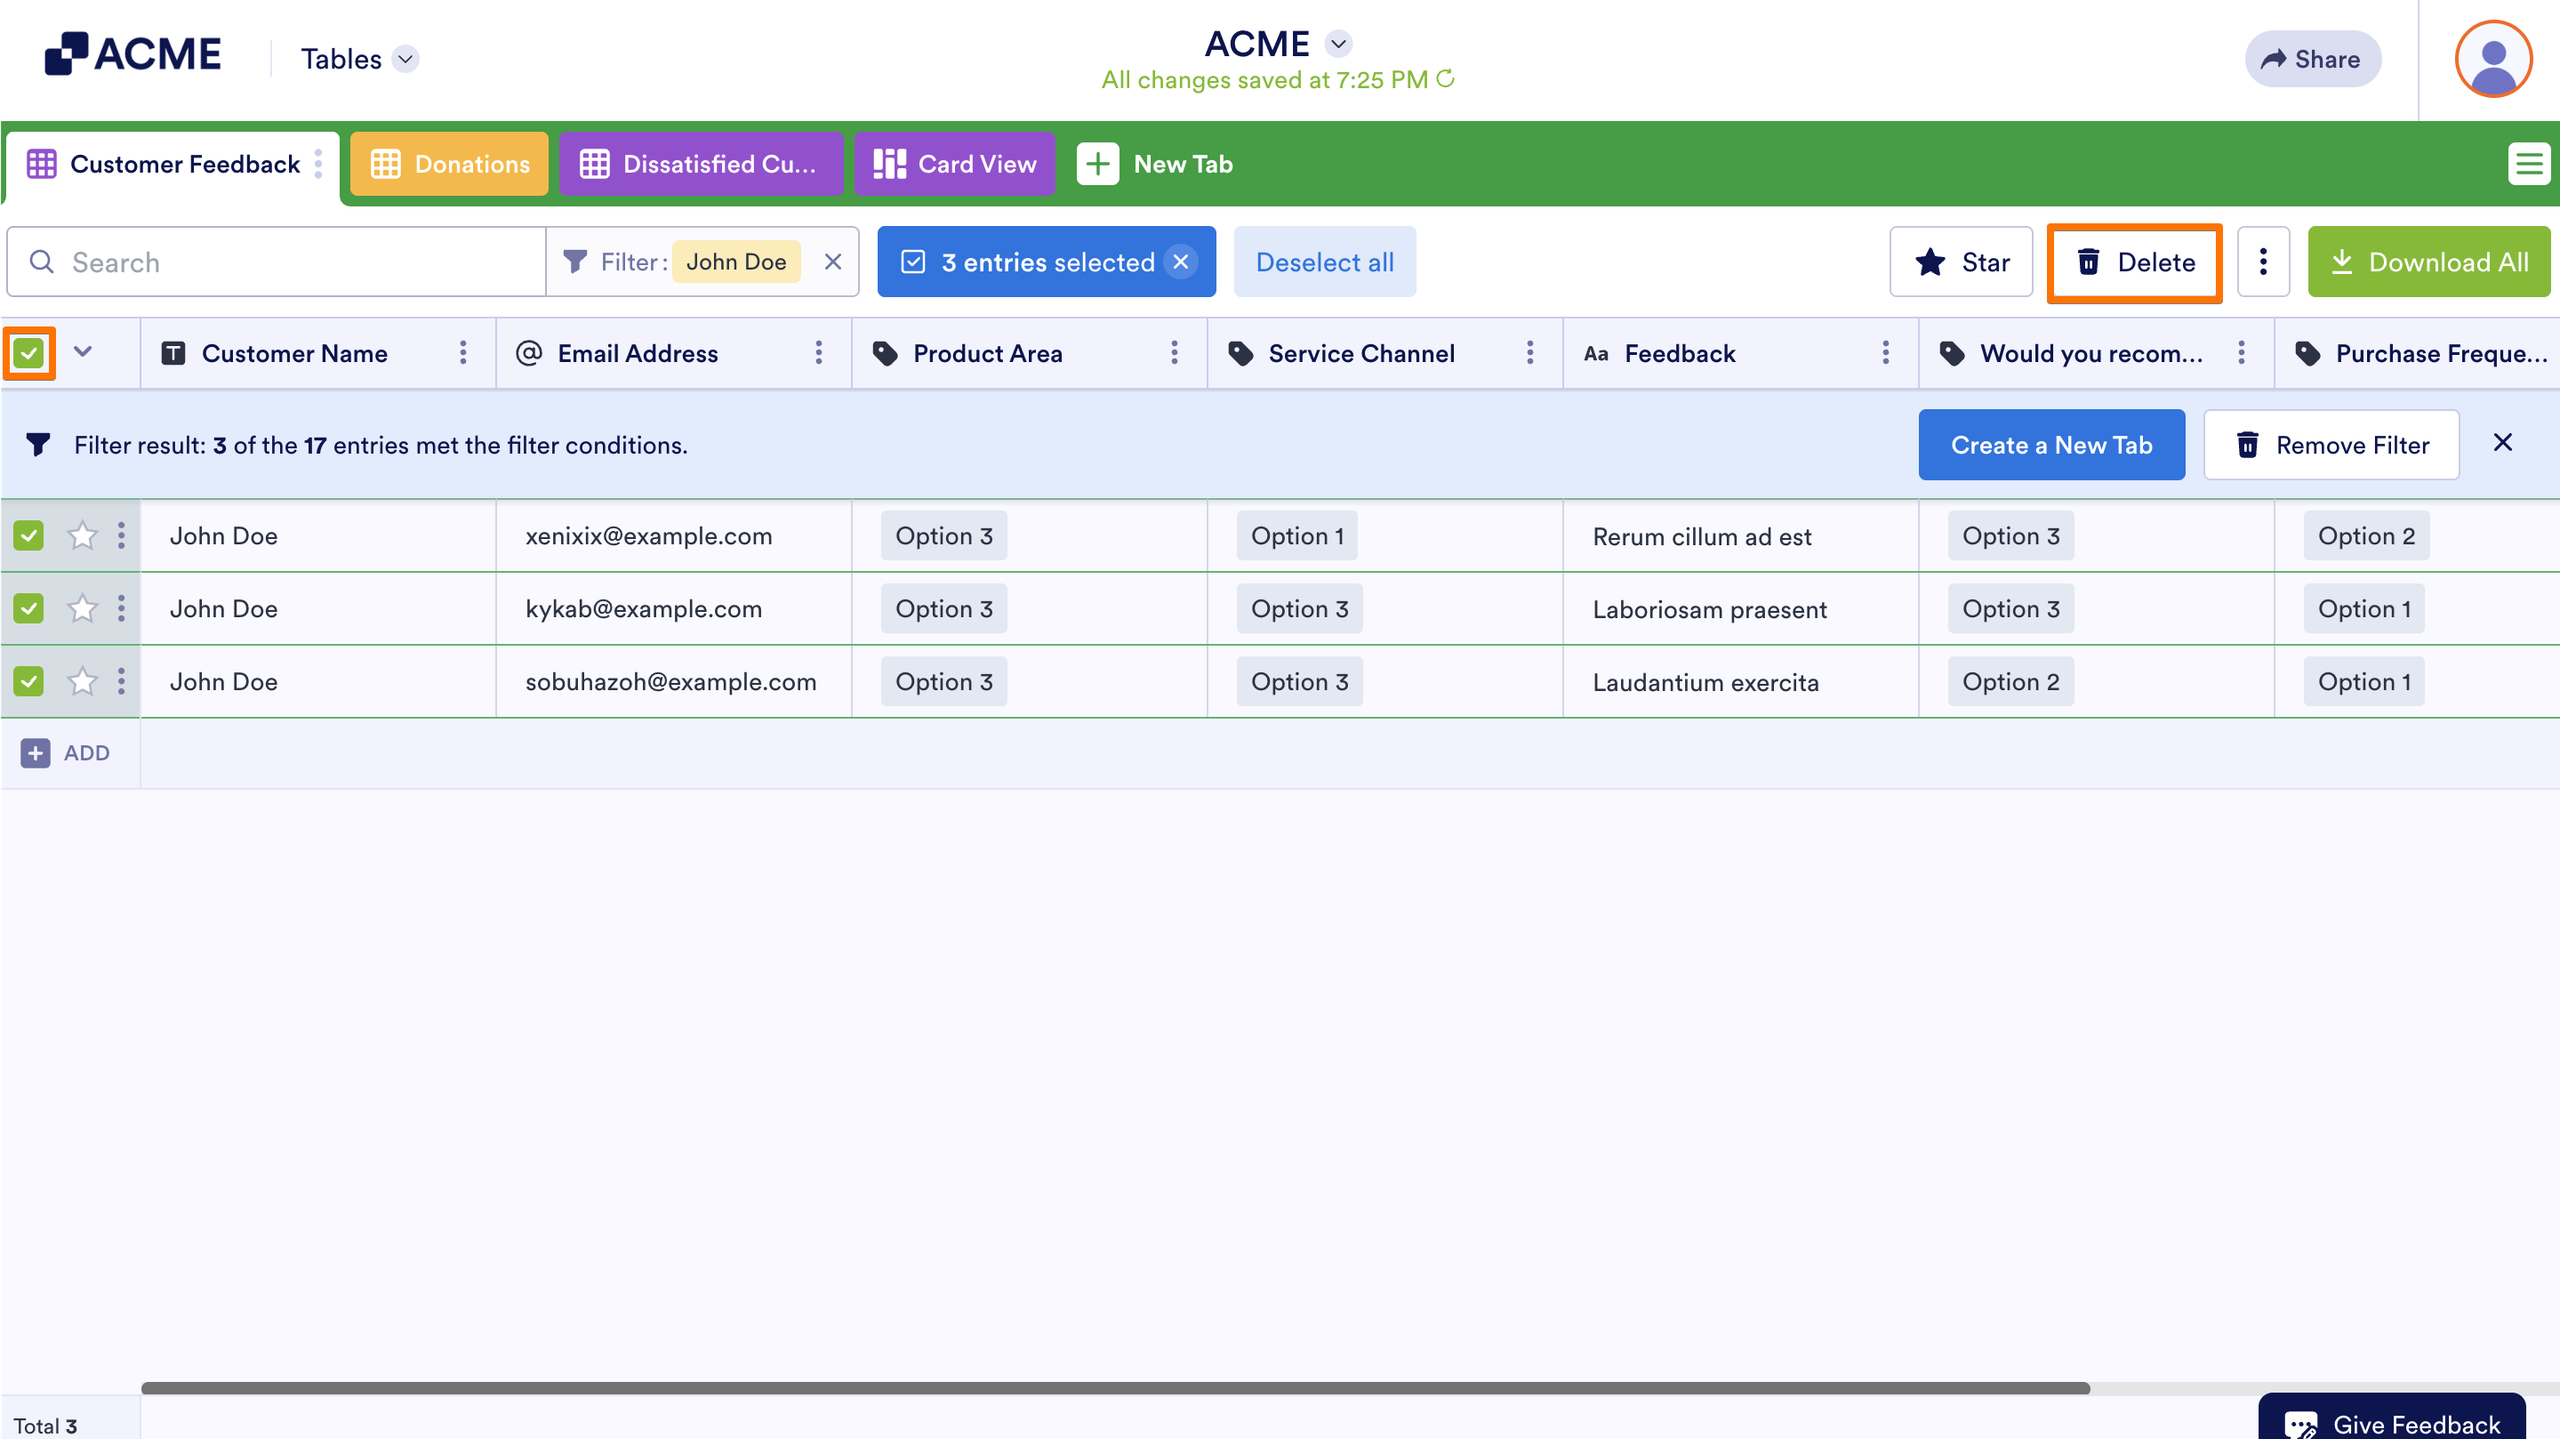
- In Tables, tick the Checkboxes of the submissions you want to delete.
- At the top right of the table, click on Delete.
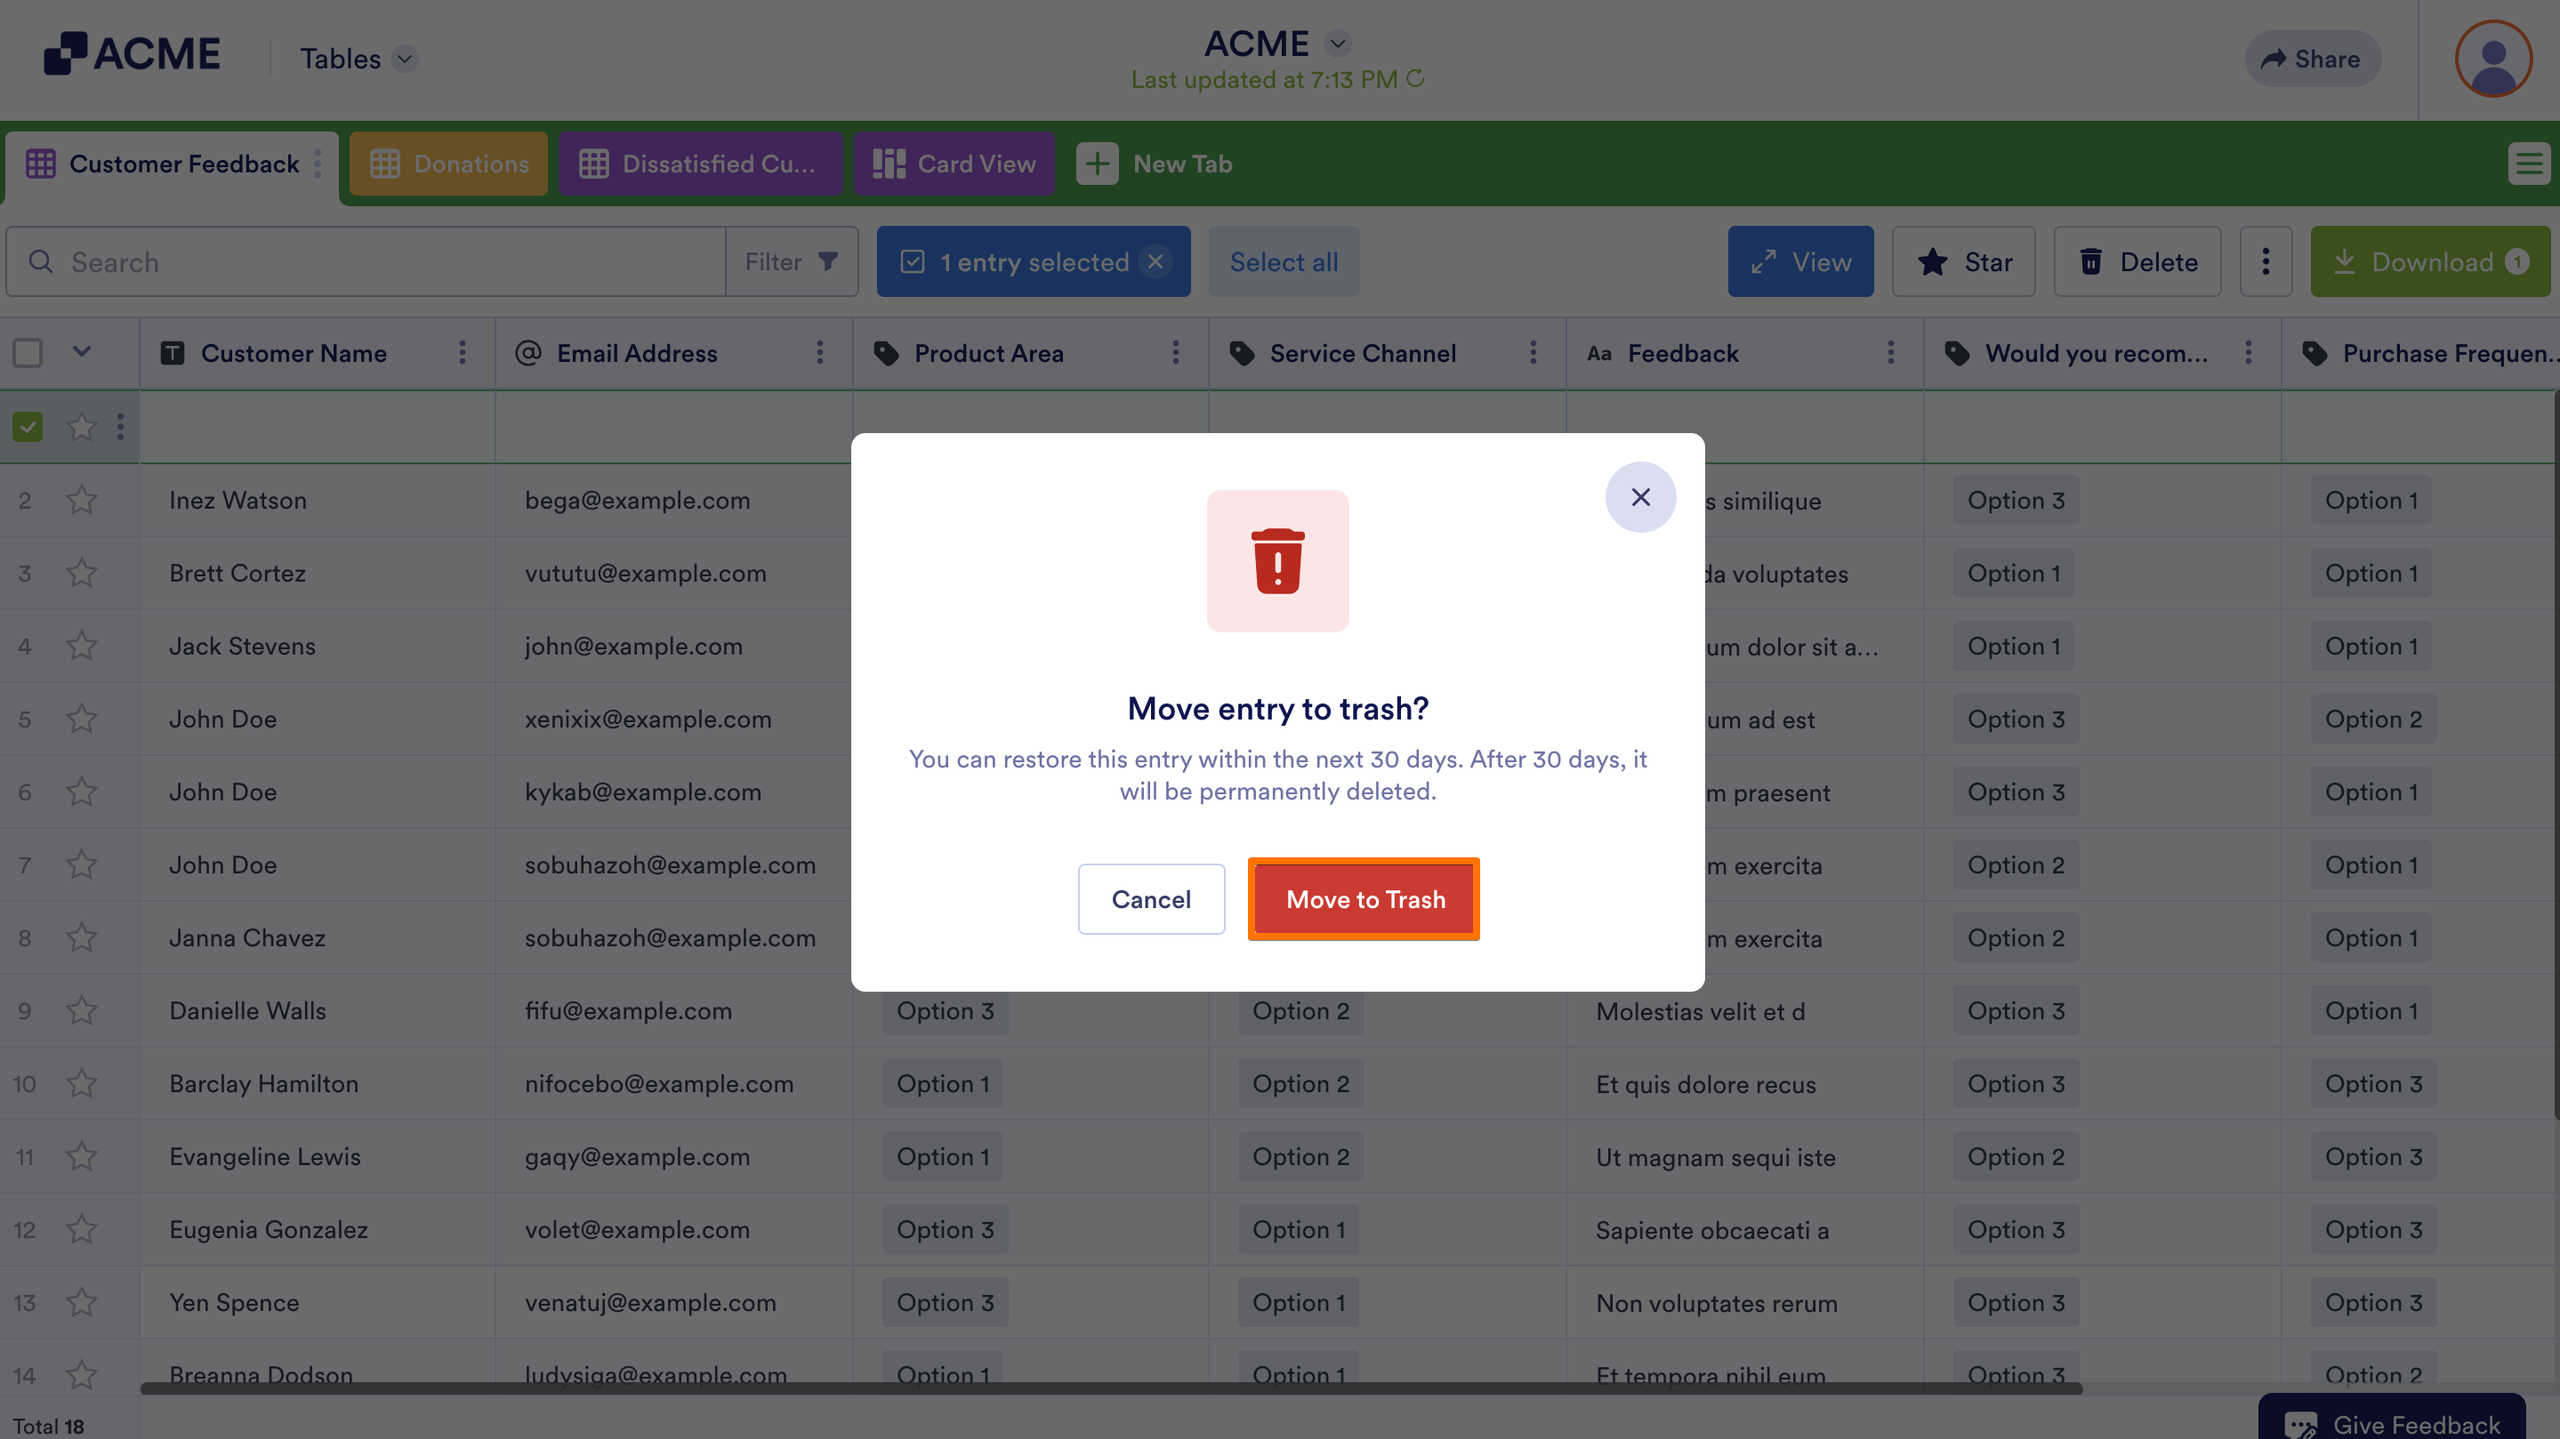
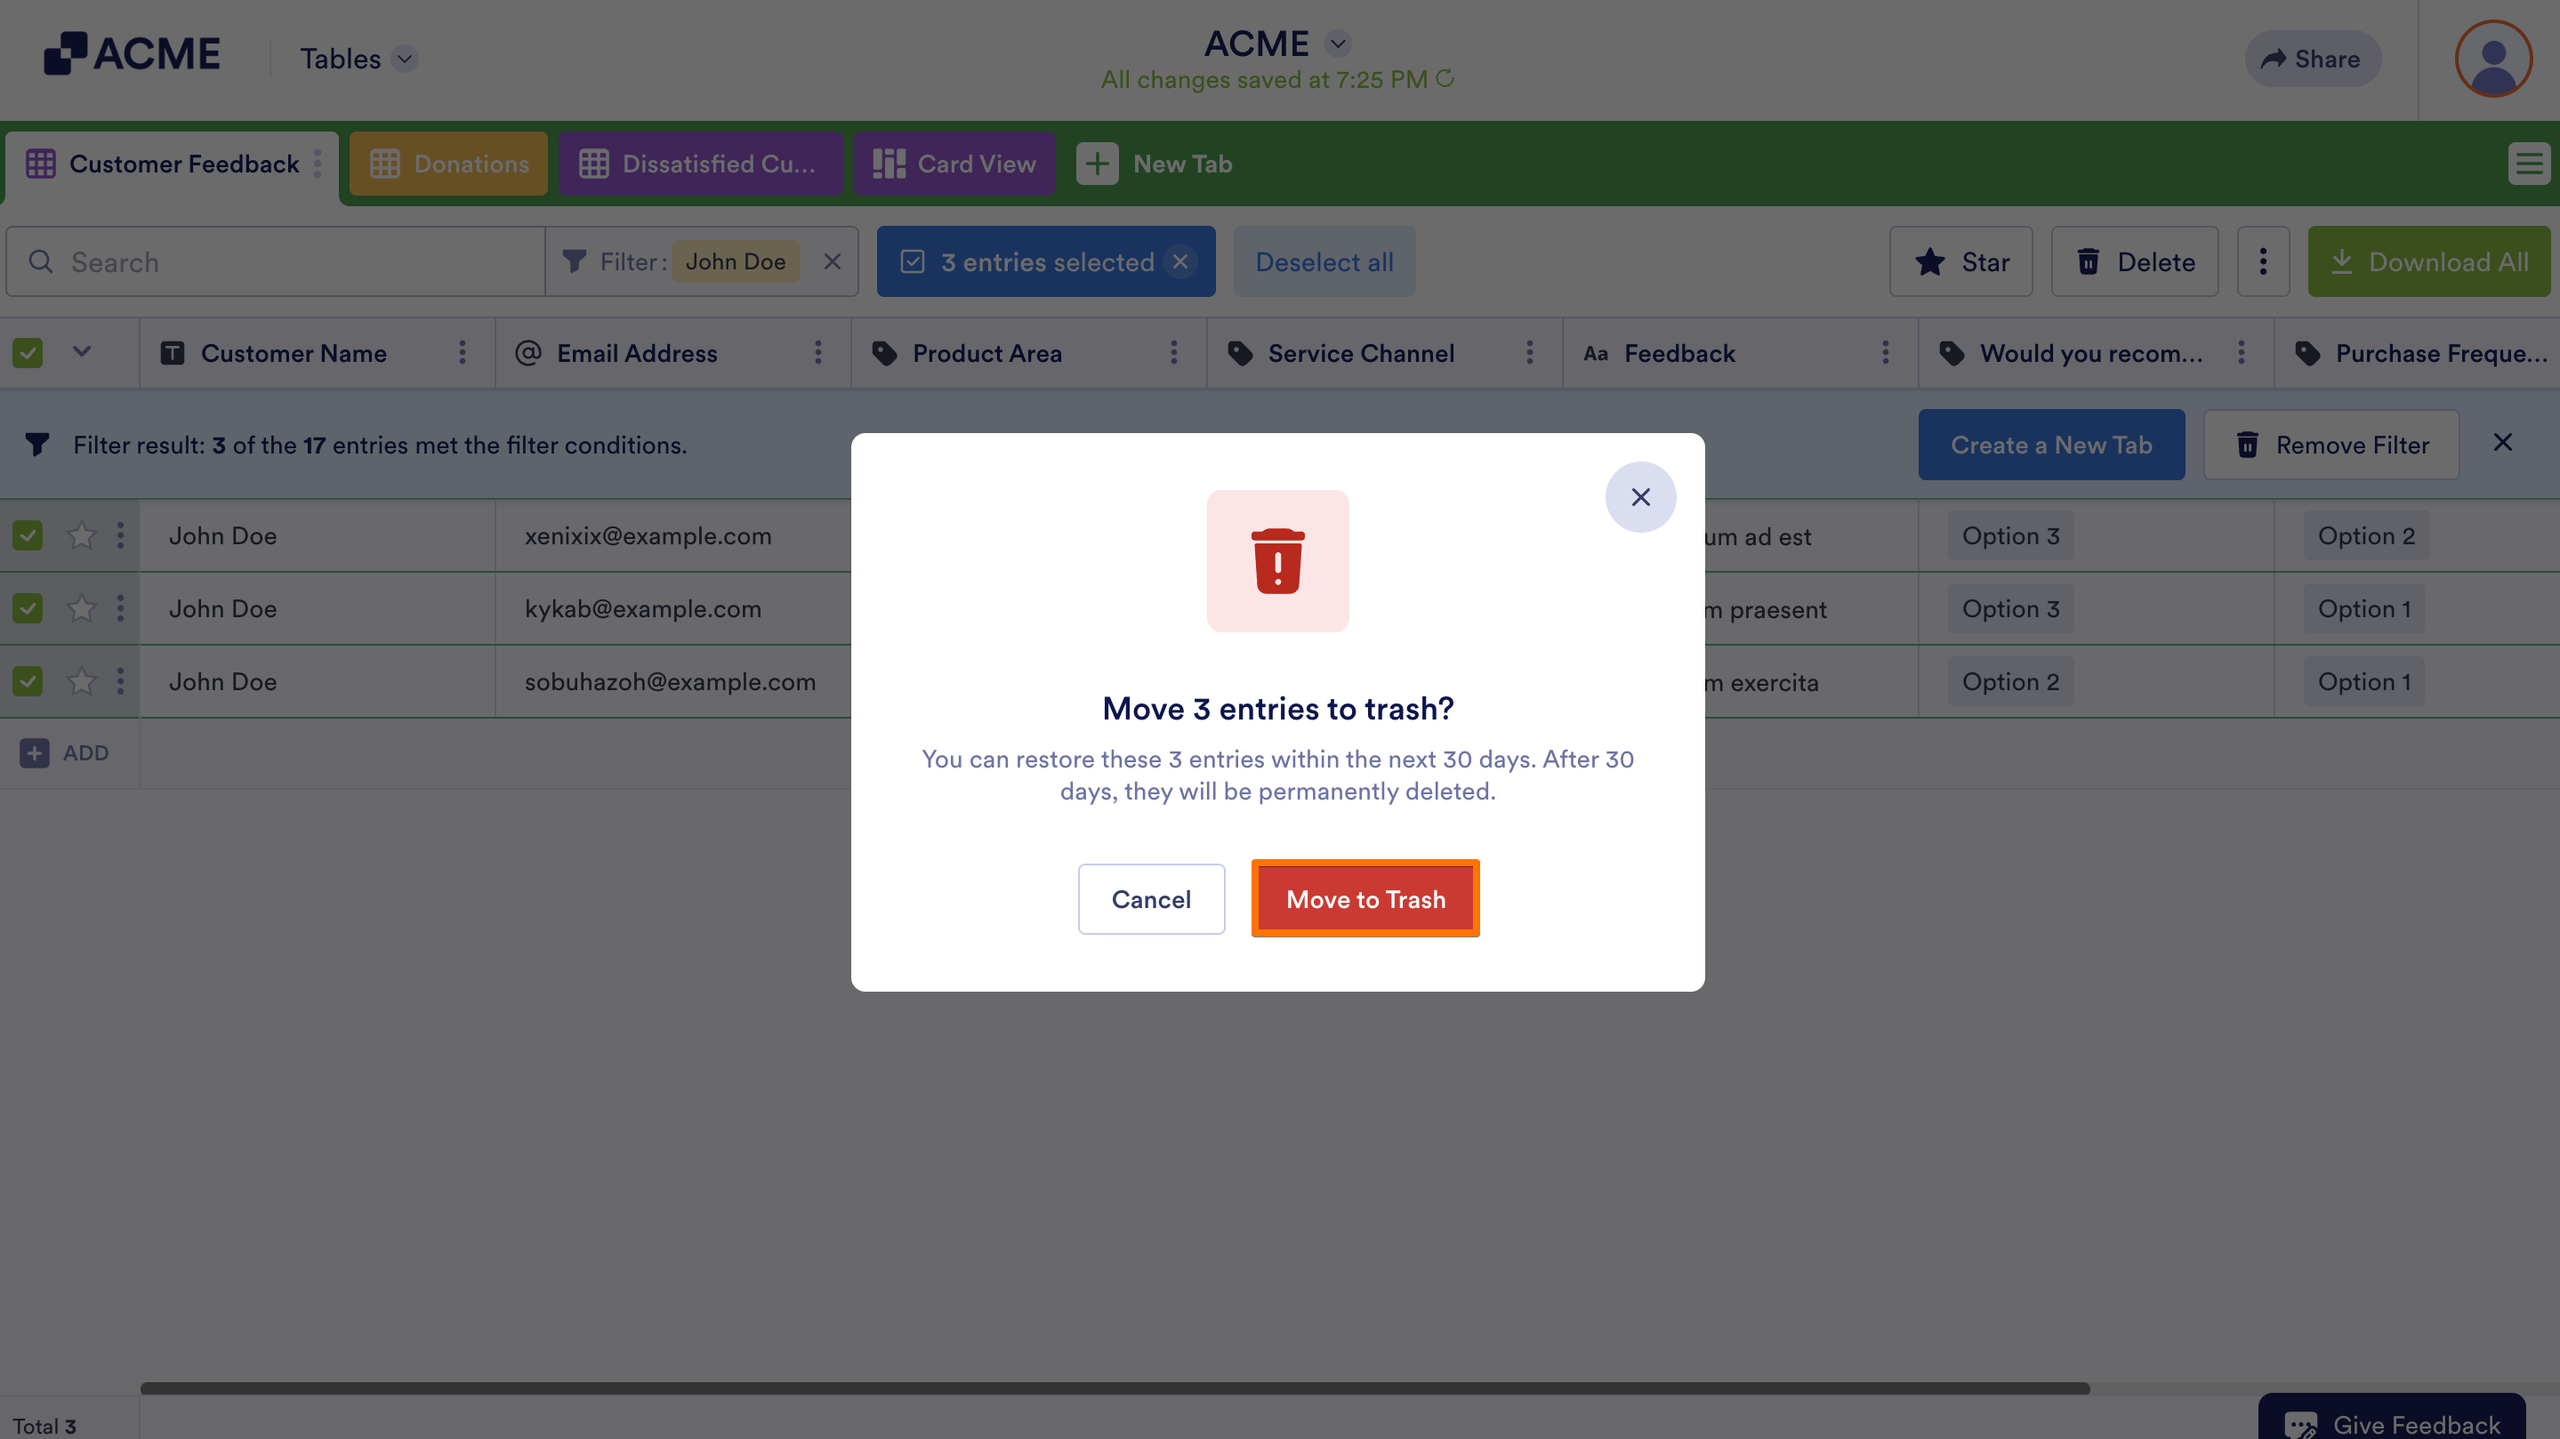
- In the confirmation window that pops up, click on Move to Trash.
Deleting Submissions Based on a Filter
You can also filter your submissions first to quickly find and delete only the ones you no longer need. Here’s how to do it:
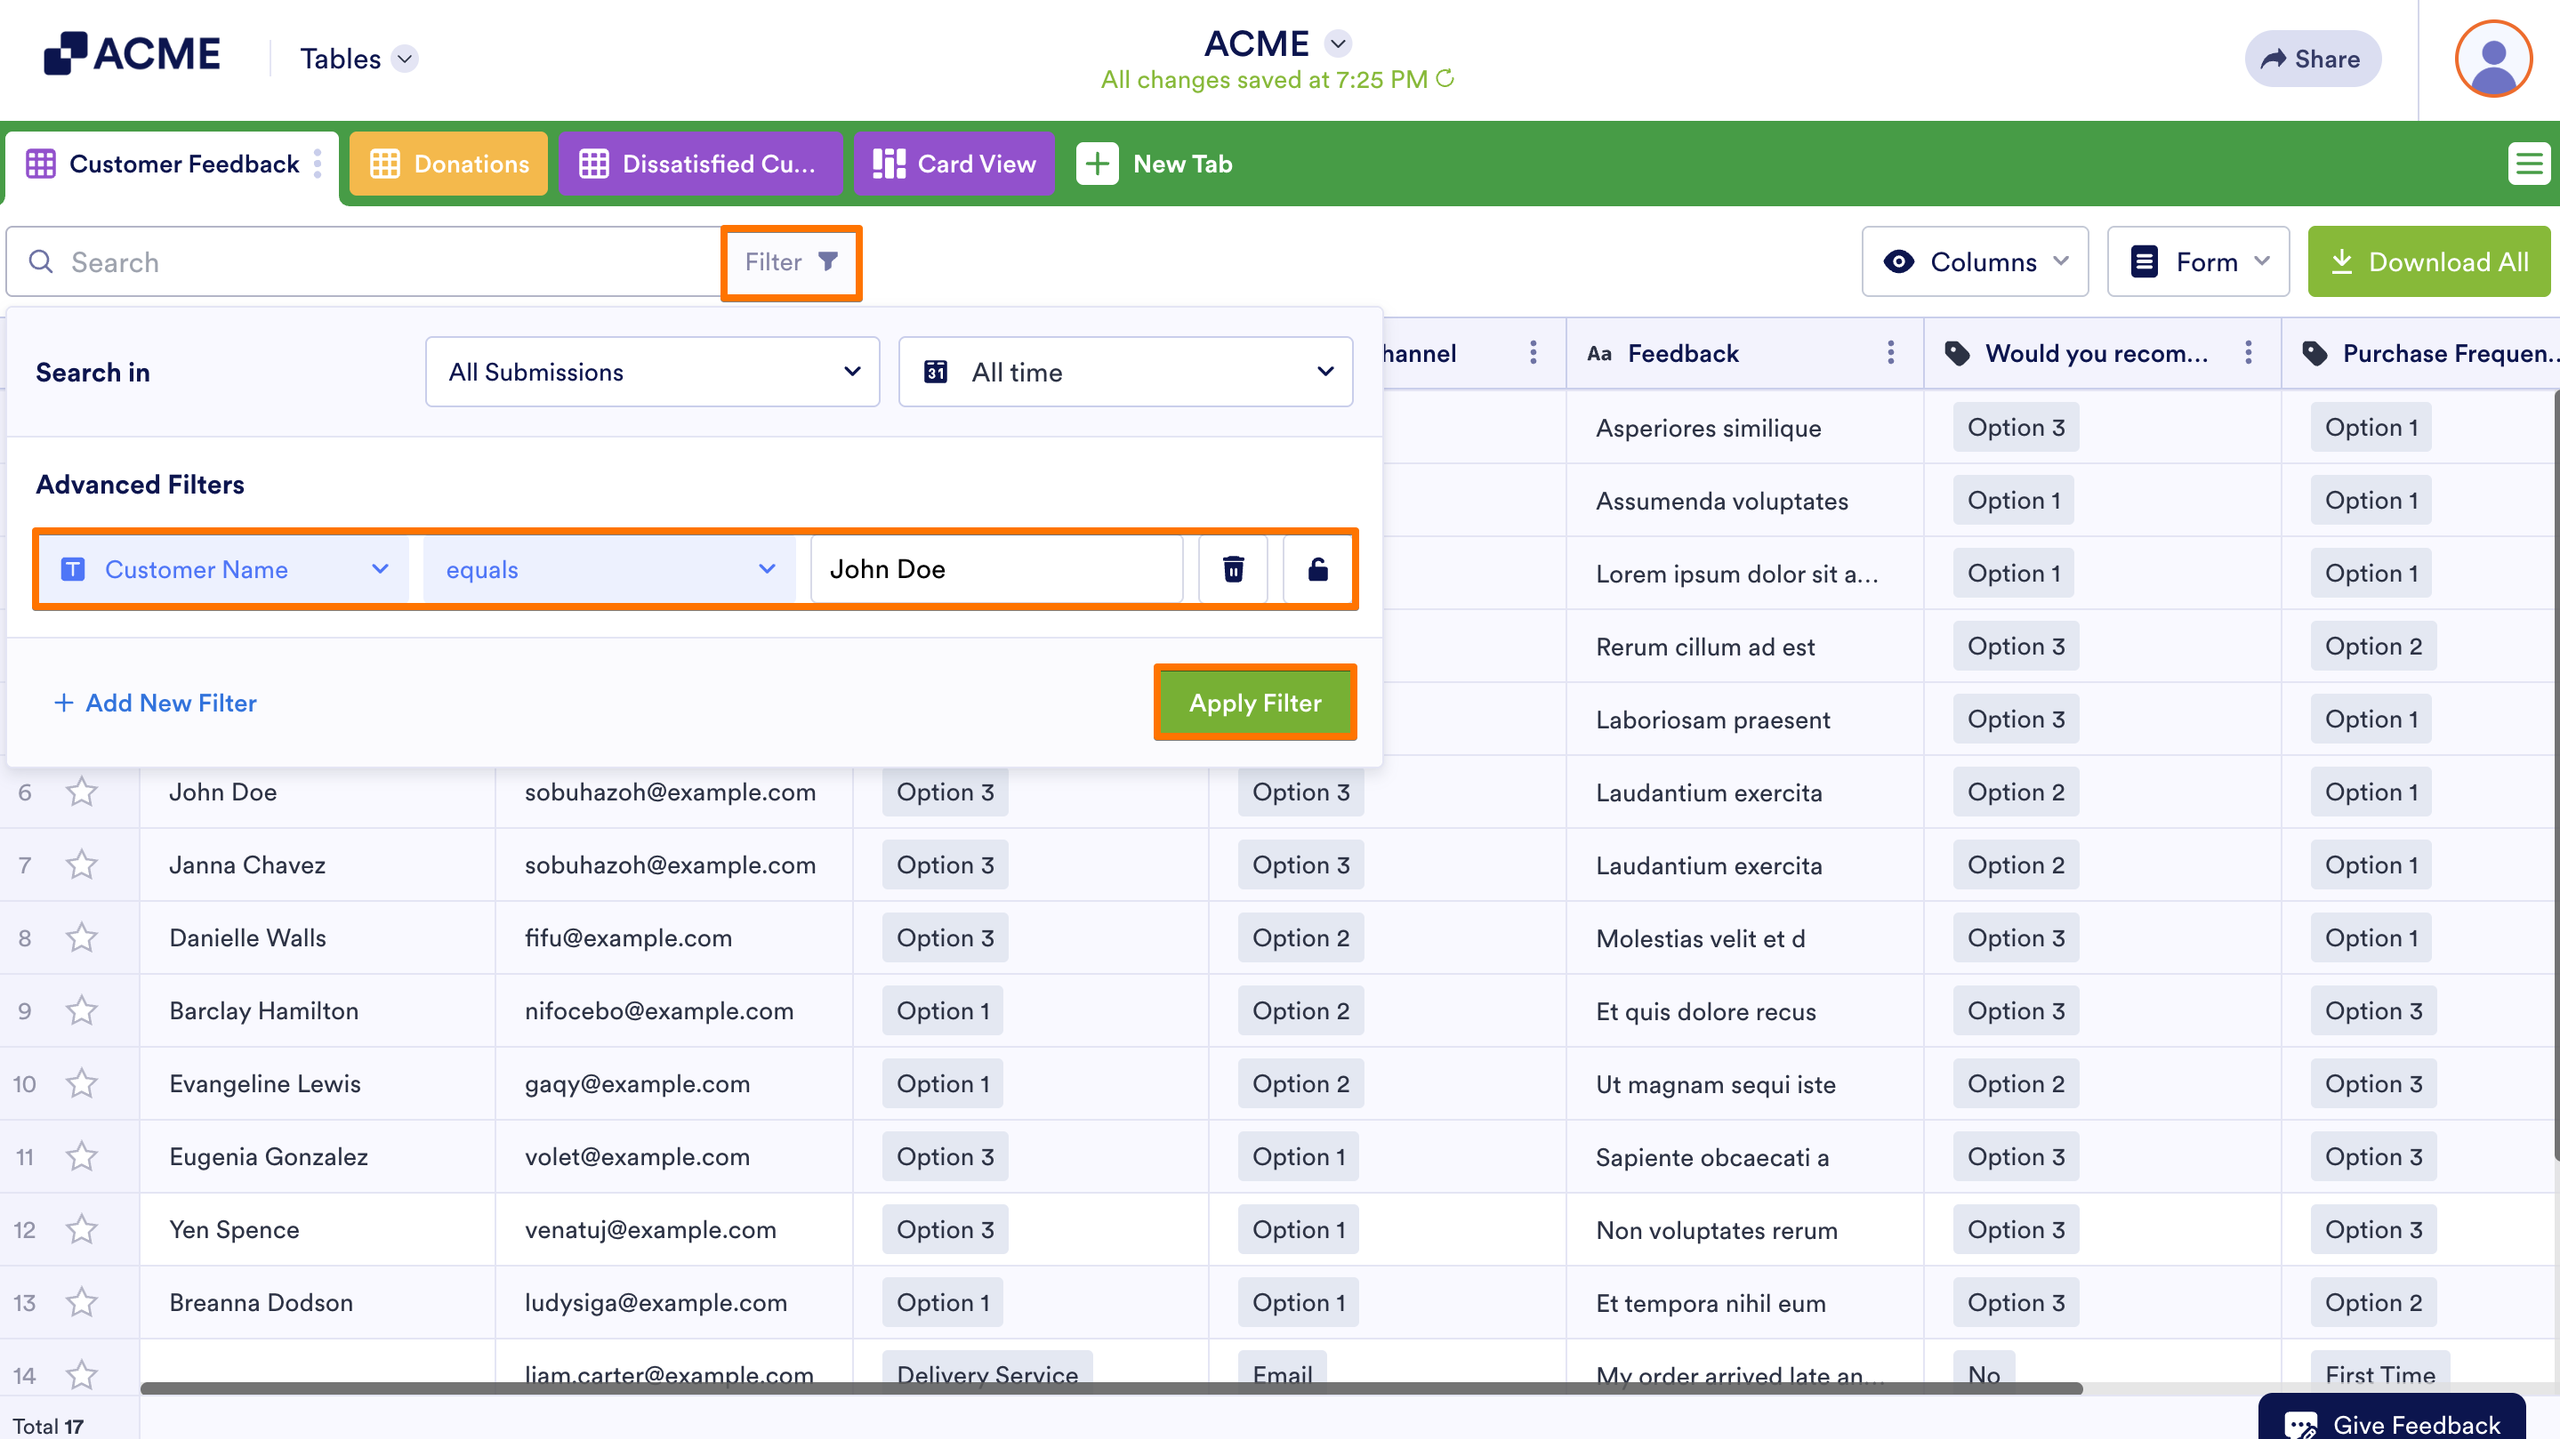
- In Tables, click on Filter on the right side of the Search bar.
- Adjust the filters to narrow submissions down.
- Once you’re done, click on Apply Filter.
- Select the checkbox at the toolbar to choose all submissions.
- Then, at the top right of the table, click on Delete.
- In the confirmation window that pops up, click on Move to Trash.
Deleting Trashed Entries
Trashed submissions aren’t deleted right away. To stay organized, you can permanently delete them from your Table. It’s easy, here’s how:
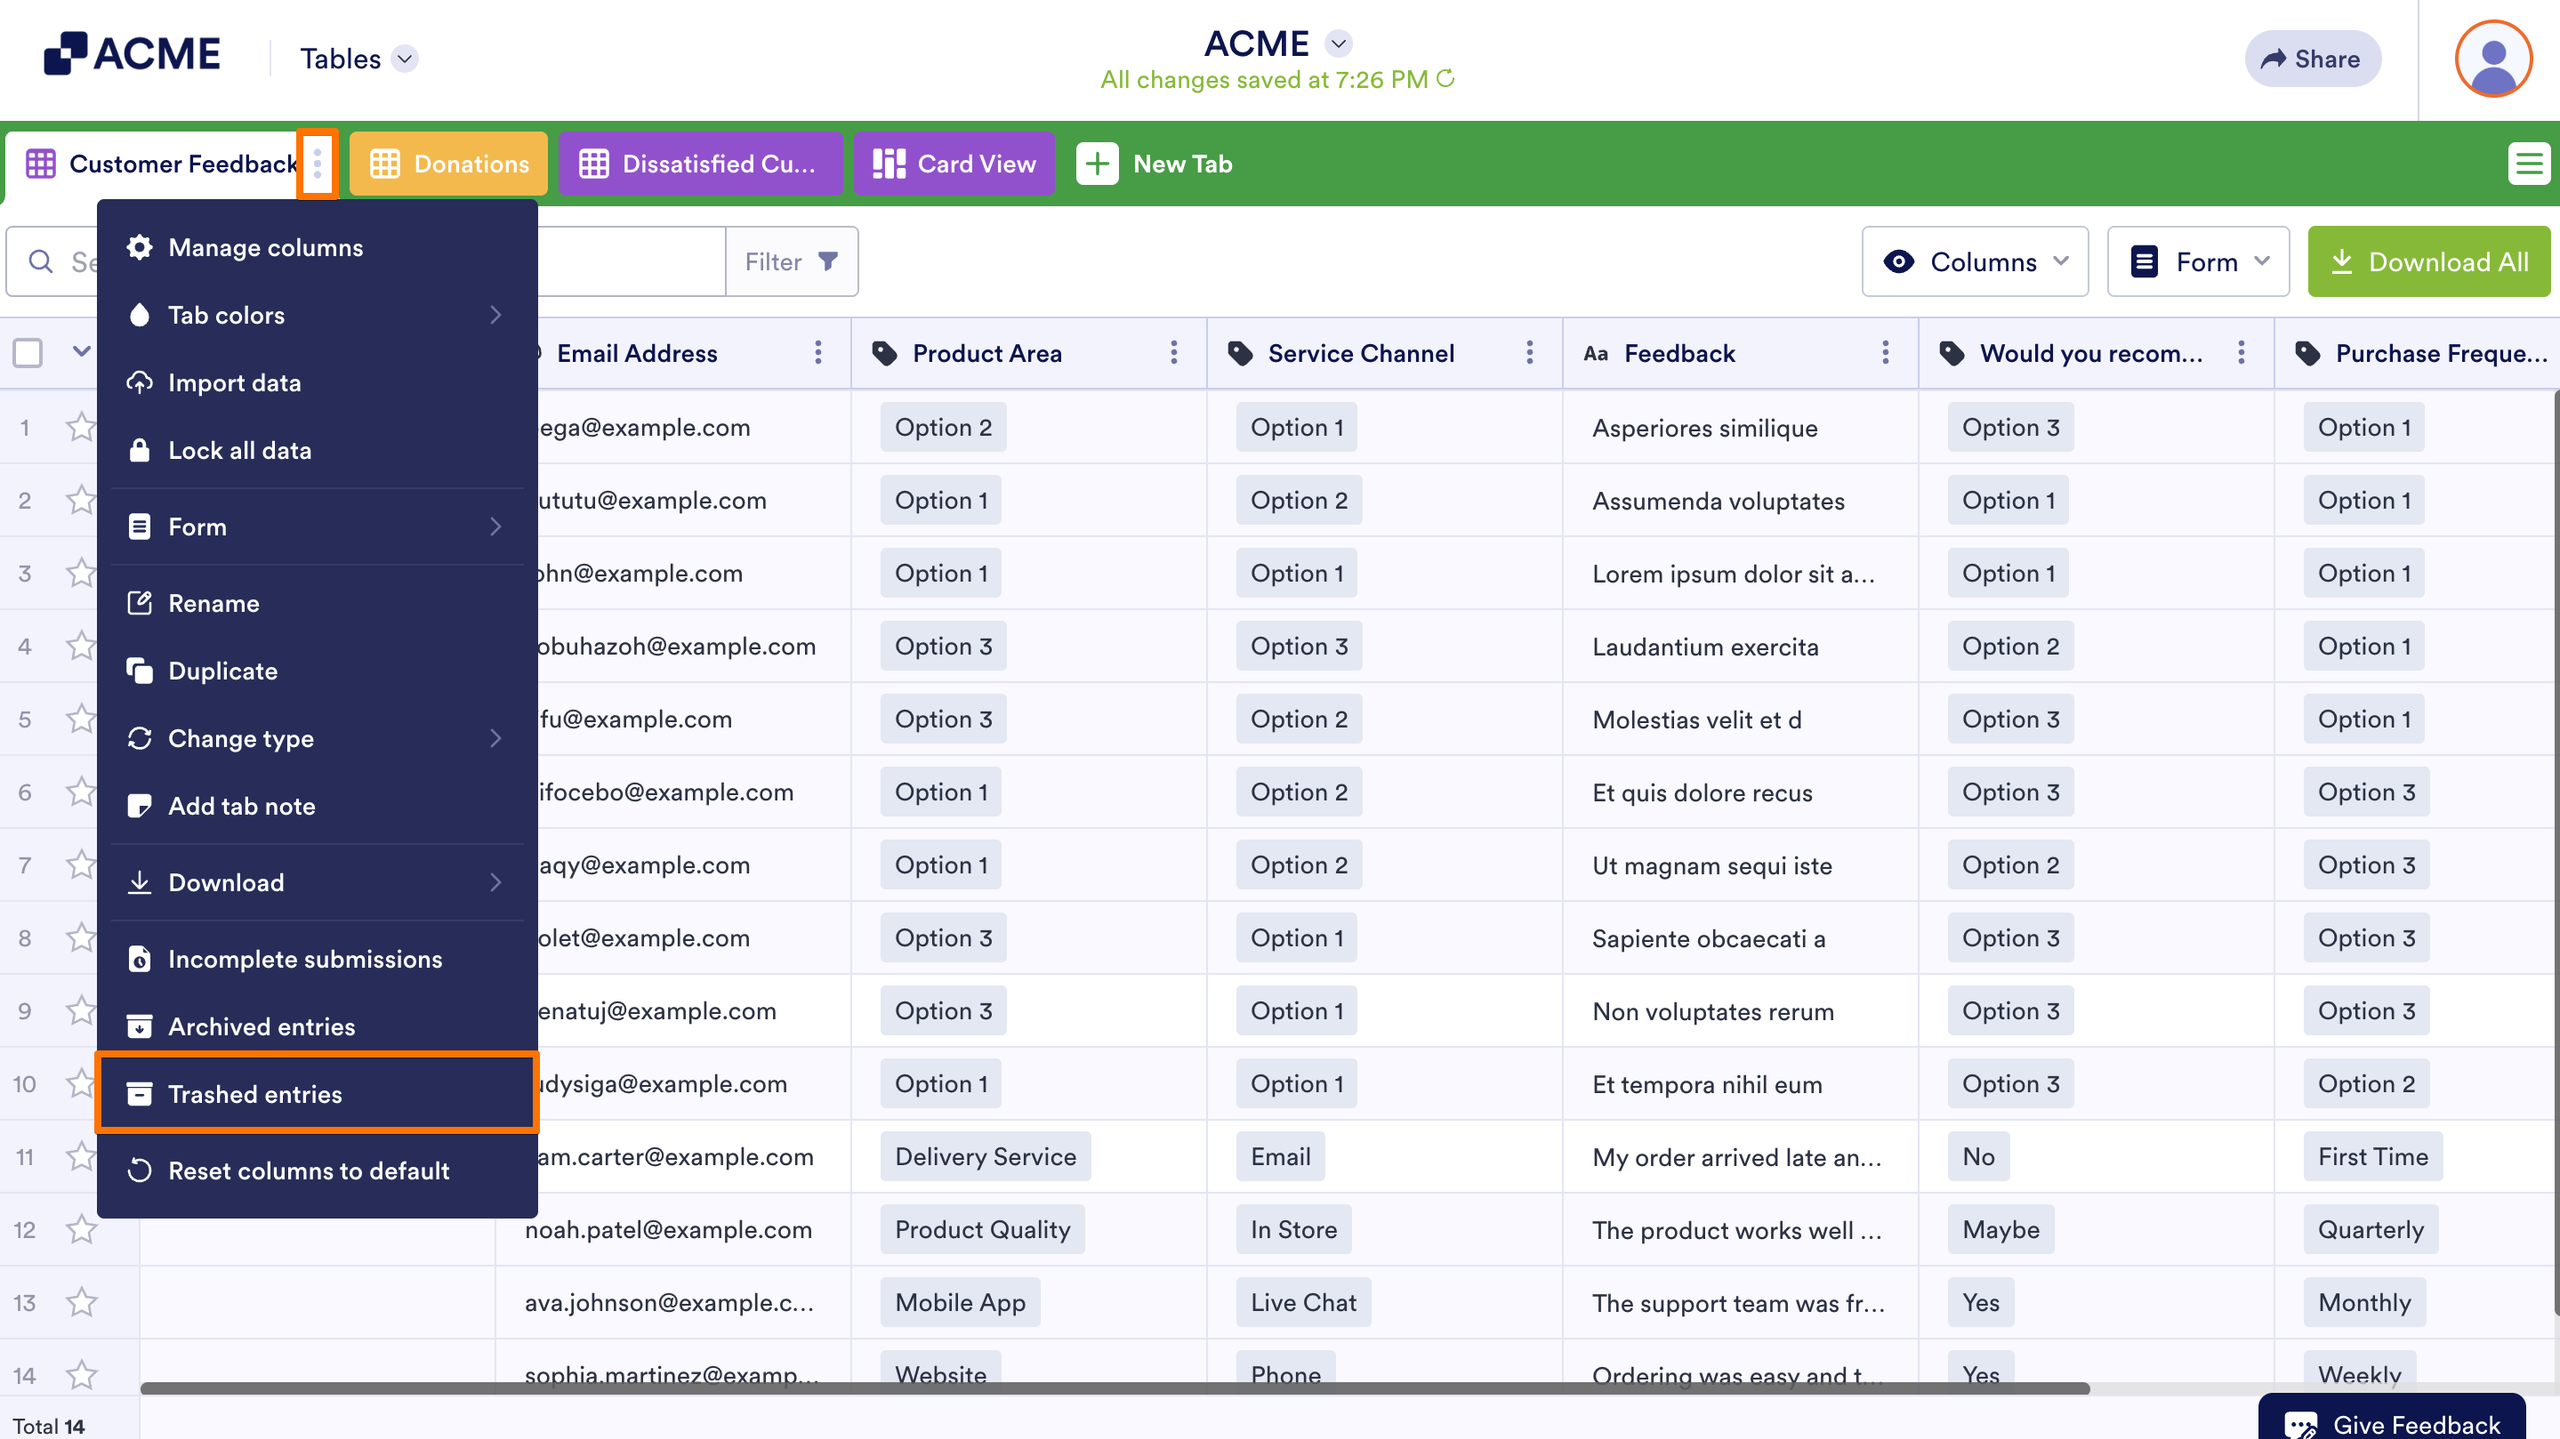
- In Tables, click on the Three Dots icon on the right side of the main tab in your Submission Table.
- Then, in the Dropdown menu, select Trashed Entries.
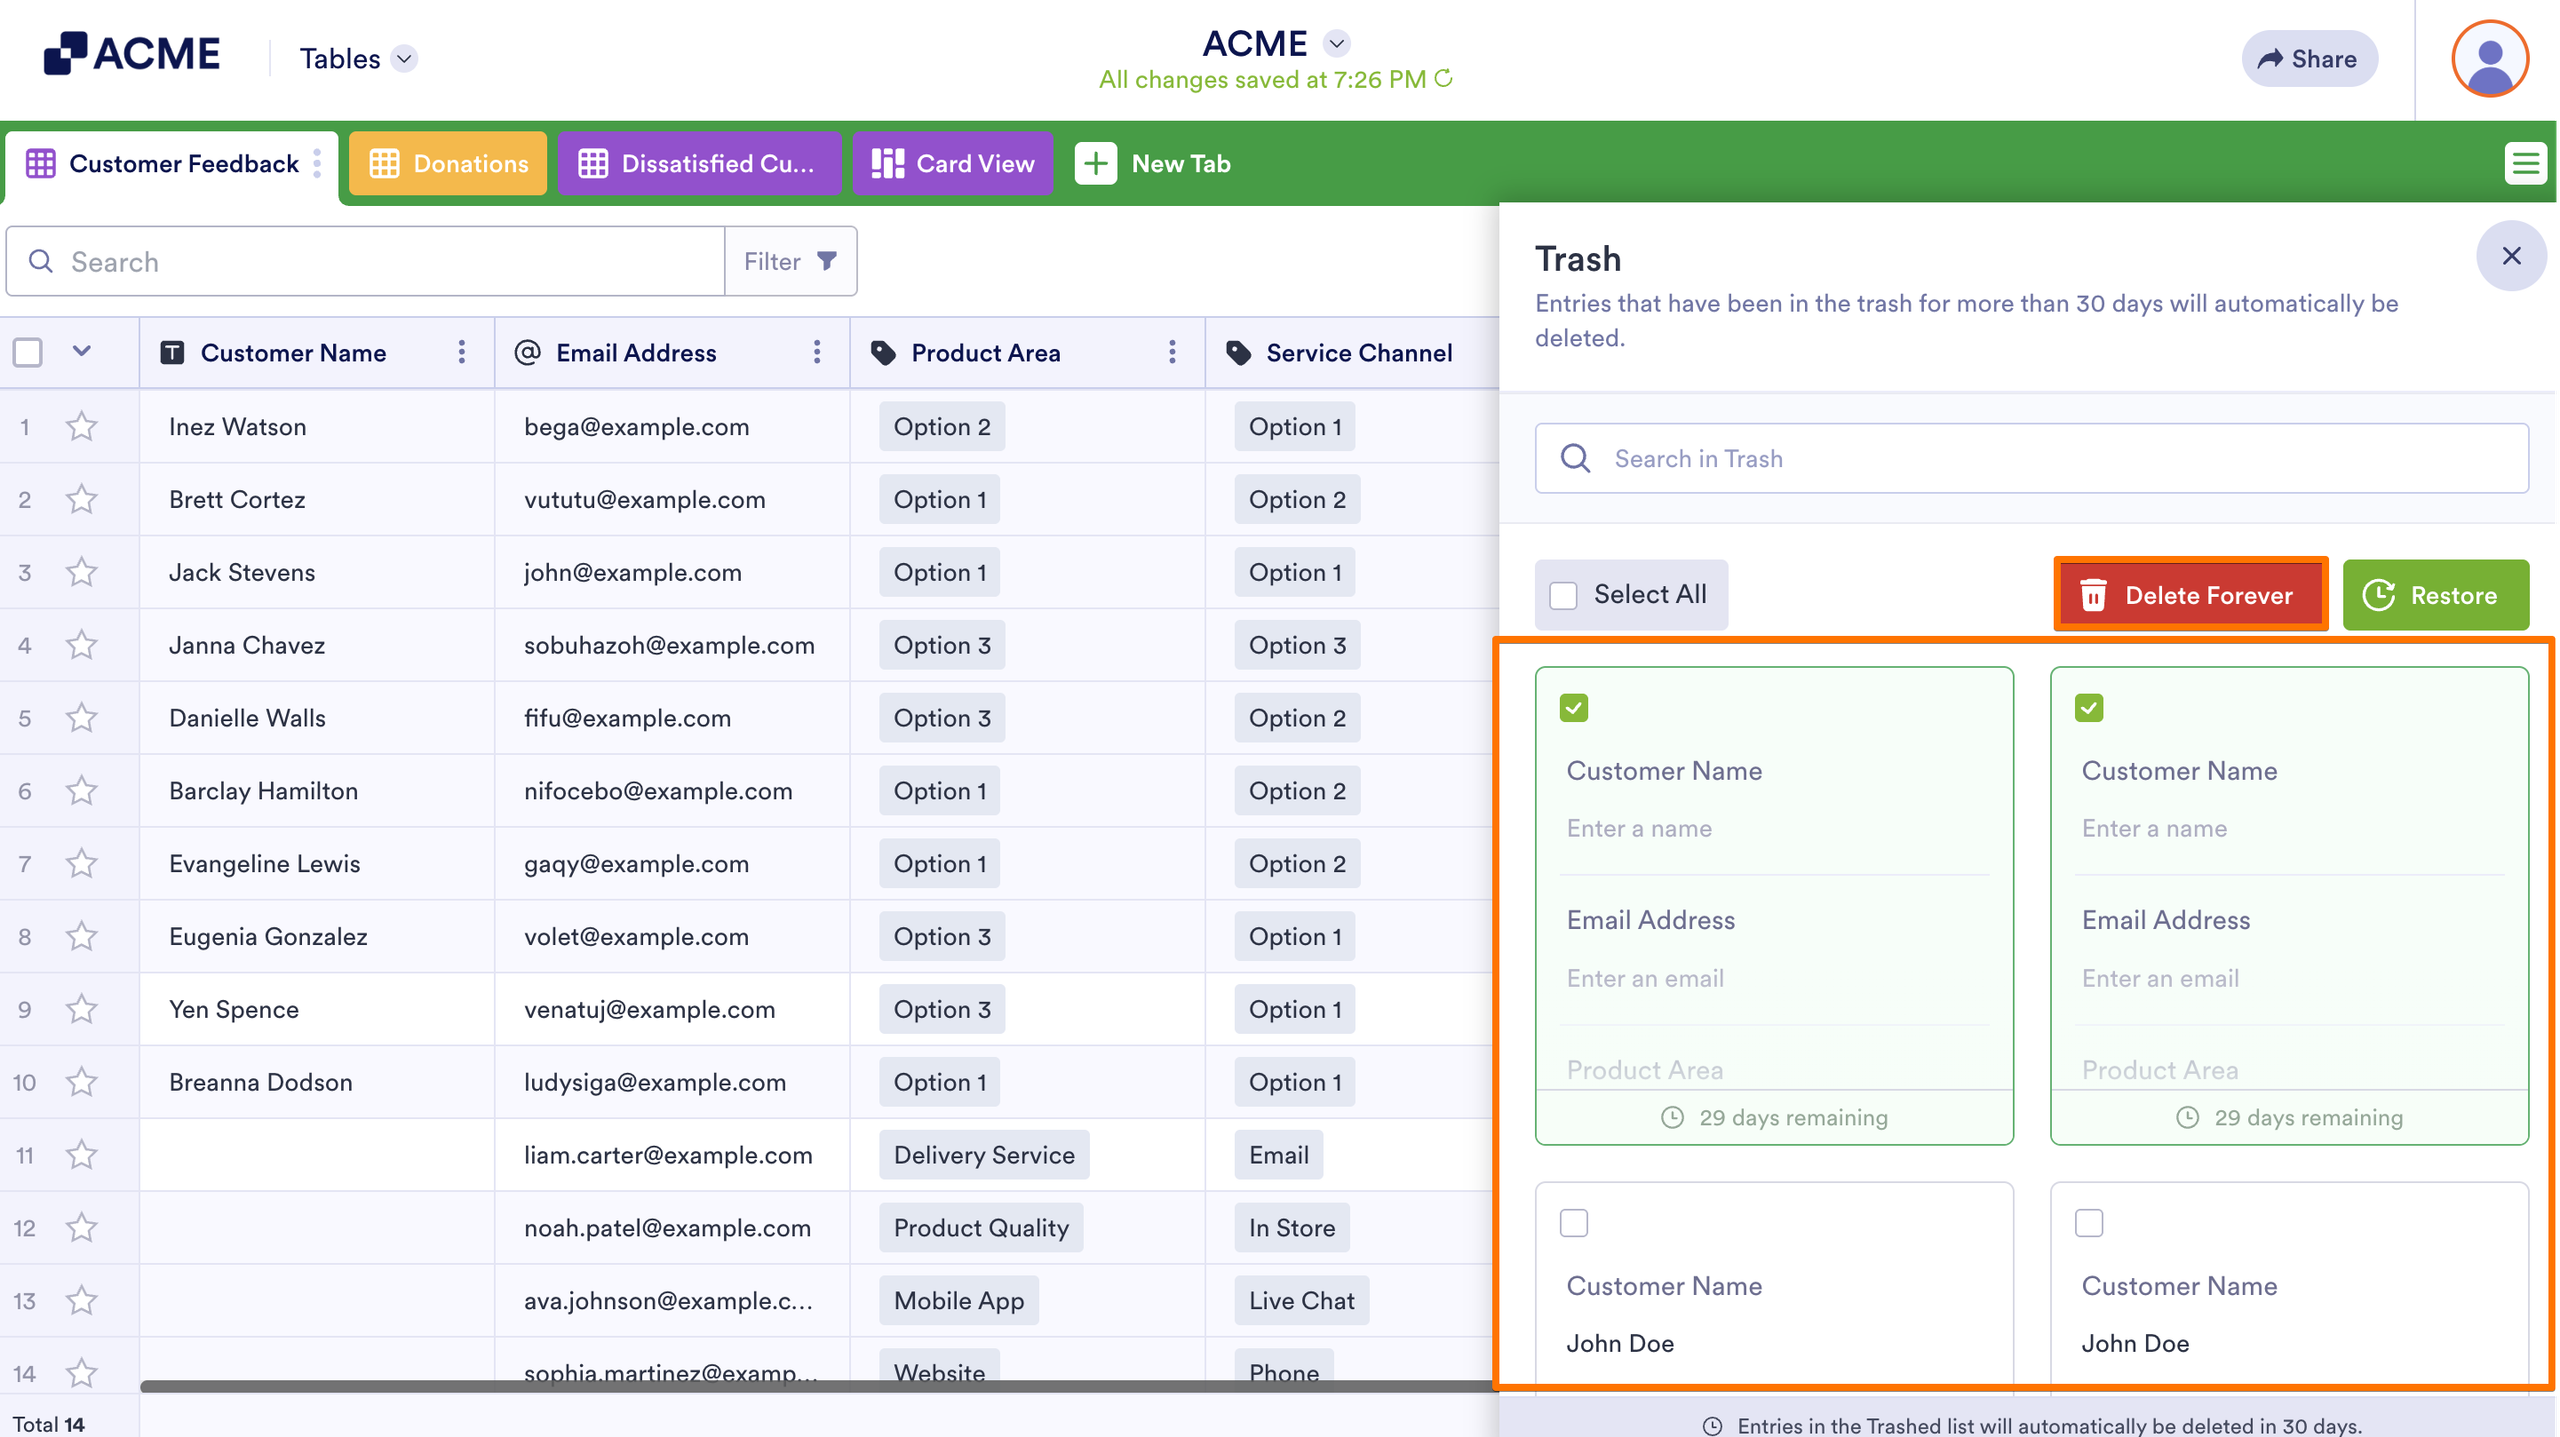
- Here, select the submissions you want to purge
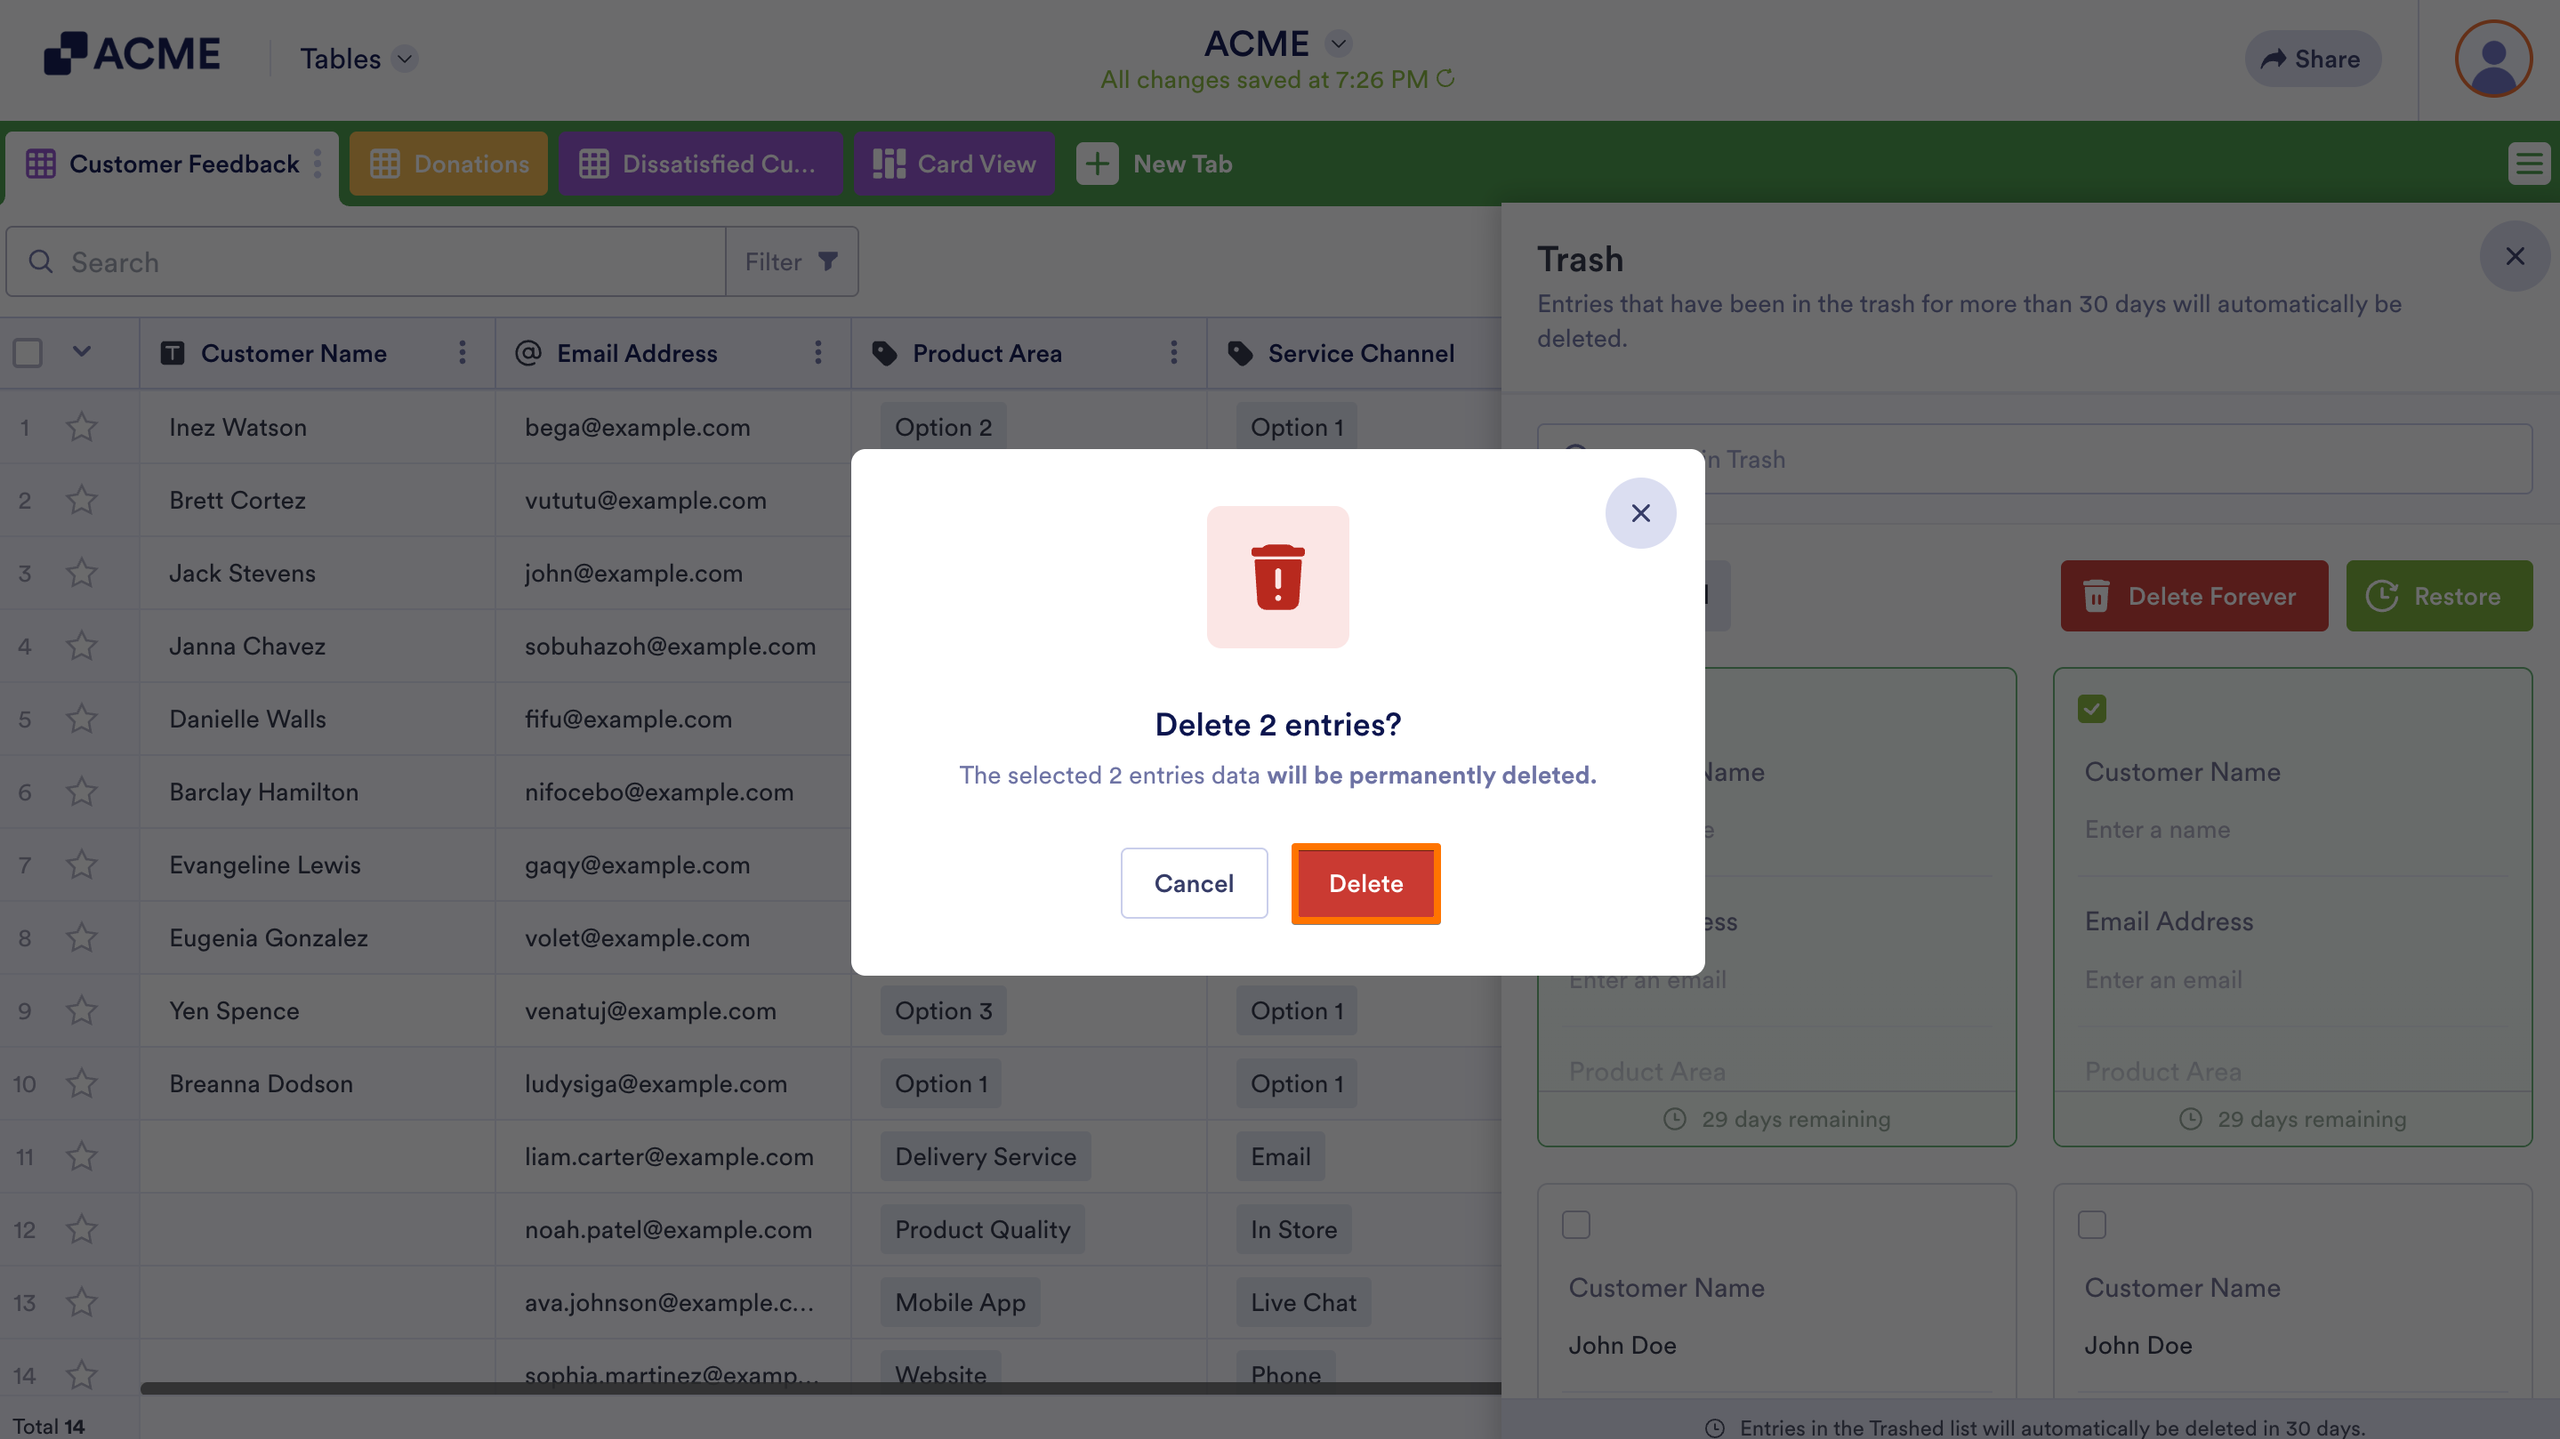
- And then click on Delete Forever.
- Finally, in the Confirmation window that pops up, click on Delete.
Note
If you want submissions to delete themselves after a set time, Auto-delete feature makes it easy. Just set it up once, and your form will handle it for you. Check out our guide about How to Set Up a Custom Date to Auto-Delete Your Form Submissions to learn more about it.

Send Comment: