When you upload a PDF to create a form, Jotform automatically detects the fields in your document, converts them into annotations, and maps them to corresponding fields in the Smart Form Builder—instantly transforming your static PDF into a fully functional online form.
With PDF Editor, you can now edit and customize these annotations, giving you greater flexibility and control over your document. Adjust layout, refine formatting, reposition fields, or update field properties—all from a single interface. This streamlined workflow helps you maintain your document’s original design while updating faster and more efficiently, without switching back and forth between editors.
Accessing Your Uploaded PDF in PDF Editor
Uploading a PDF form automatically opens it in the Smart PDF Forms Builder. If you need to return to the PDF Editor to edit the annotations, you can easily do so by following these simple steps:
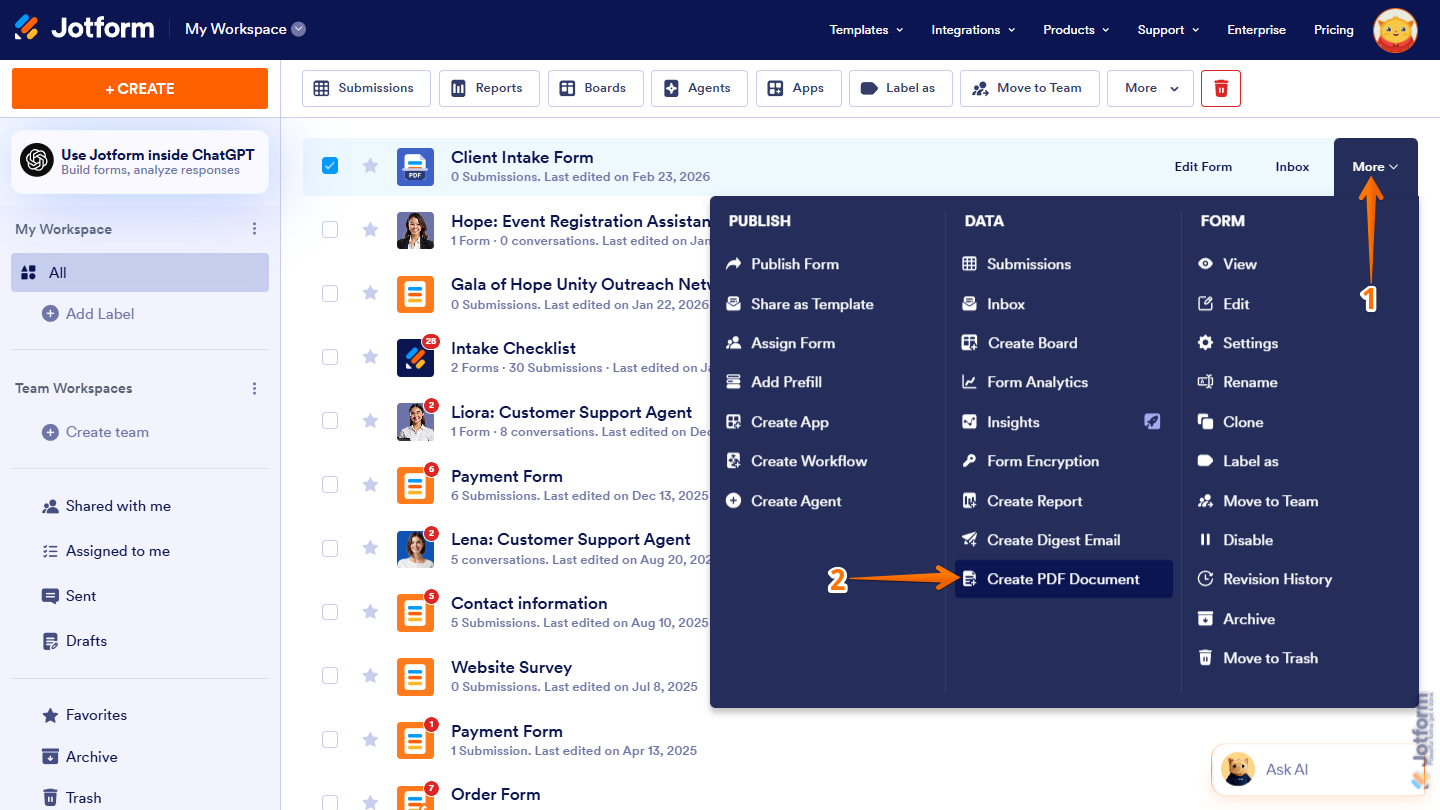
- On your Workspace page, hover your mouse over the PDF form you want to edit, then click on More on the right side of the page.
- Then, in the Dropdown menu that opens, under the Data column, click on Create PDF Document.
Here’s one way to do it:
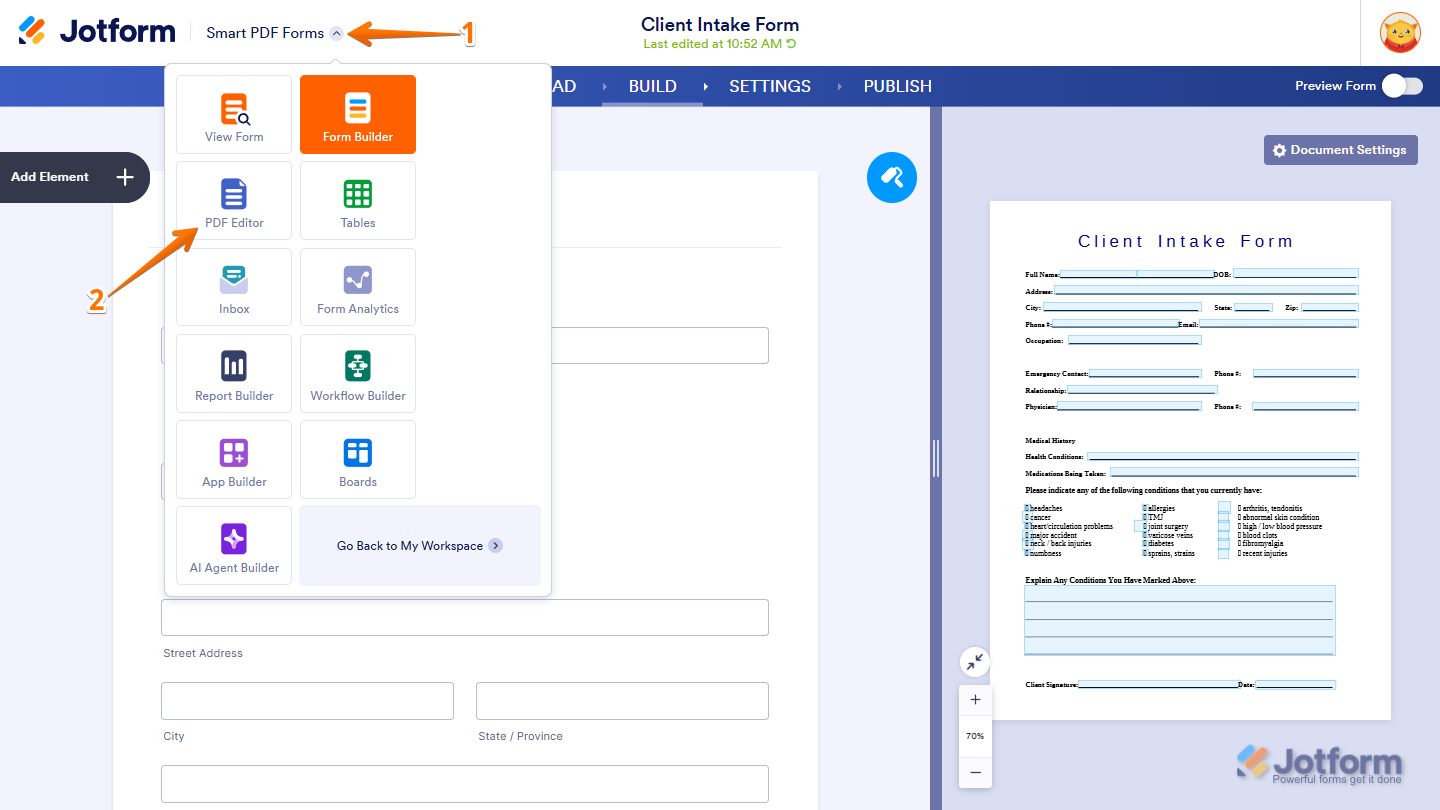
- While in Smart PDF Forms, click on the Downward Arrow icon at the top-left side of the page.
- Then, in the Dropdown menu that opens, click on PDF Editor.
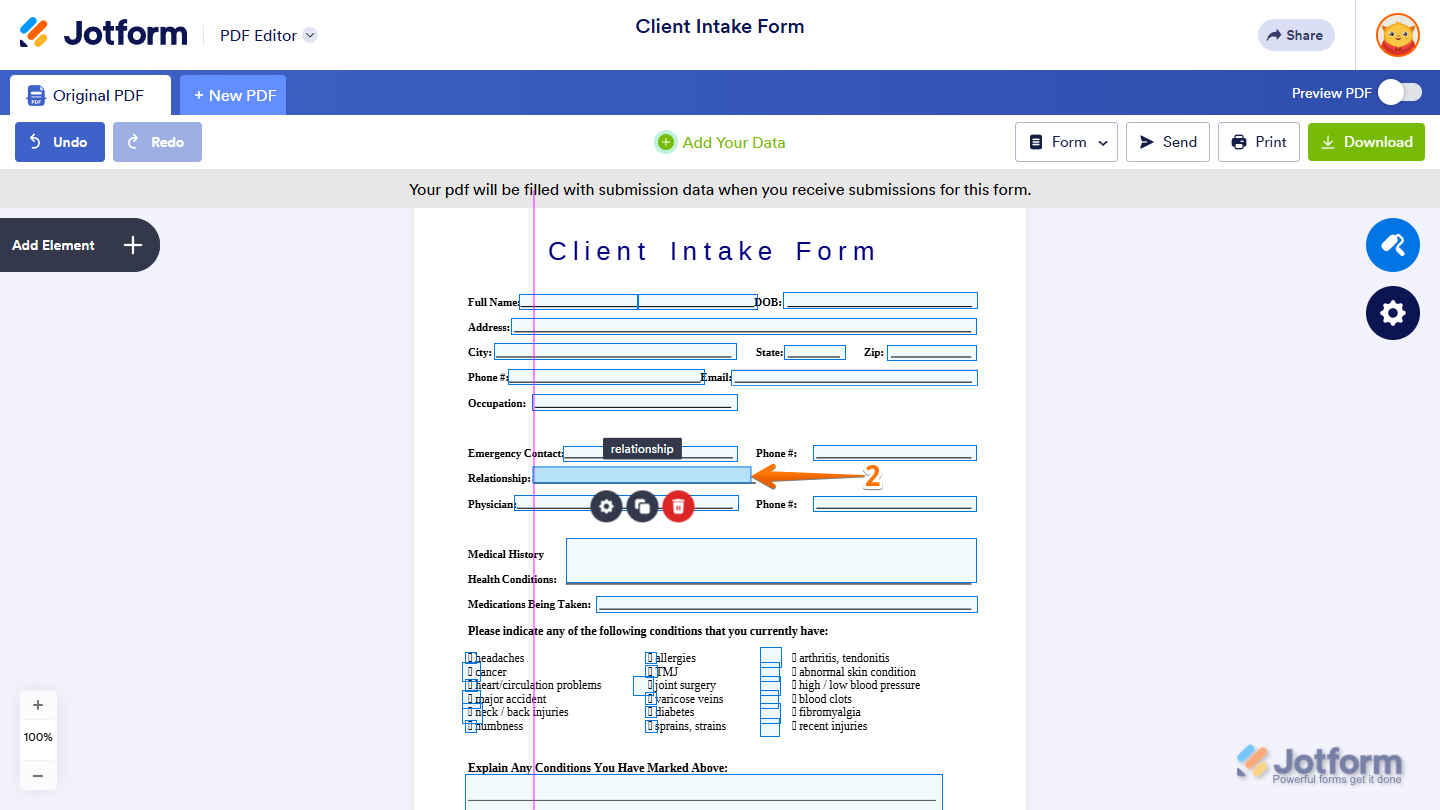
Repositioning the Annotations
You can move any annotation to a specific part of the PDF by simply selecting it and dragging it to its desired location. This lets you align fields accurately with your document’s layout and ensure everything appears exactly where it should. Get started like this:
- In PDF Editor, select the annotation that you wish to reposition.
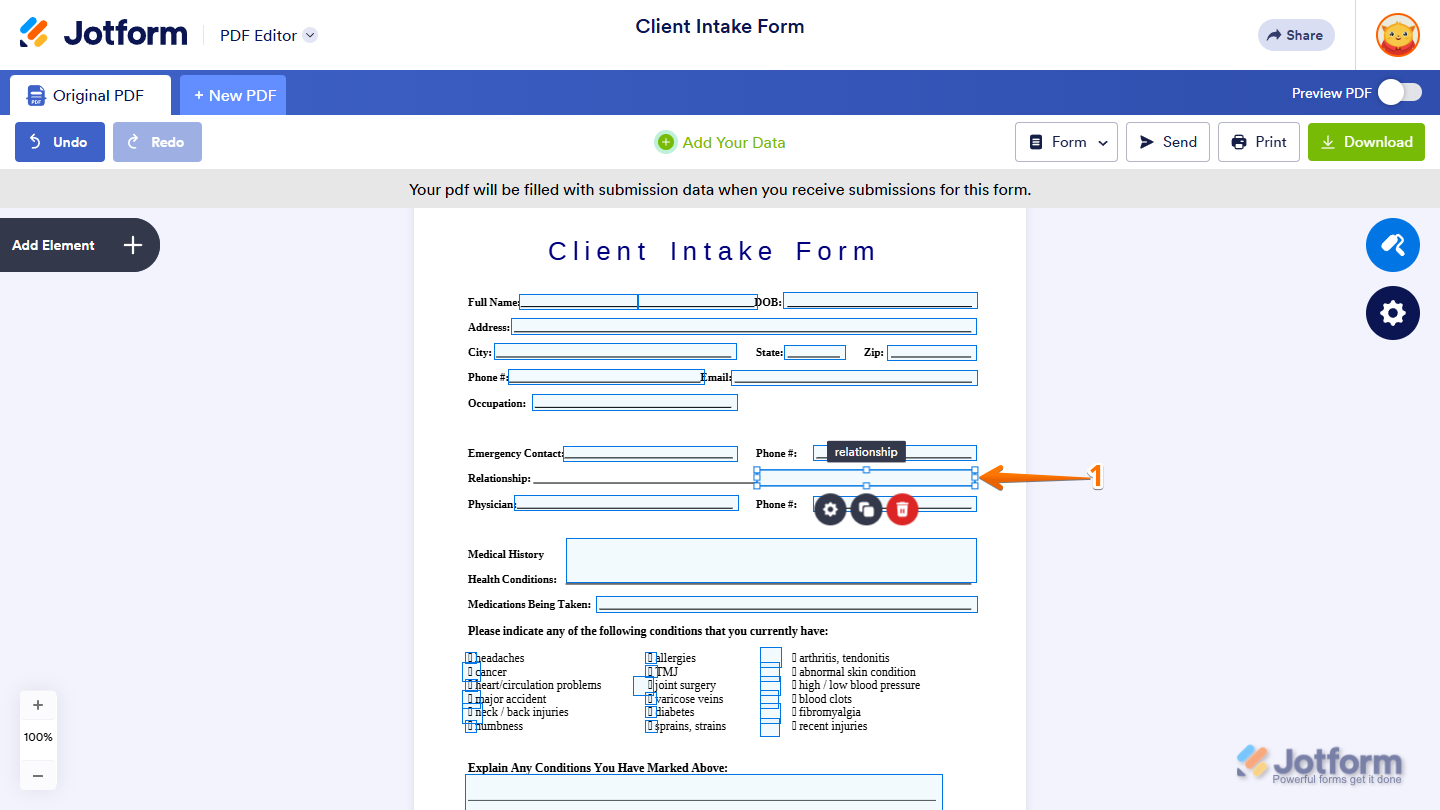
- Now, drag and drop it to its desired position.
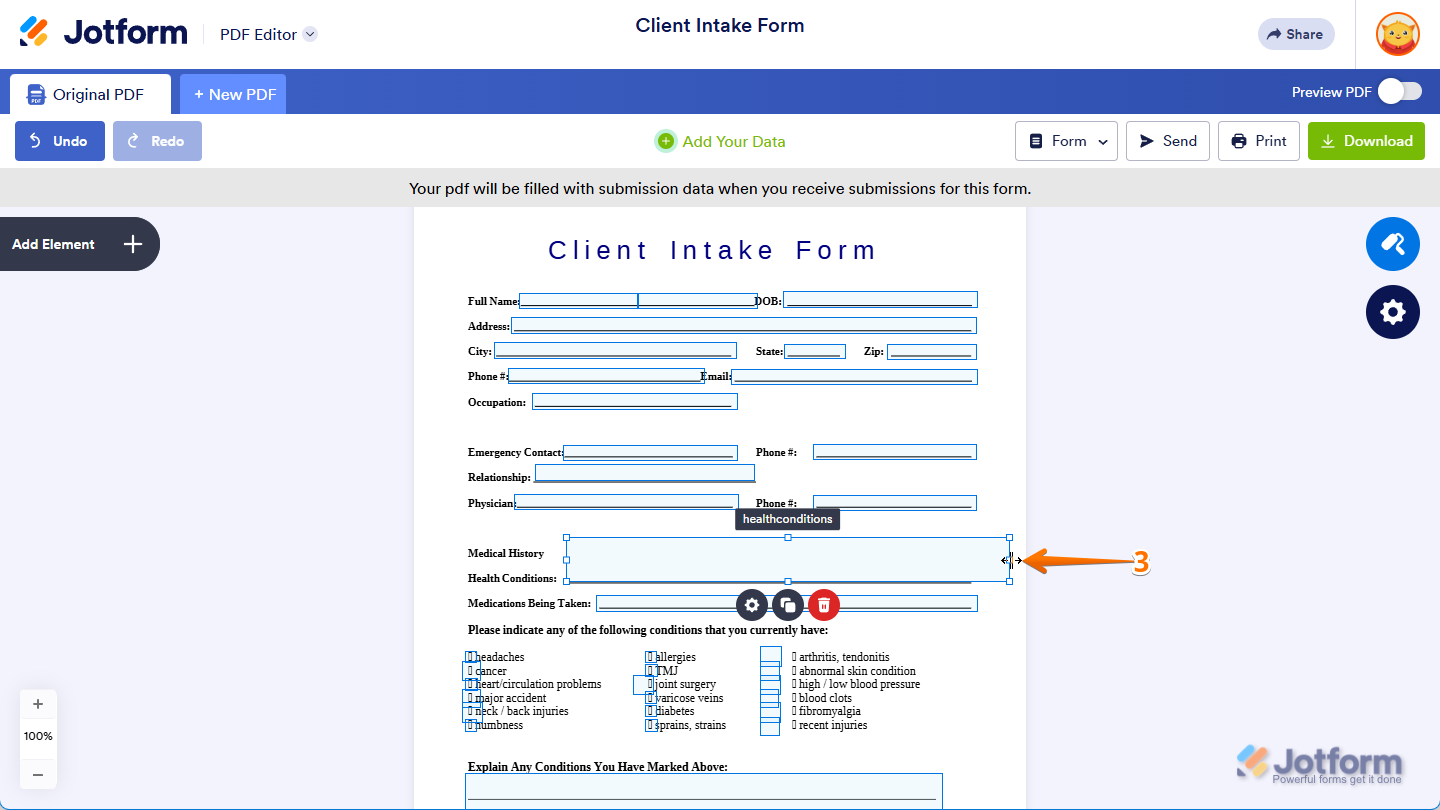
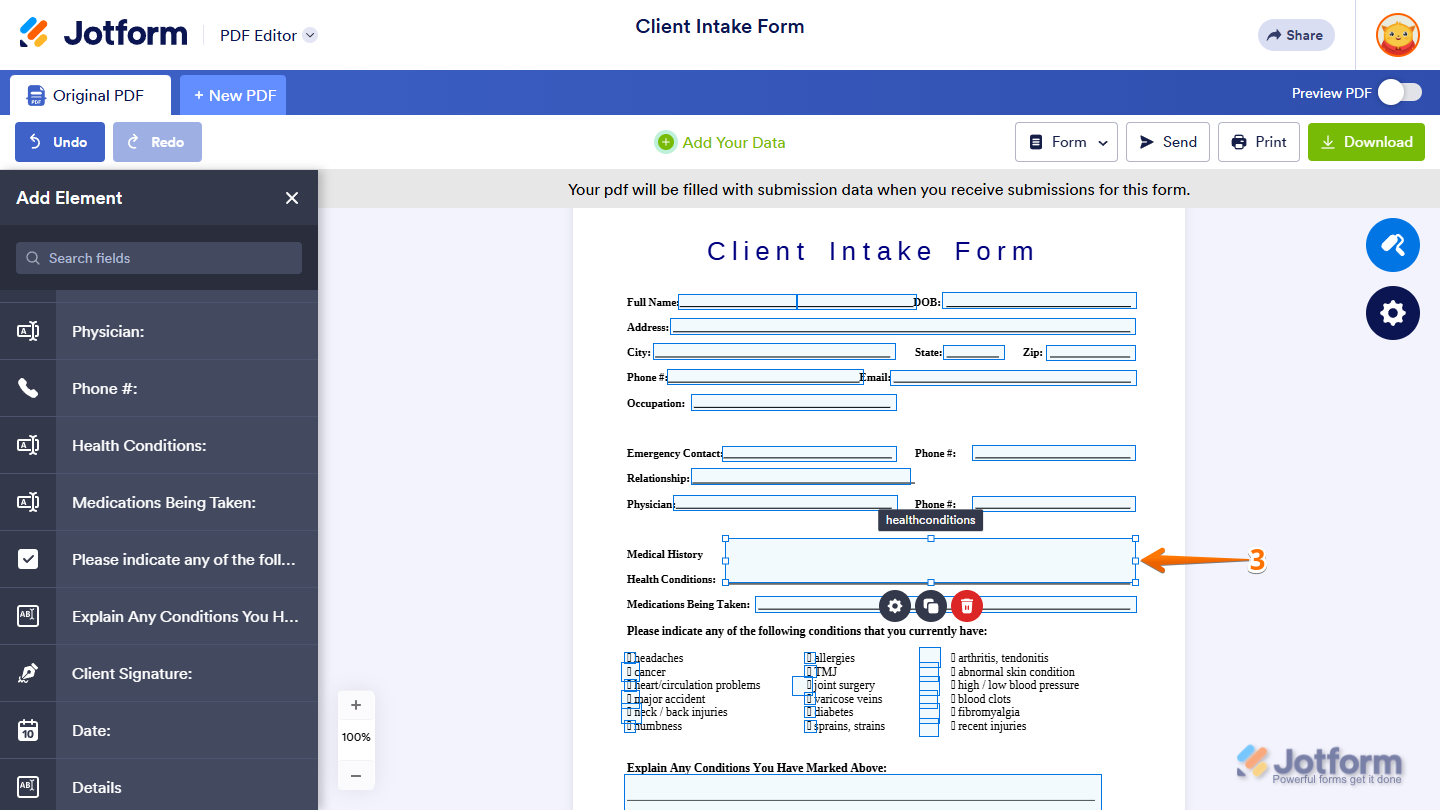
Adjusting the Size of the Annotations
You can also adjust the size of annotations by selecting them from the editor and dragging their corner handles. This helps ensure each field fits perfectly within your document’s layout and maintains a clean, professional appearance. Here’s what to do:
- In PDF Editor, select the annotation that you wish to adjust.
- Then, place your cursor on the resizer handles, which appear as small squares in the annotations.
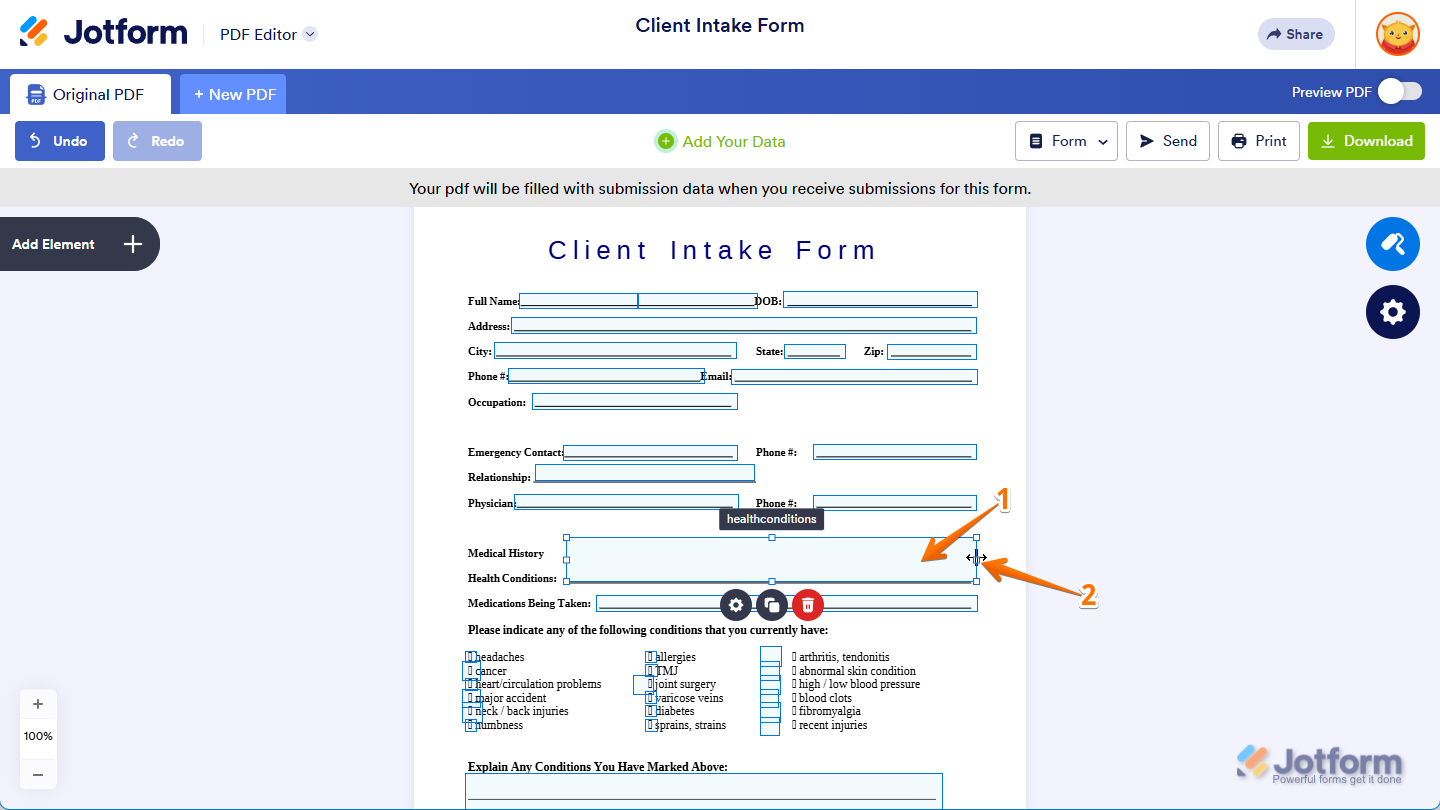
- Now, hold down your left mouse button, then drag and drop the handle inward or outward to resize the annotation to your preferred dimensions.
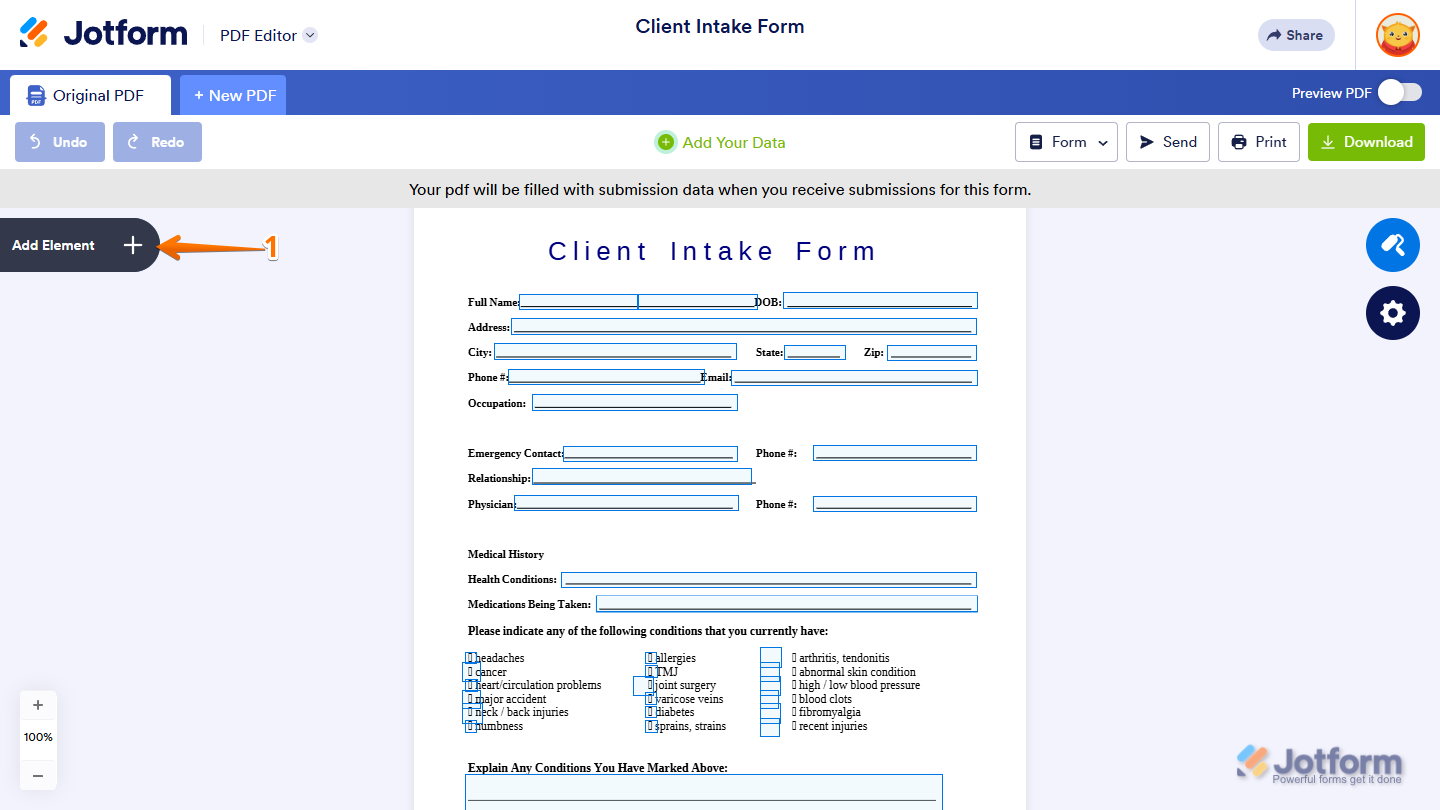
Adding New Form Fields
If you’ve added a new field to your form through the Smart PDF Form Builder, you can also add it to your PDF document. It’s easier than you think:
- In PDF Editor, click on Add Element on the left side of the page.
- Then, in the Add Element menu on the left, click on the new field you wish to add to the PDF. You’ll see this new field added at the top-left side of the document.
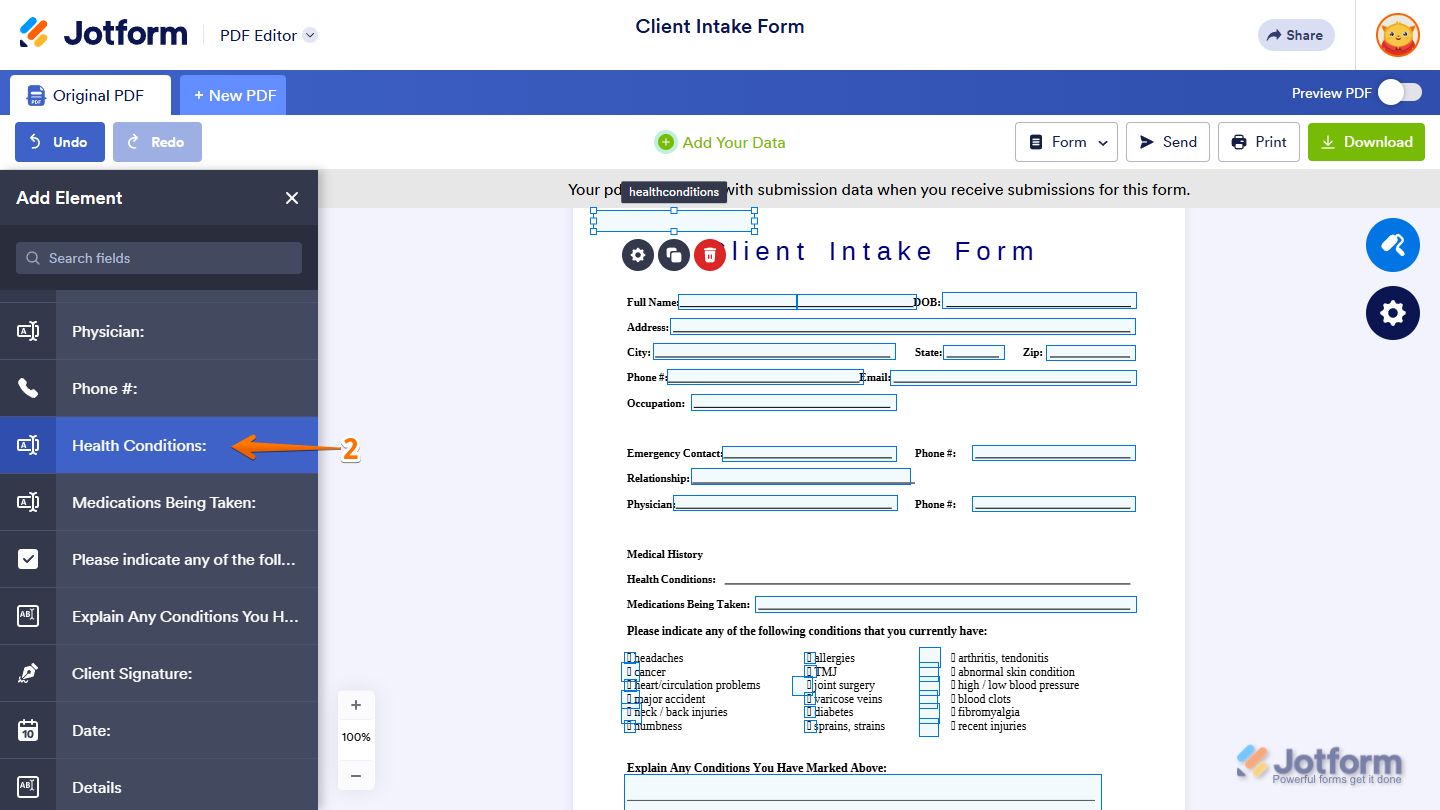
- Now, simply drag and drop the newly added field to its desired position in the PDF. Adjust its size accordingly when needed.
Removing Existing Form Fields
If you no longer need a mapped field in the PDF, simply select its annotation in the PDF Editor and delete it. Here’s a quick how-to:
- In PDF Editor, click on the field you want to remove from the PDF.
- Now, simply click on the Trash Can icon to delete it.

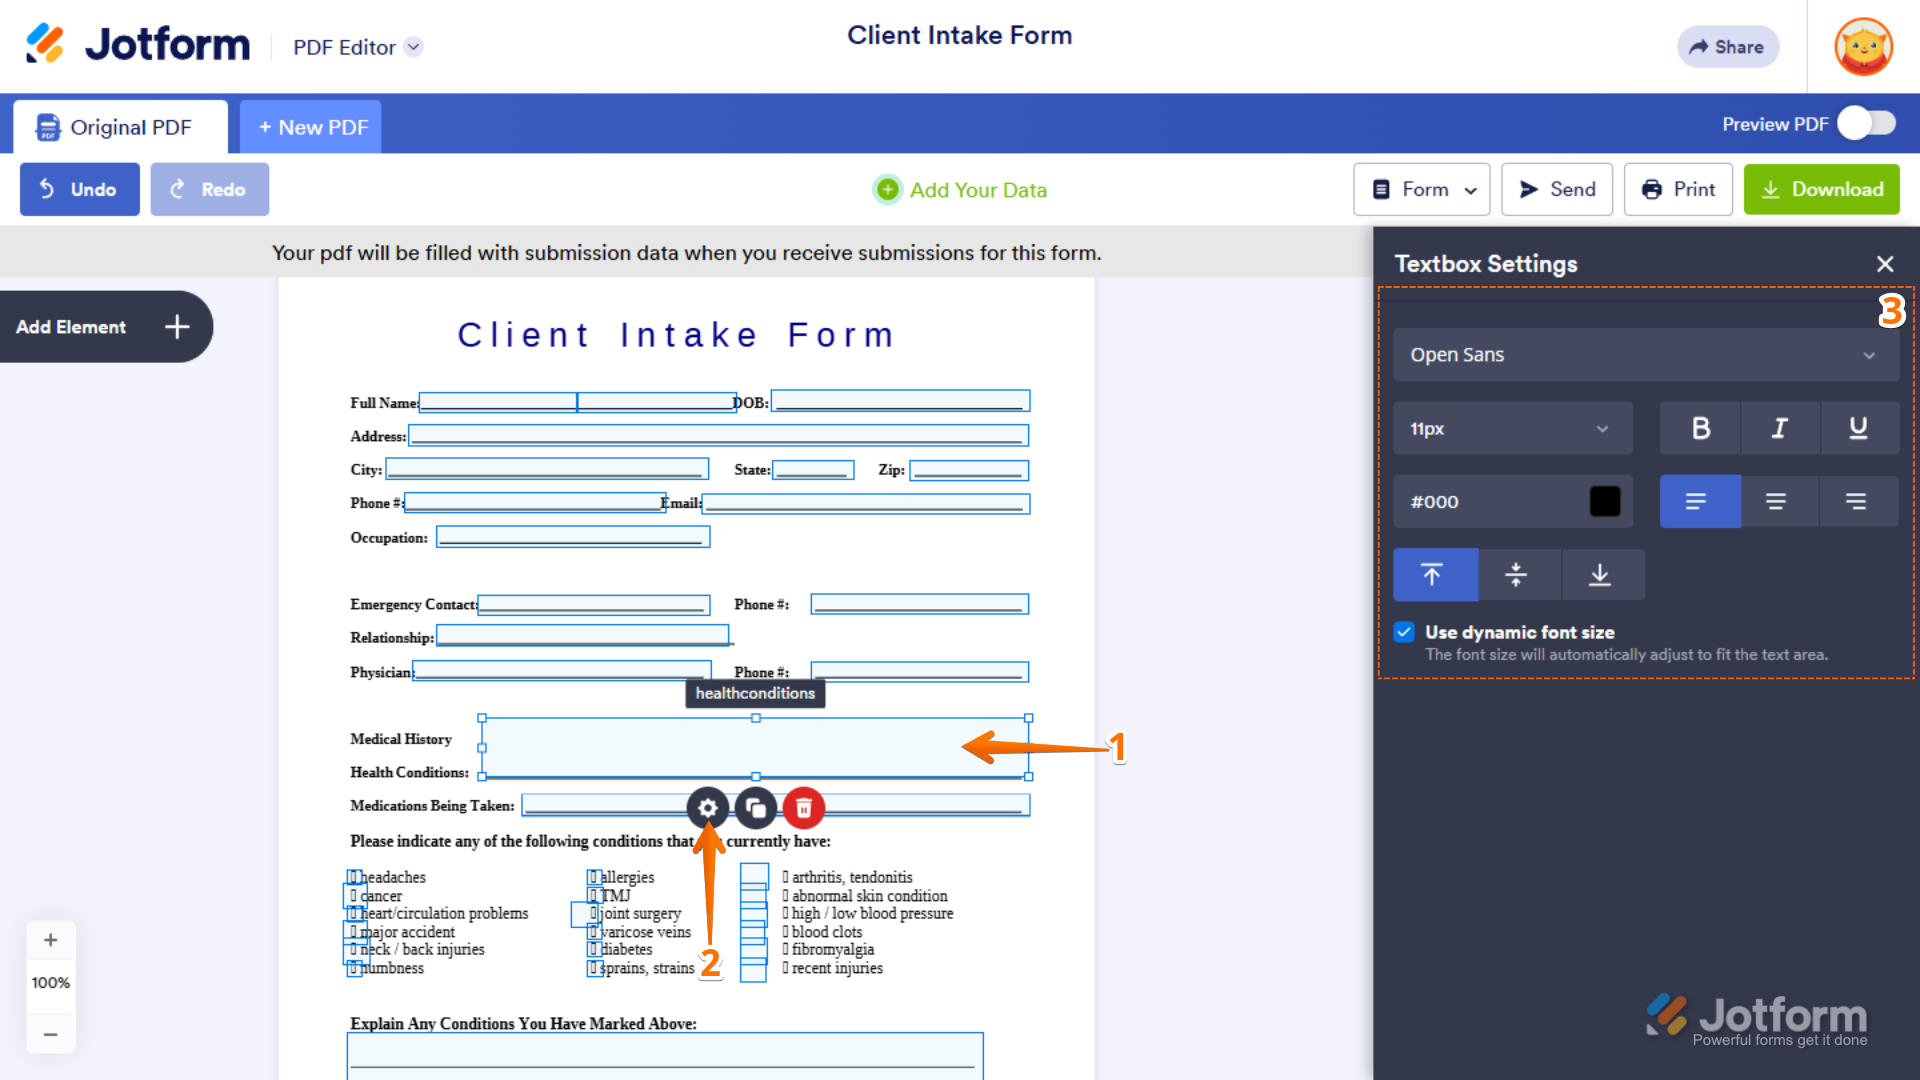
Changing the Format of a Single Field
You can customize individual fields to better match your document’s design or specific data requirements. This allows you to modify a field’s format, appearance, or settings without affecting the rest of the fields in your form—giving you more precise control over your layout and functionality.
For the textbox field, you can set it up like this:
- In PDF Editor, click on the Textbox field in the document.
- Then, click on the Gear icon.
- Now, in the Textbox Settings menu that opens on the right, set up these things:
- Font Family — Select the typeface used for the field’s text to match your document’s style or branding.
- Font Size — Adjust the text size to improve readability and ensure it fits within the field.
- Text Formatting — Apply styling options such as bold, italic, or underline to emphasize specific content.
- Font Color — Change the text color to align with your document’s design or highlight important information.
- Horizontal Alignment — Set how the text is aligned from left to right within the field (left, center, or right).
- Vertical Alignment — Control how the text is positioned vertically within the field (top, middle, or bottom).
- Use Dynamic Font Size — Automatically adjusts the text size to fit within the field’s boundaries, ensuring content remains visible without overflowing.
For the option-based fields, such as Multiple Choice and Single Choice, you can set it up like this:
- In PDF Editor, click on the Multiple Choice field annotation in the document.
- Then, click on the Gear icon.
- Now, in the Multiple Choice Settings menu that opens on the right, configure these things:
- Option Style — Select how the selectable option appears in the PDF: Standard Checkbox, Bordered Checkbox, or Checkbox with Solid Background.
- Option Color — Set the checkbox style’s color.

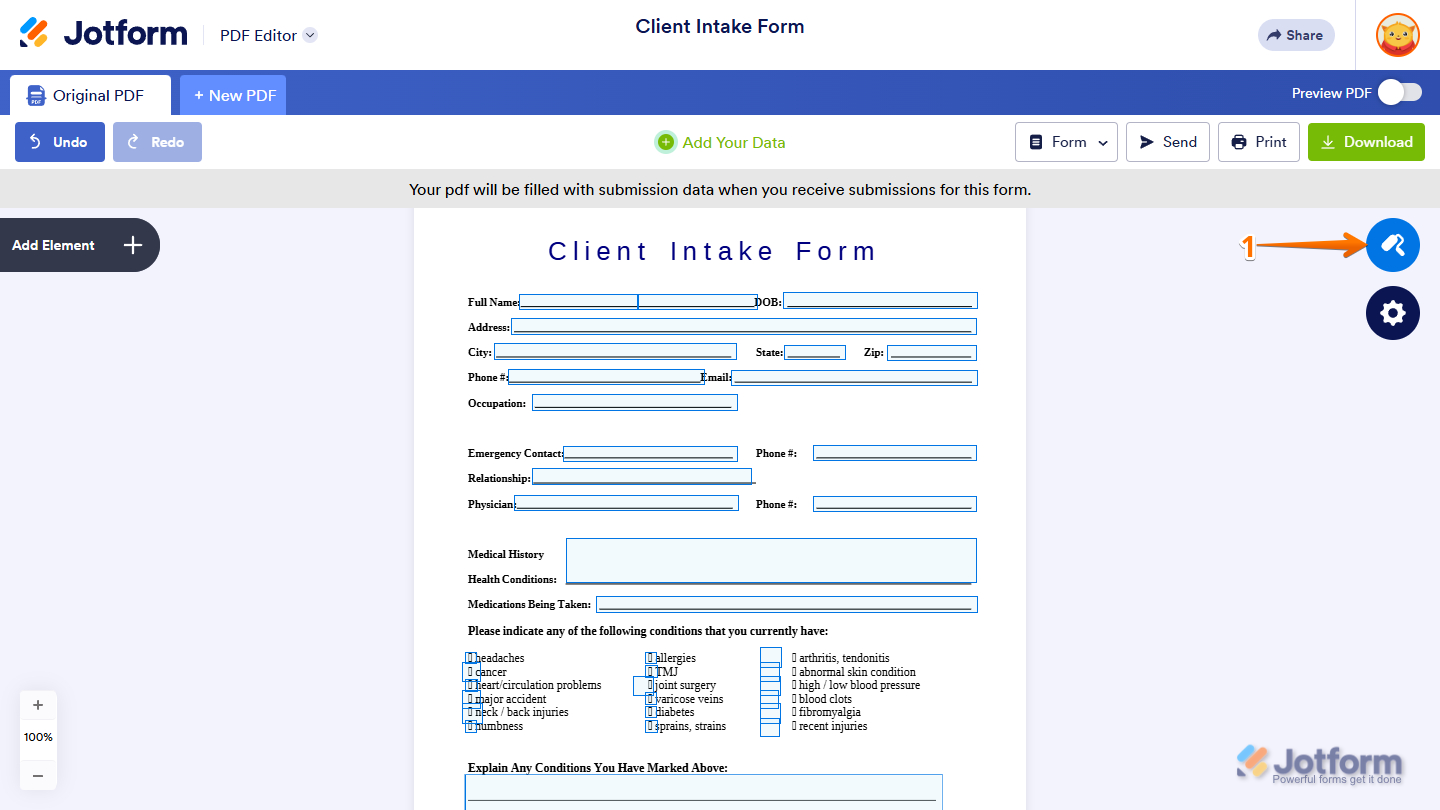
Changing the Format of Fields At Once
If you need to apply the same formatting to multiple fields, you can update them all at once instead of editing each one individually. This helps maintain a consistent design throughout your document while saving time and effort. Here’s the quick way to do it:
- In PDF Editor, click on the Paint Roller icon on the right side of the page.
- Then, in the PDF Designer menu that opens on the right, under the Text Style section, set things up like this:
- Font Family — Select the font style for the field’s text to maintain visual consistency with your document’s overall design.
- Font Size — Adjust the text size to ensure clarity and proper spacing within the field.
- Text Formatting — Enhance text with styles such as bold, italic, or underline to draw attention or create emphasis.
- Font Color — Select a text color that complements your layout or distinguishes key information.
- Horizontal Alignment — Define whether the text appears left-aligned, centered, or right-aligned inside the field.
- Vertical Alignment — Adjust the text’s placement vertically so it sits at the top, center, or bottom of the field.
- Use Dynamic Font Size — Enable automatic text resizing so longer entries scale to fit neatly within the available space.
- Now, under the Option Styles section, set up these things:
- Option Style — Define the visual presentation of the selectable option in the PDF, such as a standard checkbox, a bordered checkbox, or a checkbox with a solid-filled background for stronger visibility.
- Option Color — Customize the color applied to the selected checkbox style to match your document’s design or branding.

That’s it for editing and customizing annotations in the PDF Editor. You can now adjust fields, formatting, and layout with confidence—ensuring your PDF looks polished and functions exactly as intended.

Send Comment: