A PDF Submission Report is a downloadable PDF document that contains the data collected through your form submissions. You can use it to print records, share information, or Attach it to Email Notifications. The PDF Editor lets you customize the layout and content of the document so it reflects exactly what you need.
Creating Your Form PDF Submission Report in the Documents Section
Learn how to create or edit your form’s PDF submission report to easily organize and share the responses you collect. Get started like this:
- In Form Builder, in the orange navigation bar at the top of the page, click on Settings.
- Then, in the menu on the left side of the page, click on Documents.
- Now, in the Documents section, create a Form PDF Submission Report using the Document Copilot AI by either describing the document you need or selecting one of the predefined descriptions, then click Generate.

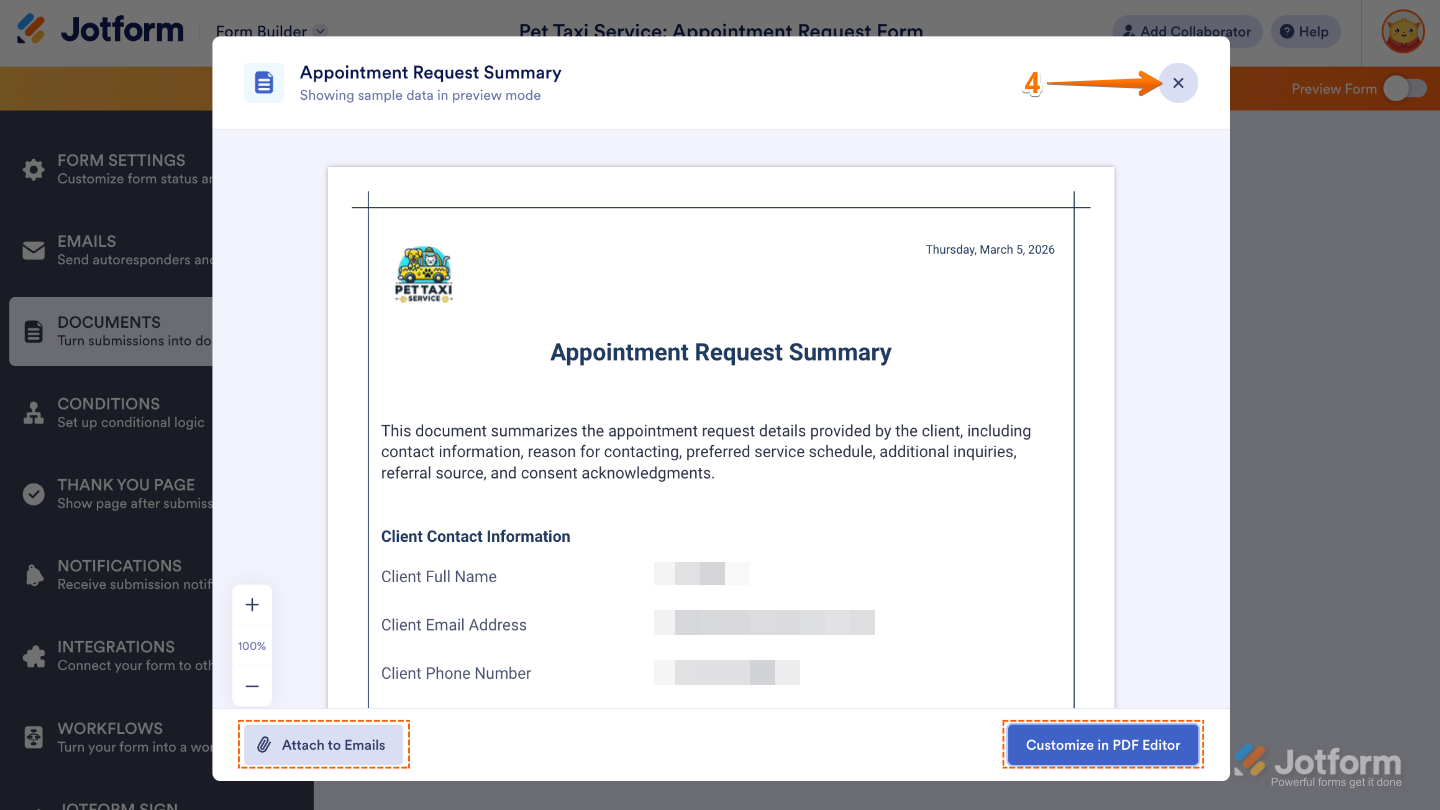
- In the Confirmation window that appears, review the created document, then either click on the X icon or choose one of the other options:
- Attach to Emails — Allows you to automatically attach this PDF document to email notifications or autoresponders.
- Customize in PDF Editor — Opens the PDF editor so you can change the layout, content, or styling of the generated PDF document.
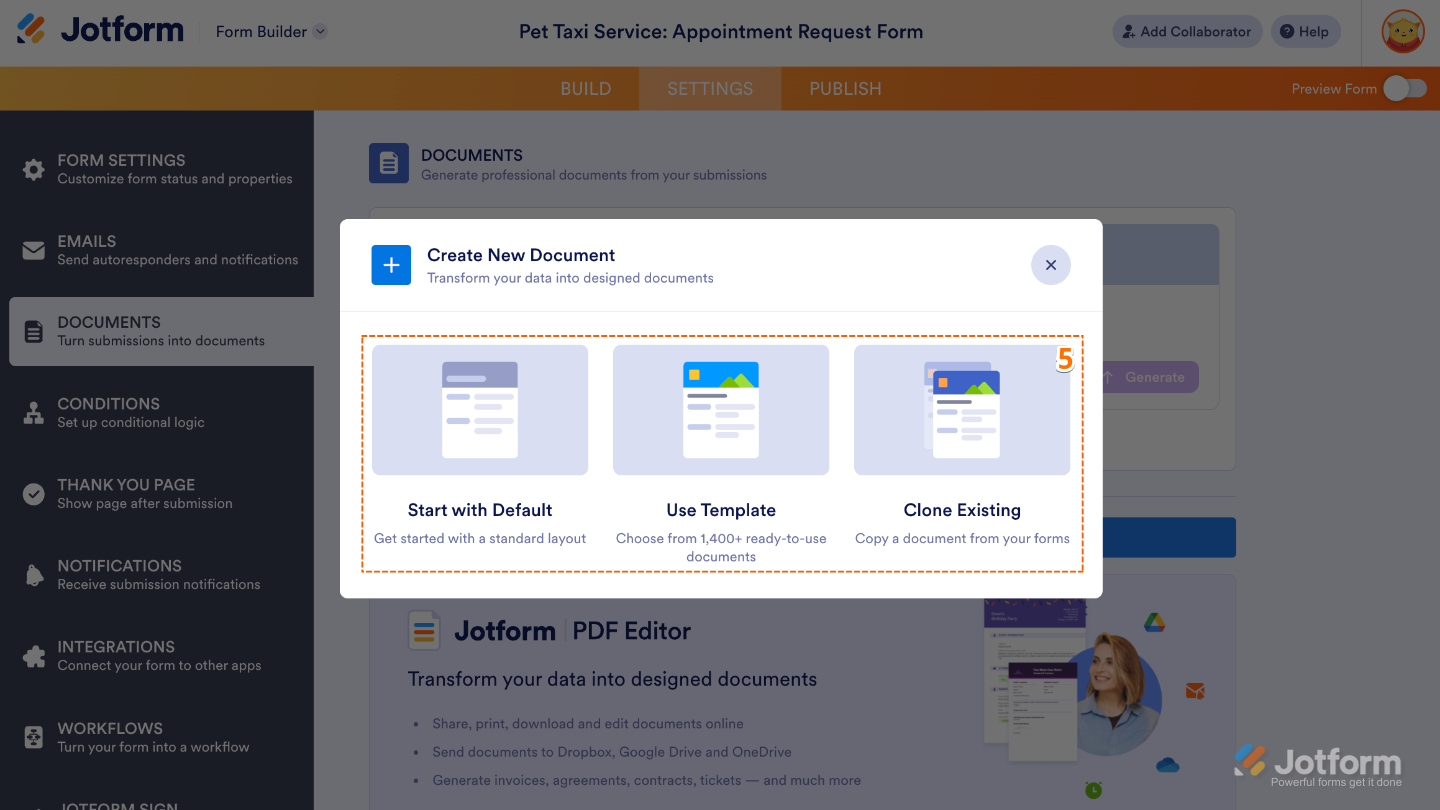
- Alternatively, to create a Form PDF Submission Report, click on Add New Document to see these additional options:
- Use Default Layout — This option automatically generates a new PDF Document using your form’s current structure. All the fields you’ve added to your form are instantly included in the document, arranged in a clean and simple layout.
- Use Template — Lets you choose from over 1,900 professionally designed templates available on Jotform’s PDF Templates page. Once you select a template, related form fields are automatically added based on the template’s content, helping you save setup time.
- Clone Existing PDF — With this option, you can duplicate a PDF Document you’ve already created for another form in your account. It copies the entire layout, styling, and structure, so you don’t have to recreate your design from scratch.
If your form already has at least one PDF document, you’ll see the available document listed below.

Managing Your Form PDF Submission Report
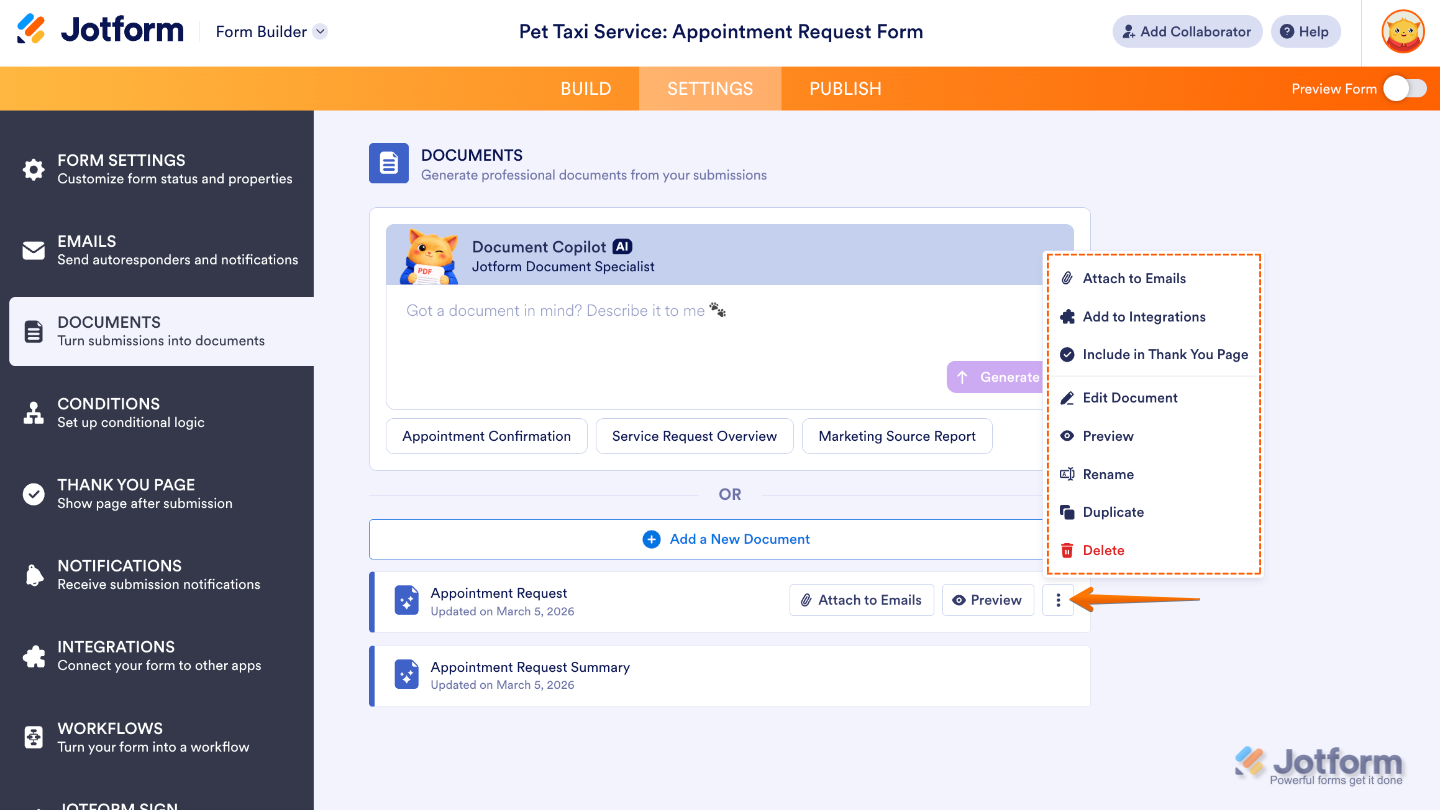
If you want to make changes later, just hover over your PDF document and click on the Three Dots icon on the right. From there, you can edit, duplicate, remove it, or use it with other features in your form—whenever you need.
- Attach to Emails — Allows you to automatically attach this PDF document to email notifications or autoresponders.
- Add to Integrations — Lets you send the PDF data to third-party apps integrated with your form (e.g., Google Drive, Dropbox, or other workflow tools).
- Include in Thank You Page — Gives the option to display the PDF directly on the form’s Thank You page after a user submits a form.
- Edit Document — Opens the PDF editor so you can change the layout, content, or styling of your PDF document. For example, adding/removing fields, adjusting spacing, or modifying headers.
- Preview — Shows a live preview of the PDF document with actual form data (or sample data).
- Rename — Allows you to change the name of your PDF document for better organization or clarity.
- Duplicate — Creates an exact copy of the PDF document. Useful if you want a similar template without starting from scratch.
- Delete — Permanently removes the PDF document from your form. Once deleted, it cannot be recovered unless you recreate it.
Another way to access PDF Editor to create or edit a PDF Document is from Form Builder or any page where an asset or page linked to your form is open, such as App Builder, Workflow Builder, Inbox, Tables, or Report Builder. Open the App Picker menu at the top of the page next to the Jotform logo and click on PDF Editor in the menu that comes up. That’ll redirect you to PDF Editor.

Creating a New PDF Document in PDF Editor
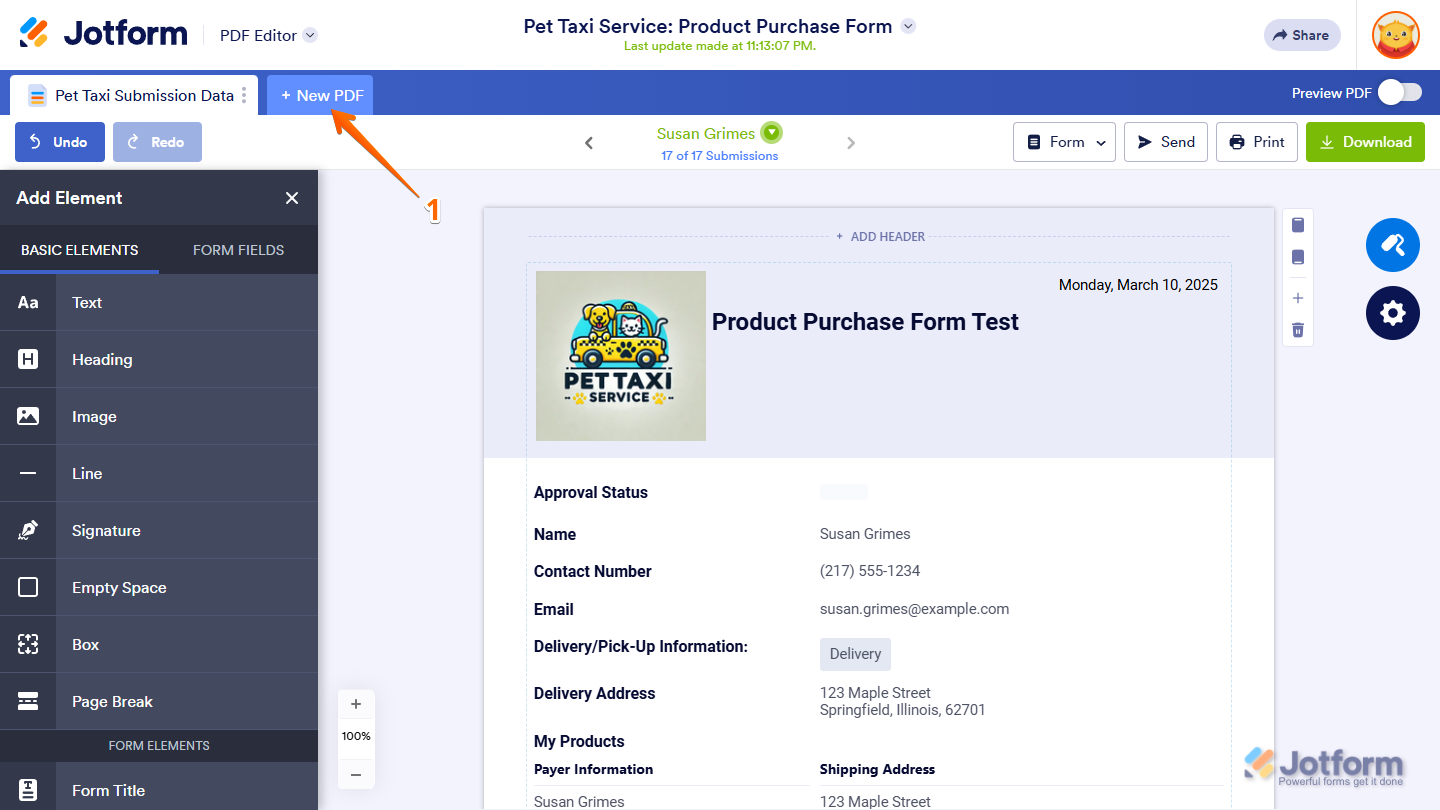
You can also create a new PDF Document for your form submissions within PDF Editor. Here’s how to do it:
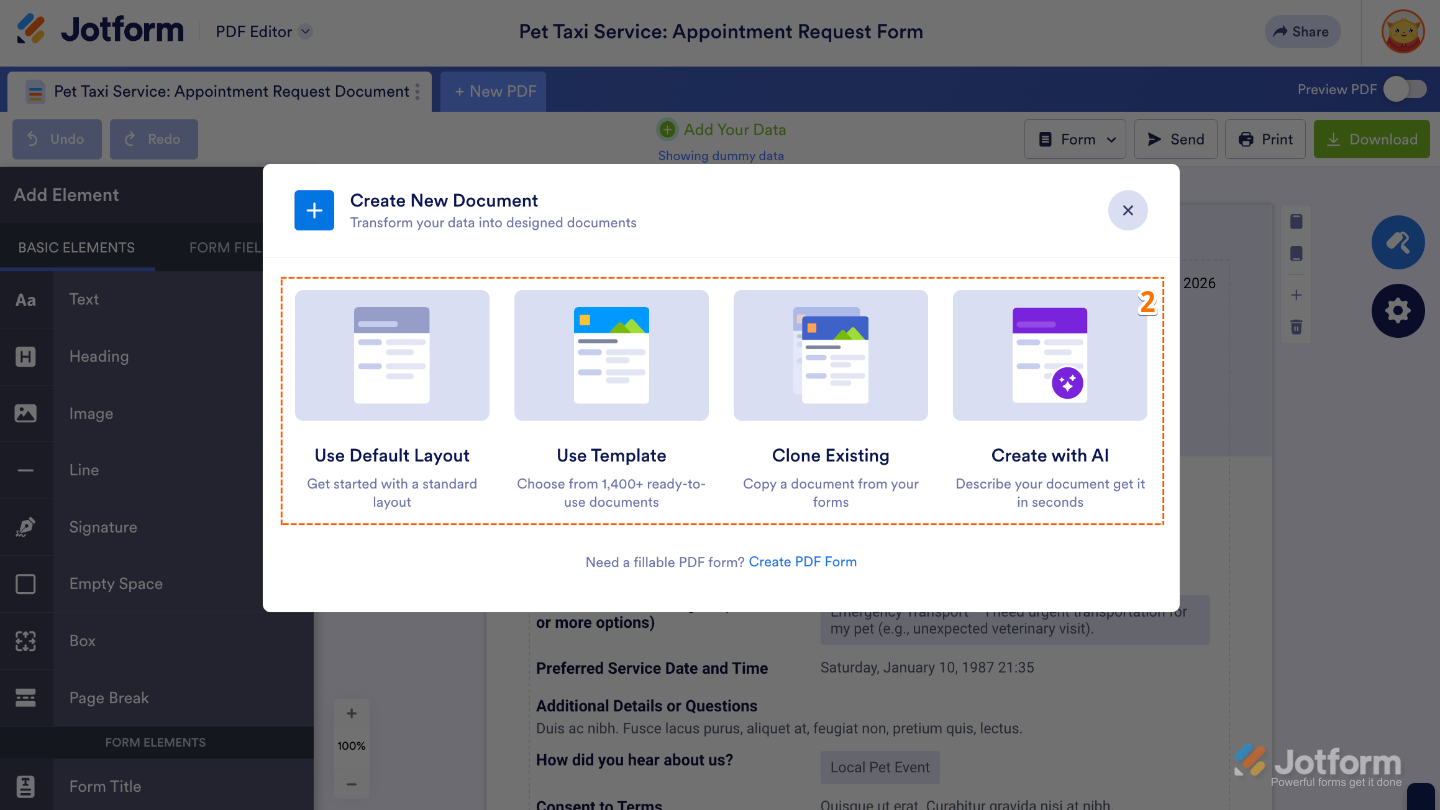
- While in PDF Editor, click on New PDF in the blue navigation bar at the top of the page.
- Now, in the Create New Document window that comes up, select one of the following options:
- Use Default Layout — This option automatically generates a new PDF Document using your form’s current structure. All the fields you’ve added to your form are instantly included in the document, arranged in a clean and simple layout.
- Use Template — Lets you choose from over 1,900 professionally designed templates available on Jotform’s PDF Templates page. Once you select a template, related form fields are automatically added based on the template’s content, helping you save setup time.
- Clone Existing PDF — With this option, you can duplicate a PDF Document you’ve already created for another form in your account. It copies the entire layout, styling, and structure, so you don’t have to recreate your design from scratch.
- Create with AI — Simply describe the document you need, and the AI will generate a PDF layout for you in seconds. For example, you can type something like, “Create a modern invoice with company details at the top and a pricing table below,” and the system will build a matching layout automatically.
Renaming, Duplicating, and Deleting an Existing PDF Document
You can also rename, duplicate, and delete a PDF Document in a few easy steps. Here’s how:
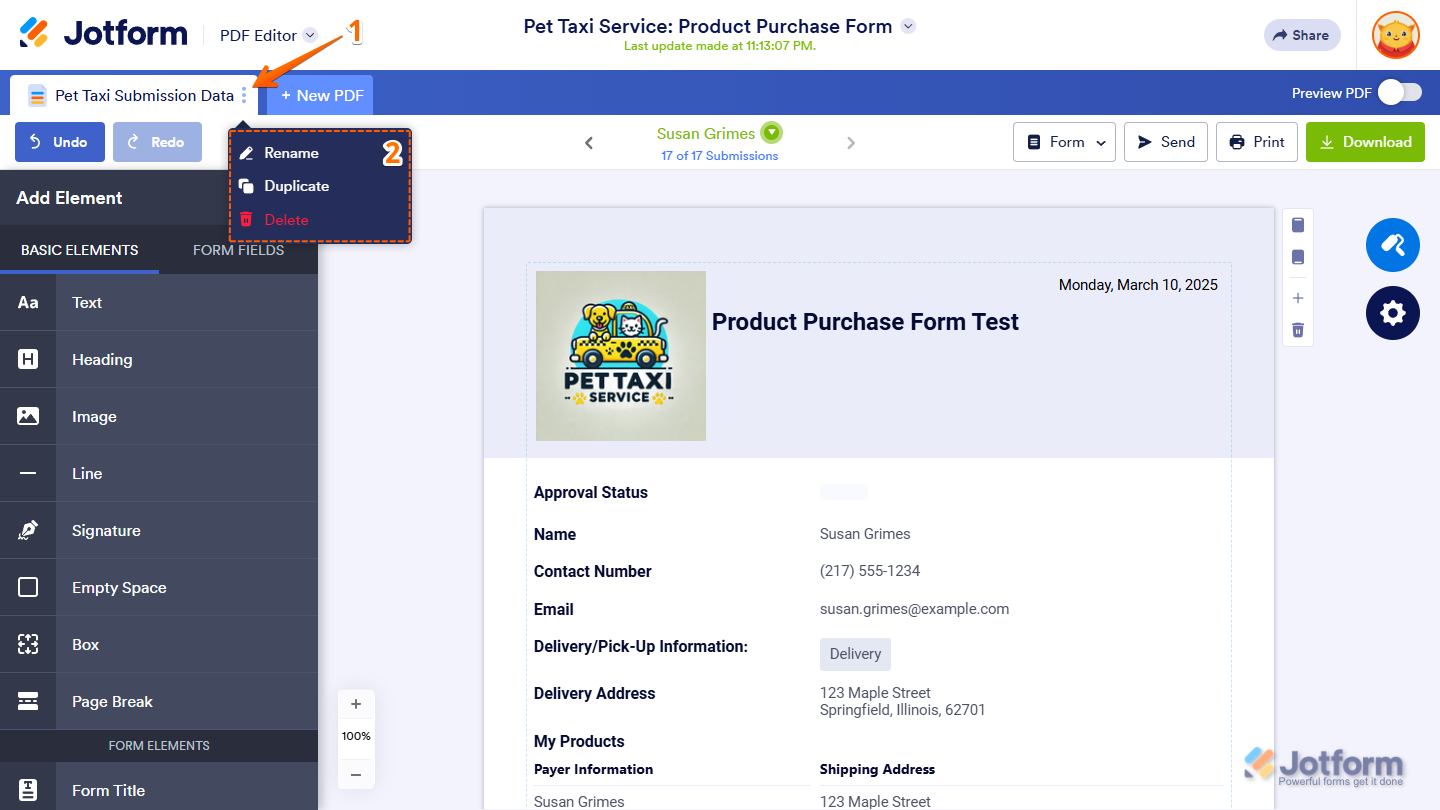
- While in PDF Editor, click on the Three Dots icon on the active PDF Document tab.
- Now, in the menu that opens, select one of the following options:
- Rename — This highlights the name of the PDF Document on the tab so you can enter a new one. Renaming helps you label documents clearly, especially when you’re managing different versions for specific use cases.
- Duplicate — This creates an exact copy of your PDF Document, with the new file name prefixed with “Copy of”. Duplicating is useful when you want to try a new layout or make changes without affecting the original version.
- Delete — This allows you to remove a PDF Document from PDF Editor if you no longer need it. Deleting helps keep things organized, especially when you’re working with multiple versions, and keeps your workspace focused on the documents that matter most.
Note
Deleting a PDF Document is irreversible once you click on ‘Yes, Confirm’ in the Confirmation window. If you delete the last PDF Document, the system will automatically create a new one in the default layout.
Creating or Opening Your Form PDF Submission Report from the Workspace Page
Creating PDF Documents or opening existing ones linked to your form from the workspace page is quick and easy. Here’s how to do it:
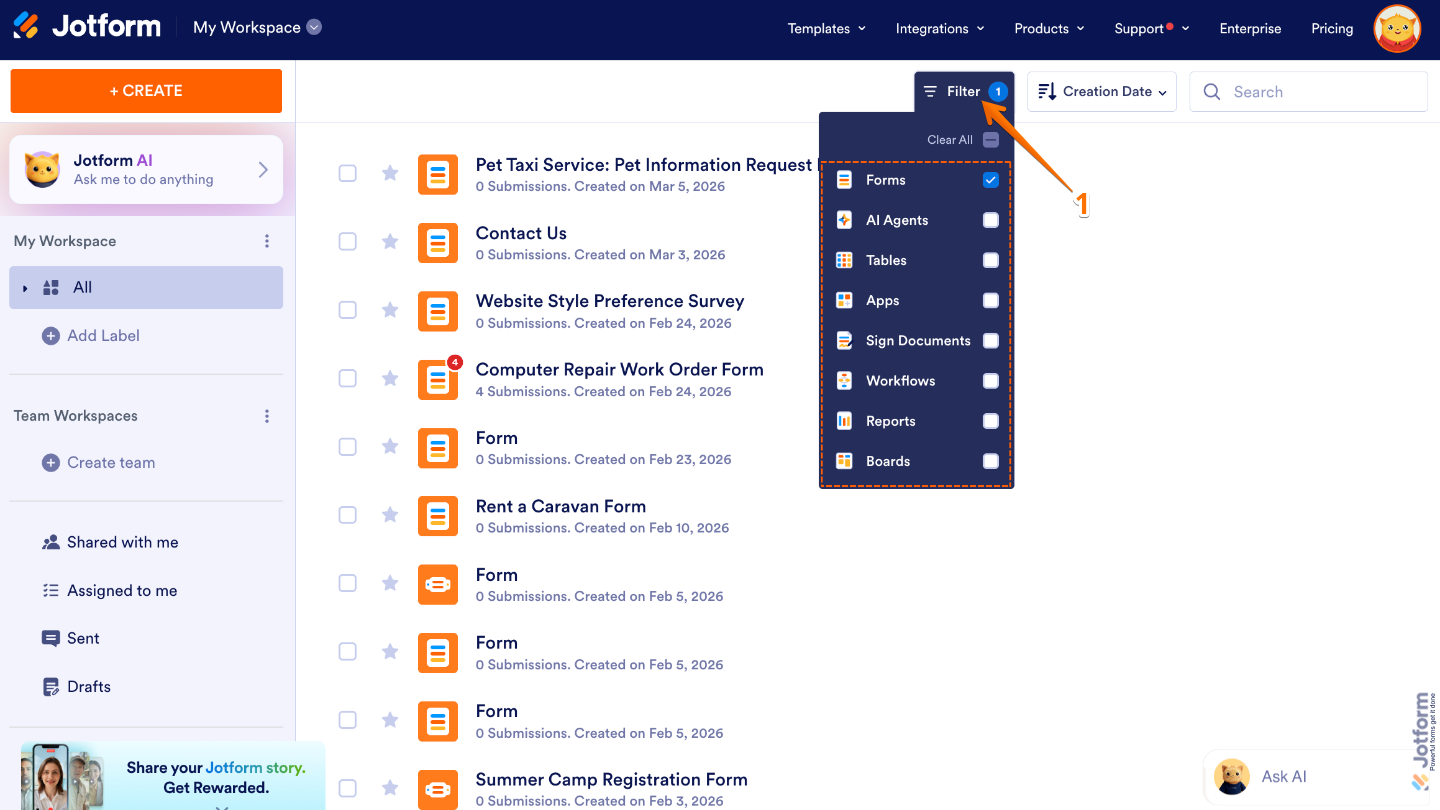
- On your Workspace page, click on Filter at the top, and in the Dropdown menu that opens, uncheck the boxes next to all the assets except Forms, so only they’ll be shown on the page.
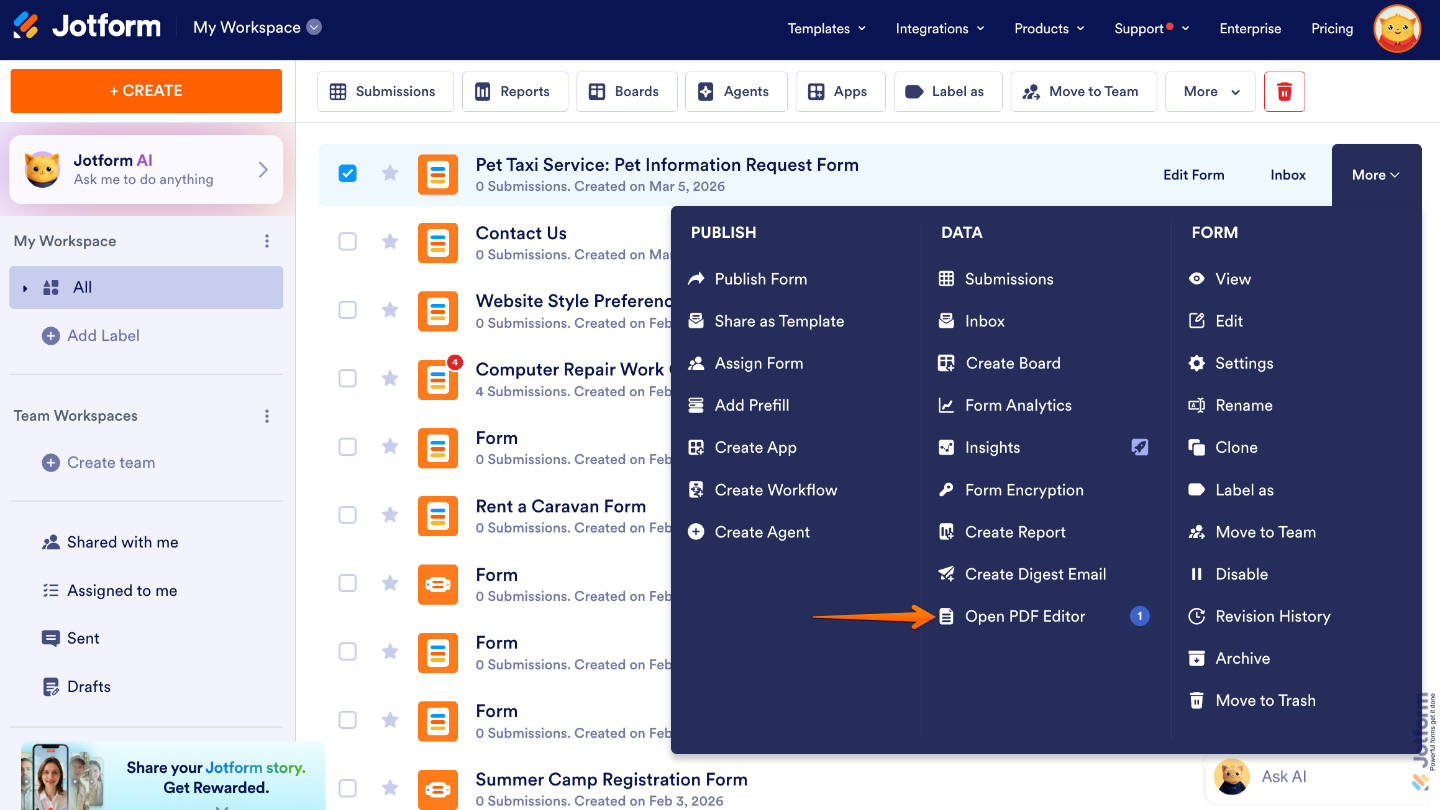
- Hover your mouse over the form you want to create a PDF Document for, and click on More on the right side of the page.
- Then, in the Dropdown menu, under the Data column, click on Create PDF Document. You’ll see Open PDF Editor instead if your form had at least one PDF Document created for it previously.

If your form already has at least one PDF document created, you’ll see the Open PDF Editor option instead.
Notes
- The Create PDF Document option creates a new PDF Document for your form submissions and opens it in PDF Editor in a new browser tab so you can continue working on it. Meanwhile, the Open PDF Editor option only opens an existing PDF Document without creating a new one.
- The number next to the Open PDF Editor option in the form’s More menu shows how many PDF documents have been created for that form.

Send Comment:
5 Comments:
February 6, 2025
How to download or print PDF submission directly in the en off submission ?
March 2, 2023
how can you add a dynamic qr on every submission pdf?
June 24, 2022
I am trying to pull data into a PDF from submitted data, but for some reason, the phone numbers will not populate. My form has a Parent/Guardian phone number and an Emergency Contact Phone Number. Is there some additional coding needed for the PDF to know which number goes where?
February 13, 2022
This is out of date. Menu does not look the same.
January 6, 2022
I have created a PDF report for this sheet:
However the PDF submitted to my Google drive is still in the OLD format (gray and white).
Can you please advise how to change this?