Enabling SSO in AI Agents ensures that only authorized and provisioned users can access your AI Agent, enhancing security and access control. This is especially useful for company-wide deployment, as it streamlines user authentication, simplifies management, and enforces organizational security policies while providing a seamless login experience.
To enable SSO in AI Agents, you’ll need to have the following ready:
- A Jotform Enterprise Server
- An AI Agent Enabled on your Jotform Enterprise Server
- Single Sign-On (SSO) Enabled on your Jotform Enterprise Server
Contact the Enterprise Sales team to learn how to upgrade your account to Jotform Enterprise and enable AI Agent and SSO.
Now, if you have everything in place, let’s do it:
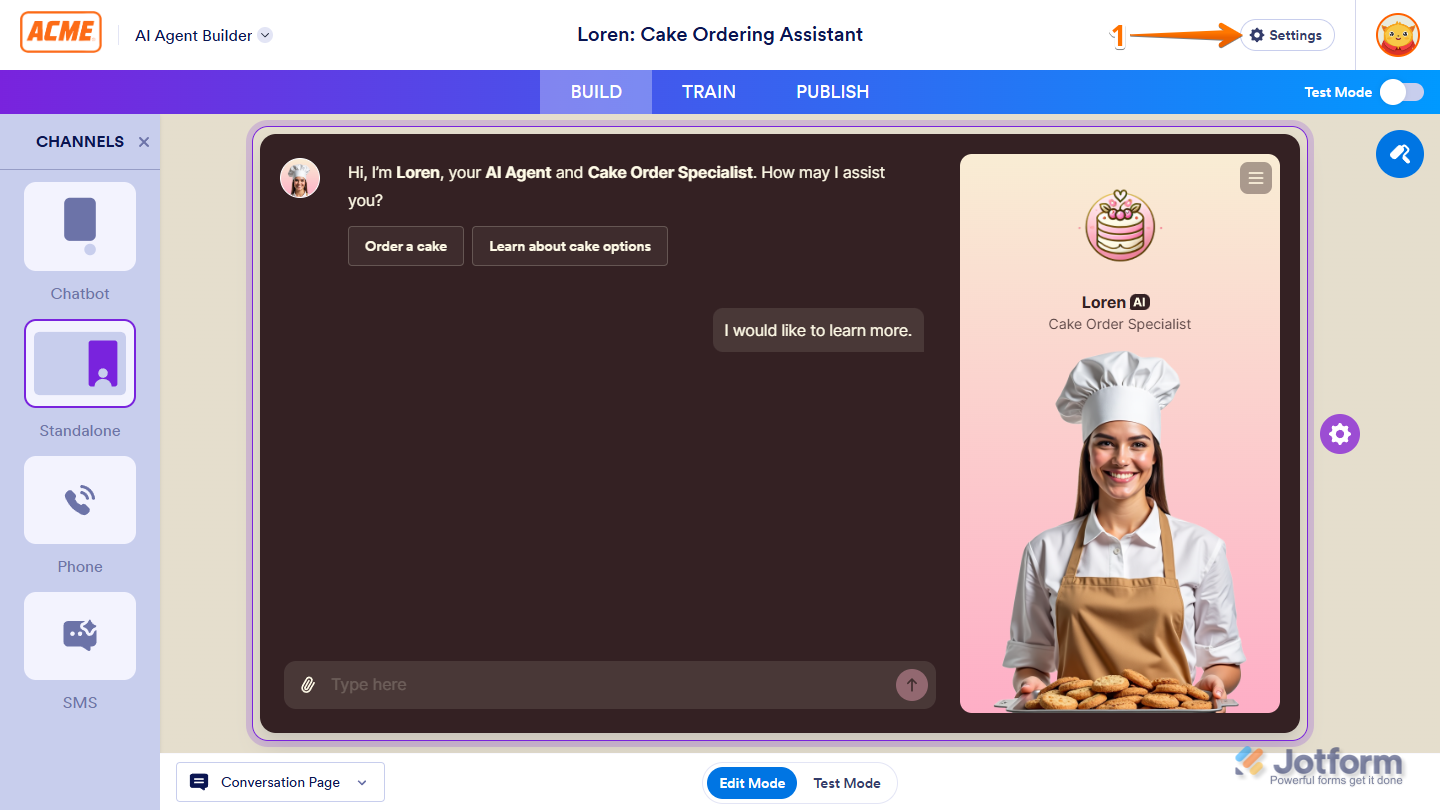
- In Jotform Enterprise AI Agent Builder, click on Settings on the left side of your Profile Picture/Avatar.
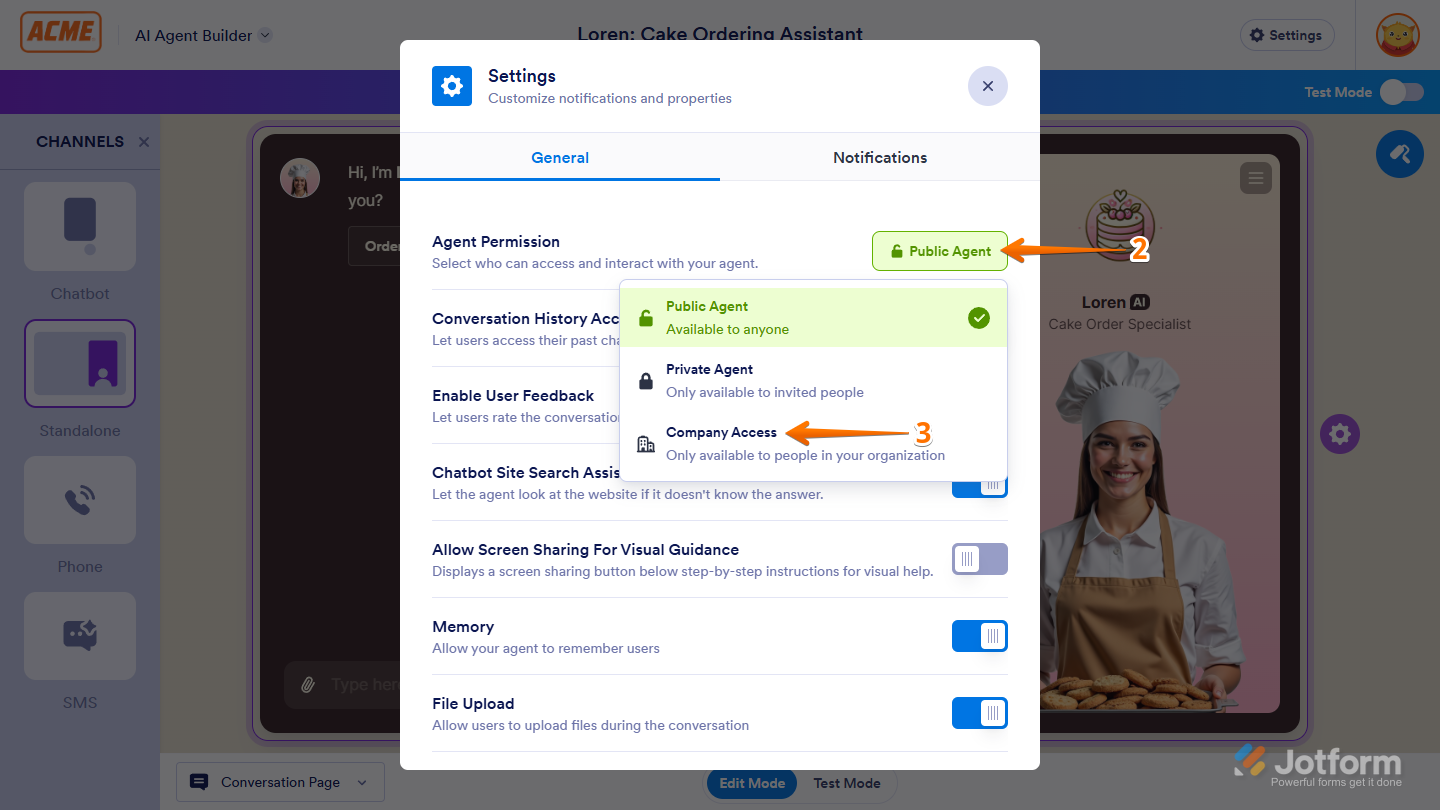
- Now, in the Settings window that opens, click on the button on the right side of Agent Permission.
- Then, in the menu that comes up, select Company Access.
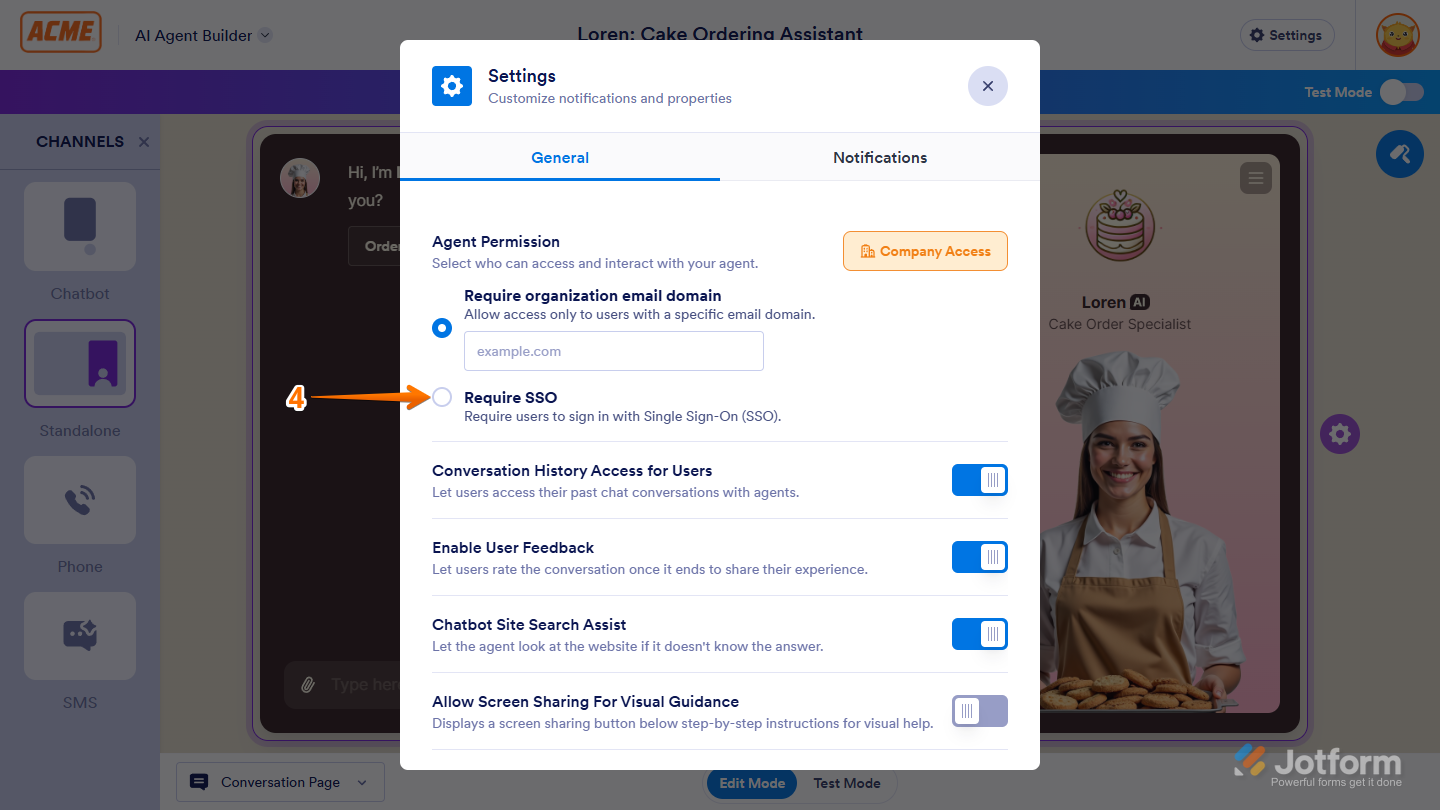
- Next, select Require SSO.
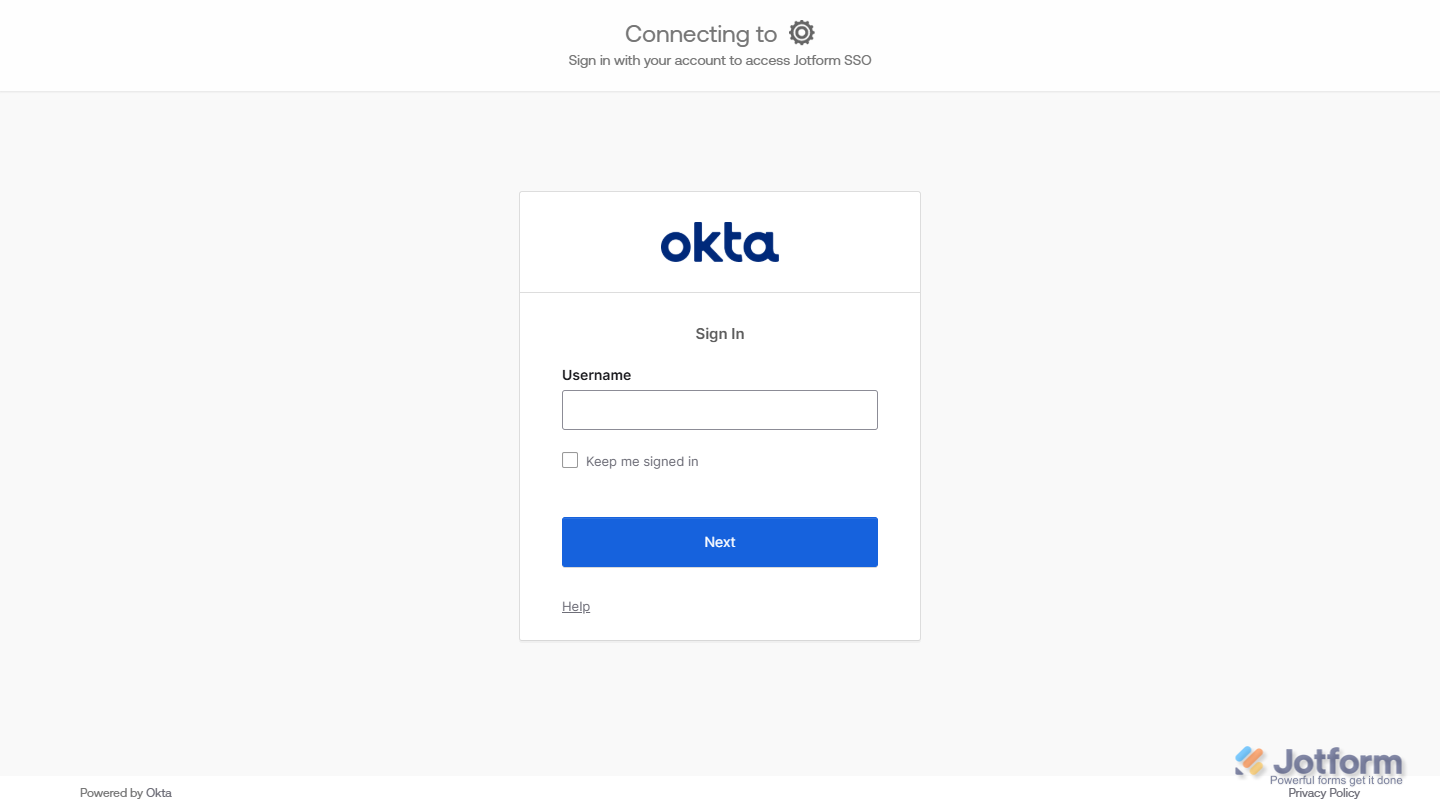
That’s it! Now, when someone accesses your AI Agent, they’ll be asked to sign in through your organization’s Single Sign-On (SSO) before they can use it.

Send Comment: