With Jotform Enterprise, you can enable Single Sign-On (SSO) so users can log in using your organization’s existing credentials. This streamlines access management and adds an extra layer of security. Users only need one set of login details, reducing password-related issues and making sign-in faster and more convenient.
Note
You can now let users log in using either Single Sign-On (SSO) or their email and password. You also have the option to require SSO for guest users.
Enabling SSO Integration
If you’re the admin of your organization’s Enterprise account, you can enable SSO so users can log in with your company’s identity provider. Getting started is simple—here’s what to do:
- On your Workspace page, click on your Avatar/Profile picture in the top-right corner of the screen.
- Then, in the Dropdown menu that comes up, click on Admin Console.

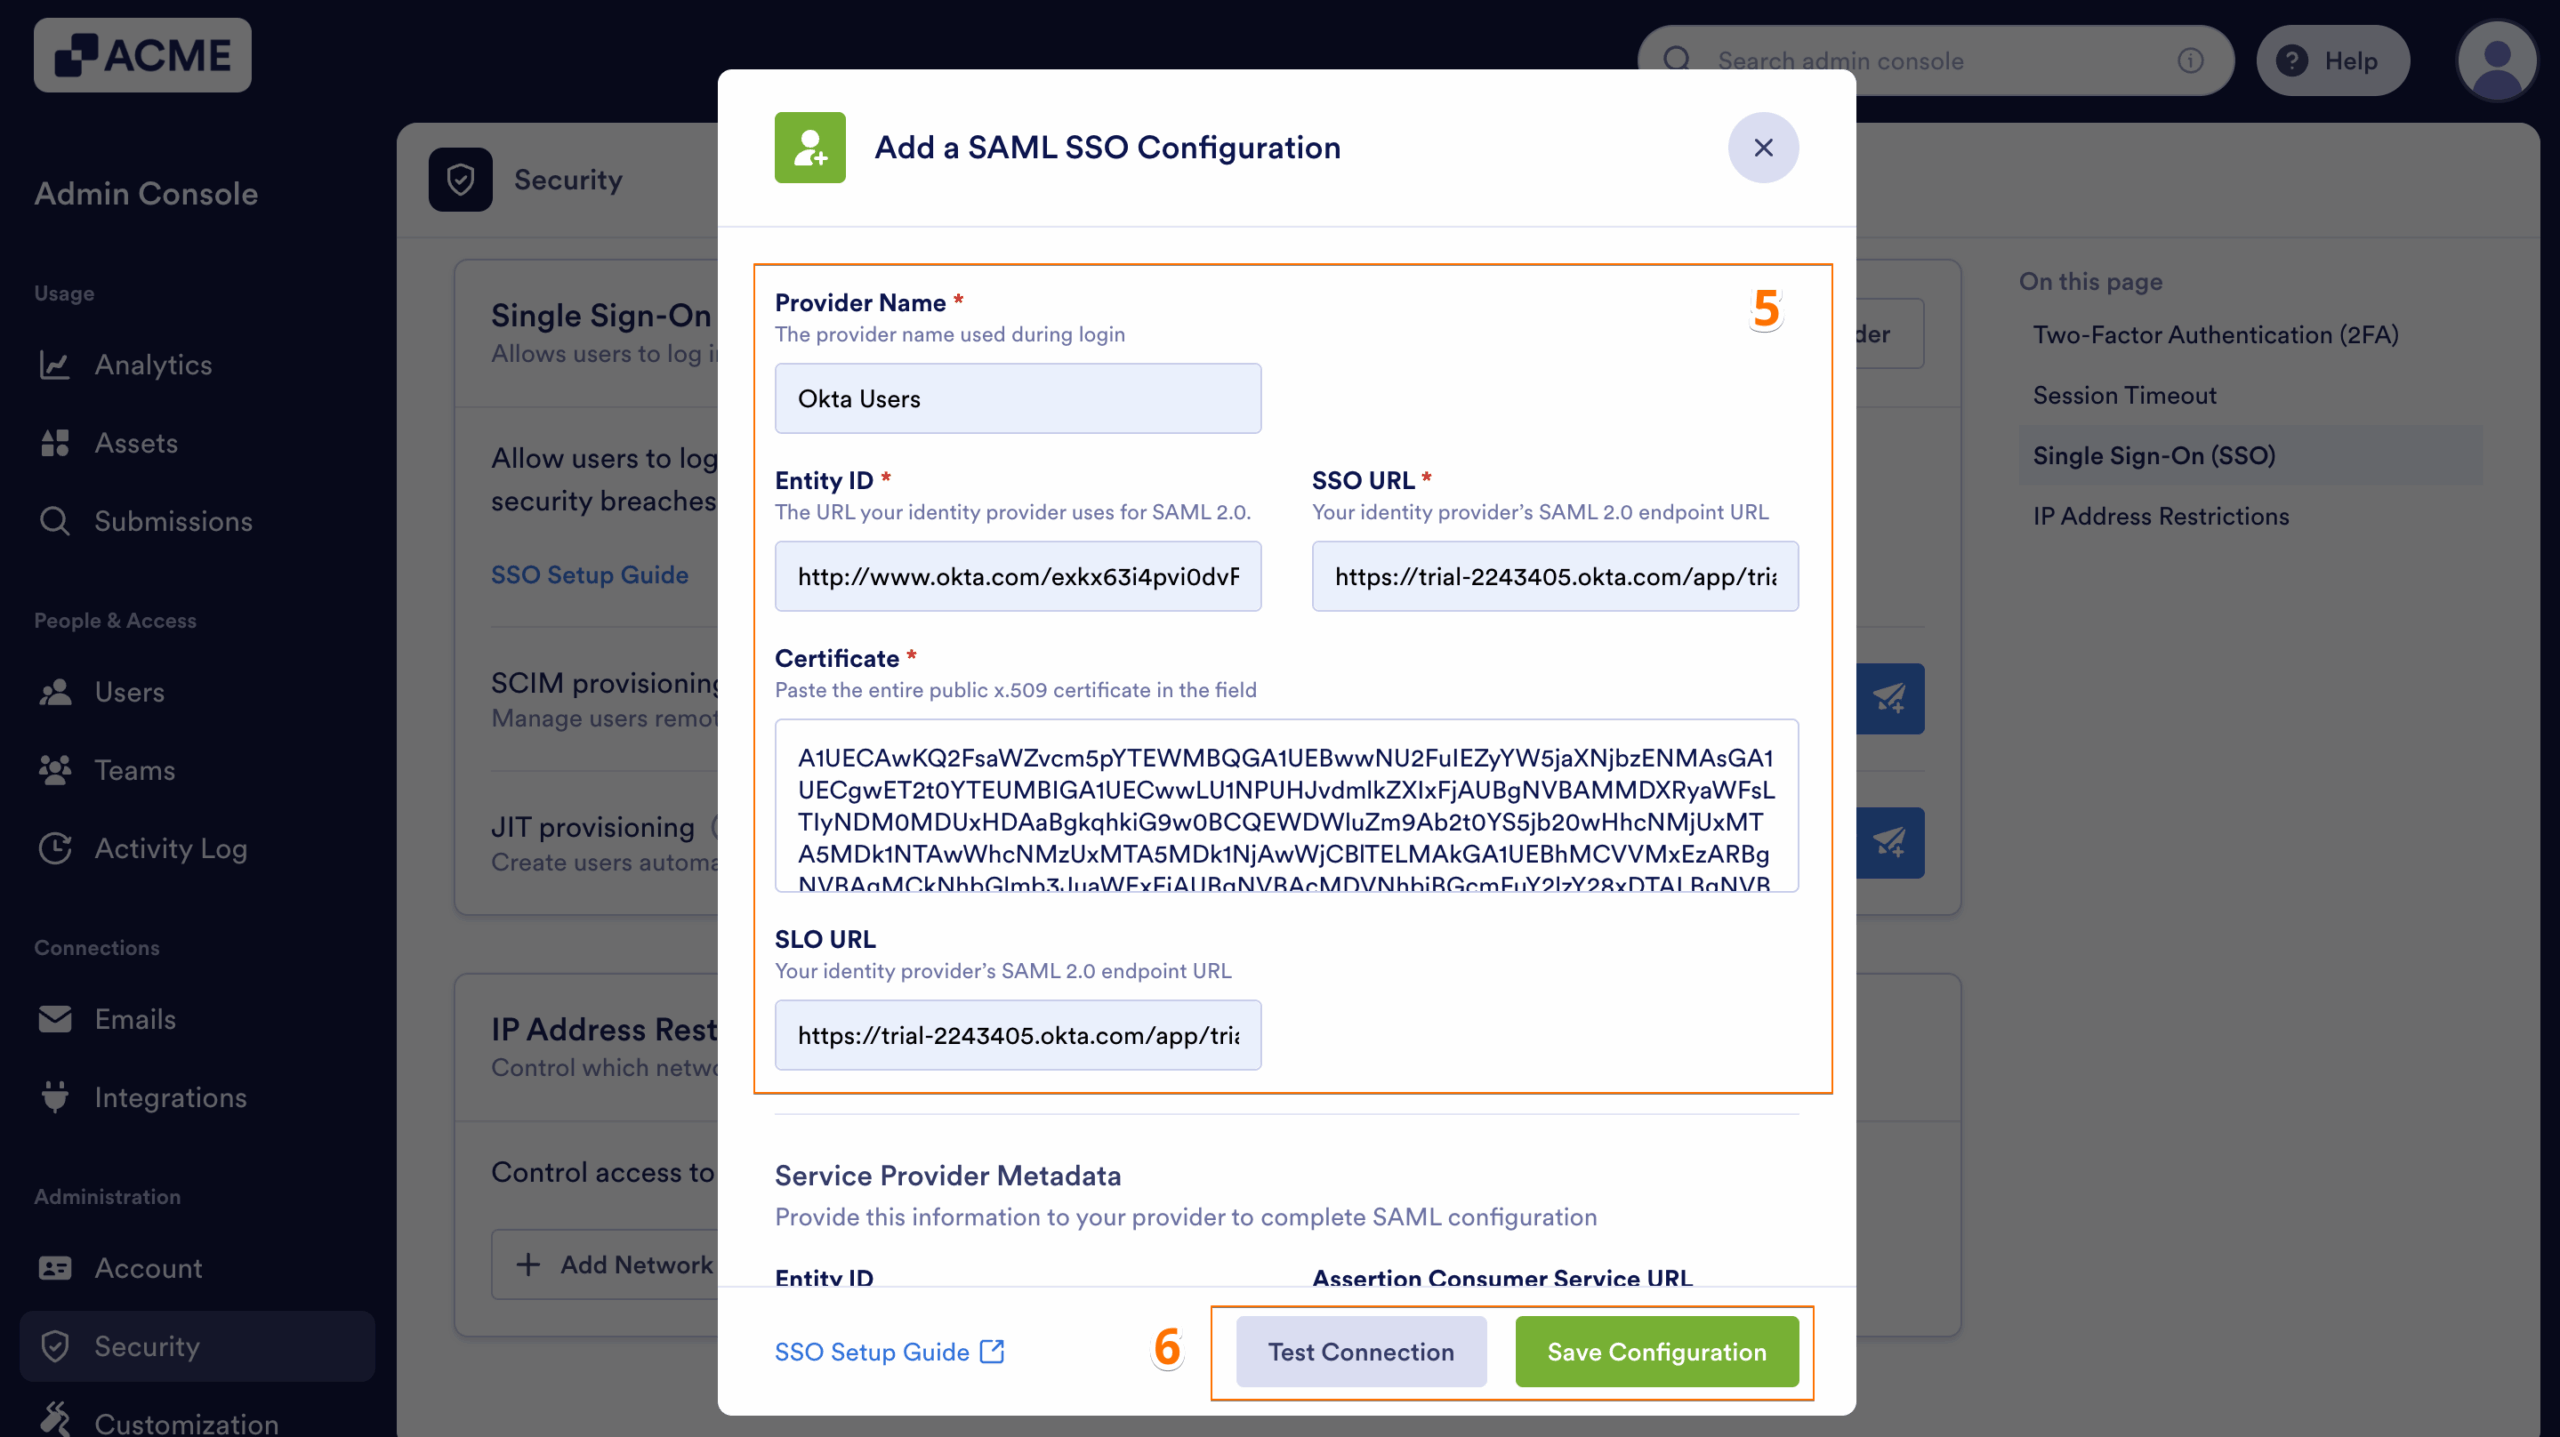
- Next, in the menu on the left side of the Admin Console page, click on Security.
- Now, in the Single-Sign On (SSO) section, click on Add SSO Provider.

- Then, in the Add a SAML SSO Configurationwindow that opens up, fill in these details. You’ll find more info in our Identity Provider Reference Table:
- Provider Name — Enter the name you want users to see on the login page.
- Entity ID —Your organization’s unique identifier in your Identity Provider (IdP).
- SSO URL — The login URL where users are redirected to authenticate via your IdP.
- Certificate — The X.509 Certificate or the one used to validate authentication requests.
- SLO URL — The logout URL to redirect users after signing out.
- Finally, click on Test Connection to make sure everything’s working correctly. If it’s successful, click on Save Configuration to apply your SSO settings—and you’re good to go.
Now, after turning on SSO, you’ll see these extra options under the SSO settings:
- Allow Email Login for Licensed Users — This lets licensed users log in with their email and password too, not just through SSO.
- Require Single Sign-On for Guest Accounts — This makes sure guest users can only sign in through SSO, adding a bit more security.
- SCIM Provision Settings — This helps you automatically manage users by syncing with your identity provider, so you don’t have to update things manually.
- Just-In-Time (JIT) Access — This allows users to request temporary, time-limited access to restricted systems only when needed. It helps maintain security by granting elevated permissions on demand and automatically revoking them once the approved period ends.

Identity Provider Reference Table
Use this table to identify where to find the required SSO configuration fields in your specific IdP:
| Provider | Entity ID | SSO URL | Certificate |
|---|---|---|---|
| Microsoft Entra ID | Microsoft Entra Identifier | Login URL | Certificate |
| Google SSO | Entity ID | SSO URL | Certificate |
| Okta | Identity Provider Issuer | Identity Provider Single Sign-On URL | X.509 Certificate |
| OneLogin | Issuer URL | SAML 2.0 Endpoint (HTTP) | X.509 Certificate |

Send Comment:
1 Comment:
December 19, 2023
Good morning Team Jotform!
We are preparing to sign an agreement to migrate to the Jotform Enterprise license. We have a couple questions regarding SSO and the Jotform App Builder functionality...