Integrating your Jotform form with GoHighLevel makes it easier to keep your leads, contacts, and workflows all in sync—without any manual effort on your end. Whether you’re capturing new sign-ups, gathering inquiries, or collecting customer details, this integration helps you send that information straight into your GoHighLevel account so you can act on it right away. No more switching between platforms or copying data by hand.
We’ill walk you through the steps to connect your form to GoHighLevel, even if you’re doing it for the first time. You’ll learn how the integration works, what you can send over, and how to make sure everything flows smoothly into your CRM. By the end, you’ll have a fully connected setup that helps you stay organized and focus more on nurturing your leads—rather than managing your data.
Integrating Your Form with GoHighLevel
Whether you’re creating a fresh form or giving an existing one a little update, connecting it to Salesforce is super simple. Getting started is simple—here’s what to do:
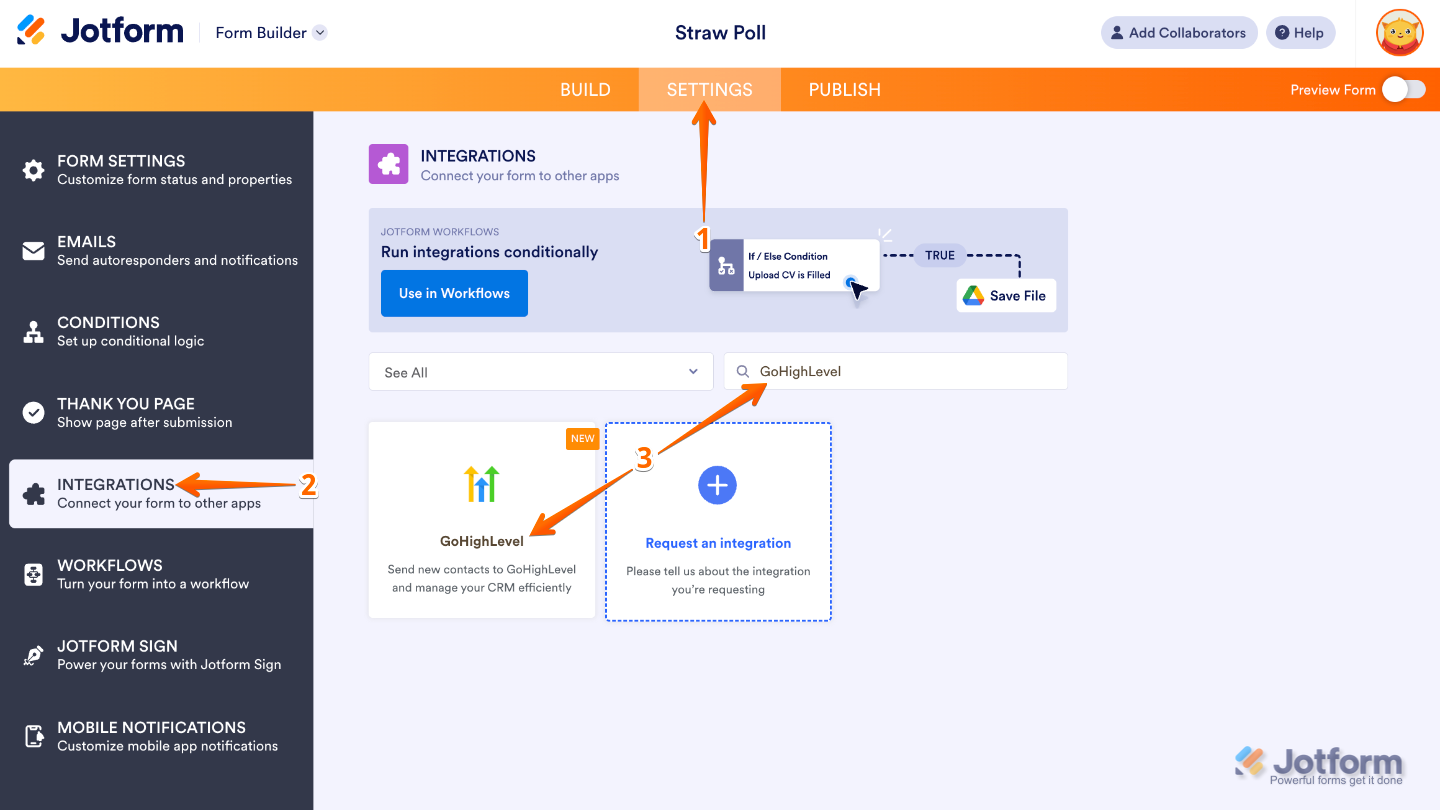
- In Form Builder, in the orange navigation bar at the top of the page, click on Settings.
- In the menu on the left, click on Integrations.
- Then, search for GoHighLevel and click on it.
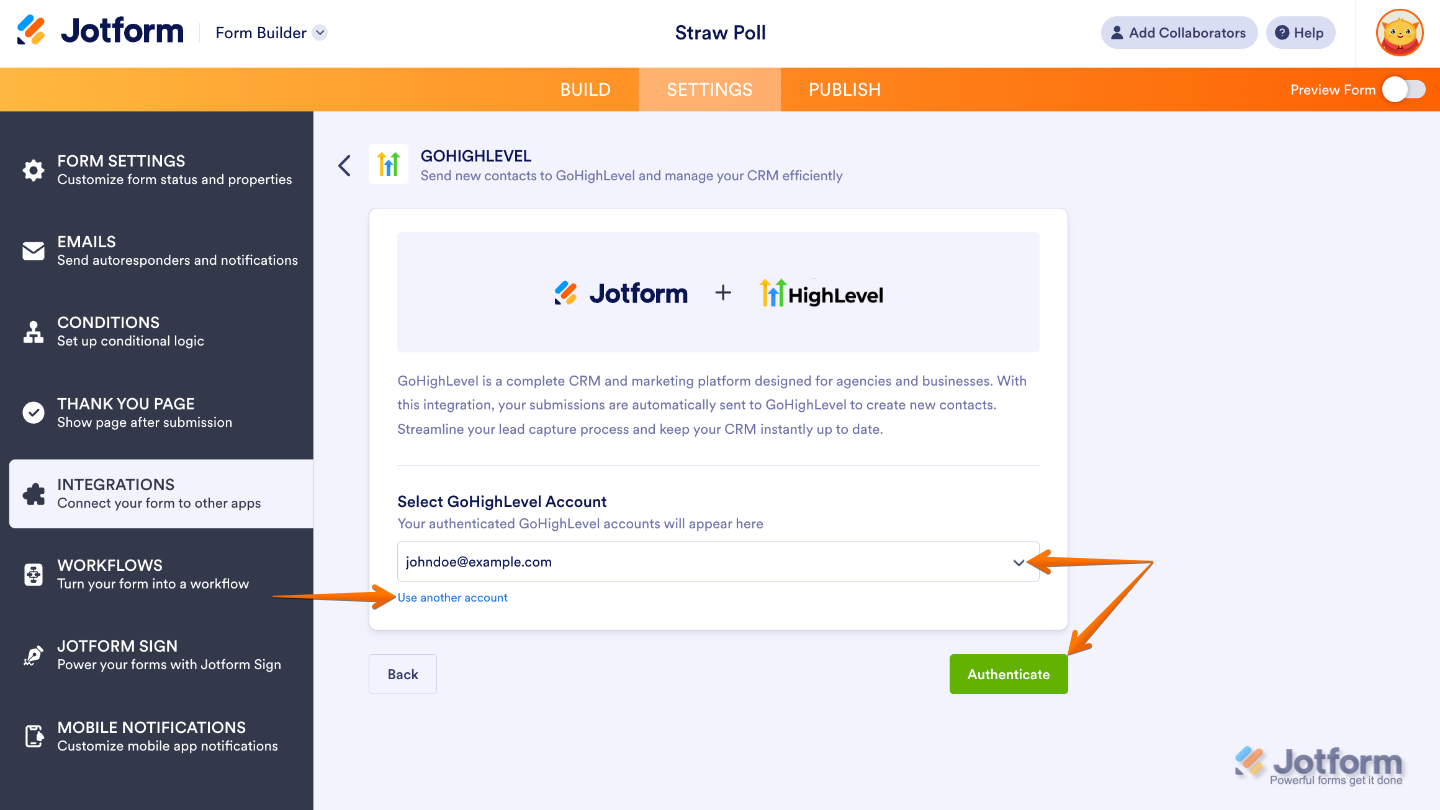
- Now, click on Authenticate and log in to your GoHighLevel account.

If you’ve logged in before, just pick your GoHighLevel account from the dropdown and click on Authenticate. To use a different one, click on the Use another account link.
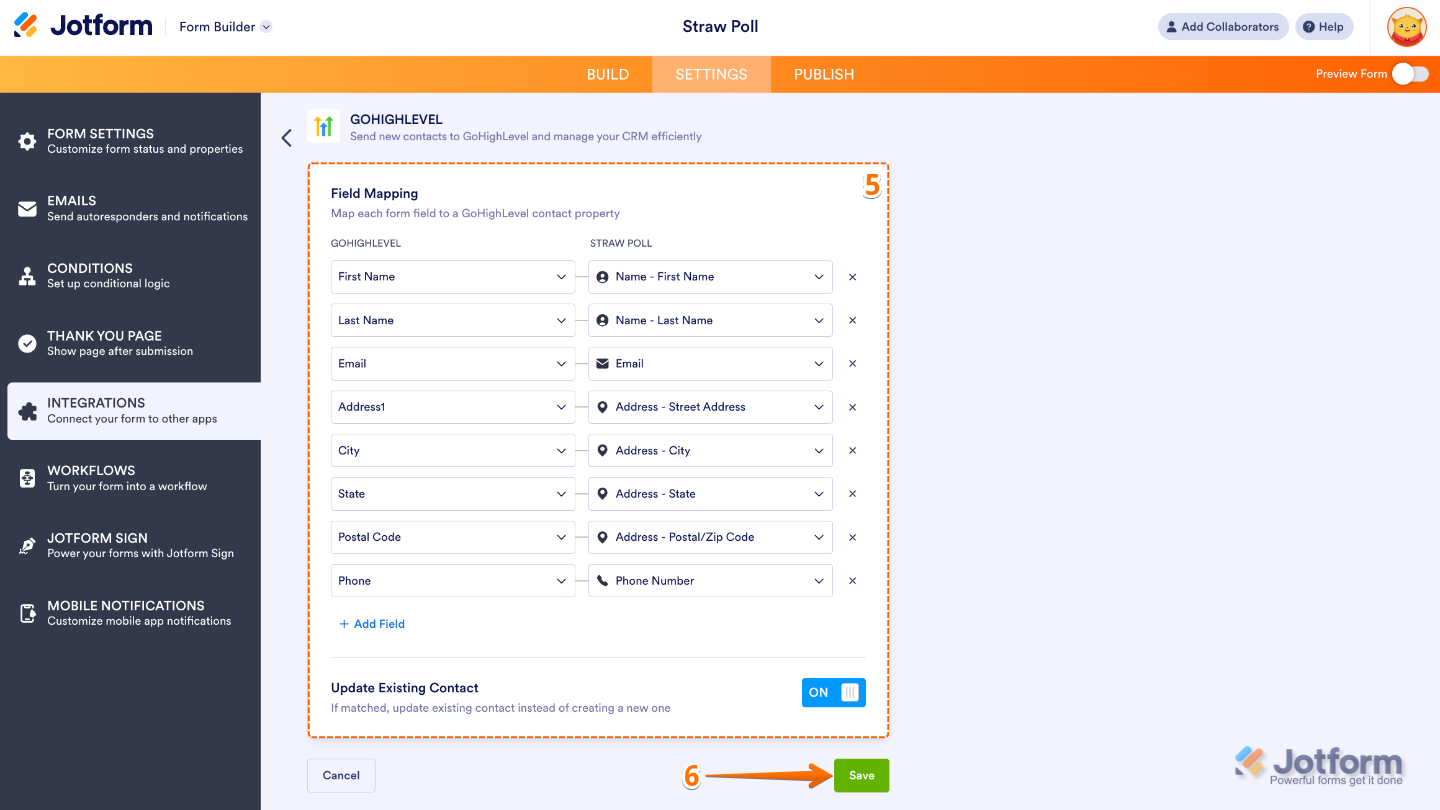
- Once connected, set up these things:
- Field Mapping — Pick the GoHighLevel fields on the left and match them with your form fields on the right. To add more, click on Add Field.
- Update existing Contact — Turn this on if you want to Jotform to check if the contact is already in your GoHighLevel account (usually by email). If found, the integration will update that contact’s existing details rather than create a duplicate.
- Next, click on Save and you’re all set.
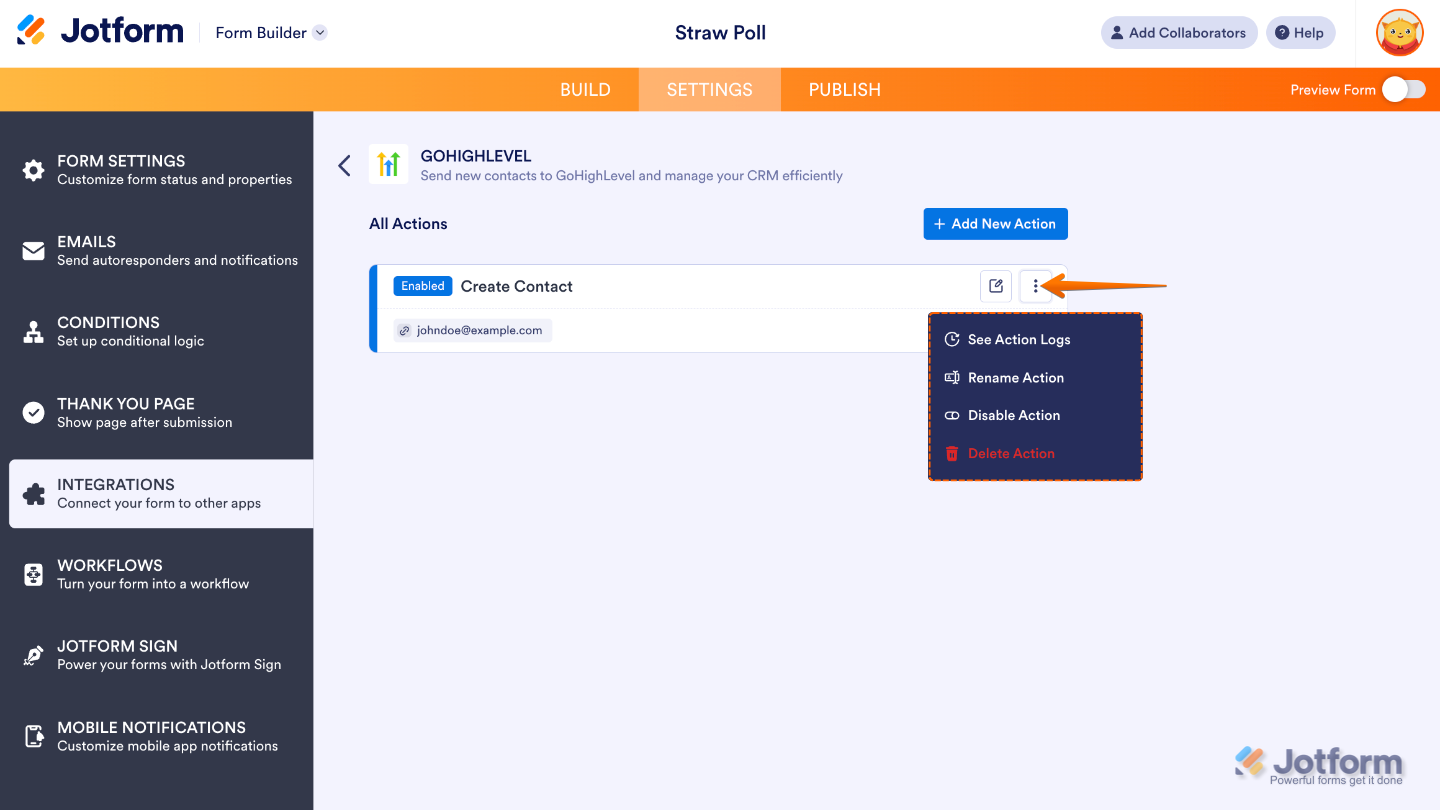
And that’s it. Your form is now all set and connected to GoHighLevel. Once you save the integration, you’ll be taken back to the main page, where you’ll see all the actions you’ve created, along with an Add New Action button in case you want to build more. If you ever need to manage or tweak an action, just hover over it and click the Three Dots icon on the right side to open additional options.
- See Action Logs — View successful and failed runs, helpful for troubleshooting.
- Rename Action — Change the action’s title.
- Disable Action — Temporarily stop the integration from sending data.
- Delete Action — Remove the action from your form.

Send Comment:
3 Comments:
March 9, 2026
I'm looking for information and syntax on custom fields. I see it in the GHL dropdown but it just says 'custom fields' and doesn't actually show me any of my custom fields. Thanks in advance!!
January 6, 2026
That is not good, I cannot map using webhook either
December 30, 2025
the GoHighLevel integration isn't there anymore.