Jotform’s Microsoft Excel integration lets you automatically send your form submissions directly into an Excel file in real time. You can choose to create a new worksheet, add rows to an existing table, or create a new table within an existing worksheet—ensuring that each new submission is neatly organized exactly where you need it.
This integration helps you efficiently track, organize, and analyze your data in a structured format. With Excel’s built-in tools like formulas, sorting, filtering, and charts, you can quickly turn form responses into actionable insights while streamlining your workflow and improving data accuracy.
Pro Tip
- Microsoft Excel files used in this integration are managed through the web-based Excel experience (e.g., Excel for the web), allowing you to access, view, and edit your spreadsheets online anytime.
- This integration is also available in other Jotform products such as Sign, Tables, Smart PDF, and the PDF Editor, and is supported on BSG, BSG EU, and Enterprise plans.
Connecting Your Microsoft Account
Whether you’re setting up a new form or updating an existing one, connecting your Microsoft account takes no time at all—here’s how:
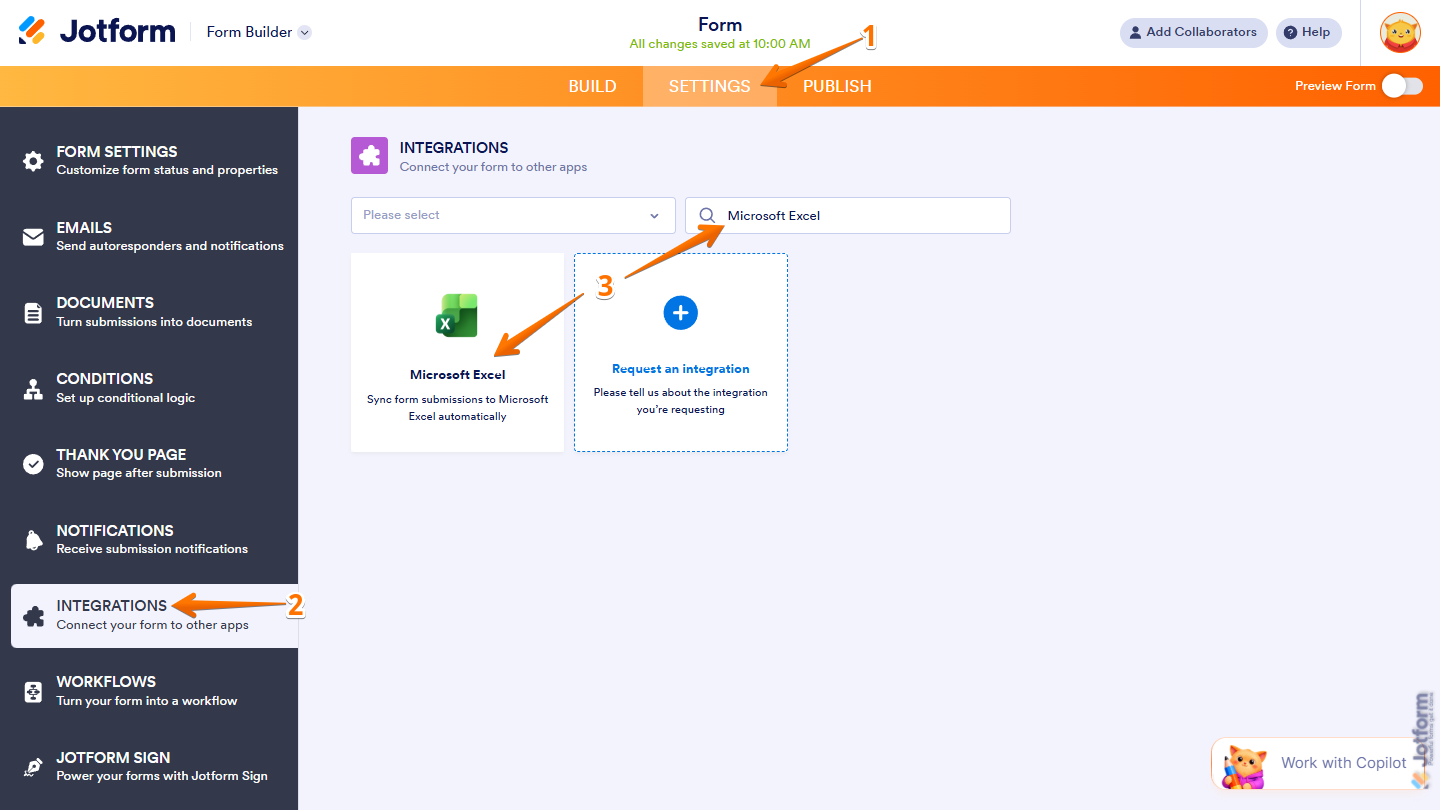
- In Form Builder, in the orange navigation bar at the top of the page, click on Settings.
- Then, in the menu on the left, click on Integrations.
- Now, search for Microsoft Excel and click on it.
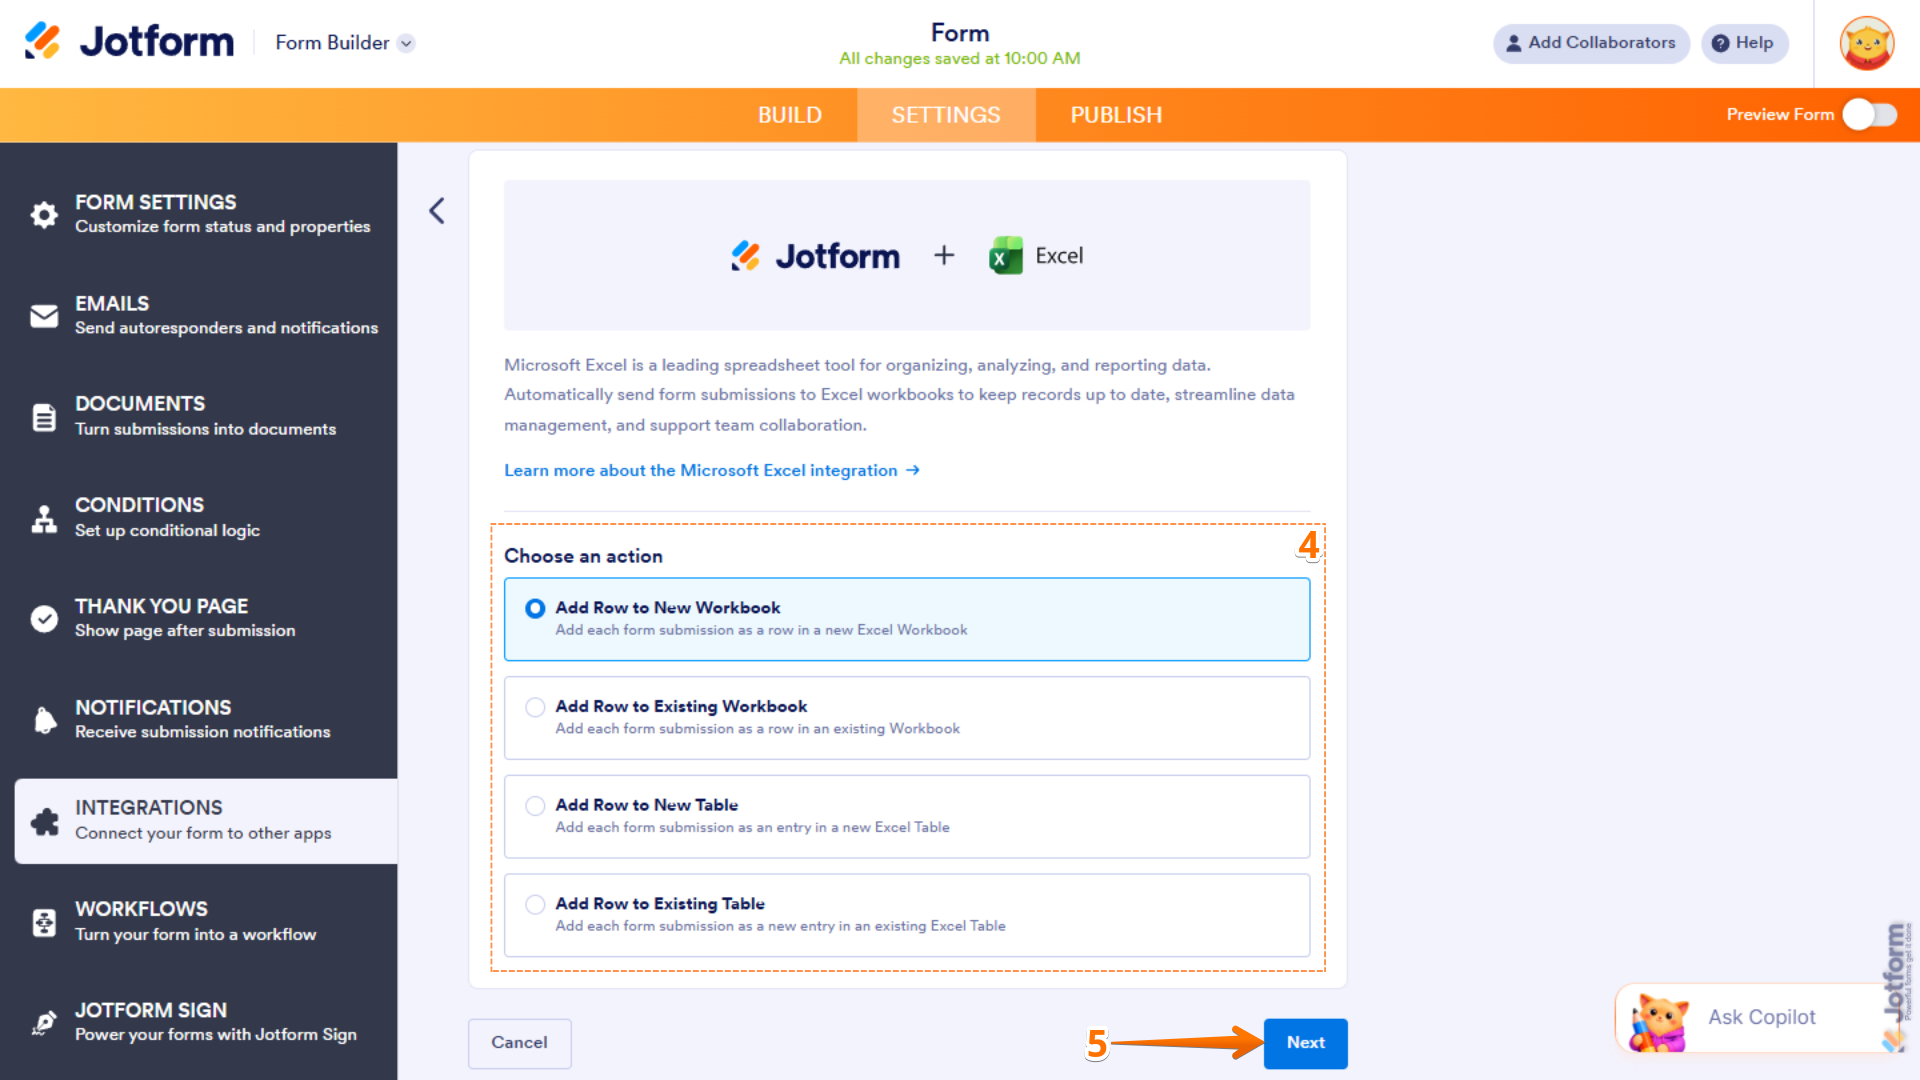
- Next, under the Choose an Action section, select what you want to do:
- Add Row to New Workbook — Creates a new Excel workbook and records each form submission as a new row.
- Add Row to Existing Workbook — Adds each form submission as a new row in an existing workbook.
- Add Row to New Table — Creates a new Excel table and records each form submission as a new entry.
- Add Row to Existing Table — Adds each form submission as a new entry in an existing Excel table.
- Then, click on Next.
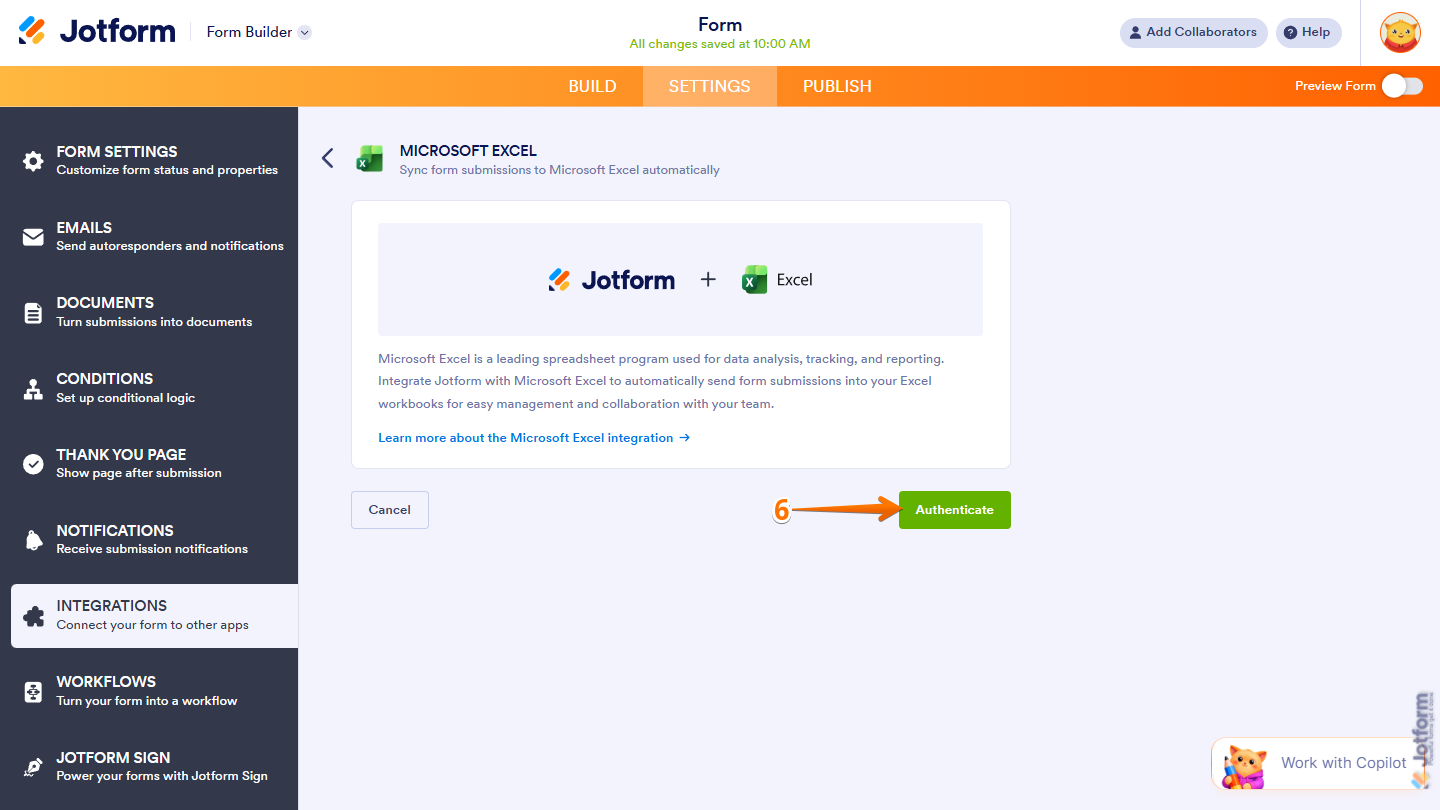
- Now, click on Authenticate and log in to your Microsoft account.
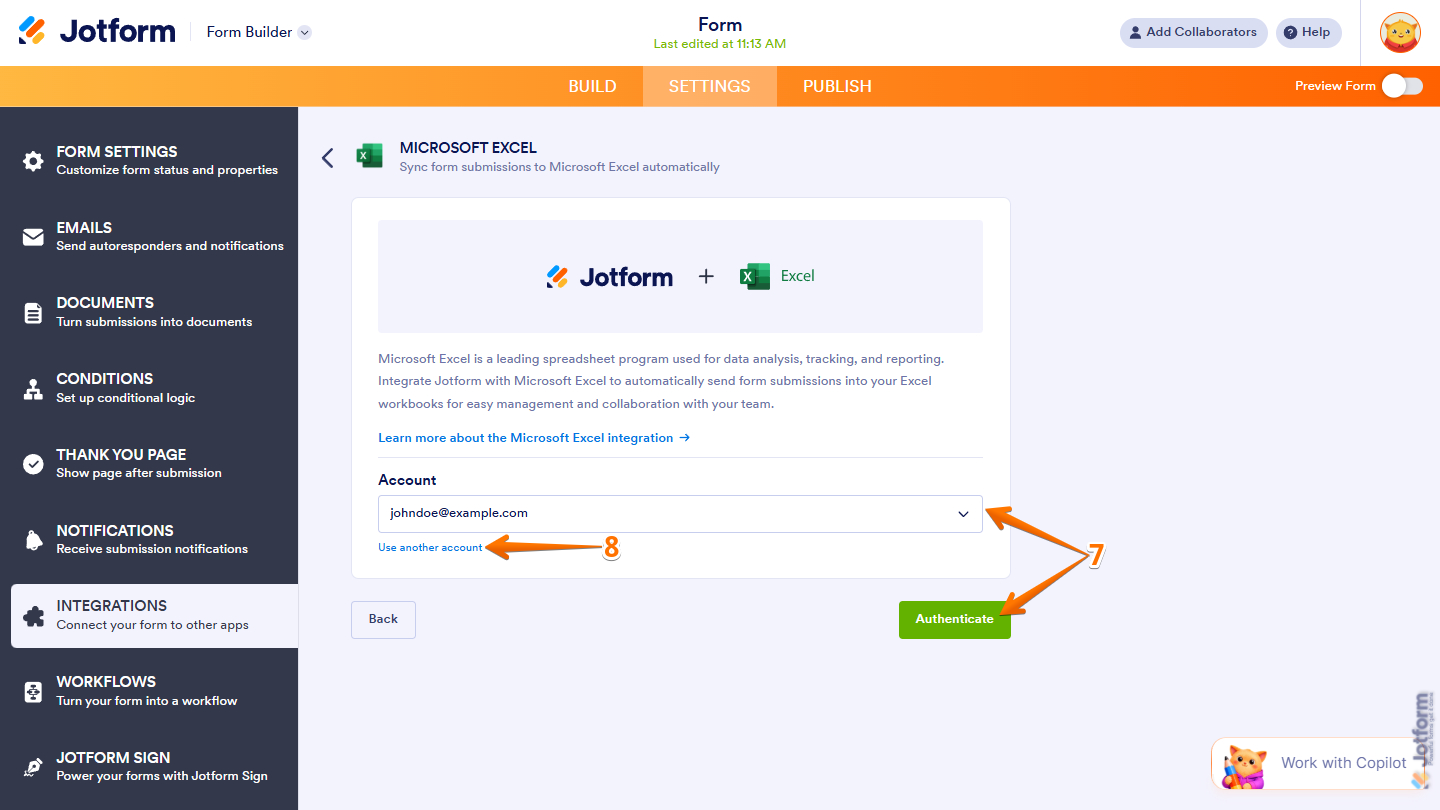
- Now, if you’ve logged in before through one of your other forms, you can pick that Microsoft account from the Dropdown menu and then click on Authenticate.
- Or, to use a different one, click on Use Another Account.
That’s it for connecting your Microsoft account. Now, you can continue with your selected action.
Add Row to New Workbook
The Add Row to New Workbook option creates a new Excel file and a worksheet and automatically records each form submission as a new row. This is ideal if you want to generate a fresh Excel file dedicated to your form submissions.
Setting up the Add Row to New Workbook option only takes a minute to set up—here’s how:
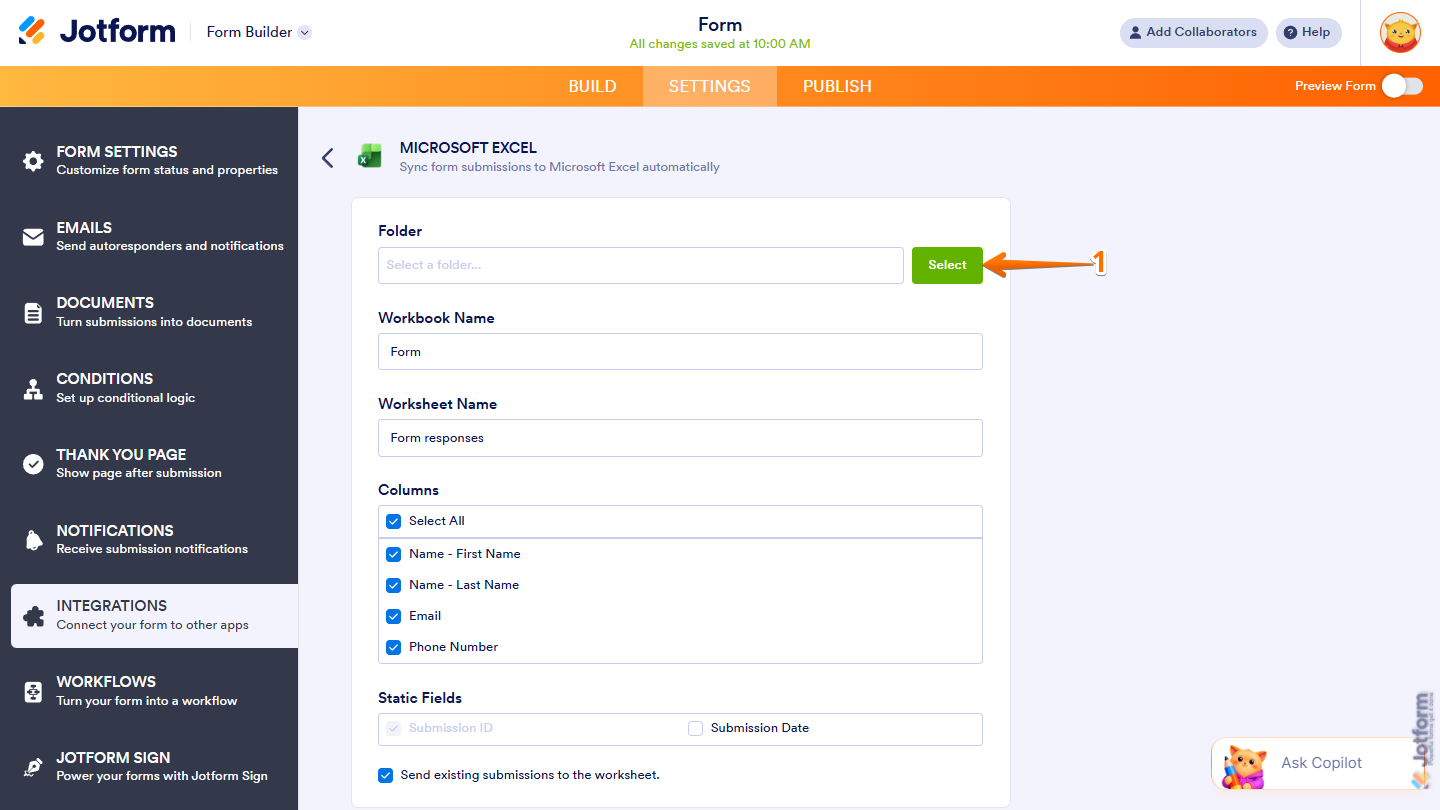
- After selecting the Add Row to New Worksheet action and authenticating your account, click on Select in the Folder section.
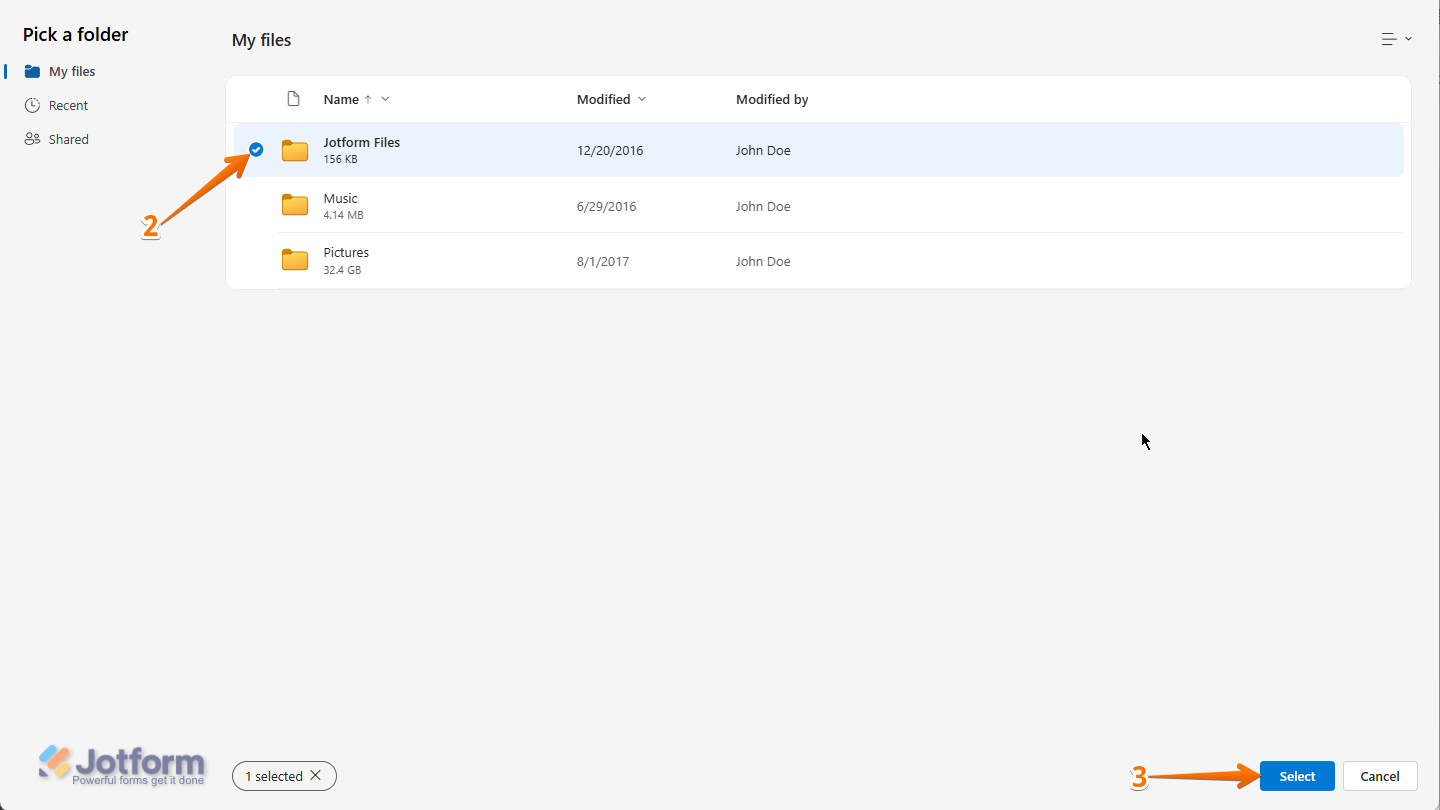
- Then, in the Pick a Folder window that opens, under the My Files section, select the folder where the new Excel file will be created and stored when your form starts receiving submissions.
- Now, click on Select at the bottom.
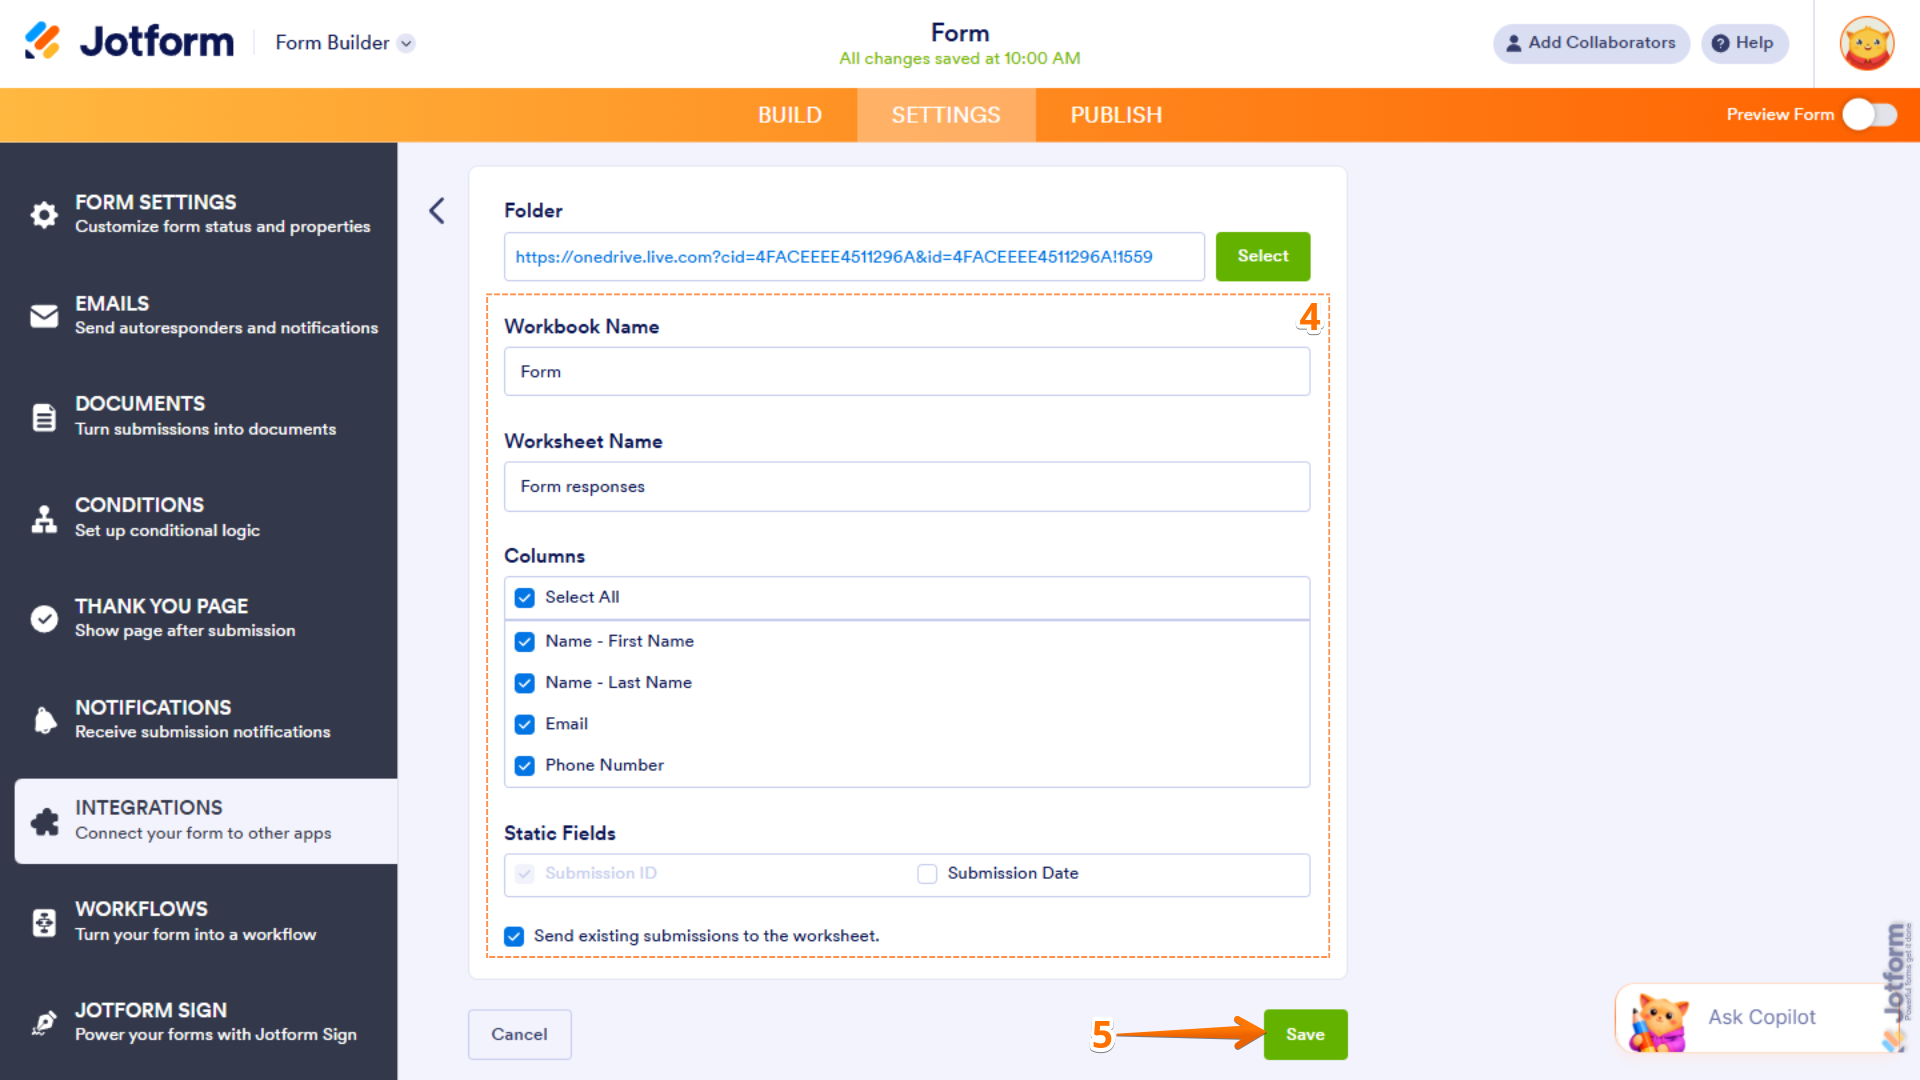
- Next, set up these things:
- Workbook Name — Enter the name of the Excel file that will be generated after your form receives its first submission following the integration setup.
- Worksheet Name — Enter the name of the worksheet where your form submissions will be recorded.
- Columns — Select the form fields that will be added as columns in your Excel worksheet.
- Static Fields — Select whether to include system fields, such as Submission Date, as columns. The Submission ID is included by default.
- Send Existing Submissions to the Worksheet — Select whether to include your existing form submissions in the newly created worksheet.
- Once your settings are ready, click on Save.
Note
We strongly recommend using a unique Workbook Name during setup, as Microsoft Excel may overwrite an existing file with the same name in the selected folder.
Add Row to Existing Workbook
The Add Row to Existing Workbook option sends your form submissions to an existing workbook in your Excel file, recording each submission as a new row. This is ideal if you already have a spreadsheet and want to continuously append new data to it.
Setting up the Add Row to Existing Workbook option is quick—here’s how:
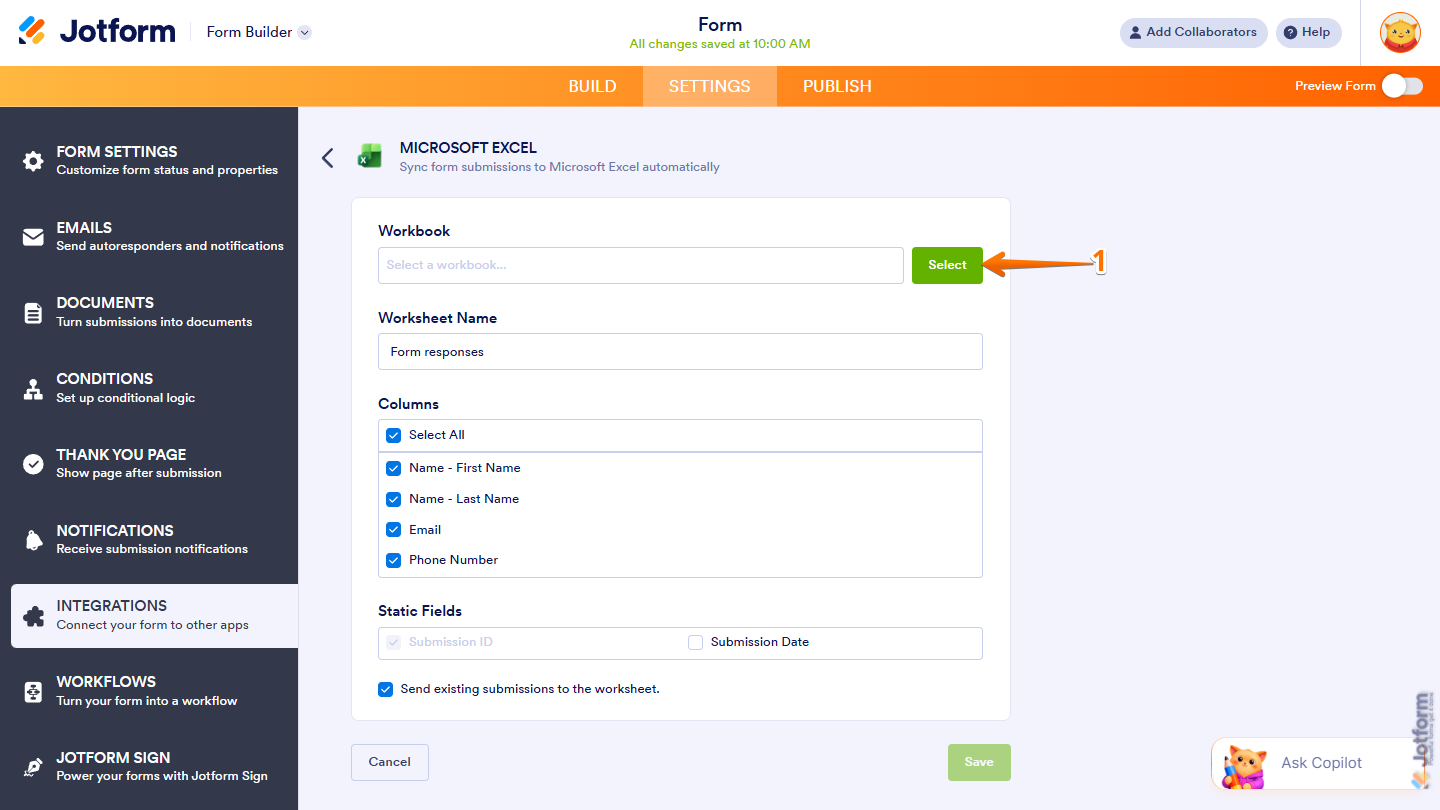
- After selecting the Add Row to New Worksheet action and authenticating your account, click on Select in the Workbook section.
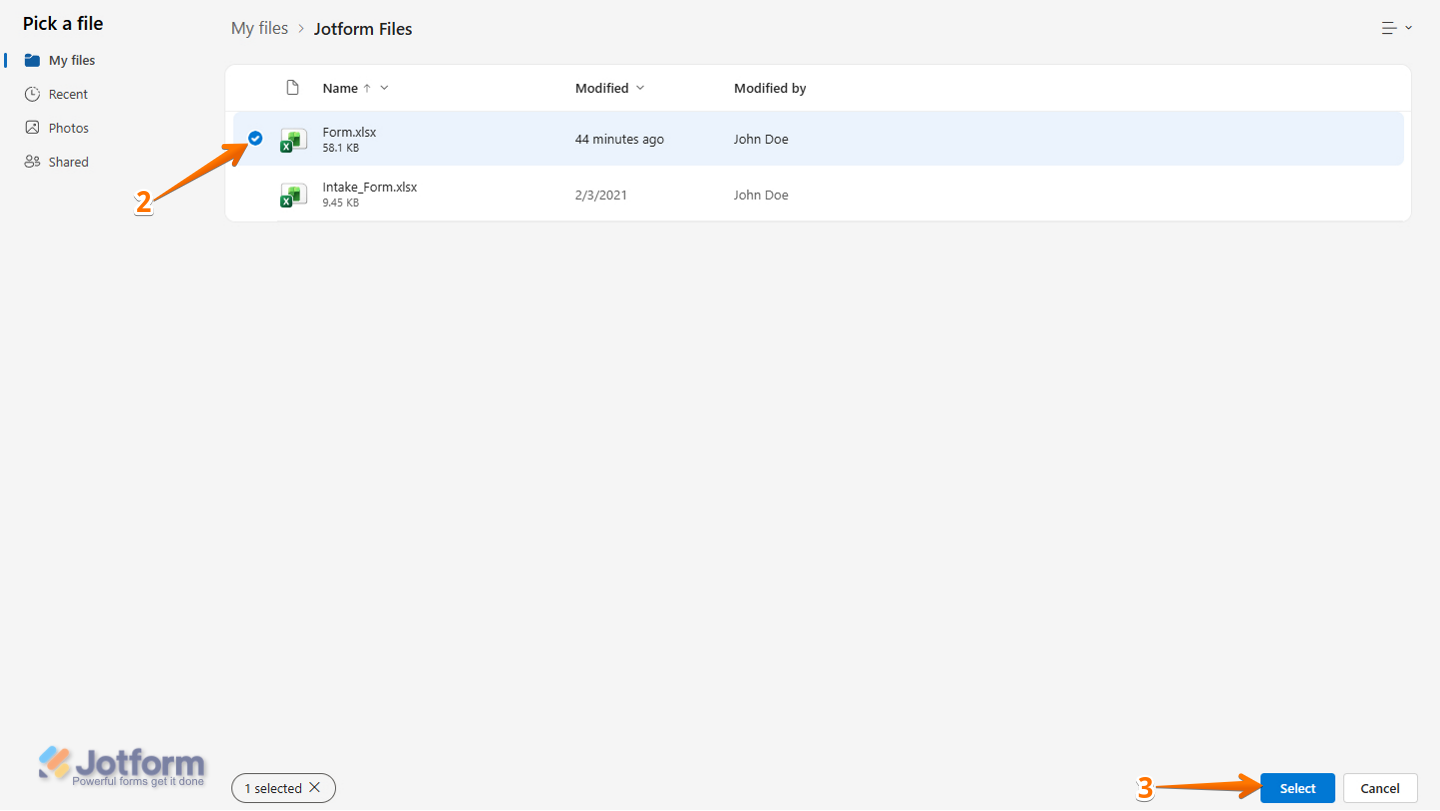
- Then, in the Pick a File window that opens, under the My Files section, select the Excel file where your form submissions will be sent.
- Now, click on Select at the bottom.
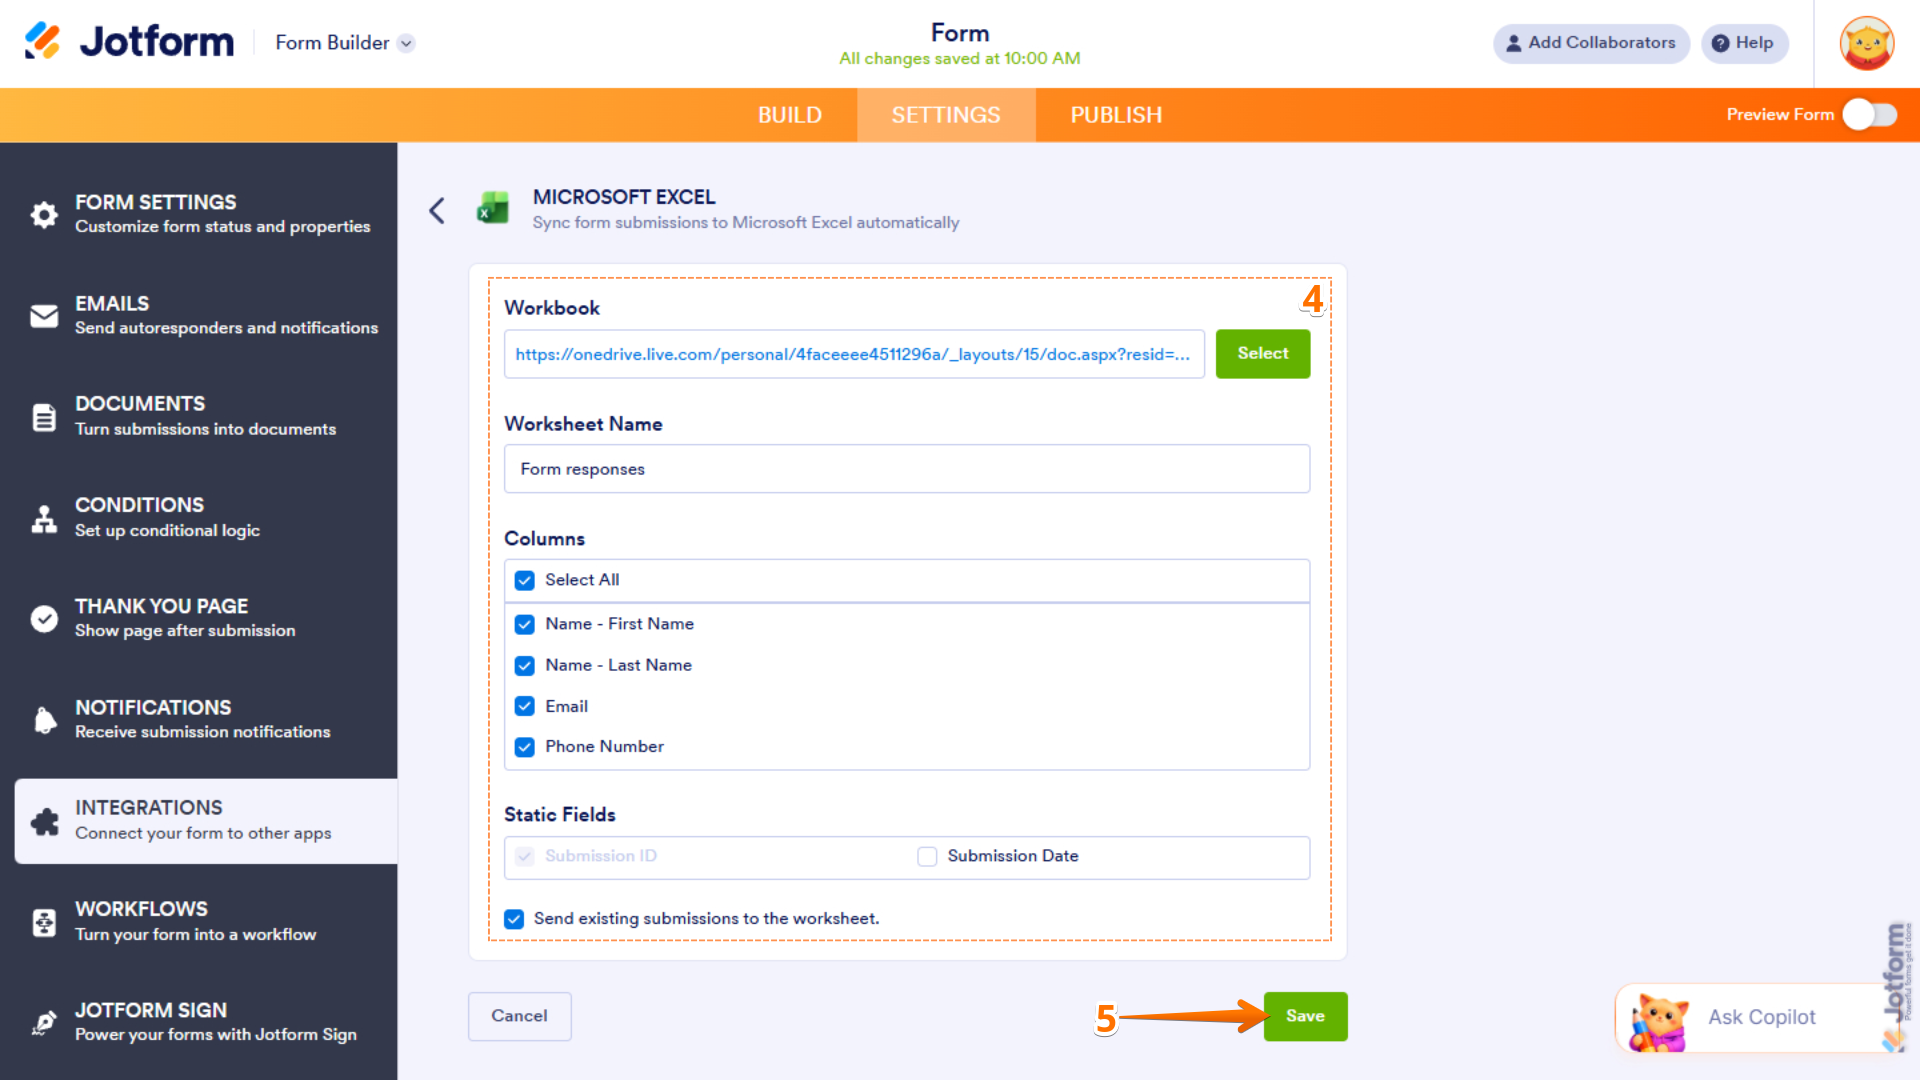
- Next, configure these things:
- Worksheet Name — Enter the name of the worksheet where your form submissions will be added.
- Columns — Select the form fields that will be added as columns in your Excel worksheet.
- Static Fields — Select whether to include system fields, such as Submission Date, as columns. The Submission ID is included by default.
- Send Existing Submissions to the Worksheet — Select whether to include your existing form submissions in the selected worksheet.
- Once you’re done, click on Save.
Add Row to New Table
The Add Row to New Table option creates a new table in your Excel file and records each form submission as a new entry. This is ideal if you want to organize your data in a structured table format while keeping it separate from other content in your workbook.
Note
When selecting this option, ensure that the Worksheet Name is unique to avoid overwriting existing data—especially in worksheets that are not structured as tables.
Setting up the Add Row to New Table option takes no time at all—here’s how:
- After selecting the Add Row to New Worksheet action and authenticating your account, click on Select in the Workbook section.

- Then, in the Pick a File window that opens, under the My Files section, select the Excel file where the new table will be created.
- Now, click on Select at the bottom.

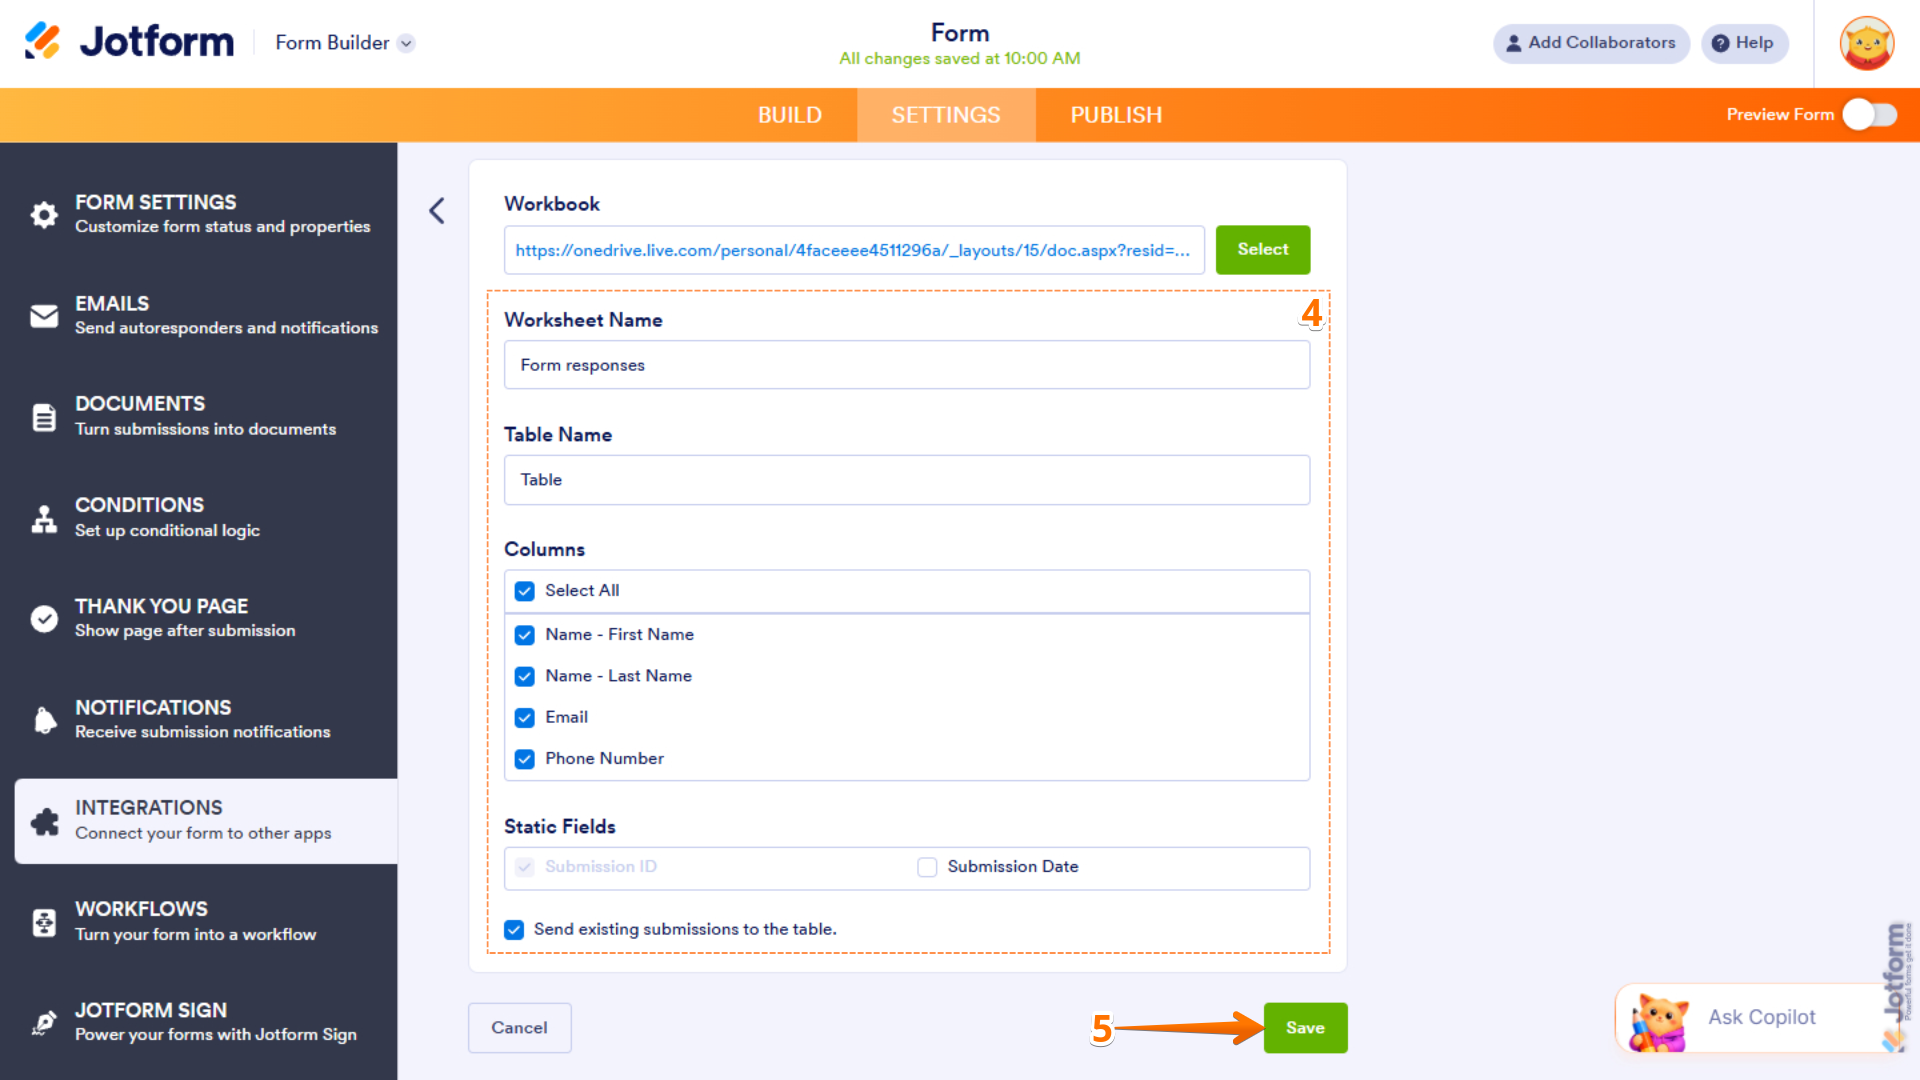
- Next, set up these things:
- Worksheet Name — Enter the name of the worksheet where your form submissions will be added.
- Table Name — Enter a unique name of the table.
- Columns — Select the form fields that will be added as table columns in your Excel worksheet.
- Static Fields — Select whether to include system fields, such as Submission Date, as columns. The Submission ID is included by default.
- Send Existing Submissions to the Table — Select whether to include your existing form submissions in the selected worksheet.
- Once everything’s set, click on Save.
Add Row to Existing Table
The Add Row to Existing Table option sends your form submissions to an existing table in your Excel file, recording each submission as a new entry. This is ideal if you already have a structured table and want to continuously append new data to it.
Note
An existing table must be set up in your Excel file to use this option. Without a table, the integration cannot be completed. Check out Microsoft’s guide on Create and Format Tables to learn more.
Setting up the Add Row to Existing Table is easier than you think—here’s what to do:
- After selecting the Add Row to New Worksheet action and authenticating your account, click on Select in the Workbook section.

- Then, in the Pick a File window that opens, under the My Files section, select the Excel file where the new table will be created.
- Now, click on Select at the bottom.

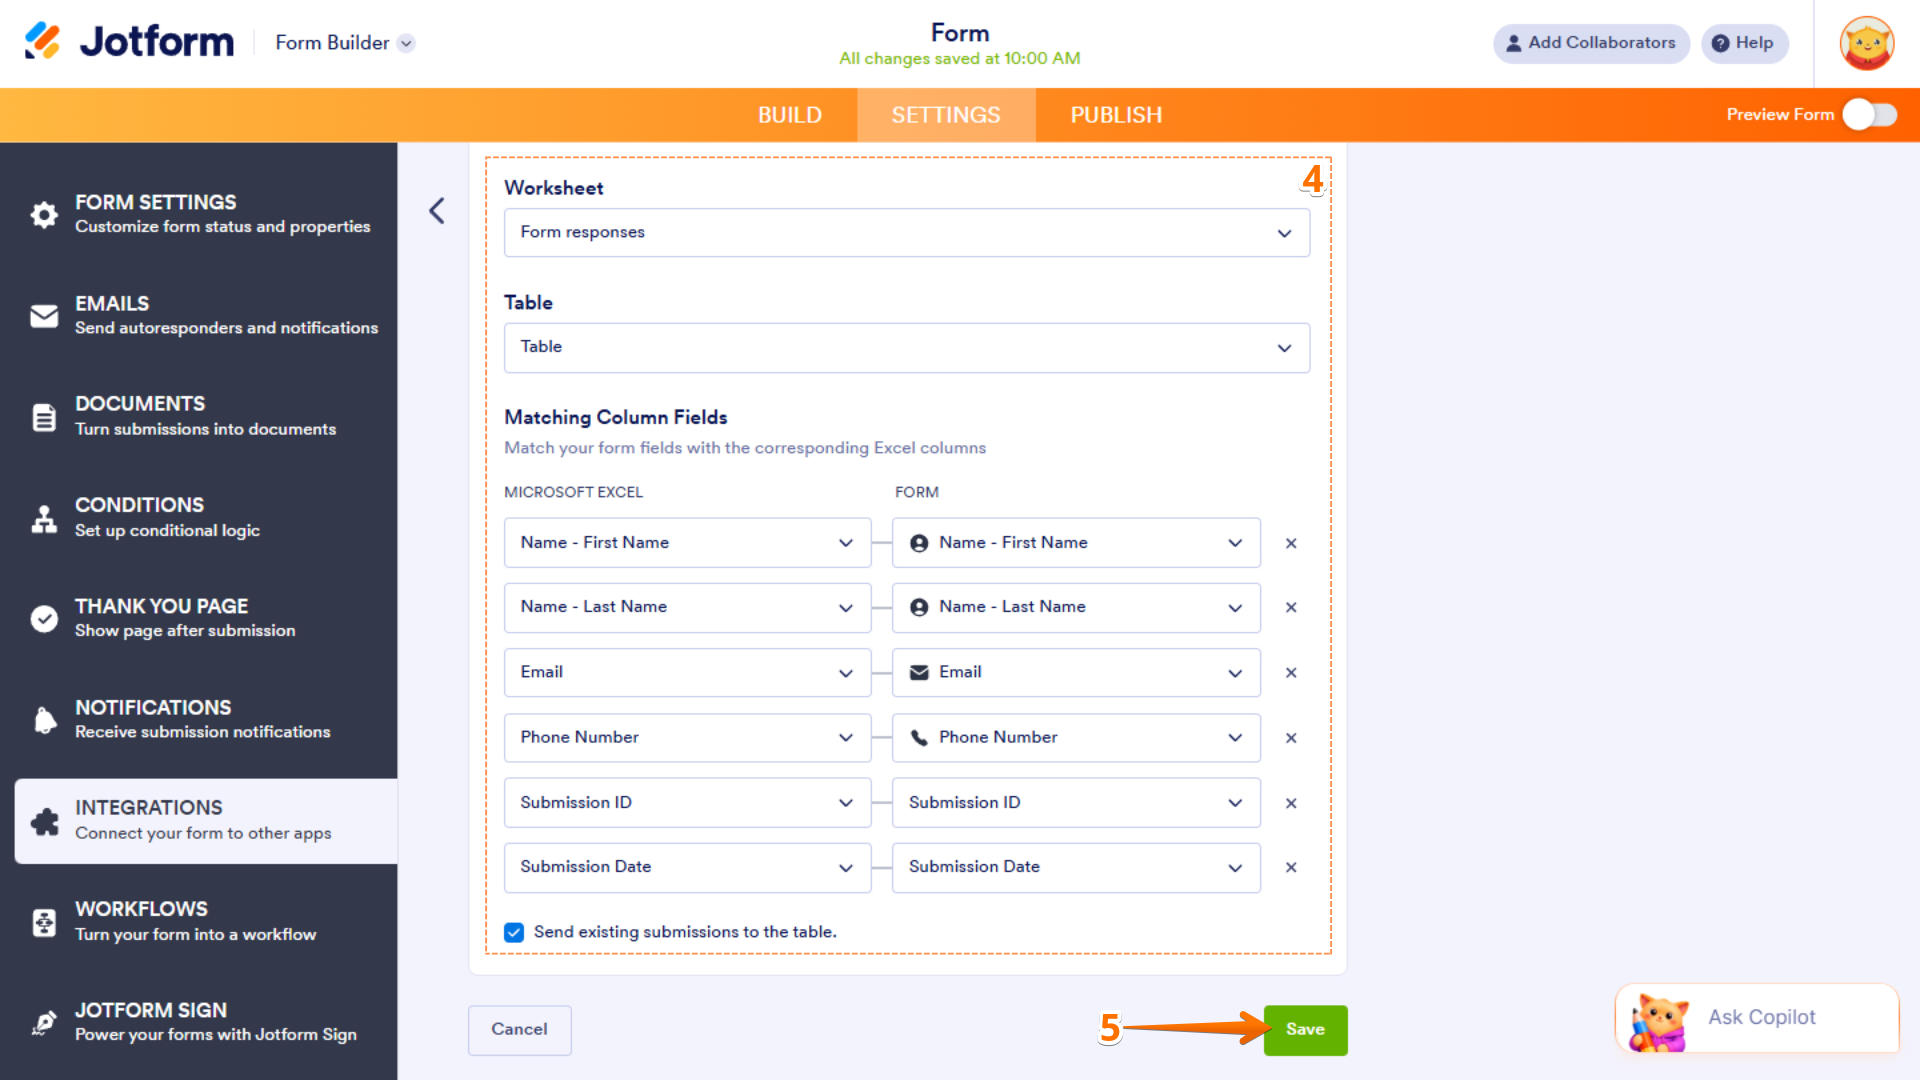
- Next, scroll down and set up these things:
- Worksheet — Select the worksheet within the chosen workbook.
- Table — Select the table from the chosen worksheet where submissions will be added.
- Matching Column Fields — Map your Microsoft Excel columns on the left to your Jotform form fields on the right. Click Add Field to include more mappings.
- Send Existing Submissions to the Table — Select whether to include your existing form submissions in the selected worksheet.
- Once you’re done, click on Save.
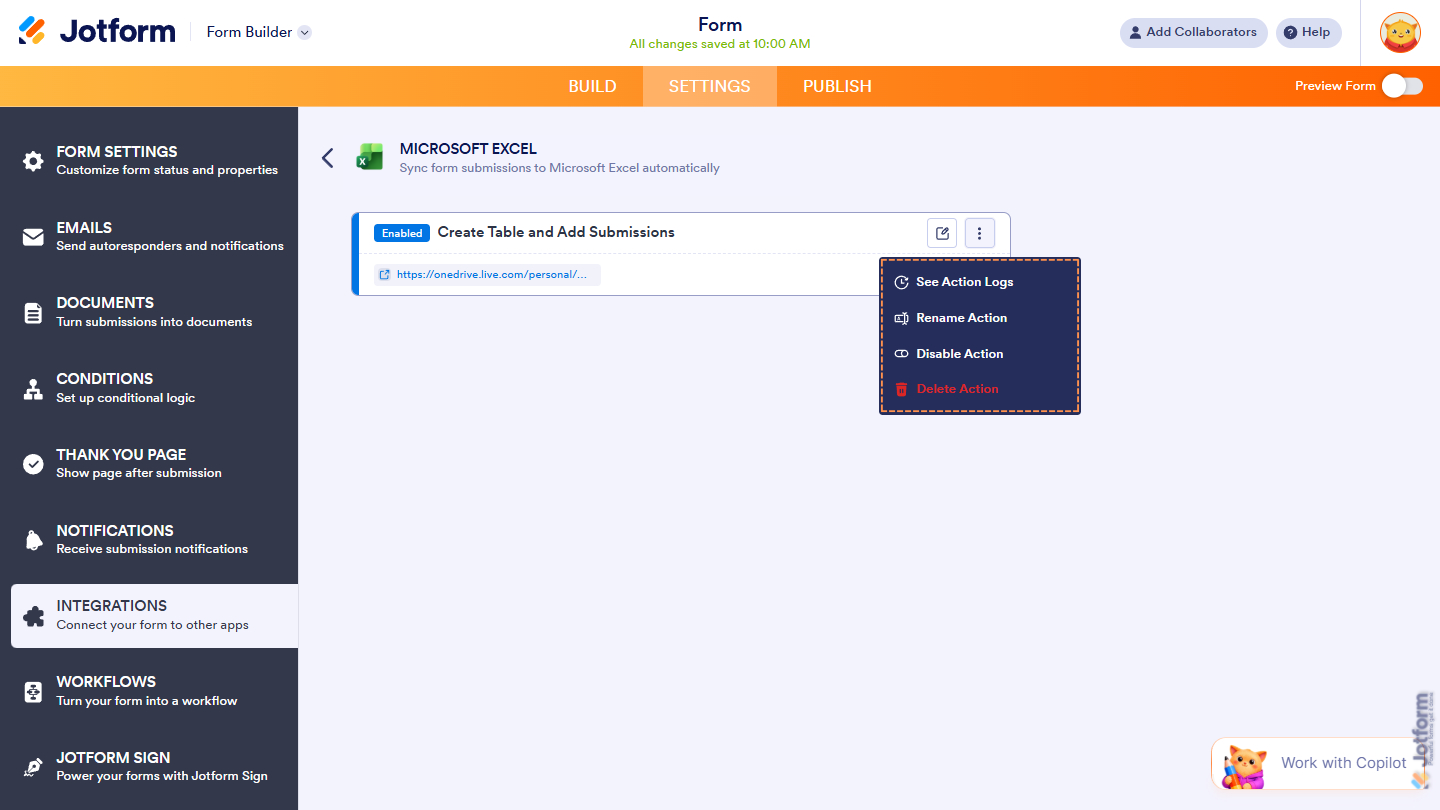
Managing Microsoft Excel Integration Action
After saving the integration, you’ll see the action you’ve set up on the page. Hover your mouse over the action and click on the Pencil icon to edit it or the Three Dots icon to access more options:
- See Action Logs — View successful and failed runs, helpful for troubleshooting.
- Rename Action — Change the action’s title.
- Disable Action — Temporarily stop the integration from sending data.
- Delete Action — Remove the action from your form.
That’s it for integrating your form with Microsoft Excel. Your submissions will now be automatically sent and organized in your Excel file, helping you keep your data structured and up to date. You can further customize your spreadsheet using Excel’s built-in tools to analyze responses, generate reports, and gain valuable insights from your form data.


Send Comment:
4 Comments:
May 5, 2026
es posible que se exporten los datos a celdas específicas en cada excel y ejecutar una macro para que la persona pueda ver el resultado de los exceles??
May 4, 2026
I noticed that column headers cannot be renamed so they stay matched to the form fields. Can columns be reordered? In my most recent integration, the columns did not populate in the same order as the fields on the form.
May 1, 2026
Is there a way to create an excel of just one of the options from my drop down of 30 options?
April 28, 2026
Is there a way to integrate to an excel file that is stored in dropbox?