Todoist is a popular task management app that helps individuals and teams stay organized and focused on what needs to get done. When you integrate your Jotform form with Todoist, every new form submission can automatically create a task for you. That means no more copying and pasting details or worrying about missing an important request.
Whether you’re tracking customer inquiries, managing internal requests, or following up on leads, this integration helps you turn responses into actionable tasks instantly. It’s a simple way to streamline your workflow, reduce manual work, and keep your to-do list up to date without extra effort.
Notes
- Make sure you have an active Todoist account before starting the integration.
- Each form submission can create a task in Todoist, so think ahead about which project or task list you want the submissions to go into.
Integrating Your Form with Todoist
Whether you’re creating a fresh form or giving an existing one a little update, connecting it to Todoist is quick and straightforward. This is how it’s done:
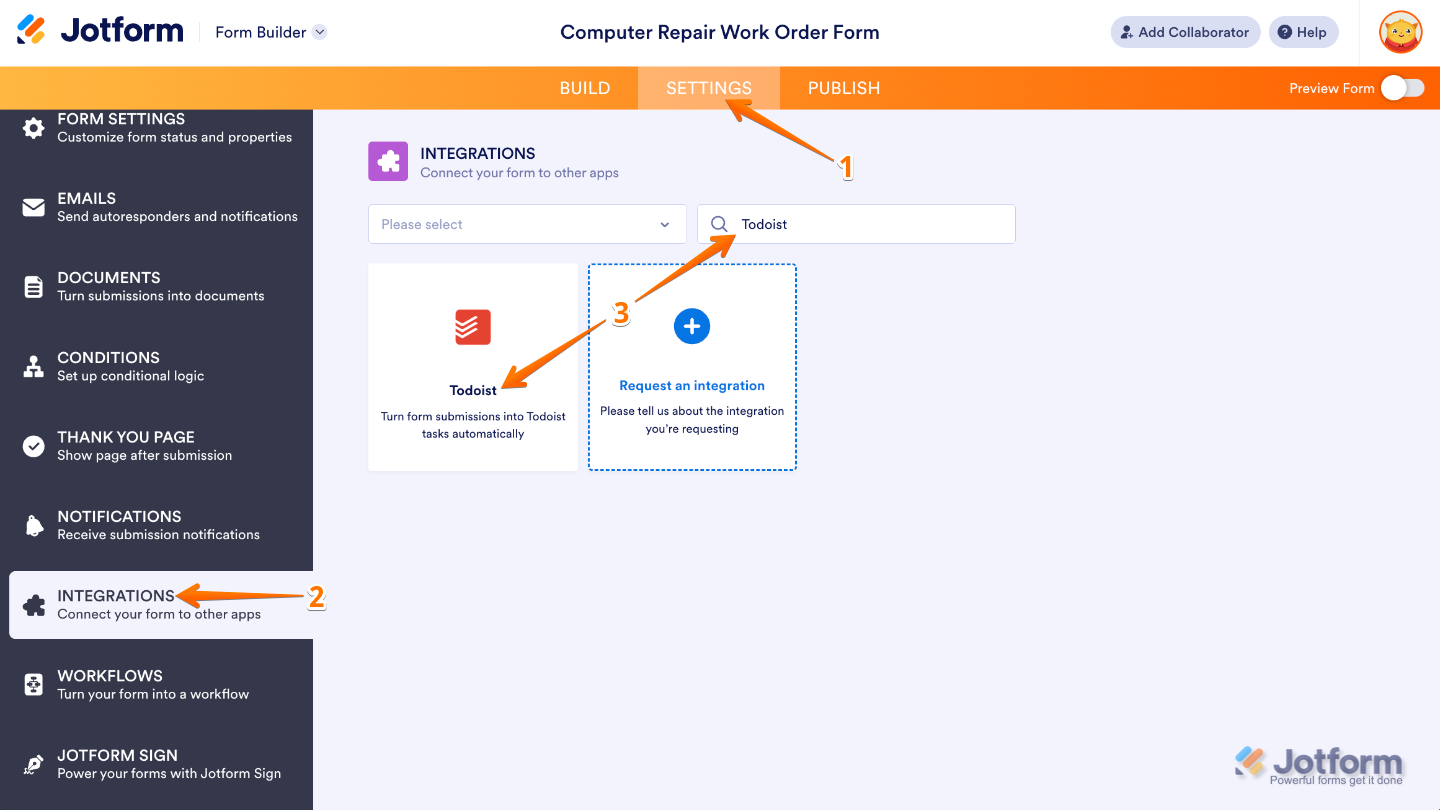
- In Form Builder, in the orange navigation bar at the top of the page, click on Settings.
- Then, in the menu on the left side of the page, click on Integrations.
- Now, in the Integrations section on the right, search for Todoist and click on it.
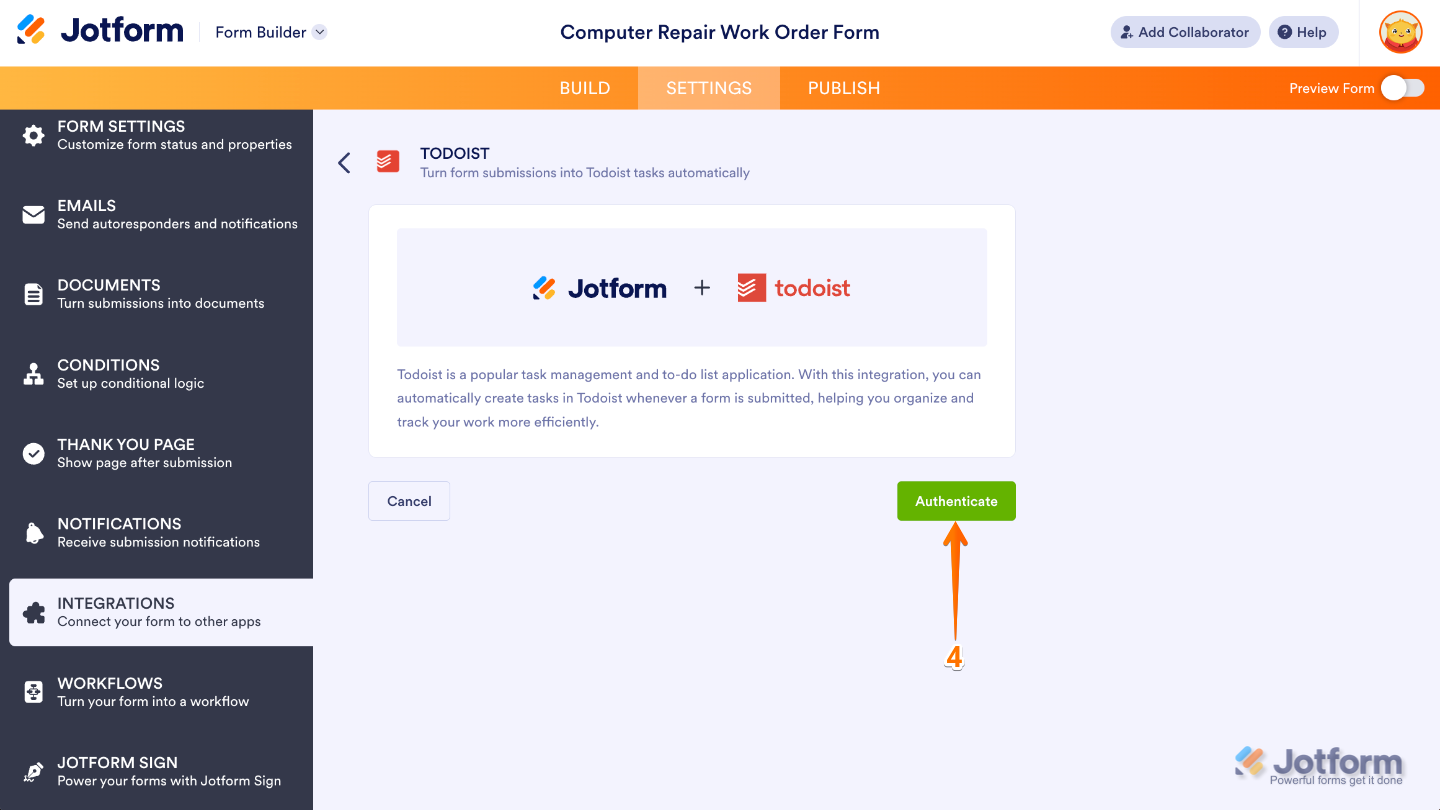
- Next, click on Authenticate.
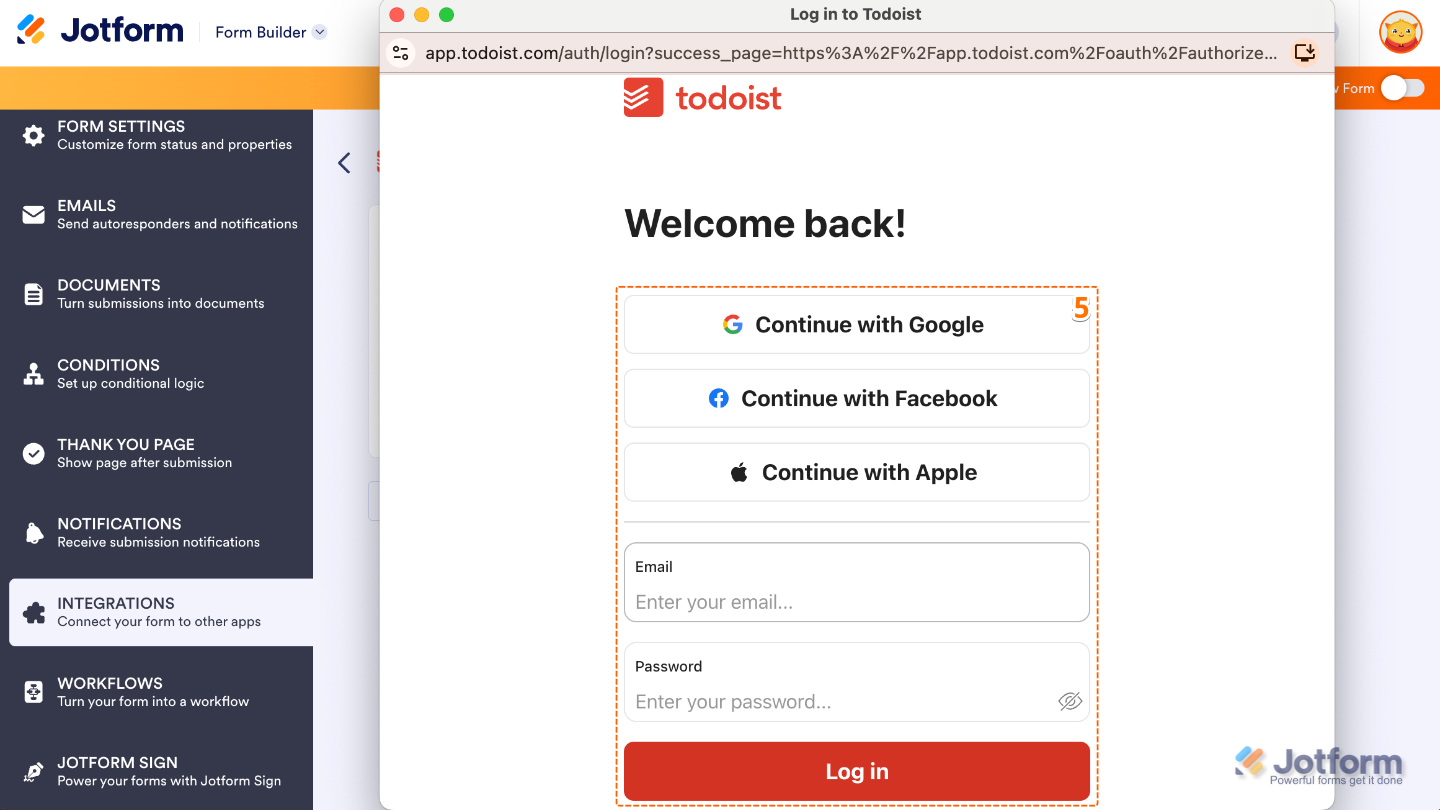
- In the Todoist login screen that pops up, log in to your Todoist account and grant access.
If you’ve logged in before, just pick your Todoist account from the dropdown and click on Authenticate. To use a different one, click on the Use another account link.

- Once connected, set up these things:
- Projects — Choose the Todoist project where the task will be created. This determines where the issue lives and which project settings, workflows, and permissions apply.
- Task Fields — Pick the Todoist fields on the left and match them with your form fields on the right. To add more, click on Add Field.
- Next, click on Save, and you’re all set.

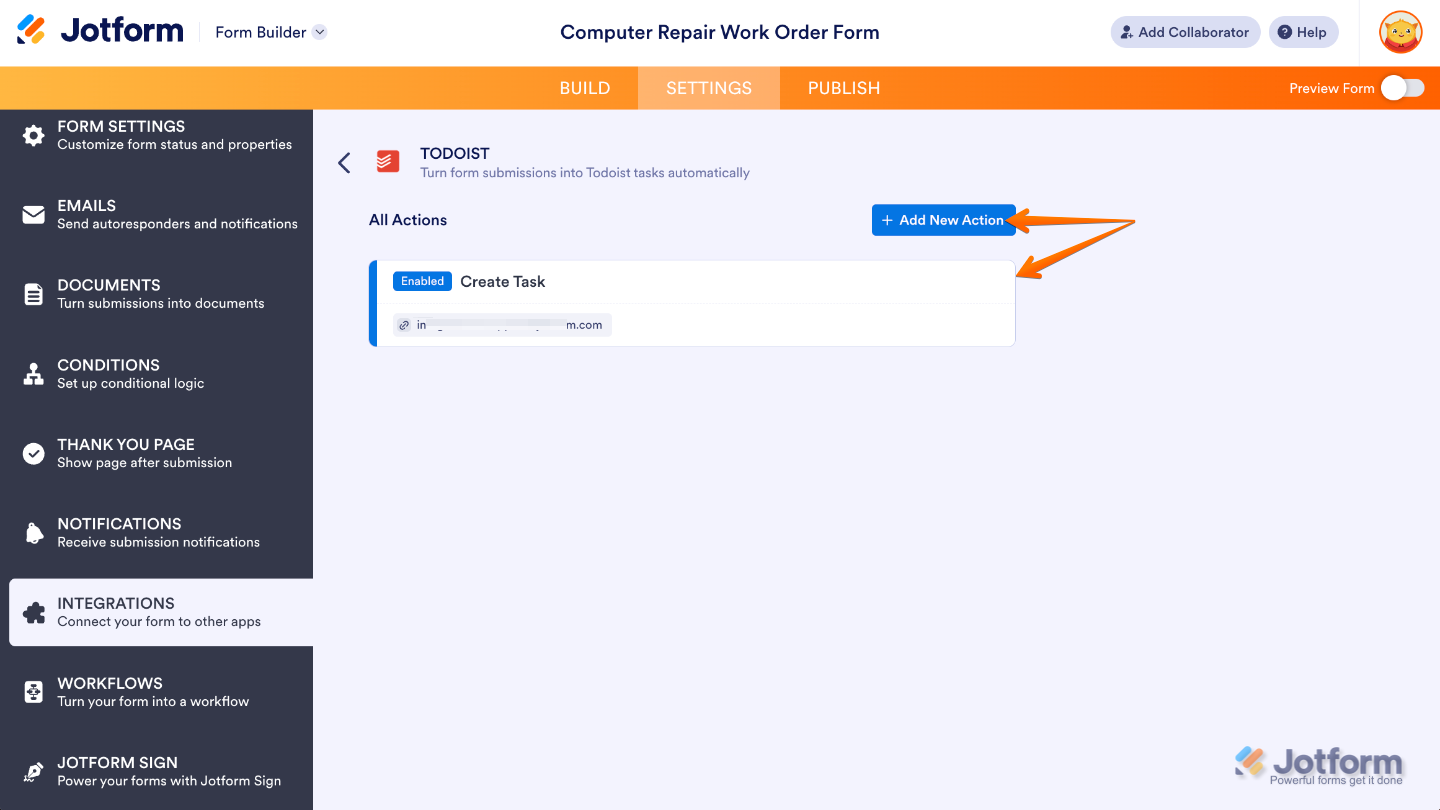
And that’s it. Your form is now successfully connected to Todoist. Once you save the integration, you’ll be redirected back to the main integration page, where you can see the action you’ve just created. You’ll also find an Add New Action button if you’d like to set up more automations.
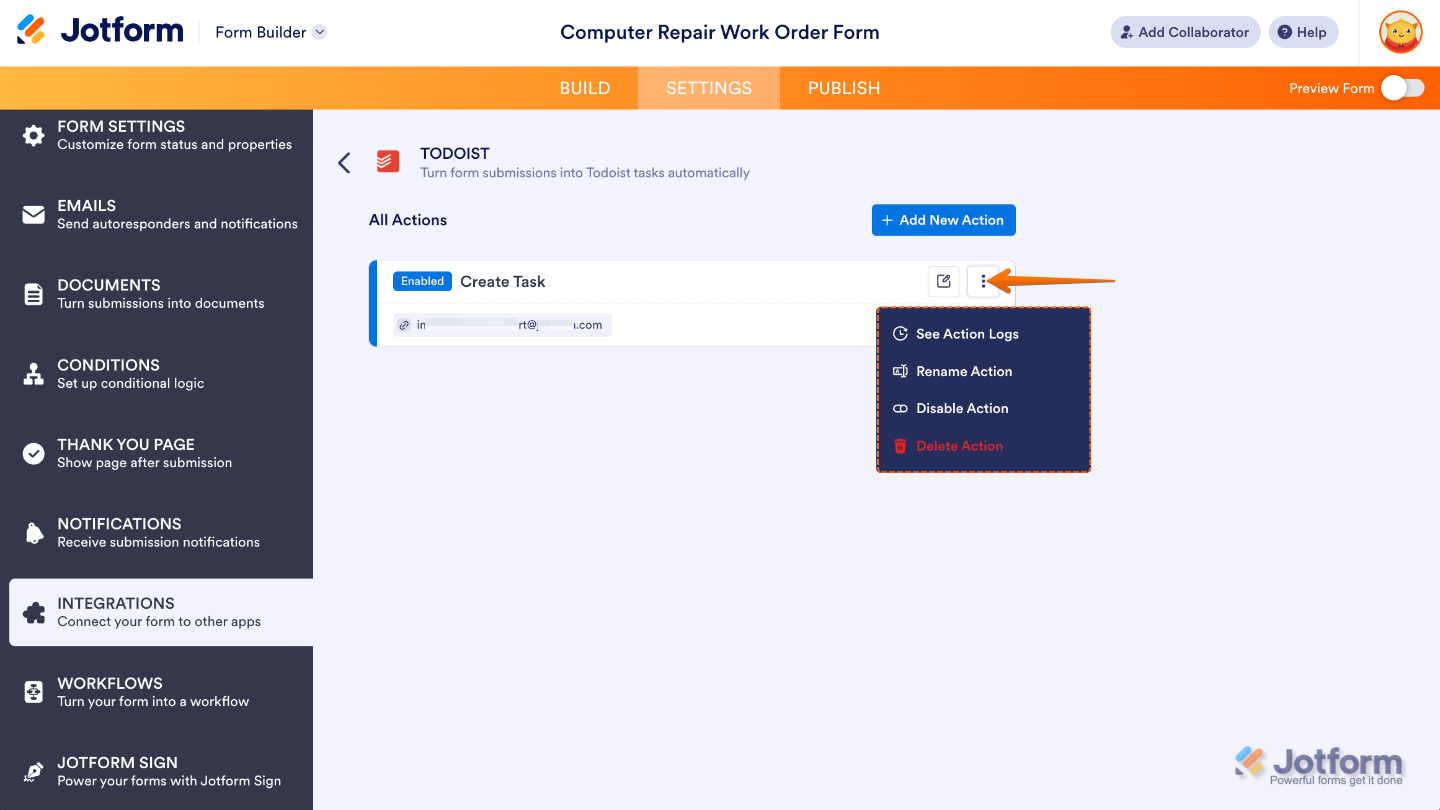
Managing Todoist Integration Actions
If you need to make changes later, simply hover over your existing action and click the Three Dots icon on the right to view options to edit, duplicate, or remove it anytime.
- See Action Logs — View successful and failed runs, helpful for troubleshooting.
- Rename Action — Change the action’s title.
- Disable Action — Temporarily stop the integration from sending data.
- Delete Action — Remove the action from your form.
Pro Tips
- Keep your form fields clearly labeled, this makes mapping them to Todoist tasks much easier.
- Use descriptive task names or include key form fields in the task title to quickly identify submissions in Todoist.
- If you handle multiple types of requests, consider creating separate actions for each form section to keep tasks organized.
- Test your integration with a few submissions first to make sure tasks are created exactly how you want them before going live.
- Take advantage of Todoist’s labels and priority settings to automatically categorize and prioritize tasks based on form responses.


Send Comment: