It’s easy to organize your form submissions with tabs in Inbox. With this feature, you can group, sort, and filter entries based on different criteria, so it’s quicker to find the information you need.
Tabs help you keep everything neat and easy to manage, especially when you’re dealing with a large number of submissions. It’s a simple way to stay organized and keep your workflow running smoothly.
Creating a New Tab
You can create custom tabs to organize your submissions in just a few steps. Here’s how:
- In Inbox, in the menu on the top of the page, click on New Tab.
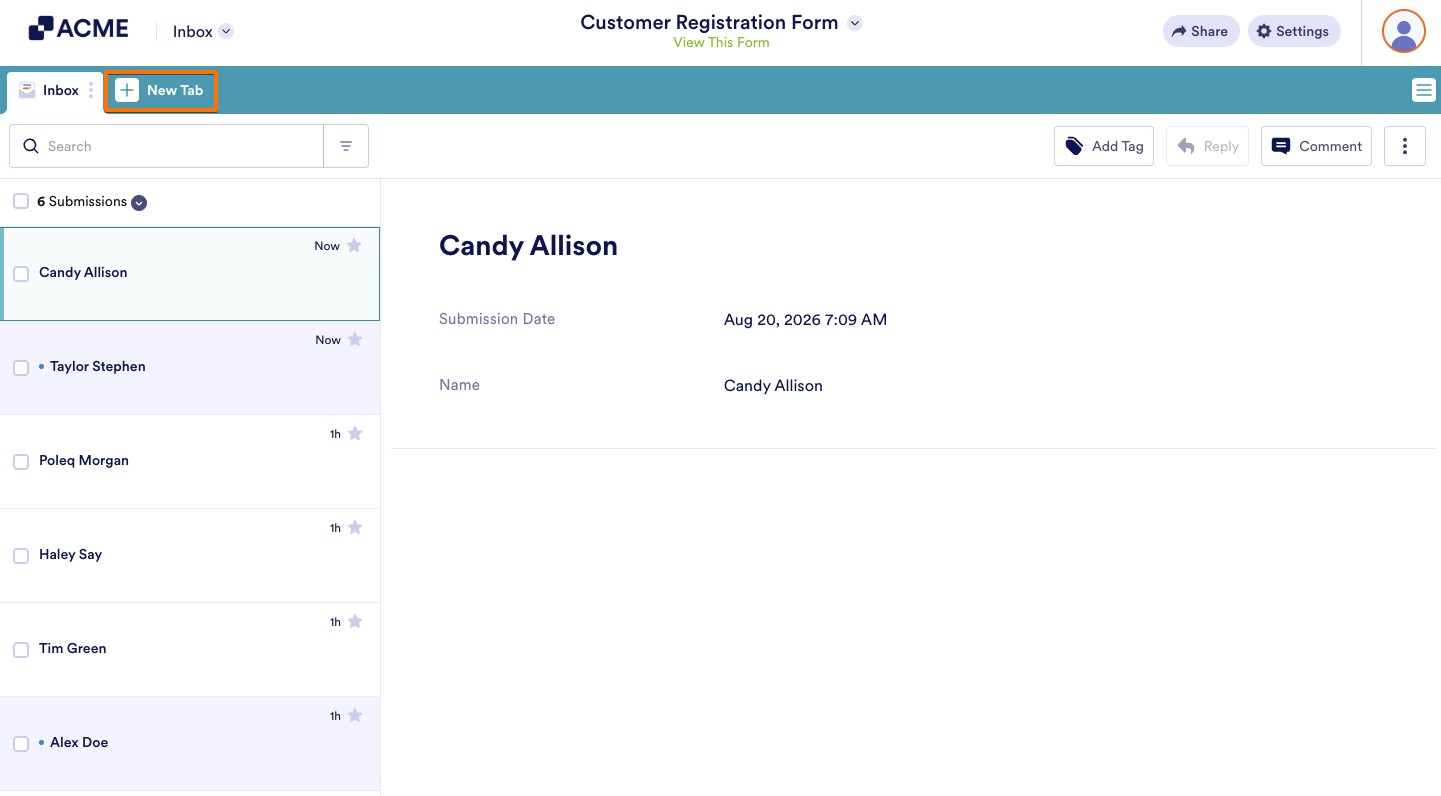
- Next, in the Create a New Tab window that opens, enter a name for your tab and click on Create Tab.
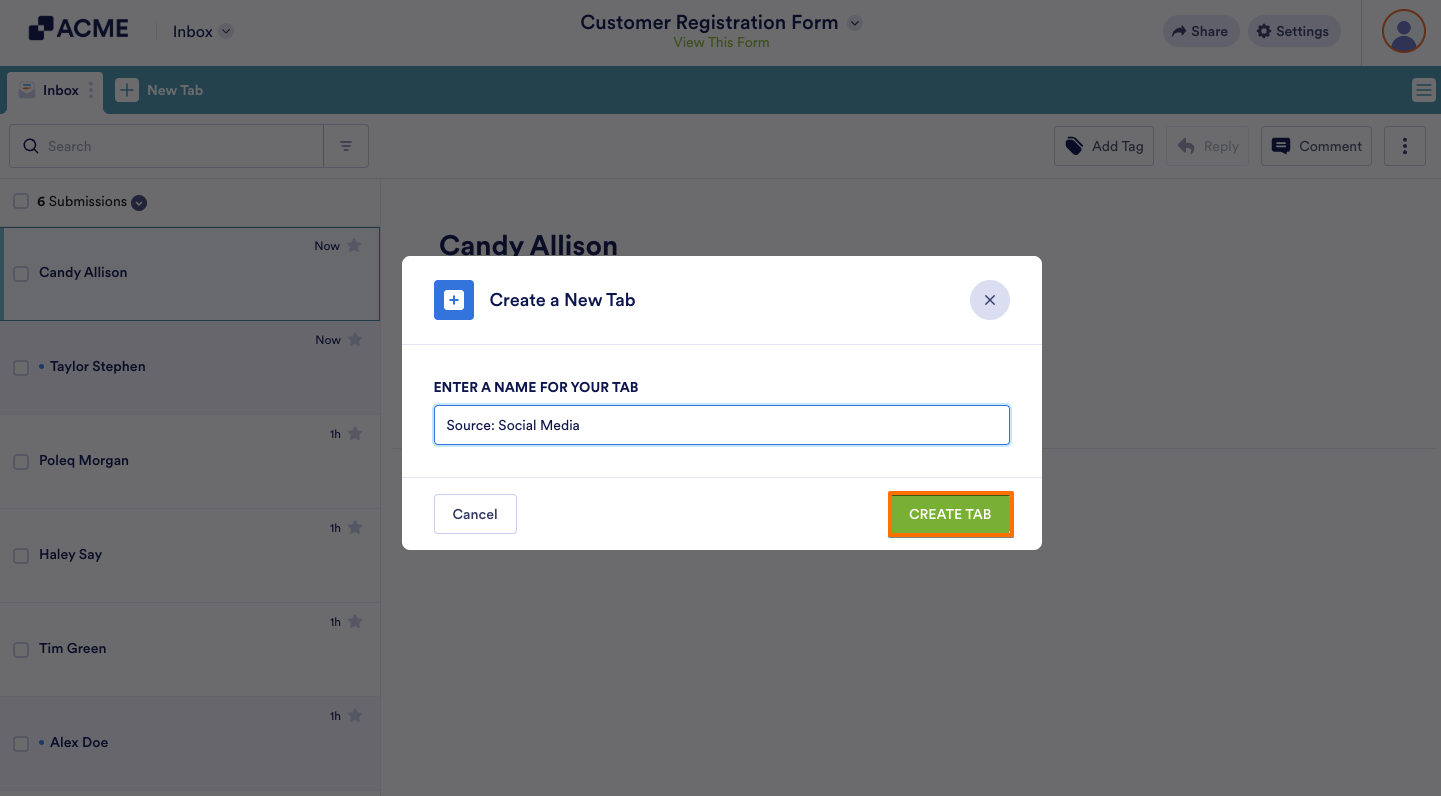
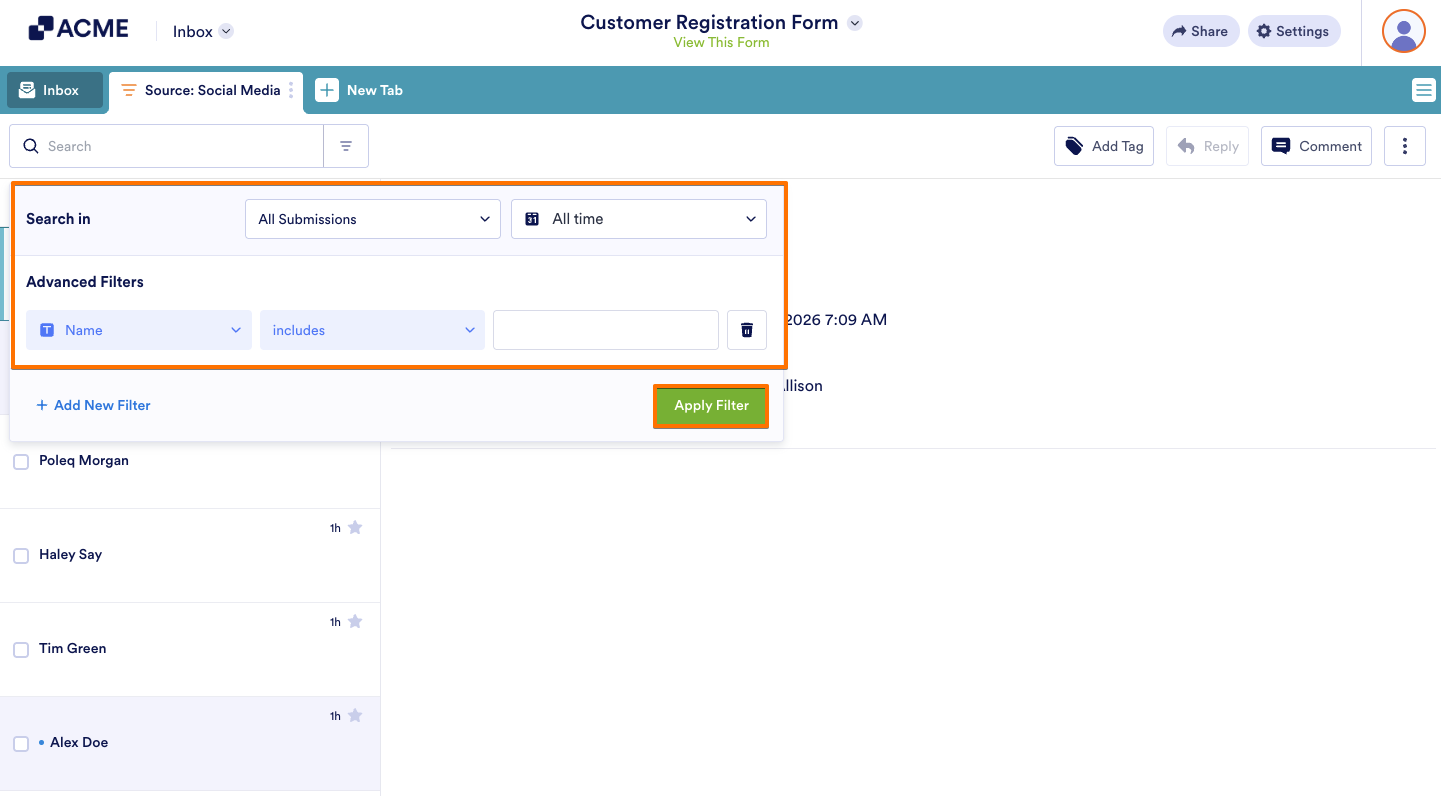
- Then, in the window that opens, set the filter you want to apply to this tab.
- Finally, click on Apply Filter and you’re done.
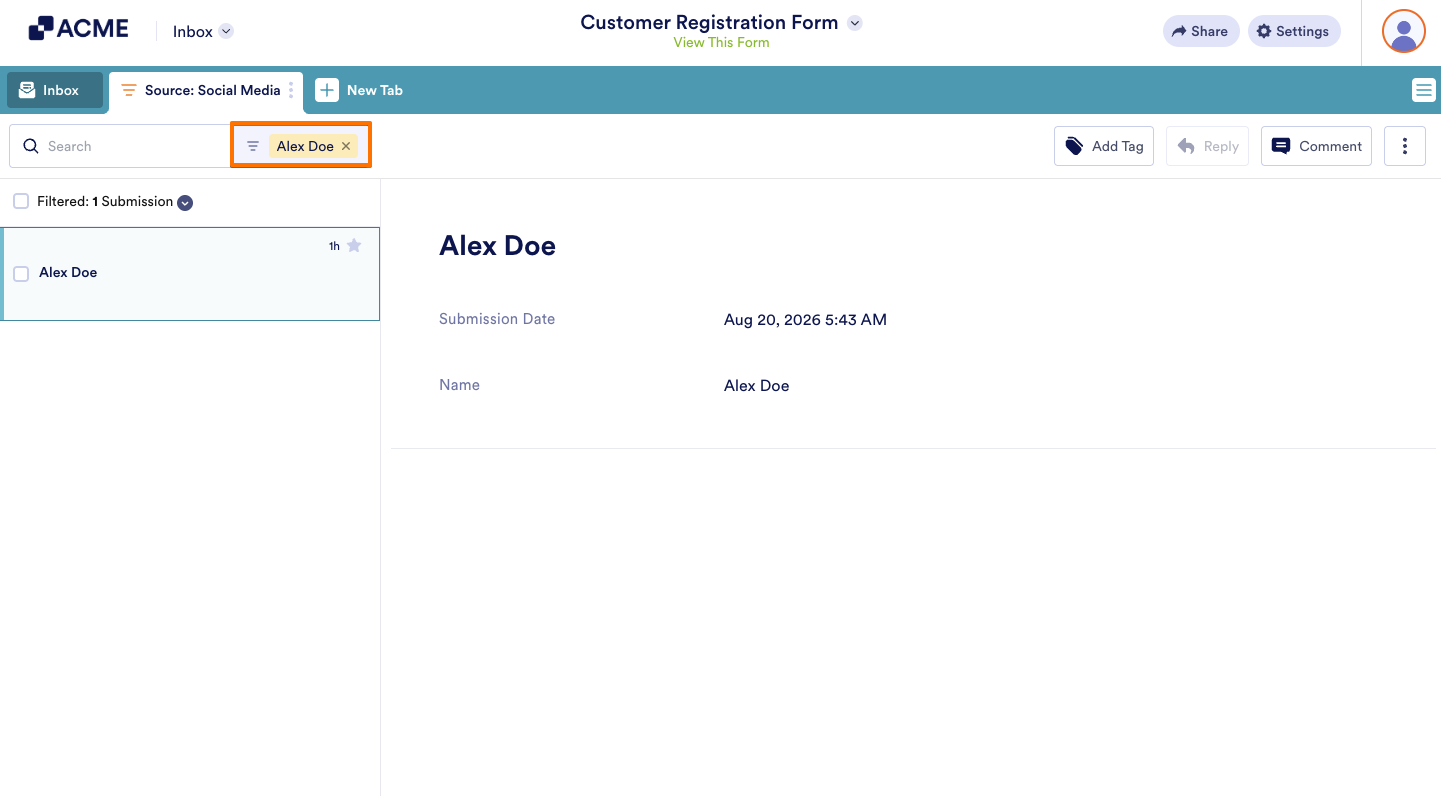
Once created, the tab will display only the submissions that match the filter that you’ve set.
Managing Your Inbox Tabs
After creating a tab, you can manage it or adjust how submissions appear inside it. To access the tab options, here’s what to do:
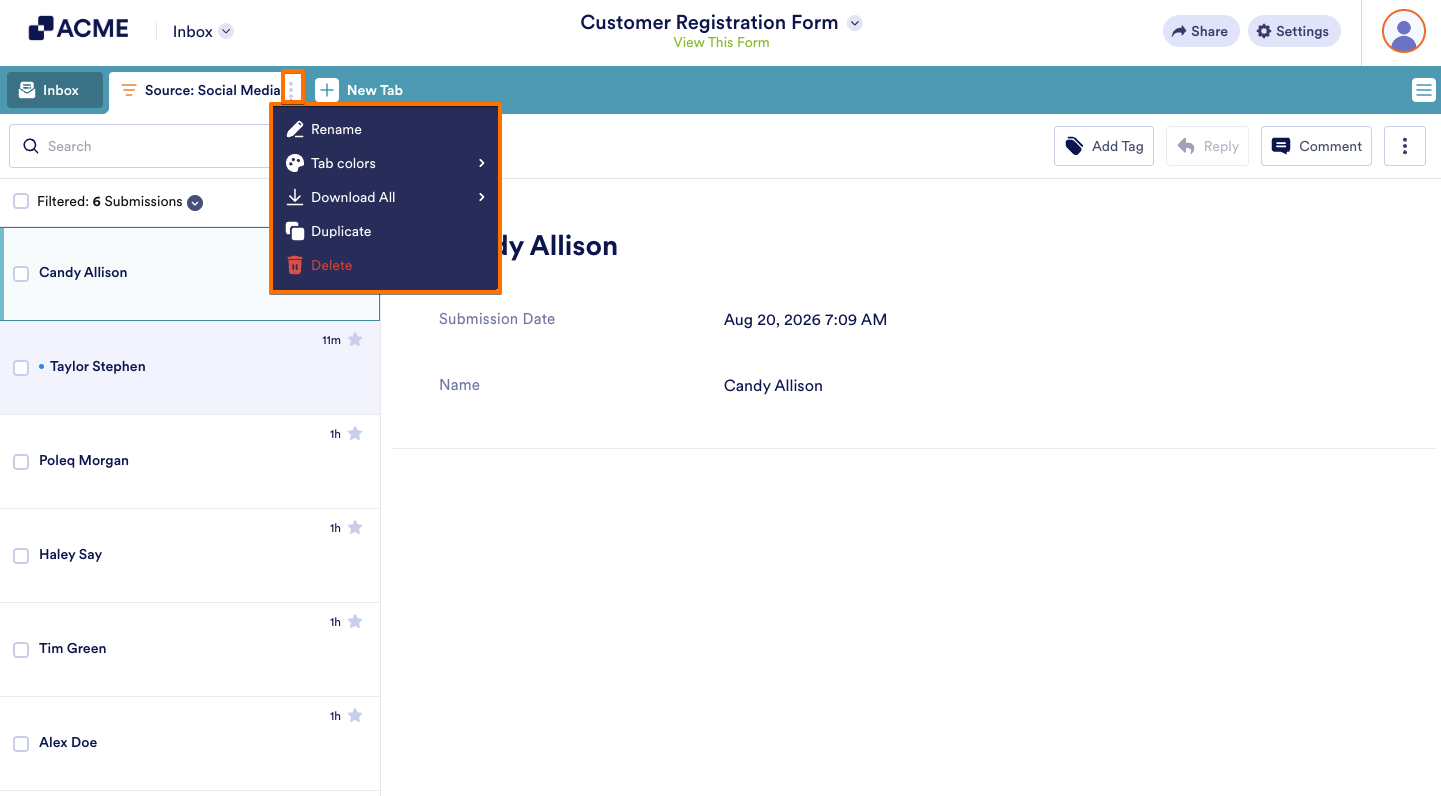
- In Inbox, click on the Three Dots icon next to the tab you’ve created.
- Then, in the menu that appears, you’ll see these options:
- Rename — Change the name of the tab.
- Tab Colors — Assign a color to the tab to make it easier to identify.
- Download All — Export all submissions currently visible in the tab in CSV, Excel, or PDF.
- Duplicate — Create a copy of the tab along with its filter settings.
- Delete — Remove the tab from your Inbox.
Note
Deleting a tab only removes the filtered view and doesn’t delete any submissions from your Inbox.
Removing a Tab Filter
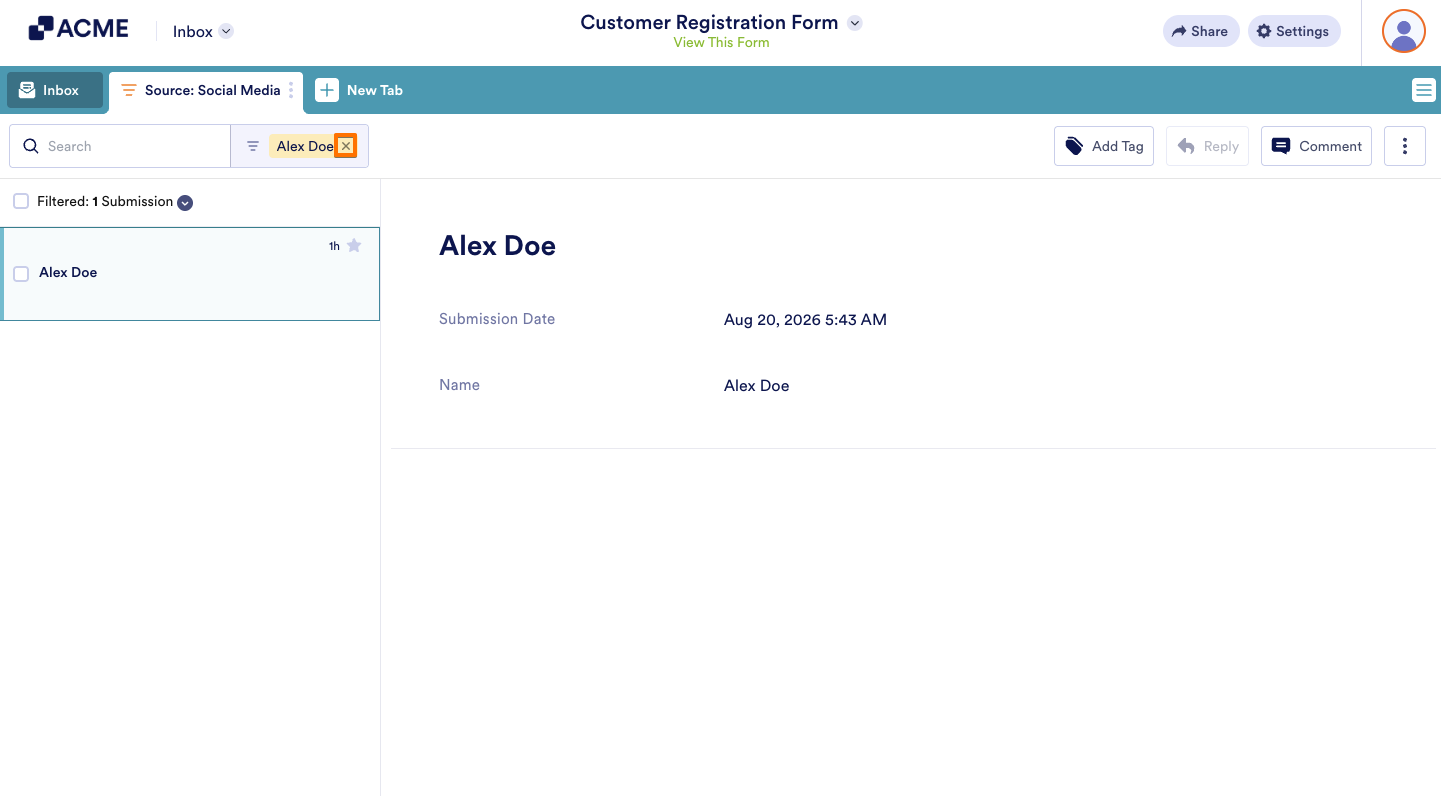
You can clear the filter by clicking on the X icon next to the Search bar.
Note
Removing the filter only resets the current view in your Inbox. The tab will remain available, and you can reapply the filter if needed

Send Comment: