Jotform’s Wix Plugin lets you integrate your form with Wix Contact to automatically sync form submissions, making it easier to keep your Wix contact list up to date. Once connected, information submitted through your Jotform form can be added to or used to update contacts in your Wix account, reducing the need to transfer contact details manually.
You can map your Jotform form fields to the corresponding Wix contact fields, giving you control over which submission data is synced. This is especially useful for forms that collect customer information, registrations, inquiries, and other contact details.
Notes
- Syncing requires the Jotform Wix Plugin to be installed and a Jotform form already added to your Wix page using the plugin. You can check out our guide on Adding a Form to Wix Using the Jotform Wix Plugin to learn more.
- The steps in this guide use the Wix Harmony Editor. But the steps are essentially the same on the Classic Editor.
Setting up the Wix Contact Integration
You can integrate Wix Contact with your form in just a few steps. Here’s how to set it up:
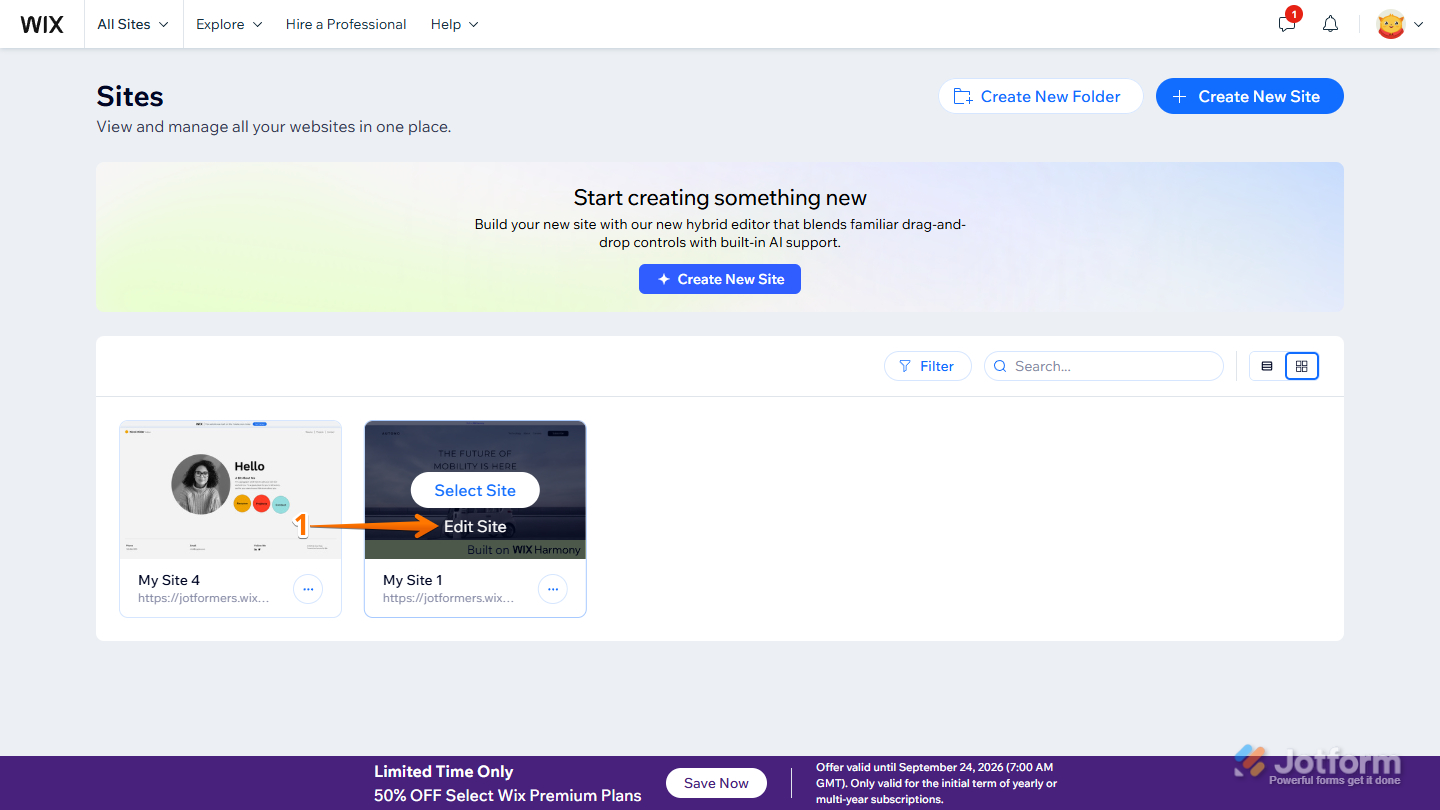
- On your Wix Sites page, hover your mouse over the site, and click on Edit Site.
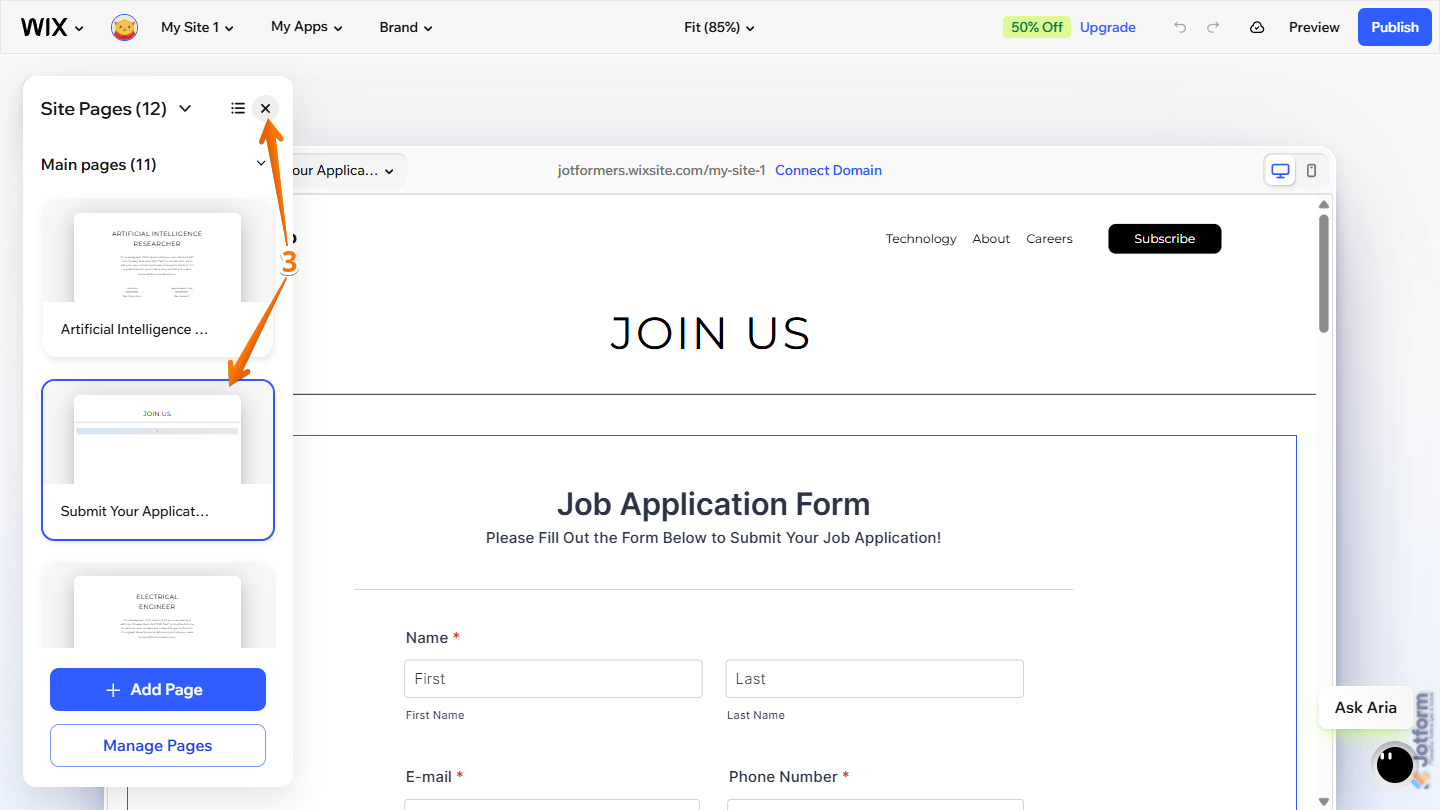
- Then, at the top-left side of your Wix Harmony Editor, click on the Downward Arrow icon next to the Page.

- Next, in the Site Pages menu that opens, under the Main Pages section, click on the page where your form is currently located, then click on X at the top to close it.
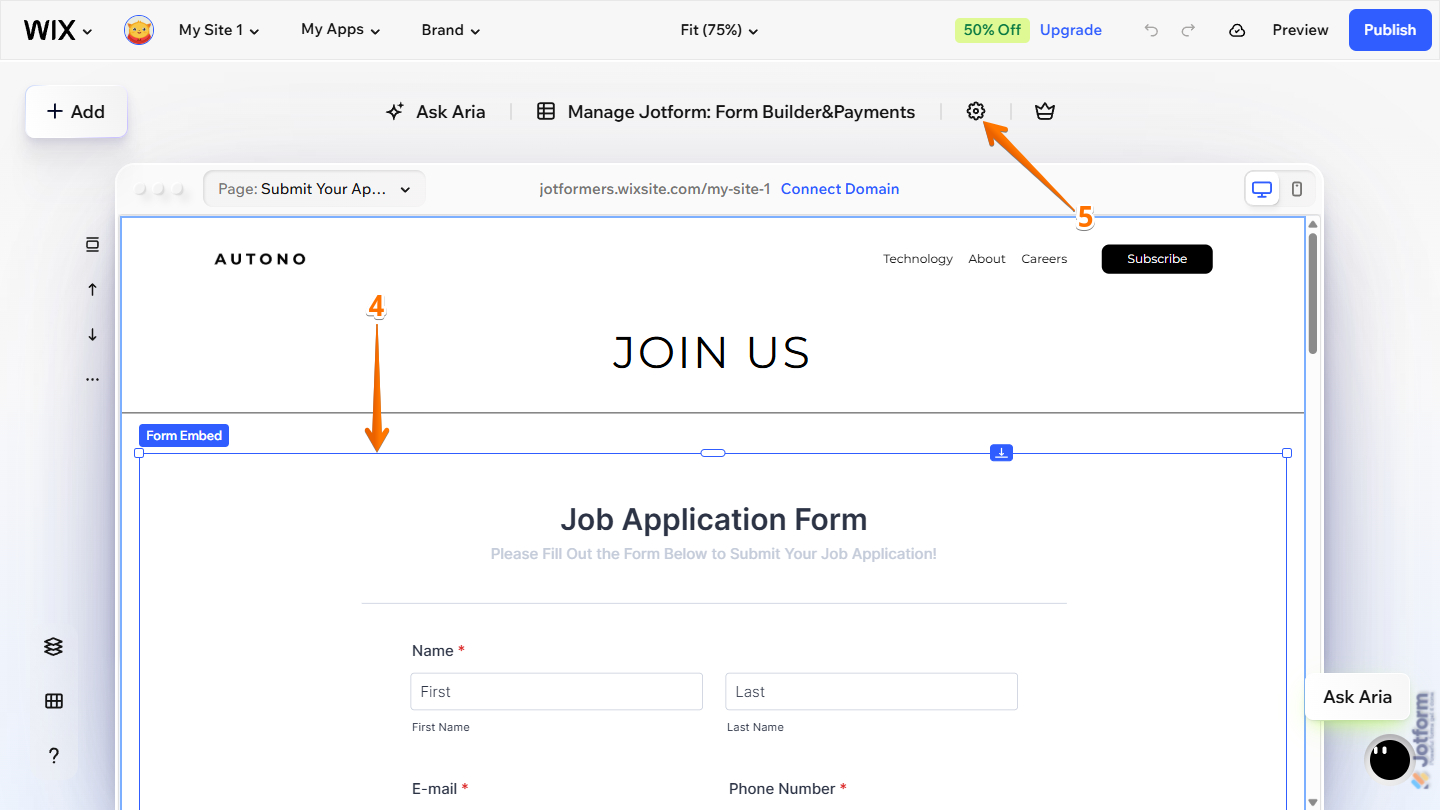
- While in the Wix Harmony Editor, click on Form Embed from the selected page.
- Then, at the top-center of the page, click on the Gear icon.
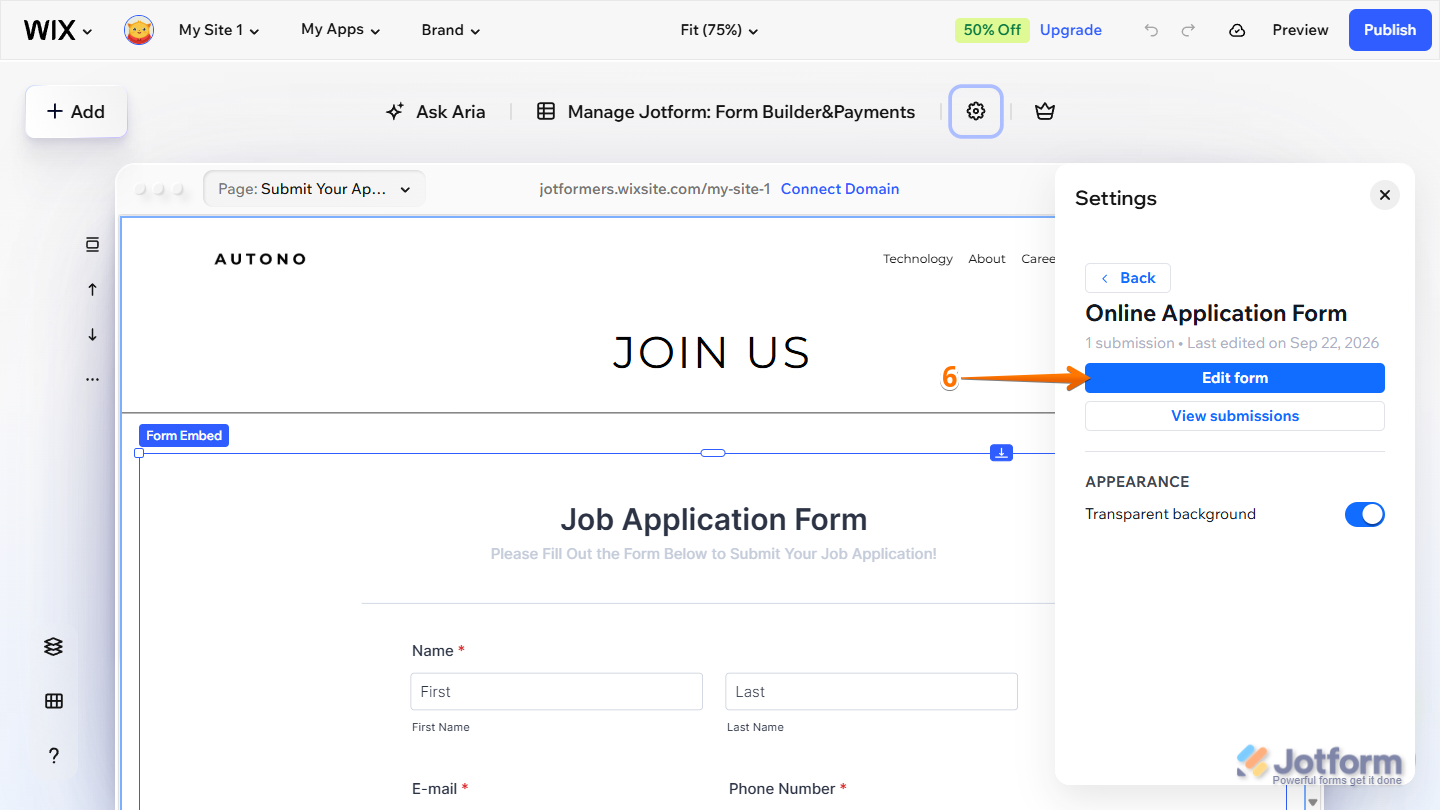
- Next, in the Settings menu that opens on the right side of the page, click on Edit Form.
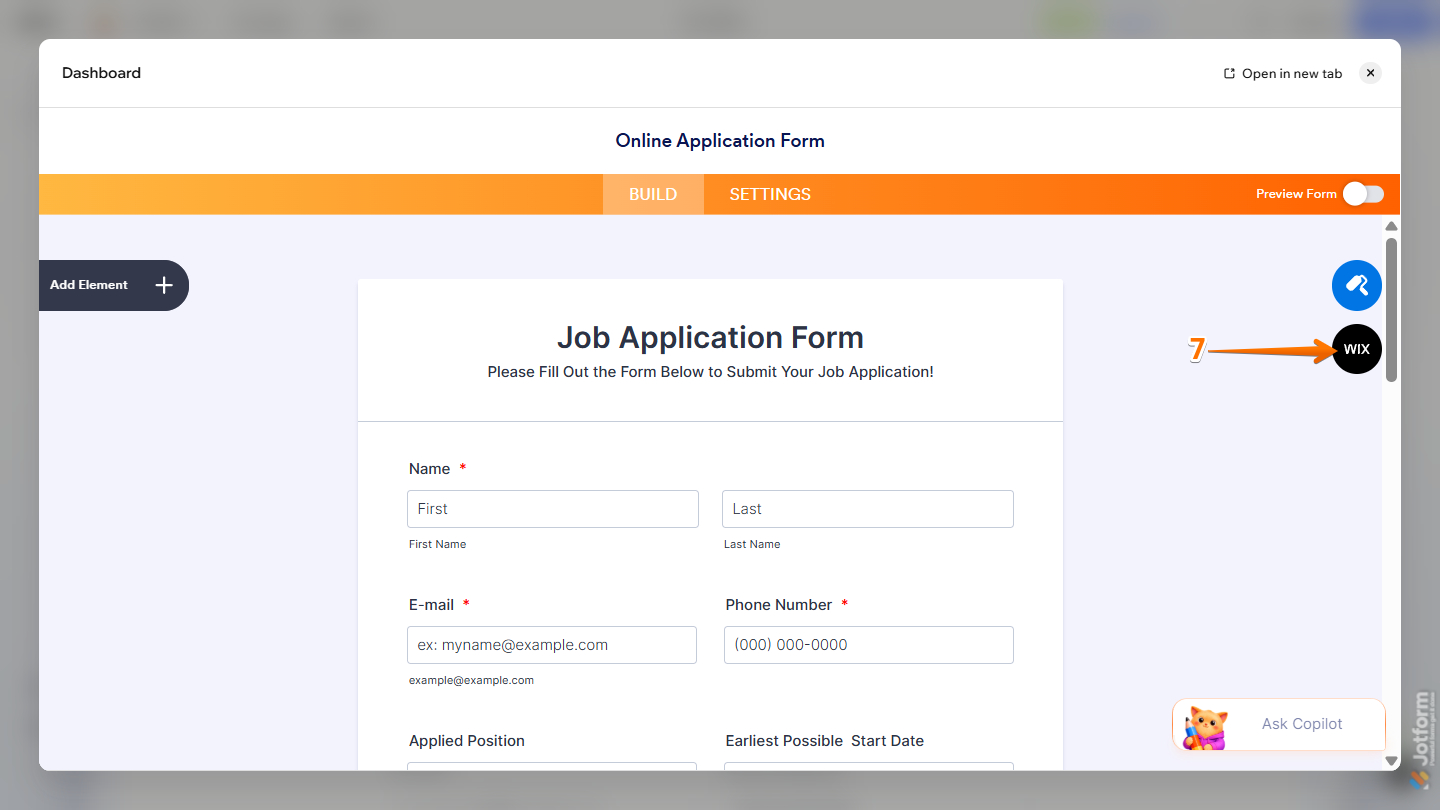
- Now, on the right side of the Form Builder window that opens, click on Wix.
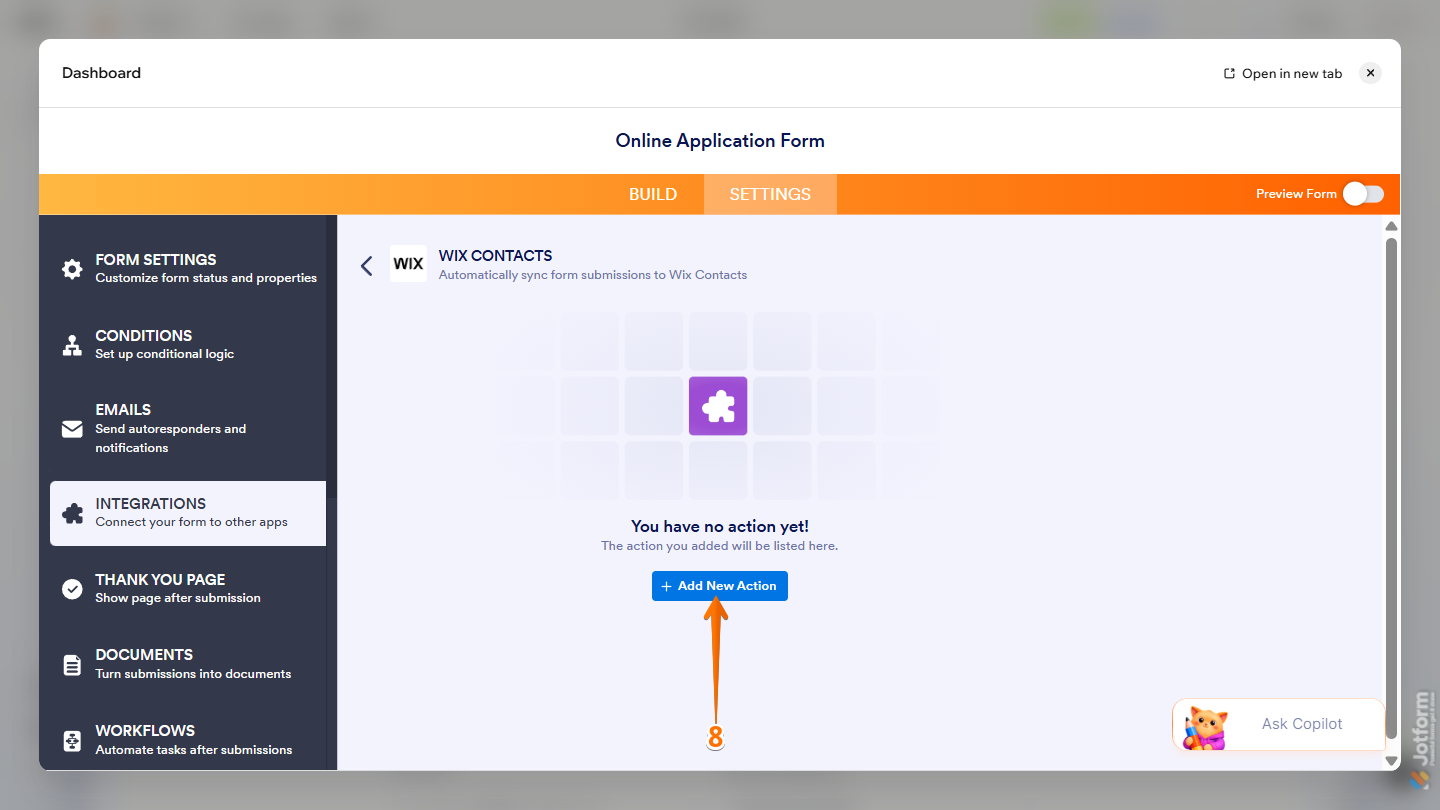
- Then, in the Wix Contacts section on the right side of the Integrations page, click on Add New Action.
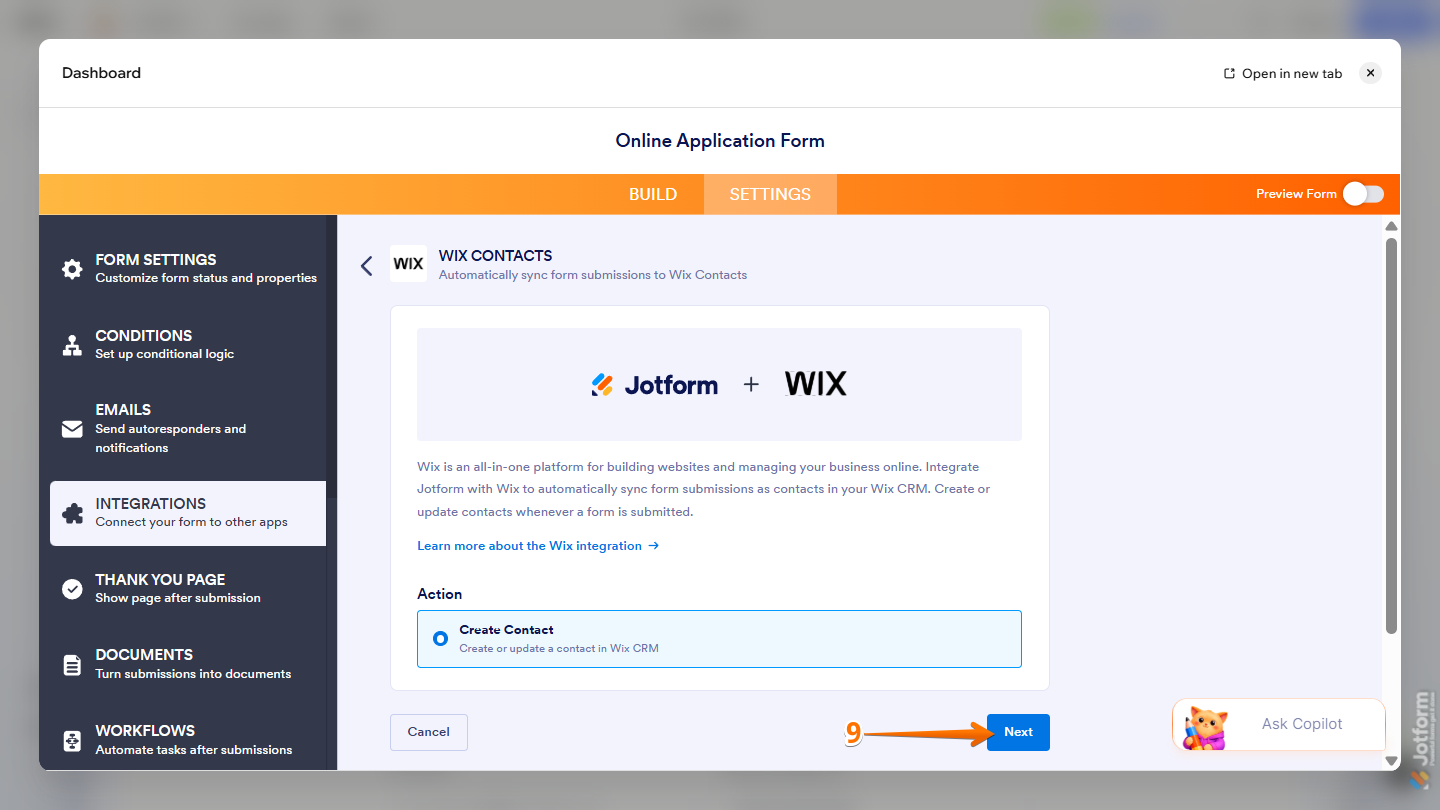
- Next, the Create Contact option is automatically selected in the Action section, so click on Next to continue.
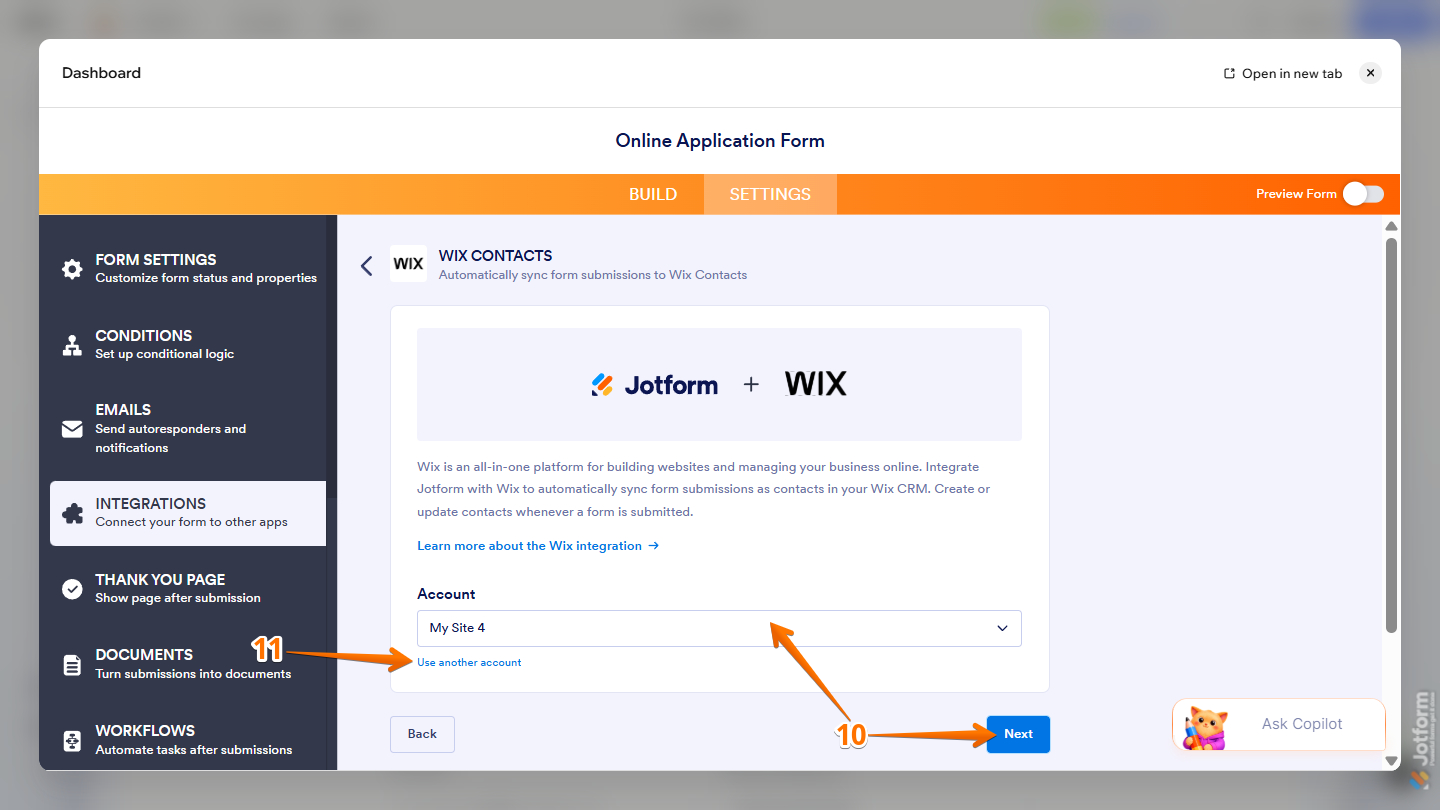
- Now, in the Account dropdown, select your website and then click on Next.
- Or, to use a different one, click on Use Another Account.
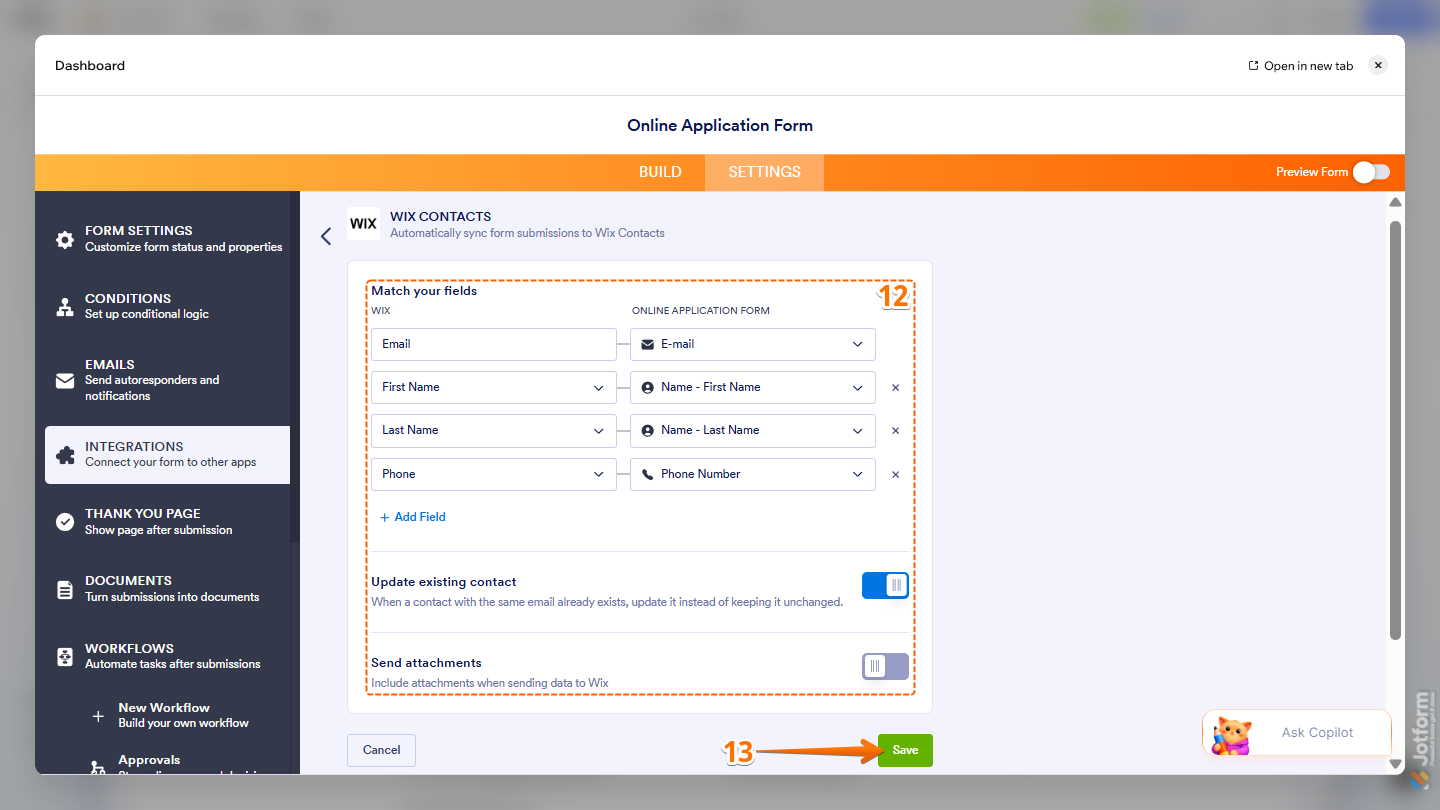
- Then, set up these things:
- Match Your Fields — Match your Wix fields on the left to your form fields on the right. Click on Add Field to map additional fields.
- Update Existing Contact — This is toggled on by default. It updates the contact if the form is submitted using the same email address on record.
- Send Attachments — Toggle this on to send the PDF version of the submission and the uploaded files as attachments to the Wix contact.
- Once those are set, click on Save at the bottom.
Managing Your Wix Contacts Integration Actions
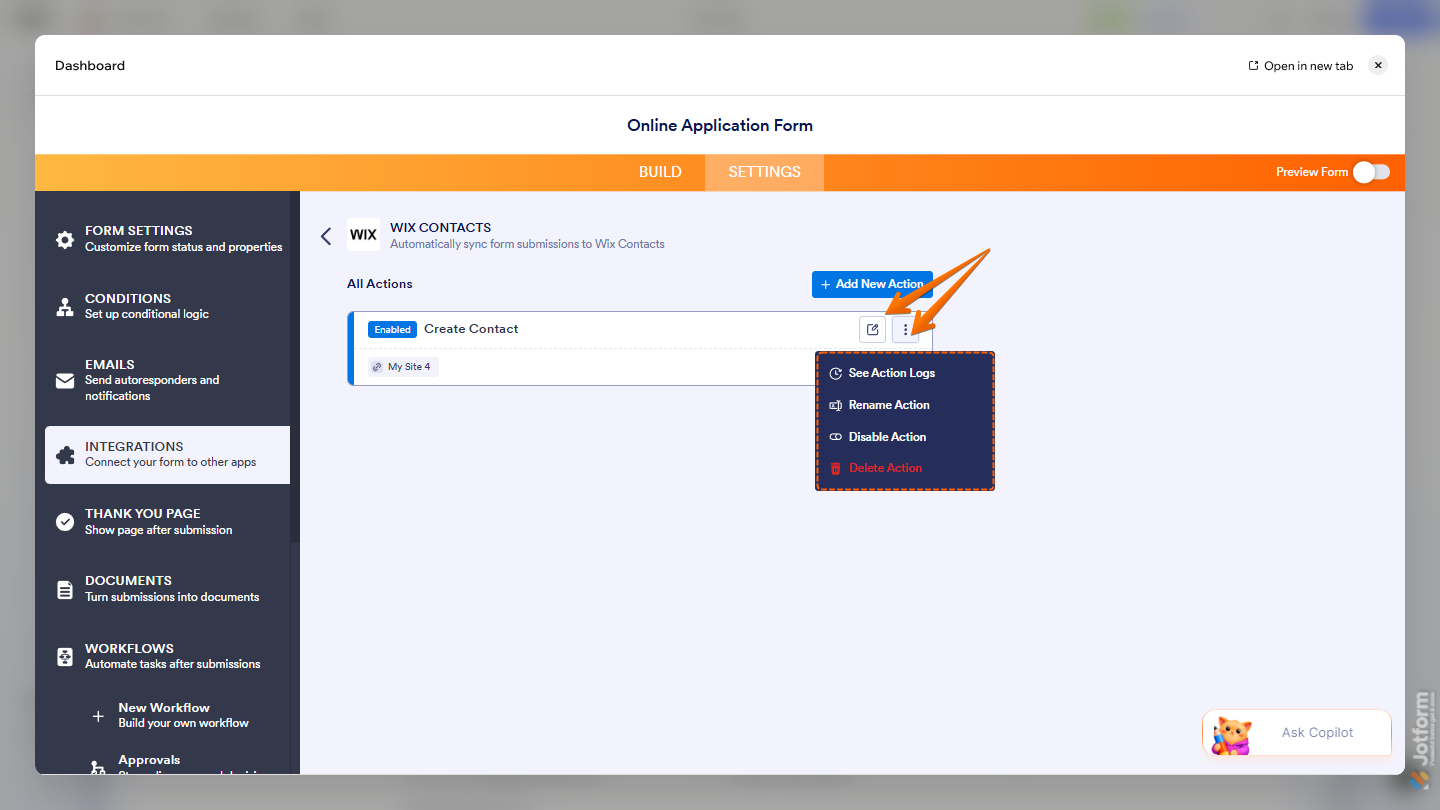
After saving the Wix Contacts integration, you’ll see the list of actions you’ve set up and the Add New Action button on the main page. Hover your mouse over an action and click on the Pencil icon to edit it or the Three Dots icon to access more options:
- See Action Logs — View successful and failed runs, helpful for troubleshooting.
- Rename Action — Change the action’s title.
- Disable Action — Temporarily stop the integration from sending data.
- Delete Action — Remove the action from your form.
Viewing Contacts in Wix
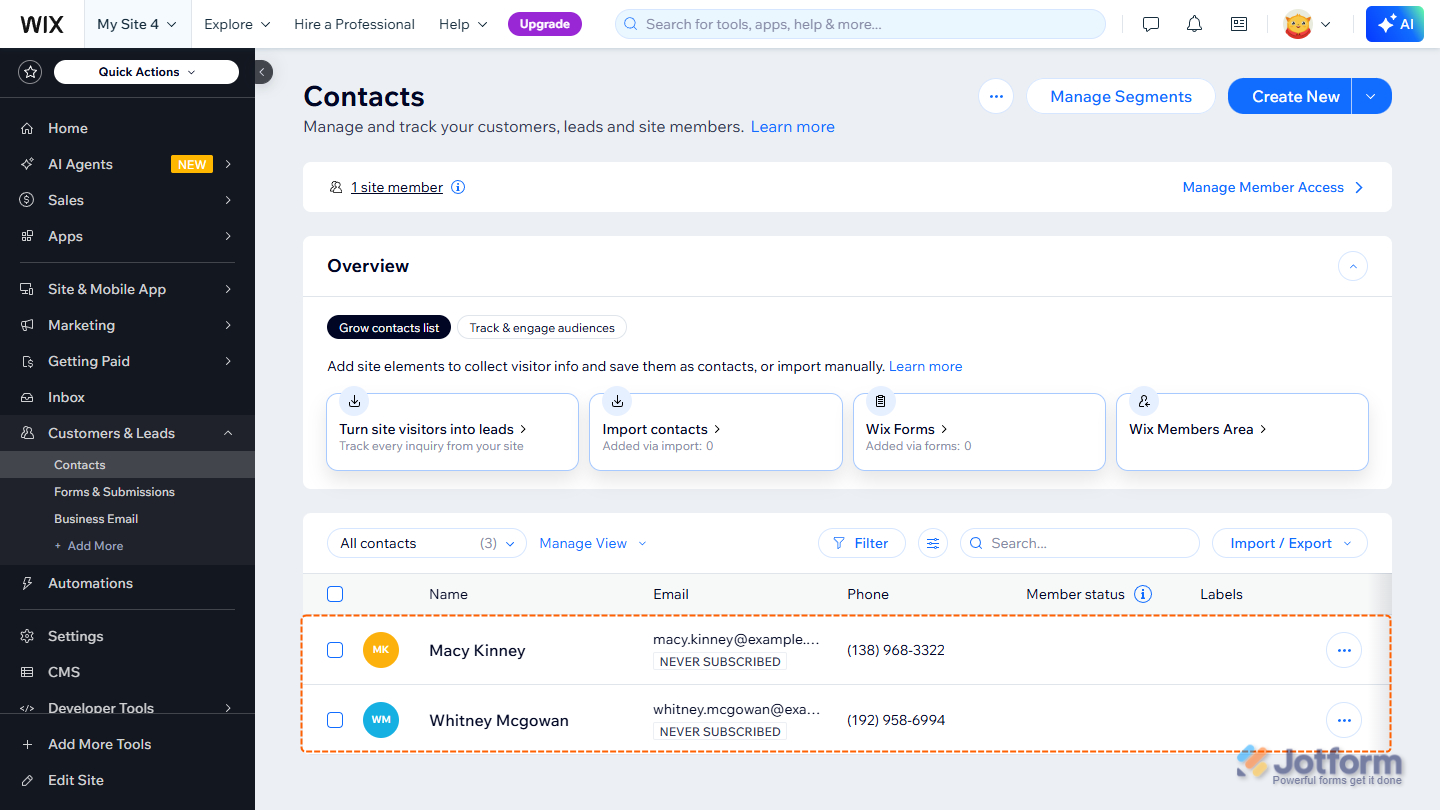
Once configured, information collected through your form will now be sent to Wix Contacts, where you can view and manage it directly from your Wix account. Viewing your Wix Contacts only takes a second—here’s what to do:
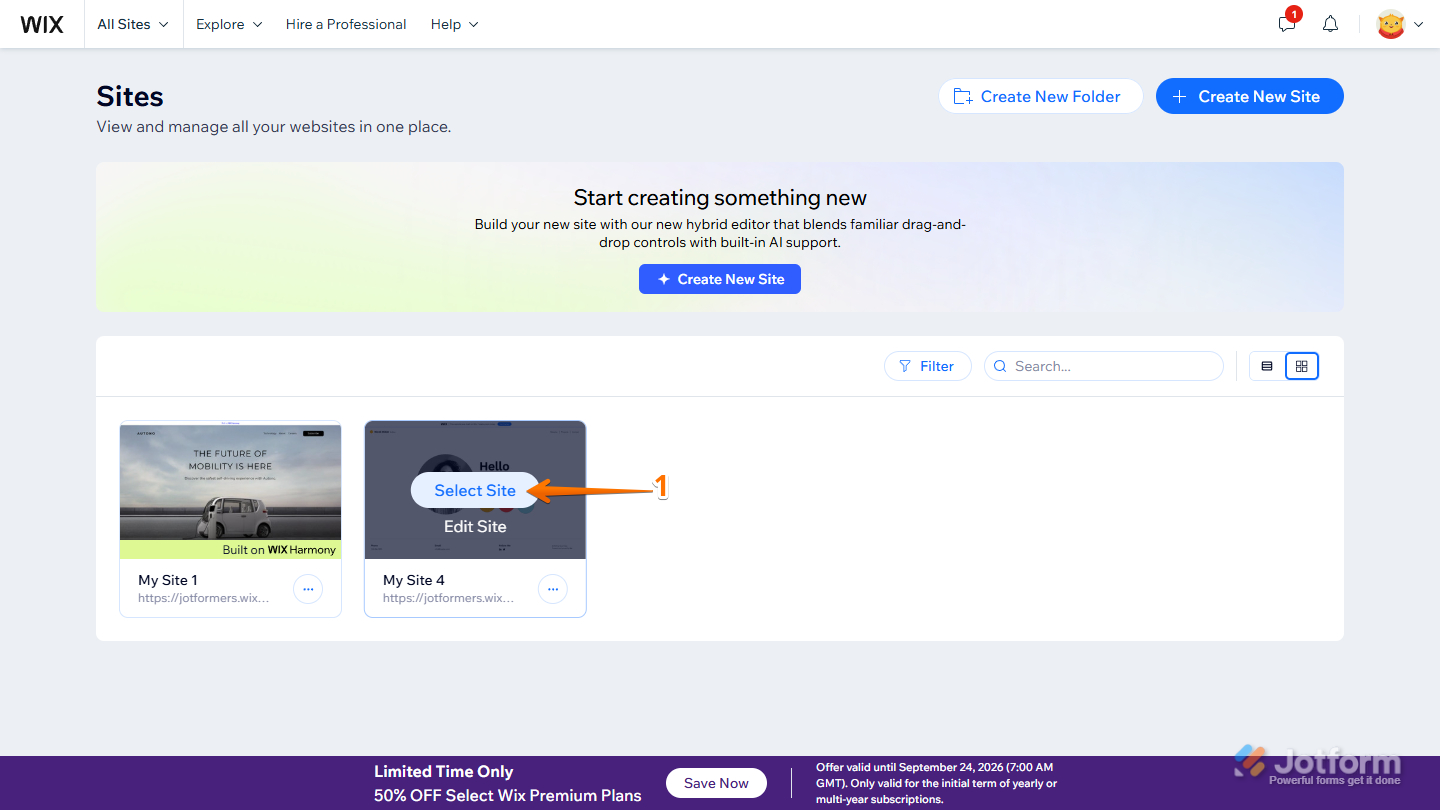
- On your Wix Sites page, hover your mouse over the site, and click on Select Site.
- Then, on your Wix Dashboard, hover your mouse over Customer & Leads, and in the Side menu that opens, click on Contacts.
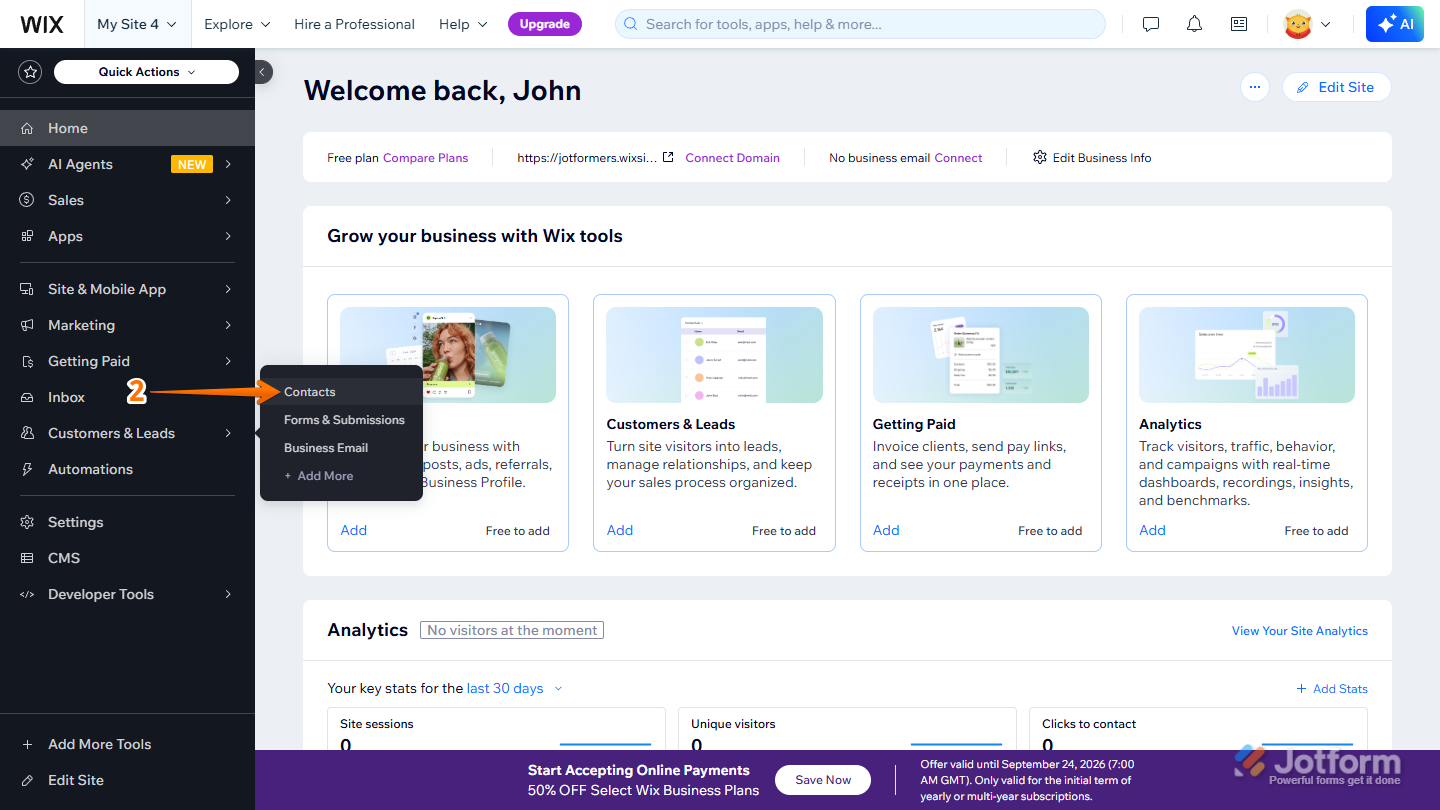
That’s it! Click on any contact to view their details and manage their information individually.
That’s it for syncing your form submissions to Wix Contacts and viewing and managing your contacts in Wix. The integration helps keep your contact information organized and up to date, so you can spend less time transferring data manually and more time managing your contacts.



Send Comment: