You can easily organize and categorize your form submissions using Tags in Inbox. Tags help you quickly sort conversations, group related responses, and find exactly what you’re looking for without digging through your entire Inbox. Whether you’re managing customer inquiries, internal requests, or ongoing projects, tagging keeps everything neat and easy to track.
With recent improvements, you can add, remove, and manage tags at both the individual submission level and from the Inbox Settings panel—giving you more flexibility and control over how your submissions are organized. It’s a simple way to stay on top of incoming responses and keep your workflow running smoothly.m
Adding Tags to a Submission
When you access your form submissions in Inbox, you can easily add tags to keep everything organized. Getting started is simple—here’s what to do:
- On the left side of Inbox, click on the submission you want to add tags to.
- Then, on the top-right side of the page, click on Add Tag.
- In the menu that appears, select the tags you want to add to the submission. You can use the search bar at the top of the list to find one easily.
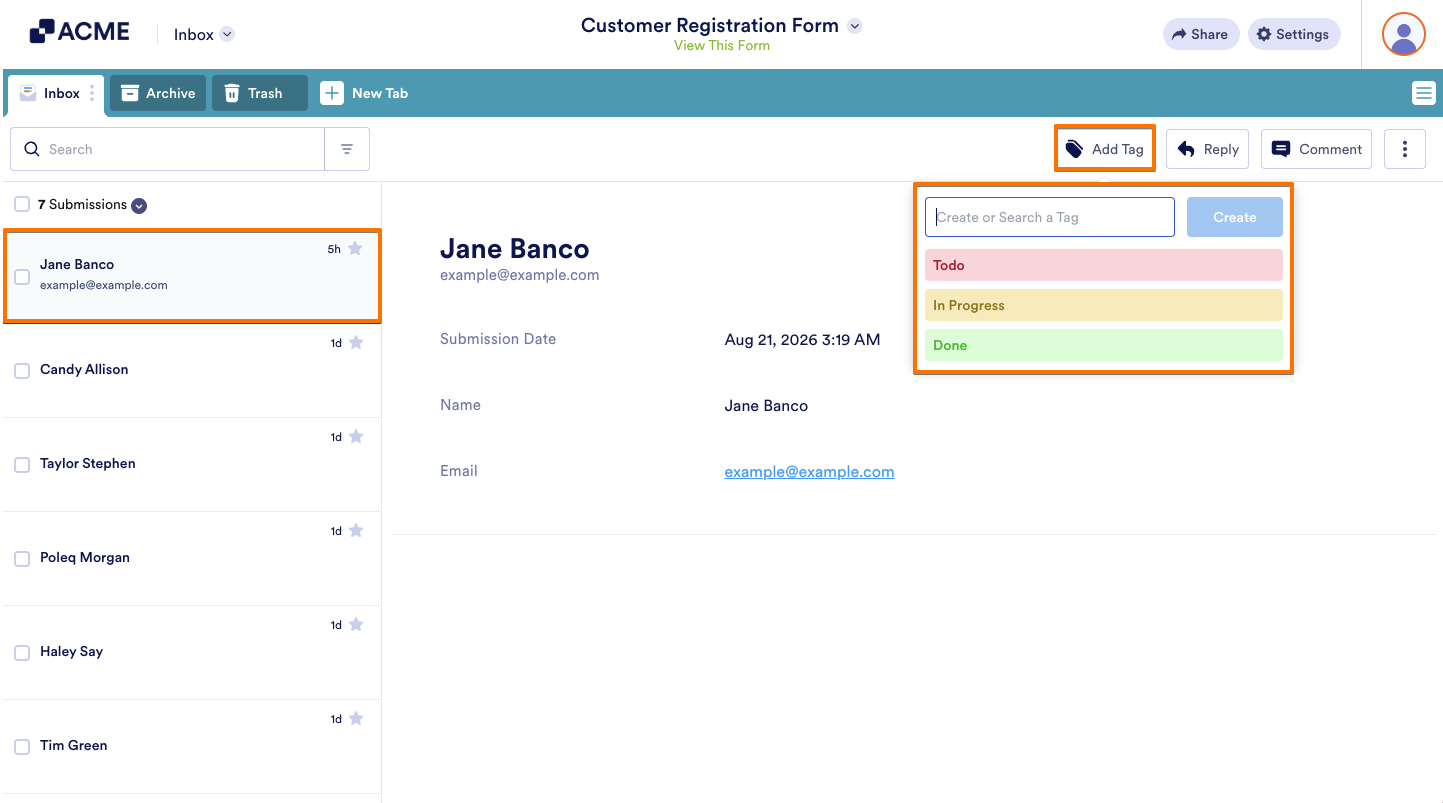
If the tag you need isn’t in the list, enter its name in the search bar at the top of the menu, then click on the Create button next to it or press the Enter key on your keyboard. The new tag will be selected automatically.
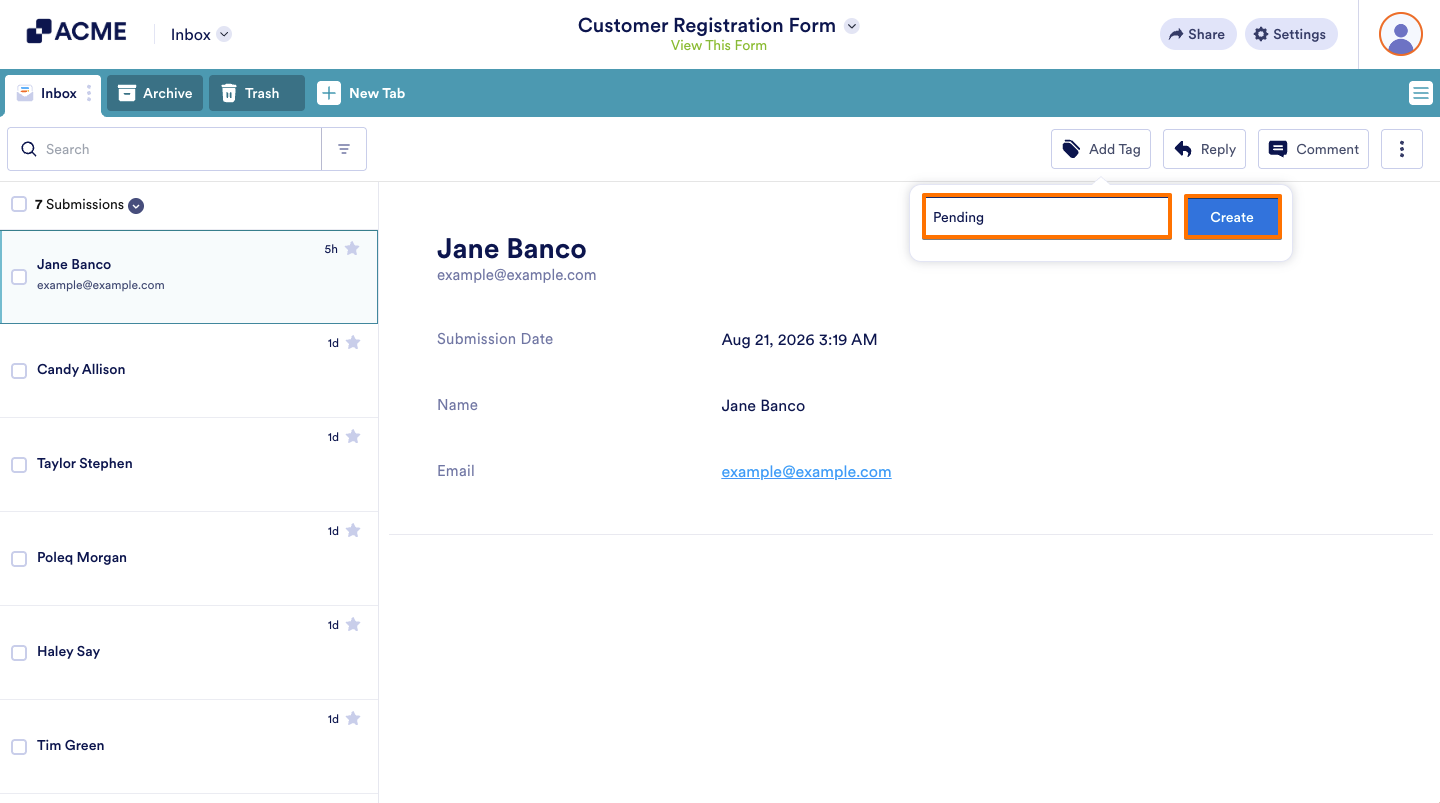
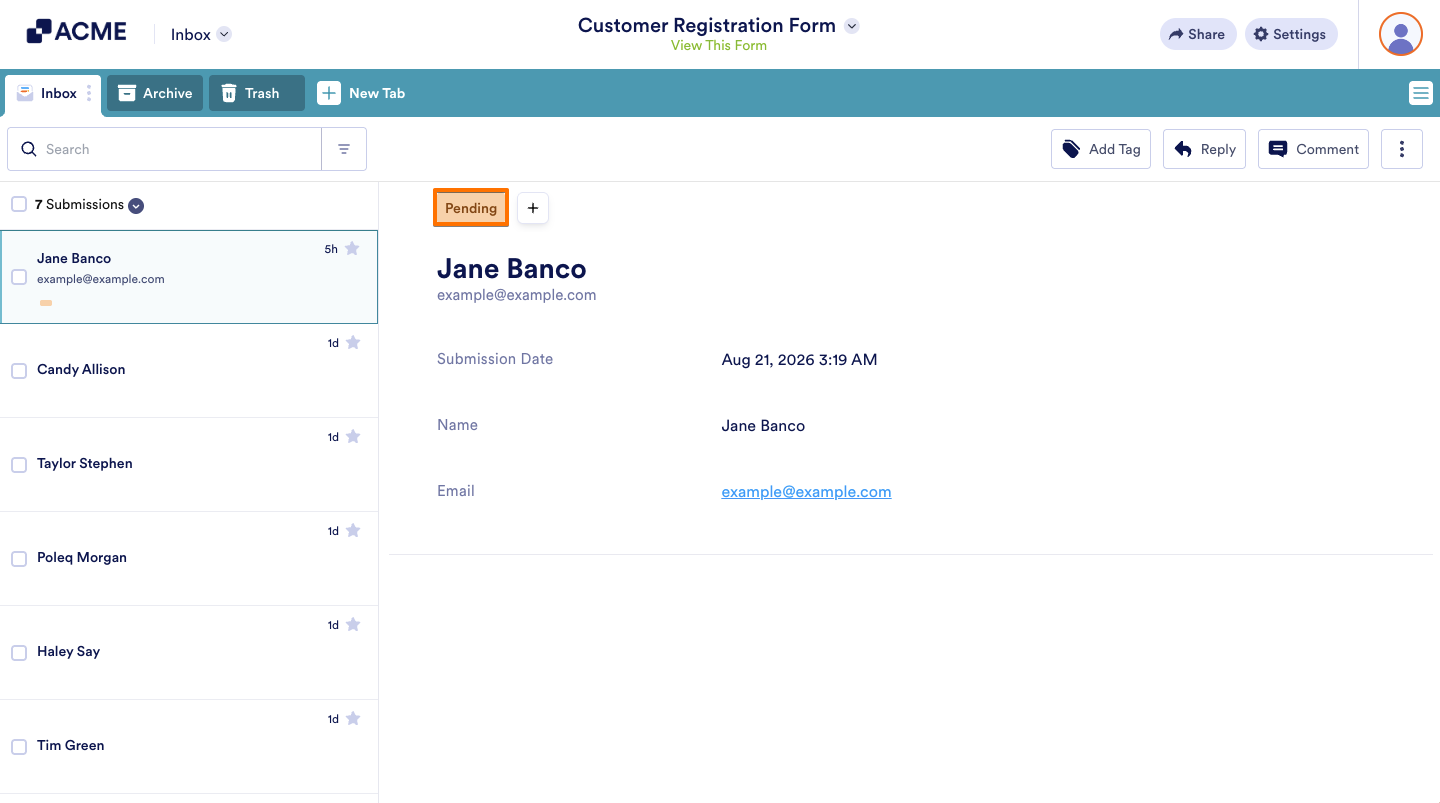
That’s it. The added tags will appear at the top of the submission title. If you want to edit or organize your tags, check out Managing Tags below.
Note
Tags appear at the top of the submission title in the order you select or add them.
When you click a tag on a submission, you’ll see all the other submissions that use the same tag. If you want to learn more, check out our guide on Filtering Submissions Using Tags below.
Removing Tags from a Submission
You can quickly remove tags from a submission whenever you need to. You can do it in just a few steps:
- On the left side of Inbox, click on the submission you want to remove tags from.
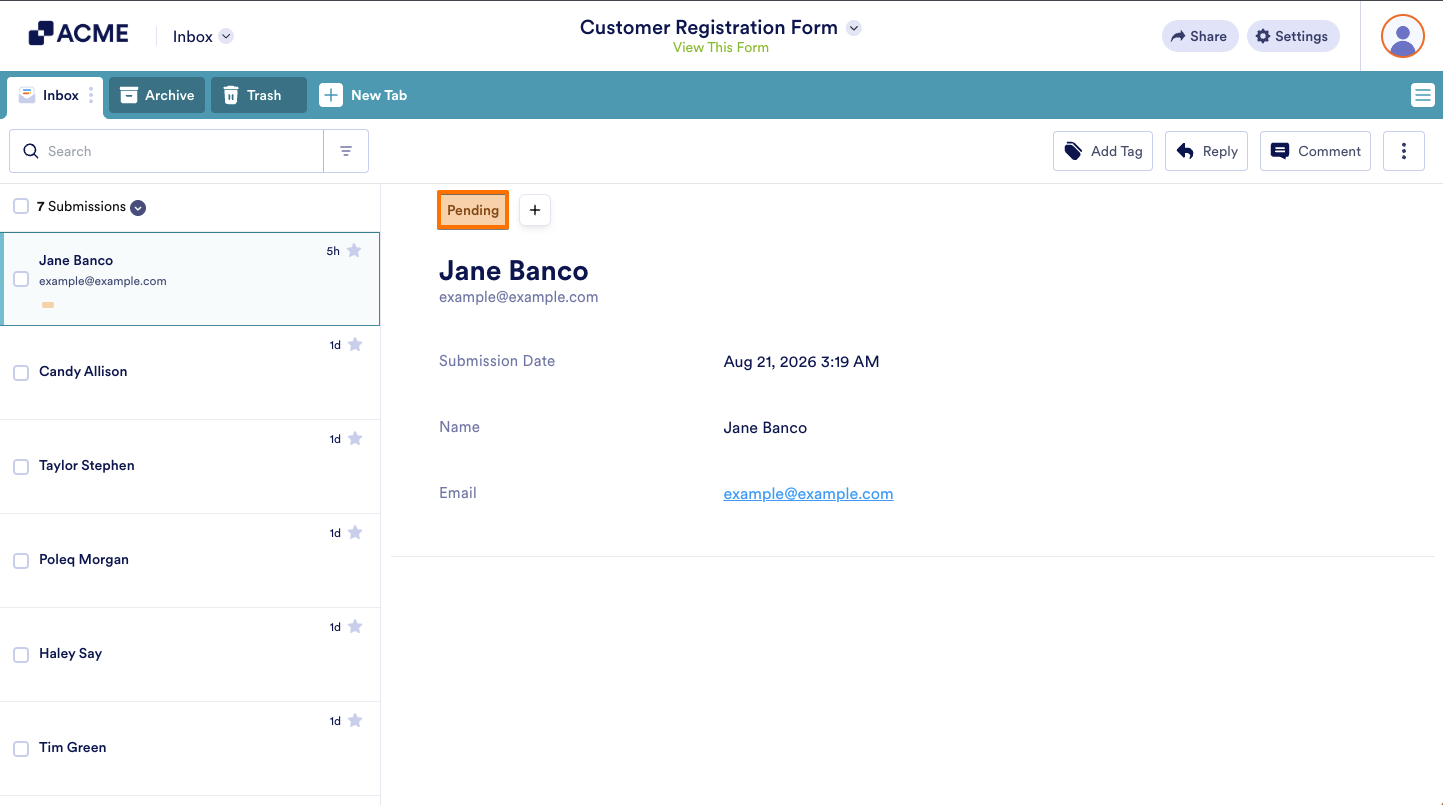
- Then, at the top of the submission title on the right, hover your mouse over the tag you want to remove, then click on the X button that appears on the right side of it.
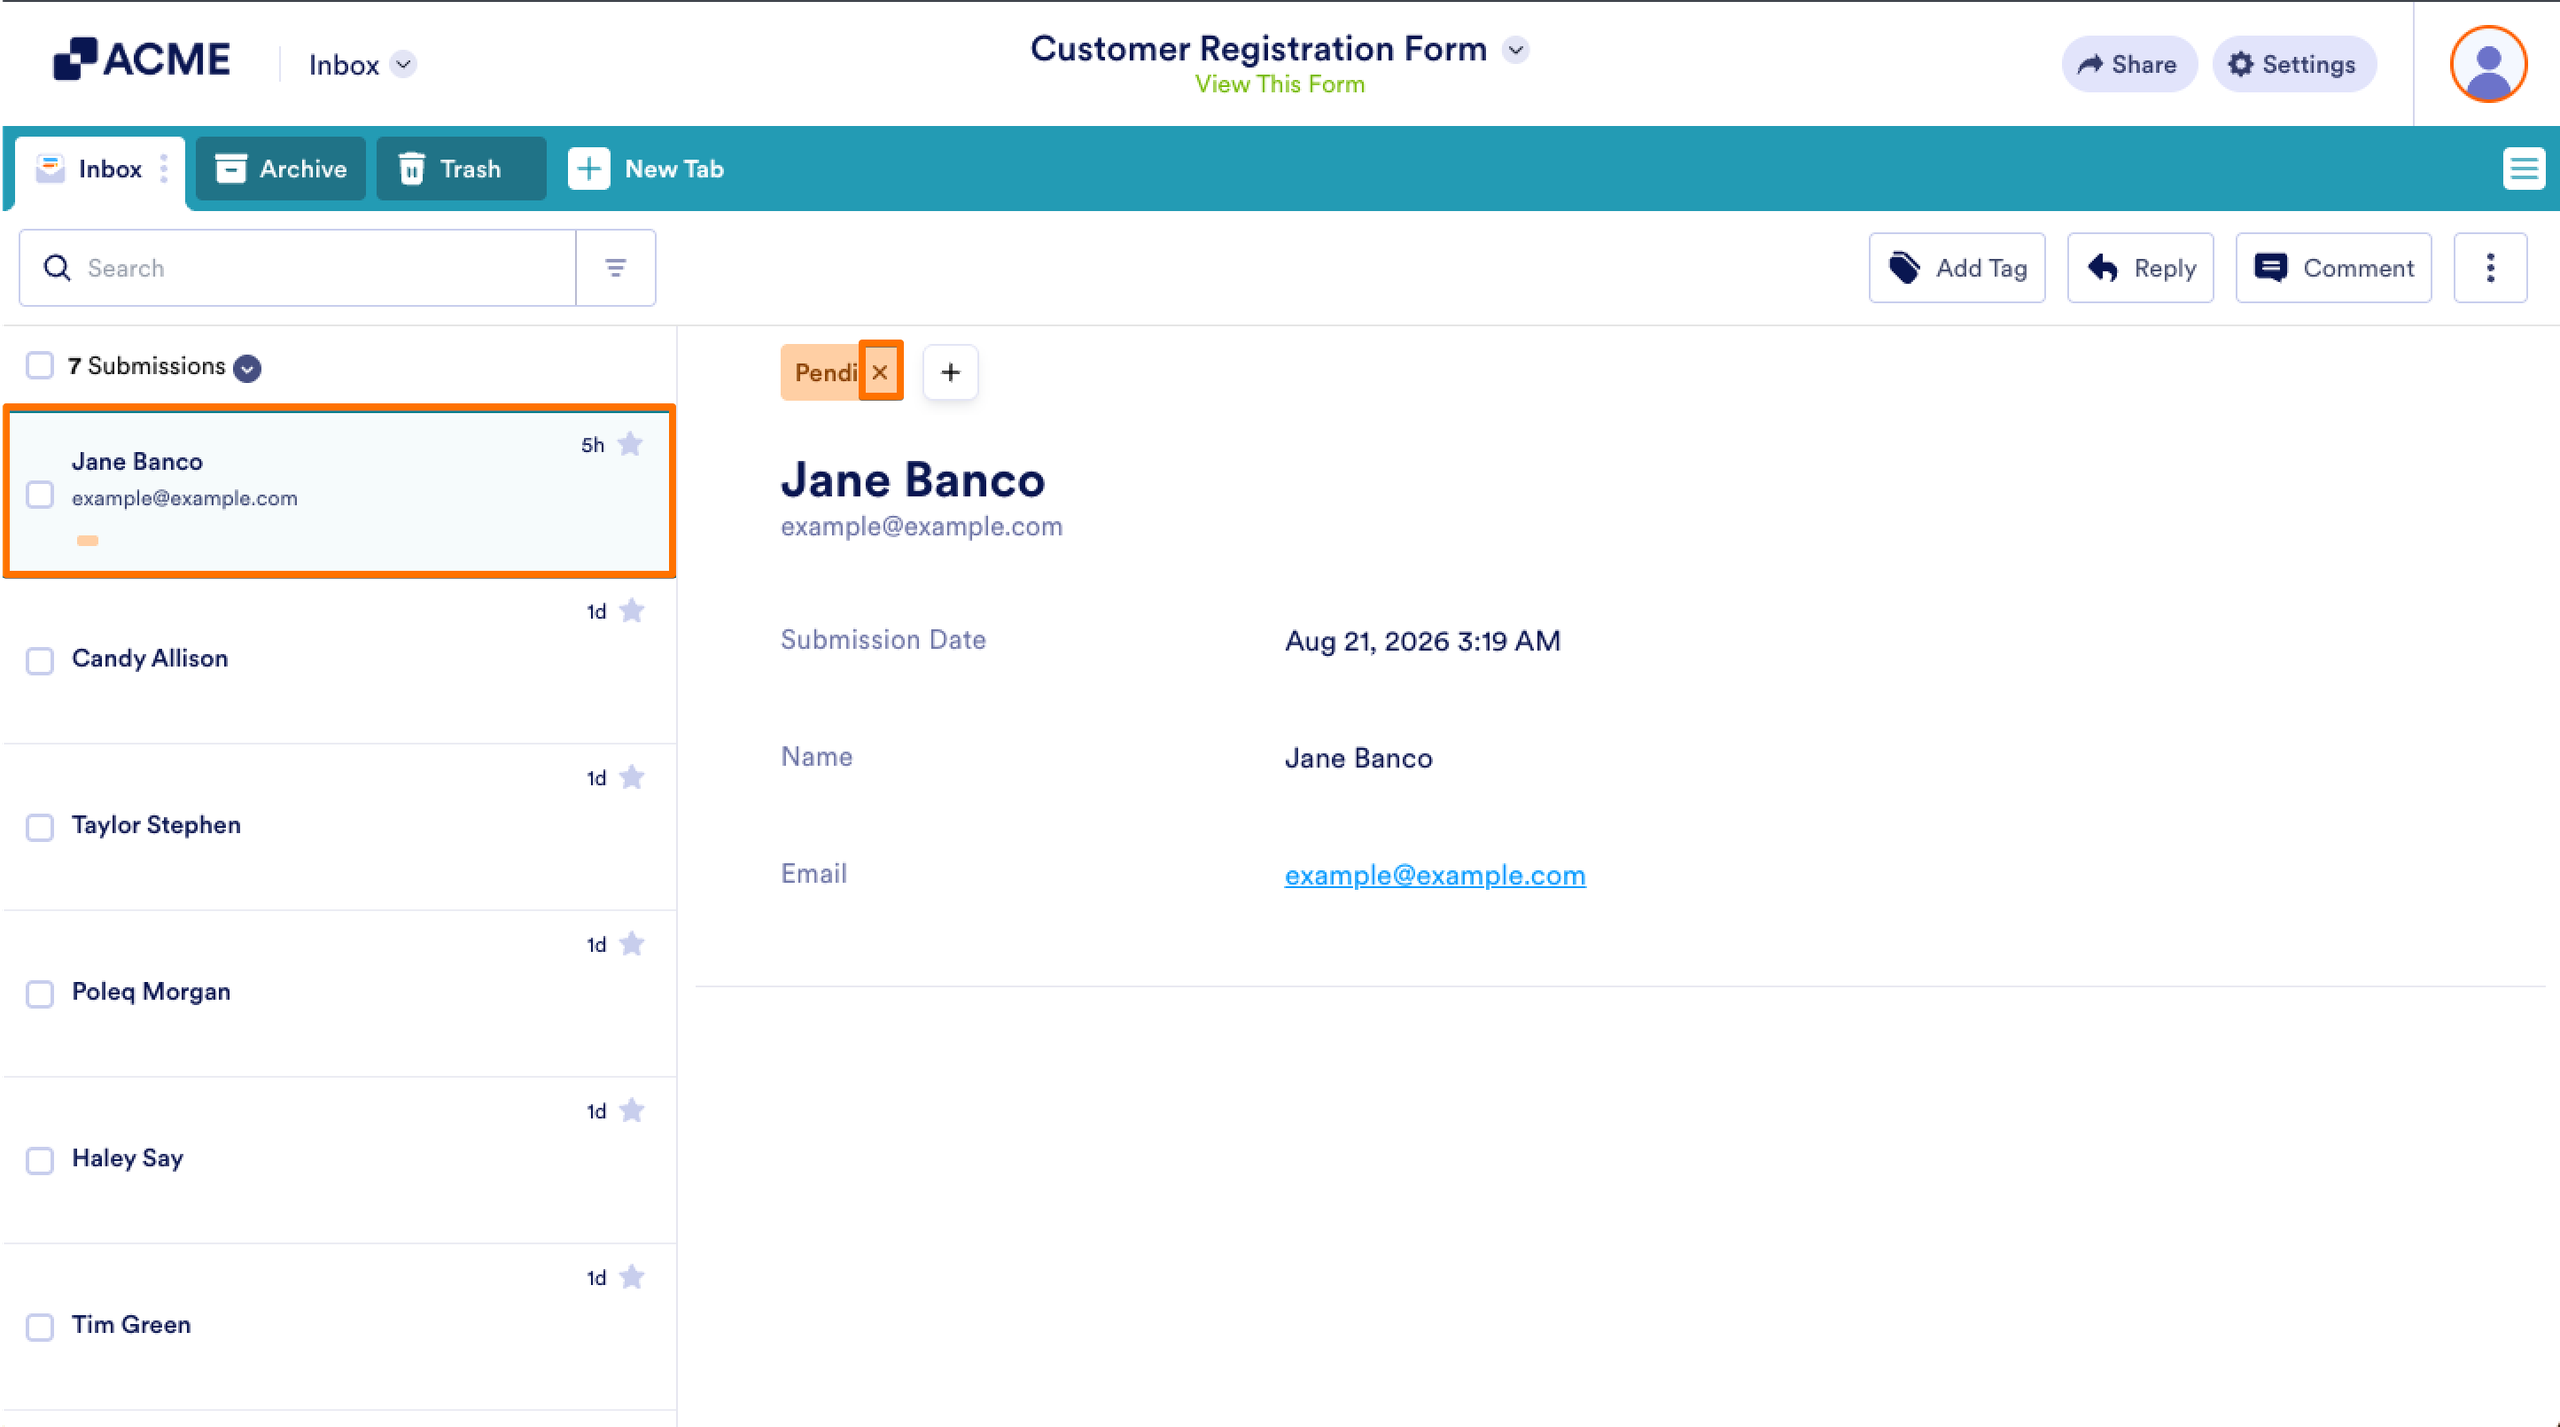
You can also click on the + button next to the last submission tag, then, in the menu that appears, click on the tags with checkmarks to deselect them.
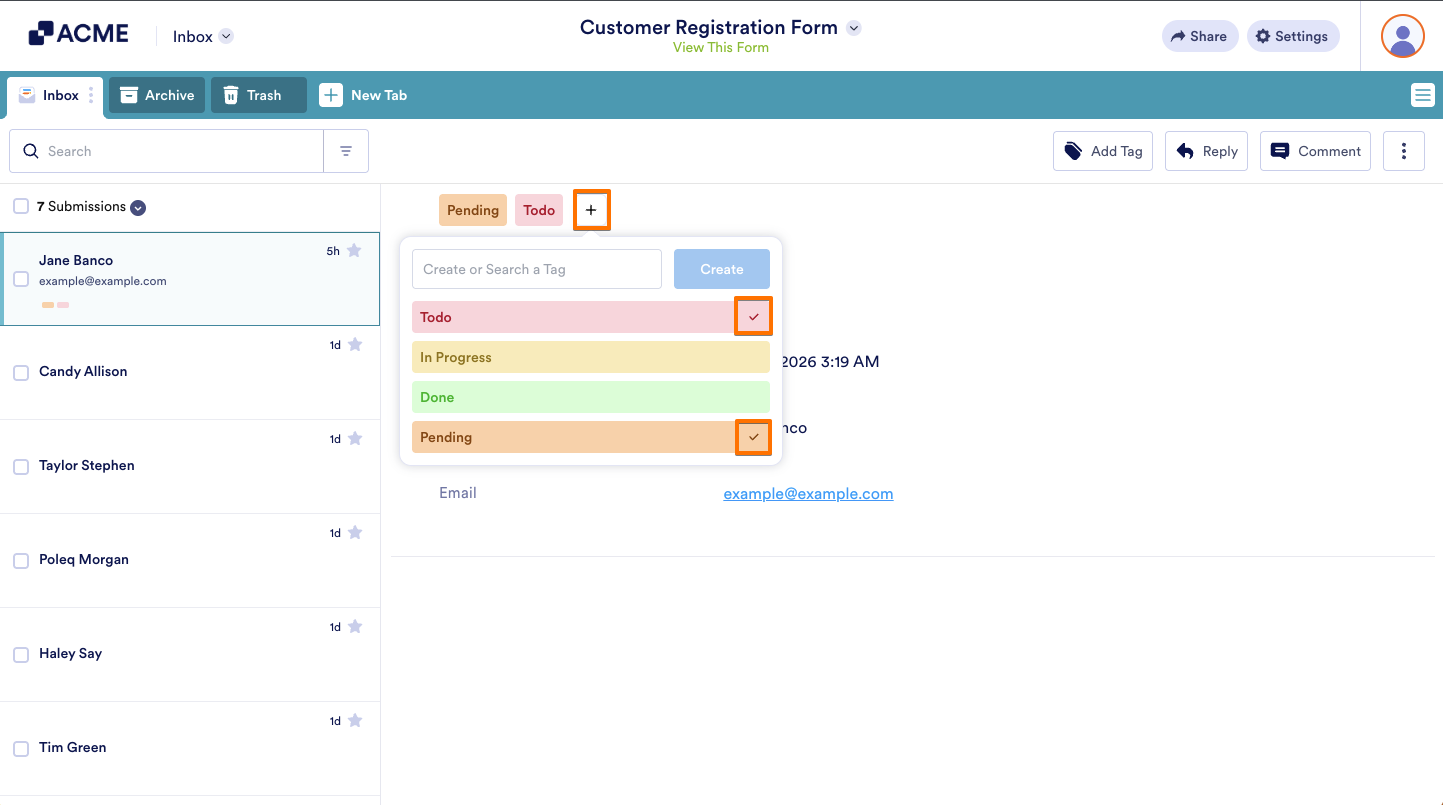
That’s it. The tag will no longer appear on the submission.
Note
When you remove a tag from a submission, you don’t delete the tag itself. You can still use it again later.
Managing Tags
You can manage all tags used across your Inbox in one central place. It’s easy to create new tags, edit their names and colors, or remove them entirely to keep your Inbox organized and consistent. Here’s the quick way to do it:
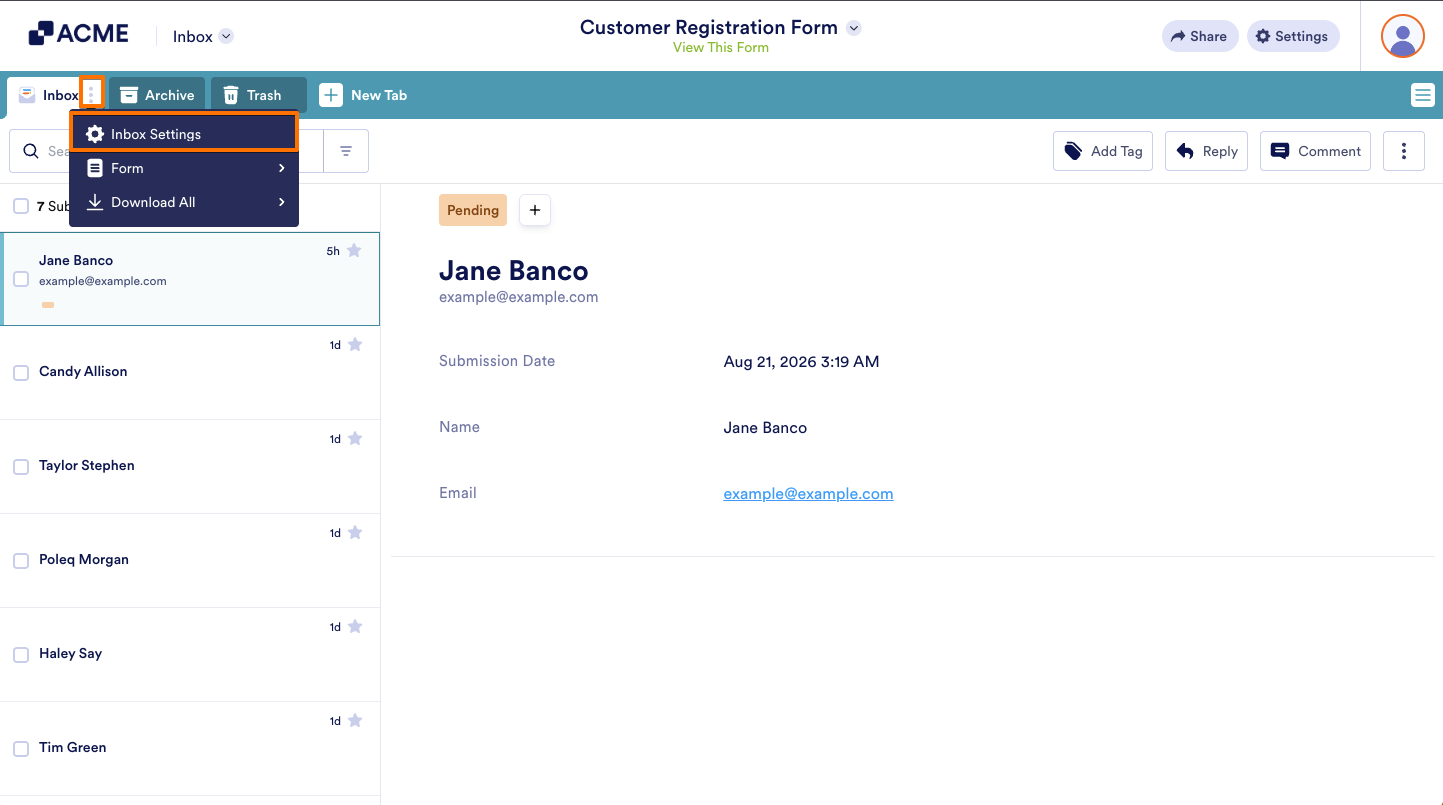
- In Inbox, on the right side of the main Inbox tab, click on the Three Dots icon.
- Then, in the menu that appears, click on Inbox Settings.
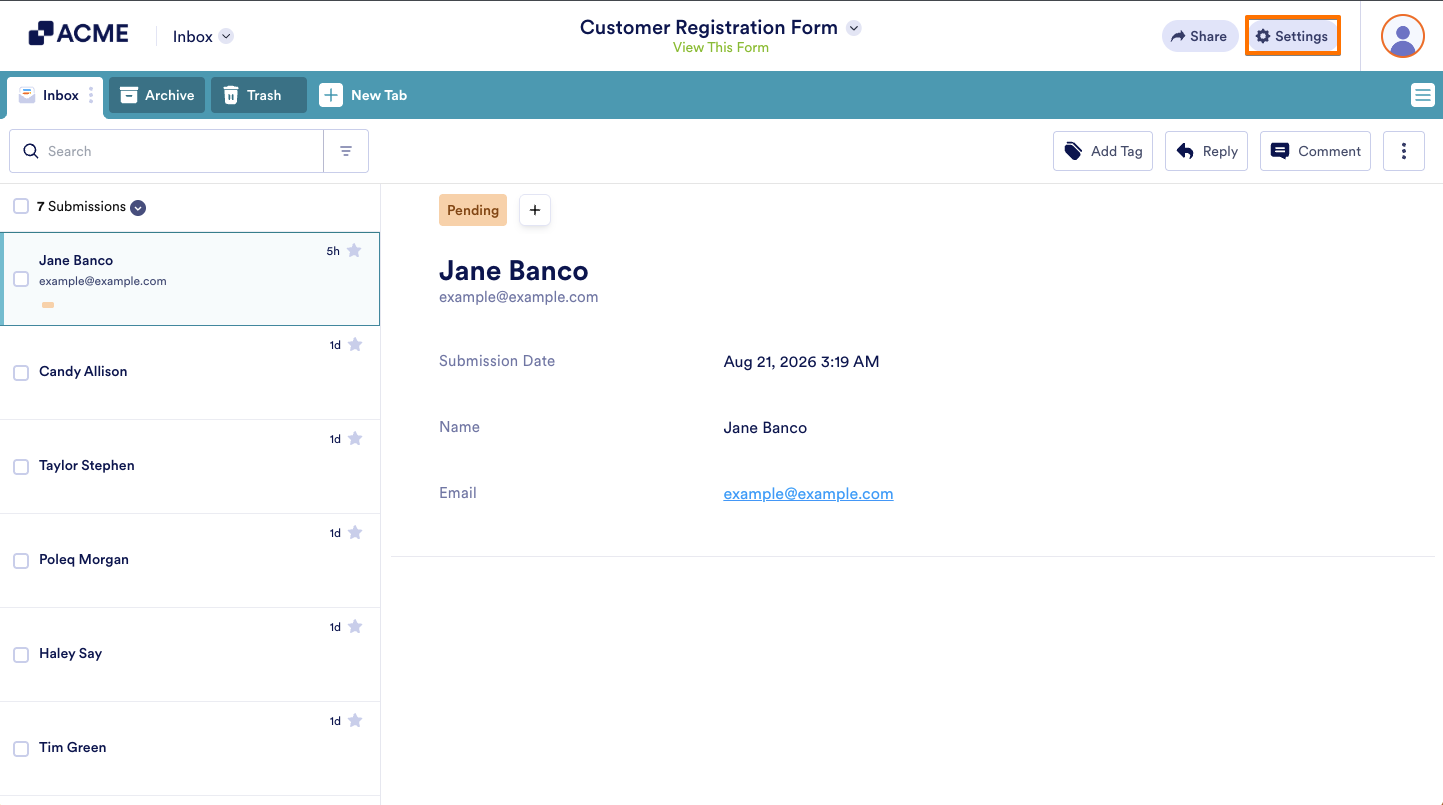
You can also open Inbox Settings from the Settings button on the top-right side of the page.
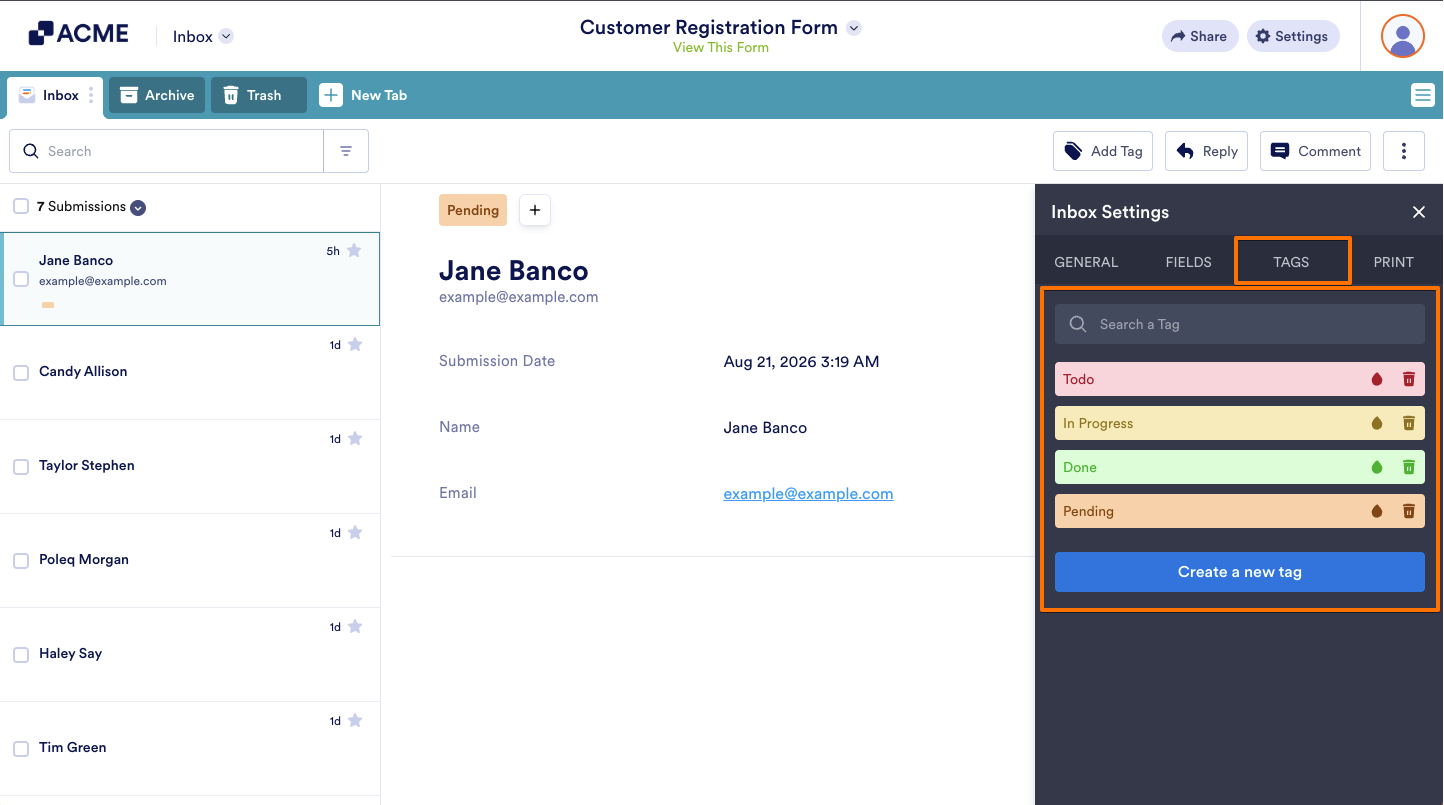
- Now, in the Inbox Settings menu that opens on the right side of the page, under the Tags tab, you’ll see all the tags you can use. You can use the search bar at the top of the list to find one easily, and you can also perform the following changes and actions:
- Create New Tags
- Rename Tags
- Change Tag Color
- Delete Tags
Note
Any changes you make will apply to all submissions that use the tag.
Creating New Tags
You can create new tags at any time to better organize your submissions. Here’s how to do it:
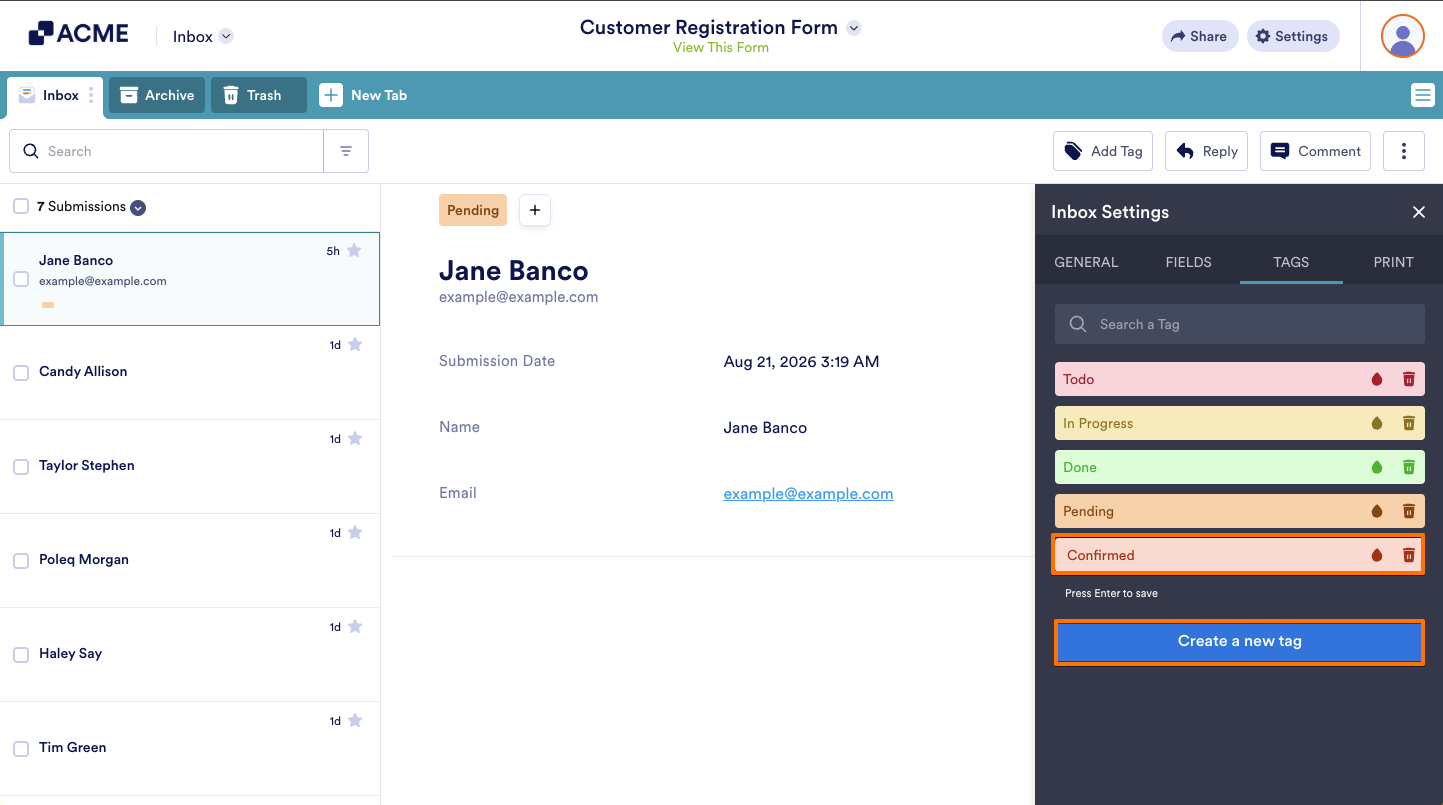
- While you’re under the Tags tab of the Inbox Settings menu in Inbox, click on Create a New Tag.
- Then, in the input box that appears, enter a unique name for your tag and press the Enter key on your keyboard to save your changes.
Note
You can also click on the Create a New Tag button to save the current tag and immediately create another one.
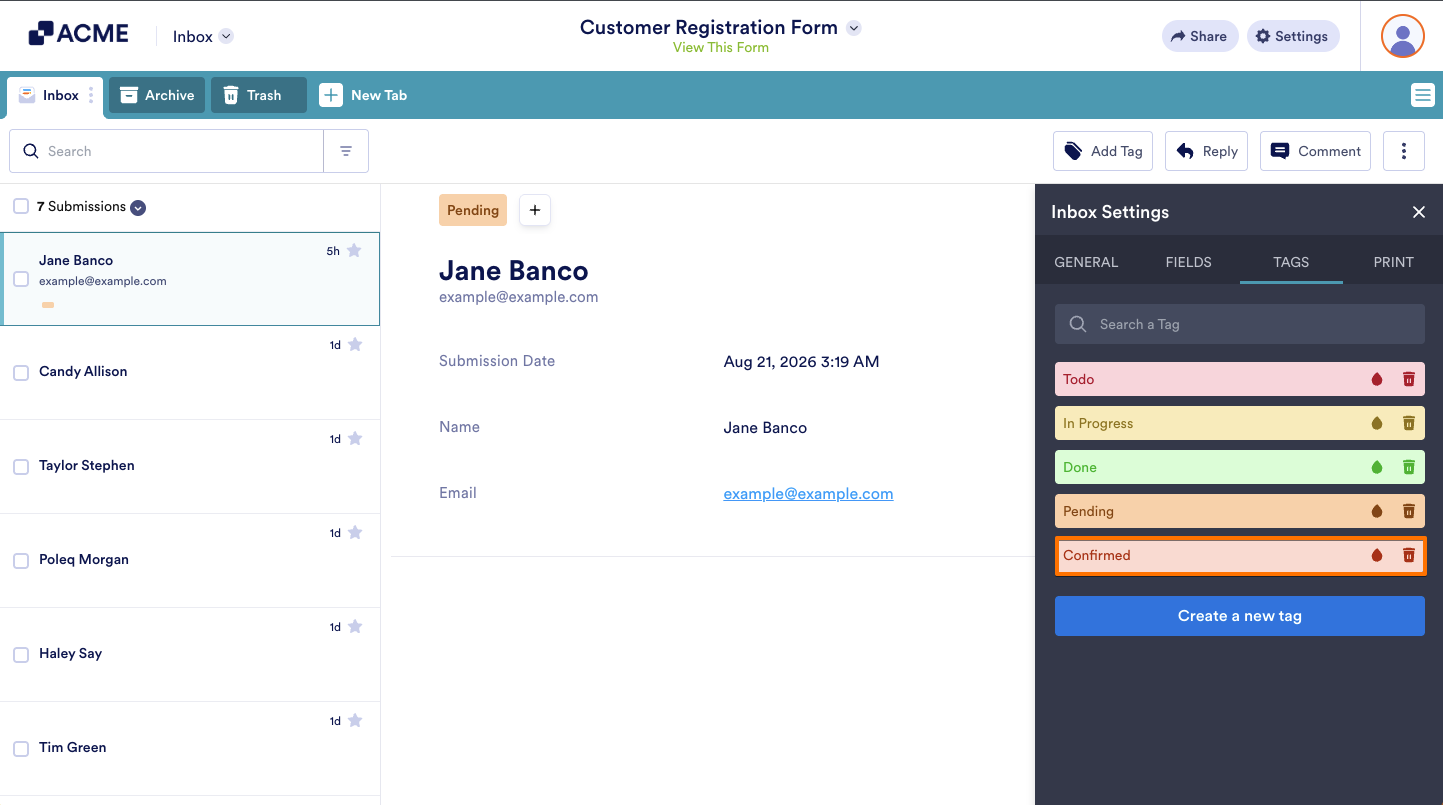
That’s it. The new tag will be added to your tag list.
Note
There’s no limit to the number of tags you can create in an Inbox.
You must use a unique name for each tag. You can’t create two tags with the same name.
New tags are initially assigned a color that’s unique from existing tags, but you can use the same color for multiple tags. If you want to change a tag’s color, check out Changing Tag Color below.
You create tags for a specific Inbox. Tags you create in one Inbox won’t appear in other Inboxes.
Renaming Tags
If you need to update a tag’s name, you can rename it in just a few steps. You can do it in a few simple steps:
- While you’re under the Tags tab of the Inbox Settings menu in Inbox, click on the tag you want to rename.
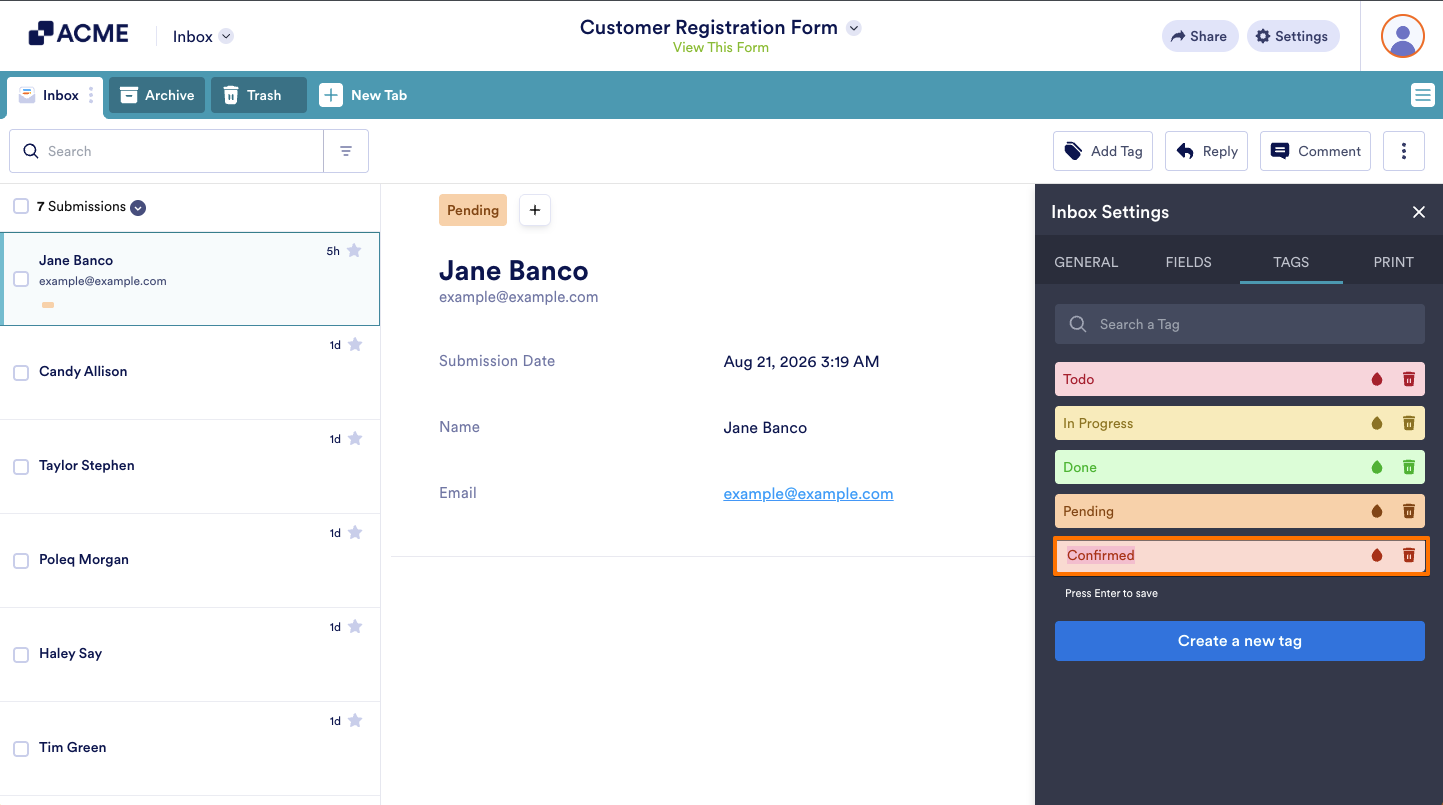
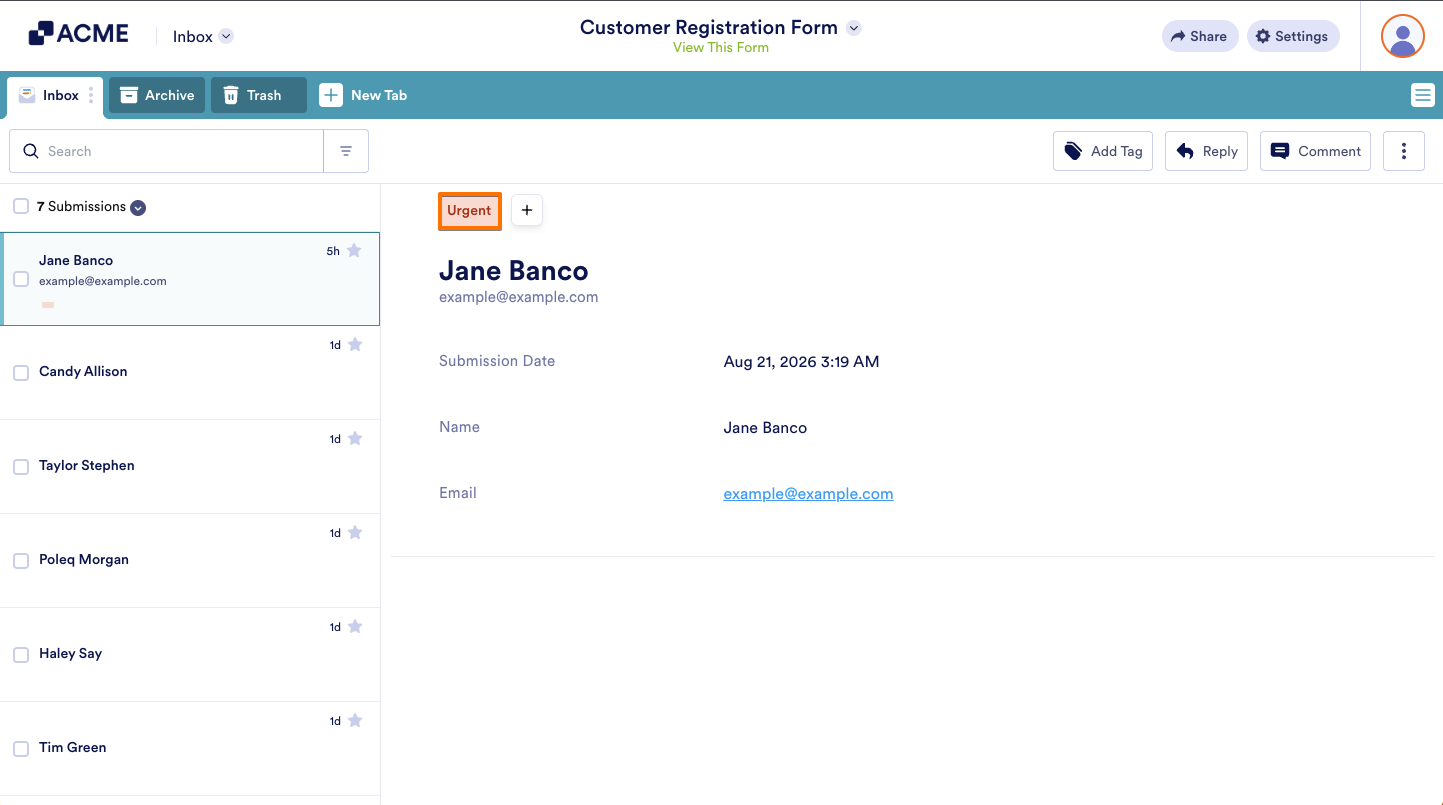
- Then, enter a new unique name for your tag and press the Enter key on your keyboard to save your changes.
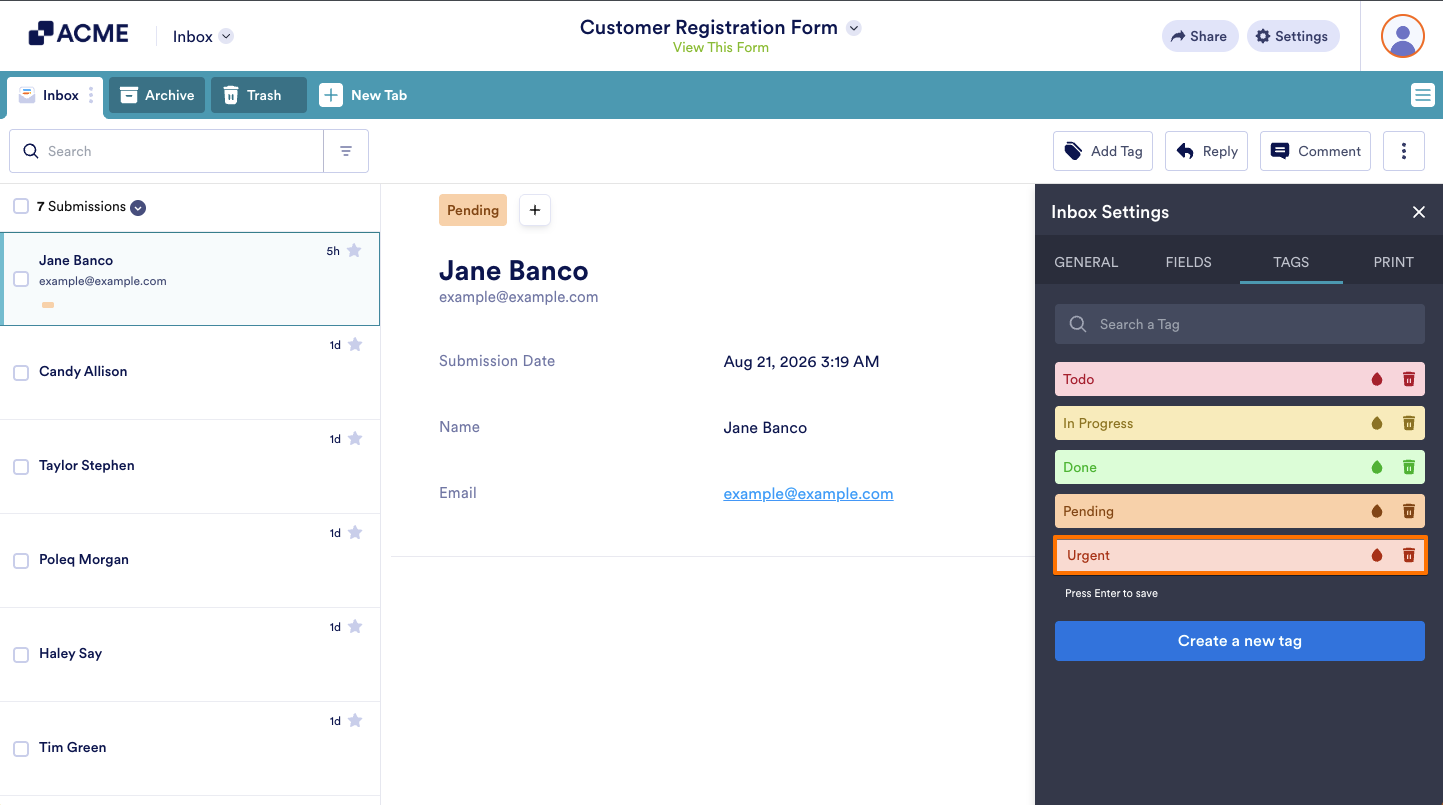
That’s it. The tag’s new name will appear wherever it’s used.
Changing Tag Color
You can change a tag’s color to make it easier to recognize at a glance. Here’s the quick way to do it:
- While you’re in the Tags tab of the Inbox Settings menu in Inbox, click on the Ink Drop icon on the right side of the tag whose color you want to change.
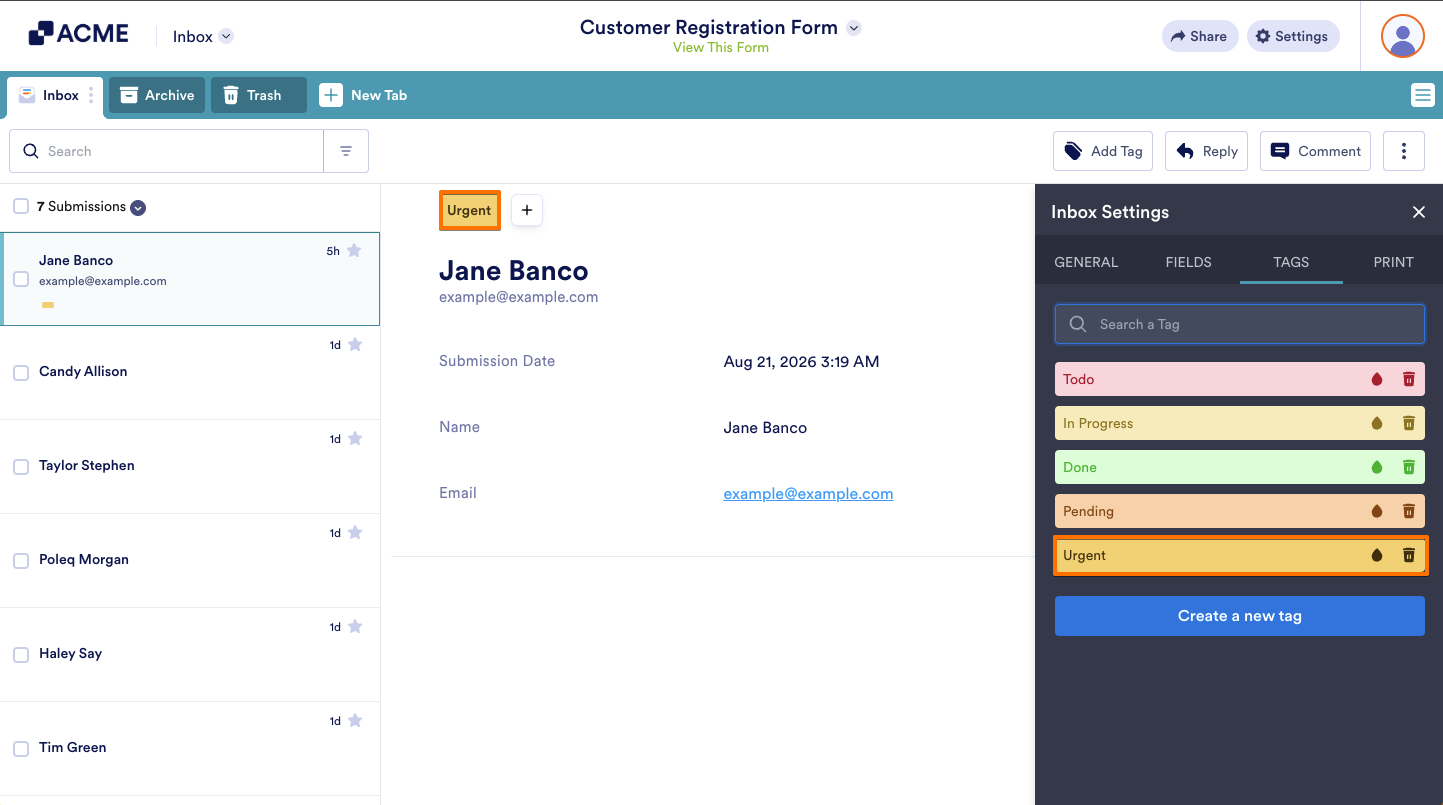
- Then, in the Select a Color menu that appears, click on the color you want to use for your tag.
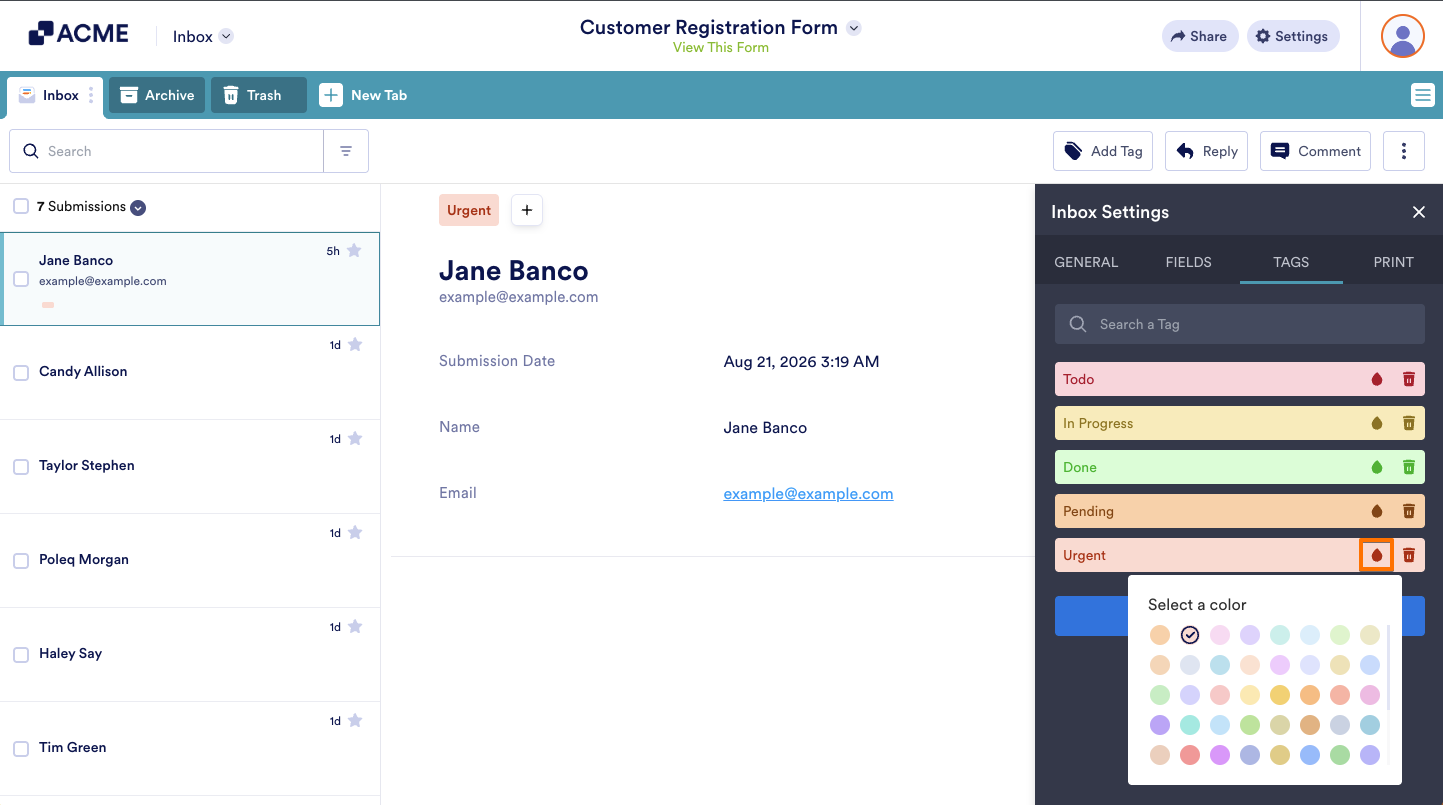
That’s it. The updated color will appear on all submissions that use the tag.
Deleting Tags
If you no longer need a tag, you can remove it from your Inbox. This is how it’s done:
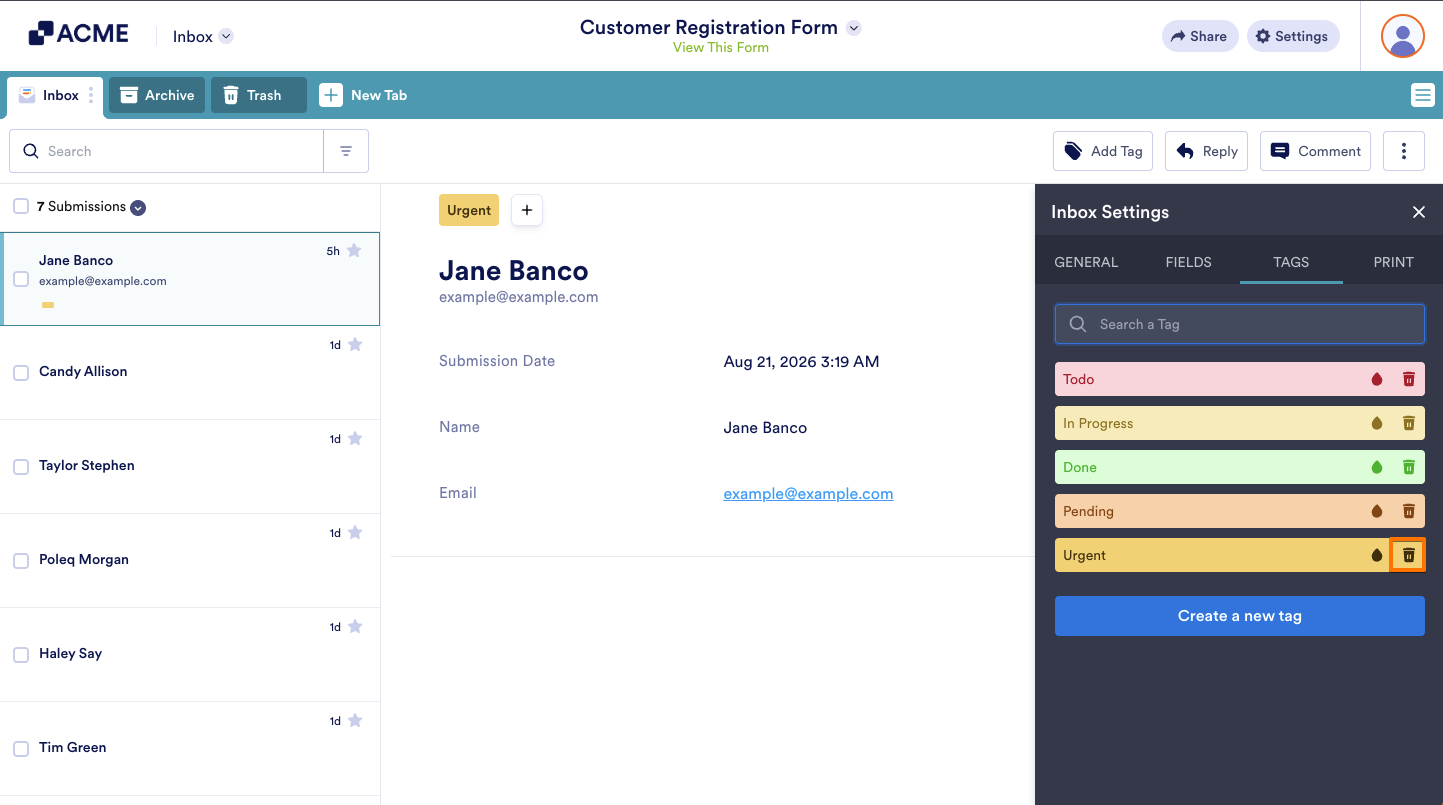
- While you’re under the Tags tab of the Inbox Settings menu in Inbox, click on the Trash icon on the right side of the tag you want to delete.
- Then, in the confirmation window that pops up, click on Delete to proceed.
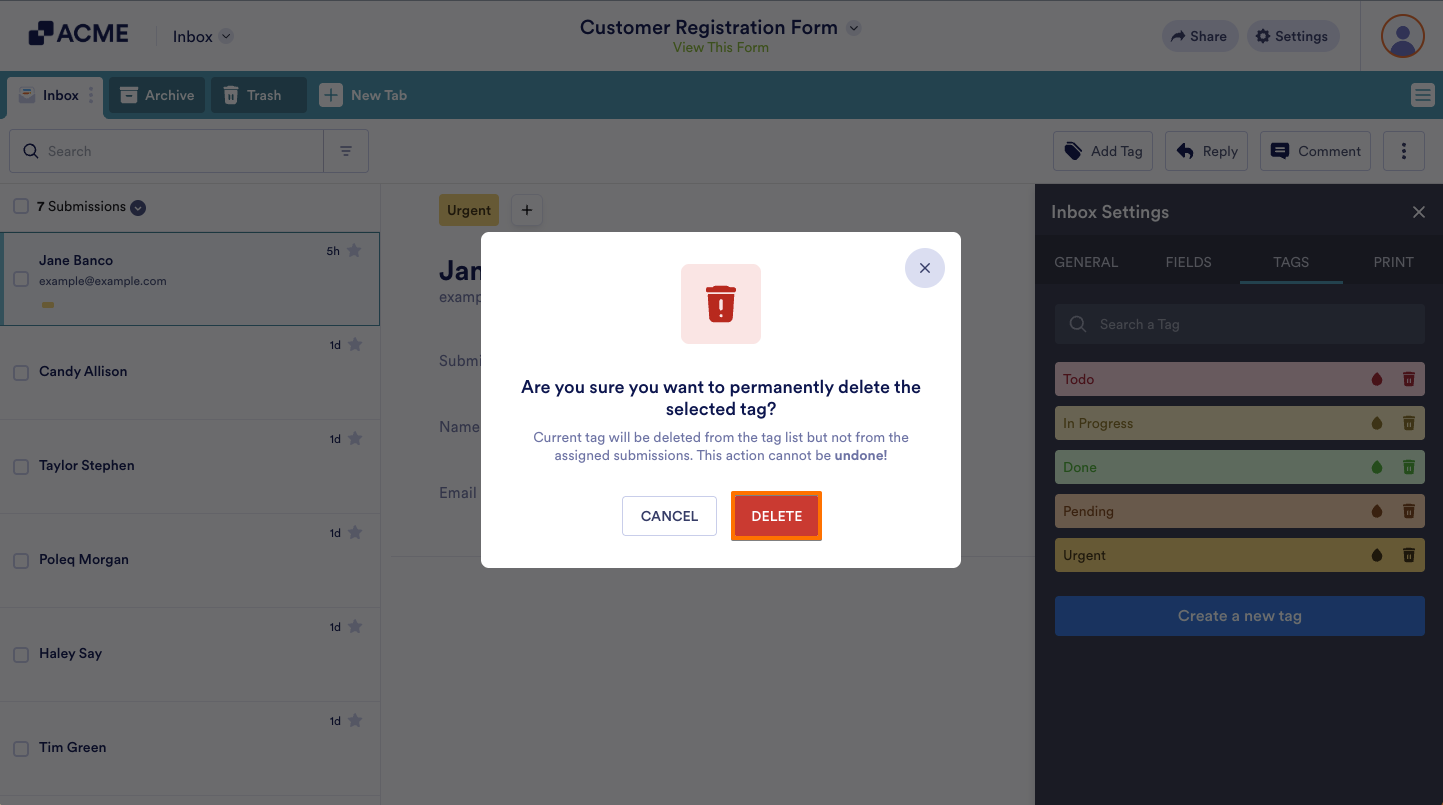
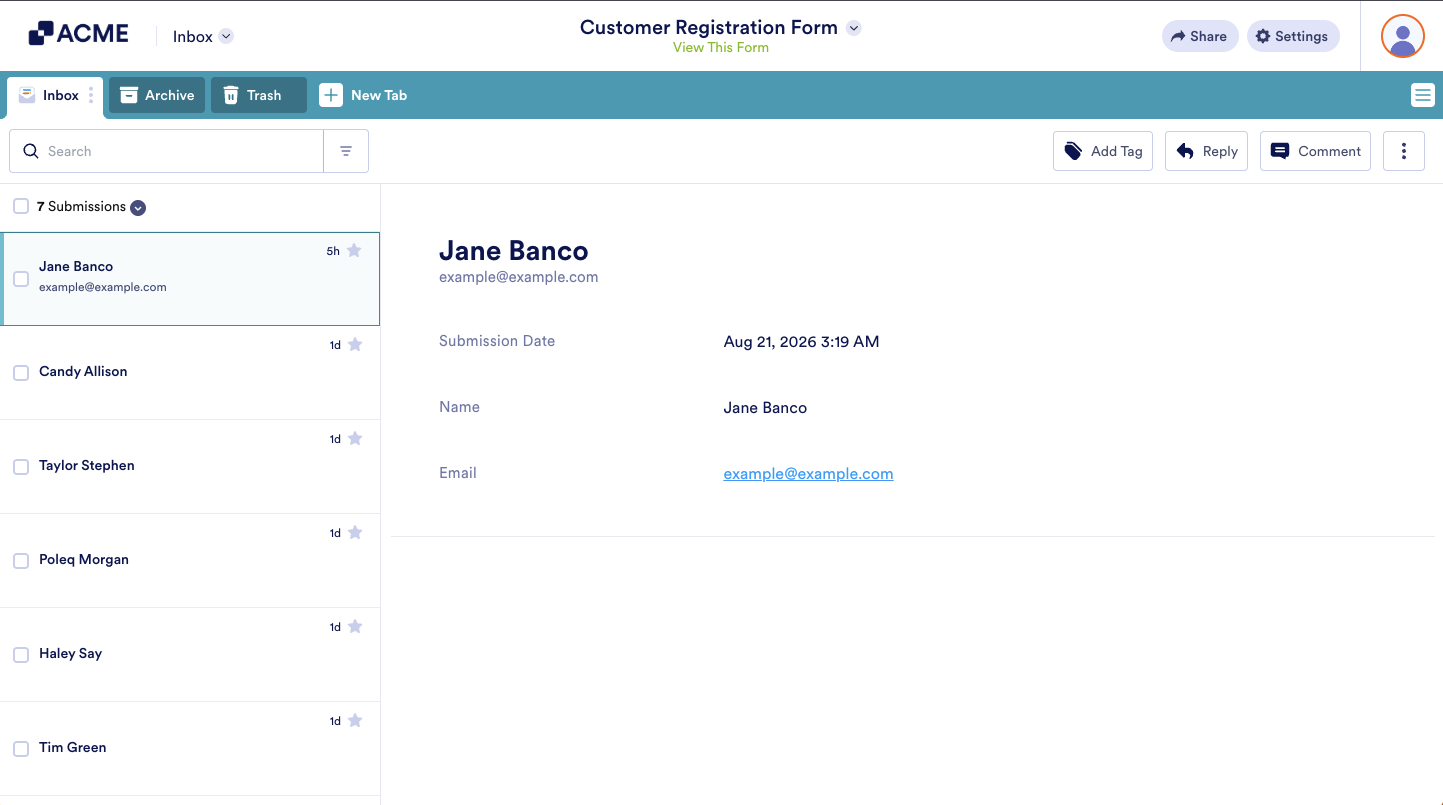
That’s it. The tag will be removed from your tag list and from all submissions where it was used.
Note
When you delete a tag, you remove it permanently from your Inbox. It will also be removed automatically from any submissions where you used it.
If you recreate a tag that you previously deleted, it won’t be added back automatically to the submissions where it was used before. You’ll need to add the tag to those submissions again manually.
Filtering Submissions and Creating Tabs with Tags
You can use tags to filter submissions in your Inbox and quickly view related entries together. You can also create a tab from the filtered results to access them more easily later. Here’s what to do next:
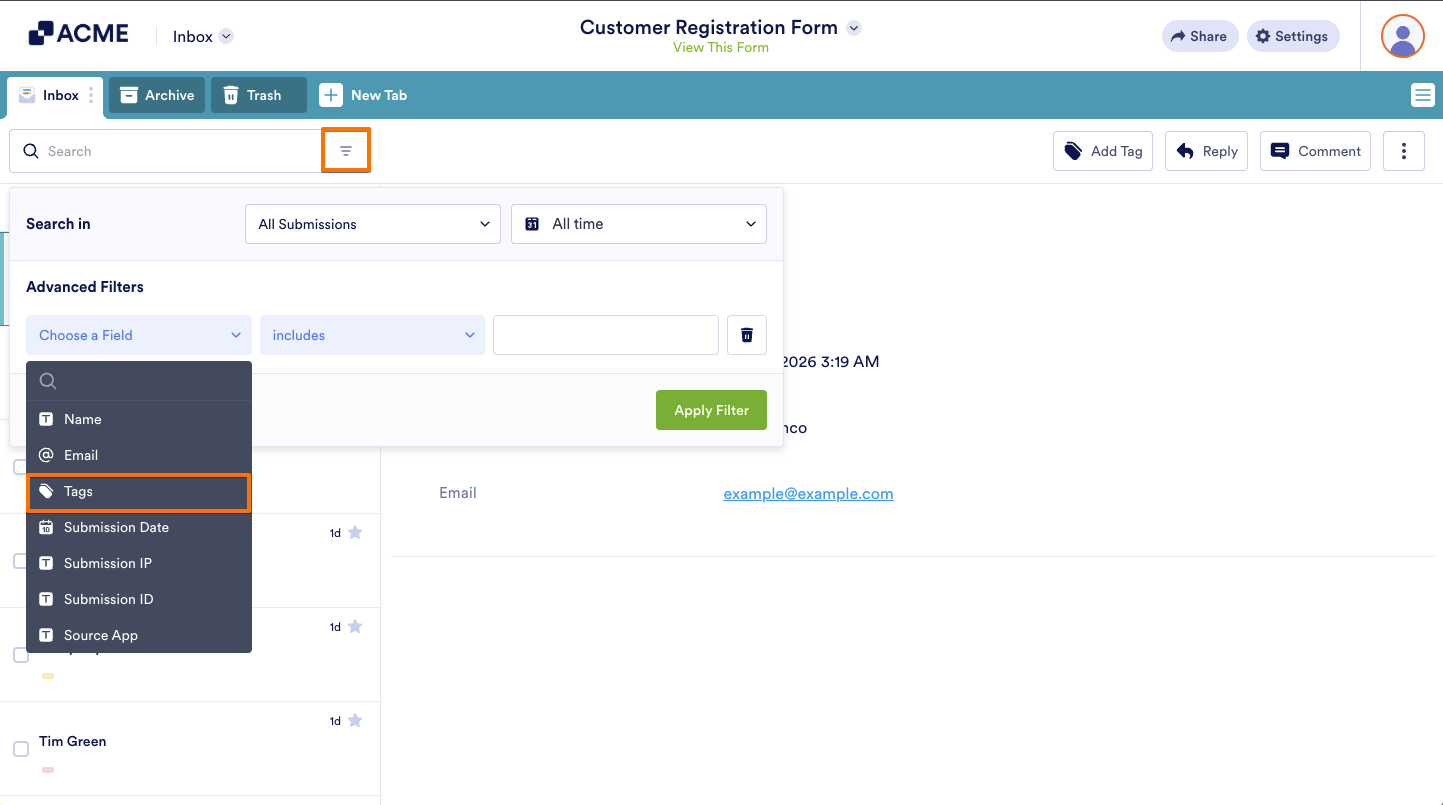
- In Inbox, on the right side of the Search bar at the top-left side of the page, click on the Filter button.
- Then, in the Advanced Filters section of the menu that appears, click on the Choose a Field Dropdown menu and then select Tags.
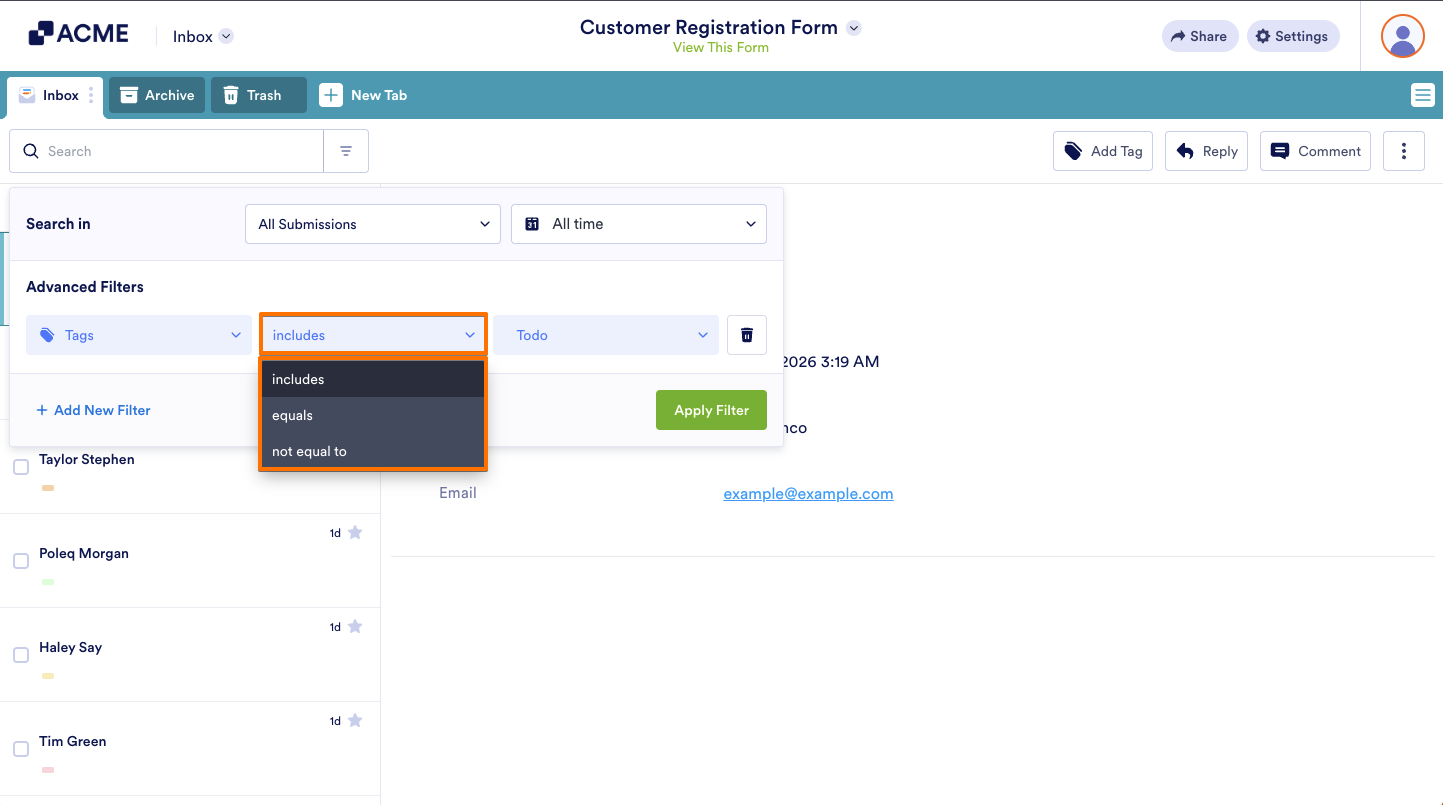
- Now, in the dropdown menu next to it, depending on what you want the filtered results to show, select one of the following options:
- Includes — Keep this option selected if you want to show submissions that contain the selected tag.
- Equal — Select this option if you want to show only submissions that exactly match the selected tag.
- Not Equal — Select this option if you want to show submissions that don’t have the selected tag.
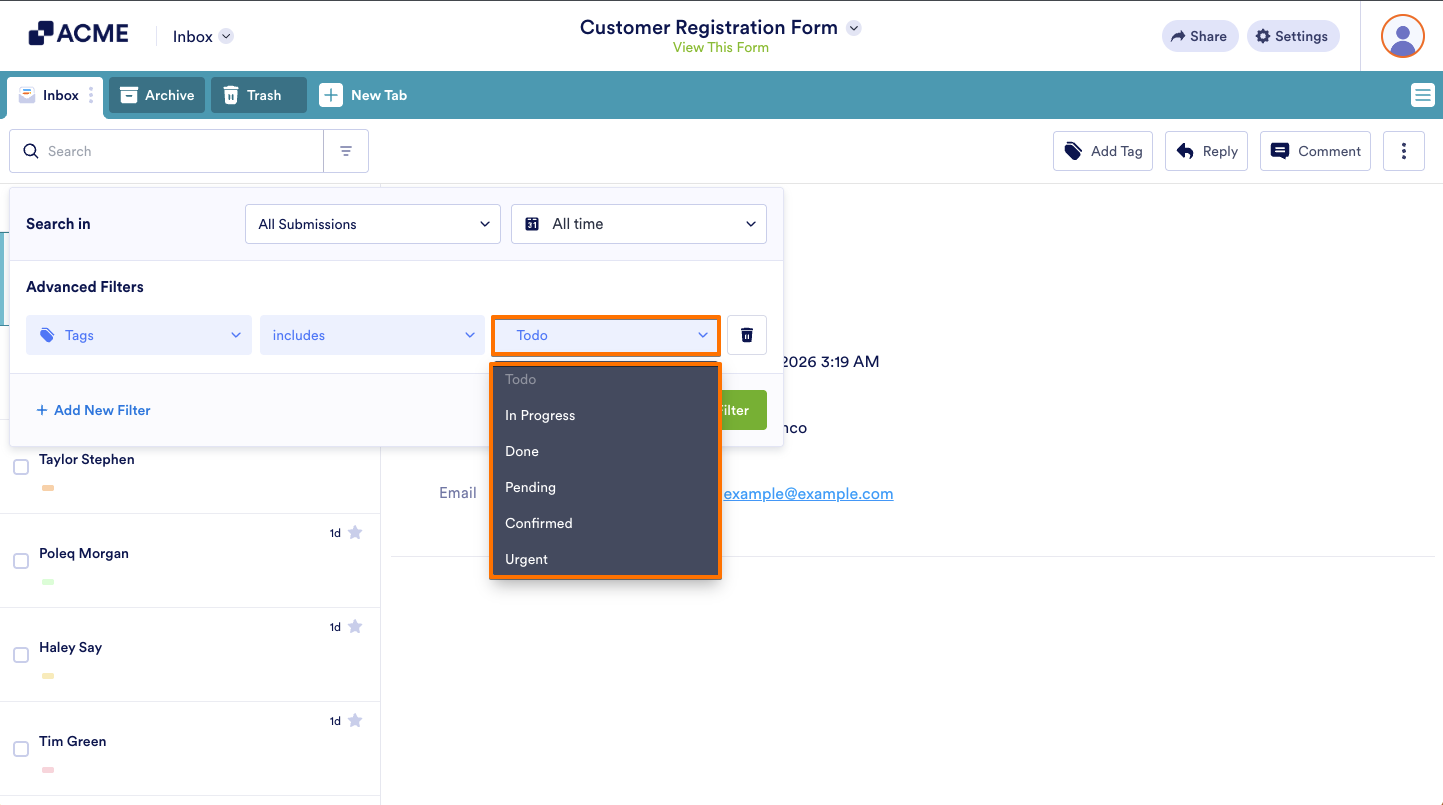
- Next, in the dropdown menu on the right side of the section, select the tag you want to filter by.
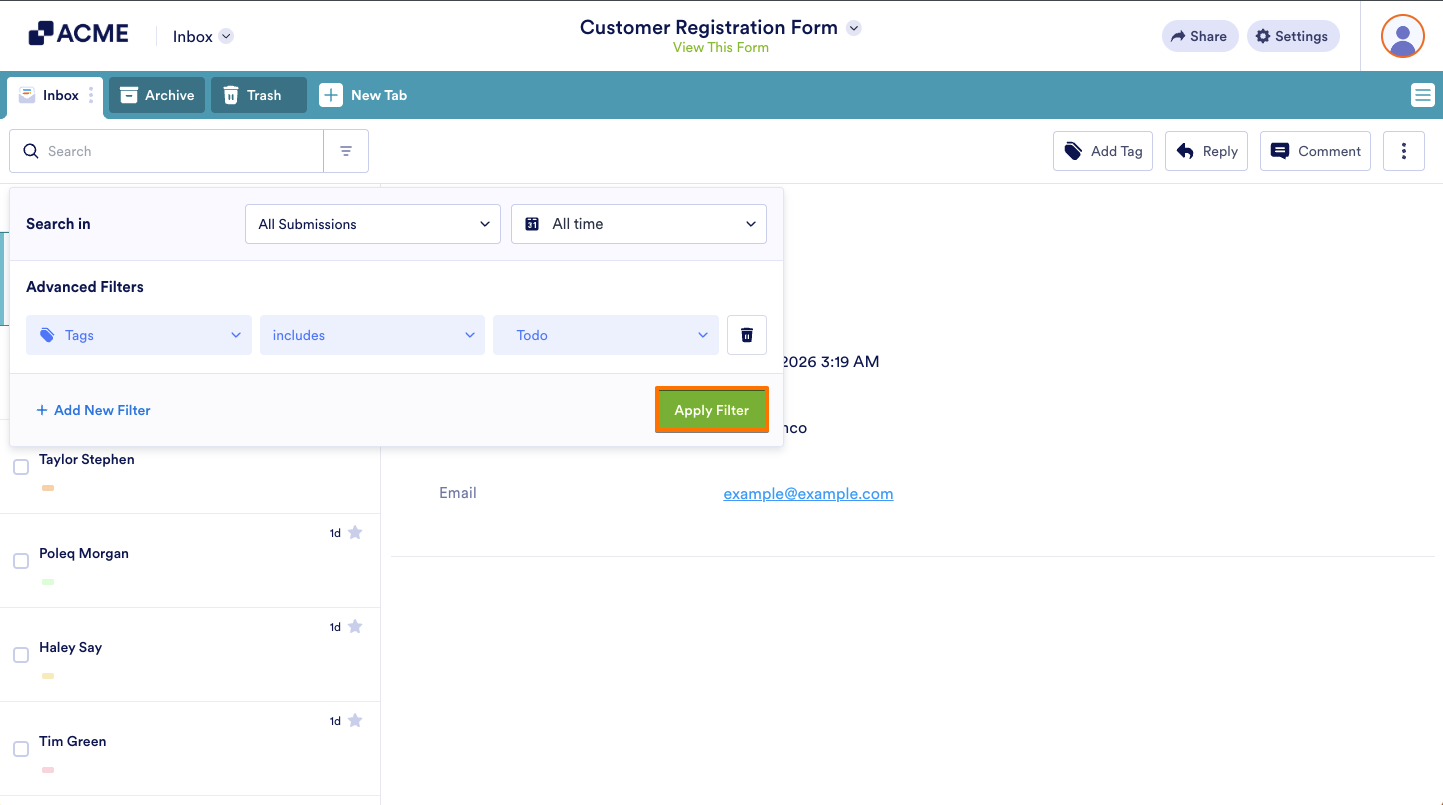
- Then, click on Apply Filter.
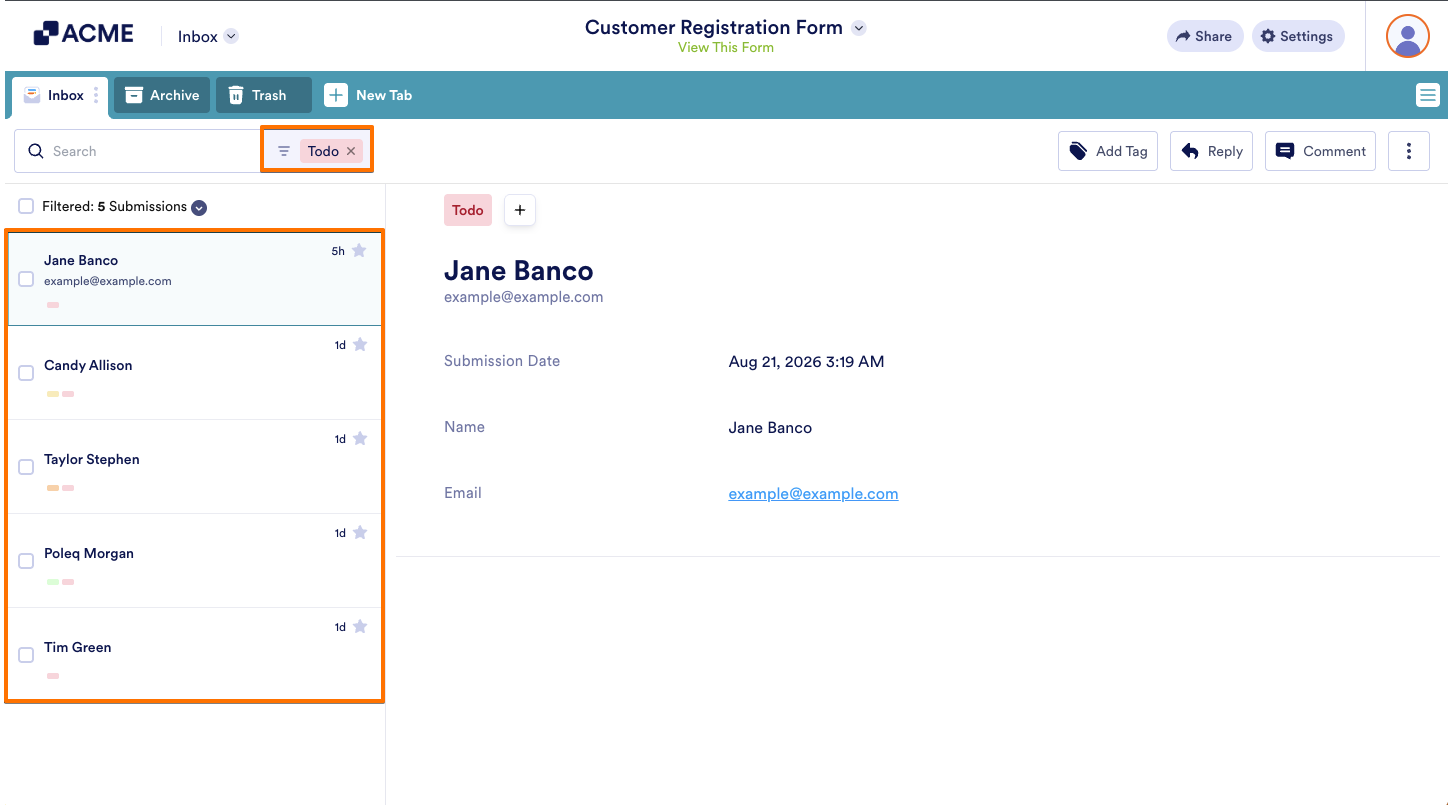
That’s it. The submissions with the tag you selected in the filter will now appear in a new tab.

Send Comment: