The Approval element in Workflows allows you to configure and define outcomes for your approval flow. Aside from the default Approve and Deny options, you can add more outcomes if needed and even set up multistep and parallel approvals.
Adding the Approval Element in Your Workflow
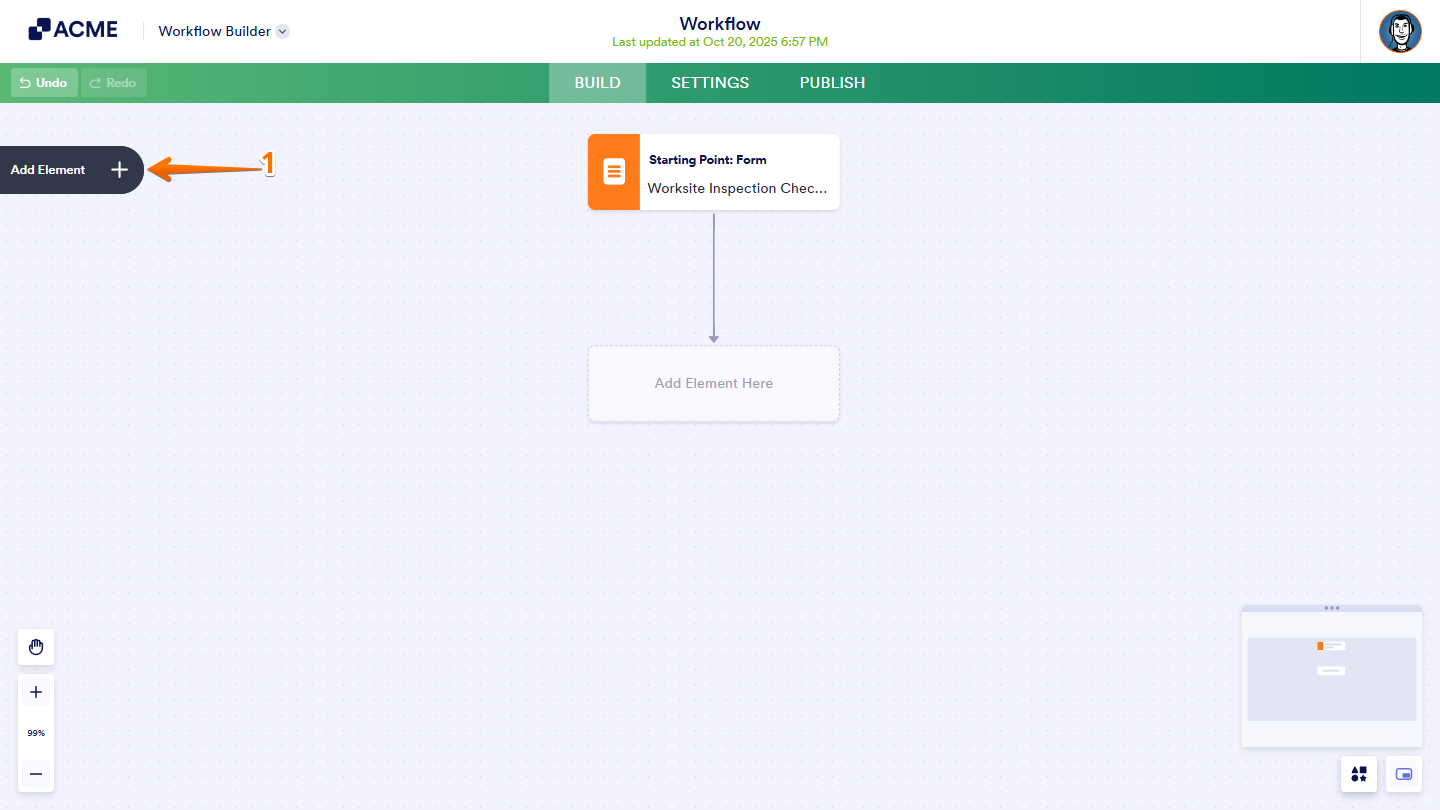
To add an Approval Element in your Workflow. Here’s how:
- In Workflow Builder, click on Add Element on the left side of the page.
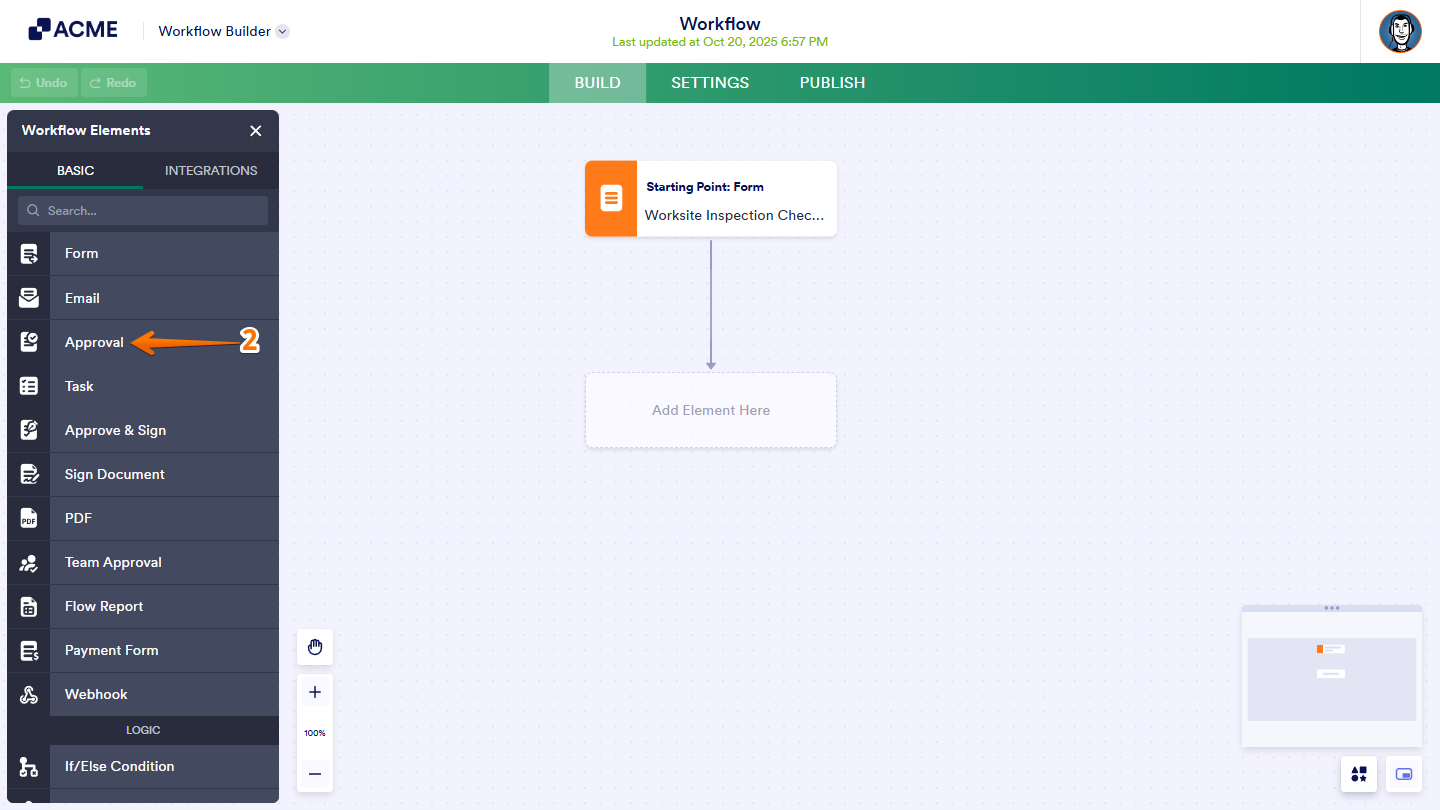
- Then, in the Workflow Elements menu, click on it, or drag and drop the Approval element to add it to your workflow.
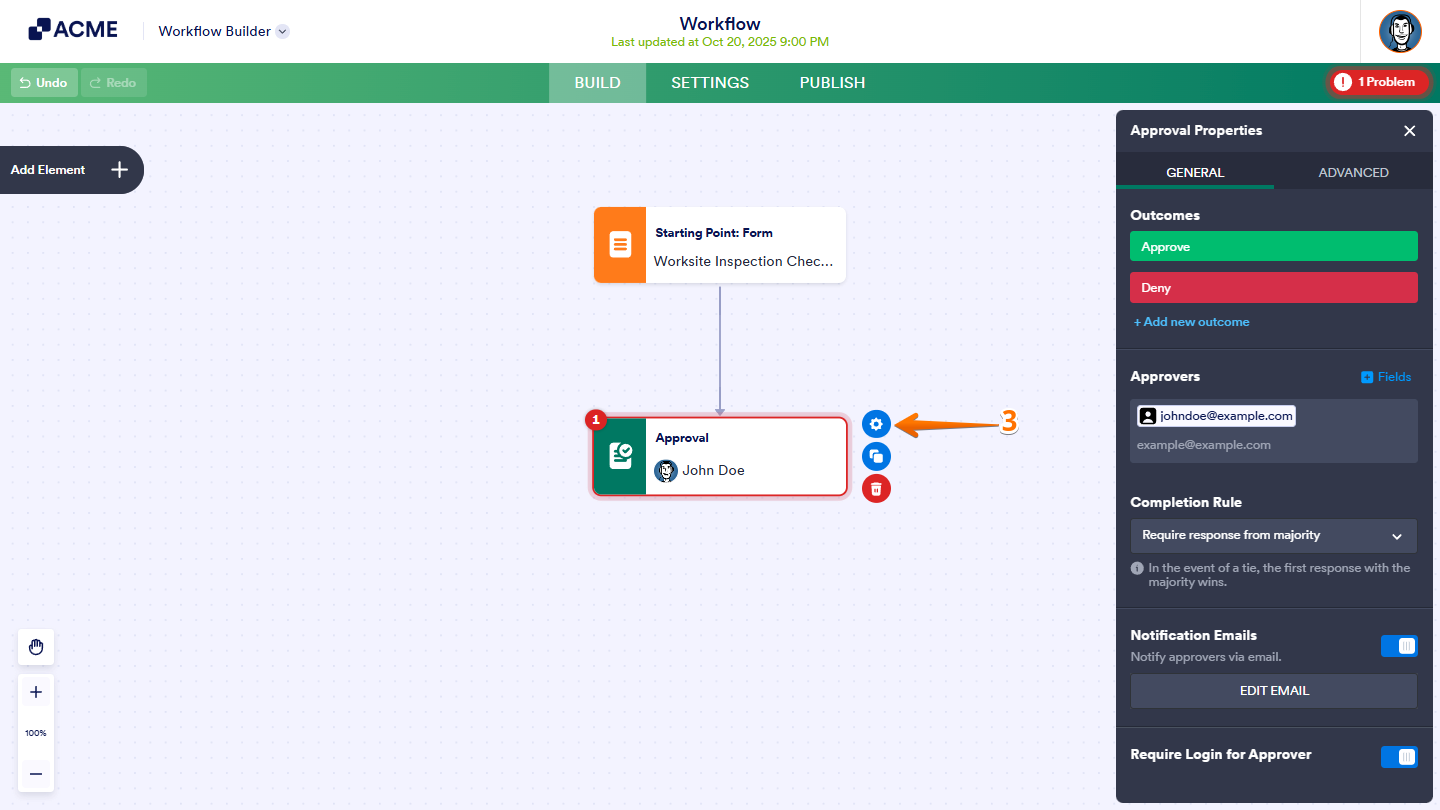
- Now, select the Approval Element that you added and click on Gear icon to open its properties. You’ll find two tabs in the Approval Properties window: General and Advanced.
Let’s discuss in detail each tab below:
Setting Up the General Tab
In the General tab of the Approval element, you’ll find a few options allowing you to configure the approval process to fit your workflow needs. These settings let you define who approves submissions, how approvals are handled, and how notifications are sent. Whether you need to collect signatures, set approval rules, or customize email notifications, the options in this tab give you full control over how approvals are managed in your workflow.
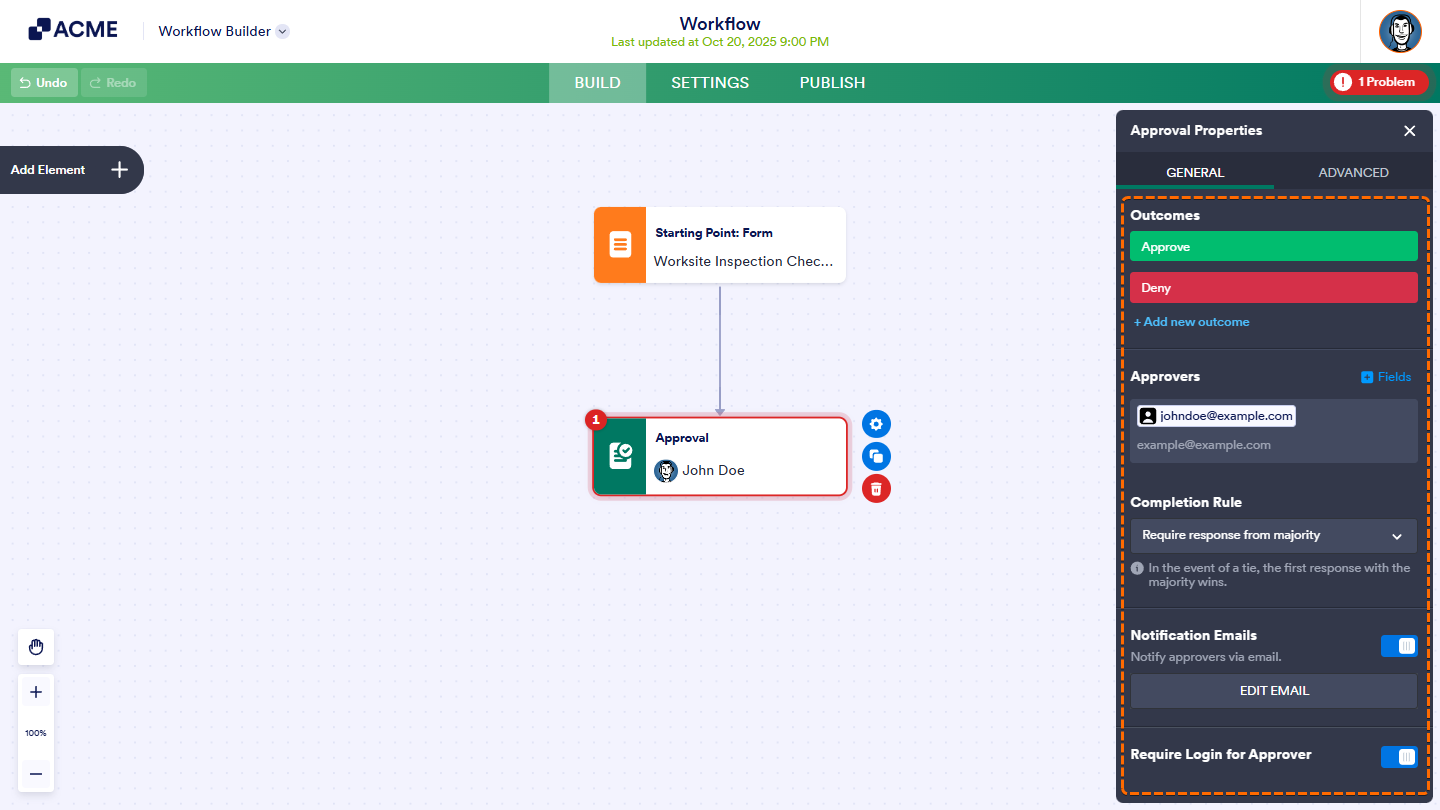
Below is an overview of each feature available in the General Tab:
- Outcome — This section allows adding or removing outcomes based on the requirements of the approval process.
- Approvers — Specify the individuals who will review and take action on submitted requests.
- Completion Rule — Determine how the approval is finalized. You can require a response from the majority, from all assigned approvers, from a single approver, or from a specific number of responses. Enable the notification option to alert approvers by email when a new request is available for review.
- Notification Emails — Select this option to configure automated messages that inform participants about the status of their requests.
- Edit Email — Choose Edit Email to modify the subject and message content of the notification. The recipient address, attached files, and PDF copies can also be defined here.
- Require Login for Approver — Enable this setting if approvers must be signed in before taking action on a request.
Setting Up the Advanced Tab
In the Advanced tab of the Approval element, you’ll find extra options to fine-tune your approval process. These features help you manage tasks that need more time, extra information, or follow-up actions. You can ask for more details, set reminders, or automatically escalate tasks if they’re not completed on time. These settings give you more control over how tasks are handled and ensure they are finished correctly and on schedule.
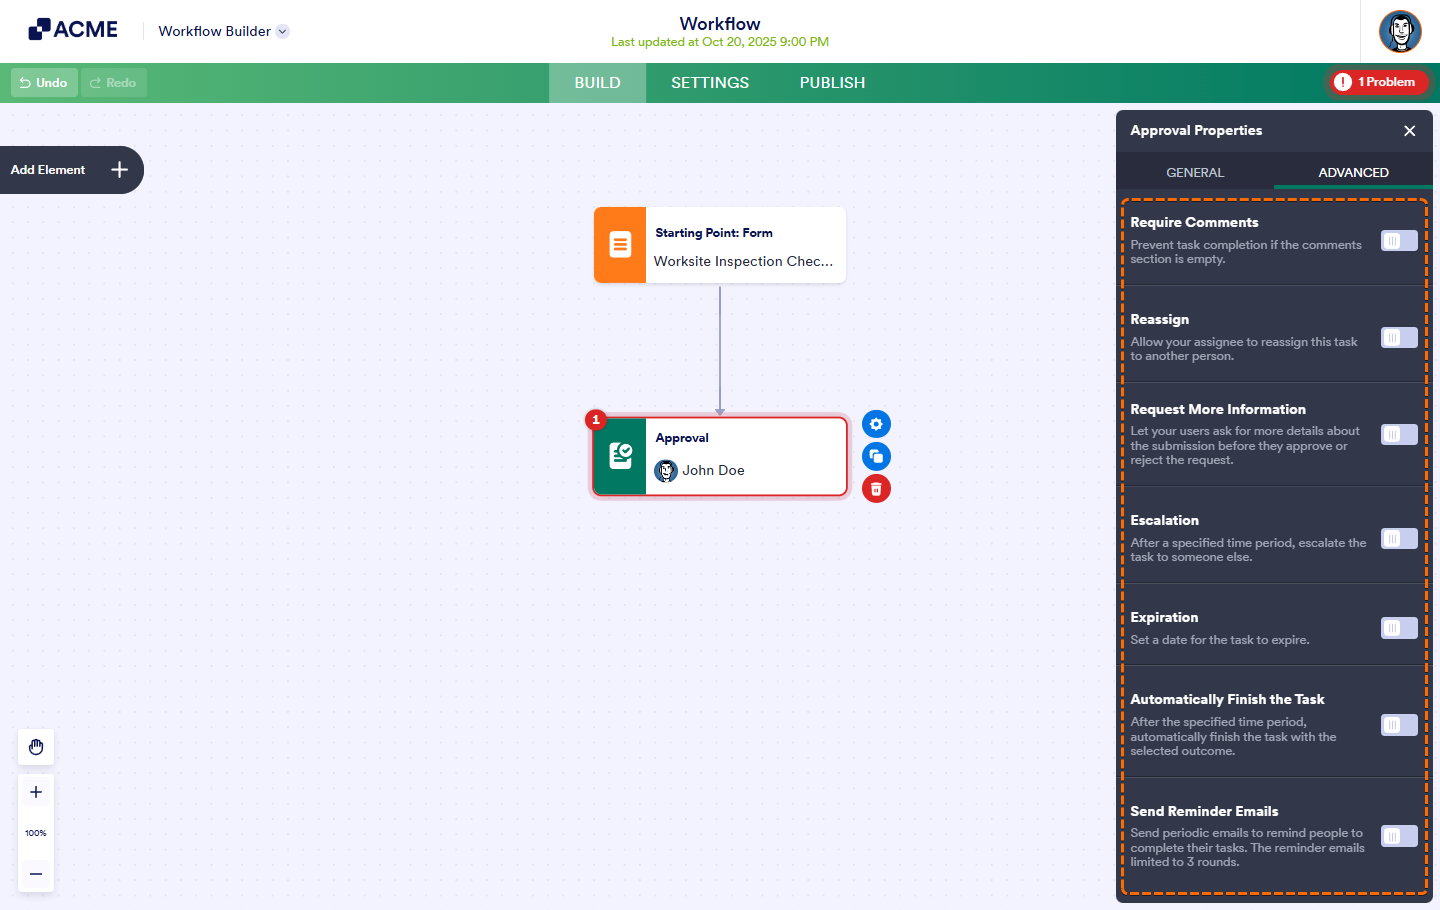
Here’s a quick overview of the options available in the Advanced Tab:
- Require comments — Prevent your approvers from task completion if the comments section is left empty.
- Reassign — Allow your assignee to reassign this task to another person.
- Request more information — Allows your approvers to ask for more details about the submission before they approve or reject the request.
- Escalation — Automatically escalate the task to someone else after a specified time period.
- Expiration — Enable this if you want to set a date for the task to expire.
- Automatically finish the task — Enable this if you want after the specified time period, automatically finish the task with the selected outcome.
- Send reminder emails — Enable this if you want to send periodic reminder emails to encourage people to complete their tasks.
And that’s it! Once done, complete the rest of your workflow by adding more elements and connecting each other in the Workflow Builder.

Send Comment: