Workflows often involve blending online tracking with offline actions, like issuing a parking pass during onboarding. Tasks such as vehicle inspections, equipment delivery, or obtaining signatures happen offline but remain vital to the process.
Workflows‘ Task element simplifies managing these tasks by enabling seamless tracking, assignment, and completion alongside digital ones. It turns submissions into actionable workflows, keeping everything organized, ensuring accountability, and streamlining processes.
Adding Task Elements
Follow these steps to add the Task element to your workflow:
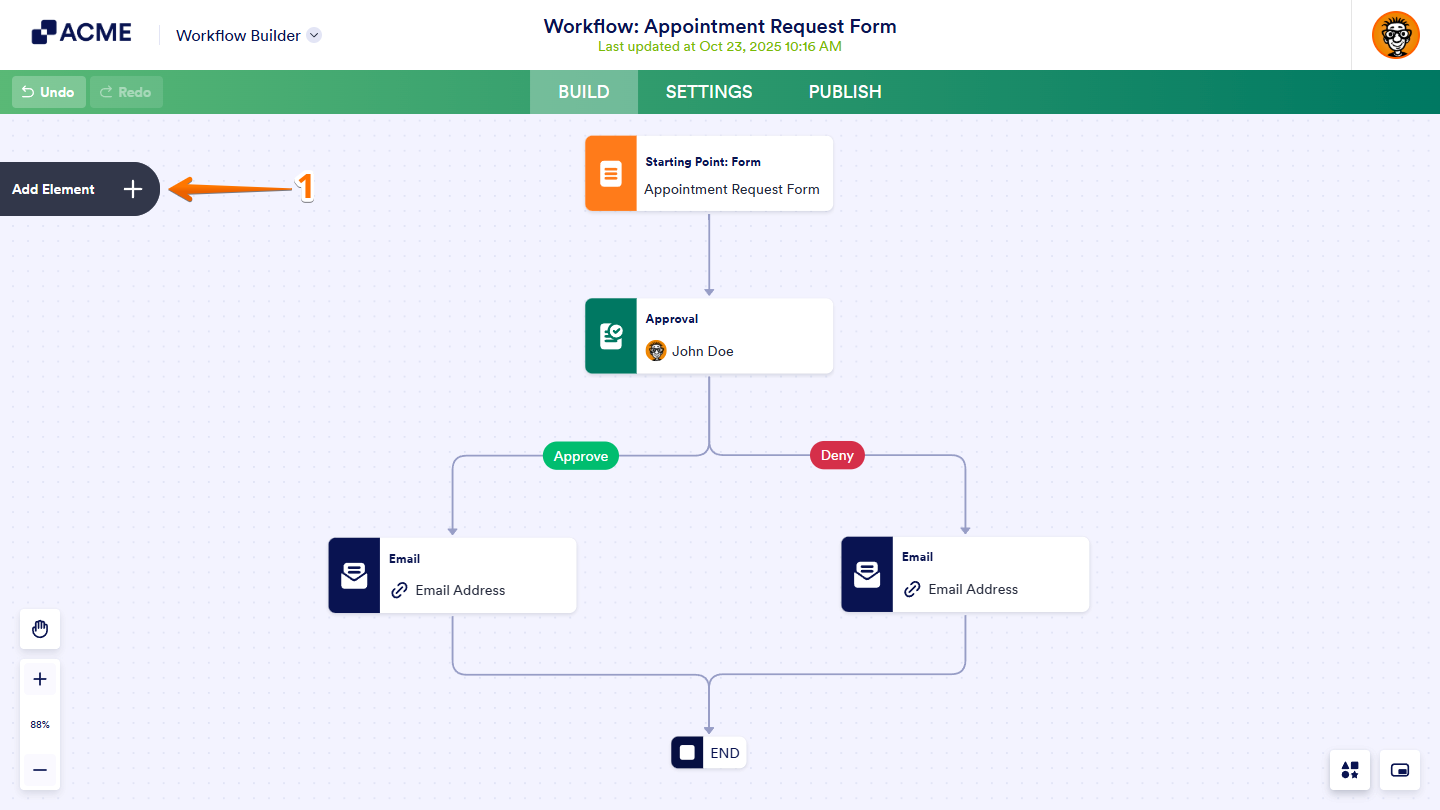
- In Workflow Builder, click on Add Element on the left side of the screen to open the Workflow Elements menu.
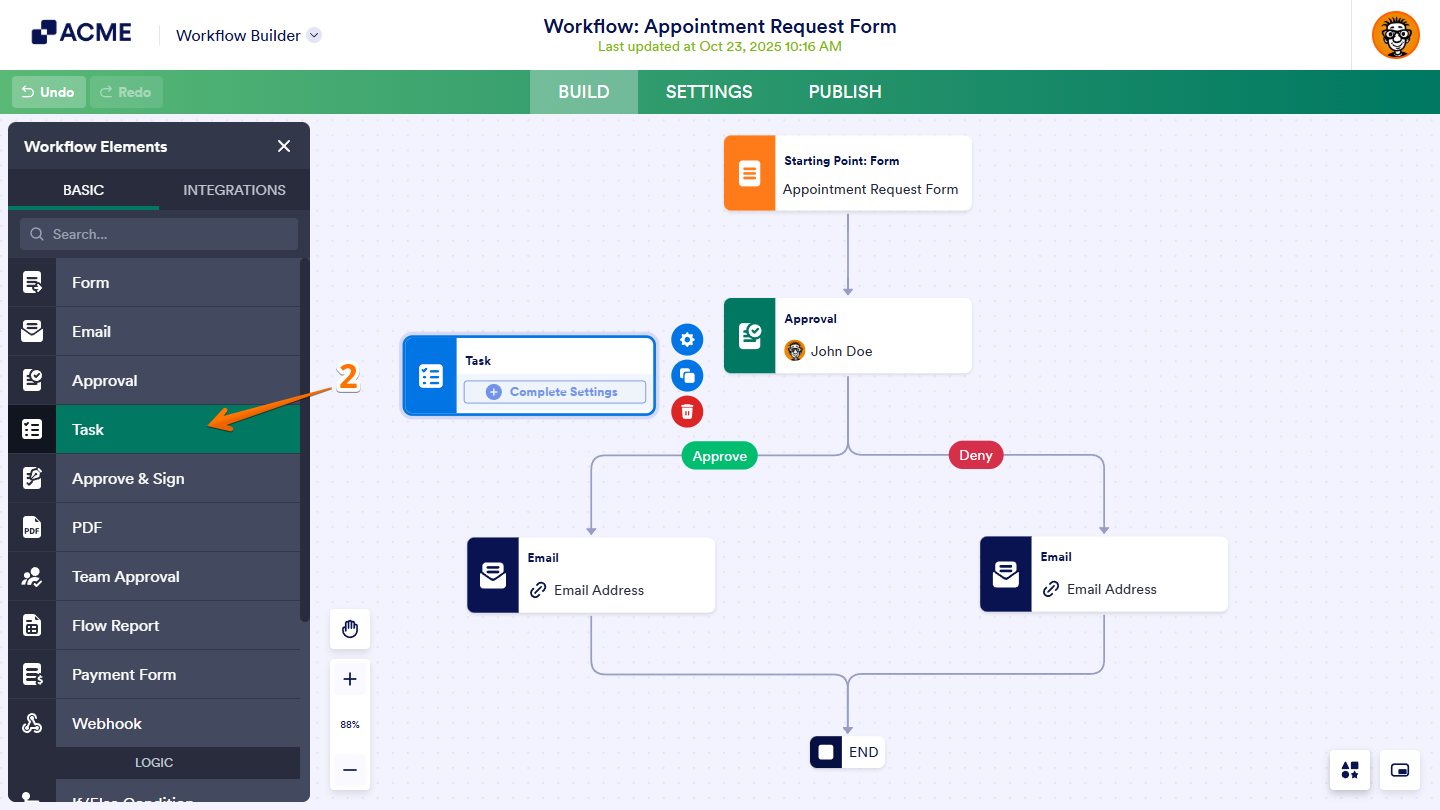
- Under the Basic tab, drag and drop or click on the Task element to add it to your workflow.
Setting Up Task Elements
After adding the Task element, follow these steps to start setting it up:
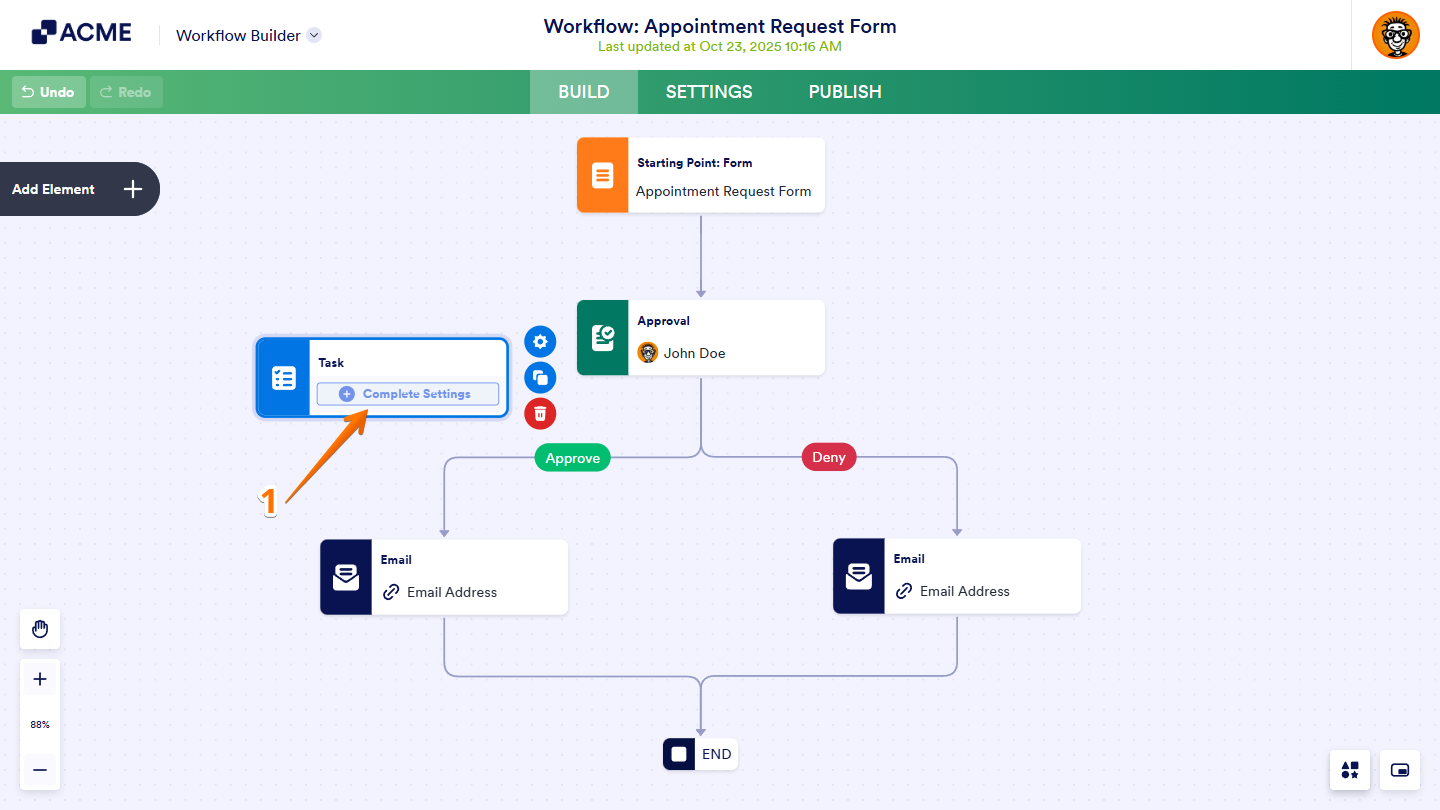
- In your workflow canvas, click on the Complete Settings button on the Task element to open the Task Properties on the right side of the page.
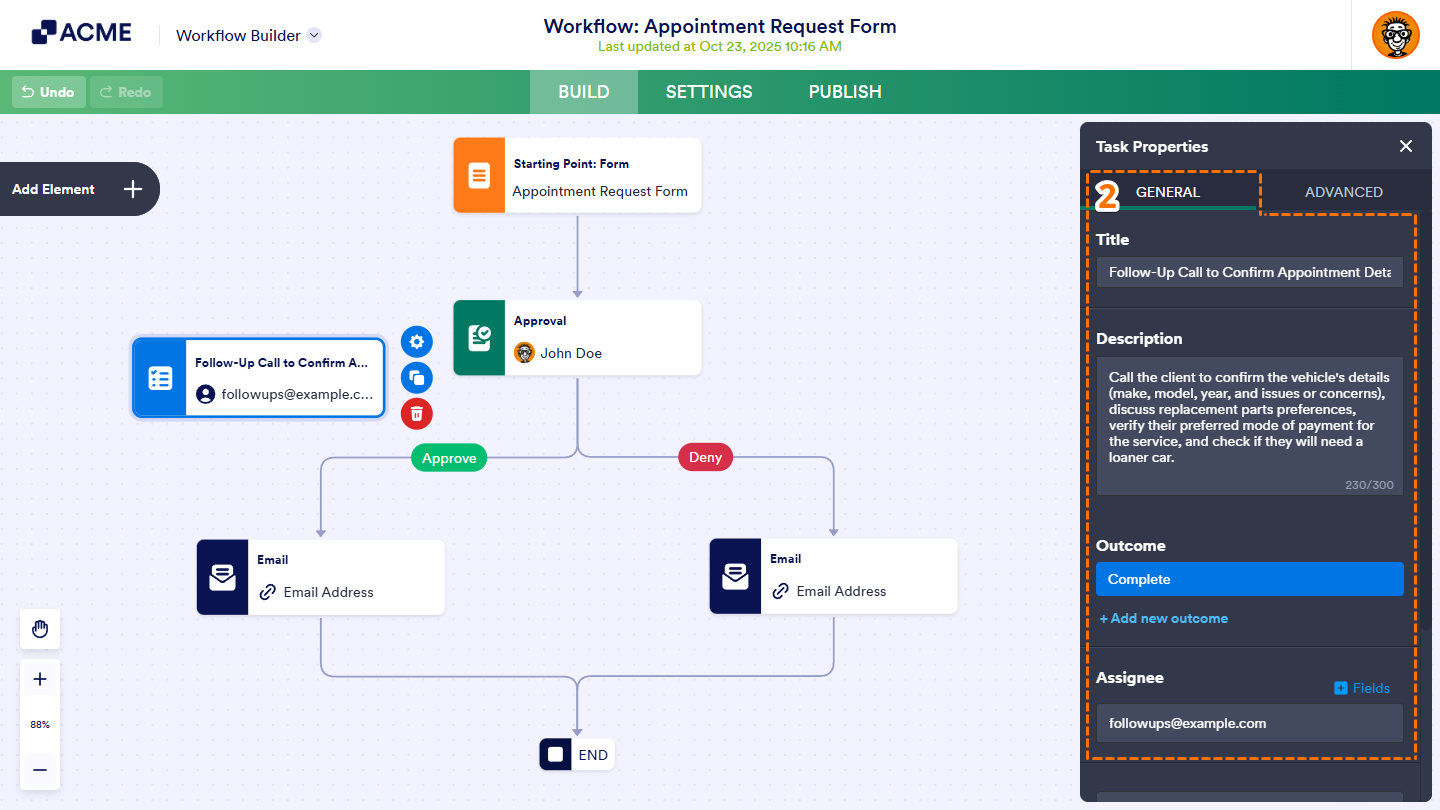
- Under the General tab, configure the following properties:
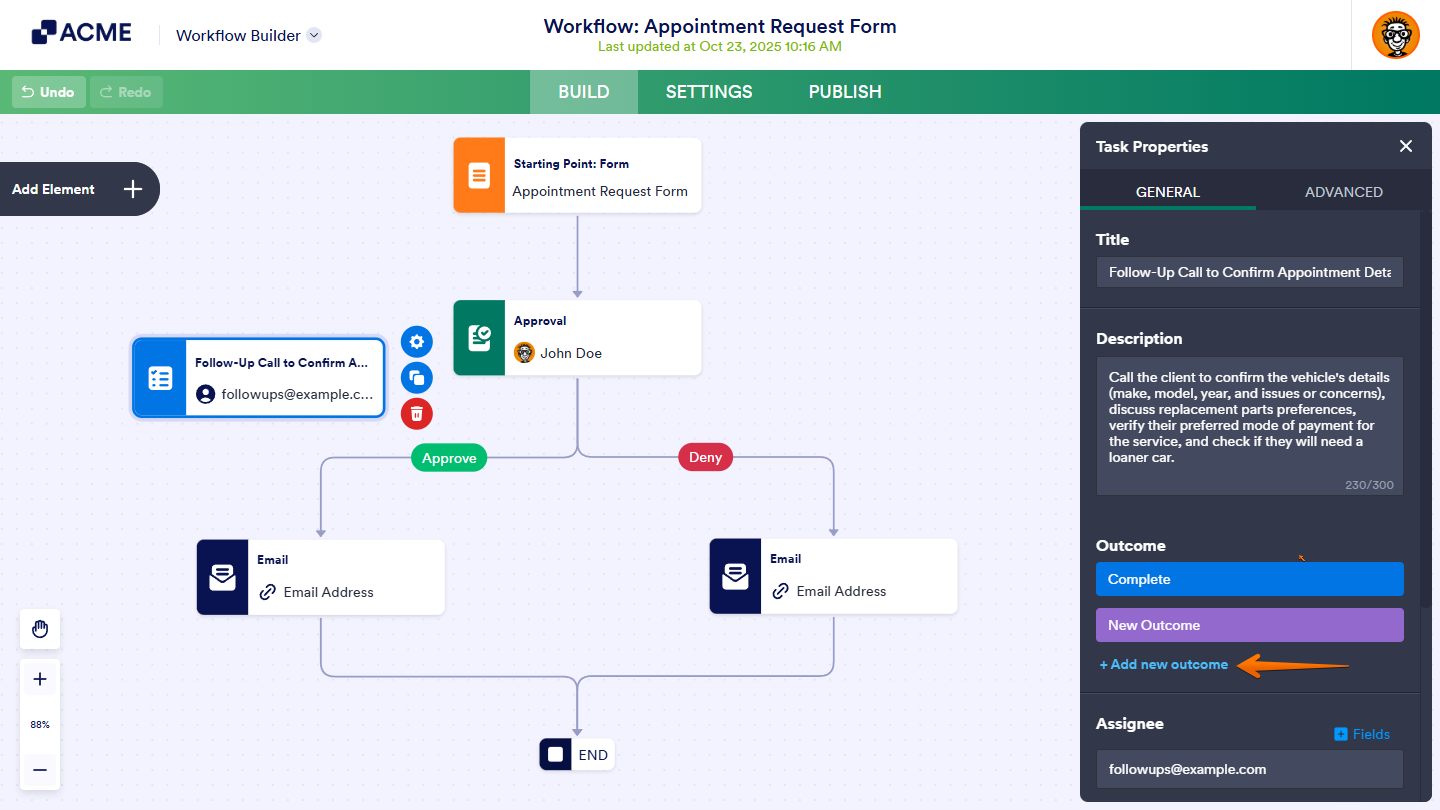
- Title — This is where you define the name of the task. The title will act as the label for your Task element in the workflow canvas and as the heading on the Task Response Form. It helps you identify what the task is about clearly, keeping everything organized for you and your team.
- Description — Here, you can provide details about the task. The description will appear as a subheading on the Task Response Form, giving your assignees information that will help them understand their responsibilities. You can also include why the task matters or any specific instructions they need to follow.
- Outcome — It is where you can add, edit, or remove outcomes and even assign custom colors for easier tracking. For more details, refer to Creating Task Outcomes below.
- Assignee — Here, you specify who is responsible for completing the task. You can either enter the assignee’s email address directly or choose a form field or task field from the dropdown on the right. The email address will be automatically pulled from the selected field.
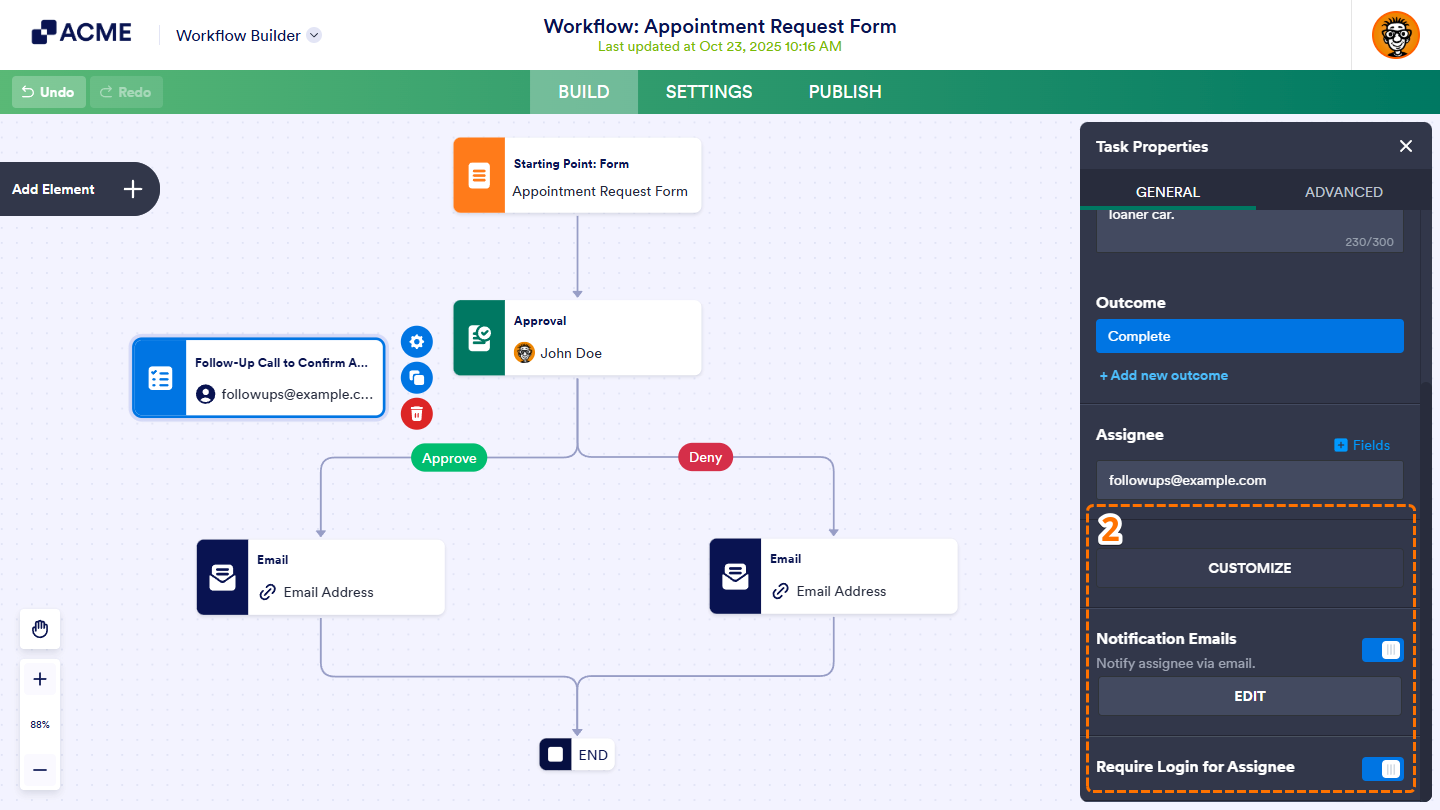
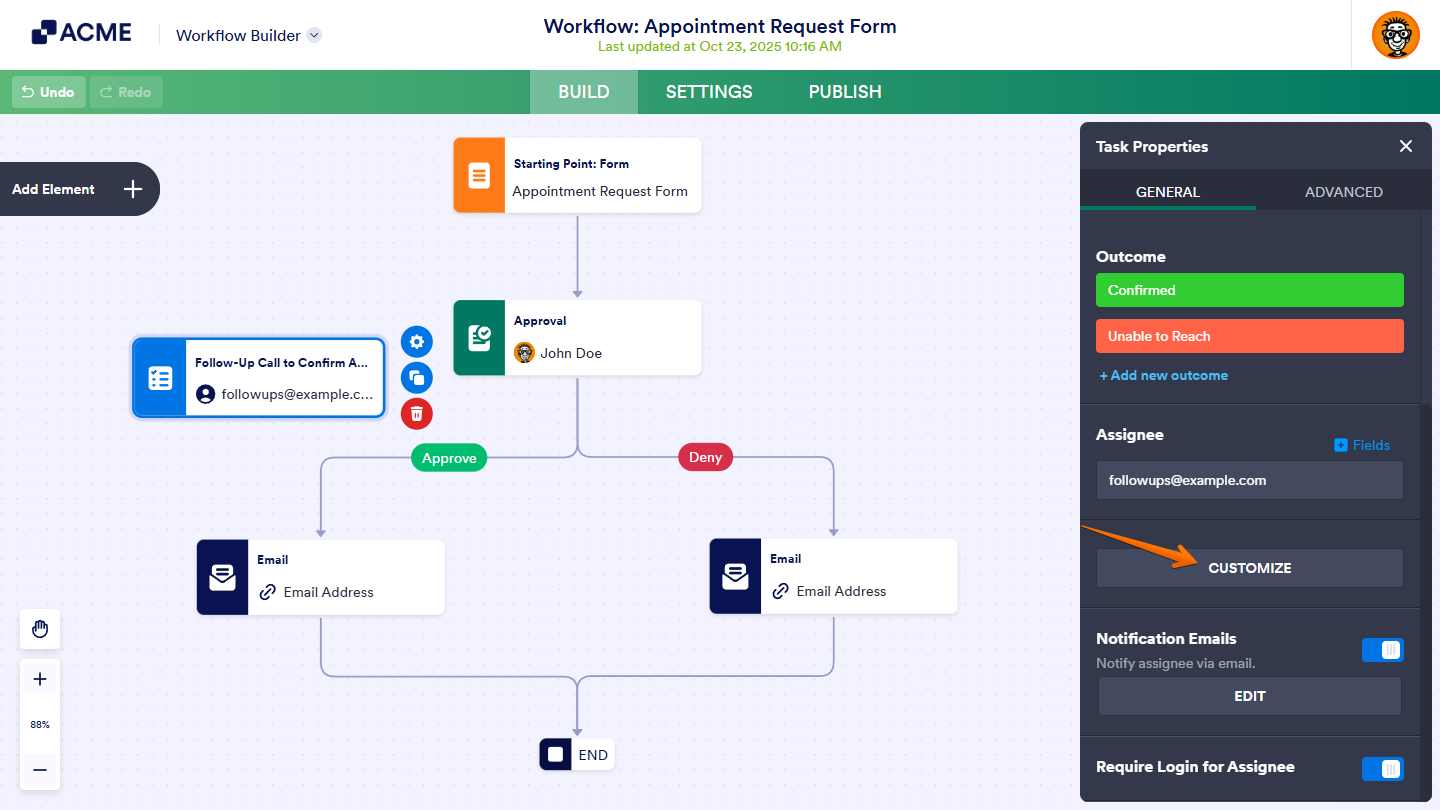
- Customize — Click on this button to set up the form that assignees must fill out and submit to complete their tasks. For more details, check out Customizing the Task Response Form below.
- Notification Emails — This option is enabled by default. It notifies Task Assignees via email when they need to take action on a task. Click on the Edit button to open the Task Email Properties window, where you can customize the email’s subject, sender name, sender email, and reply-to address, and add attachments like PDFs, uploads, or external documents to the notification email sent to assignees.
- Require Login for Assignee — This is enabled by default, requiring your Task Assignees to sign in to their account before they can complete the assigned task. It also lets them access and manage their tasks directly from their accounts.
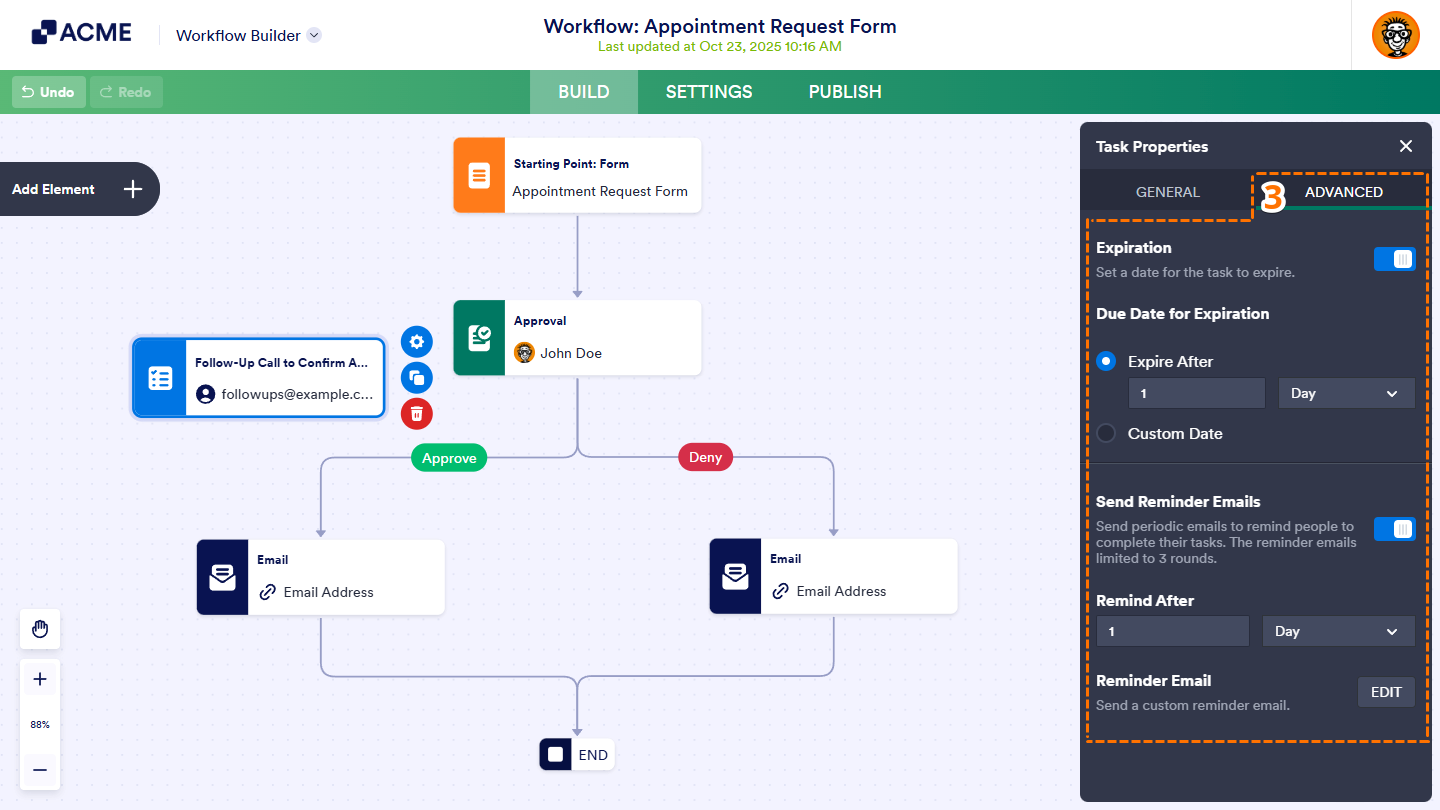
- Next, go to the Advanced tab and set up the following properties as needed:
- Expiration — This option is turned off by default. You can turn it on to define an expiration for the task. Once the assigned timeframe or specific date has passed, assignees can no longer take any action, and the submission is automatically marked as completed. The countdown begins when the task is assigned.
- Due Date for Expiration — Here, you can specify the expiration time frame by entering a number in hours, days, weeks, or months, or choose a custom date. This setting determines how long the task remains accessible before it expires.
- Send Reminder Emails — Enable this property to send periodic emails to remind your assignees to complete their tasks.
- Remind After — This is where you specify the number of hours, days, weeks, or months before the reminder is sent.
- Reminder Email — Click on the Edit button for this property to open the Task Reminder Email Properties window. Similar to the task notification email setup, you can customize the reminder email’s subject and content, set the sender name and email, configure the reply-to address, and attach files like PDF submissions, uploads, or external documents to the reminder email sent to your assignees.
Pro Tip
If you’ve previously completed setting up the Task element and you need to make more adjustments to it, double-click on the Task element or click on it and then the Gear icon on its right to open its properties again, just like with other elements in your workflow canvas.
Creating Task Outcomes
You can customize the possible results for the task in your workflow. The outcomes are what task assignees will select from on the Task Response Form to complete their task.
The Task element initially has only one outcome, Complete. To add more outcomes, click on the Add New Outcome button in the Task Properties.
To edit the name of an outcome, click on it and start typing a new name.
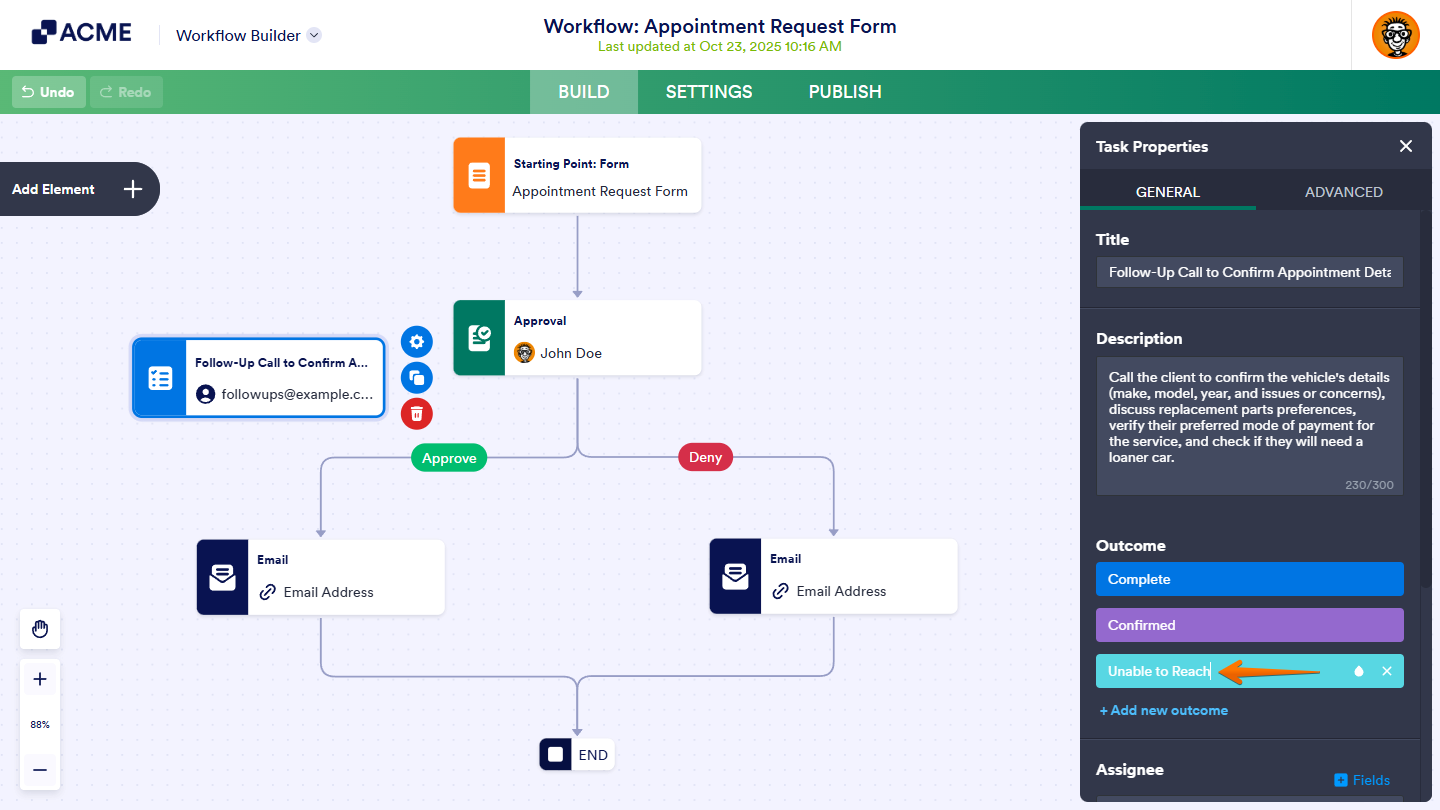
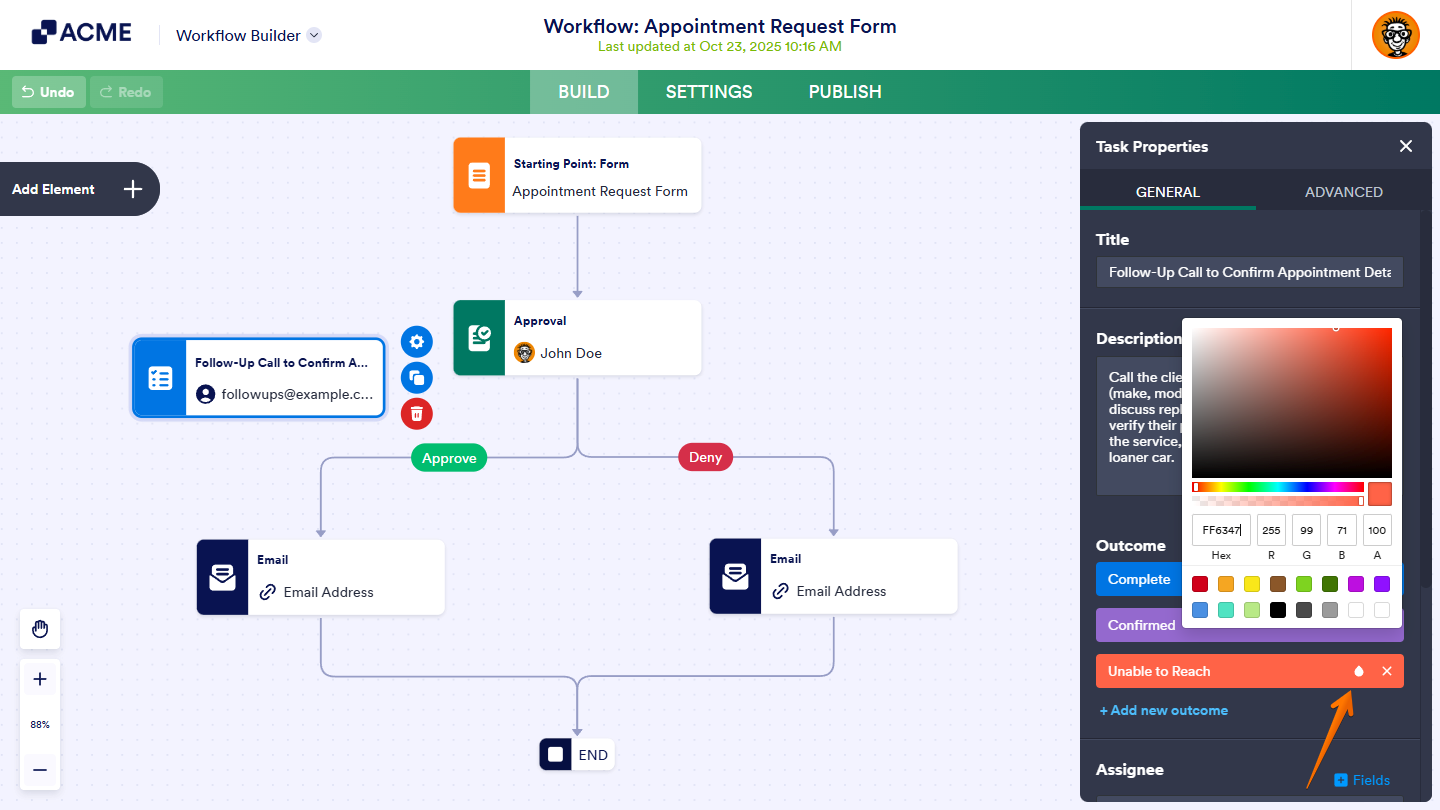
Hover over an outcome, then click on the Ink Drop icon on its right to open the color palette. From there, you can select or enter a new color for it.
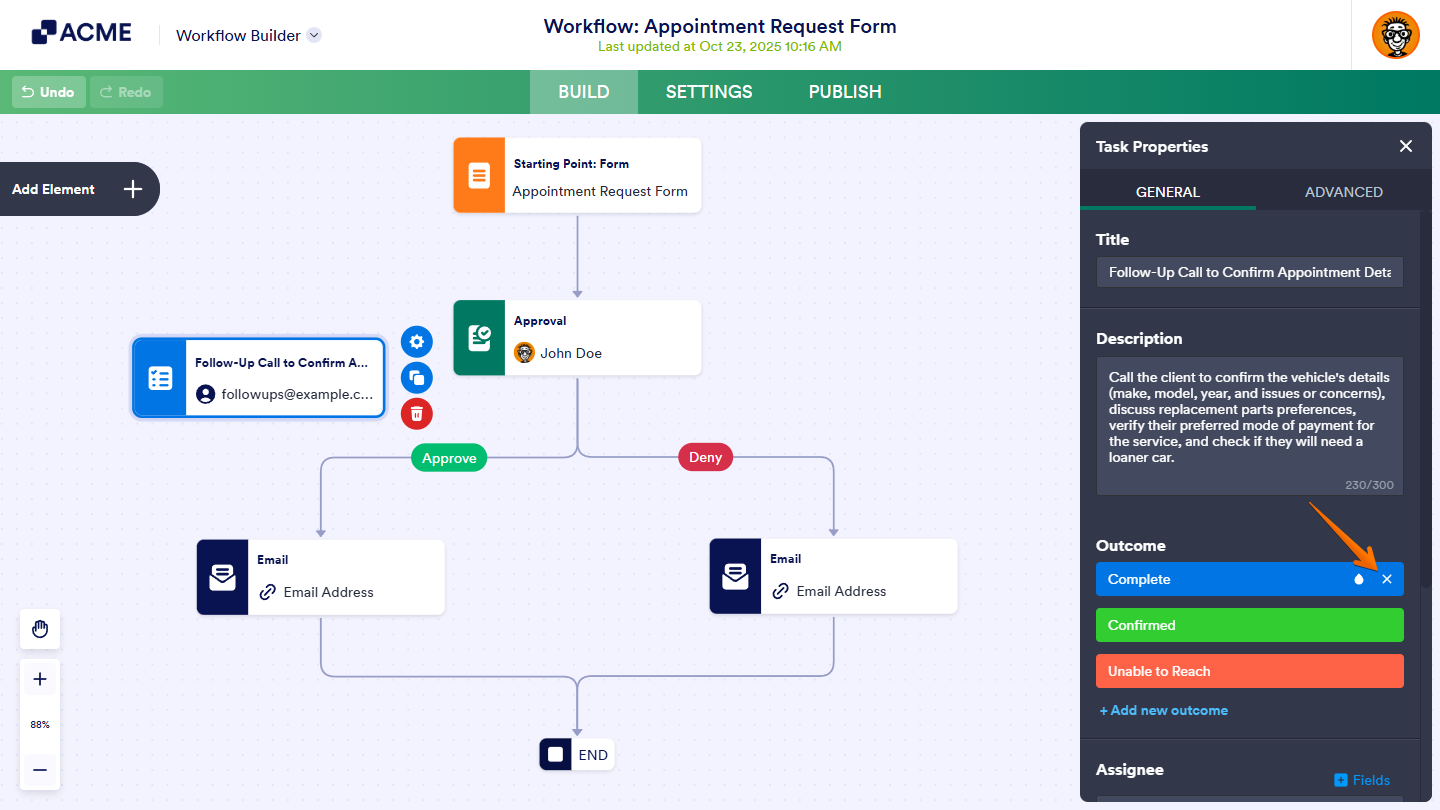
Task elements need at least one outcome. The last outcome cannot be deleted. To remove additional outcomes, click on the X icon next to the Ink Drop icon.
Customizing the Task Response Form
In the Task Properties, click on the Customize button to open the Task Response Form Builder in Workflow Builder.
Initially, the Task Response form includes only the Header, Outcome, and Submit elements. To add more fields to the form, follow these steps:
- In the Task Response Form Builder, click on the Add Field button under the Build tab.
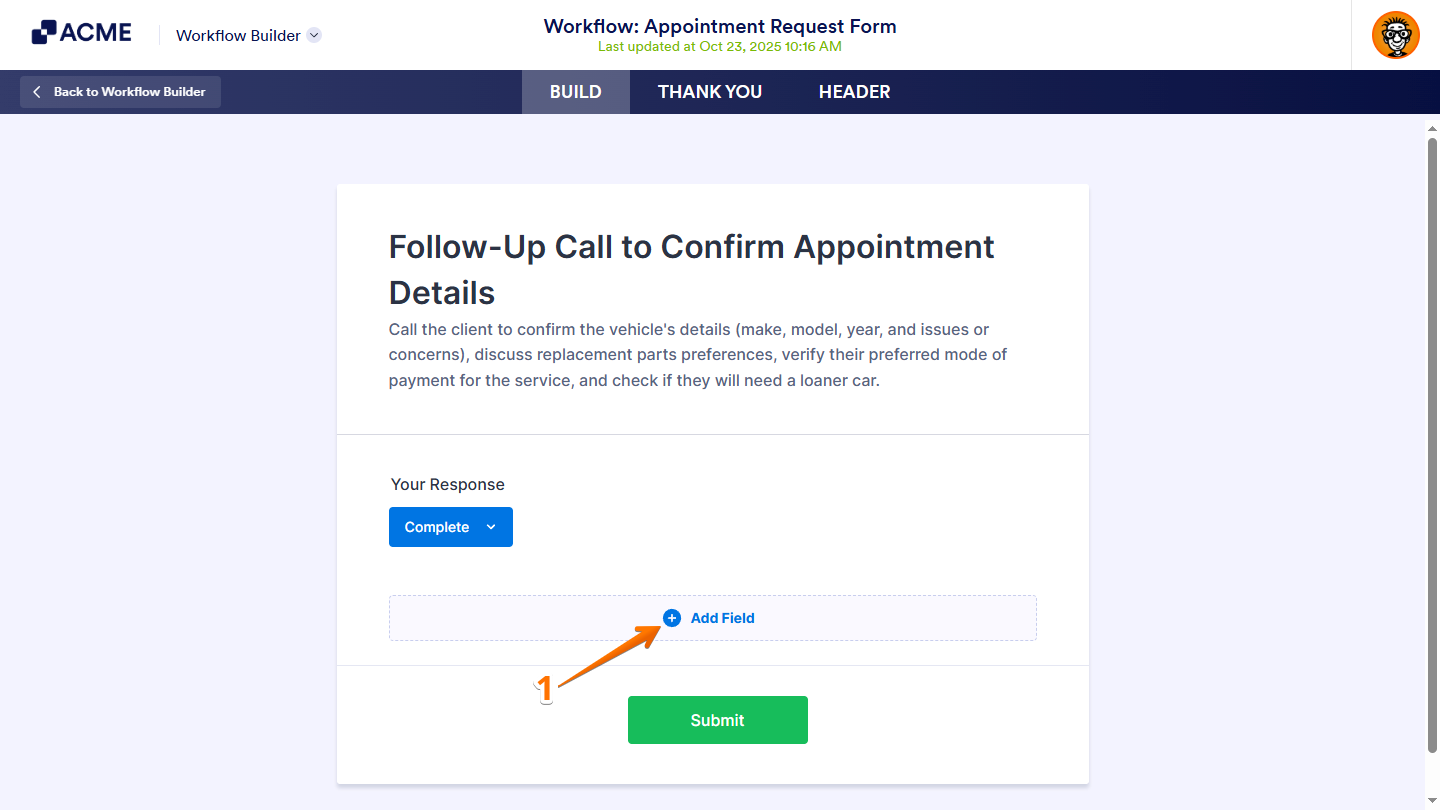
- In the menu that appears, select a field you want to add to the Task Response Form.
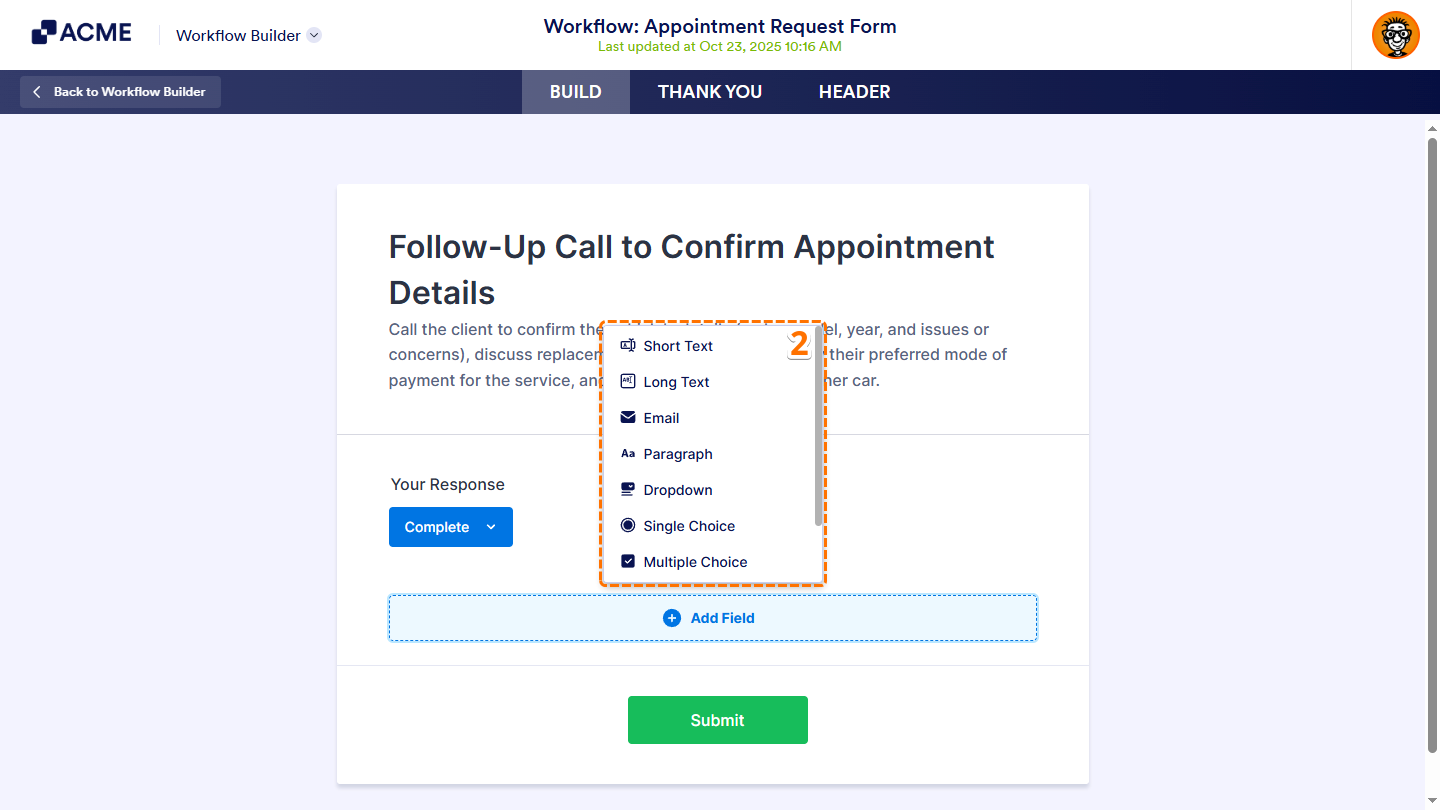
Here’s a quick overview of the available fields that the Task Response Form supports and how they can be used:
- Short Text — Also known as a textbox, this field allows your assignee to enter single-line answers. This is ideal for brief responses such as names or short identifiers.
- Long Text — Also known as a textarea, this field allows your assignee to enter long or multiple-line answers. It’s suitable for more detailed responses or explanations.
- Email — This field is used to collect email addresses, ensuring your assignee enters a valid email address in the correct format.
- Paragraph — A rich-text editor with a toolbar for adding text, images, lists, hyperlinks, form field values, and more. This is useful for providing detailed instructions, formatted content, or extra information.
- Dropdown — This field is used to create a menu that allows your assignee to select a single option from a dropdown list, useful for category-related questions.
- Single Choice — Also known as a radio button, this field allows you to create questions with an exclusive set of options from which your assignee can pick one answer.
- Multiple Choice — Also known as a checkbox, this field lets you create questions where multiple answers can apply, allowing your assignees select more than one option from a list.
- File Upload — This field lets you add a file upload option to the form, allowing your assignee to attach files as part of completing the task.
- Date Picker — This field allows you to add a date selection option to the form, allowing your assignee to pick a specific date for scheduling or tracking deadlines.
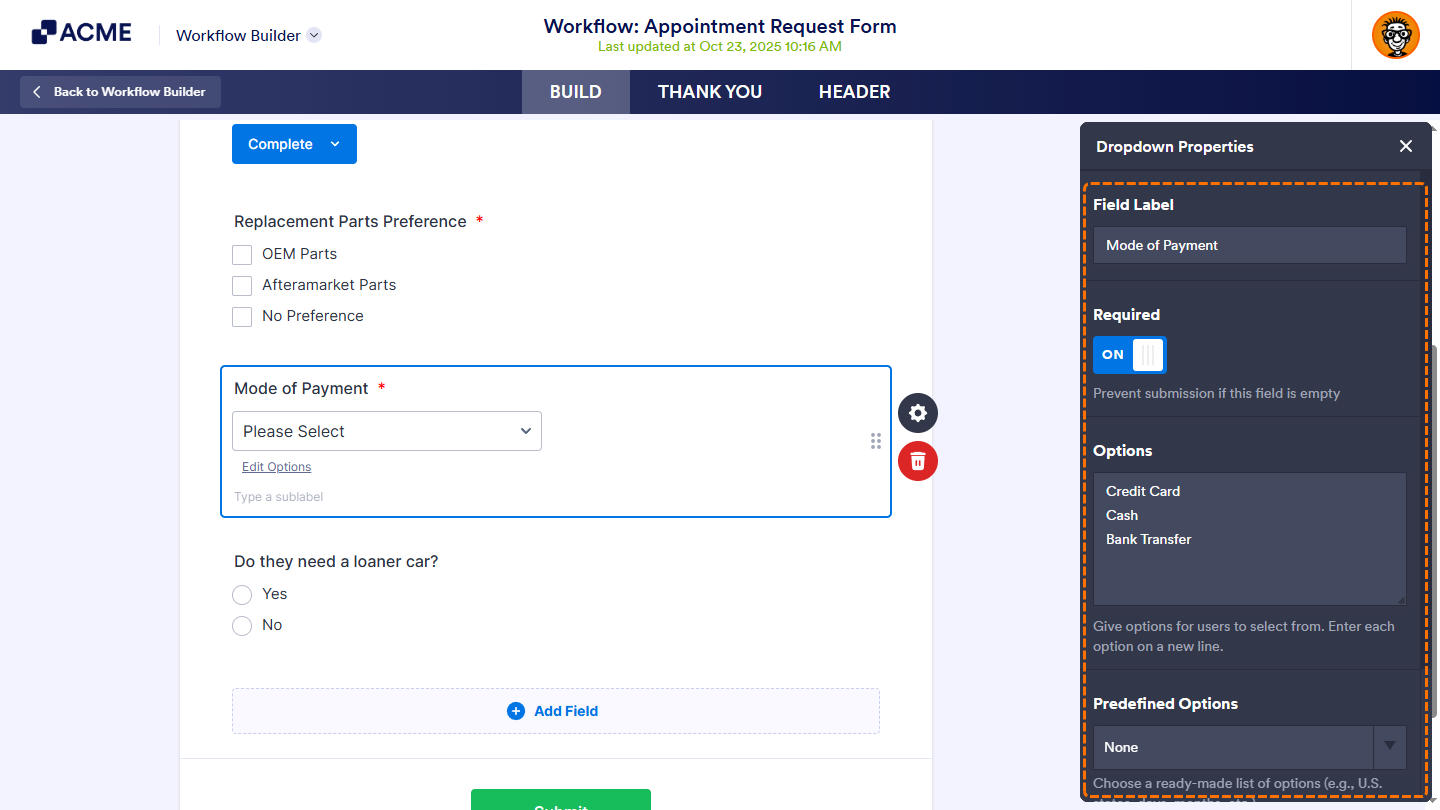
Double-click on a field on the Task Response Form Builder or click on it and then the Gear icon on its right side to open its properties.

You can then modify the field’s label, add a sublabel, mark it as required, and adjust other field-specific settings.
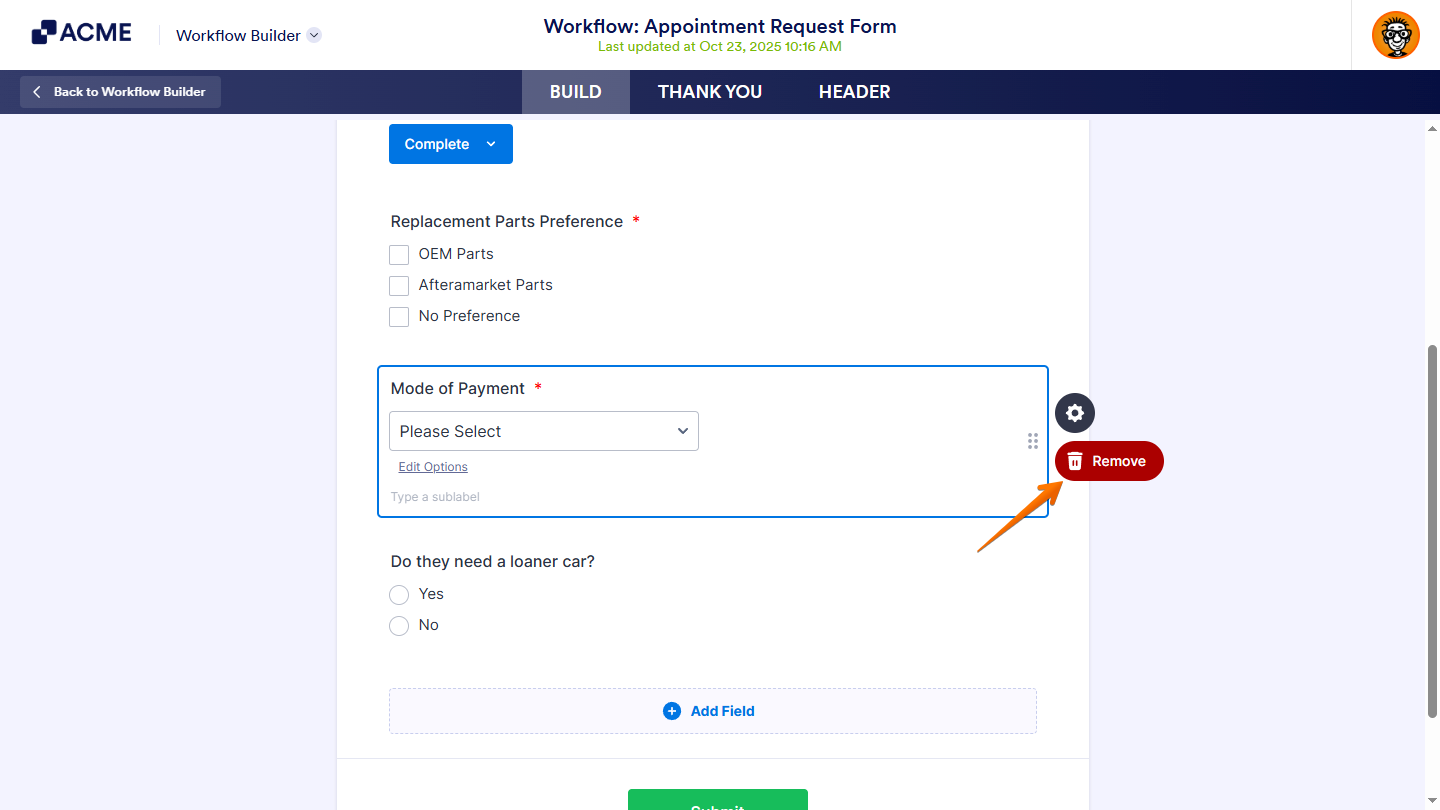
To delete a field, click on it and then the Trash icon on its right.
Notes
The Task Response Form Builder is part of the Workflow Builder, so changes made there are automatically saved and instantly reflected in the Task Response Form. In the Task Response Form Builder, you can also perform the following actions:
- Drag and drop elements to position them.
- Edit the heading, subheading, and label of the Outcome field by clicking on it and typing a new one.
- Adjust the outcomes in the Outcome Properties.
Connecting Task Elements
Once you’ve set up the outcomes for your Task element, draw flow lines to and from the Task element to connect it to other elements in the workflow canvas. Just hover your mouse over an element, click and hold a dot that appears around its edges, then drag the line to another element in your workflow.
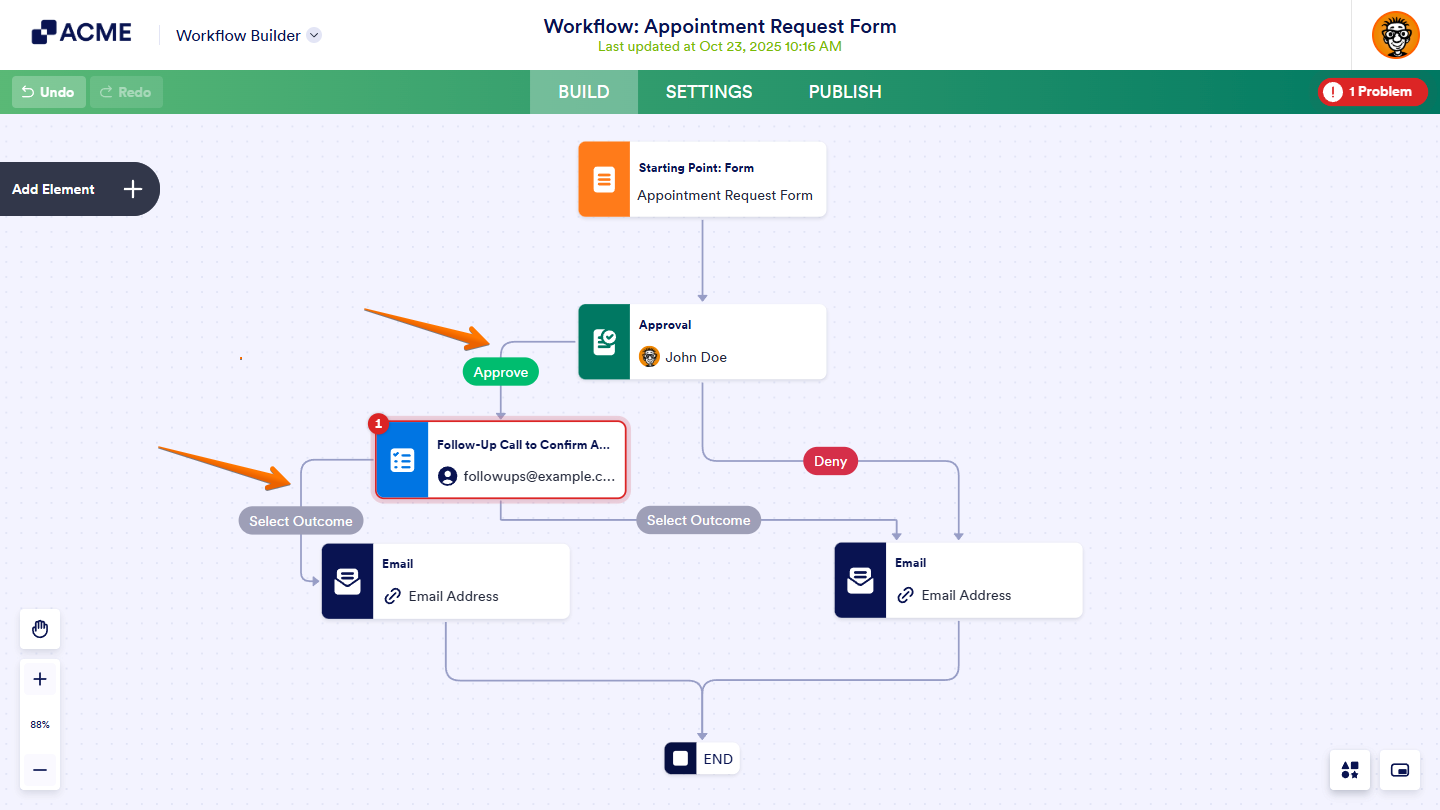
After that, select an outcome when you connect a Task element to another element. Outcomes guide the workflow by determining the next steps based on the task’s status.

Pro Tip
You can open the Outcomes menu again to change a selected outcome by either clicking on it or the Select button that shows when you click on a flow line that connects it to another element.

Send Comment: