Contact forms are one of the most commonly used form types. They provide a quick and easy way for users to reach out for help, share feedback, report issues, or submit ideas. Manually creating contact forms can be time-consuming, difficult, and frustrating.
Jotform is the easiest drag-and-drop (WYSIWYG) form builder available. Simply drag and drop the form fields where you need them and any changes will automatically be saved on your form. That’s it. You don’t need to write even a single line of code. Let’s dive in!
Setting Up a Contact Form
Setting up a Contact Form is easy. Let’s do it:
- On the top-left side of your Workspace page, click on Create.
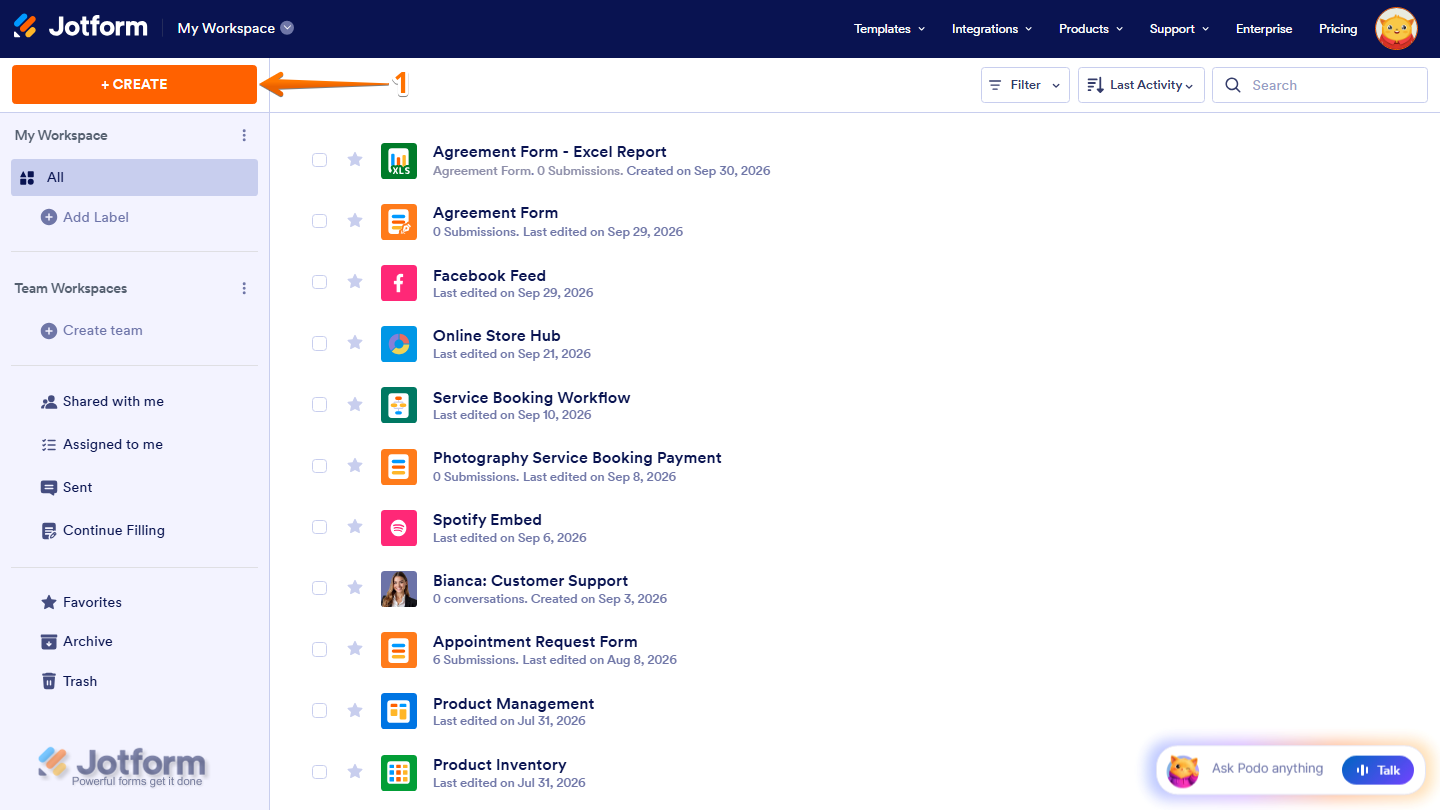
- Then, in the menu that opens up, select Form.

- Next, at the bottom of the page, click on Start From Scratch.

- Then, select one of the following layouts:
- Classic Form — Displays all the questions on a single page.
- Card Form — Shows one question on each page for a guided experience.

- Now, you’ll be redirected to Form Builder where the Organization Settings window opens. Here, you can configure the following:
- Upload Organization Logo — Add your organization’s logo.
- Organization Name — Enter or edit your organization’s name.
- Select Industry — Choose the industry that best matches your organization.
- Don’t Show this Again — Prevent the prompt from appearing again in the future.
- Once you’re done, click on Save.

- Next, click on the Add Element on the left side of the page to see the complete list of elements and widgets.

- Now, you can start adding fields to the Contact form you’re creating, such as:
- Full Name — Collect the user’s full name.
- Email — Capture their email address.
- Phone Number – Request their phone number, if needed.
- Submit — Allow them to submit their form.
- Just scroll down the list, and then drag and drop the elements onto your form.

If you want your Contact form to look more friendly and professional, here are a few best practices you might want to consider.
Make Your Form Specific
Contact Us is a broad term that might confuse your users. Make it clear what the contact form is for by adding a specific subheading. Check out the sample screenshot below:
Which Looks Better?


Add Helper Information
Filling out a form can be tricky. Use Sublabels, Placeholders, Hover Texts, and Short Instructions to guide users and prevent mistakes. Below is an Email Address field example:
- Hover Text — We’ll contact you at this email.
- Sub label — Enter your work email.
- Placeholder — example@company.com
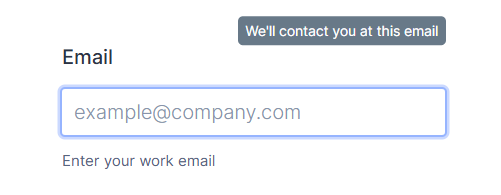
Adding Sublabels
Adding a sublabel to your form fields is easy. Here’s how to do it:
- In Form Builder, select the field you want to add a sublabel to, and then click on the Gear icon next to it.

- Then, in the Full Name Properties menu that opens on the right side of the page, add your labels in the Sublabels field, and you’re all set.

Adding Placeholders and Hover Text
You can also easily add a Placeholder and Hover Text to your fields. Let’s do it:
- In Form Builder, select the field and then click on the Gear icon next to it.

- Then, in the Full Name Properties menu that opens on the right side of the page, under the Advanced tab, add your placeholder and hover text in the Placeholder and Hover Text fields, and you’re done.

Pro Tip
Double-clicking on an element will automatically open the Properties Settings window.
Avoid Using CAPTCHAs
We know CAPTCHAs serve a purpose, but, sometimes, they can be frustrating and decrease conversion rates. With Jotform, you don’t have to use a CAPTCHA unless you continually receive fake submissions. Jotform has built-in spam prevention systems. If you still want to add a CAPTCHA field, check out our user guide on How to Add a CAPTCHA Field.
Keep It Simple
As the saying goes, Simplicity is Beauty. When creating a contact form, it’s important to keep things straightforward. Avoid adding unrelated information, ads, or extra fields that could confuse your users. A clean, simple form ensures that users know exactly what to do and makes it easier for them to submit their information. The more focused and clear your form is, the higher the chances of users completing it without frustration. Keep it simple, and you’ll see better results.
Embedding it on Your Website
Once your contact form is ready, the next step is to embed it directly on your website so visitors can start using it right away. Jotform makes this process simple and flexible—just copy and paste a short embed code, use a dedicated platform integration, or share it as a standalone link. For a full breakdown of how to do it, head over to our guide on How to Embed a Form on a Web Page.

Send Comment:
4 Comments:
January 23, 2025
How can I make the submit button actually send an email to me ?
On the website it looks like it sends but nothing is received on email
Thanx
June 4, 2024
How do you put validations into name field and email field?
December 20, 2023
Does your form builder also include a script for processing information that people send in the completed forms.
C
September 7, 2022
Hello. My Submit button does not do anything. Is there something to do in settings to make it work?
You can try it here: