Box Metadata makes it easy to add more context to the files you collect. With the Box Integration, you can attach helpful details—like names, dates, or custom labels—to each file uploaded through your form. This extra information travels with the file, making it simpler to organize, search, and manage everything later without digging through folders or guessing what each file is for.
Note
The Metadata feature is available only for Business Plus, Enterprise, and Elite Box accounts. To learn more about how it works, check out Using Metadata.
Creating a Metadata Template
Before anything else, you’ll need to set up a Metadata template in your Box account. Think of this template as a blueprint—it defines what kind of information (like names, dates, or custom labels) will be attached to each uploaded file. Here’s a quick how-to:
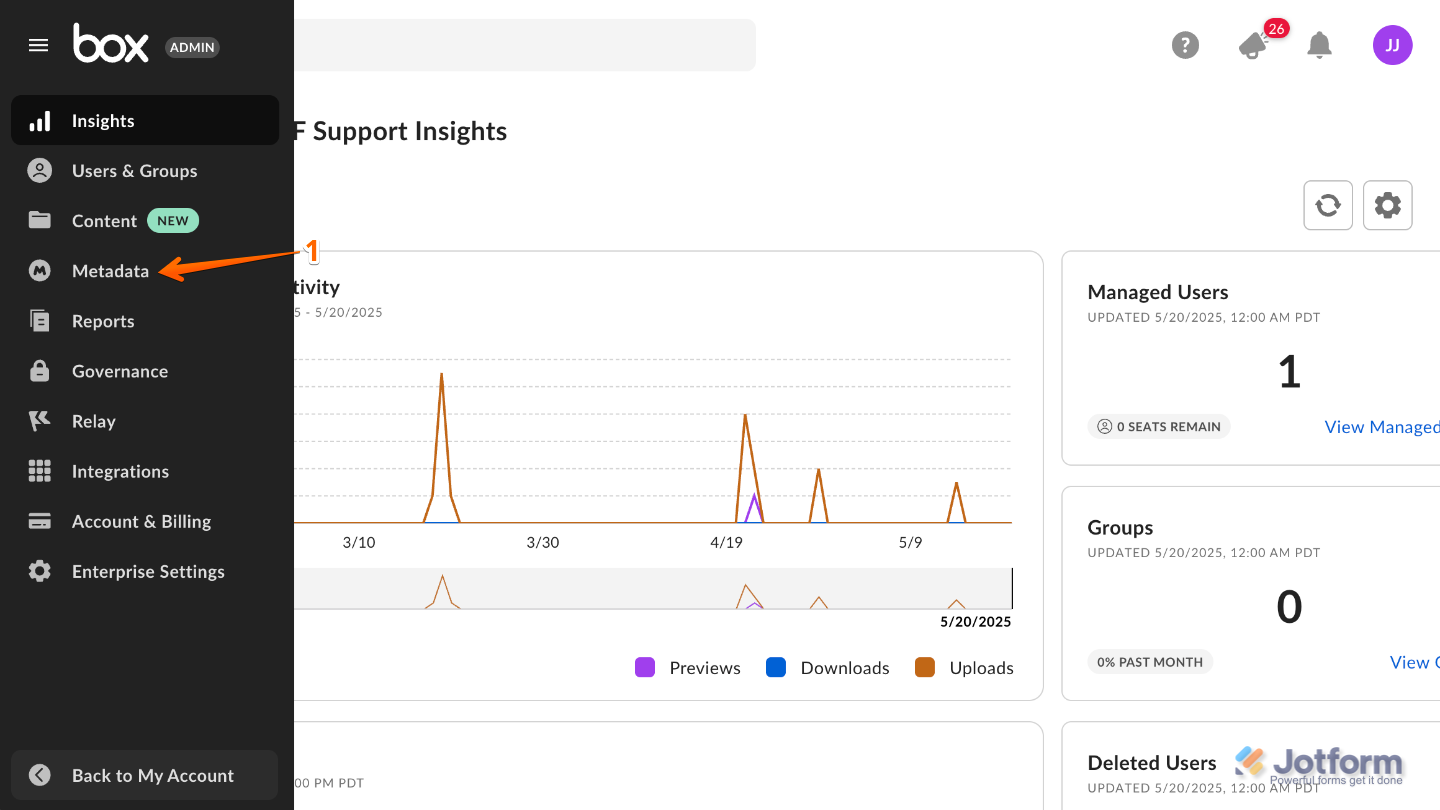
- In your Box Admin Console, click on Metadata in the menu on the left side of the page.
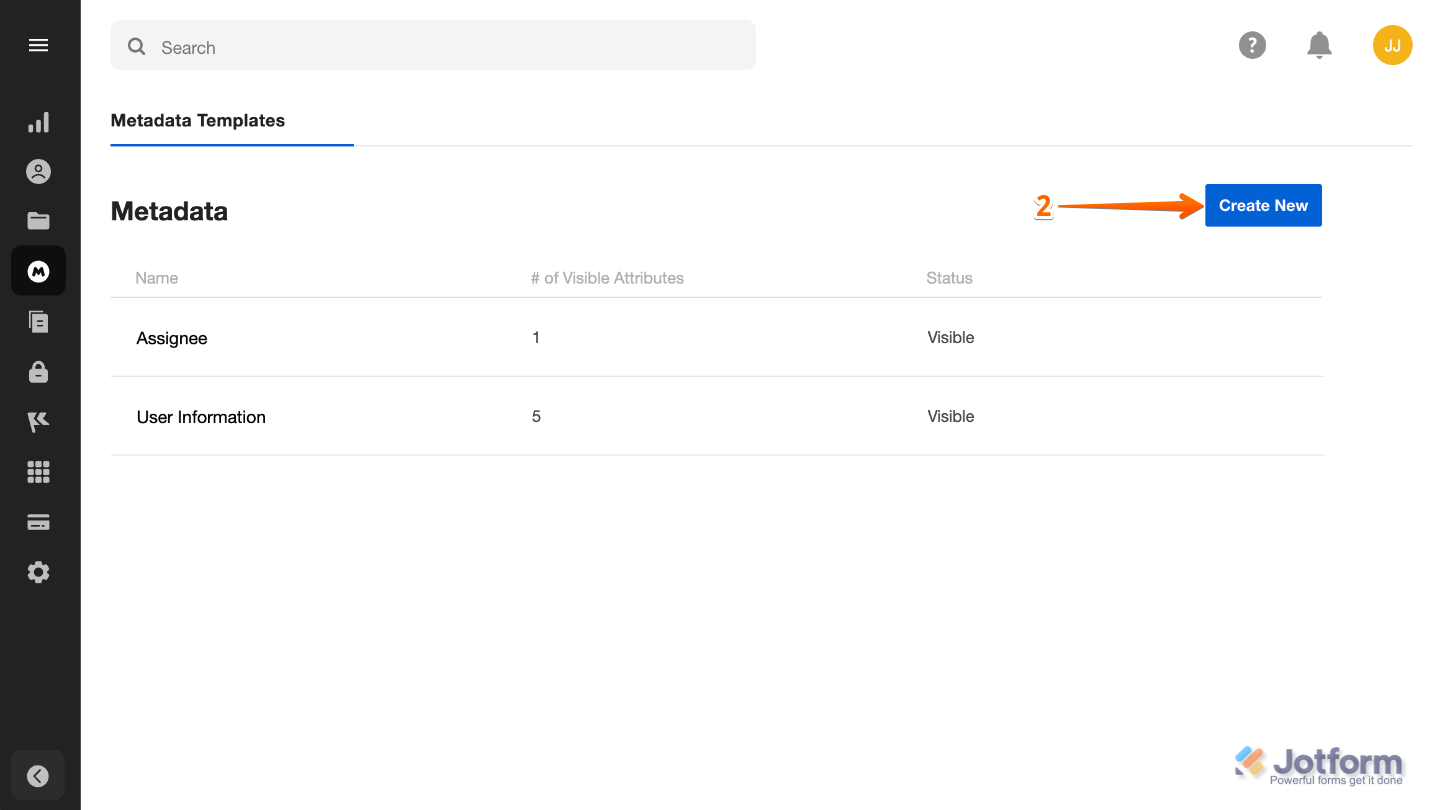
- Next, click on Create New.
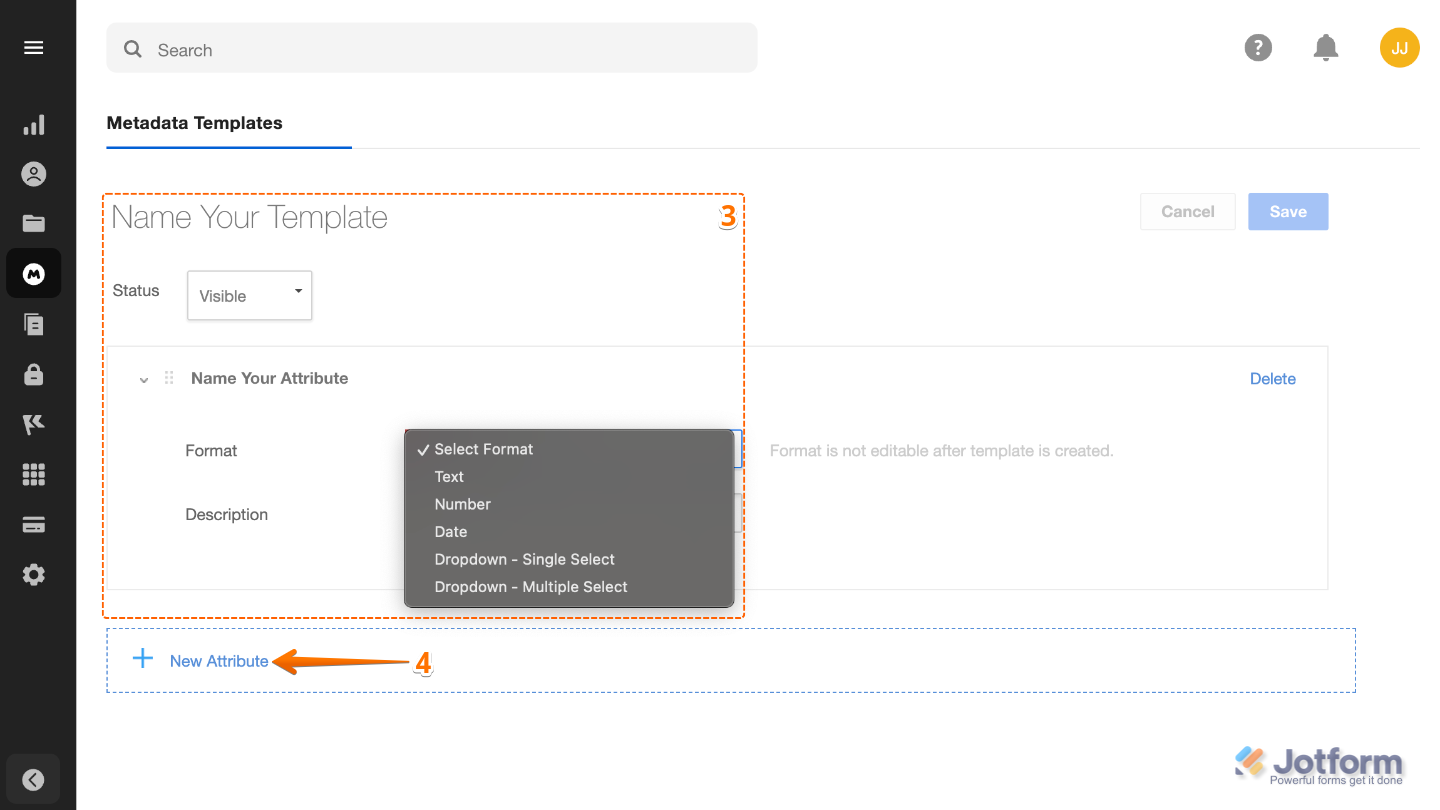
- Now, edit the following:
- Name Your Template — Enter the label of the template you want to select in the Box integration.
- Name Your Attribute — Add the labels of the metadata fields you want to use through the integration.
- Format — The specific type of field. You can find more details of this below.
- Text — You can map the Text attribute to Jotform fields like the Short Text Element (textbox) or Long Text Element (text area). Compound fields, such as Full Name or Address, can also be mapped, but the form will combine the values with spaces. For example, the Full Name might appear as “John Smith,” and an Address could appear as “9999 W Magnolia Blvd Burbank California 91505 United States.”
- Number — Number-formatted attributes can only accept integers, so it’s best to use the Number field. You can also use the Short or Long Text Entry fields, but make sure the input is restricted to numbers by enabling the Input Masking option. Additionally, you can use fields like Dropdown or Single Choice when appropriate.
- Date — For metadata attributes formatted as dates, only the Date Picker field is supported at this time.
- Dropdown — Single Select — The dropdown limits input to the options you defined in the metadata template. For this reason, you should use a Dropdown or Single Choice element in your Jotform form.
- Dropdown — Multiple Select — Just like the Dropdown’s single-select restriction, you should use a Dropdown or Multiple Choice element in your Jotform form.
- Then, click on Add New Attribute to add more fields.
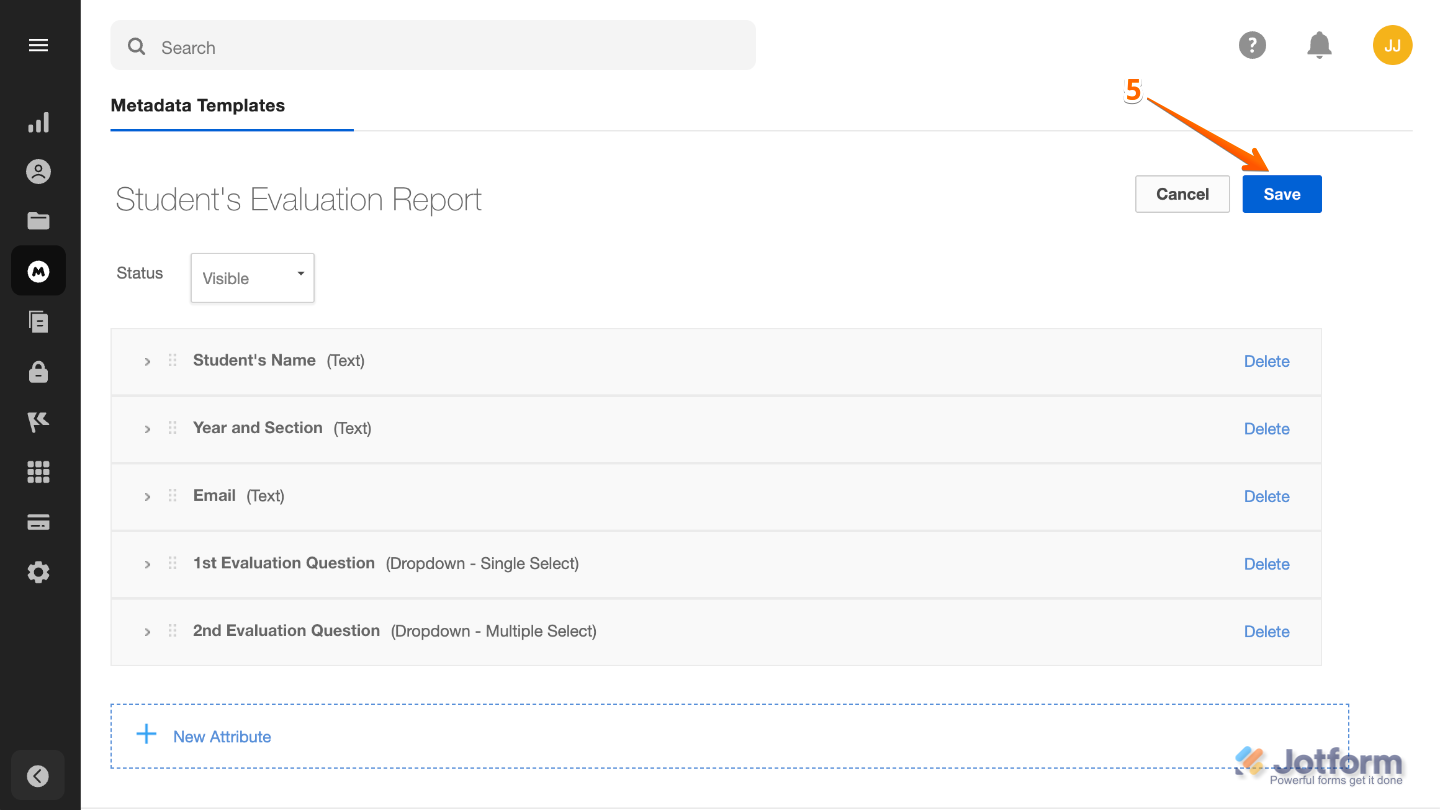
- . Once done, click on Save on the upper-right side of the page.
That’s it. With your metadata template ready, you can now move on to mapping the fields in your integration settings so everything lines up just the way you want.
Note
When mapping Field Types and Metadata Attribute Formats, it’s important to make sure everything lines up correctly. Box only accepts values that match the exact format expected by each metadata attribute. If there’s a mismatch, Box will simply ignore that data, and the metadata won’t be attached to the uploaded file. Taking a moment to double-check your formats helps ensure all your file details are saved just the way you expect.
Mapping Jotform Fields to Your Metadata Template
Once your metadata template is ready in Box, the next step is connecting it to your form fields in Jotform. Mapping these fields ensures that the information your users enter—like names, IDs, or project details—gets sent to the right metadata fields in Box, keeping everything organized and accurate. Here’s how to get going:
- In Form Builder, in the orange navigation bar at the top of the page, click on Settings.
- Click on Integrations in the menu on the left side of the page.
- Search for Box, and then click on it.
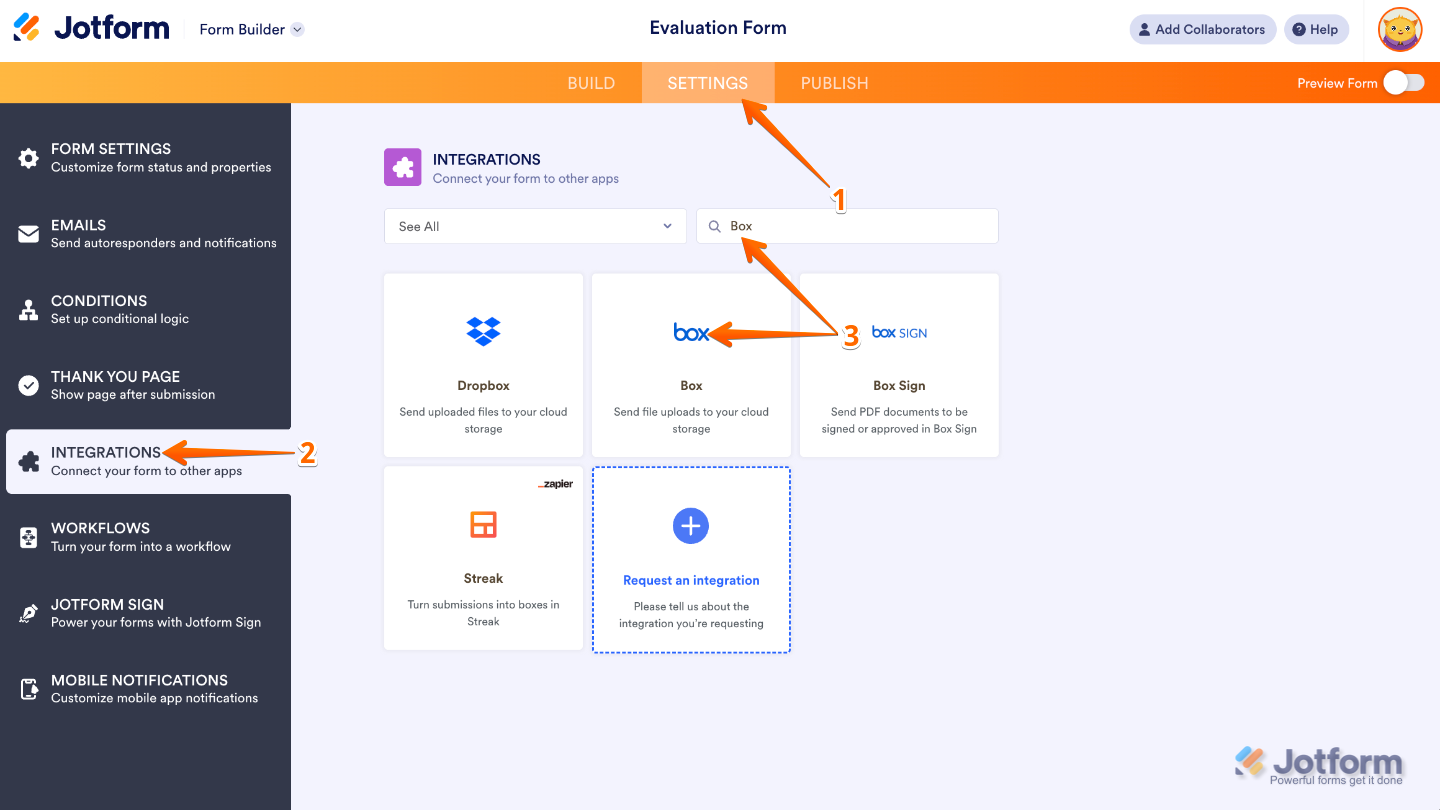
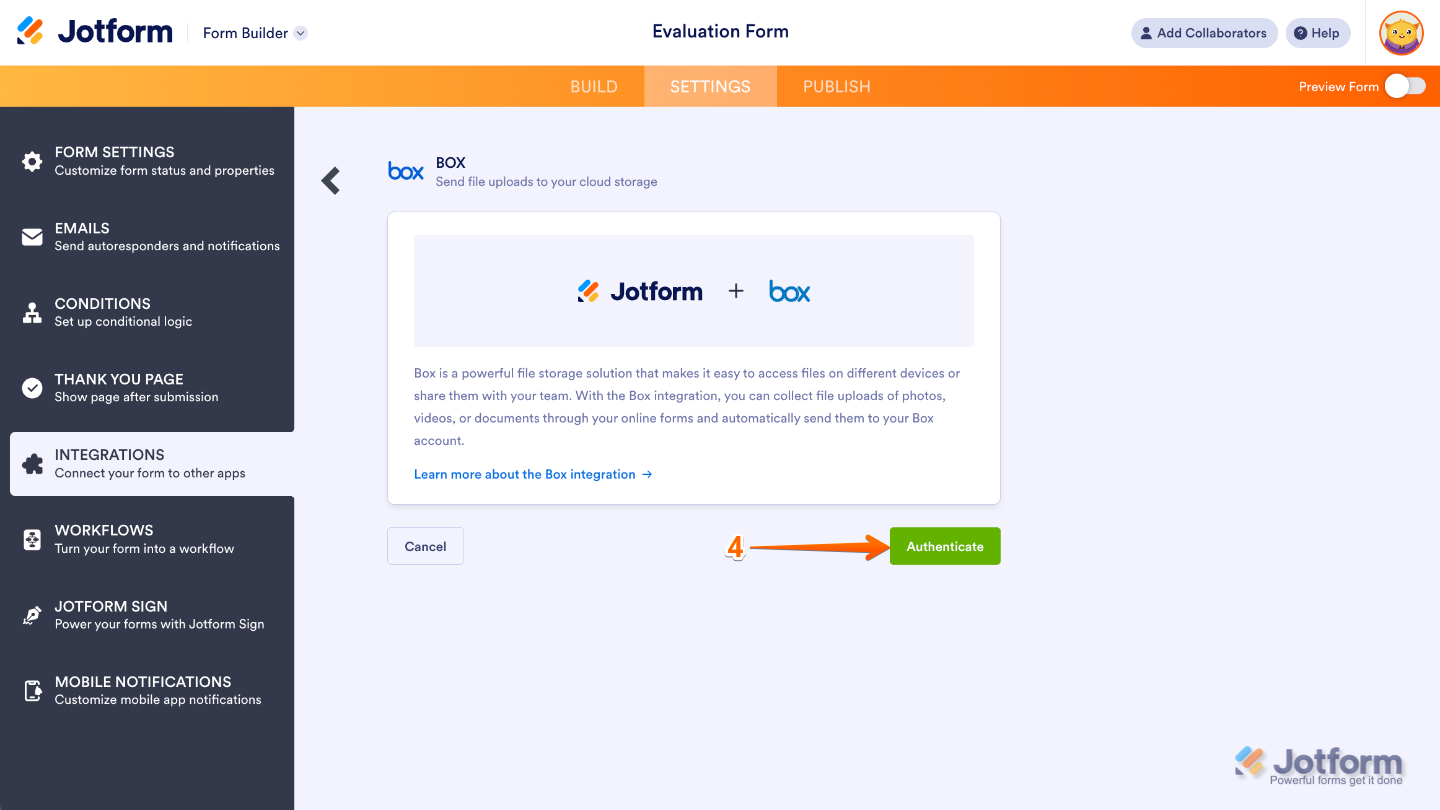
- Next, click on Authenticate.
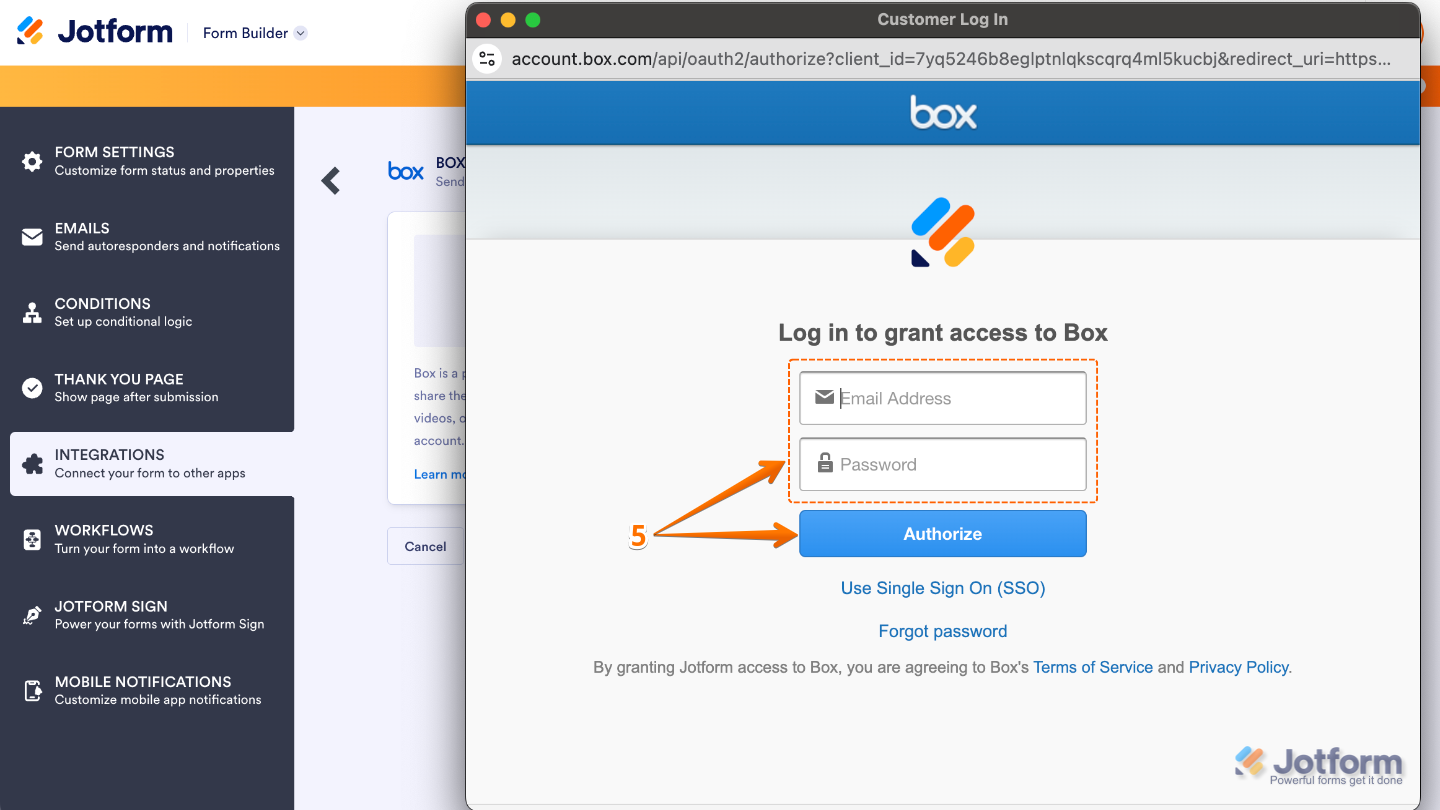
- In the window that pops up, enter your Box account credentials, and then click on Authorize.
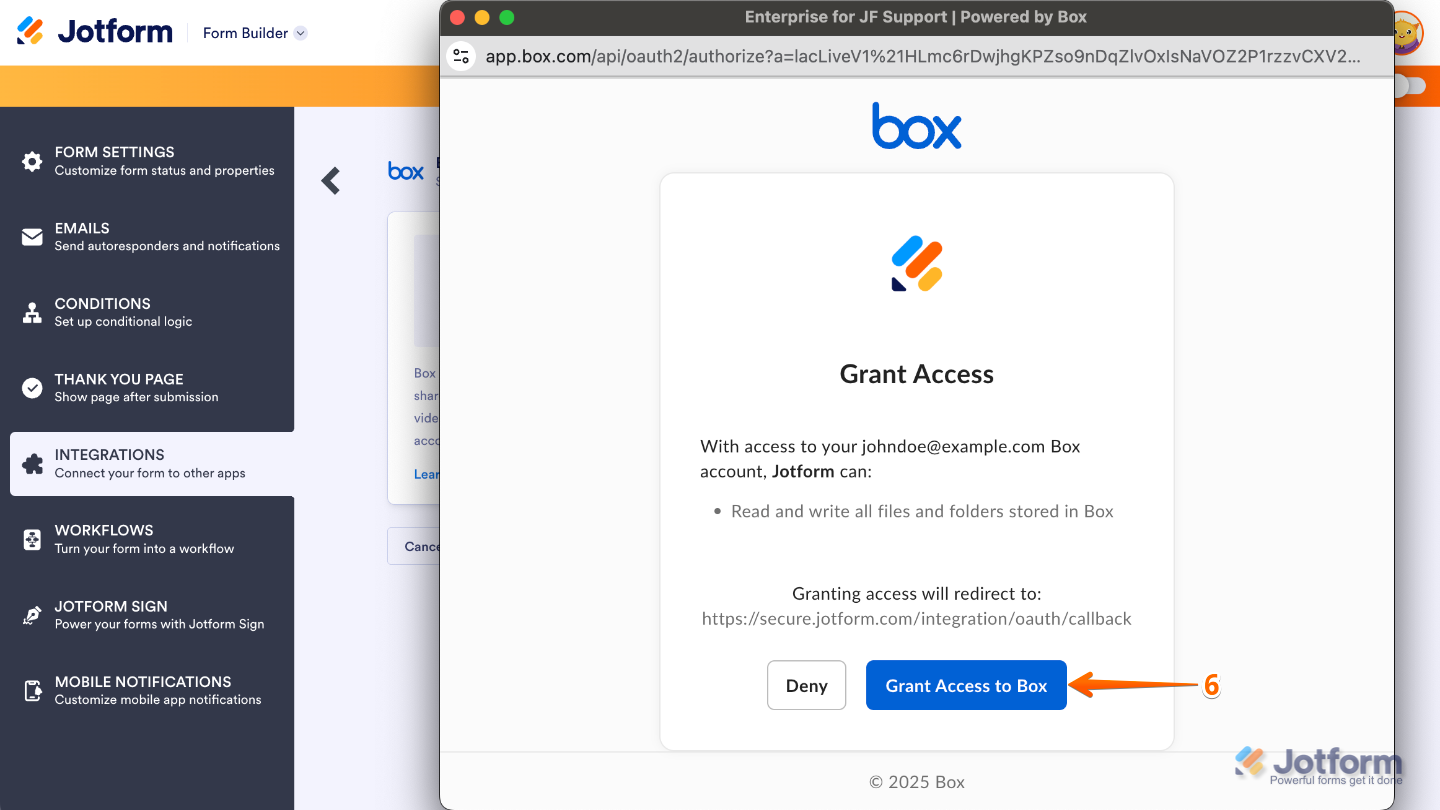
- Once logged in, click on Grant Access to Box.
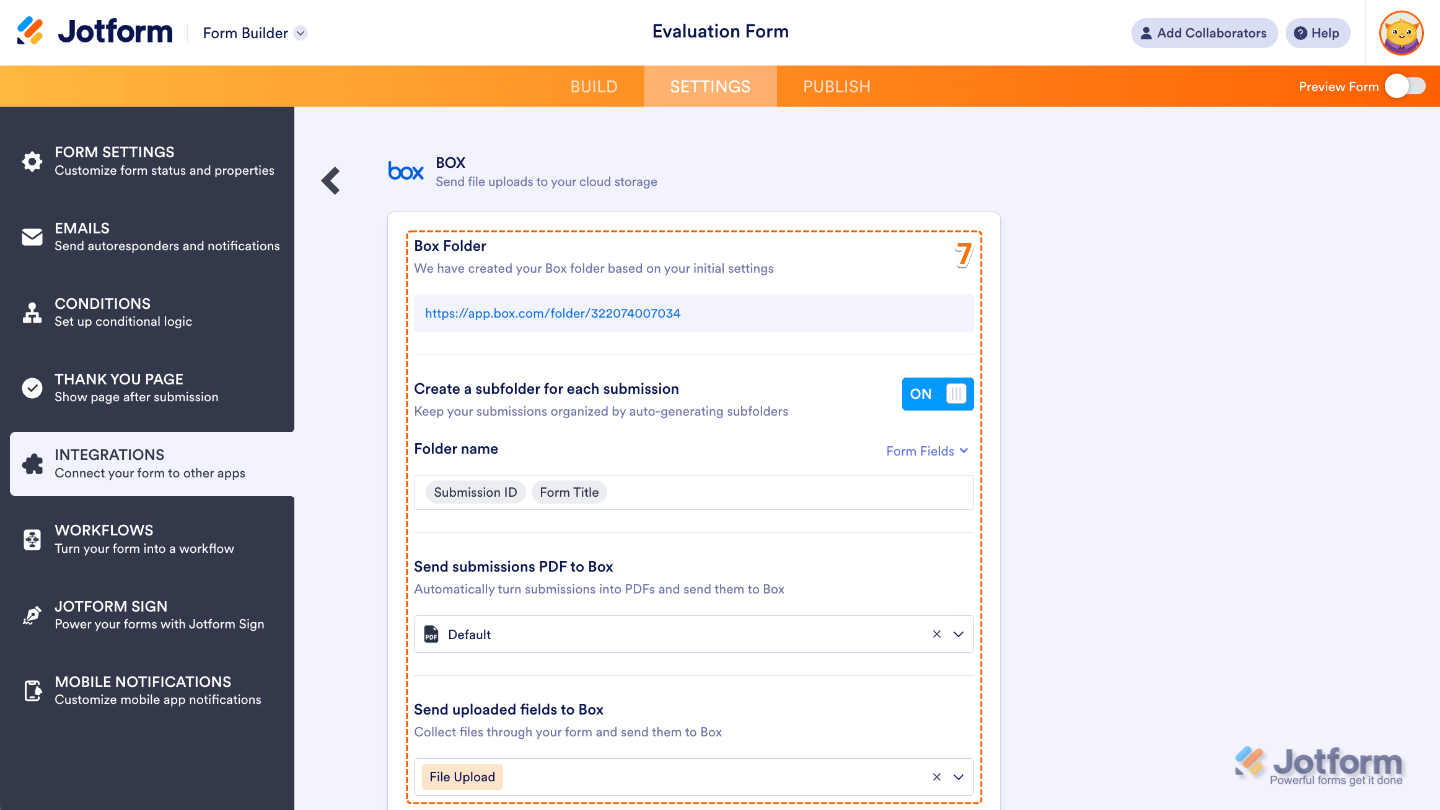
- Then, edit the following:
- Box Folder — This will be the main folder in your Box account.
- Create a subfolder for each submission — Turn this on if you want to create a separate folder for each submission inside the main Box folder. You can type your custom folder name or dynamically create it based on Form Fields.
- Folder Name — This will show up when the Create a subfolder for each submission feature is switched on. It will designate a subfolder name for your Box based on the form fields you selected.
- Send submissions PDF to Box — Select which PDF document to send to Box. You’ll see Default if you haven’t created a PDF document yet. To rename your PDF, you can check the guide about How to Assign a Custom File Name to Your PDF Report.
- Send uploaded fields to Box — Select from which file upload to send to Box. You can select multiple file upload fields here.
- Now, scroll down to the Metadata section and then Select a Template. Match your form fields and click on Add Field to map more fields. Once you’re done, click on Save.
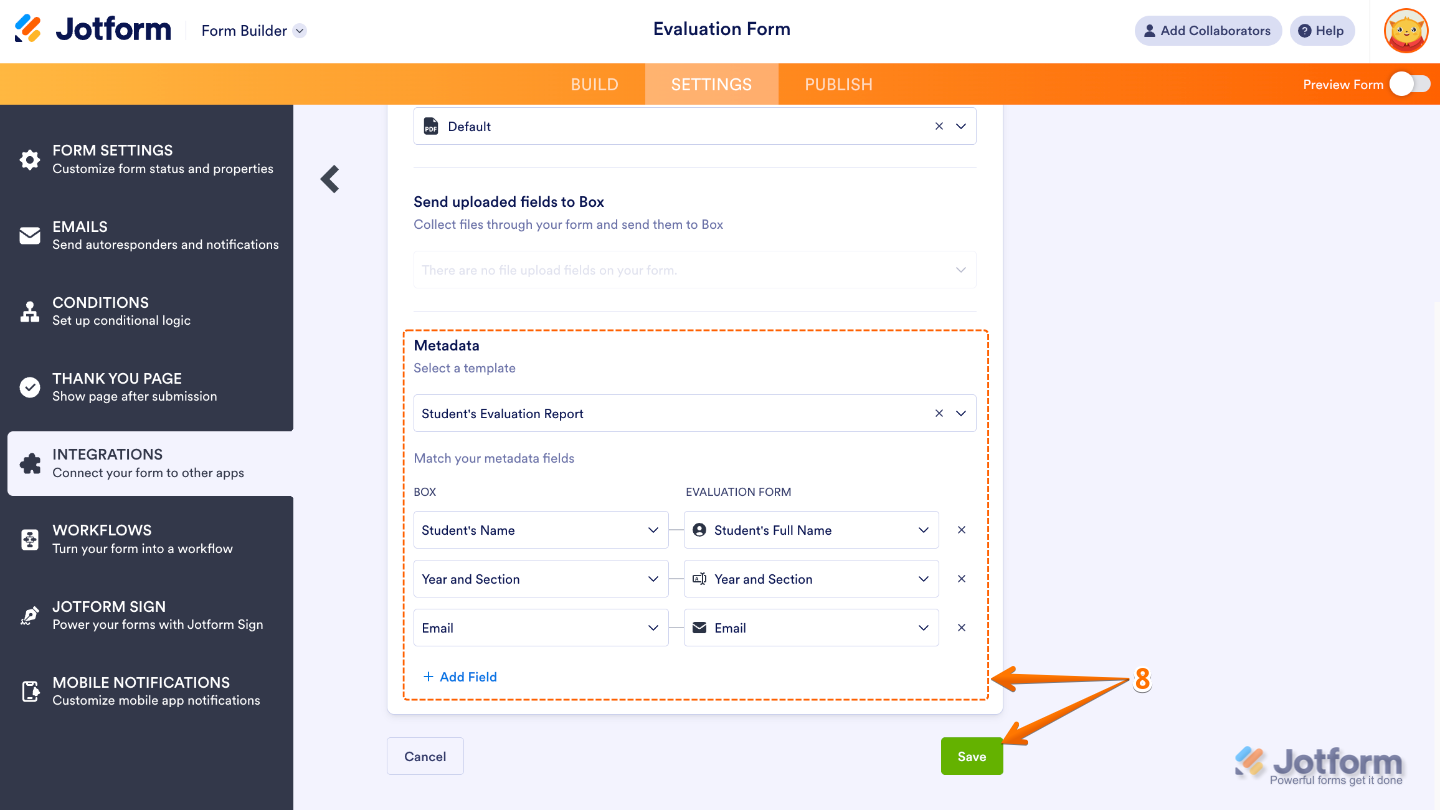
That’s it. From now on, any form submissions with uploaded files will automatically include the metadata details you’ve set up in your Box template.
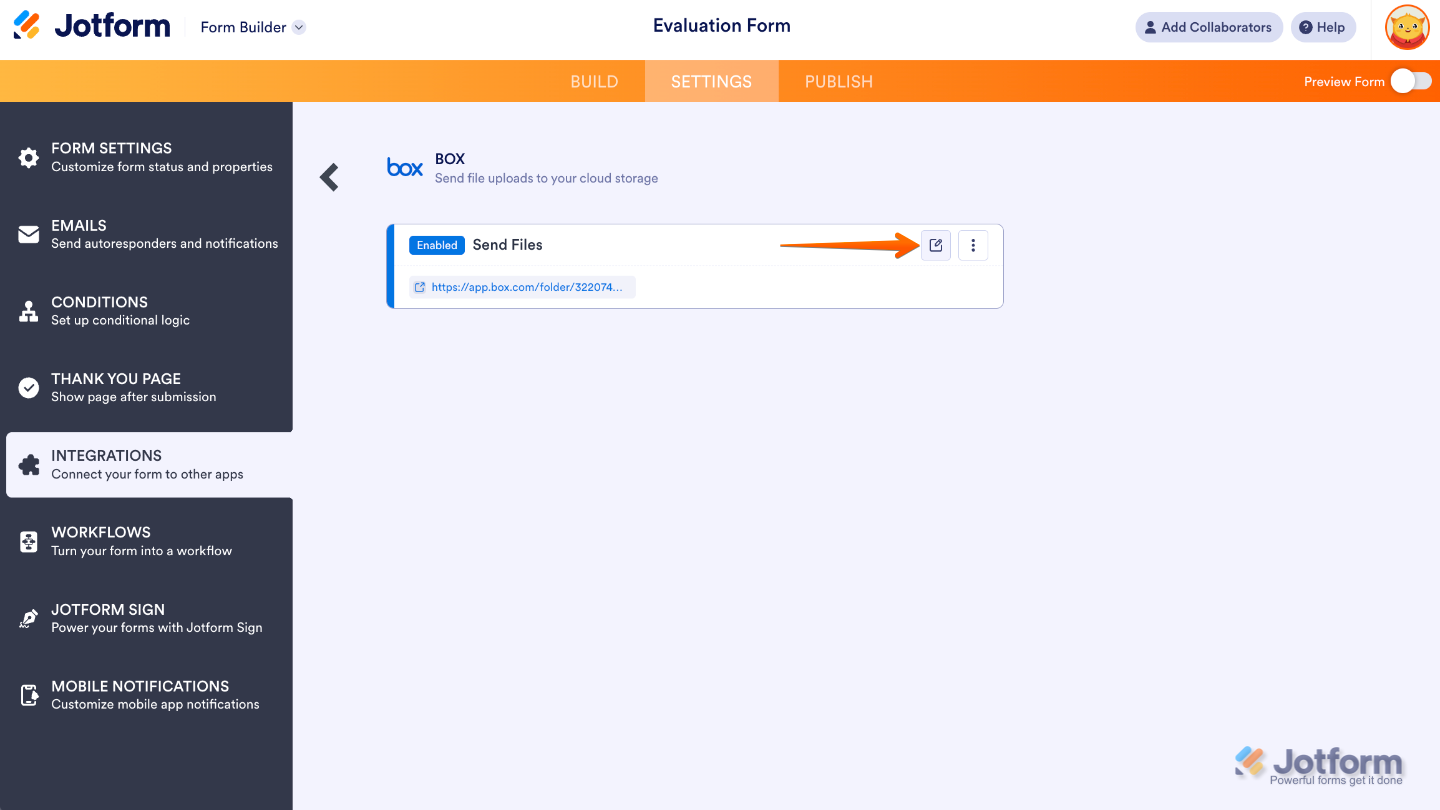
If you’ve already connected Box to your form, you can easily add Metadata by editing your existing Box integration. Just click the Edit icon to get started:
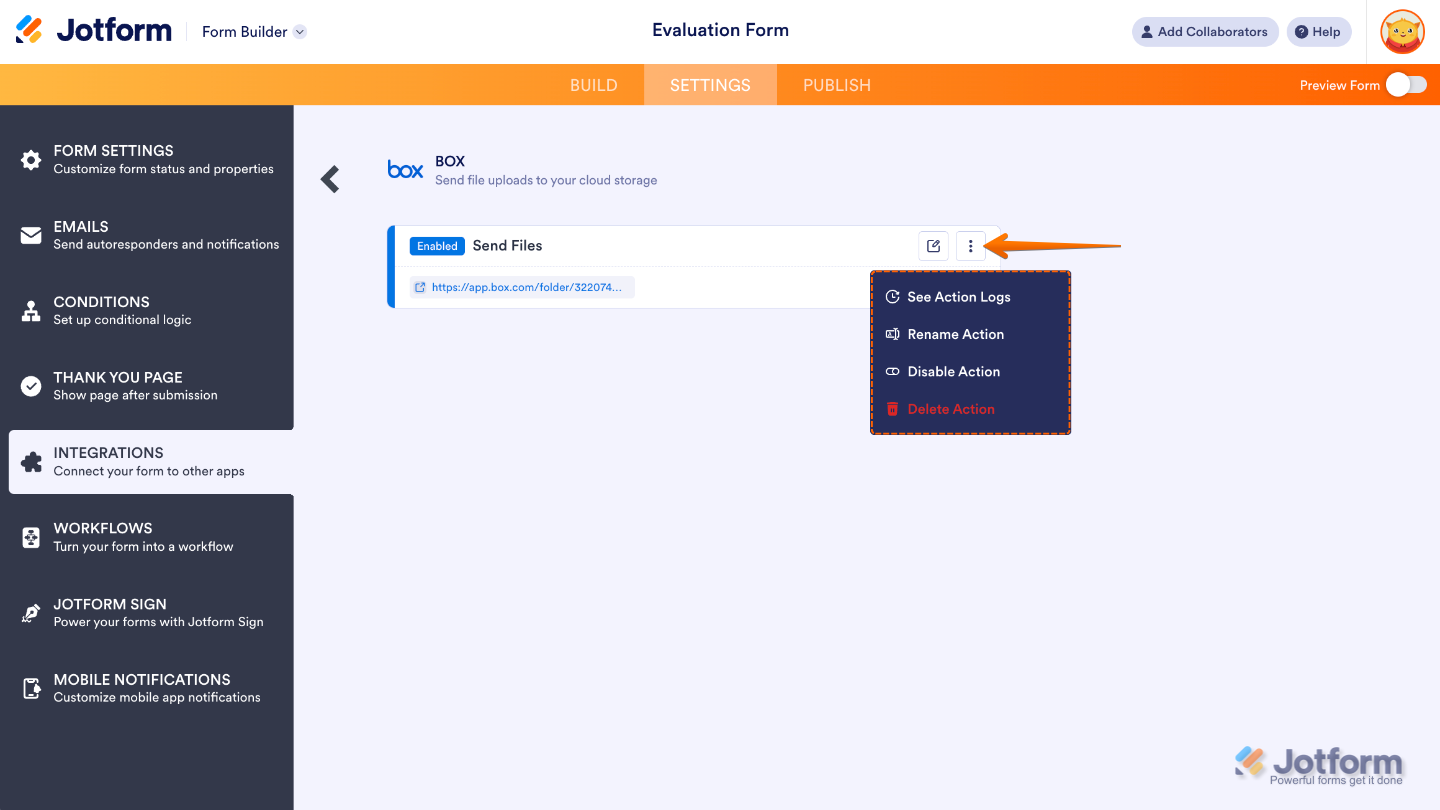
Keep in mind, if you hover over your existing Box integration and click the Three Dots icon, a menu will appear with several options to manage it. From there, you can:
- See Action Logs — This section will display your Box integration’s successful and failed runs. It’s useful when troubleshooting issues.
- Rename Action — If you want to personalize the action’s title.
- Disable Action — This option is useful to temporarily stop the integration from sending files.
- Delete Action — If you want to completely remove the integration from your form.

Send Comment: