Input masking may be underrated or not often used. Still, it is handy in different situations, especially if you talk about specifying and accepting input in a fixed format — for example, formatting for a custom date, number, or phone number.


To get you started, we’ll look at two different scenarios.
Input Masking Scenario #1:
For the first scenario, let’s look at this one using a simple Short Text element, so go ahead and add one to your form right now if you haven’t already. To view the Input Mask option, you can follow the steps below:
- Click the Short Text element.
- On the right side of the element, click the Properties (gear icon).
- Go to the Options tab.
- Scroll down and find the Input Mask option. Make sure to enable it.
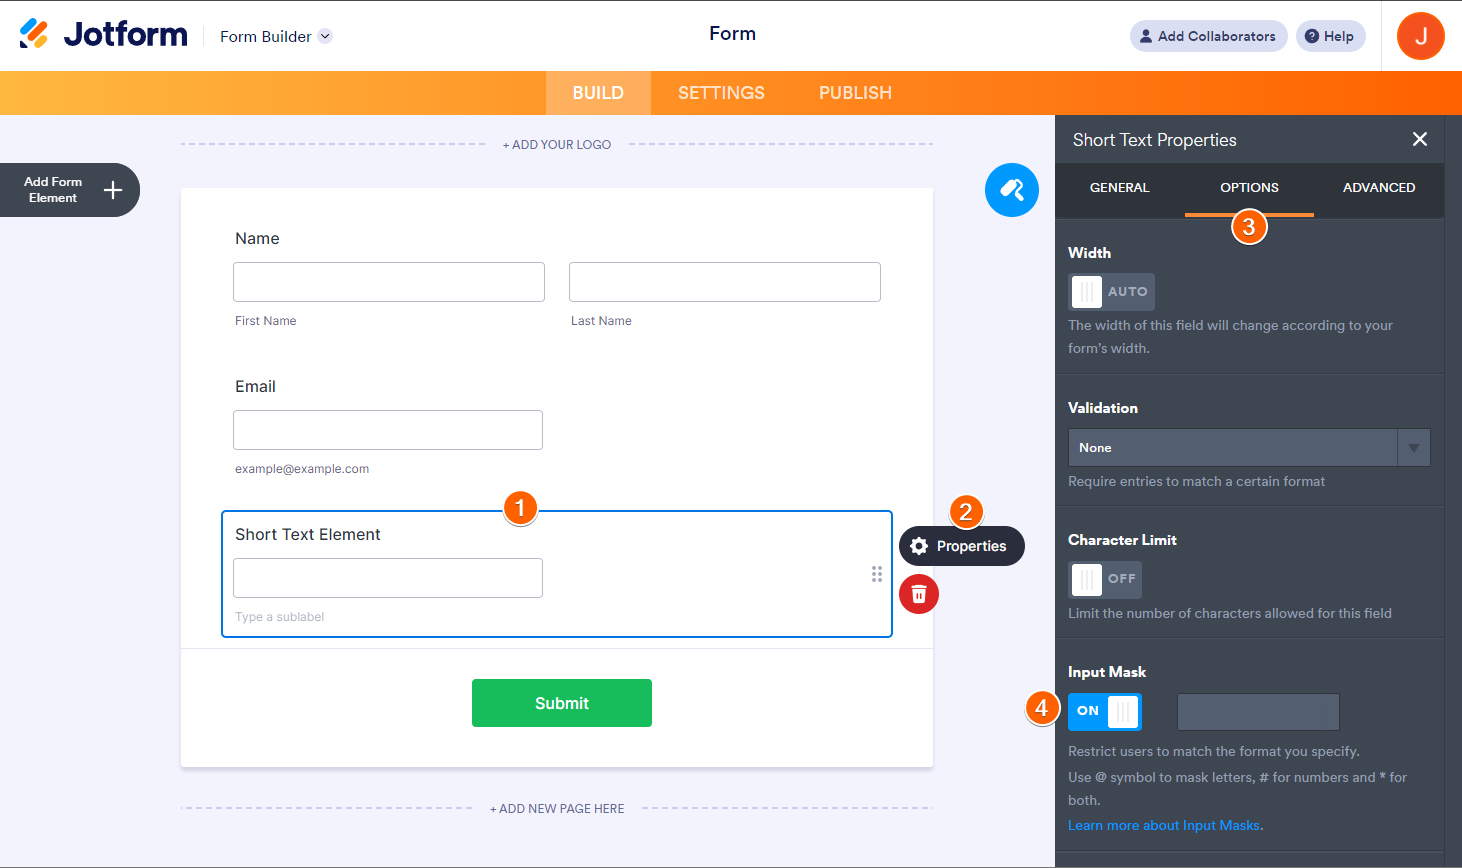
With input masking, you’ll only use three HTML characters, and these characters are explained right below the Input Mask toggle.
- @ — Masks Letters
- # — Masks Numbers
- * — Masks Letters & Numbers
To explain the above in a simplified manner, the Input Mask gives you much greater control over what is entered, limiting your users to the masked inputs.
That might still sound confusing, so summarize this by looking at the examples below.
Example A:
In this example, let’s say, for instance, you want to name cities that start with “St” (Saint), such as “St Augustine,” which would look like this @@ @@@@@@@@@.
The back-end of your form:

Front-end of your form:
Example B:
Now let’s take a glance at this in another instance where you might want to show a set of spaced-out numbers that would show up like this: # # # # #.
The back-end of your form:

Front-end of your Form:
Example C:
A good use for the Numbers Mask would be for advanced custom dates where you might not want to use the standard date fields such as ##/##/####.
The back-end of your Form:

Front-end of your Form:
Example D:
Both the above are good, but what if you needed more than that but didn’t need that much information, such as when you only want the street address where someone’s business is located?
So, in this particular case, you would want to combine the above by using both @ and # together, and that could look something like #### @@@@@@@@@ @@.
The back-end of your Form:

Front-end of your Form:
Example E:
Also, don’t forget that you can additionally allow either of these but still control yet limit this with the third option using the * (asterisk), and that would look a bit like *** ** **** ** ***.
The back-end of your Form:

Front-end of your Form:
Example F:
But what if none of the above was good enough for your situation? What if you work for a government, legal, or car parts company? You can do that too by compartmentalizing your characters to create something systematic, such as #@-#**#-#@.
The back-end of your Form:

Front-end of your Form:
Example G:
Some of the above examples are fixed input masking, so what about if you would like a way for users to enter characters but not require it all? For example, a membership number that ends with one or two characters. You can do the input masking as @@-#####-@[@]. As you can see, we’re using a Square Bracket for the optional character.
The back-end of your Form:

Front-end of your Form:
Input Masking Scenario #2:
Sure, using the masking capability is handy, but what if you’re a phone directory provider searching for 1-800 numbers to list, or you have users with foreign phone numbers and such?
Instances like this are where input masking on a phone field would be helpful just as much to give you control over how your phone numbers are entered and used.
Example A:
For the first example, let’s start again, but this time around, add a phone field. You should be able to access the Input Mask option the same way we described earlier in this guide.
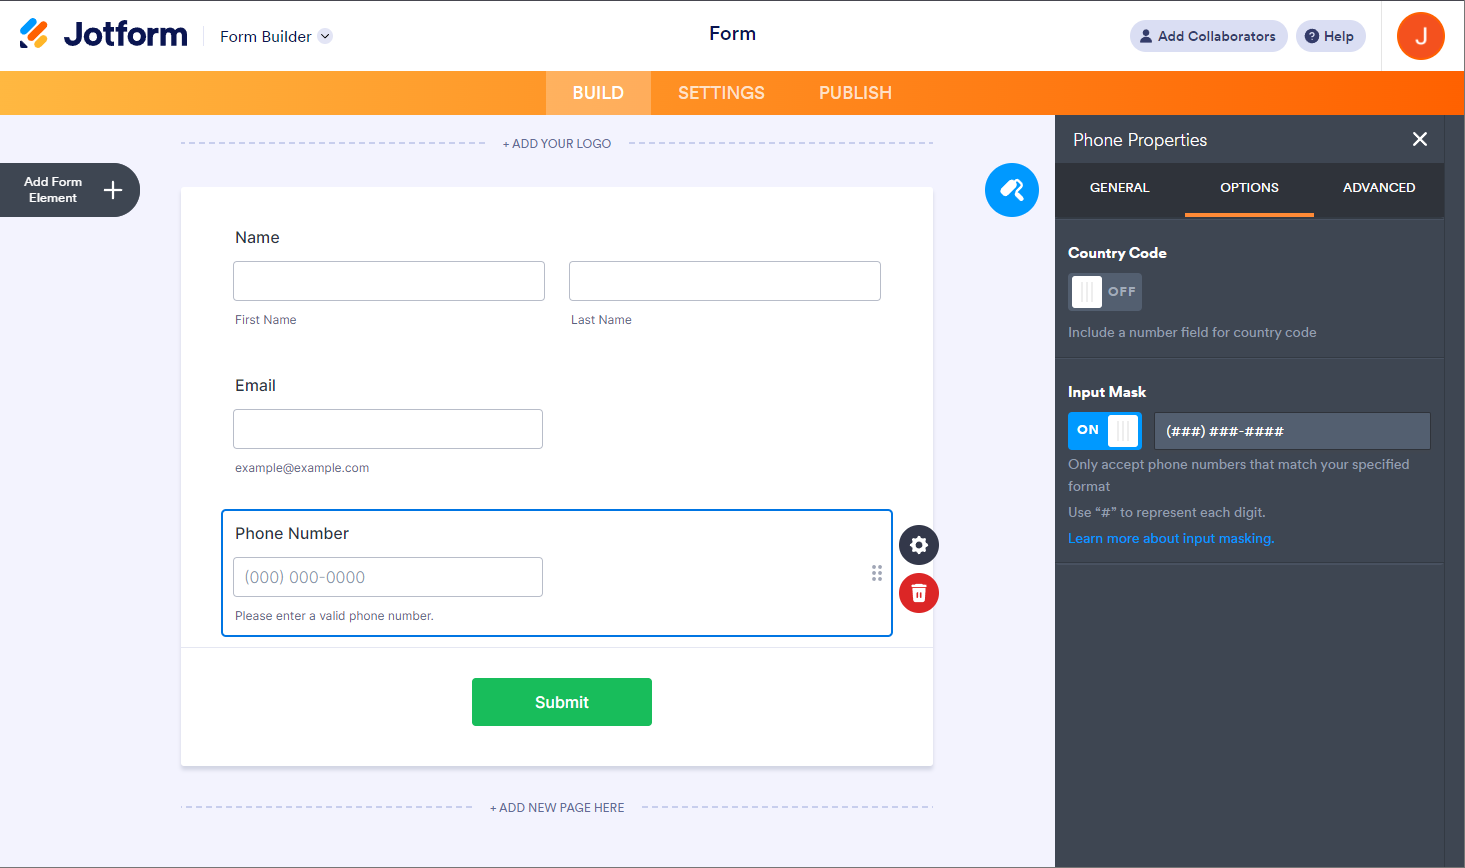
You’ll notice this time around that you can only use a Number Masking with #, and you will also see the default phone number input change from two inputs to one input, which is additionally prepopulated with (###) ###-####.
The back-end of your Form:

Front-end of your Form:
Example B:
Now, for using this for 1-800 numbers with a phone number, you could make it something like 1-(8##)-###-#### to let your users know that’s the type of info needed.
The back-end of your Form:

Front-end of your Form:
Example C:
As another example, let’s say you plan on running an outreach call program in Australia. You’d need to gather phone numbers limited to that formatting, so for this, it would end up looking something like +(##)#########, but you can format it to any country if elsewhere.
The back-end of your Form:

Front-end of your Form:
That’s about it for the Input Masking. It’s convenient in many cases, and you could apply it to your form.

Send Comment:
58 Comments:
April 18, 2026
Is there a way to update the font "please enter a valid phone number" to Arial 12pt?
April 12, 2026
I want to create a phone number filed that can accept different phone number formats
April 10, 2026
great feature. under rated feature to say the least
April 10, 2026
HOW TO FIXED CAPITAL LETTERS
February 18, 2026
What if I just want the phone number field entry to start with a "+" but then make it possible to enter 7 to 14 digits after that +
What did you guys plan for a maybe input mask
February 6, 2026
What if i would to allow manual entry of negative numbers
October 26, 2025
Which masked letter do I use for a number which can be a blank? For example, if a currency value input is requested, "#,###,###" will not allow 200,000, or 10,000. By the way, I don't want to show preceding commas such as in ',10,000' for an input of '10000'.
September 21, 2025
I need space for 11 digit phone number ?
July 28, 2025
Is there an inbuild dropdown option for country code
July 17, 2025
The phone widget really needs the option to have optional characters [ ] in the masking - we have a mix of 9 and 10 digit mobile phone numbers here, which is impossible to mask for currently.
June 7, 2025
What if I want to mask to require our own company domain name in an email address? If I create a Short Text field for entering an email address, how do I restrict the email address entered to "@ourcompanydomain.com"?
May 20, 2025
How would we go about configuring an input mask for a variable number of characters? For example, if I wanted to do an IP address, '###.###.###.###' wouldn't exactly produce the outcome I want, because I would need to insert leading zeros.
February 27, 2025
how to make checklist icon
January 22, 2025
How can I allow thew user to put a space at any position they like?
The @ or * masks only allow letters/numbers, but not spaces. You have to put a space on a particular position.
January 21, 2025
HOW TO FIXED CAPTIAL LETTERS
December 15, 2024
How do I make the entry conditions some words that I only want
These words or numbers are in a table I have and they are about 500 words
December 13, 2024
How to set Currency Format ?
October 22, 2024
how to add a drop down on the form
June 14, 2024
is there a way to input AM or PM times? some of my customers do not know how to read or write 24hr time
May 2, 2024
If anyone is looking for the feature of adding multiple characters,
You can do so by adding one character, then add a lot more - and each one should be in an open and closed bracket...
April 9, 2024
Please include a financial example that may or may not require thousands number and comma (i.e. $[#,]###.##
April 4, 2024
Hi. I would like to create an input mask for location data. I am trying to create a mask for location data to allow a form recipient to input latitude and longitude values to 6 decimal places...
March 29, 2024
I need the client to enter the amount they are applying for between $10,000.00 and $20,000,000.00 in that format. I built $##,###,###.00 but the clients are frustrated as they would enter 100000 for $100,000 and it would show up as $10,000,0##.00 and they don’t know how to fix it. Thoughts?
February 20, 2024
How to give gender ? Male or female
December 12, 2023
How can I limit a field to accept only A-Z, a-z, and dashes? NO spaces allowed.