Jotform’s Check In Check Out widget makes it easy to track time, whether you’re managing attendance, logging work hours, or keeping records of when someone starts and finishes a task. With just a click, users can check in at the beginning and check out at the end — giving you accurate, time-stamped data right inside your form. It’s a simple, reliable way to streamline time tracking without extra tools or complicated setups.
Here are a few ways to use it:
- Manage Hotel or Accommodation Bookings — You can use the Check In Check Out widget to allow guests to select their arrival and departure dates when booking a room or property. This helps streamline reservation forms and prevents date confusion.
- Handle Vacation Rental Reservations — The widget works well for short-term rentals such as apartments, cabins, or vacation homes. Guests can easily choose their stay duration when submitting a booking request.
- Schedule Equipment or Resource Rentals — Businesses that rent equipment, vehicles, or tools can use the widget to track when items are checked out and when they are expected to be returned.
- Organize Event Venue Bookings — Event organizers can allow users to select the start and end dates for venue reservations. This helps track how long a location will be used for an event.
Note
The widget automatically provides a start and end date picker, so you don’t need to add separate calendar fields.
Adding and Setting Up the Check In Check Out Widget
Adding the Check In Check Out widget to your form is a quick way to let people make reservations or book classes online. Setting it up takes no time at all—here’s how:
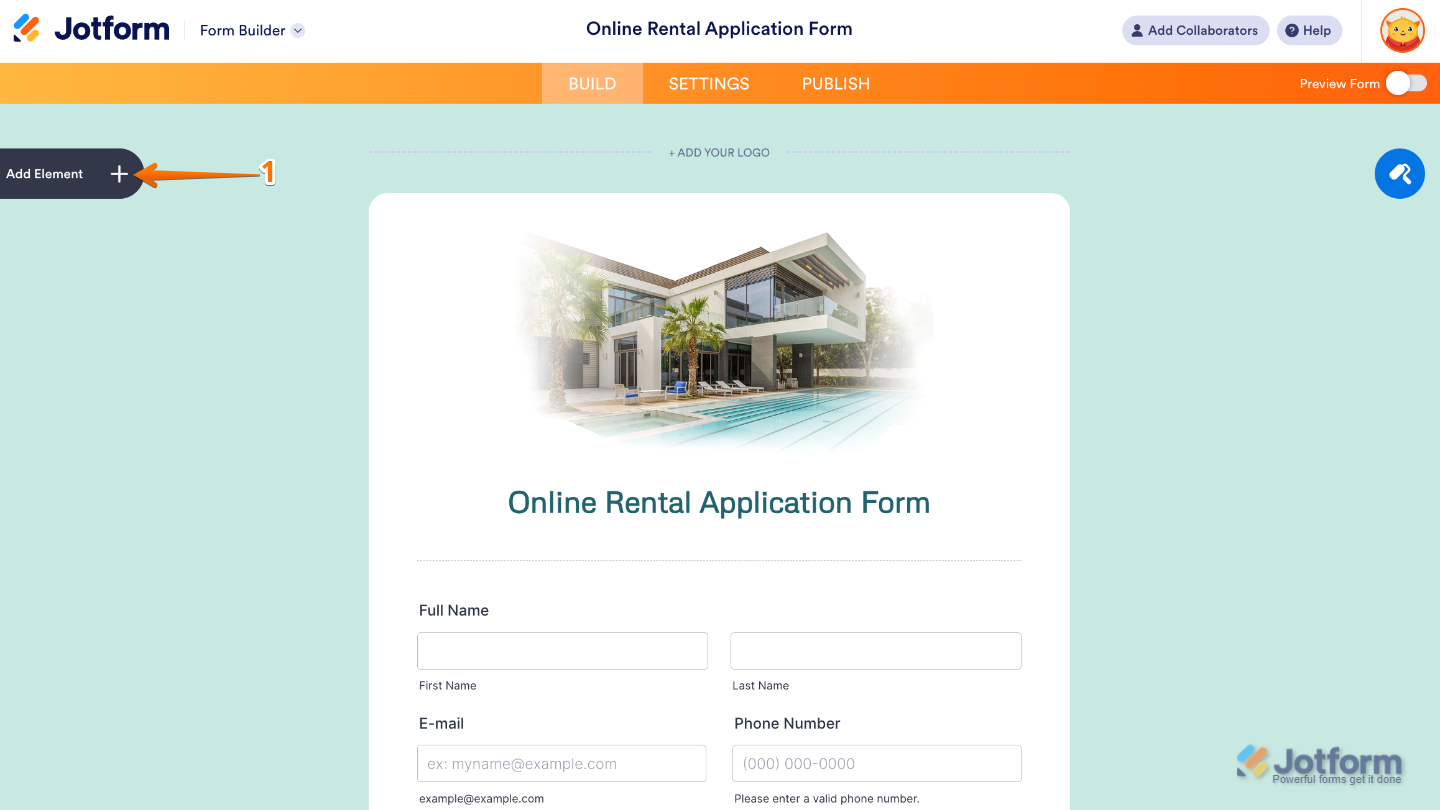
- In Form Builder, click on Add Element on the left side of the page.
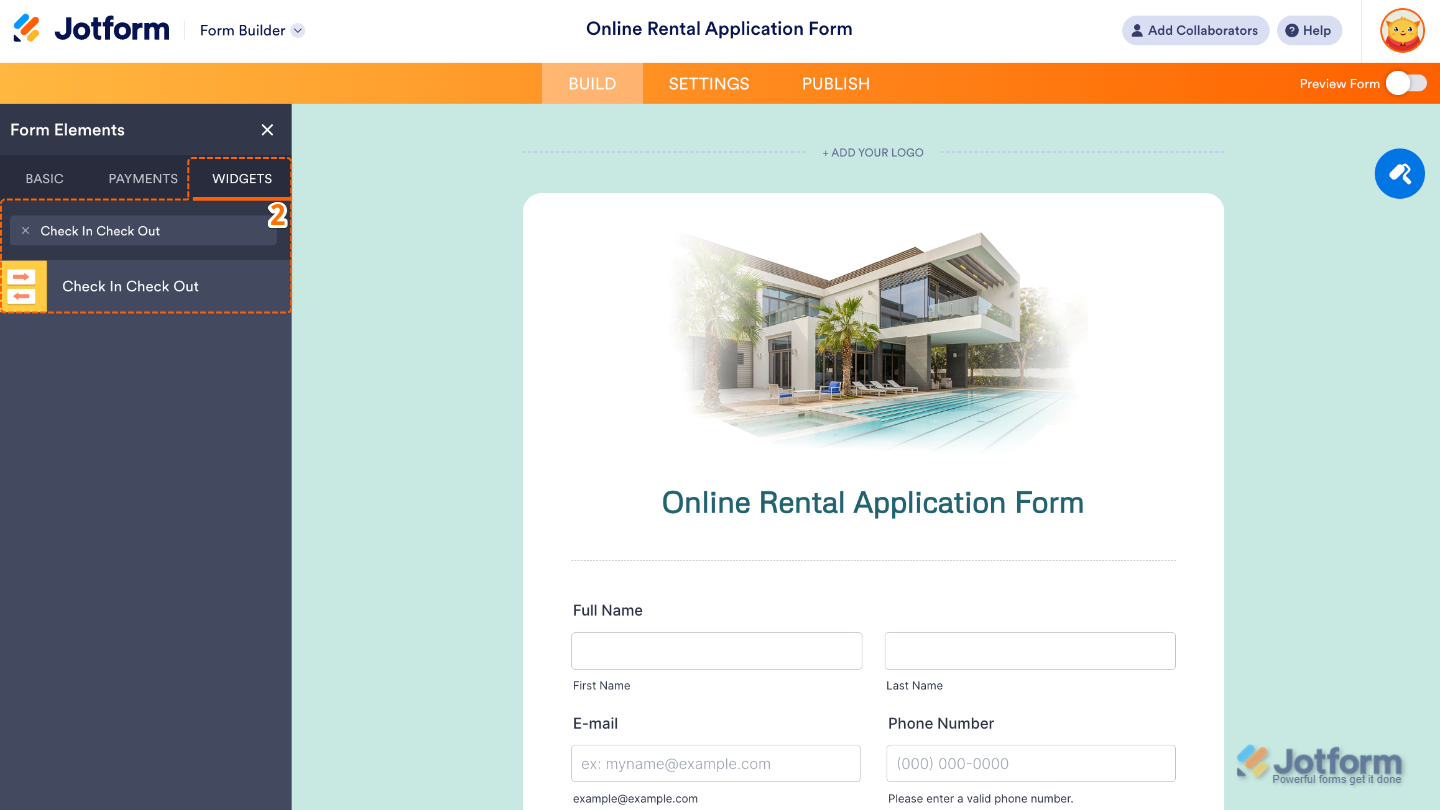
- Now, in the Form Elements menu, under the Widgets tab, search for Check In Check Out and then click on it. Or, just drag and drop it to where you want it to be on your form.
- Next, in the Widget Settings window that opens on the right side of the page, set up the following options:
- Minimum Stay — Decide the minimum number of days your guests need to book before confirming their stay.
- Data Format — Select how the date appears (e.g., DD/MM/YYYY, MM/DD/YYYY, or YYYY/MM/DD), making it easier for your users depending on their region.
- Days — Choose which days of the week you’d like to block off. Just add an asterisk (*) after the day, and it won’t be available for booking.
- Months — Control which months you’d like to block off from booking. Just pop an asterisk (*) after the month, and it’ll be marked as unavailable.

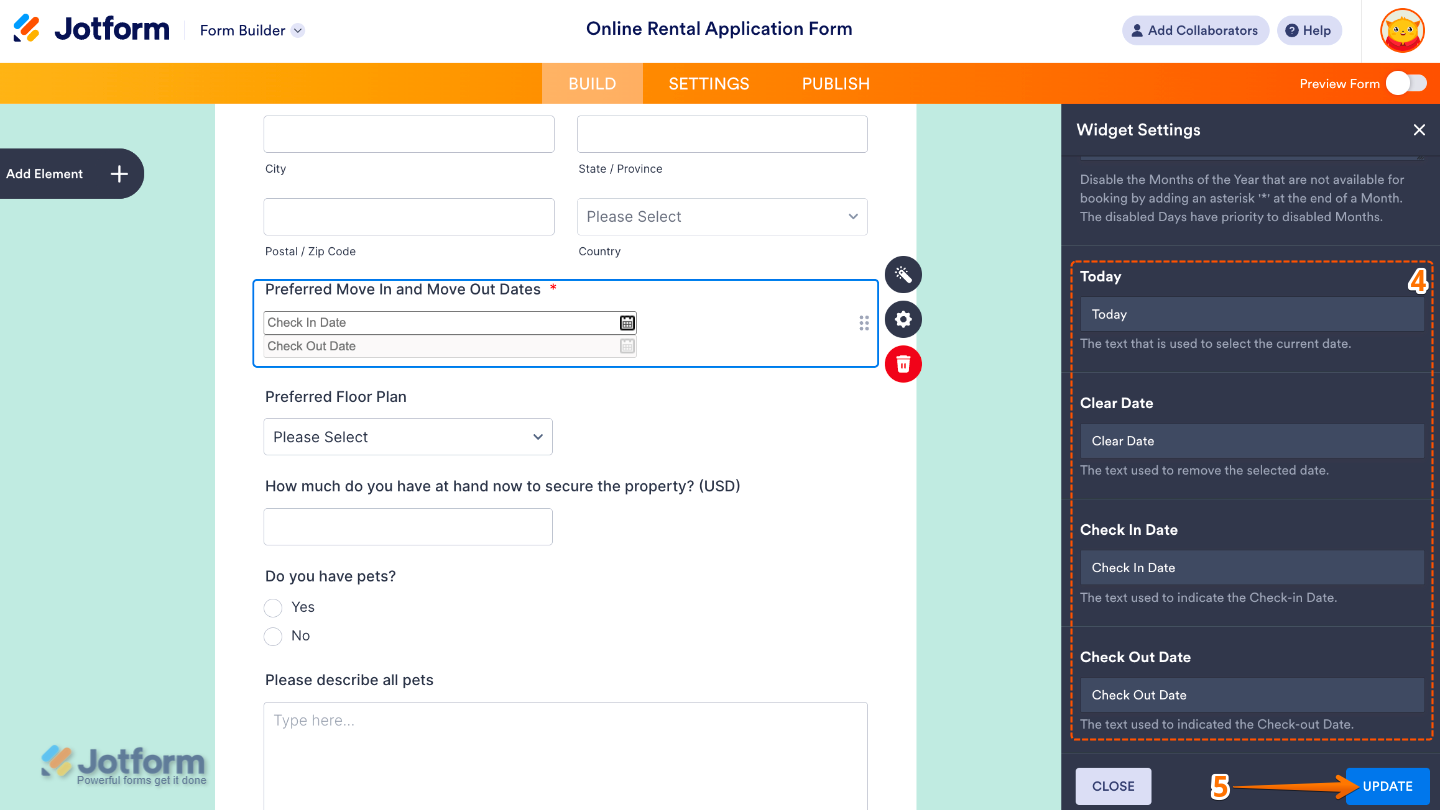
- Then, scroll down to the bottom and continue to set up these options:
- Today — Edit this to highlight the current day on the calendar, so users always know where they are.
- Clear Date — Set the text that will appear for clearing or removing a selected date.
- Check In Date — Compose the label text that tells users where to pick their check-in date.
- Check Out Date — Create the label text that lets users know where to select their check-out date.
- Once you’re done, click on Update.
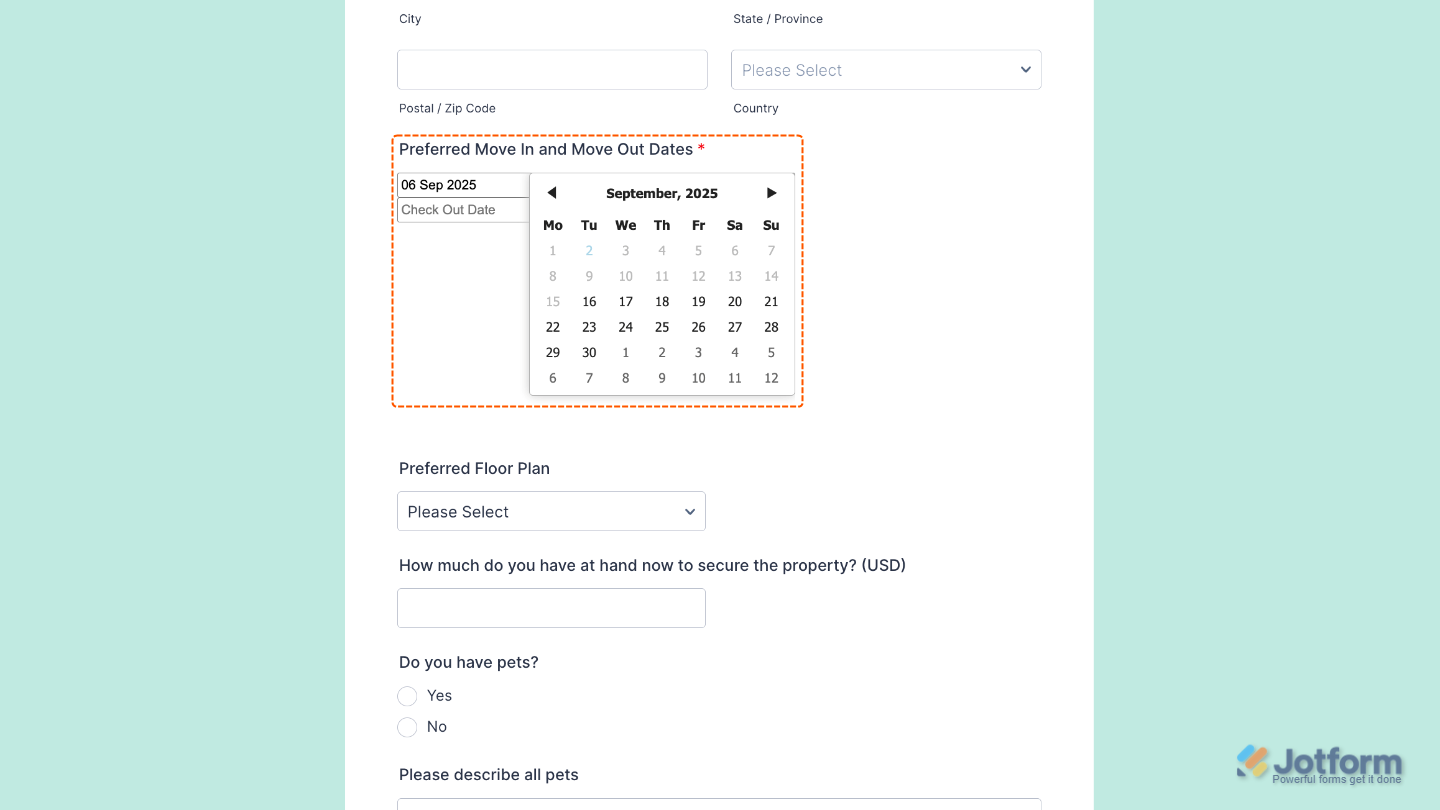
That’s it. You’ve successfully added and set up the Check In Check Out widget to your form. Now, you have a field in your form that allows users to easily enter their details and pick start and end dates from a simple, interactive calendar. Curious how it works on a live form? Check out this Demo Form.
To tweak how your Check In Check Out field looks, just click the gear icon to open its settings and adjust it to your liking.
Note
For advanced styling, you can add your own custom CSS under the Custom CSS tab in the widget settings and style the Check In Check Out field. Our guide on How to Inject CSS Codes to Widgets walks you through everything.

Send Comment: