Jotform’s DateTime Single widget makes it easy for users to pick both a date and time in one simple field—perfect for things like booking appointments, logging events, or setting deadlines. It helps keep your form tidy and easy to use. You can tweak the date and time format, adjust the minute intervals, and even set it to pre-fill with the current date and time to make things quicker for your users.
Here are a few ways to use it:
- Schedule Appointments or Meetings — Let people pick the exact date and time they want to meet you. It’s a simple way to keep everyone on the same page without endless back-and-forth emails.
- Collect Event RSVP Dates — Hosting a party, webinar, or workshop? Use this widget to let guests select the date they plan to attend (or to confirm they saw the event date).
- Track Deadlines or Due Dates — Whether it’s a project submission, application deadline, or payment date, this widget helps you collect and organize important time-sensitive info.
- Time-Stamp Entries Automatically — Want to know exactly when someone filled out your form? You can prefill the widget with the current date and time so it captures submissions automatically.
Adding and Setting Up the DateTime Single Widget
The DateTime Single widget lets you collect both a date and time in one handy field, keeping things simple and making the form easier for your users to fill out. Setting it up takes no time at all—here’s how:
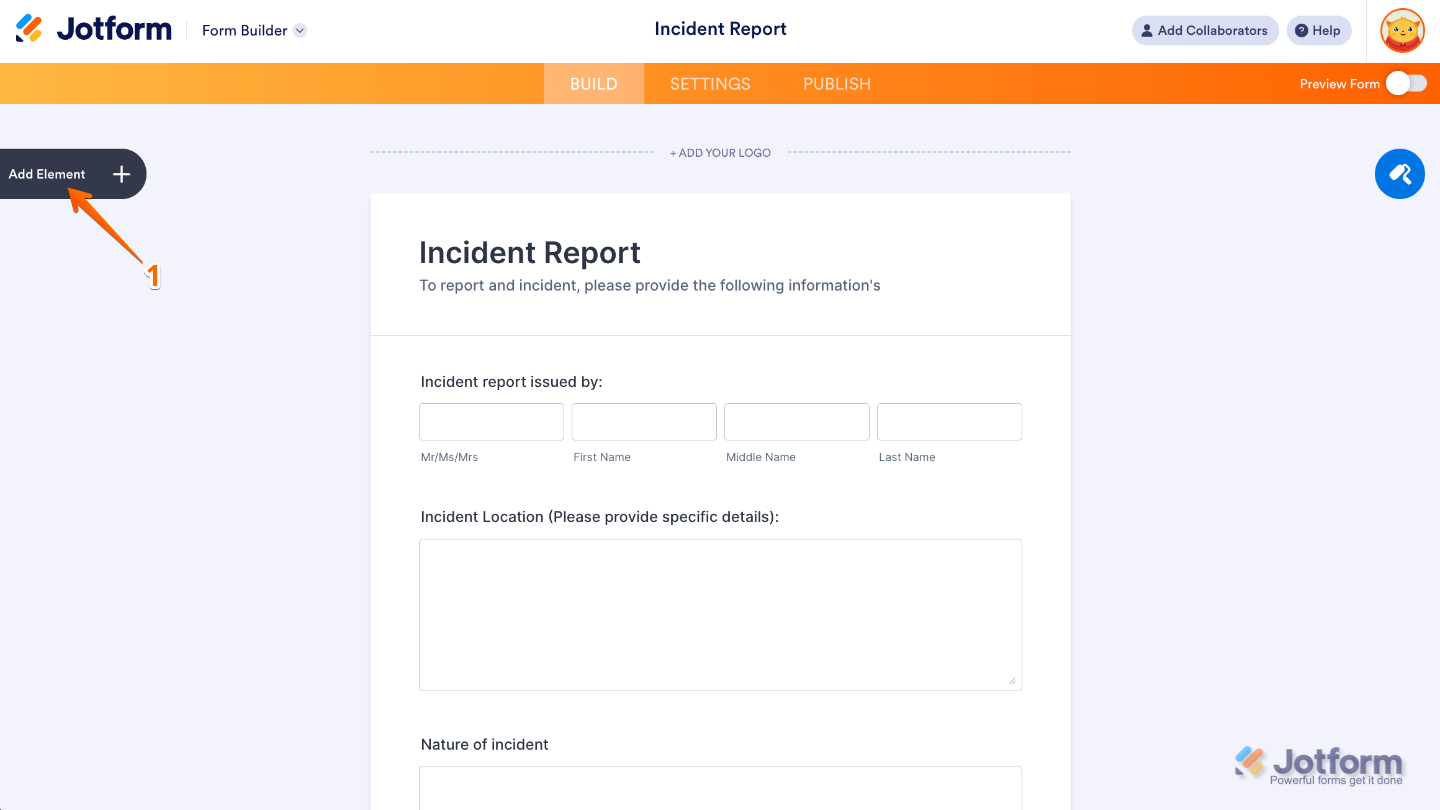
- In Form Builder, click on Add Element on the left side of the page.
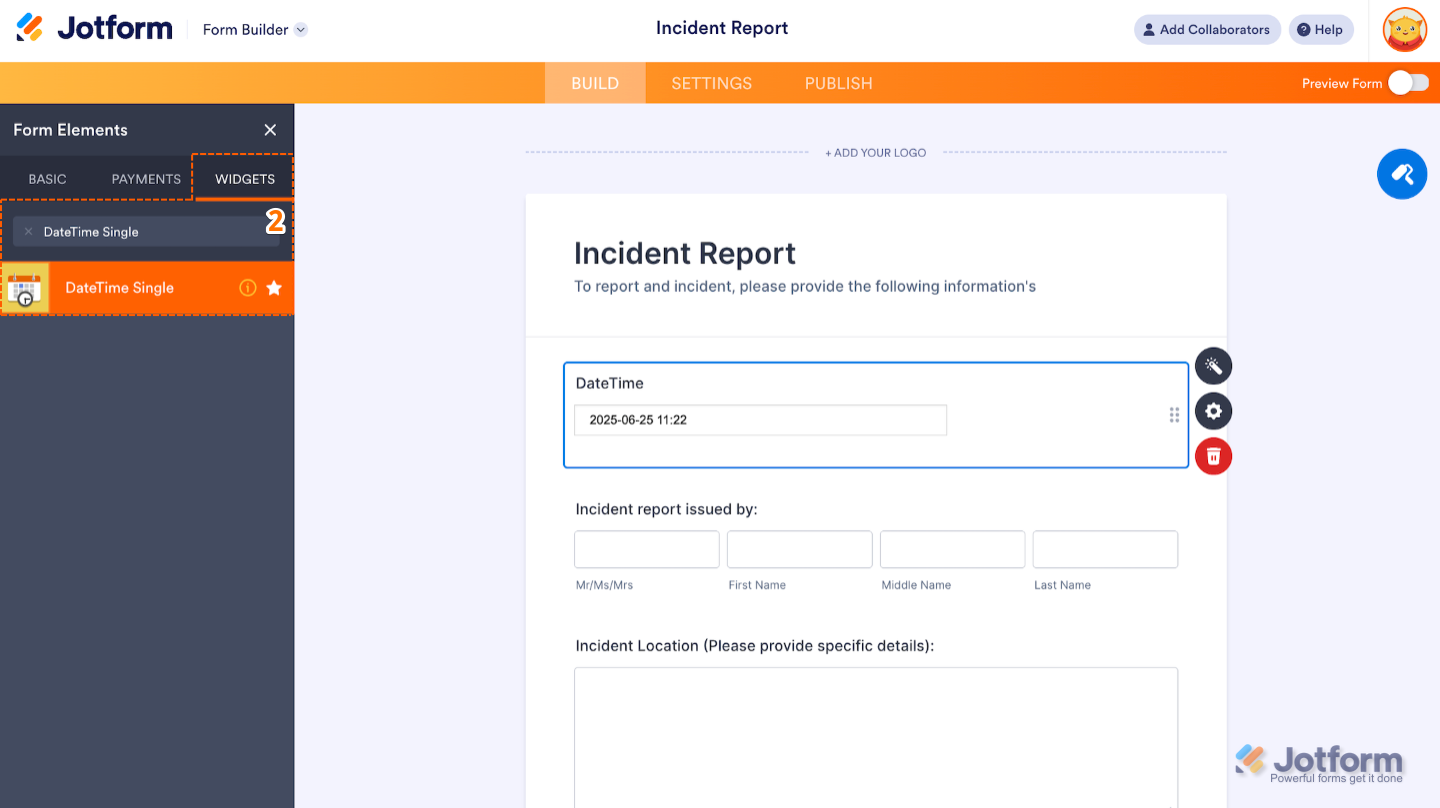
- Now, in the Form Elements menu, under the Widgets tab, search for DateTime Single and then click on it. Or, just drag and drop it to where you want it to be on your form.
- Next, in the Widget Settings window that opens on the right side of the page, under the General tab, set up the following options:
- Date Format — Use this to choose how the date and time will appear on your form. You can pick from formats like:
- YYYY/MM/DD hh:mm
- MM/DD/YYYY hh:mm
- DD/MM/YYYY hh:mm
- DD.MM.YYYY hh:mm
- d, DD m YYYY hh:mm
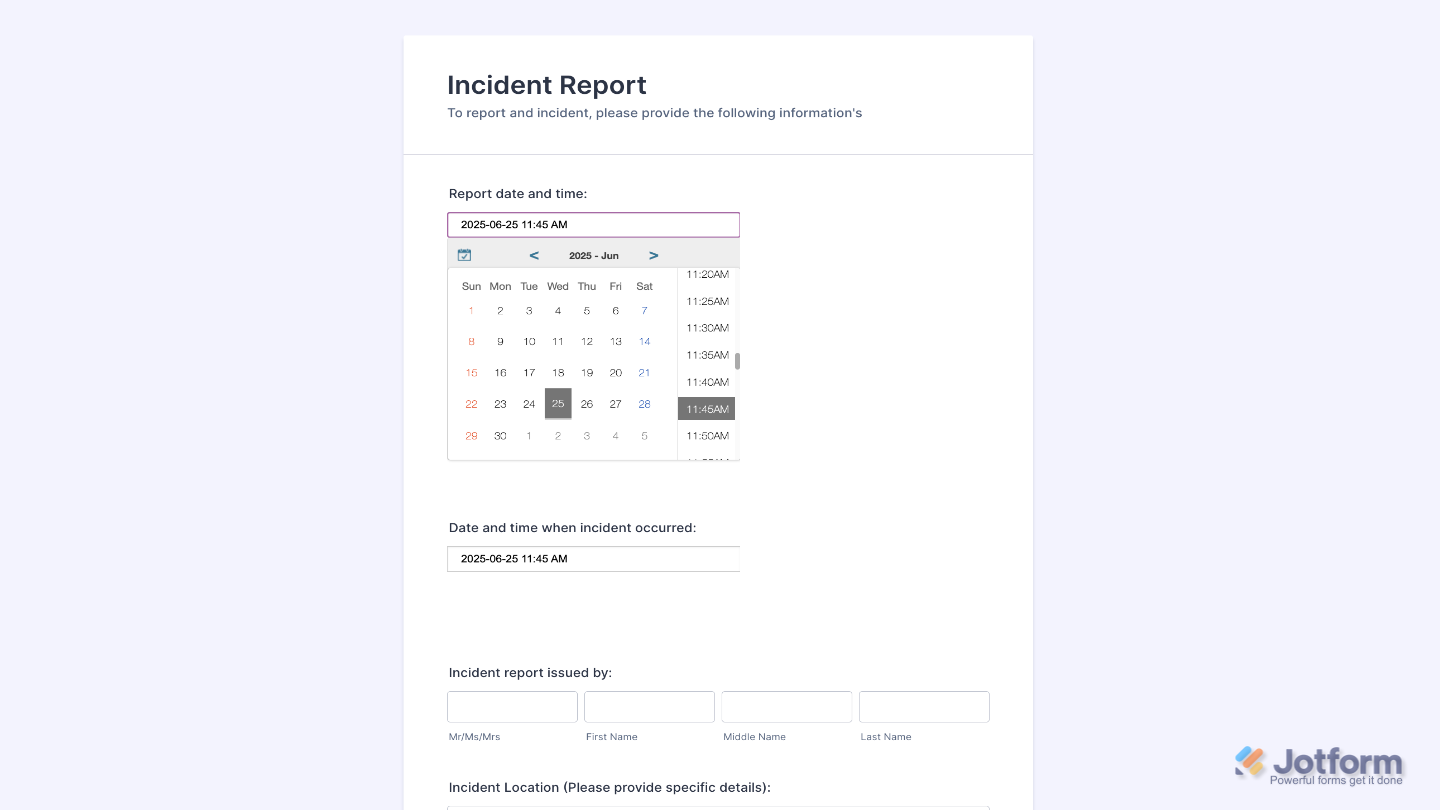
- Time Selector —When enabled, users can pick both a date and time. If it’s disabled, they’ll only be able to select a date.
- Time Format — Choose whether time is displayed in 12-hour (AM/PM) or 24-hour (military) format.
- Minute Interval — Select the spacing between selectable minutes (5, 10, 15, 30)
- Date Format — Use this to choose how the date and time will appear on your form. You can pick from formats like:

- Then, scroll down to the bottom and continue to set up these options:
- Show Current Date and Time — When enabled, the field automatically displays the current date and time when the form loads.
- Locale — Select a country so your date and time match the local language and format.
- Run in the Background — When enabled, the widget loads and runs without showing visible input, but still captures the date/time in the background.
- Once you’re done, click on Update.

That’s it. You’ve successfully added and set up the DateTime Single widget to your form. Now, you can collect both date and time in one field, keeping your form clean and efficient. It’s perfect for scheduling, appointments, event tracking, or time-sensitive submissions. Curious how it works on a live form? Check out this Demo Form.
To personalize how your DateTime Single field looks, simply click the Gear icon to open its settings.
Note
For advanced styling, you can add your own custom CSS under the Custom CSS tab in the widget settings and style the Image DateTime Single field. Our guide on How to Inject CSS Codes to Widgets walks you through everything.
Pro Tips
- Turn on Show Current Date and Time to automatically fill in the field with the user’s current info; perfect for things like activity logs, sign-ins, or quick confirmations.
- Use the Run in the Background option if you need to silently record when the form was opened or submitted.
- To make things easier for your users, set a time interval that makes sense, like every 5 or 15 minutes, so picking a time is quick and smooth.
- Pick a date format and locale that your audience is familiar with, especially if you’re sharing your form with international users. It helps keep things clear and avoids any mix-ups.

Send Comment: