Jotform’s Day Countdown widget makes it easy to add a touch of excitement and urgency to your forms. Whether you’re running a limited-time offer, counting down to an event, or creating a sense of anticipation for your audience, this widget helps you keep things clear and engaging.
Here are a few ways to use it:
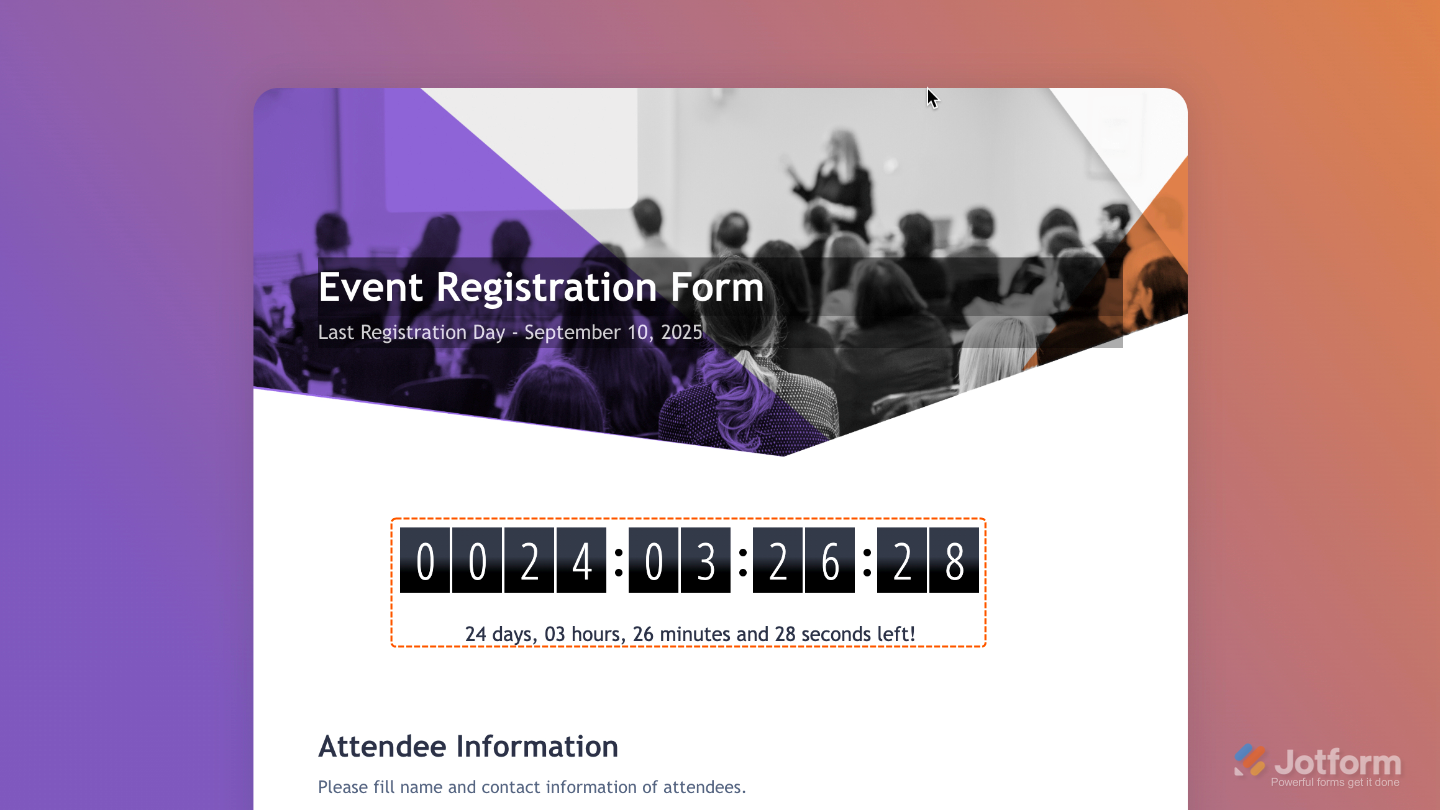
- Create Urgency for Event Registrations — You can use the Day Countdown widget to show how many days are left until an event, webinar, or workshop. This encourages users to register before the deadline.
- Promote Limited-Time Offers — The widget is ideal for sales, discounts, or special promotions. Displaying a countdown motivates users to act quickly before the offer expires.
- Track Project or Submission Deadlines — You can use the widget to highlight deadlines for applications, assignments, or project submissions. This keeps users aware of the time remaining to complete tasks.
- Build Anticipation for Product Launches — For new products or services, the Day Countdown widget can create excitement by showing the number of days left until the launch date.
Adding and Setting Up the Day Countdown Widget
Adding the Day Countdown widget to your form is a fun way to show exactly how much time is left until an event or deadline. Setting it up takes no time at all—here’s how:
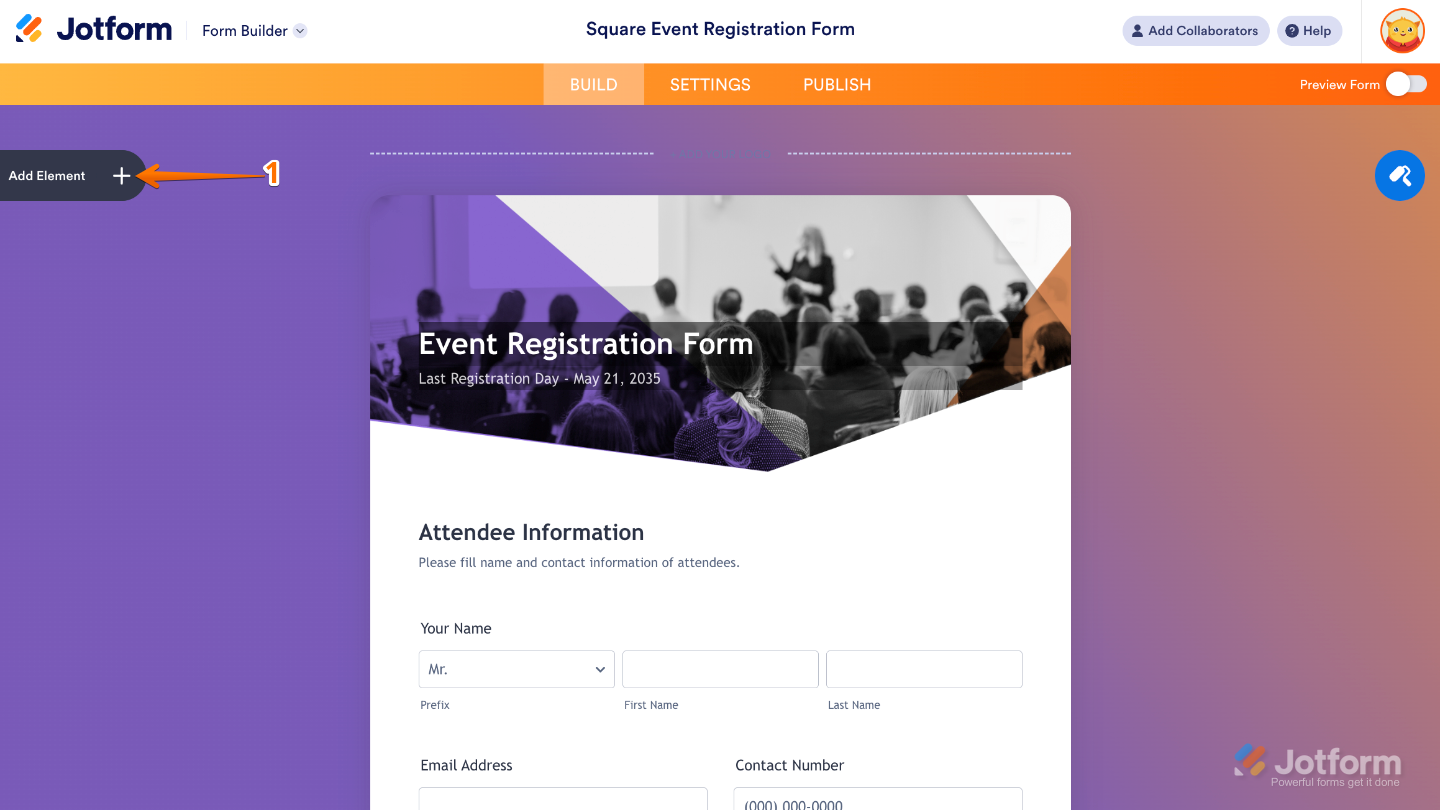
- In Form Builder, click on Add Element on the left side of the page.
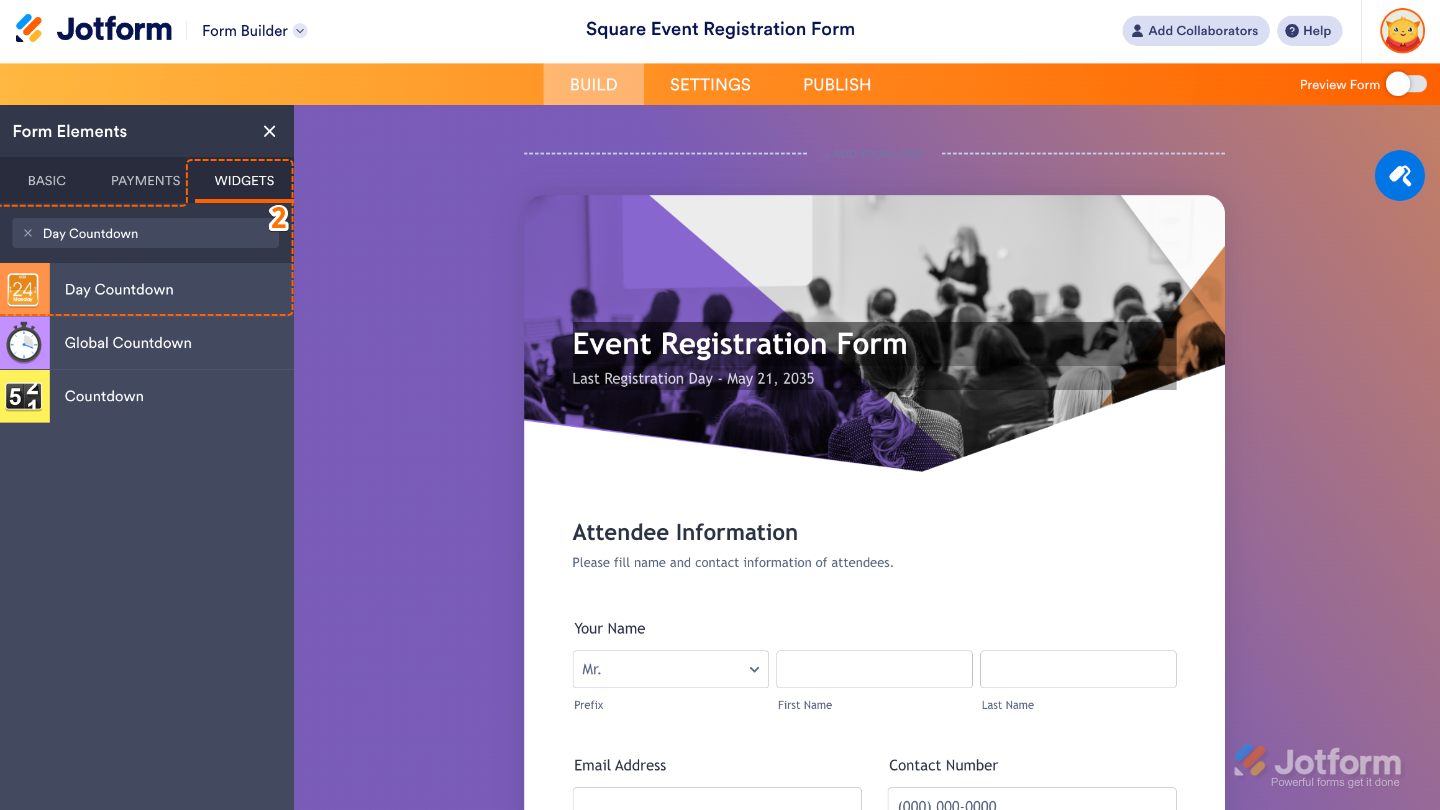
- Now, in the Form Elements menu, under the Widgets tab, search for Day Countdown and then click on it. Or, just drag and drop it to where you want it to be on your form.
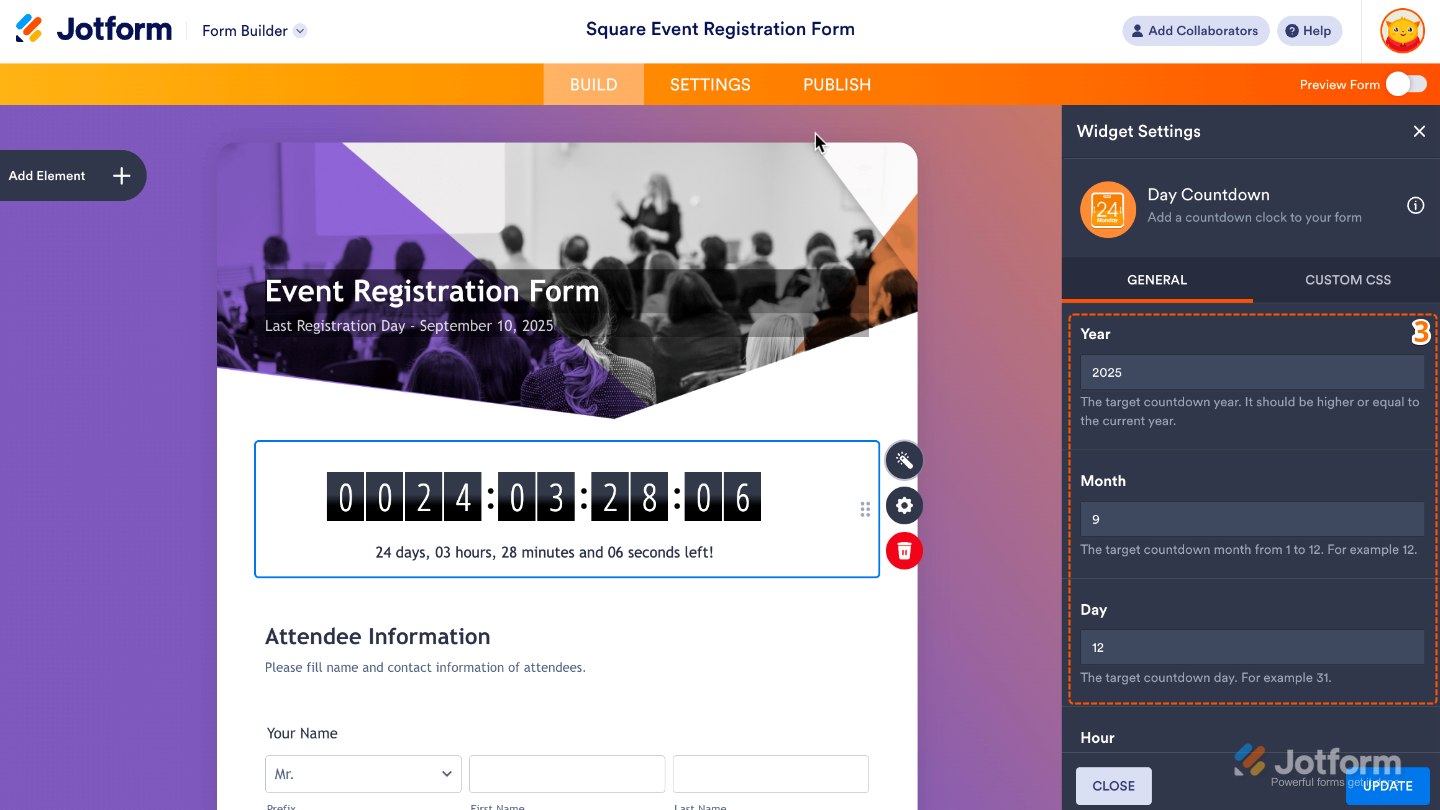
- Next, in the Widget Settings window that opens on the right side of the page, set up the following options:
- Year — Set the exact year your countdown will end.
- Month — Choose the specific month (1 to 12) when your countdown should finish.
- Day — Pick the exact day to mark your deadline or special event.
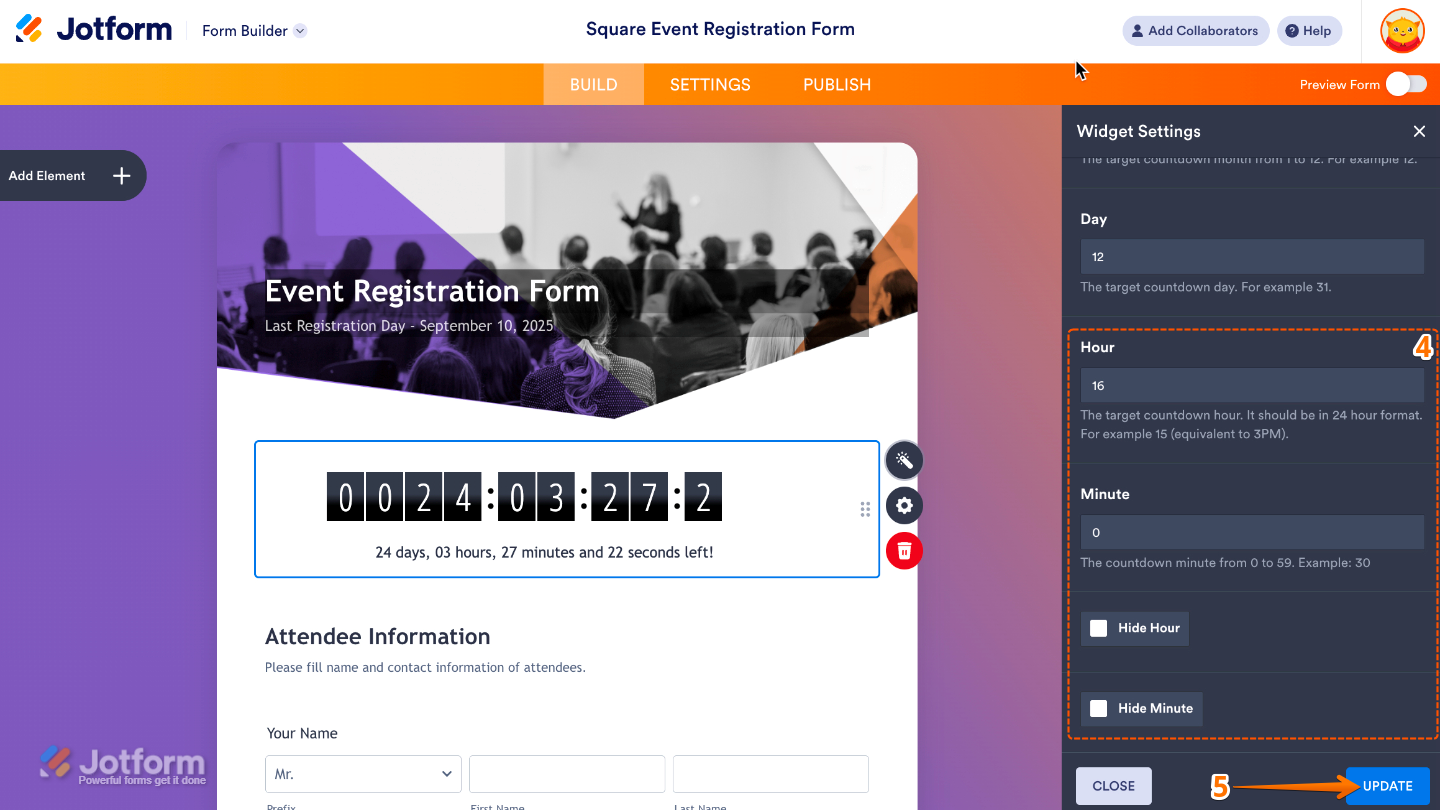
- Then, scroll down to the bottom and continue to set up these options:
- Hour — Set the hour in 24-hour format so your countdown ends right on time with precise timing.
- Minute — Fine-tune the countdown by setting the exact minute it should wrap up.
- Hide Hour — Turn this option on if you’d like to hide the hour and keep your countdown nice and simple.
- Hide Minute — If minutes aren’t important for your event, you can toggle this on to hide them and make your countdown cleaner.
- Once you’re done, click on Update.
That’s it. You’ve successfully added and set up the Day Countdown widget to your form. Now, you have a field in your form that keeps your audience informed, excited, and ready to join in when the big day arrives. Curious how it works on a live form? Check out this Demo Form.
To tweak how your Day Countdown field looks, just click the gear icon to open its settings and adjust it to your liking.
Note
For advanced styling, you can add your own custom CSS under the Custom CSS tab in the widget settings and style the Day Countdown field. Our guide on How to Inject CSS Codes to Widgets walks you through everything.
Pro Tips
- Always preview your form to double-check that your countdown ends exactly when you want it to.
- A visible countdown adds urgency, which is great for limited-time offers, early-bird signups, or event registrations.

Send Comment: