With Jotform’s Get Visitor Location widget, you can automatically capture a user’s IP-based location information such as their geographical coordinates, ZIP code, time zone, and more when they fill out your form. Whether you’re collecting leads, managing regional data, or customizing user experiences based on location, this widget makes it easy.
Here are a few ways to use it:
- Personalize the Form Experience — Show users location-based messages or offers. For example, you can display different options depending on which city or country they’re in.
- Make Event Sign-Ups Smarter — If you’re hosting events in multiple places, the widget can detect where someone’s coming from and suggest the closest event location.
- Track Where Submissions Come From — Whether you’re running a survey, feedback form, or order form, knowing where your responses are coming from helps you spot trends and understand your audience better.
- Simplify Service Requests — For delivery forms, repair requests, or local services, the widget helps auto-fill location details—no need for users to type their full address.
Notes
- IP accuracy can vary depending on the user’s internet provider or whether they’re using a VPN.
- The widget works automatically in the background, users don’t need to take any action to provide their location.
Adding and Setting Up the Get Visitor Location Widget
If you’d like to see where your form submissions are coming from, the Get Visitor Location widget is a great fit for the job. To get going, here’s what you’ll do:
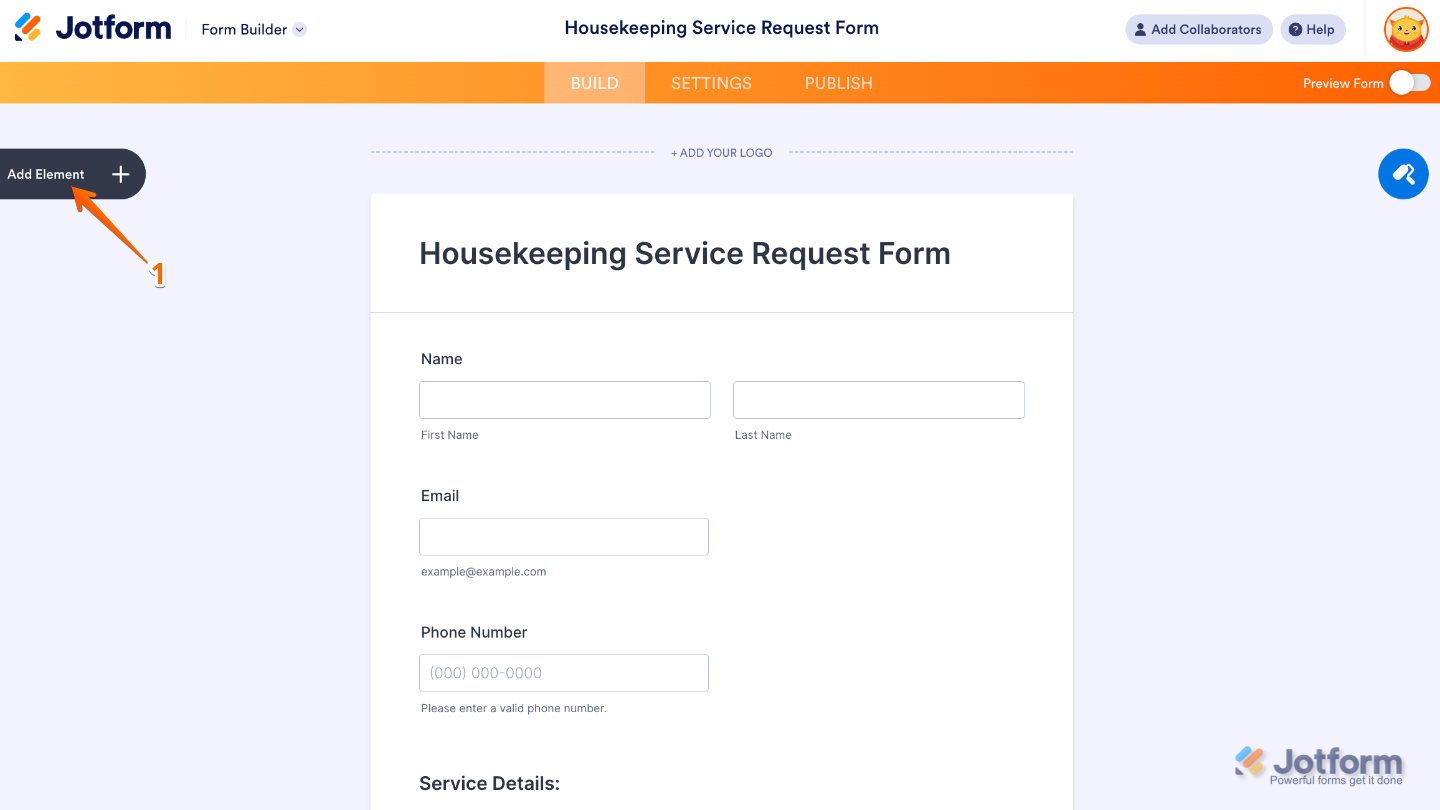
- In Form Builder, click on Add Element on the left side of the page.
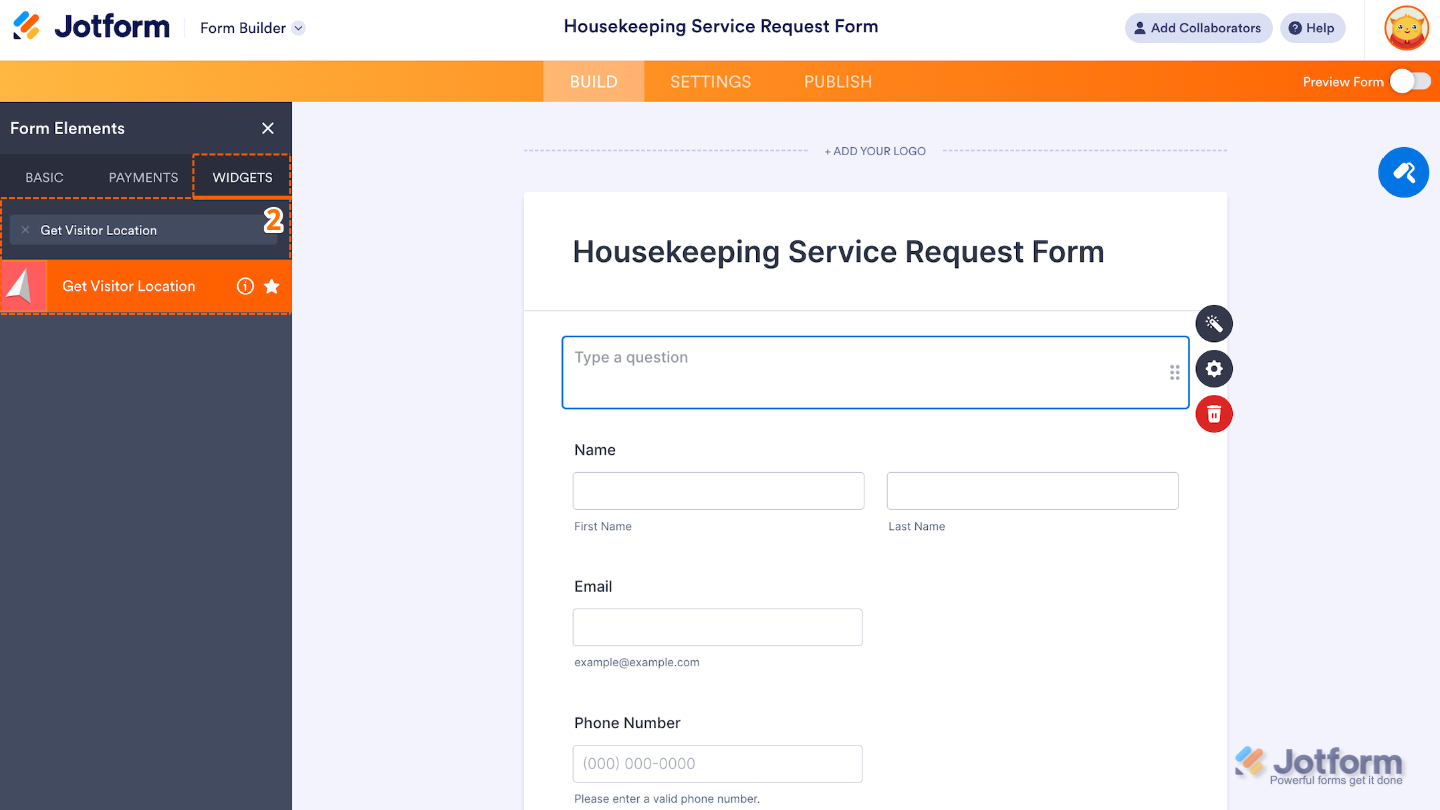
- Now, in the Form Elements menu, under the Widgets tab, search for Get Visitor Location and then click on it. Or, just drag and drop it to where you want it to be on your form.
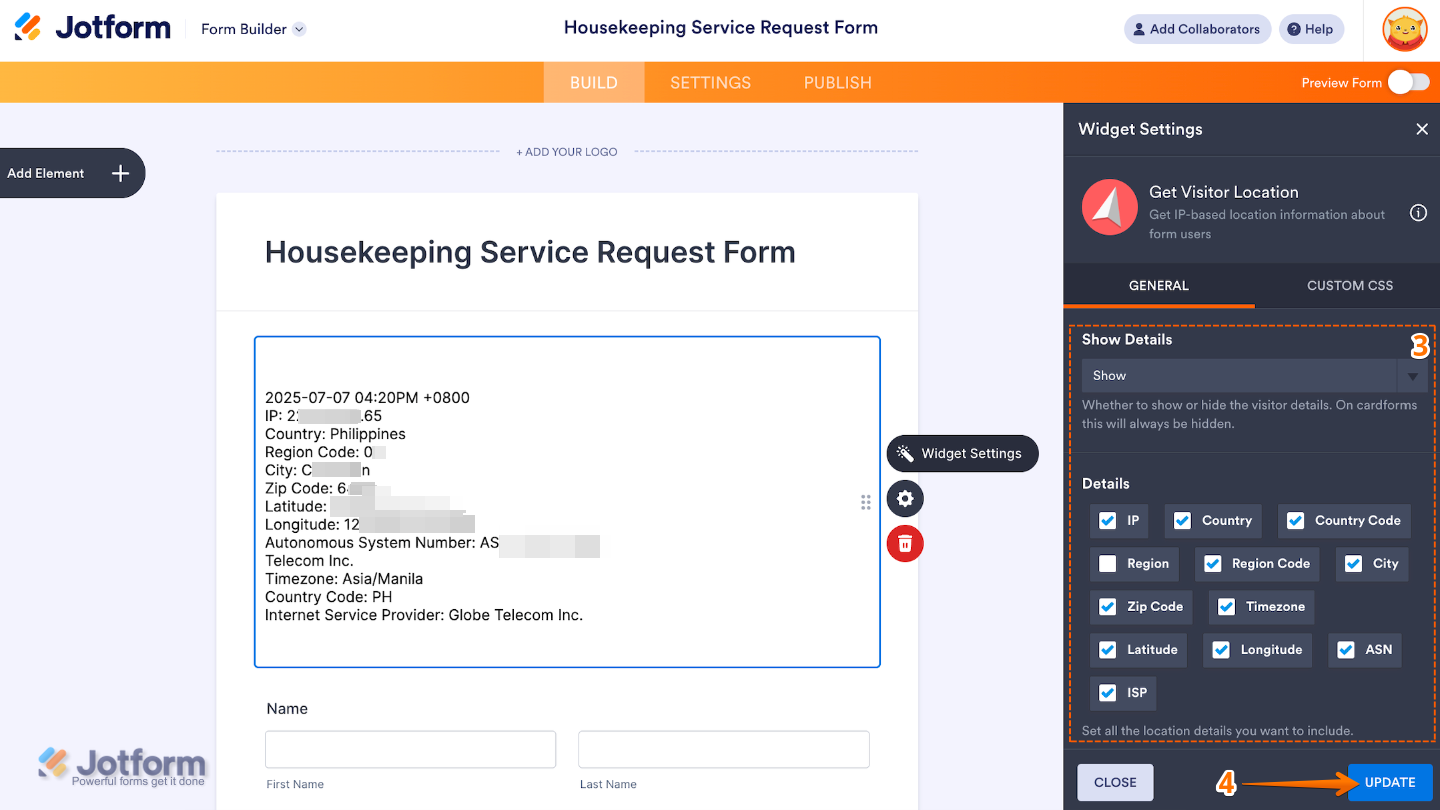
- Next, in the Widget Settings window that opens on the right side of the page, set up the following options:
- Show Details — If Yes is selected, users will be able to see the location information collected through the widget.
- Details — Simply check the boxes next to the options you want to include. This lets you control which location details the widget collects and shows.
- Once you’re done, click on Update.
That’s it. You’ve successfully added and set up the Get Visitor Location widget to your form. Now, you can collect the respondent’s IP address to estimate their location. Want a quick preview? This Demo Form shows how it works.
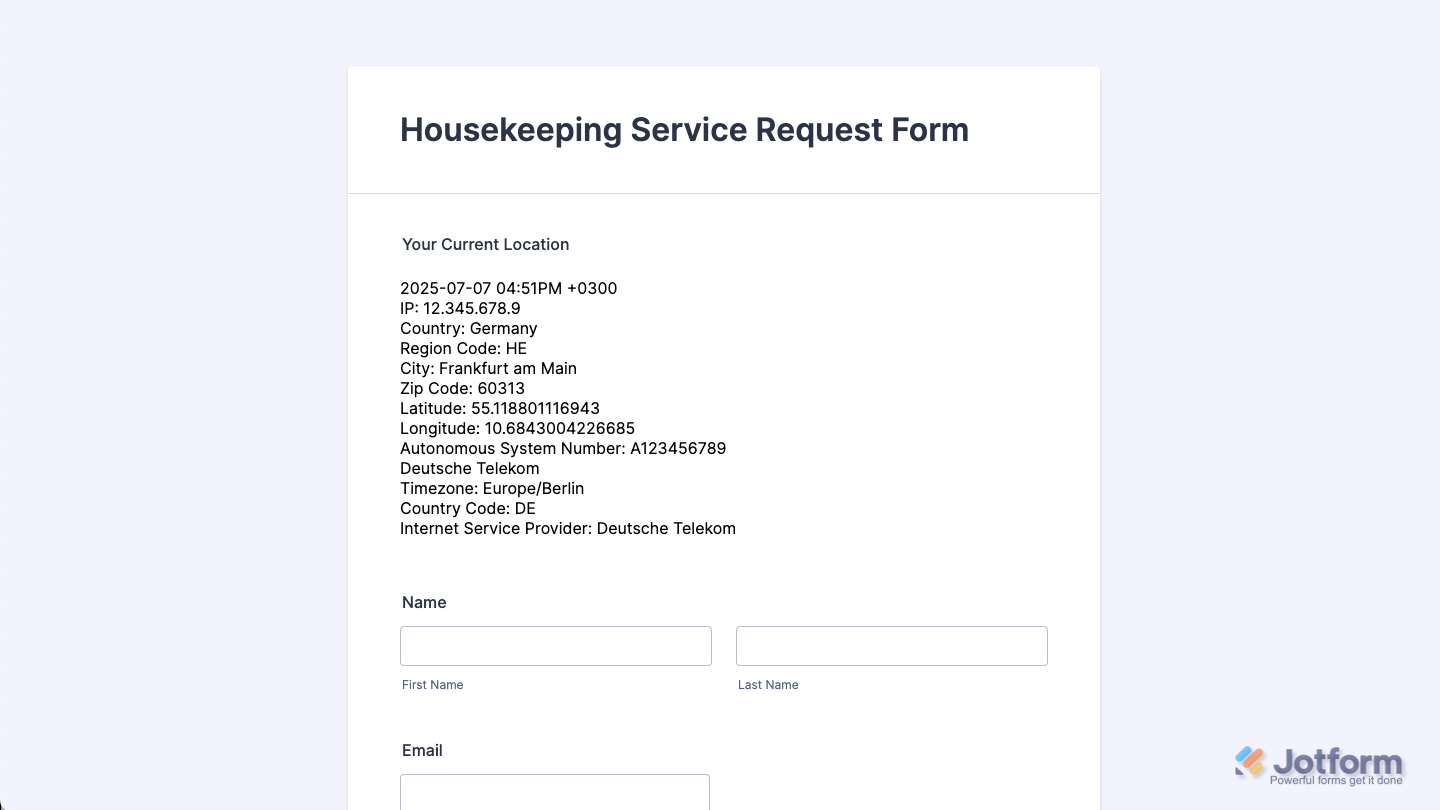
Form with the Get Visitor Location widget set up, allowing location data to be captured automatically from the respondent’s IP address.
Note
For advanced styling, you can add your own custom CSS under the Custom CSS tab in the widget settings and style the Get Visitor Location field. Our guide on How to Inject CSS Codes to Widgets walks you through everything.
Pro Tips
- Respect Privacy: Let users know in your privacy policy or a form disclaimer that location data is being collected, transparency builds trust.
- Test for Accuracy: Test the widget on different networks or devices to see how location accuracy may vary, especially if you’re relying on it for routing or reporting.

Send Comment: